When it comes to creating a successful portrait, there are a lot of moving parts! We talk often about finding the light, composition, and camera gear when it comes to portraits. While all three of those things are important in creating your final image, they aren’t the only variables at play.
Another important aspect in capturing portraits is angles. Understanding and making good use of angles in portrait photography, allows you to capture images of your subjects in the most flattering way, unique to each person you’re photographing.
Under the umbrella of “angles” are two different aspects – facial view, and camera angle. Facial view simply refers to how much of a person’s face is visible in the photograph. Whether or not you recognize the term facial view, you probably understand that there’s a visual difference between a photograph of someone looking directly into the camera, and a photograph of them in profile. These are examples of both ends of the facial view spectrum. In addition to facial view, you’ll also want to learn to utilize camera angle in portraiture. Camera angle refers to whether you’re holding the camera at eye level, or above or below the eye level of your subject.
The concepts themselves are pretty simple, right? However, the difficult part is learning how each of these variables interact with each other, and your subject. Let’s walk through some visual examples of different facial views and camera angles using the same gear, subject, location, and same time of day, while observing how different angles change the look and the feel of each image.
Camera Angles
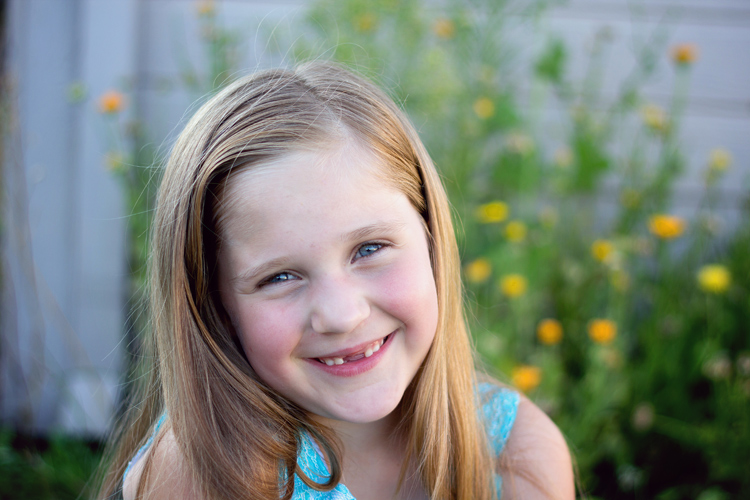
Eye Level
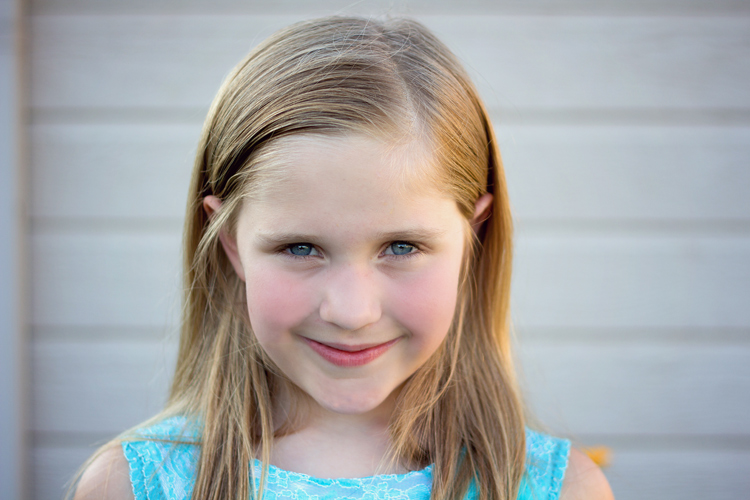
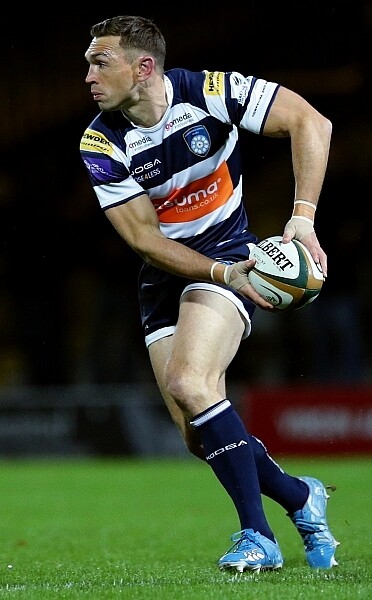
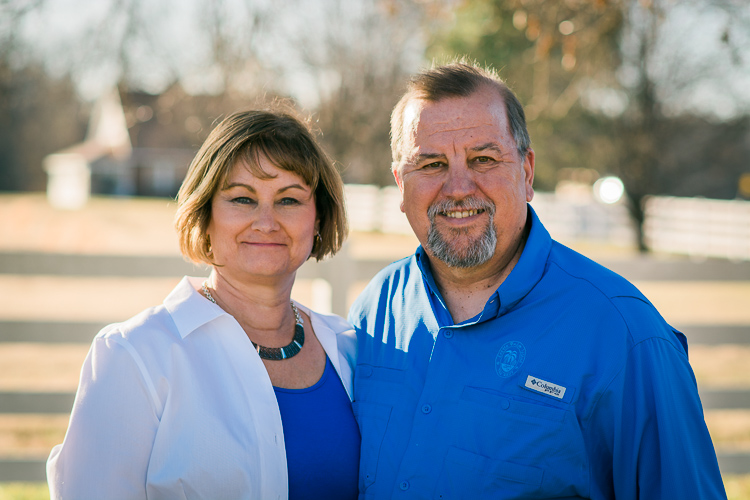
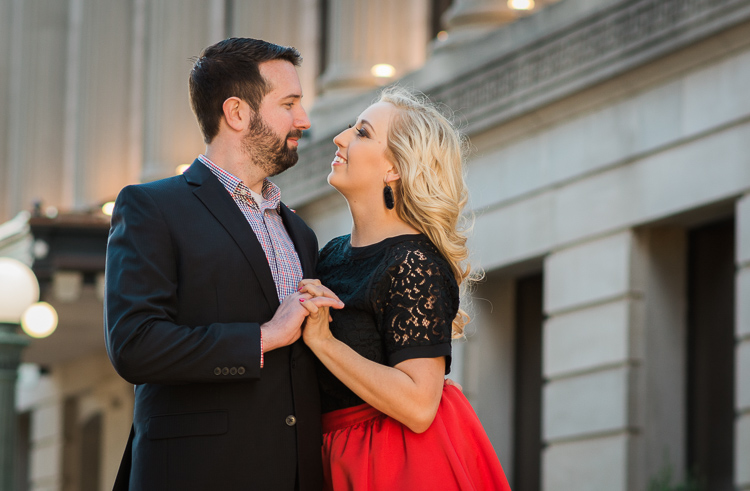
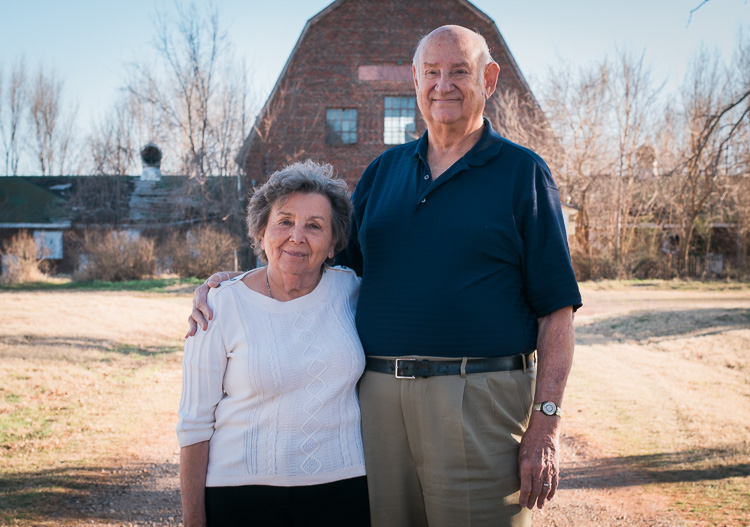
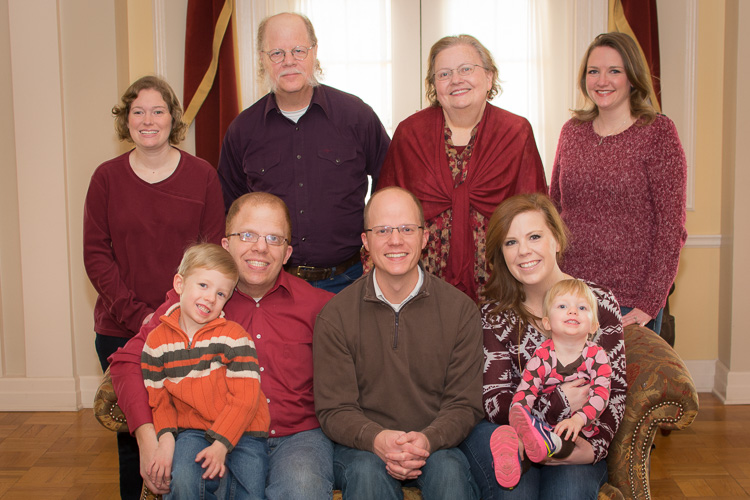
One of the most common camera angles for portraits is to place the camera at the subject’s eye level. This camera angle results in a final image that is balanced, and proportionate between head and body. It also allows for the subject to look directly into the lens, which tends to create the feeling of connection in a portrait. This is a flattering camera angle for most people.
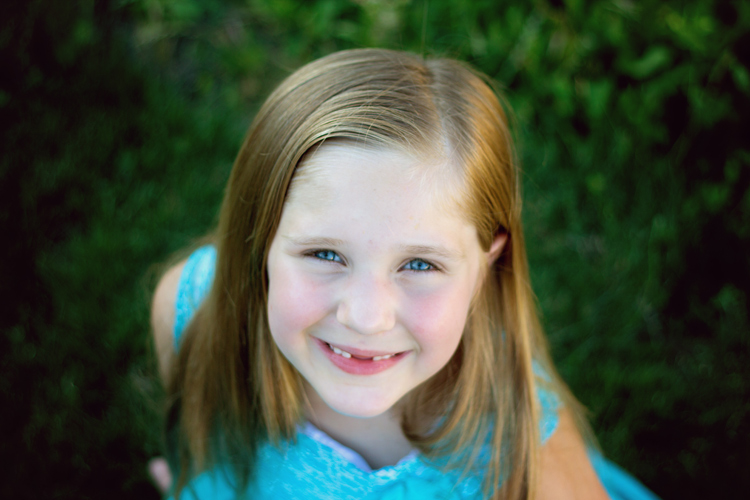
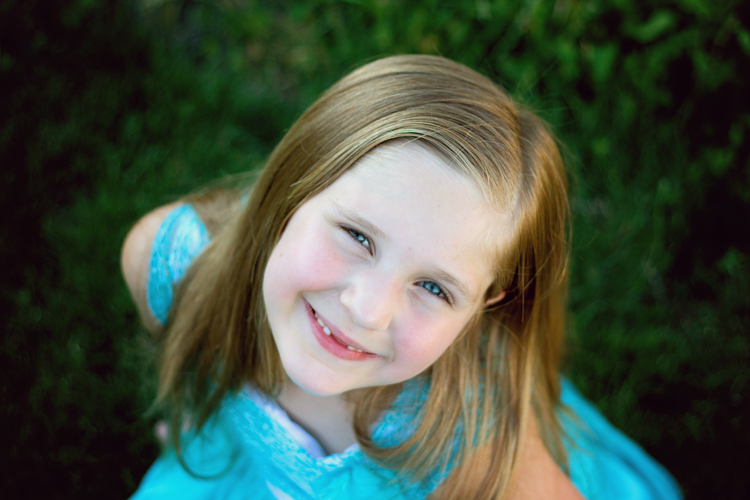
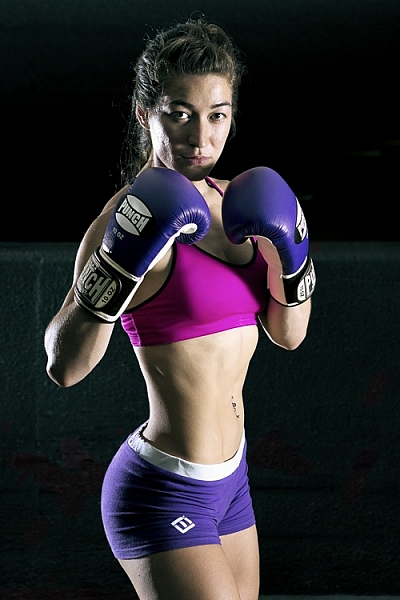
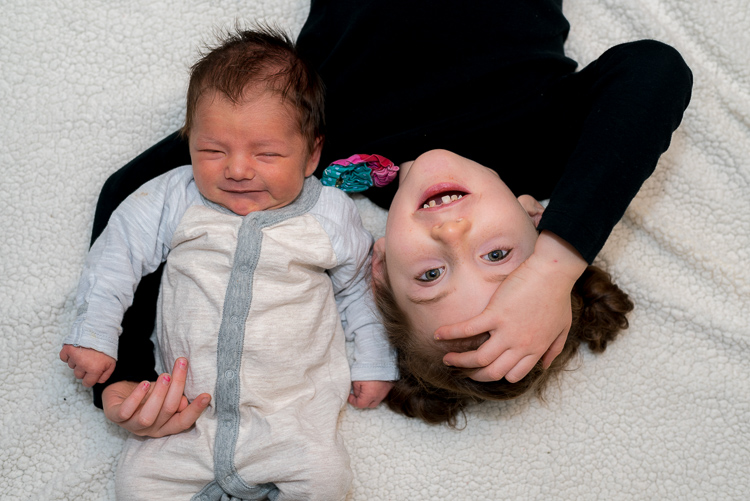
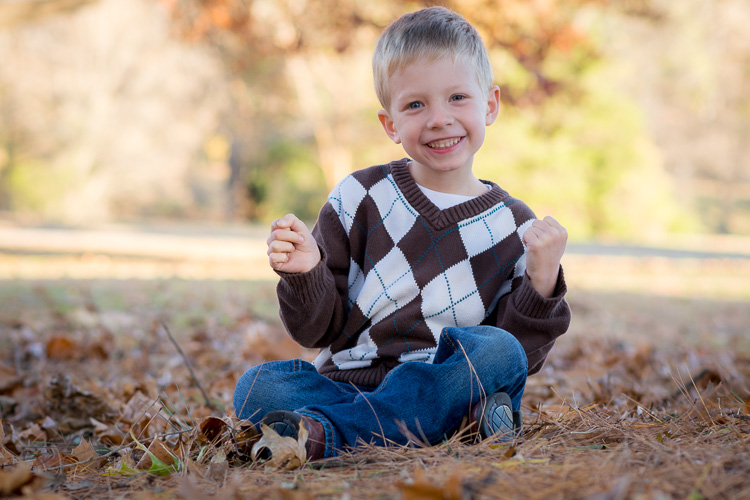
High Camera Angle – Above Eye Level
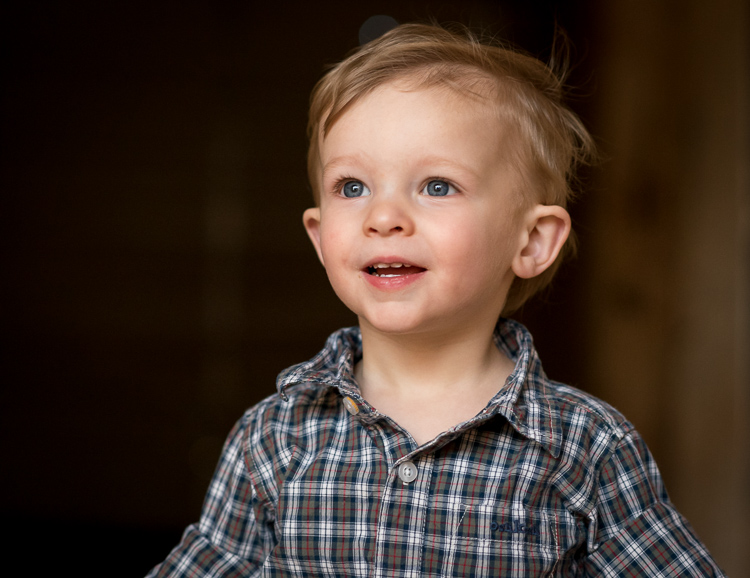
Shooting from a high camera angle (with the camera above the subject’s eye level) is another great option to try in your portrait photography. With this angle, the focus is on the face rather than the body and can be a very slimming angle for adults. I’m not at all concerned with making children seem slimmer than they really are, but find that I use this angle a lot when photographing children because I like the way that it emphasizes the childlike qualities of kiddos. I find that parents tend to really enjoy photographs of their children taken from a high camera angle, and I believe that’s because parents see their children from this angle quite often in their day-to-day life, so it feels very natural and candid.
As a bonus, shooting from a high angle makes it really easy to achieve good catch lights in their eyes, and can also help to camouflage a less than desirable background. On the other hand, this camera angle may not be to your advantage in some situations; if your subject is very thin, shooting from above can sometimes make your subject look like a bobble-head, which is very rarely flattering.
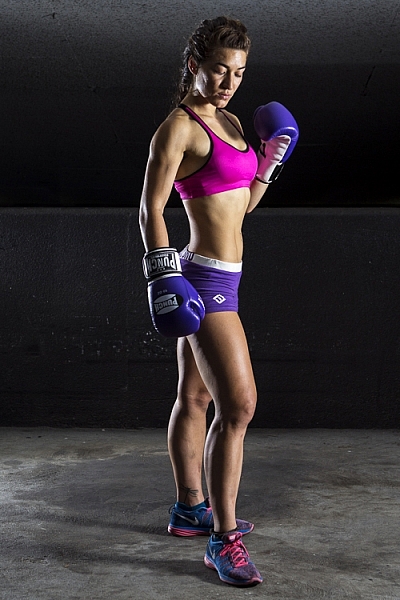
Low Camera Angle – Below Eye Level
Shooting from a low camera angle (with the camera placed below the subject’s eyes and tilted up) can make people seem tall and authoritative, but can also tend to make people (their body in particular) look larger than they really are, which is not very flattering for most people.
This is particularly important to keep in mind if you’re photographing someone who is taller than you. If you’re 5’2″, and the person you’re photographing is 6’4″, you may need to be creative to make sure that you’re not photographing the whole session from a low camera angle. Have your subject sit, crouch, or find something that you can climb on to create a more even plane, for at least some of the photos – it really will make a difference.
I’ve used this camera angle a handful of times with newly walking babies, and could envision using it with a wider angle lens (to capture more of the body) if I were photographing a politician, a football player, or someone who wished to appear particularly powerful. Overall though, this is usually not the most flattering angle for portraits.
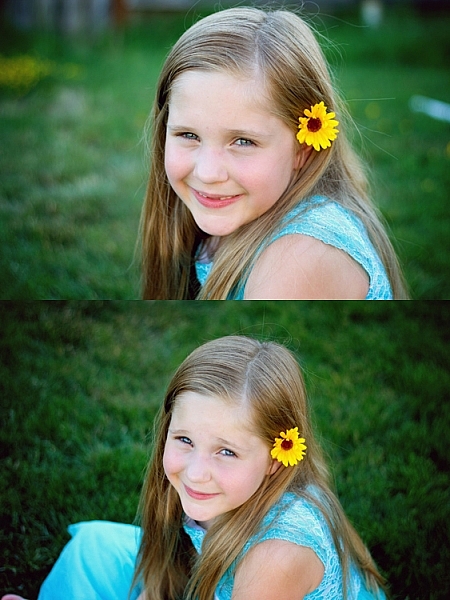
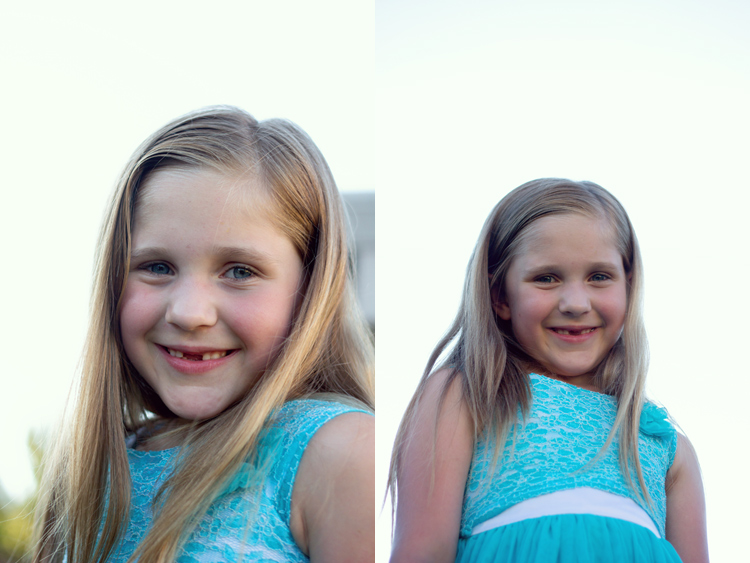
Don’t be afraid to experiment. Try capturing the same image from two different camera angles. The image above demonstrates how the same subject and pose appears from eye level, as well as from a high camera angle. If you did a poll, I bet you’d find that some people prefer the eye level shot, and some prefer the high camera angle. This is largely a matter of taste and preferred aesthetic, so I frequently make a point to include both sorts of angles in my portrait sessions.
Facial Views
Photographing a subject full-face means that their face is pointing directly towards the camera lens – you can see both ears, and both sides of the face in equal amounts. Full-face portraits often convey a sense of confidence and assertiveness, especially when the person being photographed is looking directly into the camera with their eyes also.
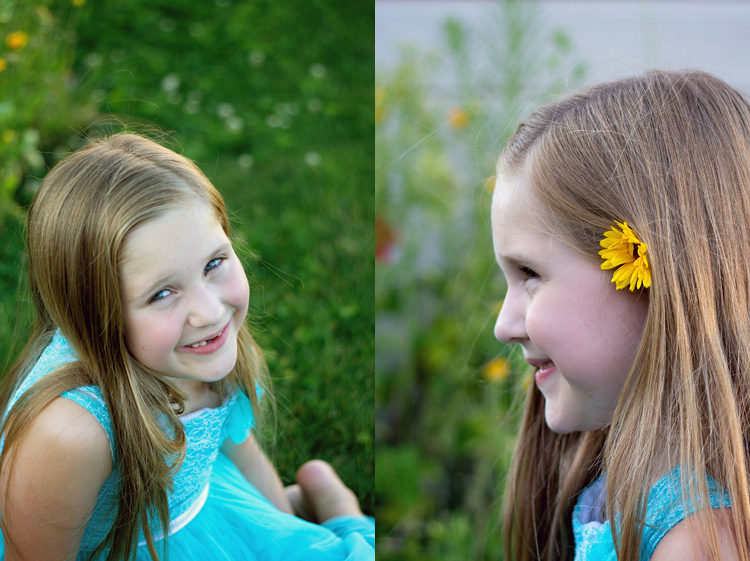
Other facial views include 3/4 view, 2/3 view, and profile view. With 3/4 view, the subject has turned just enough so that one of their ears is no longer visible to the camera. With 2/3 view, the subject has continued to turn so that their nose is just about to break the plane of their back cheek. For a true profile portrait, the subject’s face is turned 90 degrees, and is perpendicular to the camera.
Shooting with the subject’s face turned to 2/3 view or 3/4 view tends to convey a more casual, and less assertive portrait. Images shot with a 3/4 facial view, and the subject looking just off camera, are often the most successful candid images, because the facial expressions are still easily visible to the viewer. Similarly, shooting in profile allows for portraits that feel unposed, while also being graceful and demure (particularly when shot in silhouette).
The best way to begin to learn, and really understand angles, is to grab a friend and go experiment. Take photos from every camera angle you can think of, including non-traditional angles like a bird’s eye or worm’s eye view. Then, take a photo with every facial view – full face, 3/4 view, 2/3 and profile. If you’re really feeling ambitious, try combining facial views and camera angles – does the feel of the portrait change if you shoot full-face from eye-level versus from a high camera angle?
Chime in below, do you find that you gravitate towards images with a particular facial view and/or camera angle? What tends to be your preference and why?
googletag.cmd.push(function() {
tablet_slots.push( googletag.defineSlot( “/1005424/_dPSv4_tab-all-article-bottom_(300×250)”, [300, 250], “pb-ad-78623” ).addService( googletag.pubads() ) ); } );
googletag.cmd.push(function() {
mobile_slots.push( googletag.defineSlot( “/1005424/_dPSv4_mob-all-article-bottom_(300×250)”, [300, 250], “pb-ad-78158” ).addService( googletag.pubads() ) ); } );
The post How to Use Portrait Angles More Creatively: A Visual Guide by Meredith Clark appeared first on Digital Photography School.


You must be logged in to post a comment.