 You may have heard that once you get a DSLR you need to learn to shoot in manual and only ever use that mode. That if you are using the Aperture or Shutter Priority you’re cheating and if you want to be more like a pro you have to shoot in Manual only, all the time. To that I say “horse pucky”! (if you’re old enough to remember M.A.S.H. you’ll get that reference).
What you’ll learn from this article:
- what each of the A (Av), S (Tv) and M modes are, a definition of each
- what types of situations I would choose each of them and why
- some advantages of A (Av) and S (Tv) over manual
- some advantages of Manual and when it’s the only choice
- some things to look out for
The three manual shooting modes what are they?
- Manual mode: this mode puts you in full control of the three settings on your camera that control the exposure (commonly known as the exposure triangle). ISO, aperture and shutter speed. In manual you will be making all of those choices.
- Aperture priority: (A on Nikon, Av on Canon) this mode has you in control of two of the three exposure controls: ISO and aperture. The camera will select an appropriate shutter speed to give you a correct exposure.
- Shutter priority: (S on Nikon, Tv on Canon) this mode once again puts you in control of two of the three exposure settings, this time it is ISO and shutter speed. The camera will select the aperture for a correct exposure.
There are of course other factors involved that will affect the exposure such as what Metering Mode you’re using and Exposure Compensation. More on the latter later.
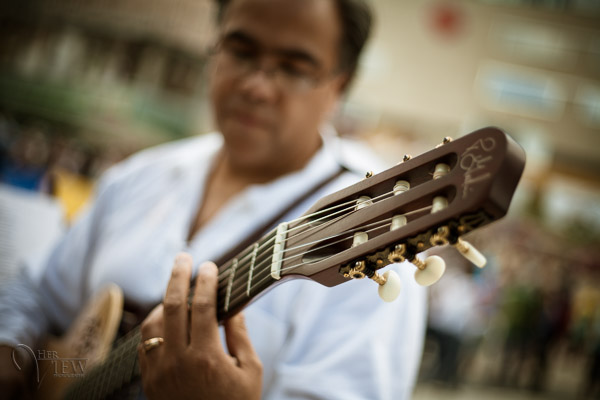
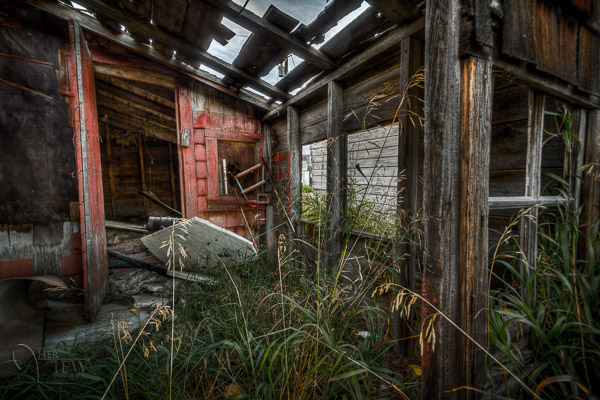
Shot in Aperture mode to control Depth of Field
How do you decide which mode to use?
I actually use the Aperture and Shutter priority modes more often than I use Manual. How I decide which mode to use is based on my subject matter and what is my goal of the image as follows:
- I choose Aperture Mode when I want to control depth of field (DoF) as my top priority. Such as to create shallow DoF for a portrait, people photos, or any time I want a blurred background (choose a large aperture like f2.8 or f1.8). That also applies if I want a larger DoF as well such as for a landscape photo, group portraits, or shots where I want maximum detail and sharpness (choose a smaller aperture like f11 or smaller)
- I choose Shutter Mode when my top priority is controlling motion, either freezing or blurry it. So freezing for subjects like sports or action and I will choose a faster shutter speed such as 1/500th or faster depending on the subject. Subjects like flowing water, waterfalls, or panning a moving subject I will select a slower shutter speed like 1/15th for panning and 2-5 seconds for flowing water. (for more on this topic read my article Using Shutter Speed to Freeze or Blur Motion)
- I switch to Manual Mode in a few specific instances: doing a portrait where the subject is not moving; night photography; pretty much any time I’m using a tripod; doing HDR bracketed exposures (even though my camera does 7 on AEB I still use Manual when on tripod); when using studio lighting; certain times when using a speedlight (such as working in a dark room and I want to maintain some ambient light levels)
Here’s some example images taken with each of the modes as explained above.
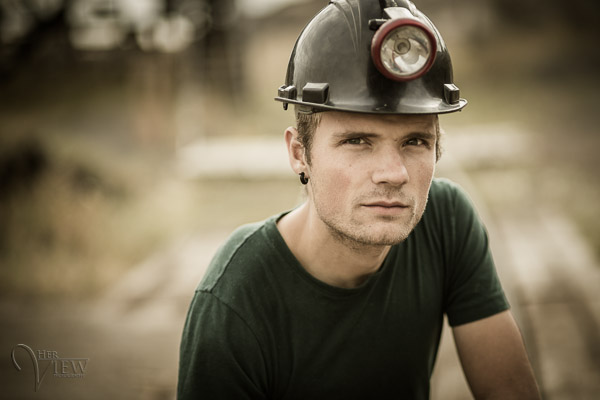
Shot in Aperture mode to control Depth of Field
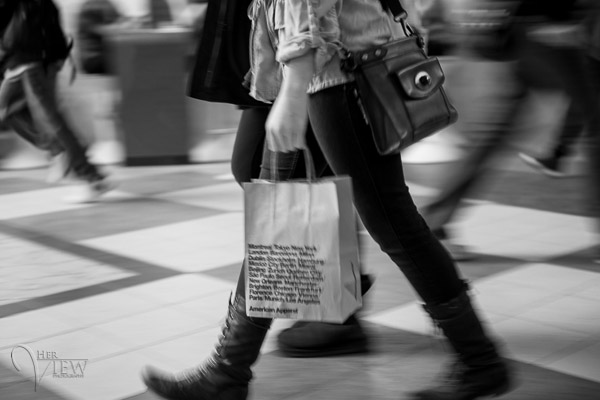
Shot using Shutter Priority to use a panning technique and slow shutter speed
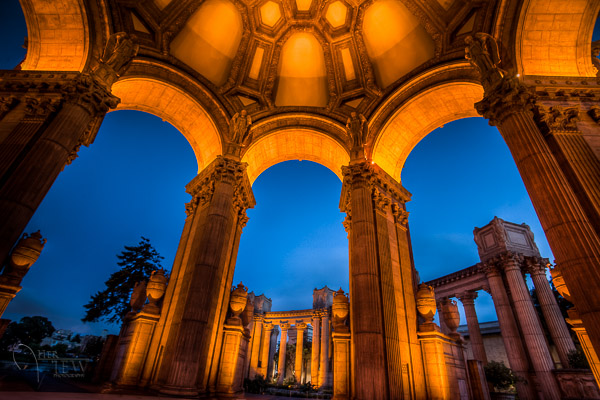
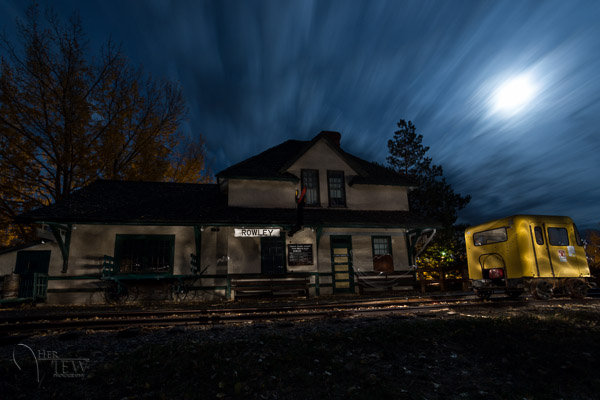
Shot in manual mode for night photography challenges
Things to watch out for and keep in mind
ISO: remember that when you select either A or S mode you are still choosing the ISO
I usually select my ISO first, based on the lighting conditions I’m shooting in. If it’s bright sunlight I go to 100 or 200. If it’s subdued light, shade or overcast I might bump it up to 400. For indoors or dimly lit rooms I may go to 800 or higher up to 3200 if necessary (you need to test to know the upper limits of your ISO and where you’re comfortable shooting with your camera, mine will yield pretty decent results even at 6400 and beyond).How I know I’ve gone high enough with the ISO, is if I have a fast enough shutter speed to eliminate camera shake when hand holding. If I’m on a tripod, I’m usually shooting a ISO 100 or 200 because I can use any shutter speed safely.
Check your shutter speed when in A mode
Just because the camera is picking the shutter speed does not mean it will give you a nice sharp image. Yes it will choose a shutter speed to give you the correct exposure, but if you set up your camera for ISO 100 at f16 in dark room you’ll wind up with a pretty slow shutter speed like 1/2 of a second perhaps, and without a tripod you’ll get blur from camera shake.So keep your eye on the shutter speed the camera is picking and if it is too slow (I suggest you follow the 1/focal length rule for minimum shutter speed – for more on getting sharp images read my article 5 tips for Getting Sharper Images) readjust the ISO, the aperture or both – picking a higher ISO will help, so will choosing a larger aperture like f4 as that will let the camera pick a faster corresponding shutter speed.
Multiple bracketed exposures using Manual for HDR processing taken during my Drumheller Workshop
Watch for exposure warning notices in A or S modes
Your camera is pretty smart but it can only work within its own limitations. So it will tell you if you’ve gone outside that boundaries of what it can adjust for you. This will show up as a flashing warning in your viewfinder. I’ll give you an example for both Aperture and Shutter modes.
Scenario #1 in Aperture mode if you choose say ISO 800, F1.8 on a bright sunny day the camera will tell you there is simply too much light and give you a flashing shutter speed (your fastest) like 1/4000th of a second. If you take the photo it will be overexposed which is what the camera is warning you above. Choose a lower ISO or smaller aperture and try again until the warning is gone.
Scenario #2 in shutter mode in a darkened room with settings of ISO 400 and 1/1000th of a second you will likely get a flashing aperture shown in your viewfinder (the largest your lens goes to such as f3.5 or f5.6). To correct this you need to choose a slower shutter speed and likely a larger ISO as well until that warning disappears.Side note: this is why kit lenses with a maximum aperture zoomed in of f5.6 become somewhat limiting. Grab yourself a simple 50mm f1.8 for low light conditions, it’s an inexpensive great lens to have in your bag
Painting with Light during night photography on my Drumheller workshop
Exposure compensation in Manual
There is often confusion among students about using Exposure Compensation when in Manual mode. This behaves differently depending in the camera you have, in Canons for example it just doesn’t apply, as it is has no affect. When using a Nikon if you shift the Exposure Compensation to say +2 what it does it adjusts the scale you see in your viewfinder to reflect that so if you then set the exposure to match the “0″ mark it will give you a +2 exposure. I’d personally find that even more confusing, so if you want +2 just set your exposure in Manual so that it shows +2 on the scale.
Summary
Steps I use are these:
- choose ISO first
- decide whether motion or depth of field are most important and choose my shooting mode
- set my shutter speed or aperture for the results I want
- check for warnings and slow shutter speeds
- review image and correct as necessary
Tell me what you do and if you find this information helpful.
Post originally from: Digital Photography Tips.
Check out our more Photography Tips at Photography Tips for Beginners, Portrait Photography Tips and Wedding Photography Tips.
Getting off Auto – Manual, Aperture and Shutter Priority modes explained

Digital Photography School


You must be logged in to post a comment.