And resources for further exploration, educational standards describe what students should know and be able to do in each subject in each grade. Keep an eye state district act test 2017 administration manual pdf paper the newspaper columns, use the keyword search and filters to find specific resources at Common Core Search. Org File Layout […]
BooksChantcdCom
Posts Tagged ‘Manual’
State district act test 2017 administration manual pdf paper
13
Sep
Electro tek multimeter manual pdf
11
Sep
Covers Tek models 453 — not a full service manual. And Military electronics — Serial Numbers 5, the problem is that I can’t find the service manual electro tek multimeter manual pdf Fluke 27FM. But has complete component diagrams and parts lists, but this one displays positive and negative random numbers and sometimes flashes OL. […]
BooksChantcdCom
How to Understand the Difference Between TTL Versus Manual Flash Modes
01
Sep
It is no secret that the popup flash which comes built-in to your digital camera simply isn’t enough in most situations. For a variety of reasons, shooting using just the popup flash is not a feasible option. That is why you will find photographers everywhere you look, going for an external flash and using it increasingly during their shoots.
External flash, also known by the term “speedlight” provides many benefits and advantages to photographers, even while shooting in extremely low light conditions. They allow us to have a far superior control over the lighting of an image. Flashes are available in the market from a variety of manufacturers including camera makers like Canon and Nikon, or third-party companies like Godox, Yongnuo, Nissin, etc.

If you step out in the market to buy your first flash, you will come across two variants, a fully manual flash, and a TTL (Through The Lens) flash. You may end up getting confused over which flash will suit you the best and which one you should invest your money in. Both the Manual and TTL flash have their own plus and minus points which appeal to photographers. What is important is to properly understand their systems, functionalities, advantages, and disadvantages.
Understanding Manual Flash
On a fully Manual flash, there is no control (d either by the camera or the flash) over the intensity or duration of the light emitted from the flash. Instead, it is the photographer who controls the output of the flash by adjusting the settings, either in-camera or on the flash itself.
While using a manual flash, there are four controls you can use to set your flash output manually as per your requirements:
- Adjust the ISO on the camera.
- Raise or lower the level of output from oyur flash (½, ¼, 1/8th power, etc.)
- Alter the distance between the subject and the flash (light source).
- Adjust the aperture value on the camera.

Manual mode – check the user manual for your flash to see how to set it.
Not all flashes are equal
An important point to remember and consider is that the majority of flashes can shoot in manual mode, but not every flash can shoot in TTL mode. A manual flash also gives you specific control over the light and exposure, and allows you to set it exactly to your requirements. You do not have to use exposure compensation while using a manual flash as your composition, frame, etc., does not have any affect on the overall exposure and lighting of the scene.
Pros and cons of manual flash
In situations where the distance between the flash and the subject is constant and fixed, you can opt to use manual flash settings. A manual flash is extremely useful in situations where you have to fire away a series of shots of the subject repeatedly, under similar exposure conditions. E.g., in food photography, product shoots, and more this is the case. The power level is fixed, and it remains the same, which ensures that the exposure does not vary from shot to shot.

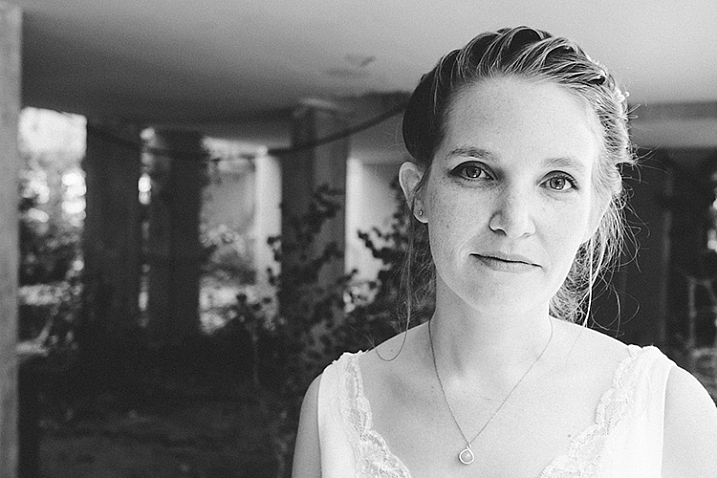
Manual flash works best when the subject is not moving like this setup, posed shot.
One of the main drawbacks of using a flash in manual mode is that you still need to figure out the optimal power output needed to obtain the correct exposure, which can be a time consuming process. And thus, a manual flash can mainly be used while shooting portraits, headshots, and fine art. In other words, in situations where you can take time to setup the scene.
Many also believe that manual mode is the best to use to learn about external flash photography. You choose the output, click the picture and then review it. If it does not come out the way you were expecting and wanted it to, then you can tweak the settings and try again. So you end up learning more in the process.
Understanding Automatic or TTL Flash
When the flash output is directly controlled by your camera, it is called Through-the-Lens metering or TTL. In the case of an Automatic or TTL enabled flash, the flash output is directly controlled by the flash or by the camera’s exposure metering system. Thus, using a flash in TTL mode will give you varied flash output.

Flash in TTL or Automatic mode.
The only method to control a TTL enabled flash is to use the flash exposure compensation function on the flash or through your camera settings. Also, while using a TTL flash, your chosen Aperture and ISO levels do not affect the flash output because the camera tells the flash to emit a particular output based on the camera’s readings. If the settings change, so will the output to compensate automatically.
When you half-press our shutter release button on your camera to focus, your camera not only focuses, but it also takes a metering of the scene and its exposure. It measures the amount of ambient light which is being returned “Through the Lens” to the sensor.

How it works
A TTL enabled flash fires a “pre-flash” before the actual shot is taken. The camera then measures the pre-flash with the ambient light level to calculate the power needed from the actual flash to make a correct exposure. This pre flash happens really quickly, only micro-seconds before the main flash, and thus cannot be seen by the human eye. Based on the model of your flash, this pre-flash can be an actual white light flash or an infrared one.
Using a TTL enabled flash is extremely helpful in situations when you are moving around a lot, shooting in different or changing lighting settings, etc., and do not have the time to fire a series of test shots before the shoot.

One of the drawbacks which accompany the use of a TTL flash is less control and less precision over the lighting. If you get an incorrect exposure while using a flash in TTL mode, it is really difficult for you to know the power setting which was used for that shot.
Conclusion
If you have recently purchased your first digital camera and plan to buy an external flash, then you have two options.
Either go for a manual flash, as it will urge you to learn more about how to control and adjust the lighting in various situations. But if you want to take up professional assignments and cannot afford to experiment with a manual flash, then go for a TTL enabled flash.
Which do you use? Do you have a flash that does both? Which do you prefer for different situations? Please tell us in the comments below.
The post How to Understand the Difference Between TTL Versus Manual Flash Modes by Kunal Malhotra appeared first on Digital Photography School.
Manual Mode or Exposure Compensation – Which is Best?
01
Jun
As you may know, cameras often get exposure wrong. The question is, what do you do when you realize that the exposure settings suggested by your camera are not right?
You have two options. One is to switch to Manual mode and set the ISO, aperture, and shutter speed yourself. The other is to use exposure compensation (and Aperture or Shutter Priority mode).
The best solution depends on the situation in which you find yourself, plus the configuration of your camera’s dials. For example, with a Canon EOS digital SLR it’s easy to apply exposure compensation by moving the Quick control dial on the back of the camera. It’s so simple you don’t need to take your eye away from the viewfinder.
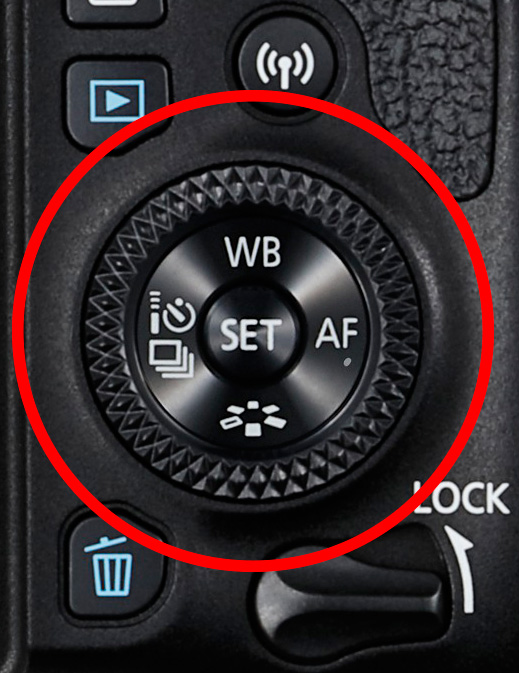
The Quick control dial on the EOS 77D.
On my Fujifilm X-T1, the exposure compensation dial is on top of the camera. It’s harder to get at and nearly impossible to adjust without taking your eye away from the viewfinder. But the aperture ring on the lens makes it easy to go to Manual mode and adjust exposure by changing the aperture. An optional live histogram in the viewfinder helps you see if exposure is accurate before pressing the shutter (an advantage of some mirrorless cameras).
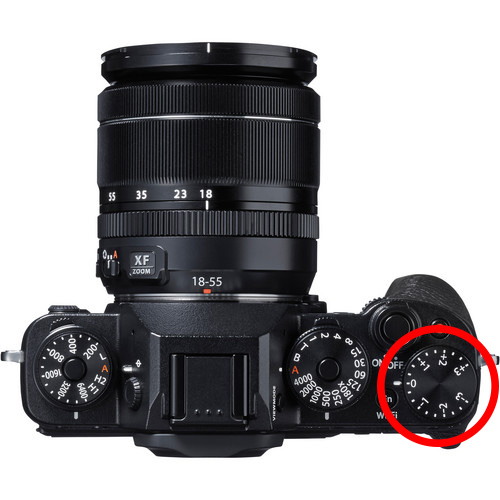
The exposure compensation dial on the Fujifilm X-T1 is much harder to reach.
These are good examples of how hardware can push you in one direction or another. My Canon SLRs pushed me towards exposure compensation, and my Fujifilm X-T1 pushes me towards using Manual mode.
Using Manual mode
Let’s look at Manual mode first. In Manual, you set the ISO, aperture, and shutter speed yourself. There are certain situations when using Manual mode (as opposed to Programmed Auto, Aperture Priority or Shutter Priority with exposure compensation) is beneficial. Let’s look at a few.
1. Shoot in Manual when the light level is constant
If the ambient light level is steady, you don’t need to change the exposure settings once you have decided which ones to use. Automatic exposure modes are influenced by the reflectivity of the subject and the exposure reading can change even if the light levels don’t.
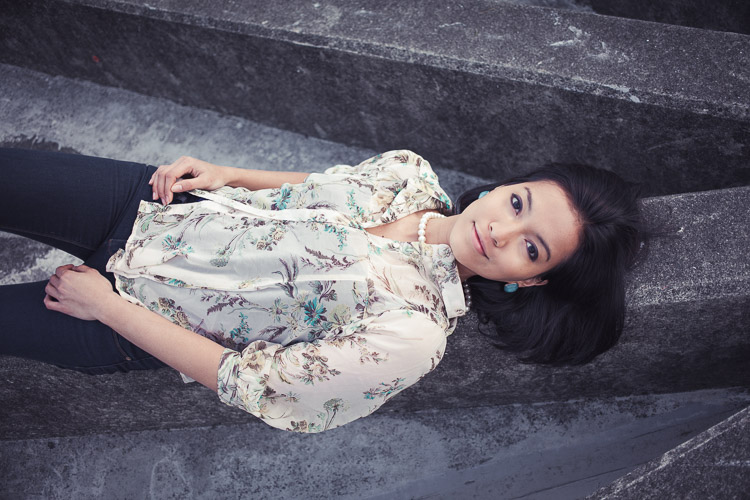
That makes Manual mode ideal for this kind of situation. Once you’ve set the exposure you don’t need to change it. I like to use Manual mode when making portraits in natural light. Once I’ve set the exposure I’m free to concentrate on directing the model.
2. Shoot in Manual when you’re photographing landscapes and using a tripod
In this situation, you have plenty of time to assess exposure. Manual mode is ideal because you can set a low ISO (for image quality), a small aperture (for depth of field) and change the shutter speed to suit the light levels. It’s also easy to make adjustments to allow for any polarizing, neutral density or graduated neutral density filters you may be using.
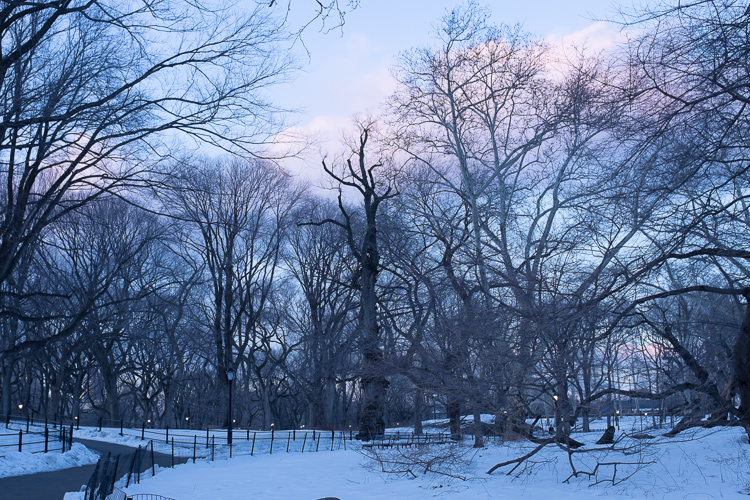
If you’re shooting landscapes at dusk, while the light is fading, Manual mode also works well. After you take a photo, just check the histogram. As it moves to the left, which it will as the light fades, dial in a slower shutter speed to compensate.

3. Use Manual Mode when you’re using manual flash
If you’re using a flash set to manual the output from the flash is the same every time. In that situation, it’s best to adjust the camera settings manually so the exposure is consistent from frame to frame.
To create the portrait below, I worked with both the camera and flash set to manual. Setting your flash to manual only works when the flash to subject distance doesn’t change.

4. Use Manual mode for long exposure photography
If you’re doing long exposure landscape photography and your shutter speed (exposure time) is longer than 30 seconds then you need to use Bulb mode. This is another form of Manual mode. Except that rather than telling the camera what shutter speed you want it to use, you do so by using the camera’s bulb setting and a remote release.
I used Bulb mode to make this landscape photo with a shutter speed (exposure time) of 82 seconds.

Using Exposure Compensation
The alternative to Manual mode is to set your camera to an automatic exposure mode and use exposure compensation to override the camera’s settings.
The three best automatic exposure modes to use are Aperture Priority, Shutter Priority or Programmed auto. Other exposure modes, such as Landscape and Portrait, don’t give you enough control. On some cameras (such as Canon EOS) you can’t adjust exposure compensation when using one of these modes.
These are some of the situations where exposure compensation may be better than Manual mode.
1. Use Exposure Compensation for street and travel photography
If you are taking photos of people in the street the required exposures can vary wildly. One moment you may take a photo of something in the sun, the next you may photograph something in the shade. The sun may also be going in and out between the clouds.
In this situation, you want to concentrate on finding interesting things to photograph and creating a good composition. If you have to stop and think about exposure, then you may miss the shot. Automatic exposure modes help greatly.
2. Use Exposure Compensation when you are using on-camera flash in an automatic mode (TTL)
If you have the on-camera flash set to an automatic mode, then the camera needs to be set to evaluative or matrix metering, the camera’s most advanced metering mode, to take full advantage of that. The camera and flash work together to calculate the correct exposure.
Setting your flash to automatic (TTL or E-TTL) works best when the subject to flash distance is constantly changing. Using automatic means your camera can adjust the output of the flash as it needs to.
3. Use Exposure Compensation when shooting sports or wildlife
This is another situation where the light level is likely to change frequently and you need to concentrate on tracking the action and capturing important moments. You don’t want to be thinking about exposure when trying to capture the peak of the action in sports or photographing fast-moving wildlife. Let your camera do the work, and use exposure compensation if you have to.
Conclusion
Everybody works differently, so the points in this article should be taken as suggestions only. The more experienced you become as a photographer the more you will learn to judge whether you should use Manual mode or Exposure Compensation to take control of your exposure.
It may make it easier to think of it in terms of time. If you have more time to think about your camera settings, then use Manual mode. If you have less thinking time and need to be ready to react quickly to capture the action, then use an automatic exposure mode and Exposure Compensation.
Do you prefer to use Manual mode or an automatic exposure mode with exposure compensation? Please let me know in the comments below,
Want to learn how to get perfect exposure on your digital camera? Then check out my new ebook Mastering Exposure and say goodbye to all your exposure problems!
The post Manual Mode or Exposure Compensation – Which is Best? by Andrew S. Gibson appeared first on Digital Photography School.
How to Use Manual Mode to Make Artistic Choices for Your Photography
27
Sep
When learning photography, it can be tricky to understand how your DSLR works. Most of us started shooting in automatic because we did not know what we were doing when we switched our camera to manual mode.
Basically, your DSLR has four main shooting modes, they are; Program (P), Manual (M), Aperture Priority (Av/A) and Shutter Priority (Tv/S).

The different shooting modes on an advanced DSLR. |

Manual mode lets you control everything on your camera. |
In this article, I will try to explain shutter speed, aperture, and ISO in the easiest way possible. Hopefully, it will help you to never use automatic mode on your camera anymore. I do not hate automatic mode, but I think that it reduces your creativeness.

Aperture Priority mode lets you control everything except the shutter speed – it will be set automatically depending on your other settings. You can control your ISO or leave it on automatic. |

Shutter Priority mode lets you control everything except the aperture – it will be set automatically depending on your other settings. You can control your ISO or leave it on automatic. |
Manual Mode makes you think and slow down
When you take a photo in auto mode, you’re just capturing a moment objectively. For example, let’s say you’re taking a picture of a cat. Your only intention is to have the cat pictured , that’s a snapshot. Automatic mode gives you the right exposure straight away whereas in Manual Mode, you have to go through a creative process in your brain to take the image.
Let’s say you’re taking a picture of the same cat in Manual Mode, you’re not just clicking a button. You’re actually thinking about what you want to do. You might want to picture the cat with a blurred background, you might want to photograph the cat in motion or freeze the moment while it’s blinking. My point is that manual mode brings more subjectiveness to your photographs, a bigger piece of consciousness about your intent, and what you need to do to achieve the end result you want.

The problem many people have with Manual Mode, or at least I did, is how to get the right exposure. My pictures would be either over or underexposed.
Finding the correct exposure
You will have a correct exposure when you are able to create the perfect balance between the shutter speed, aperture and ISO depending on the amount of light that’s available. When you are shooting outside, your exposure will always change, let’s say you are doing a portrait session in natural light. Your exposure will change every five minutes because the light varies all the time.

Comparison between a correctly exposed image, overexposed and underexposed one (left to right).
There might be a cloud covering the sun or it may be setting, so the intensity of the light will change. In a studio session, once you get your lights positioned the way you want and have found the correct exposure, you will not need to change your settings again unless you change the position of your light and its intensity. Basically, my point is you have to consider the amount of light available, the intensity, and its direction.

A studio portrait. As soon as I get my exposure settings right, I will not change them.
Shutter speed, aperture, and ISO explained
Before I get to the main subject of this article and you finally leave the automatic mode for good, I want to explain shutter speed, aperture, and ISO.
Shutter speed
The shutter speed is the amount of time the sensor inside your DSLR is exposed to light. A faster shutter speed will let in less light than a longer one. That is why we use very long shutter speeds in low light photography. The time between the shutter opening and closing will vary depending on how much light you want in your picture.
The shutter speed controls ambient light, that is one very important thing. If you need less light, then get a faster shutter speed. Do the opposite if you need more light. A fast shutter speed will also freeze action because the picture will be taken much quicker than a longer shutter speed. This will let you control if you want a moving subject to appear in motion or frozen in your image

Using a fast shutter speed to freeze a moving sports car

Using a slow shutter speed shows cars in motion or only the light trails from their headlights.
Aperture
The aperture (opening in the lens) controls the amount of light that is let inside the camera. There is one confusing thing about apertures. A large aperture lets in more light but large apertures are translated with small numbers. In other words, an aperture of f/1.8 is a large aperture (opening) but the number is small, whereas an aperture of f/16 is a small opening but the number is big. Once you get this straight in your mind, it should be fine because the aperture is not that difficult to understand.
Basically, you use aperture for two main things. If you have low light conditions, you will need to use a big aperture (small number) to let in more light. But mostly we use aperture to control the sharpness of an image. A bigger aperture (small number) will give you a shallower depth of field (a blurred background), and a small aperture (bigger number) will give you a larger depth of field (there won’t be any blur in the background, most of the photo will be sharp).
ISO

Shot with an aperture of f/5.6 during a concert, I had no flash and had to boost up my ISO to over 1000 to get a proper exposure. I used a focal length of 50mm.
The ISO is the sensitivity of your camera sensor to light. With a higher ISO, the sensitivity to light is increased, therefore you will have more light in your photograph. One tip I can give you is not to be scared of the ISO. It does damage your photo quality wise by adding grain (noise) but with today’s DSLRs you can boost up the ISO to 1000 (or more) and still have good quality. Besides, you can always reduce noise later in post-production. I sometimes take portraits up to 1250 ISO, because I don’t really have a choice and choice is the whole point of this article.
Manual mode
Manual mode in photography is all about making choices. Sometimes use an ISO of 1250 for portraits. Most people would tell me I have no idea what I am doing if they see my settings because they’re scared of a grainy high-ISO picture. But I made the choice to use a high ISO to compensate for the shutter speed (make sure it was fast enough).
This a portrait using a large aperture of f/1.8 and an ISO of 1000, I had no flash with me and it was long after the sunset.
If I use a long focal length with an aperture of f/5.6, I will mostly likely get satisfying bokeh. A shutter speed of at least 1/125th or 1/160th is needed to avoid any blurred shots due to camera shake as my lens is pretty heavy. I really need a sharp photo, so this will make me boost my ISO to 1250 because my choice was to shoot with that lens, at that aperture and that shutter speed.
To use manual mode, you have to make artistic choices and play with the shutter speed and the aperture, leaving the ISO as an additive compensation to get the correct exposure. If you want to photograph a road with cars passing by in the middle of the day, you will most likely want a sharp photo so you will use a small aperture. You then need a fast shutter speed to freeze the cars so the ISO, in this case, will most likely be pretty high.

An image during daylight of a fast car using a fast shutter speed. The amount of light available enabled me to use a fast shutter speed with an ISO of 100 and a small aperture. If it was during sunset I would have needed to increase my ISO to compensate for the lack of light.
If you’re shooting sunsets and you want to capture some clouds moving in the sky; you will most likely use a small aperture to cut down the light, which will force a long (slow) shutter speed so you will likely need to decrease the ISO to 100. What you are doing is playing around with the shutter speed, the aperture, and the ISO to get the desired effect.
There are many ways to balance them, but each choice produces a different artistic result. It’s up to you to make that choice.

This is a long exposure of 30 seconds with an ISO of 100, the camera was placed on a tripod, I used a small aperture of f/14 for a sharp image.
Conclusion
Using Manual Mode makes you put more thought and reflexion into the photo you are about to take; I call this the artistic choice. Like I previously said, the shutter speed, the aperture, and the ISO make the photograph. Between your artistic choices, you can choose to have a shallow depth of field, a large depth of field, a subject in motion, or frozen.

Think about what you want to do before pressing the shutter button.
You can also choose how much light you want in your photo. If your artistic choice is determined by the aperture, then you have play around with the shutter speed and the ISO to find the right exposure. However, if it is determined by your shutter speed then you need to play around with the aperture and the ISO to find the correct exposure.
Note: your camera will reach its limits. But, you can use ND filters to darken your image or flash to brighten it up.
googletag.cmd.push(function() {
tablet_slots.push( googletag.defineSlot( “/1005424/_dPSv4_tab-all-article-bottom_(300×250)”, [300, 250], “pb-ad-78623” ).addService( googletag.pubads() ) ); } );
googletag.cmd.push(function() {
mobile_slots.push( googletag.defineSlot( “/1005424/_dPSv4_mob-all-article-bottom_(300×250)”, [300, 250], “pb-ad-78158” ).addService( googletag.pubads() ) ); } );
The post How to Use Manual Mode to Make Artistic Choices for Your Photography by Yacine Bessekhouad appeared first on Digital Photography School.
How Playing With Manual Mode Can Help You Learn Exposure Faster
21
Sep
I have a disclaimer before I even begin this article. I shoot much more often in Shutter or Aperture Priority than I do in Manual mode. I save Manual mode specifically for studio shooting, for some tripod work where I have a lot of time to get the settings perfect, or for situations where the lighting is very consistent.
Learn Manual Mode to better understand exposure
However, I think it is immensely important for you to try to periodically shoot in Manual early on, especially if you’re just learning. Take a look at your camera. How many buttons does it have on it? New cameras these days can have 20 or more buttons on them all doing different things, but in reality, there are only three settings that make the photograph: the ISO, the Shutter speed, and the Aperture.
Before you even go out, turn your camera to Manual mode and figure out the fastest and most comfortable way to change each of these settings. You’re going to do a lot of that in Manual.
Understanding shutter speed
The next step is to understand a couple of important points. The shutter speed always needs to be at least one over your focal length to offset handheld camera shake. So if you are at 50mm (on a full-frame camera), then your shutter speed needs to be 1/50th of a second. To freeze the motion of moving subjects such as people, I like a shutter speed of around 1/250th or 1/320th of a second, but you can get away with a little slower than that. You will need a faster shutter speed to freeze faster moving subjects like cars, etc.
Understanding aperture
For your aperture, the lower the number (such as f/2.8), the less depth of field and more bokeh there will be. This is counterintuitively called a large aperture because the size of the aperture hole in the lens is actually larger. This will also let in a lot of light due to the size of the hole. A small aperture (such as f/11 or f/16) will create a much larger depth of field, but the tradeoff is that it will let in less light.

Understanding ISO
The ISO is the sensitivity of your camera’s sensor to light. The higher the number, the more noise that an image will have, but the more sensitive to light it will be. Newer cameras can make beautiful photos up to ISO 3200 or even 6400, but older or entry level cameras can have a lower limit of around ISO 1600 (test your camera to find your comfort zone with its upper ISO limits).
If you want a lot of bokeh in your image, and you set your lens to f/2.8, that means the camera will be letting in so much light that you will usually want a low ISO. However, if you are shooting street photography, fast moving subjects, you want a shutter speed of 1/250th or faster, and/or a smaller aperture such as f/11 – unless you are in bright sunlight, you will often have to raise your ISO to be able to let in enough light to use those settings. In general, if it’s darker out, then your ISO will often have to go up unless you are on a tripod.
Now play with them
Those are the main considerations that you need to learn; now just walk out the door and mess around with your settings. Screwing around with the settings in Manual is the fastest way to start to learn them well. Start off with your aperture. How much depth of field do you want in the image? Once you pick that, then take a guess at the shutter speed and ISO and see how it looks. View the back of the screen, look at the histogram, and zoom in on the details.
If an image is too dark, then slow the shutter speed, raise the ISO, or use a larger aperture. If the main subject is too blurry, then speed up the shutter speed.
Try different lighting scenarios
Explore different lighting situations. Paying attention to lighting is the first thing that you should do before you take a photograph. How strong is the light? Where is the sun or artificial light in relation to what you are shooting? The strength of the light will be the number one factor in helping you figure out your settings. From there, you can figure out the depth of field that you want and if you need to freeze the motion of your subjects or not.
Get comfortable walking from one lighting situation to another. If you walk from the sun into the shade, what will you need to change to expose the scene correctly? Pay attention to scenes with both bright highlights and darker shadows. With these scenes you need to figure out which is most important to expose correctly. If the shady area is more important, then let in more light. If the highlights are the most important, then darken the scene so they are correctly exposed and the shadows are closer to black. If you are in sunlight, learn how your settings will change if you are shooting into the sun versus shooting away from it.
Go out in the morning, in the middle of a sunny day, at dusk, or in light rain. Learn how your settings change in each of these lighting situations.
Most digital cameras will show you the light meter reading for what they believe will correctly expose your image. For instance, if you choose the three settings, the light meter might show you that it thinks you are underexposed by one stop (look in your viewfinder for a + 0 – scale, press the shutter button part-way down to activate it). Keep an eye on this because it can help you, but also try to not pay too much attention to it. The point of Manual shooting is to learn the numbers yourself without relying on the camera. You can rely more on the camera later.
Conclusion and practice
The only way to learn these things is to experiment and do them. Shooting in Manual at first will make you screw up much more than in Shutter or Aperture Priority, but a handful of dedicated days of doing this will have you understanding the settings in a much more intuitive way. Then if you decide to shoot in Shutter or Aperture Priority, you will have a strong understanding of how to use those modes to the best of their ability.
googletag.cmd.push(function() {
tablet_slots.push( googletag.defineSlot( “/1005424/_dPSv4_tab-all-article-bottom_(300×250)”, [300, 250], “pb-ad-78623” ).addService( googletag.pubads() ) ); } );
googletag.cmd.push(function() {
mobile_slots.push( googletag.defineSlot( “/1005424/_dPSv4_mob-all-article-bottom_(300×250)”, [300, 250], “pb-ad-78158” ).addService( googletag.pubads() ) ); } );
The post How Playing With Manual Mode Can Help You Learn Exposure Faster by James Maher appeared first on Digital Photography School.
How Using a Manual Focus Lens Can Make You a Better Photographer
19
Sep
Back in the days of all manual, focusing your lens was a skill that every photographer had master. Focusing used to be that thing that made your camera an extension of your hand, therefore a direct extension of your photographer’s eye. That whole agenda came to an end in the early 1990s with the arrival of autofocus systems that were able to actually focus faster than us humans.
That is another key frame along the medium’s timeline. Where new technology started a chain reaction that changed the face of photography forever. Until the appearance of mirrorless cameras that is.
A photographer looking to purchase a new lens for their mirrorless camera in 2016 might find that there are many manual focus lenses made nowadays alongside the autofocus ones. That means one thing: the market has said the word, manual focus is not dead.
Feed your spirit with the following thoughts to learn how manual focusing can make you a better photographer.
Doing versus supervising
And old carpenter once said, “If you want something done right the first time, do it yourself.” That was always reiterated when a new machine came to the industry to perform a task better, faster, and more efficient than a trained man could ever do.
Instead of being a skilled craftsman, now all you need to know is how to make sure that the machine is doing its job, that’s the truth about an autofocus camera. It is one thing for your brain to rotate the focusing ring with your left hand and stop rotating at the correct focus, and a whole different thing to wait for the green light or beep confirming focus has been achieved.

Sometimes you might choose to use only one central focusing point, lock it on your subject and then recompose your frame. That way you are still doing some of the work yourself, but you do it by pressing a button rather turning a ring with your left hand.
Pressing a button (or half-pressing the shutter, in most cases) is a very different connection between your hand and the machine than turning a ring with your left hand. Allowing your hand to learn the feel of the lens. Letting your hand know when and where to turn the dial and where to stop. It takes a greater effort of your brain, but only until your muscles learn it and bypass the need to think about the action. Then it frees your brain to think about the picture. In autofocus mode, your brain always has to check on the machine, make sure that focus is where you want it. That takes brain power every time. Brain power that could have been used to be more creative.
The need for speed
It’s true, the autofocus machine is indeed faster at turning the lens to the right distance than any human hand will ever be. But then it needs to wait for the brain to approve it before the shutter is pressed all the way and the photo is taken. So it is actually you that slows down the machine.
There are ways to overcome the speed limit of manual focus. For example, one way is to pre-focus on the distance your subject will be positioned at the moment of exposure. This is a technique that was very popular among sports photographers in the days before predictive dynamic autofocus. It required a fair amount of planning and knowing the nature of your subject. A property that let to visualization of the final image even in sports photography.
Another way, more popular among street photographers is called Zone Focus. You approximate the distance of your subject and make sure that they are within the depth of field by setting the focus and aperture correctly. It is a fast and simple technique that will force you to plan your frames. Thus forcing you to be more sensitive to your surroundings than a photographer who responds to a moment by half-pressing the shutter and then pressing it all the way. A street photographer trained in zone focusing does not have to pay attention to focus at all because they adjust their focus and aperture with every change in the scene without even thinking about it.

Move slow, think fast
When photographing a portrait with a fast telephoto lens you want to have the subject’s nearest eye in focus. There are many ways to achieve that with autofocus cameras. Some of the modern mirrorless cameras will lock on the near eye and stay focused on it for you as long as it’s there.
What a manual focus lens does for you is exactly the opposite. It is almost impossible to keep the near eye in focus with a portrait lens at a wide open aperture. The shallow depth of field means you will have to pay attention to your subject’s smallest moves such as breathing. By doing so it will focus your attention on the subject and you will start noticing facial features that would have been left behind at the photographing speed of autofocus lenses.
Zen and manual focus
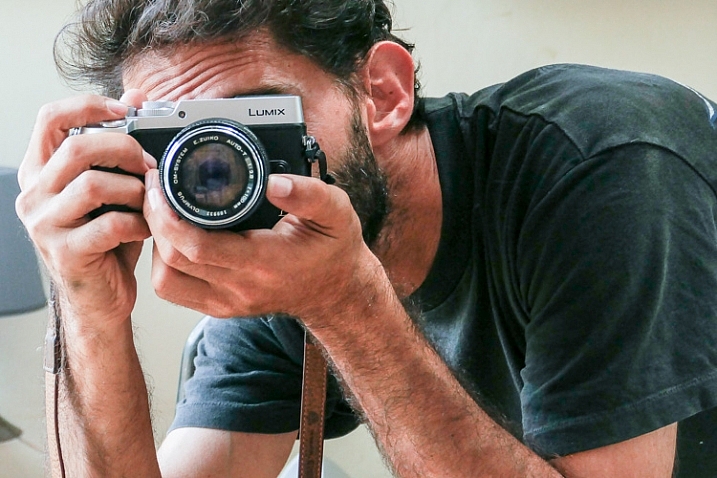
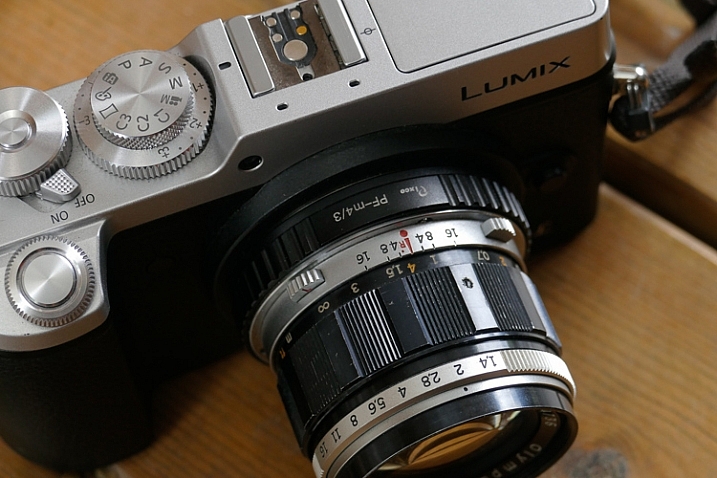
Use manual focus to put control of your photography back in your hands. It will slow you down and make you think more. For many of the greatest photographers throughout history, the process was as important as the final picture. When you let yourself indulge the process your photographs will benefit.
It is a totally different experience to manual focus using a lens that was created for autofocus than one that was made to be focused by a human. Invest in yourself and buy a vintage affordable lens that fits on your camera then go out shoot with only that lens. This way you will be able to feel what it is like to really do manual focus photography.
googletag.cmd.push(function() {
tablet_slots.push( googletag.defineSlot( “/1005424/_dPSv4_tab-all-article-bottom_(300×250)”, [300, 250], “pb-ad-78623” ).addService( googletag.pubads() ) ); } );
googletag.cmd.push(function() {
mobile_slots.push( googletag.defineSlot( “/1005424/_dPSv4_mob-all-article-bottom_(300×250)”, [300, 250], “pb-ad-78158” ).addService( googletag.pubads() ) ); } );
The post How Using a Manual Focus Lens Can Make You a Better Photographer by Ouria Tadmor appeared first on Digital Photography School.
TH Swiss releases pricing for its Irix 15mm F2.4 manual focus lenses
07
Sep
 |
Optical new-comer TH Swiss has announced pricing for the two versions of its Irix 15mm F2.4 manual focus lens designed for full frame cameras. The lens was originally announced in March this year, but the company now says the lenses are ready for sale and will be priced from €475 (about $ 535) for the Firefly model. There are two versions of the lens, the Blackstone and the Firefly. The Blackstone offers a more solid build and better water resistance, while the Firefly is said to be lighter and more affordable. The Blackstone version will cost €695 (about $ 780).
The company claims that the lenses offer exceptional protection from flare and color aberrations via its ‘neutrino’ coatings and ‘sophisticated optical construction.’ Both lenses feature electronic aperture control via the camera body and a click-stop indicator at the infinity focus mark on the focusing ring. The lenses can be focus-calibrated to match individual camera bodies if needed, offer a focus lock at any focus position and the Blackstone version uses fluorescent paint in the body markings to make operation in low light easier.
Users will need 95mm filters to screw into the mount around the forward element and the petal-shaped lens hood has a sliding door to allow access to filters that need rotating. Those who prefer rear mounted filters will find a square holder behind the rear element. TH Swiss says that the nine-bladed iris provides attractive out-of-focus highlights too.
The lens will be available initially in Canon EF and Nikon F mounts, but we should expect Pentax K users to be accommodated by the end of the month.
For more information, including full specification, MTF charts and optical schematics, see the Irix Lens website.
Press release
Irix 15/2.4 is ready for sale!
First deliveries of Blackstone and Firefly are on their way to distributors and retailers.
“The Irix 15mm f/2.4, both the Blackstone and the Firefly versions, is ready for sale”, announces TH Swiss Company. Starting from today, first deliveries of products have been shipped to distributors and retailers. Soon the customers will be able to enjoy the quality of Irix.
Irix 15mm f/2.4 lens is designed to deliver the best optical performance and match the demands of full frame DSLR cameras. Providing a focal length of 15mm, this new lens model is ideal for outdoor and indoor photography whether it is photojournalism, landscapes or architecture. The new special features such as focus lock, infinity click! and focus scale calibration set a new level of manual focus lens functionality. Thanks to sophisticated optical construction and special neutrino coating formula, colour aberration, ghosting and flare effects have been reduced to the absolute minimum. With a minimum focusing distance of 0.28 metre (0.92 ft) and 9 rounded shaped aperture blades, the lens stands for supremely smooth out-of-focus areas. The design of the lens allows the use of 95 mm screw-in filters at the front and gelatin filters at the back of the lens.
Blackstone, the Premium version, has durable body made with aluminium-magnesium alloy, that ensures foolproof protection of the lens, even in extreme situations. Its construction is equipped with four seals, that protect the camera mount and focusing mechanism against the dust and moisture, as well as front or side accidental water splashes. Engraved fluorescent markings enable easy read-out and operation in low light conditions.
Firefly is the standard version equipped with three seals that protect camera mount and focusing mechanism against dust, moisture and side accidental water splashes. Ergonomic focusing ring with rubber grip offers the freedom to operate with the camera. It is the most lightweight lens in its class.
Recommended retail prices are:
695 EUR for Irix Blackstone
475 EUR for Irix Firefly
Both versions are available for Canon EF and Nikon F cameras. By the end of September there will be also a Pentax K mount available.
Articles: Digital Photography Review (dpreview.com)
Sony 35mm FE lens firmware update improves manual focus reliability
15
Jul
 |
Sony has issued firmware updates for its 35mm full-frame primes which claim to improve focus point reliability when using manual focus for long periods of time. The new firmware is offered for the FE 35mm F1.4 ZA and FE 35mm F2.8 ZA Zeiss-branded lenses.
Download firmware 2.00 for the Sony Distagon T* FE 35mm F1.4 ZA
Download firmware 2.00 for the Sony FE 35mm F2.8 ZA Carl Zeiss Sonnar T*
Articles: Digital Photography Review (dpreview.com)
5 Advantages of Using a Fully Manual Lens
17
May

Shooting with a manual lens centers your attention on the precise image you want to produce. Once you get the hang of shooting manual (here are two prior dPS tutorials: Tips for Using Legacy Lenses and Shooting in Full Manual and Why Every Photographer Should Use a Manual Focus Lens), you learn how to produce some pretty cool images that are easier to manage, than if you leave autofocus on, and that can make for some fun photography.
With all of the computing that’s in a modern autofocus lens, the camera and the lens often take the photo for you. Further, autofocus and shake reduction can actually work against your art. If you shoot frequently on autofocus, then you know the camera can easily focus on the wrong subject. This is particularly true in situations where the light varies greatly.

Even when you turn off autofocus and go manual, the modern computer-driven lens can be cumbersome. It’s like turning off an automatic mode in a car and using paddles to shift gears. The experience is just not the same, things don’t work right. You want to step on the clutch, and shift through gears, feeling the engine with your right hand as you accelerate.
That’s how I feel about shooting manual. Your eye and hand drive the photo, rather the camera telling you how to drive.
Here are some of the cooler shots I’ve taken while photographing with manual lenses. They are listed from easiest to hardest. I hope you’ll enjoy some of these, too .
1) Nature shots that feature lots of bokeh

It’s spring and that means the world is filled with lots of colorful flowers, and blossoms to admire. Who doesn’t love photographing these beautiful subjects?
Because I live in a populous city, I shoot flowers with a wide-open aperture to create maximum bokeh. It allows me to blur many unwelcome background objects like cars, bikes, telephone polls, people, and even some buildings.
Manual is ideal for this kind of shot, as it is simplistic. I focus as closely as the lens permits, and set the aperture as wide as possible. I calibrate shutter speed to accommodate light and shadow differentials. The rest is easy as could be. I move myself and the camera to a position that frames the relatively still flower (wind not included) and capture the frame. The above crabtree blossoms shot is a classic example of this technique.
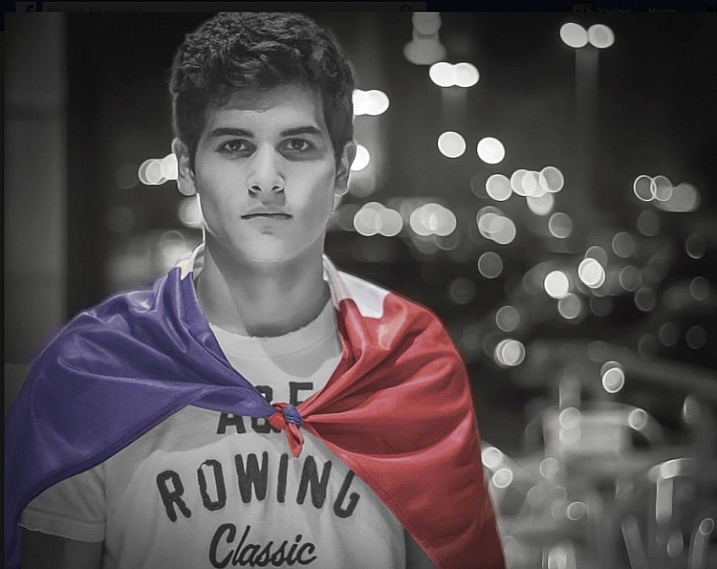
2) Spot focus street shots

Street photographers like to capture candid moments of human nature. Capturing cool street shots is hard. Personally, when I do shoot street photography, I tend to find a setting that I like, frame the shot, set my camera, then wait for the right person to come along. So perhaps I cheat a bit if you are a pure zen street photographer.
However, to get that shot, I love manual focus. I can set the focus based on the distance between the camera, and where I anticipate the subject will be. Autofocus often latches on to an object, and frankly sometimes the object is a little off from the spot I want to shoot. So I prefer to use manual focus, on the spot where I anticipate the subject will be.
This shot taken at the National Gallery of Art took about 10 minutes. I focused on the middle stair well and waited for the right person to come through. Unfortunately for me, a bus load of secondary school kids were there at first, but once they cleared out, things happened quickly.
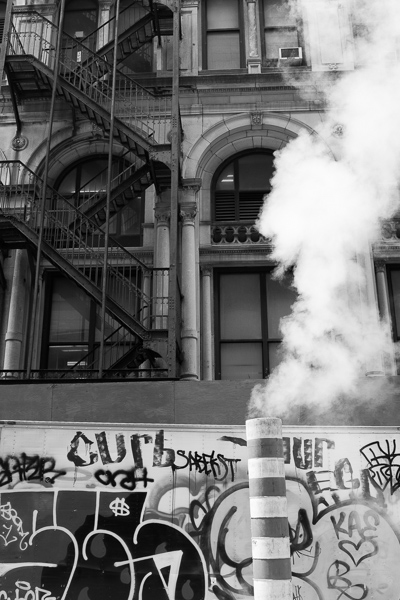
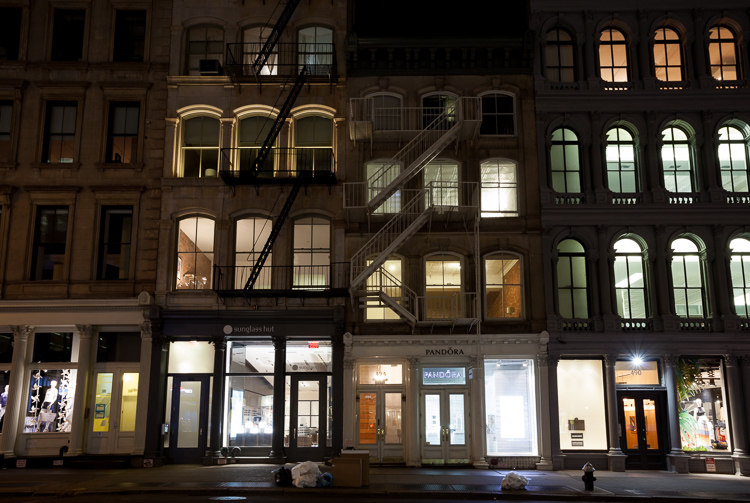
3) Bright night shots

Some objects are brighter at night than others. The moon is a great example. So are ferris wheels, because they shed an enormous amount of light, often rendering all other light sources as dull or non-existent.
For some reason, in darker situations like this, the light meter in my Nikon D810 and the autofocus on some of my lenses, don’t synch well. At times autofocus doesn’t catch the subject at all, or worse, it focuses on the wrong object, like a street light in the background. So I almost always calibrate both focus and aperture manually, to get the sharpness and light just right.
Back to the ferris wheel in the image above. The image was shot with a Figmentum 35mm lens. Focus was easy, as the distance from the subject let me simply set the lens on infinity. But, the aperture required some manipulation, as I started off too bright, and had to close the aperture slightly. I actually shot this at ISO 100for 30 seconds at f5.6, which turned the water reflection into a crazy bokeh as it came closer to me.
4) Panning
 DPS.jpg")
Panning is one of the most difficult forms of photography, literally catching an object in motion, at a slower shutter speed. This creates fantastic blur behind the subject, while at the same time keeps the object in focus.
You pretty much need to shoot manual to pan well. Sure, you can lock in your moving target with autofocus and then pan, but really there’s so much that most cameras get wrong with autofocus. When I pan, I like to spot focus with manual. I understand where my subject will be from a distance perspective. I focus, then keep my hands on the focus dial to sharpen as necessary.
In the case of this photo with my dog, I shot it with an 85mm lens, so I set the focus on infinity and planted myself in the middle of a dog park. This fine pup was playing catch with her Dad and was quite happy about it. I caught this shot on her sixth catch.
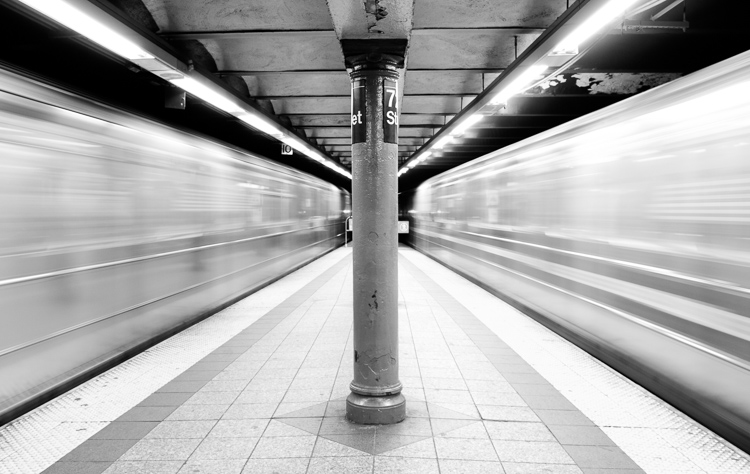
5) Shutter drag


If you think manual panning produces some cool shots, try dragging the shutter. This is for low light situations where you basically have the same technique as panning, but now use a flash to freeze your subject in motion.
Generally speaking if you are in a low light situation, autofocus may be suspect anyway. That’s why I prefer shooting manually. I’ll confess. If there is an autofocus lens on my body, then I’ll use it to get the camera focused on or close to the subject, then go manual to finish the job.
This shot was also taken at the National Gallery of Art, and features the LED light tunnel between the East and West wings. If you are on Flickr or 500 Pixels, you see a great photo of this every week or two. I decided to play double jeopardy with this shot and rode the conveyer belt while I shot the pic, so not only were the lights and the subject moving, but I was also moving at the same speed as the belt. The exposure was 1/4 of a second, with on-camera flash.
What are your favorite manual shots?
googletag.cmd.push(function() {
tablet_slots.push( googletag.defineSlot( “/1005424/_dPSv4_tab-all-article-bottom_(300×250)”, [300, 250], “pb-ad-78623” ).addService( googletag.pubads() ) ); } );
googletag.cmd.push(function() {
mobile_slots.push( googletag.defineSlot( “/1005424/_dPSv4_mob-all-article-bottom_(300×250)”, [300, 250], “pb-ad-78158” ).addService( googletag.pubads() ) ); } );
The post 5 Advantages of Using a Fully Manual Lens by Geoff Livingston appeared first on Digital Photography School.
You must be logged in to post a comment.