RSS
 

Posts Tagged ‘Manual’

NameThatLens is a cross-platform tool for adding EXIF info to vintage manual lenses

03 Jul
Erwan Hesry/Unsplash

Do you ever shoot with older lenses that aren’t capable of transmitting metadata to the camera when you shoot? If so, you might want to try out NameThatLens, a cross-platform program that simplifies the process of adding lens information to photo files.

NameThatLens was developed by Georg Fiedler, a photographer who often shoots with classic and vintage manual lenses. ‘Unlike with a modern auto-focus lens, a digital camera has no way of determining what lens was used to take a photo, or indeed what the aperture and focal length were set to,’ says Fiedler in the NameThatLens announcement post, adding ‘it is therefore not possible to record this metadata in the image RAW file or processed JPEG file.’

Fiedler says he came across the LensTagger plugin for Lightroom, but felt limited, because he often uses other post-processing programs such as Darktable. So, he set out to develop his own version—one that would work across Windows, MacOS and Linux computers. The result was NameThatLens.

In Fiedler’s own words, ‘NameThatLens, in its current form, is essentially a GUI for the wonderful ExifTool by Phil Harvey.’ But the goal is to turn it into a standalone program ‘in the near future.’

Currently, you can create author profiles, lens profiles and image parameters. The author profile tab of NameThatLens adds artist and copyright information to the images, the lens profile tab is a collection of the manual lenses you shoot with and the image parameter tab lets you set the aperture, focal length (if it’s a zoom lens) and other details.

As of writing this, the following formats are tested and proven to work with NameThatLens: JPG, ARW, ORF, and RAF, although Fiedler notes that most any image file you throw its way should ‘theoretically’ work.

Fiedler notes that the program is in Alpha phase, meaning there’s still work to be done and bugs to squash. However, if you’re fine with possibly running into a few snags, you’re free to download it and take it for a spin. Currently, the MacOS and Linux versions are available, with the Windows version set to be ‘released shortly.’

You can find out more information on NameThatLens, complete with installation instructions on Fiedler’s NameThatLens webpage.

Articles: Digital Photography Review (dpreview.com)

 
Comments Off on NameThatLens is a cross-platform tool for adding EXIF info to vintage manual lenses

Posted in Uncategorized


SLC-1L-04: A Hack for Manual Flash at Sunset

16 Jun

Manual flash is great for its consistency and repeatability throughout a shoot. But working in a fluctuating ambient environment, such as against a fast-waning sunset, can get hairy.

Today in the Lighting Cookbook, how to easily control the exposure level of both your subject and background without your eye ever leaving the viewfinder. Read more »
Strobist

 
Comments Off on SLC-1L-04: A Hack for Manual Flash at Sunset

Posted in Photography


Nokia 8 update adds new Pro Camera mode with manual controls

05 Jun

Last week, HMD Global released a software update for the Nokia 8 smartphone that added a new Pro Camera mode. The mode, which resembles the camera controls offered on older Nokia handsets, gives users manual control over five camera functions: shutter speed, ISO, white balance, focus, and exposure.

The Nokia 8 Android handset features dual rear 13MP cameras with Zeiss optics, optical image stabilization, PDAF and a dual tone flash. The handset supports 4K video recording with 360-degree audio. With the newly added Pro Camera mode, users can view the changes each manual adjustment makes to the final image in real time.

The update is currently rolling out globally.

Articles: Digital Photography Review (dpreview.com)

 
Comments Off on Nokia 8 update adds new Pro Camera mode with manual controls

Posted in Uncategorized


4 Tips to Help You Love Using Manual Mode

07 May

In this article, I’d like to share with you a few tips on how to utilize some of your camera’s functions to help you come to grips with shooting in Manual Mode.

Sometimes stripping back to the basics and only using minimal, older equipment with none of the modern features new cameras possess, can help you grow as a photographer. Sometimes making good use of selective technology on your digital camera can also help you learn and create more accurate exposures more easily than is ever possible with older cameras.

Asian woman holding an old 35mm film camera - 4 Tips to Help You Love Using Manual Mode

I started learning on a camera which had no auto anything. There were no options other than to learn Manual Mode. I still use shoot manual 99% of the time.

During the photography workshops we run, I love to encourage people to switch to manual and commit to it for a period of time. If you try Manual Mode once or twice for a short time it’s likely you will not “get” it. You need to commit and using only Manual for most of what you photograph for long enough until you feel you are making progress.

man taking a photo - 4 Tips to Help You Love Using Manual Mode

1. Live View/Electronic View Finder

Many cameras now have LCD screens/electronic viewfinders which display how the exposure will look when you take a photo in Manual Mode. If your camera has this function it pretty much eliminates the need to look at the exposure meter or change your metering mode to obtain well-exposed photographs.

By focusing your attention on the exposure of the image on your LCD screen or in your electronic viewfinder while you are adjusting your aperture, shutter speed, and ISO settings you can easily see when your photo will look good.

Asian woman photographer 4 Tips to Help You Love Using Manual Mode

You need have your screen or viewfinder set so it’s neutral, not too bright and not too dark. To check this you can take a few test photos and then review them (on the computer). If they are over or underexposed adjust the brightness value of your camera’s LCD screen and/or viewfinder until your photos have the same exposure value you are seeing in the viewfinder or on your monitor in Live View mode.

2. Use Your Spot Meter

If you prefer not to use Live View or do not have an electronic viewfinder which displays the changes to the exposure value as you adjust your controls, using the spot meter can help you achieve more accurate reading and set your exposures more precisely.

Woman selling mangoes - 4 Tips to Help You Love Using Manual Mode

Modern cameras have a selection of metering modes which include a spot meter. Most often using the averaging mode, which takes a reading from multiple segments of the image area and gives an exposure value the camera calculates, is sufficient.

However, in some situations, particularly if your subject is back-lit or contrast in the scene you are photographing is high, using the spot meter setting will allow you to make a reading off the area of the image which is most vital to you.

For example, making a portrait where your background is significantly lighter or darker than your subject it is best to take a spot meter reading from their face as this is usually the most important part of your image. Using the averaged setting your camera’s meter will also read from the background and calculate that into the result it returns, potentially giving you a less than satisfactory exposure.

Karen woman smoking a pipe - 4 Tips to Help You Love Using Manual Mode

Learning to use your spot meter will assist you in creating more accurate exposures. I have one of the function buttons on my cameras set to switch to spot metering, allowing me to quickly and easily take a reading from any particular part of my composition.

3. Review Your Photos

It’s not a healthy practice to always be checking your camera’s monitor after every photo you take, as this can interrupt your attention from your subject. But it can be helpful to review your first few images after making adjustments to your exposure settings.

Taking a look at the results after changing your aperture, shutter speed, or ISO will give you a clear idea as to whether your settings are suitable for the photos you want to create. If you see a photo that’s too bright or too dark overall or in a part of the composition you prefer to see well exposed, then you will need to make some adjustment to your settings.

Asian woman reviewing a photo on a DSLR camera monitor - 4 Tips to Help You Love Using Manual Mode

As you practice this technique you may start to find you can estimate how much you need to alter your exposure settings rather than consulting your exposure meter again. This does take some practice, but if you form a habit of doing this, you will find this is a quick and easy way to achieve a better exposure.

4. Check Your Metadata

Our digital cameras record an incredible amount of metadata, associated information about each photograph you take. Learning to read and understand even a small amount of this information can assist you in producing more consistently pleasing exposures.

Back of a DSLR camera at dusk - 4 Tips to Help You Love Using Manual Mode

Being able to freely review the exposure value for any photo you have taken can help you understand why it’s good or maybe why it needs improving. I find this information most handy when I am sitting at my computer reviewing my images from a photography session.

Comparing photos made with different exposure values and looking at the metadata can help you have a better understanding of what settings you can use next time.

In Conclusion

Evening photo with bold colors taken during a Chaing Mai Photo Workshop

Autofocus, Facial Recognition, Auto White Balance, and ISO flexibility are all modern advancements in camera technology which make using Manual Mode easier. Because you don’t have to pay so much attention to these things and can better concentrate on setting your exposure well.

Exposure is one of the key elements of every photograph. Learning to understand how you can use the various features of your camera to assist you in making better exposures will help you become a more creative photographer.

?

The post 4 Tips to Help You Love Using Manual Mode appeared first on Digital Photography School.


Digital Photography School

 
Comments Off on 4 Tips to Help You Love Using Manual Mode

Posted in Photography


Simplifying Manual Mode to Help You Take Control of Your Images

05 Feb

As the owner of a DSLR camera, you may have heard the pros encouraging you to graduate to Manual Mode or M on your camera’s dial. While there are different schools of thought on which mode to use, Manual Mode allows you the greatest control over your settings.

Simplifying Manual Mode to Help You Take Control of Your Images

So why are so many people still daunted by it and how do you take next step to start working with Manual Mode? In this article, I’ll try to simplify it for you so you can understand how to use it and take better images.

Simplifying Manual Mode to Help You Take Control of Your Images

Why Manual Mode?

If you use the other modes, the camera helps you figure out some or all of the settings. For example, if you choose Aperture Priority mode, the camera works out the shutter speed and vice versa if you choose Shutter Priority. So if it already does all this, why bother with manual?

Sometimes these automated or semi-automated settings are not always in line with your vision. They may even be incorrect or tricked by unique lighting situations. This is where you take back control by using Manual Mode. You tell the camera how you want your output and your photos to look.

Simplifying Manual Mode to Help You Take Control of Your Images

Understanding the Big Three

As stated before, with Manual Mode you have control over “everything”- but what exactly does this mean? Well simply put, there are three variables that determine the exposure of your photograph and Manual Mode puts you in control all of them. These variables are the aperture, shutter speed, and ISO, which together make up what is known as the Exposure Triangle. The balance of these three points of the exposure triangle is what Manual Mode is all about.

Aperture

Also known as f-number or f-stop, aperture refers to the size of the hole in your lens that lets in light. With a larger aperture (smaller f-number like f/2.8), more light hits your camera sensor. The reverse is also true (a larger f-number like f/16 lets in less light).

NOTE: It is often confusing for beginners because the smaller the number, the larger the hole. Just remember that the aperture is a ratio or fraction so f/2 is like 1/2 and f/20 is like 1/22. So remember that one half of anything is larger than 1/20th. 

Your control of aperture determines the depth of field in your photo – or how much of your image is sharp. A wider aperture (like f/2.8) results in a shallow depth of field. This means that only a part of your image is sharp, leaving the rest blurred or out of focus. Portraits are a good scenario to use wider apertures.

Simplifying Manual Mode to Help You Take Control of Your Images

Here a shallow depth of field has been combined with a fast shutter speed to get this shot.

If you want most of your image to be sharp, use a smaller aperture. Smaller apertures (higher f-numbers like f/16) are commonly used when shooting outdoor or landscape scenery.

Shutter Speed

Shutter speed refers to the length of time that the shutter inside your camera is opened and light is allowed to hit the sensor. So to double the amount of light, you can double the length of your exposure.

If you want to freeze motion, use faster shutter speeds to limit the amount of time that light hits the sensor. Conversely, if you want to blur motion in your scene, use slower shutter speeds (or long exposure photography).

Simplifying Manual Mode to Help You Take Control of Your Images

Taking control of your shutter speed can change your usual day shots. Here a long exposure was used to add a motion blur to the moving water.

ISO

To keep the definition of ISO simple, it is the way your camera controls its sensitivity to light. Increasing your ISO value allows you to shoot in lower light conditions without a tripod. Note that higher ISO values add digital noise to your image which affects image quality. Fortunately, most cameras now handle digital noise better that those of times gone by, so experiment with it as it can be quite useful.

Simplifying Manual Mode to Help You Take Control of Your Images

Higher ISO values can add noise (grain) to your image but it is sometimes necessary to do this.

How to use Manual Mode

Now that you are familiar with what Manual Mode controls, how do you start working with it? Well, after you decide what you want to shoot, pick one the points of the exposure triangle as your starting point.

To shoot a landscape, for example, decide how much you want in sharp focus. Let’s say you choose an aperture of f/16. After your aperture is set, turn your shutter speed dial until the exposure is balanced. You can use the camera marker on your exposure chart as a guide. Theoretically, you have just balanced your aperture and shutter speed.

Start with your ISO at 100 and take a shot. Is your photo too bright or too dark? Based on the results, adjust your settings and retry. When working with the exposure triangle, most times when you adjust one setting, you usually have to adjust one of the other two (in the opposite direction) to get a balanced result and a proper exposure.

Simplifying Manual Mode to Help You Take Control of Your Images

Conclusion

Manual Mode may seem daunting, but as you learn more about controlling light, it becomes easier with time. While nothing is wrong with using the other available modes of your camera, the ability to control the final output of your vision is a great skill to develop.

If you have any tips or tricks that worked for you when you were learning Manual Mode, please share with us in the comments below.

The post Simplifying Manual Mode to Help You Take Control of Your Images by Nisha Ramroop appeared first on Digital Photography School.


Digital Photography School

 
Comments Off on Simplifying Manual Mode to Help You Take Control of Your Images

Posted in Photography


Super Simple Introduction to Manual Mode and How it Will Transform Your Photos

30 Jan

Super Simple Introduction to Manual Mode and How it Will Transform Your Photos

“There is only you and your camera. The limitations in your photography are in yourself, for what we see is what we are.” Ernst Haas

Do you ever ask yourself why the images you capture are not like the ones you see in your mind’s eye?

Do you ever wonder why your photos don’t look as good as a professional’s? What makes theirs look so great?

The answer is – probably because you are shooting in Auto!

Super Simple Introduction to Manual Mode and How it Will Transform Your Photos5 seconds, f/8.0, ISO 100

Get more creative with Manual Mode

A professional takes full creative control over every aspect of the photo and makes creative choices in the image creation process. Aperture, shutter speed and ISO are the base. If you don’t control these then you will be unable to create the best possible image.

Digital cameras nowadays make exposure so easy. There doesn’t seem to be a good reason to shoot on manual. But there is – it’s creativity. Specifically, creative exposures.

Super Simple Introduction to Manual Mode and How it Will Transform Your Photos
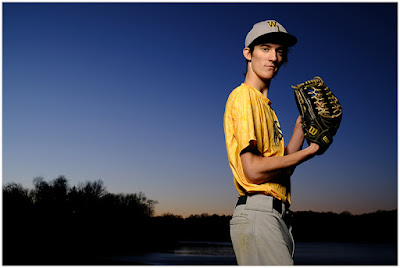
1/200th, f/2.2, ISO 500

Take control of the process

If you want awesome photos, then shooting with control is the most important part of the creative journey with photography. With Manual Mode, you get full control. Total creativity.

I know a lot of people feel intimidated trying Manual, but I have taught hundreds of people to feel comfortable and confident with it so I know it’s totally possible for anyone to learn.

Even if you aren’t tech-minded, you can do this! All you need is the basic understanding of the process – and practice.

Super Simple Introduction to Manual Mode and How it Will Transform Your Photos30 seconds, f/10, ISO 200

The camera cannot (at least at the moment) make creative choices in the way that you can. You’ll often end up with un-dynamic exposures when the camera chooses for you.

How many well-exposed photos do you see on Facebook? The majority are shot using some Automatic Mode or another. They are all the same base density. Sure, they are properly exposed, but that base exposure is just the beginning when shooting with intent.

All those exposures start from the same base, zero. Many photographers just leave it there because it looks good, it looks “correct”. That is Auto.

Super Simple Introduction to Manual Mode and How it Will Transform Your Photos1.6 seconds, f/10, ISO 50

Exposure is part of photographic artistry. Don’t pass on it just because your photos look good….they can be so much better!

Here is the simple method I use to explain the process of shooting in Manual Mode.

The Exposure Triangle

Shooting in Manual Mode means controlling three fundamental settings in photography:

  1. ISO
  2. Aperture
  3. Shutter Speed

Together they are collectively known as “The Exposure Triangle”.

Super Simple Introduction to Manual Mode and How it Will Transform Your Photos13 seconds, f/9, ISO 250

What do these three controls do?

  • ISO is the camera’s sensitivity to light. Think of it this way – do you want the sensor to absorb light quickly, sacrificing detail and contrast (high ISO), or do you want to let the light in slowly absorbing every color, capturing every juicy detail (low ISO)?
  • Aperture controls the INTENSITY of the light flowing onto the sensor. Think of coming out of a Saturday afternoon matinee and how intense the light is after being in the dark for a few hours. You’re practically blinded for a moment (until your pupils adjust to the light and become smaller – the aperture opens and closes much the same way). That’s intensity!
  • Shutter Speed (SS) is a time value – in other words, how long is the exposure. The time is combined with the intensity of the light from your Aperture setting. Shutter speed is represented as 1/250th of a second, for example.

These three settings are all you need to know about making a manual exposure. That’s it. Now let talk about how to approach it.

Super Simple Introduction to Manual Mode and How it Will Transform Your Photos1/30th, f/2.2, ISO 3200

Think ISO first

When making a manual exposure ISO should always be your first consideration!

There are two questions you have to ask yourself before you start making exposures.

  1. How much light is on the subject?
    This is essentially a technical decision. (ISO)
  2. How can I make my subject look its best?
    This is essentially a creative decision. (Shutter speed and Aperture combination)

The answers to these questions are the key to the whole process. Once you have the answers, you can set your exposure.

Super Simple Introduction to Manual Mode and How it Will Transform Your Photos1/125, f/13, ISO 400

This is how I shoot in Manual Mode, explained in three easy steps.

Step #1 – How much light is on the subject?

Do I have:

  • Full daylight
  • A gloomy interior
  • A heavily shaded area between buildings
  • And so on…

Super Simple Introduction to Manual Mode and How it Will Transform Your Photos2 seconds, f/10, ISO 320

First off, I’ll set my ISO accordingly. I usually go for the lowest ISO I can get away with shooting handheld. If I have a tripod I’ll go even lower. You can go almost a whole day without needing to change your ISO much.

It’s the easiest thing to set and forget. But if you need to move it you can. This is not a big deal on modern cameras where image quality is amazing at almost any ISO.

ISO scale - Super Simple Introduction to Manual Mode and How it Will Transform Your Photos

TIP #1

Set your ISO and don’t think about it unless the light level changes a lot – like you go indoors, the sun sets, or you walk into a heavily shaded area, etc. You get the point.

TIP #2

Look at the light! Photography is a study of light, after all, so your first step is to learn to really see it, to observe what it is doing, its strength and quality. When you have a deep familiarity with light from willfully observing it, you grow to know it.

Being aware of light levels makes shooting in manual much easier. When you are out, be tuned in to the light.

Step #2 – I ask myself “What is my priority?”

How do I decide what is the priority for my shot?

Super Simple Introduction to Manual Mode and How it Will Transform Your Photos10 seconds, f/11, ISO 50

It all comes down to what I’m shooting – prioritizing shutter speed or aperture to whatever I think will make my subject look its best.

  • Am I shooting landscapes and want a wide depth of field? (select a small aperture like f/16).
  • Am I shooting portraits and so want a shallow depth of field? (aperture again, this time a wide setting like f/2.8).
  • Perhaps I am shooting sports or action, and want pin-sharp images of fast-moving subjects? (shutter speed this time – choose a fast one to freeze the subject like 1/2000th).

I’ll make my choice of shutter speed or aperture as my top priority. Now I have two points of the exposure triangle set. For the last setting, I adjust the exposure on the light meter scale.

Super Simple Introduction to Manual Mode and How it Will Transform Your Photos1/15th, f/4.5, ISO 12,800

Step #3 – Adjusting the exposure

Now is the time to look at the camera meter.

Use the light meter scale – get the marker near the center or thereabouts with the one remaining dial (in other words if you chose the aperture in step #2, the last one being set here is the shutter speed). On this -2 to +2 scale, where you place the exposure matters a lot! This is the essence of creative exposures. It dictates the mood of the photograph.

Being in the centre or “0” position is rarely the right exposure for me.

Light meter scale - Super Simple Introduction to Manual Mode and How it Will Transform Your PhotosLight Meter Scale

Remember, each point of the exposure triangle is NOT fixed. Each click or interval (usually in 1/3 increments) are equal, so 2 (+) clicks of ISO is equal to 2 (-) clicks of aperture or shutter speed. These are called reciprocating exposures and they are the key to shooting creatively.

So, if you find yourself in a situation where you would like a little faster shutter speed, then do it. But compensate with an equal but opposite amount of another setting. What choice you make at this point is completely creative, not technical.

Super Simple Introduction to Manual Mode and How it Will Transform Your Photos3.2 seconds, f/4.5, ISO 100

TIP # 3

Let’s say you are shooting a landscape with a good foreground, a large tree perhaps, You set your aperture to f/16 for good depth of field (priority), ISO is at 100 and you have a shutter speed of 1/60th. This is a classic landscape exposure – with a lot of Depth of Field.

For an alternative image of the same scene, you could think of the tree as a portrait photo and open up the aperture to f/4 (+4 stops) and adjust the shutter speed to 1/1000th (-4 stops) keeping the ISO at 100 and the exposure the same.

You would lose most of the Depth of Field, but gain a nice bokeh making the tree isolated, like a good portrait. Now you’ve created a different feel to a classic landscape using a reciprocating exposure. But wait, there is still more you can do!

Super Simple Introduction to Manual Mode and How it Will Transform Your Photos2.5 seconds @ f/4.0 ISO 100

Now, how about underexposing this scene by 1-1.5 stops to create a more low-key moody image. If the tree was in bright sun and the background shaded, I would instinctively underexpose to emphasize that contrast.

Putting it all into practice

You will miss a few exposures now and then. Everyone does, but don’t let it discourage you. I think a big part of the fear of shooting in Manual Mode is the, “I will miss the shot”echoing in people’s heads. Like I say, it happens to everyone.

Losing a few shots is still worth the wealth of knowledge and creativity you get from sticking with it and totally controlling your photography. Those missed shots will appear less and less as you improve, and your new found skill shooting in manual will reflect in your photos.

Super Simple Introduction to Manual Mode and How it Will Transform Your Photos2 seconds @ f/5.0 ISO 50

I recommend you shoot at least 1,000 images in your practice. If you really focus, you could nail Manual Mode over a weekend. There is no substitute for practice.

Slow down and have fun! It will be worth every bad shot you take.

Study your images in post-production

Once you have taken your images, it is a really good idea to study your images in post-processing. All of the information about exposure is stored in the metadata which you access in a program like Lightroom (you can filter and sort your images by ISO, Aperture, etc.).

Super Simple Introduction to Manual Mode and How it Will Transform Your Photos1/30th, f/8, ISO 50

A few more final words – and action steps!

Did you know that two of the best ways to fully learn something is to:

  1. Practice it
  2. Explain it or teach it to someone else

By practicing it over and over you are teaching it into your body, almost like muscle memory. You do it so many times you’ll end up with it being automatic like it is for me (and those with years of experience who make it look effortless).

Super Simple Introduction to Manual Mode and How it Will Transform Your Photos1/400th @ f/4.0 ISO 200

By explaining it, preferably a few times, to someone else, your brain starts to build new neural networks (which happens anytime you learn anything). So if you want to remember anything, you need to keep the neural networks alive, and by repeating it, explaining it, and practicing it over and over you’ll make that a solid memory in your brain.

So the short term work of repetition leads to remembering it long term. How cool is that?

I really, really hope this has helped you “get” Manual Mode. I love the creative possibilities of photography, and it makes all the difference when you feel comfortable with your tools. I would love to know if this has helped you – and if you’ll take the leap to practice shooting in manual.

The post Super Simple Introduction to Manual Mode and How it Will Transform Your Photos by Anthony Epes appeared first on Digital Photography School.


Digital Photography School

 
Comments Off on Super Simple Introduction to Manual Mode and How it Will Transform Your Photos

Posted in Photography


The Myth and Reality of Shooting in Manual Mode

21 Dec

I’ve heard it. You’ve heard it. And it’s a great big steaming pile of…baloney.

Myth – Professionals Only Shoot in Manual Mode

I recently read an account of a new photographer who heard that “expert” photographers only shoot in manual mode, so he headed out to shoot. Camera firmly set to M, he shot away, happy as could be. However, the results from that first exploration were, needless to say, disappointing; overexposures, under-exposures, and a lot of crappy, blurred photos.

Professionals Shoot in Manual Mode

I had about 10 seconds to make this image of a grove of Baobabs in Botswana. Had I been fiddling with finding the right manual settings, I likely would have missed the shot.

Here is the reality: Professionals and other experienced photographers use just about every shooting mode on their camera.

Those modes are there for a reason. Settings provide simplicity, speed, flexibility, or full control. Depending on the conditions in which you are shooting, any one of these may be appropriate. While other articles here at dPS discuss how to use each of the settings on your camera, I want to talk about the myth of Manual Mode, but also why it’s important to use it

Professionals Shoot in Manual Mode

Moving subjects and quickly shifting scenes are not conducive to manual mode.

The Professional Reality

Try shooting on full manual control while making images of birds in flight. Go on, try it. I’ll wait.

Professionals Shoot in Manual Mode

On the off chance that you actually went out and tried that exercise, I suspect you ended up with a lot of really bad photos. As birds passed quickly in front of different backdrops, as the sun darted in and out from behind clouds, the lighting conditions were undoubtedly in constant change. To adapt to those changes on the fly would be a nearly impossible task.

Professionals Shoot in Manual Mode

Rather, any professional would use one of the other settings. I, for example, would probably choose Shutter Priority mode under those conditions. That would assure I could maintain sharp (or artfully blurred) images as I shot, and leave the decision on aperture up to the camera. If I wanted a brighter or darker exposure I’d adjust the exposure compensation.

Now, if I was carefully shooting a landscape and had a particular vision for the final image, that’s when I’d make the switch to Manual Mode. In manual, I can take full control of the scene. I can adjust the depth of field, the exposure, incorporate blurs, or selective focus. In Manual Mode, I own all aspects of the final image, for better or worse.

Professionals Shoot in Manual Mode

My point here is simply this – professionals use all the tools at their disposal. If it were true that pros only use Manual Mode, then pro-level cameras would only have one setting. Quite obviously, that is not the case.

You Still Need to Shoot in Manual

Shoot in Manual Mode, but not all the time. But understanding exposure, focus, shutter speed, and aperture and their effect on the final image is the heart of photography. To master the technical aspects of image-creation, you need to be able to put all these together without the help of your camera.

Professionals Shoot in Manual Mode

Manual Mode is perfect for landscape photography because you have the time to dedicate to creating the image you envision.

Manual means full control

I regularly practice the art of manual settings. When a scene is in front of me, I’ll imagine a particular way to portray it. I’ll envision how bright I want the image to appear. I select the focal point, whether motion blur is incorporated or eliminated, and how deep the depth of field should be.

Once I’ve got the image in my mind. I’ll select the ISO, shutter speed, and aperture without using the camera’s light meter to help me. Then I click the shutter and have a look.

Professionals Shoot in Manual ModeThis exercise reminds me of light and settings and how the camera works, sure. But more so, it turns every aspect of the image into a purposeful decision. There is no “spray and pray” photography when you are shooting in Manual Mode. Setting your camera to that scary “M” means you grant yourself full control and full responsibility for whatever emerges.

Professionals Shoot in Manual Mode

Aurora borealis and most other night photography require the use of Manual Mode.

There is no better way to learn about your camera, light, and about thoughtful photography than to set your camera to Manual Mode, turn off the autofocus, and go make images.

Summary

It’s absolute nonsense that pros only shoot in manual. Utter garbage. Your camera has a bunch of settings for a reason. Shooting in just one would be like only eating one type of food. Each has a purpose, and each has their place in the art of photography.

Professionals Shoot in Manual Mode

Purposefully underexposed images are also well-suited to Manual Mode, particularly when you want to retain a shallow depth of field, as I did with this flower image.

However, and this is a big HOWEVER, shooting in Manual Mode may be the best tool at our disposal for turning our photography into a purposeful exercise. Using manual will force you to understand depth, light, exposure, blur, and focus.

So yes, you should shoot in manual mode. Just not all the time.

The post The Myth and Reality of Shooting in Manual Mode by David Shaw appeared first on Digital Photography School.


Digital Photography School

 
Comments Off on The Myth and Reality of Shooting in Manual Mode

Posted in Photography


Nikon’s redesigned SnapBridge app adds full manual camera control and ‘intuitive’ UI

30 Nov

Nikon just released a new version of its camera connectivity app SnapBridge. The new SnapBridge Version 2.0—which is available for both iOS and Android devices starting today—has been redesigned with an easier-to-use interface and a bunch of new features like the ability to register up to five devices, and full-manual control of select cameras.

On the UI side, both the screen design and the menu structure have been updated to be ‘more intuitive’ and offer direct access to Help functions. The app has also now been equipped with a ‘power saving mode’ that keeps SnapBridge from draining your smartphone or tablet’s battery when you’re not connected to a camera (i.e. when it’s not in use).

On the feature side, the major addition is full manual control. If you have a compatible camera—according to Nikon, these include the Nikon D850, D500, D7500, and D5600—you’ll now be able to control exposure modes (P/S/A/M), shutter speed, aperture, exposure comp, ISO, and white balance.

You can learn more about the new SnapBridge app by reading the full press release below, or downloading it yourself off of the iTunes App Store or Google Play.

Press Release

Nikon Announces Updated Version of SnapBridge Camera Connectivity App for Seamless Image Transfer and Sharing

Easier to Use, More Intuitive and Simpler Connection with SnapBridge Version 2.0*

MELVILLE, NY (November 29, 2017 at 11:00 P.M. EST) – Today, Nikon is pleased to announce the release of version 2.0 of Nikon SnapBridge, which offers enhanced functionality, stability and ease of use. SnapBridge is the Nikon app that enables users to easily and seamlessly share images and control select Nikon digital camera via Bluetooth** and Wi-Fi® connection with a compatible smart device such as a phone or tablet.

Enhanced Interface and Connectivity

SnapBridge version 2.0 reflects feedback from users of earlier versions of the app and represents a significant update of the user interface (GUI). Screen design and menu structure have been significantly revised in several ways, including the adoption of progress displays to provide visual confirmation of the status of an operation (e.g. when a smart device is paired with a camera or connection is changed to a Wi-Fi connection). Direct access to help functions from the app menu are also now available. The app also offers different instructions for each category of camera to ensure easier setup, navigation and usage.

Additionally, up to five cameras can now be registered with the device running the app. This makes switching between cameras much easier for those who own multiple Nikon cameras.

The app is also equipped with a new power-saving mode that controls the amount of smart device power consumed by the app when it is not connected to a camera for an extended period of time. SnapBridge Version 2.0 also features a location data accuracy setting that allows users to choose between lower power consumption and greater location data accuracy by selecting how often the smart device updates location data.

Greater Remote Photography Functions

For even more creative control with select Nikon cameras, important digital SLR camera settings can now be controlled from the SnapBridge app through remote photography*. The live view display on the smart device can be used to confirm and adjust camera settings, allowing users to enjoy more full-scale shooting. Users also now have access to exposure modes (P/S/A/M), shutter speed, aperture value, exposure compensation, ISO sensitivity, and white balance. Controls will vary among various camera models.

Nikon Image Space Integration

Nikon SnapBridge Version 2.0 has a dedicated tab that makes it easier than ever to use NIKON IMAGE SPACE. With SnapBridge 2.0 and a NIKON IMAGE SPACE account a user can automatically upload an unlimited number 2MB images ideal for sharing on the go. In addition, photos taken using remote photography can now be uploaded to NIKON IMAGE SPACE automatically.

Nikon will continue to enhance the app’s usability and strengthen its functions to provide users with ever increasingly rich imaging experiences well into the future.

For more information about Nikon SnapBridge and the latest Nikon cameras and other products, please visit www.nikonusa.com.

*Functions available with the SnapBridge and SnapBridge 360/170 apps differ.

  • iPhone®, iPad®, iPod touch®, and Android™ devices to which the SnapBridge app has been installed can be used. The SnapBridge app can be downloaded free of charge from the App Store® and Google Play™. See Nikon’s website for further information.
  • Operation of this app is not guaranteed with all devices.
  • Nikon SnapBridge 2.0 Compatible Cameras:
    • Nikon D850, D500, D7500, D5600, D3400,COOLPIX A900, A300, B700, B500, W100, W300, KeyMission 80

**The Wi-Fi® and Bluetooth® functions built into cameras are effective only when connected to a smart device on which the SnapBridge app has been installed.

Articles: Digital Photography Review (dpreview.com)

 
Comments Off on Nikon’s redesigned SnapBridge app adds full manual camera control and ‘intuitive’ UI

Posted in Uncategorized


How to Shoot in Manual Mode Cheat Sheet for Beginners

16 Nov

The “Manual Photography Cheat Sheet-Reloaded” by The London School of Photography is a clean-cut, visual way of showing you how to step-up your photography game from automatic to manual shooting. Not only does shooting in Manual Mode enable you to produce sharp well-composed imagery – but you’ll also gain a stronger understanding of the inner workings of your camera and just how all those curious settings work in synch with each other.

How to Shoot in Manual Mode Cheat Sheet for Beginners

By shooting in Manual Mode you have full control of your shutter speed, ISO, and aperture, among an array of other settings that can further fine-tune your images. Manually controlling the aperture, for example, can help you achieve those beautiful portraits with blurred bokeh backgrounds. It’s also highly useful for changing shutter speeds, enabling you to achieve amazing shots of those fast-moving subjects like cars or cyclists in crystal clear motion without sacrificing quality.

You may often find yourself in a tricky lighting situation where everything appears far too dark, too light, or very grainy. Unfortunately, automatic mode can’t always hack these extreme conditions and often activates your camera’s flash at the smallest hint of darkness (making some photos appear positively awful). This is where learning to shoot in Manual Mode can be a lifesaver.

ISO

One of the most talked about settings on a camera is the ISO; a numerical value on your camera that controls light sensitivity. Your camera’s ISO allows you to adjust its light-sensitivity and allows it to pick up more light. Or on the flip side, to reduce your exposure on those bright sunny days for a well-balanced result.

I highly encourage experimenting with different lighting conditions to find your ideal ISO. But be wary of making your ISO too high in dark conditions as this will increase the amount of noise in your final images.

Aperture

Another common term you may have come across is aperture. This is essentially an opening in the lens that affects your exposure. It is also responsible for controlling the depth of field.

Generally, the lower the number (or f-stop), the larger the opening of the lens will be which will result in less depth of field – ideal for those blurry backgrounds. On the other hand, the higher your aperture the sharper the background will be – making it great for capturing all the tiny details in your scene (great for landscapes).

Shutter Speed

How to Shoot in Manual Mode Cheat Sheet for Beginners

Shutter speed is another key player that determines your image’s final outcome. It is essentially the exposure time of the camera’s inner shutter that stays open to allow light to enter and hit the sensor.

Generally, if you’re after blurred shots that illustrate an object’s motion (for example a racing car or cyclist) then a slow shutter speed will keep the shutter open for longer, allowing for a longer exposure time. A faster shutter speed, however, is perfect for a pristine action shot with no motion blurs.

White Balance

Another setting on your camera which also directly affects your images is your White Balance (WB). The process of setting your White Balance involves removing unrealistic color casts and ultimately using a setting that produces more naturally toned images.

It is especially useful in removing harsh yellow tones or redness on the skin. Alternatively, White Balance can be used in unconventional ways to refine your photographic style. For example, for edgier photos, the Tungsten White Balance preset can be used in an overcast setting to produce blue hues and enhance contrasts. With this in mind, it’s highly beneficial to experiment with the various White Balance modes to achieve your desired results.

Things to note for shooting in Manual Mode

Keep in mind that when you’re ready to shoot in Manual Mode your settings will not adjust to your shooting conditions. You have to adjust them, manually. By keeping this in mind you’ll ensure your exposures are consistent throughout a shoot. The process of changing your settings may sound tedious at first, but it will actually ensure your images are consistent.

This is what shooting in an automatic mode lacks, as it calculates how much light is being measured through your camera’s light meter. As good as this might sound to you, you’ll probably find that as you adjust your shooting position, the subject moves, or the lighting condition changes to overcast – you’ll eventually have a set of very inconsistently exposed images.

Other shooting modes

camera modes - How to Shoot in Manual Mode Cheat Sheet for Beginners

As much as I love to shoot manual, don’t forget about the other letters on your mode dial that are sparking your curiosity. In fact, I even recommend shooting in these semi-automatic modes as practice to help you understand exposure compensation.

  • Program mode (P) is a great transition mode when stepping out of the auto-shooting world. It governs similar shooting to auto but allows you to adjust the exposure by controlling compensation through a dial. If any of your photos appear dark, then using this simple feature can increase the brightness.
  • Aperture priority is another great transitional mode to shoot in that allows you control over aperture as well as the ISO. It gives you control over your depth of field as well as the exposure compensation to control brightness.

If you think you’ve mastered these settings then you’re ready to go manual!

Finally

In addition to camera settings, we highly recommend the following tips that will further enhance your experience of migrating to manual shooting; such as the use of a tripod, golden hours, and the top photographic golden rules to keep in mind for capturing stunning imagery time and time again.

How to Shoot in Manual Mode Cheat Sheet for Beginners

Download the full cheat sheet infographic all-in-one here.

The post How to Shoot in Manual Mode Cheat Sheet for Beginners by Antonio Leanza appeared first on Digital Photography School.


Digital Photography School

 
Comments Off on How to Shoot in Manual Mode Cheat Sheet for Beginners

Posted in Photography


Reflex modular SLR unveiled: The first new manual 35mm SLR design in decades

08 Nov

Reflex has just launched the Reflex I: the first newly-designed manual 35mm SLR system to see the light of day in more than 25 years. The camera pairs a classic look with a modular design that enables personalization, including an interchangeable film back and lens mount. Reflex I supports legacy lenses, as well as both personally designed 3D-printed components and third-party accessories.

To help fuel the customization options, Reflex plans to freely release most of the camera’s electronic and hardware designs once the camera officially hits shelves. Notable among the modular design is Reflex’s I-Plate and included universal M42 lens mount; the company says buyers can also use alternative mounts compatible with Nikon F, Olympus OM, Canon FD, and Pentax PK lenses.

Loading film, meanwhile, has been simplified via the modular I-Back, an interchangeable back piece that enables photographers to pre-load film for rapidly swapping to a different film during a shoot. Other modern features hope to join these two modular components, though their inclusion will partly depend on how successful the Reflex’s Kickstarter funding campaign is.

The Reflex I features an integrated flash and continuous LED light source, a first for analog cameras, according to the company. Photographers can select between three different LED intensities, plus the flash.

Assuming the Kickstarter campaign reaches at least £150k in funding, the company plans to integrate the Reflex I with a companion mobile app that will log the settings for each film and shot, enabling photographers to note the settings used to capture their favorite photos.

Reflex is offering the Reflex I camera body early bird units to backers who pledge at least £350 / $ 458 on Kickstarter. Deliveries to those backers are estimated to begin in August 2018. The Kickstarter campaign also offers other rewards for different backing tiers, such as a bundle with just the I-Back and I-Mount, a prime lens, “Analogue Pack,” and more.

Check out the campaign page for more details.

Camera Specifications:

  • Type: Single Lens Reflex Camera
  • Format: 135 film, 35mm/FF
  • System: Reflex RM
  • Lens Mount: Reflex I-Plate (in M42, Nikon F, Canon FD, Olympus OM, Pentax PK)
  • Focus: Manual
  • Film Loading: Reflex I-Back
  • Film Advance/Rewind: Manual
  • Exposure: Manual – Aperture Priority (+ 4 stops EV)
  • DOF inverted preview
  • Shutter Speeds: 1s – 1/4000th, Time and Bulb
  • Metering: AV + Spot + 4 stops EV
  • ISO: 25-6400
  • Controller: Arduino based modular design
  • Connectivity: Bluetooth (BLE) enabled
  • Body: Magnesium Alloy
  • Weight: 490g
  • Dimensions: 134mm x 74.5mm x 34mm
  • Electronic system: 5v Ion Lithium rechargeable via USB-C
  • Resolution: Zero Megapixels

Articles: Digital Photography Review (dpreview.com)

 
Comments Off on Reflex modular SLR unveiled: The first new manual 35mm SLR design in decades

Posted in Uncategorized