RSS
 

Posts Tagged ‘Macro’

Sony releases 28mm, 35mm, and 90mm macro full-frame primes

04 Mar

Three full-frame prime lenses on Sony’s lens roadmap officially arrived today which, including the 24-240, brings the total number of FE lenses to eleven. The least expensive of the trio is the 28mm F2 lens, which also supports ultra-wide and fisheye adapters. Next is the long-awaited Zeiss 35mm F1.4 ZA, which is Sony’s fastest FE lens to date. Close-up shooters will be interested in the new 90mm F2.8 Macro G OSS lens, which uses a Direct Drive SSM mechanism for ultra-precise focusing. More details here.

Articles: Digital Photography Review (dpreview.com)

 
Comments Off on Sony releases 28mm, 35mm, and 90mm macro full-frame primes

Posted in Uncategorized


Panasonic introduces Lumix G 30mm macro and new 42.5mm portrait prime

23 Feb

Panasonic has announced two new additions to its Micro Four Thirds lens lineup, a 30mm F2.8 macro and 42.5mm F1.7 portrait lens. The company had previously hinted that the 30mm was in the works, and as promised it offers Mega O.I.S stabilization along with 240 fps drive AF. The 42.5mm F1.7 isn’t quite as fast (or presumably as expensive) as the existing Leica Nocticron 42.5mm F1.2. Both lenses will be available in May. Read more

Articles: Digital Photography Review (dpreview.com)

 
Comments Off on Panasonic introduces Lumix G 30mm macro and new 42.5mm portrait prime

Posted in Uncategorized


5 Tips for Getting Fresh Ideas for Macro Photography

28 Jan

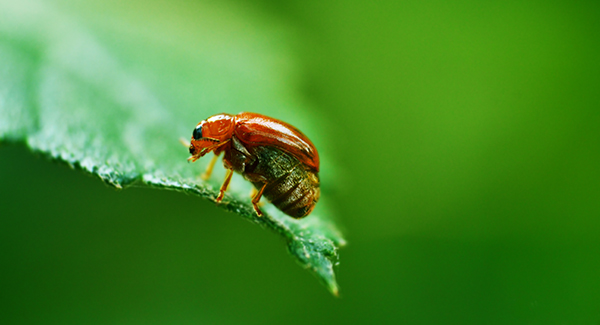
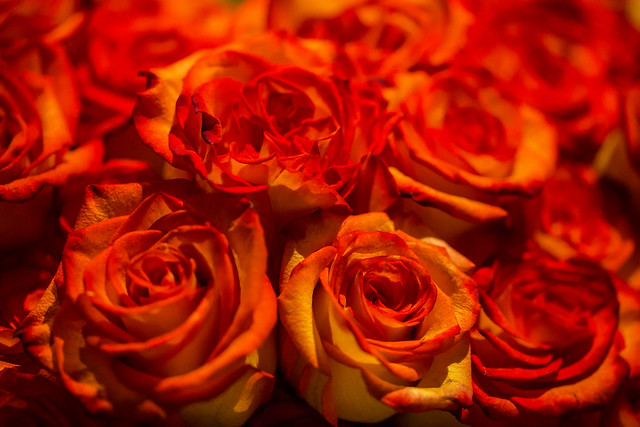
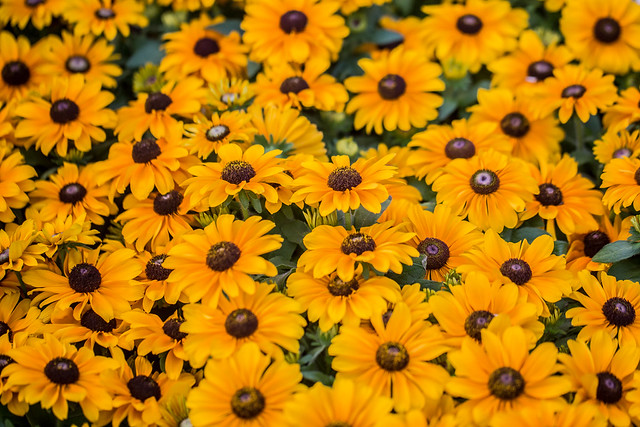
Are you seeking some inspiration for getting creative with some new macro photographs? Perhaps you’ve grown tired of taking close-ups of typical macro subjects like flowers and insects. Help is on the way.

There is a whole world of macro photography available to you that doesn’t involve the typical subject matter so often associated with close-up photography. There are some amazing images of insects and flowers to enjoy on the web, but what about going in a different direction?

Photo 1 macro photography ideas

Here are some ideas to get your creative juices flowing, to challenge your imagination, and direct you to doing more interesting macro photography:

1. Pick a location

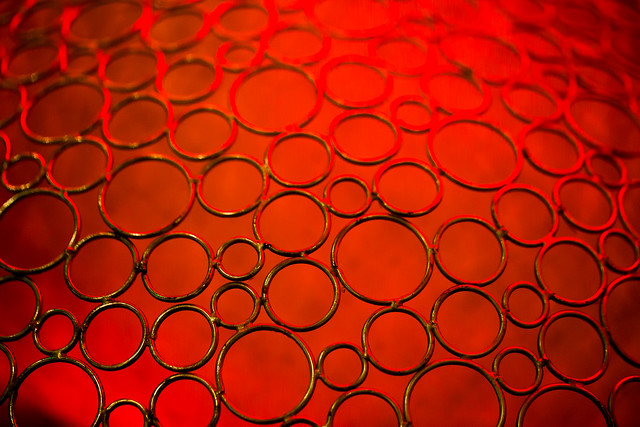
This is a good technique to use when the weather outside isn’t the best for macro work. Your kitchen is the easiest place to start generating ideas. I usually grab a notebook, or a tablet and a pen, and start brainstorming by opening drawers and cabinets and writing ideas down.

You have appliances, silverware, glasses, cooking utensils, and plates to start with. Add food and liquids to your list and you’ve got a great big inventory to work with. Coffee beans, cherry tomatoes, and peanuts work well because of their size and variety in surface and color (see photo above).

A few years back, I gave myself a photo assignment to create some new macro images using bathroom subjects. I don’t consider myself an expert macro photographer, but I did have a good time with the challenge of making a few non-typical macro photos. Cottons swabs, a suction-cup shampoo bottle holder, and a razor became the subjects from the bathroom.

Photo 2 macro photography ideas

Other locations could be an office, a workshop, or yes, perhaps even the bedroom. You could also leave your house and take a trip into town, visit a junkyard, or go to a local thrift store.

2. Come up with a theme

Rather than limit yourself to a single location, take a theme approach. What if you picked texture as a theme to develop? Take a second right now to jot down anything you can think of that has texture. Take a deep breath, relax, clothes your eyes, and let your mind go.

Use a mind map like the one pictured below. This is just a brainstorming method to generate creative possibilities. Here are just four random examples. These can lead to other tangent ideas so write down all of your thoughts and you can edit your lists later.

Photo 3 macro photography ideas mind map

3. Take a workshop

There are plenty of courses online you can take, or find a live workshop nearby. Not only will you be exposed to the close-up photos from the instructor, but you’ll surely have an opportunity to interact with other budding macro shooters.

You could ask them what their most unusual macro subject has been. They may have ideas that never would have occurred to you.

I started a practice of attending a minimum of at least two workshops or seminars yearly, and it has been a great way for me to recharge my creativity.

4. View macro photography portfolios

One of the most powerful idea tools I use is Google. Try using a variety of keyword searches with “macro” and “close-up”. Search specific categories and those search results will lead you to other themes and ideas.

You can go to big photo gallery web sites that have search boxes to explore literally millions of macro images. Do a variety of macro searches, based on subject, lighting, or location at web sites like 500pixels, SmugMug, or Flickr, just to mention a few.

5. Play with the lighting

Challenge yourself to come up with a few completely different ways to light one of your subjects. We know photography is a form of painting with light. Try to significantly change the appearance of your subject by dramatically changing the way you light it.

Change the direction, the size of your light source, and the shadow to highlight ratio in a variety of ways to get new results. This may lead to the discovery of different ways to reveal specific characteristics of your subject like texture, color or compositional lines.

The red pepper photo below was lit with a single speedlight, bounced off of a small white piece of cardboard, above and behind the subject.

Photo 4 macro red pepper speedlite

Idea generating tips

The best time for creative thinking is when your mind is fresh and rested. Many personal development books and various brain studies make the point that there are specific peak performance conditions that you can implement to boost your creativity and effectiveness.

For many, certain environments or activities can work. A few minutes of focused and relaxed breathing, time during or after exercise, a walk in the woods, or even brainstorming while in the shower can bring forth great ideas.

Other avenues you can explore can be taking your macro photographs with different lenses or manipulating them afterward with software. The photo below is of a plastic model turbine engine.

Photo 5 macro photography ideas software

I liked all of the details revealed in the close-up, but the original photo had remnants of a yellowish glue from its assembly. I used Nik Silver Efex Pro 2’s Low Key filter to convert it to a black and white image.

In addition to these five ways of getting creative ideas for macro photography, there is a wealth of information available to you for creativity, imagination, and brainstorming techniques in general which you can apply to your photography.

Some of the books by Michael Michalko, Amy Wallace, and Austin Kleon are worthwhile reading if you are looking to apply creativity to your photography or any another aspect of your life.

Have a blast and share any comments or images you have below.

googletag.cmd.push(function() {
tablet_slots.push( googletag.defineSlot( “/1005424/_dPSv4_tab-all-article-bottom_(300×250)”, [300, 250], “pb-ad-78623” ).addService( googletag.pubads() ) ); } );

googletag.cmd.push(function() {
mobile_slots.push( googletag.defineSlot( “/1005424/_dPSv4_mob-all-article-bottom_(300×250)”, [300, 250], “pb-ad-78158” ).addService( googletag.pubads() ) ); } );

The post 5 Tips for Getting Fresh Ideas for Macro Photography by Bruce Lovelace appeared first on Digital Photography School.


Digital Photography School

 
Comments Off on 5 Tips for Getting Fresh Ideas for Macro Photography

Posted in Photography


Venus Optics 60mm macro 2x lens promises high magnification on a budget

15 Jan

Anhui ChangGeng Optical Technology Company Limited, a new Chinese lens manufacturer, has introduced a 60mm lens under the Venus Optics brand name that it says can deliver 2x magnification macro photography. The f/2.8 manual focus lens is designed to cover both full frame and APS-C sensors for macro work, but will introduce vignetting when used at normal focus distances with the larger format. Read more

Articles: Digital Photography Review (dpreview.com)

 
Comments Off on Venus Optics 60mm macro 2x lens promises high magnification on a budget

Posted in Uncategorized


Best Specialty Articles of 2014 on dPS: Macro, Street, and Night Photography

02 Jan

There are so many great aspects and genres of photography it was hard to narrow it down for the best of the best series this week. Those that didn’t quite make the cut for a whole list of their own can be found here. They include: macro, street and night photography.

reverse-lens-macro-photography-04

If you enjoy these types of photography here are a few of the top articles over the last year in these categories:

Macro

  • Reverse Lens Macro: How to use it as a Great Learning Tool
  • Getting Started Guide to Macro or Close-Up Photography
  • Equipment for Macro Photography – Video Tips
  • Funny Macro Dragonfly Photo

Street Photography

I was basically running behind these guys with a wide lens. Good timing is everything in street photography.

I was basically running behind these guys with a wide lens. Good timing is everything in street photography.

  • 50 Things I Try to Avoid in Street Photography
  • 7 Street Photography Tips and Exercises to Try This Season
  • A Common Misconception About Street Photography – Just Take Photos of People Walking
  • 8 Things You Should Know if You are Dating a Street Photographer
  • How to Create Amazing Urban Landscape and Street Photography Images
  • Practical Tips To Build Your Street Photography Confidence
  • Using Humor In Street Photography
  • In the Dark: 10 Tips for Street Night Photography

Night Photography

Chicago Theater Night

  • Beginners Tips for Night Sky and Star Photography
  • 9 Tips to Help you get Sharp Focus at Night
  • How to do Long Exposure Photography and Light Trails at Night
  • 2 Night Photography Video Tutorials
  • Do you pack up and leave after sunset and miss the fun of night photography?

googletag.cmd.push(function() {
tablet_slots.push( googletag.defineSlot( “/1005424/_dPSv4_tab-all-article-bottom_(300×250)”, [300, 250], “pb-ad-78623” ).addService( googletag.pubads() ) ); } );

googletag.cmd.push(function() {
mobile_slots.push( googletag.defineSlot( “/1005424/_dPSv4_mob-all-article-bottom_(300×250)”, [300, 250], “pb-ad-78158” ).addService( googletag.pubads() ) ); } );

The post Best Specialty Articles of 2014 on dPS: Macro, Street, and Night Photography by Darlene Hildebrandt appeared first on Digital Photography School.


Digital Photography School

 
Comments Off on Best Specialty Articles of 2014 on dPS: Macro, Street, and Night Photography

Posted in Photography


Macro Photography on a Budget

13 Dec

This post is by Ed Verosky whose new Macro Photography eBook is 53% off today only.

Img 1

Close-up and macro photography continue to be popular with shooters of all levels. Practical applications include product detail shots, food photography, and technical illustration (see image below). But the fun and artistic motivations are undeniable; flowers, insects, creative abstract, and the excitement of discovering the hidden worlds found in everyday objects.

If you’ve been interested in doing some close-up and macro work, but don’t quite know how to get started, this article will show you how, without blowing your budget. Macro, in particular, is often accomplished with high-end specialty lenses and equipment, but there are ways to take impressive close-up and macro shots with little more than the gear you already have.

Img 2

Food and recipe images are featured in editorial as well as event photography. Here, a close-up shot of this delicious-looking cupcake provides context for the macro shot that follows. This shows how the power of close-up and macro can draw the viewer in and capture the imagination.

Here are three of my favorite low-cost techniques detailed in my new eBook, Introduction to Close-Up & Macro Photography:

Reverse Your Lens

If you’d like to get started right away, this technique works great and requires no extra investment. All you need is a camera that uses interchangeable lenses (most DSLRs do). Just remove the lens from the camera and hold it backward against the lens mount to get a high degree of magnification. Any lens will do, but a normal lens, or the lens that came with your camera will probably work best (e.g. 50mm or the 18-55mm kit lens).

Although this is an effective solution, you should be aware that your camera and lens won’t be able to communicate with each other when using this technique. That means no f-stop adjustments or automatic focusing. Fortunately, focusing won’t be a problem using this technique, and you can preset your lens to a specific f-stop using the aperture-locking trick I’ll detail below.

Here are the steps for using this technique:

  1. Press your camera’s lens release button to remove the lens from the
    lens mount.
  2. Turn the lens around in your hand so that the front of the lens is facing
    the camera mount.
  3. Carefully match up the front of the lens to the ring of the camera mount and hold it there when taking your shots as shown in the image below.
  4. As with many macro shooting solutions, the way you’ll focus on your subject is by moving the camera and lens toward, or away, from the subject, not by turning the focusing ring. You’ll be within two or three inchses of your subject (or less) when acquiring focus.
Reverse lens handheld

An 18-55mm lens held backward onto the camera’s lens mount.

Reversing Rings

You can also use an adapter called a reverse ring (or reversing ring) which will allow you to actually mount your lens onto your camera in the backward position. This inexpensive gadget (see image below) is made to screw onto the front of your lens, similar to a lens filter. The other side of the reversing ring fits onto your camera’s lens mount. Make sure to get a reversing ring that not only matches the filter size (thread diameter) of your lens, but also matches the lens mount of the type of camera you’re using.

Reverse ring

Reverse (reversing) ring fits onto the front of this 18-55mm lens via the lens filter thread.

Aperture-Locking Trick

Whether you’re using the handheld reverse lens technique, or a reversing ring adapter, you can set a specific f-stop, even though your lens is not electronically coupled to your camera. This technique may not work with your particular camera and lens combination, but it works with all of the DSLRs that I’ve used:

  1. 1. With the camera powered on, and the lens mounted onto the camera in the normal way, set the f-stop.
  2. 2. Press and hold the depth-of-field preview button.
  3. 3. While still holding the DOF preview button down, press the lens release button and remove the lens. The aperture will remain stopped down as shown below.
Aperture

Aperture locked-in at f/16 on this 85mm lens.

Other Budget-Minded Ways to Achieve Macro

Other ways to get good close-up and macro shots on a budget include the use of lens coupling rings, diopters, and extension tubes. Here’s an overview:

Coupling Rings:

A variation on the reverse lens technique is to use two lenses, connected front-to-front using another type of adapter called a coupling ring (below). In this case, one of the lenses is mounted to your camera normally, while the other is in the reverse orientation. The coupling ring features threading on both sides and fits on to the front of both lenses at the same time via the filter threads. Because coupling rings generally feature the same thread diameter on each side, the lenses you use with it will have to have the same filter diameter, or you’ll have to attach a step-up or step-down adapter to one or both lenses.

Coupling ring

Coupling Ring: (A) 58mm diameter coupling ring. (B) Two lenses connected via the coupling ring. Either lens can be mounted to the camera.

Be aware that a heavy lens coupled to a camera-mounted lighter (or less solidly built) lens can result in damage to one or both lenses because of the weight and stress placed on their front ends. Also, your camera-mounted lens will maintain the electronic contact with your camera, but the reverse-coupled lens will not, so you’ll have nearly the same limitations as you would with a single reversed lens.

Diopters:

One of the easiest ways to magnify your subject is with a simple filter-like attachment called a diopter (below). You can think of a diopter as a magnifying glass for your lens. They’re very easy to use; just screw one or more diopters onto your lens just like you would with any lens filter. An inexpensive set of diopters (often available for under $ 15) will give you several magnification levels to choose from. You’ll have to move in very close to your subject to achieve focus, and optical quality won’t always be as good as some of the other options presented here, but you might be very pleased with the results. Because they don’t cost much, are easy to use, and take up very little room in your camera bag, you might consider a set. Make sure to purchase diopters that fit the filter thread diameter of the lens you’ll be using them with.

Diopters

Diopters: (A) This set of Vivitar diopters was purchased for under $ 15. (B) The “10X Macro” diopter mounts just like a lens filter onto this 18-55mm kit lens.

Extension Tubes:

Finally, my favorite solution for macro on a budget; extension tubes. Your lens mounts to one end of an extension tube, while the other end of the tube mounts directly to your camera’s lens mount. Extension tubes effectively increase the focal length of your lens without adding any glass elements that might reduce optical quality. By doing so, your lens will be able to focus on small objects, at very close distances.

While a good set of extension tubes is going to cost significantly more than a cheap set of diopters, it’s still a bargain compared to an actual macro lens. Some sets feature manufacturer-specific electronic connectors that allow the camera and lens to communicate normally; this allows for aperture and focus control. Plus, your single set of extension tubes will work with all of your lenses; there’s no need for rings or adapters of different sizes for each lens diameter. Extension tubes can be purchased as a set with different lengths for varying degrees of magnification. The tubes can also be combined (stacked) for increased magnification as shown below.

Ext tubes 1

Extension Tubes: (A) Three extension tubes (13mm, 21mm, and 31mm) stacked onto an 18-55mm lens. (B) Set of extension tubes. (C) 50mm lens mounted onto all three extension tubes which are mounted onto a DSLR.

Img 3

The combination of colors, detail and depth-of-field of this photo, featuring a pollen covered anther of a flower, could have only been captured through macro photography. Extreme close-up and macro give you the opportunity to find amazing beauty in places your eyes might otherwise miss.

In this article, I’ve only provided a small sampling of the many ways to achieve quality close-up and macro images. I encourage you to explore the possibilities using one or more of these techniques, and to consider learning about other types of macro gear and lenses. The world of close-up and macro just might become your next photography obsession!

Get more great Macro Photography Tips from Ed by picking his new Close Up and Macro photography eBook with a 53% discount – today only.

googletag.cmd.push(function() {
tablet_slots.push( googletag.defineSlot( “/1005424/_dPSv4_tab-all-article-bottom_(300×250)”, [300, 250], “pb-ad-78623” ).addService( googletag.pubads() ) ); } );

googletag.cmd.push(function() {
mobile_slots.push( googletag.defineSlot( “/1005424/_dPSv4_mob-all-article-bottom_(300×250)”, [300, 250], “pb-ad-78158” ).addService( googletag.pubads() ) ); } );

The post Macro Photography on a Budget by Ed Verosky appeared first on Digital Photography School.


Digital Photography School

 
Comments Off on Macro Photography on a Budget

Posted in Photography


78% Off Ed Verosky’s eBook Bundle (or His New Macro Ebook for just $7): Today Only

13 Dec

As we announced yesterday – today is Day 1 in our 12 Days of Christmas dPS promotion – and we’re kicking things off with a cracker of a deal!

The Deal

Today’s deal has two options:

1. 53% off Ed Verosky’s new Introduction to Close-Up and Macro Photography. Today is is yours for just $ 7.

OR

2. Ed’s entire 9 eBook Bundle with Bonus Mini-Guide for a whopping 78% off the regular price. That’s 9 eBooks on everything from Flash Photography, to Portraiture, to the Basics of DSLR and much more. They’re all yours today for just $ 29 (or just $ 3.20 per eBook).

Shareable day1

Ed Verosky will be no stranger to many dPS readers as we’ve featured his work as a guest author numerous times. See his latest guest post on Macro Photography here.

In previous years of our 12 Days of Christmas his eBooks have been among the most popular we’ve ever featured but as he’s just launched his new Macro Photography eBook we invited him to come back.

Don’t Miss This Deal: It’ll be Gone in Less than 24 Hours

So whether you’ve got all his other eBooks and just need the new one for the crazy low price of $ 7 (normally $ 15) or whether you’re new to Ed’s work and want to pick up his whole bundle of 9 eBooks for just $ 29 (normally $ 135) – todays deal is for you.

Need more information on what’s in todays deals? Check them out here.

But don’t forget – this deal lasts for 24 hours only so grab yours today.

Screen Shot 2014-12-13 at 1.43.52 pm

googletag.cmd.push(function() {
tablet_slots.push( googletag.defineSlot( “/1005424/_dPSv4_tab-all-article-bottom_(300×250)”, [300, 250], “pb-ad-78623” ).addService( googletag.pubads() ) ); } );

googletag.cmd.push(function() {
mobile_slots.push( googletag.defineSlot( “/1005424/_dPSv4_mob-all-article-bottom_(300×250)”, [300, 250], “pb-ad-78158” ).addService( googletag.pubads() ) ); } );

The post 78% Off Ed Verosky’s eBook Bundle (or His New Macro Ebook for just $ 7): Today Only by Darren Rowse appeared first on Digital Photography School.


Digital Photography School

 
Comments Off on 78% Off Ed Verosky’s eBook Bundle (or His New Macro Ebook for just $7): Today Only

Posted in Photography


Fujifilm announces macro tubes, tethering software and X-series firmware availability

20 Nov

Fujifilm has unveiled two macro extension tubes for its X-series interchangeable lens cameras, as well as a launch date for the previously-promised Fujifilm X-T1 firmware. More firmware updates are also announced for the X-E2, X-E1, X-Pro1 and X-30, as well as the introduction of tethering software for PC. Read more

Articles: Digital Photography Review (dpreview.com)

 
Comments Off on Fujifilm announces macro tubes, tethering software and X-series firmware availability

Posted in Uncategorized


Time to Go Macro With the Canon EF 100mm f/2.8L Macro IS USM Lens

25 Oct

Just Wait Until Midnight

While the EF 135mm f/2L USM is my favorite Canon L Series lens, one thing it does not do is macro photography.

With a minimum focus distance of 3 feet, the EF 135mm lens can do a great job with a lot of flowers or other traditional macro subjects, but it really cannot do traditional macro work.

If you want a very high quality portrait lens that can also do macro work, the EF 100mm f/2.8L Macro IS USM is the lens for you. Like the EF 135mm lens, this lens is an Image Stabilization lens which is helpful to minimize camera shake when you take those super close very precise macro shots. This is my favorite lens to make abstract macros of flowers with. If you are into shooting insects or flowers or a close up of the human eyeball or really anything macro you can imagine you will love this lens.

What I like most about this lens though is that it is not *just* a macro lens. It takes such nice portraits and is great to use for all other sorts of photography. This makes this lens suitable for use as a primary prime lens for just about every type of photography that can also produce stunning macro work.

Just Wait Until Midnight

Shooting food is one of my favorite subjects these days. I shot the photo of caviar in this post with this lens at Michael Minna’s excellent spot in the Bellagio hotel. Be sure to try the tasting menu there on your next visit to Vegas, it’s worth it!

I also own the earlier non-L series generation of this lens and I’ll say that I’m so much more impressed with the results I get out of the newer L series version.

As a reminder, my analysis of my Canon gear is being done in partnership with Canon and I am receiving compensation for this work with them. More on Canon macro lenses here.

Just Wait Until Midnight

Just Wait Until Midnight

Just Wait Until Midnight

Just Wait Until Midnight


Thomas Hawk Digital Connection

 
Comments Off on Time to Go Macro With the Canon EF 100mm f/2.8L Macro IS USM Lens

Posted in Photography


Review of the Tamron 16-300mm F/3.5-6.3 Macro Lens

14 Oct

Tamron1All test images are presented with no alteration in color, sharpness, contrast, or clarity except where indicated. Only small adjustments in exposure were made to test images. Gear used for this review and tests – Canon 7D and a Manfrotto 190 tripod.

There is no denying that any lens capable of shooting in a wide range of conditions will always be in high demand and very popular. So called “all-in-one lenses” are most definitely a great way to be flexible in more situations without lugging around a lot of gear.

Tamron2

One of Tamron’s latest additions to this category is the 16-300mm F/3.5-6.3 Di II VC PZD Macro. Don’t worry, all of those letters will meet with explanations shortly. It is a lens that is marketed as a go-to option for shooting wide angle scenes, as well as zooming in very tight for those dramatic close-ups. It is intended for those who want to pack as little gear as possible, but still keep consistent quality through a huge range of focal lengths.

Lens Specifications

Here is the nitty gritty for this lens. The specifications are taken directly from the Tamron USA website. Please note that the lens I worked with was a Canon mount and these specifications are for Nikon mounts, but the numbers should be very similar.

Specs

Let’s talk about all those letters on the side of the lens that were mentioned earlier and go over their meanings. The “Di-II” designation simply means that the lens is intended for use with digital SLR cameras. The “VC” means that the lens is equipped with a vibration compensation (image stabilizer) feature and the “PZD” indicates the lens has Tamron’s proprietary Piezo Drive autofocus mechanism.

Fit and Finish

The lens shipped from Tamron USA, included a nice hood, and of course front and end caps. Taking the lens in hand, you really get a feel for the weight. My first impression was that it felt somewhat heavy but after further handling I prefer to call the weight of the lens substantial rather than heavy. Tamron lists the lens as weighing 19 ounces (540g) which is actually lighter than some other lenses of similar zoom range and aperture.

Tamron4

Tamron8

Tamron9

For the amount of zoom power that has been packed inside, I was very surprised at the shear compactness of this lens. Tamron’s 16-300mm is just under four inches in length at 3.9 inches (9.9cm). Here is a side-by-side comparison with my trusty Canon 28-135mm.

Sidebyside

The lens feels very solid in hand and fits securely to the camera with no rattles or gaps. All of the on-lens controls are very crisp in their function and are well placed for easy no-look operation.

Lensswitches

The rubber used for the zoom and focusing ring has just enough bite to securely adjust the lens, without the overly rubberized and sticky feel of some manufacturer’s lenses. Straight out of the box I did notice the the zoom was very tight – and I do mean tight. However, over the course of using the lens for a few weeks the tightness quickly lessened, and the zoom remained very responsive and firm for the duration of use.

Balance and Weight

The balance on the lens is acceptable even when fully extended to 300mm. I attribute this to the relatively slender profile that keeps most of the weight close to the camera and makes this lens very nimble. That being said, you will still definitely know it is attached to your camera. Always practice good camera holding mechanics when using this and other larger lenses in the field for long periods of time.

Tamron6

Performance and Image Quality

Now, on to the good stuff. I was quite impressed with the overall image performance of the Tamron 16-300mm lens. The sharpness was much better than I had expected for such a wide range variable zoom lens, even when shooting at the maximum f/3.5. Color reproduction was very good bordering on superb, and the bokeh was surprisingly creamy.

Grass

Pond

This roll of tape was shot wide at 16mm and then again at 300mm.

Tapewide

Tapezoom

There was very little vignetting around the edges of photos and little discernible chromatic aberration. The lack of this aberration is possibly due to the choice by Tamron to include three aspherical lens elements within the internal glass array. Though debated, aspherical lenses are known to produce less optical distortion and aberrations than conventional round lens elements. Still, at the widest angle of 16mm, there is some small but noticeable barrel distortion and edge darkening of images taken at or near the minimum focusing distance of 15.3 inches (38.9cm).

Bricks

Also, at wider apertures, again there is a small but still discernible edge softening of images. Here are five images shot over varying apertures. Notice the increasing edge softness as the size of the aperture increases.

Printf44

f/44

Printf22

f/22

Printf16

f/16

Printf10

f/10

Printf6 3

f/6.3

The proprietary Piezo Drive autofocus seems to live up to the manufacturer’s acclaim. Autofocus is very fast and accurate. The focusing mechanism itself is very quiet but there is a somewhat audible clicking sound that is present when operating in AF-Servo (continuous AF) mode but it is not loud enough to cause panic for wildlife and nature photographers.

Tamron has possibly hit a home run with the image stabilization system on this lens. Referred to as Vibration Control by Tamron, the image stabilization on this lens is outstanding.

VC Diagram

When looking through the viewfinder while engaging and disengaging the VC, you can truly see an immediate and substantial smoothing out of camera shake. Though definitely not a replacement for a good tripod and steady hands, the VC made a noticeable difference in the sharpness of images taken at slower shutter speeds in low light.

Small Details

As with most gear, people place varying degrees of importance on minute details. Here are a few small points that impressed me about the Tamron 16-300mm.

  • Tips for better shooting included – Tamron has chosen to include tips for better shooting with the paperwork that ships with the lens. Although these tips are very basic I found it be a positive gesture from the company to educate the people who purchase their product. Shootingtips
  • Zoom-lock function – A lockable zoom is very useful when you find yourself hiking or walking with a larger lens fixed to your camera. Gravity and vibration will slowly extend a downward pointing lens. The lock eliminates the constant pulling in of the lens barrel. I do, however, wish the lock could be used throughout the entire zoom range and not only at 16mm. Lenslock
  • Deeper finger grips on the lens cap – I know, this is an extremely small and neurotic detail. In any case, it seems that Tamron has improved their lens caps with more pinchable clips making them easier to attach and remove from the lens. This feature also reduces the chance of fumbling a cap removal.
  • Aspherical lens elements – The pros and cons of aspherical lenses is delightfully arguable among photographers. Still, the aspherical lens elements in the Tamron 16-300mm do seem to reduce some distortions. Lensstack
  • Manual override autofocus – This is a handy feature. It allows you to micro adjust focus manually while still in autofocus mode. This saves you a little time and also makes it easier to maintain your mental focus while composing.

Tamron7

Bottom Line

All in one lenses are loved, hated, and everything in between. Regardless of your inclination, the Tamron 16-300mm F/3.5-6.3 Di II VC PZD Macro seems to be a strong candidate for those looking to have one lens to cover most everything they will be shooting. It is a well constructed, reasonably compact, zoom lens that can shoot landscapes and high zoom with good image sharpness and color. Wildlife and street photographers will find this lens to be outstanding for long range subjects where camera shake can make or break a photograph. Overall, this is a lens that I would be happy to have in my bag.

These are some sample images taken with the Tamron 16-300mm F/3.5-6.3 Di II VC PZD Macro and processed in Adobe Lightroom 5.

Leaves

Moon

Jamie

Colordrops

The post Review of the Tamron 16-300mm F/3.5-6.3 Macro Lens by Adam Welch appeared first on Digital Photography School.


Digital Photography School

 
Comments Off on Review of the Tamron 16-300mm F/3.5-6.3 Macro Lens

Posted in Photography