RSS
 

Posts Tagged ‘LOOK’

Video: Sony a6500 First Look

08 Oct

From a pure design standpoint, Sony’s a6500 look all that flashy at first glance, but don’t let the looks fool you. It may look like an a6300, but with 5-axis in-body image stabilization, a touchscreen for focus point placement (even with your eye to the finder), and an improved processor that brings an extensive buffer and instant image playback/review to the Alpha line, it’s a compact force to be reckoned with. Get the low-down in our overview video. 

Articles: Digital Photography Review (dpreview.com)

 
Comments Off on Video: Sony a6500 First Look

Posted in Uncategorized


Wet Look: 12 More Cool Creative Water Tanks & Towers

26 Sep

[ By Steve in Art. ]

water-tanks-towers-1a

Due to their sizes and shapes, water tanks and towers lend themselves to artistic embellishment as these dozen creative examples refreshingly illustrate.

water-tanks-towers-1c

water-tanks-towers-1b

A waterpark? In the middle of MY Mojave Desert? It’s more likely than you think… or at least it was, before the Lake Dolores Waterpark (later the Rock-A-Hoola Waterpark and then the Discovery Waterpark) circled the drain for the final time in 2004. The water used to “power” the park(s) came from underground springs fed by the Mojave Aquifer and was stored in an enormous water tower shaped like – and painted to resemble – a Coca-Cola can.

water-tanks-towers-1d

While much of the park has been vandalized and scavenged for metal, the water tank can blame its current tattered & faded state on the Mojave’s blistering desert sun. Kudos to Flickr user Hans Proppe (shadowplay) and Imgur user loganbush for snapping the eerie and evocative images above.

Leggo My Necco

water-tanks-towers-2a

water-tanks-towers-2b

The circa-1927 New England Confectionery Company (NECCO, for short) building in Cambridge, MA is now occupied by offices of Swiss-based pharmaceutical firm Novartis, who graciously repainted the iconic Necco-wafer water tower in 1997. Flickr user Jill Robidoux (jylcat) snapped the tank on January 1st of 2003 and it’s a good thing she did: Novartis de-necco’d the tank in 2004 by painting it over in a boring-by-comparison pharma theme.

Behind The 8-Ball

water-tanks-towers-3a

water-tanks-towers-3b

The giant 8-ball water tower in Tipton, Missouri came and went like a Fast Eddie Felson pool shot in the dark… and then it came back again, this time to stay. According to the Jefferson City News Tribune, in 1968 the water tower was creatively dressed in a billiard-ball theme by its owners, the Fischer Pool Table company. The water tower was ceded to the city and painted all-white after Fischer closed in 1977 but Tiptonians wanted their landmark back so in 1999, the tower was restored to its previous 8-ball livery. Minnesota Fats is likely looking down and smiling.

Cone Job

water-tanks-towers-4

The only paint on the Grand Central Water Tower in Johannesburg, South Africa, is the aqua blue corporate corporate logo near the top… anything else would be superfluous. The curious conical tower was built in 1997 and stands 40m (131.2 ft) tall, assuming it hasn’t already tipped over.

Next Page – Click Below to Read More:
Wet Look 12 More Cool Creative Water Tanks Towers

Share on Facebook


[ By Steve in Art. ]

[ WebUrbanist | Archives | Galleries | Privacy | TOS ]


WebUrbanist

 
Comments Off on Wet Look: 12 More Cool Creative Water Tanks & Towers

Posted in Creativity


Photokina 2016: Canon EOS M5 quick look video

22 Sep

The Canon EOS M5 launches the M line of mirrorless cameras into greater significance than ever before. With abundant external controls, a mature touchscreen interface and extremely impressive Dual Pixel autofocus, it’s a camera we can’t help but like, even if we wish it had turned up to the mirrorless party a little earlier. And sure, it may not have headline features like 4K or high frame rate video, but Canon clearly knows how to make a camera that is both comfortable to hold and pleasing to use.

We stopped by Canon’s stand at Photokina 2016 and talked with Canon product specialist Hin Pang to talk a little more about what makes the EOS M5 so likeable.

Articles: Digital Photography Review (dpreview.com)

 
Comments Off on Photokina 2016: Canon EOS M5 quick look video

Posted in Uncategorized


Video: First look at the Panasonic G85/G80

21 Sep

The Panasonic G85 is the successor to the Panasonic G7 and shares its DSLR-style design with twin control dials and fully articulating touch display. It also uses the same sensor as the G7, but with no AA filter. The G85 receives a new 2.36M dot OLED electronic viewfinder with increased magnification over the G7. The camera also gains in-body 5-axis image stabilization and Dual I.S. 2 as well as weather and dust-sealing.

The camera also uses an electromagnetic shutter and features a new in-camera focus-stacking mode. Like its predecessor it is 4K-capable, has built-in Wi-Fi and utilizes Panasonic’s Depth from Defocus AF. Get a glimpse of its capabilities in our quick First Look video, or head to our First Impressions if you’re looking for in-depth analysis.

Read our Panasonic Lumix DMC-G85 First Impression Review

Articles: Digital Photography Review (dpreview.com)

 
Comments Off on Video: First look at the Panasonic G85/G80

Posted in Uncategorized


Vessel: Climb This Sculptural NYC Landmark to Look Out Onto Hudson Yards

17 Sep

[ By SA Rogers in Architecture & Cities & Urbanism. ]

hudson yards heatherwick

Unlike most of New York City’s standout architecture, this sculptural, almost alien-looking structure set to rise above the new Hudson Yards development will be open for the public to explore. Architect Thomas Heatherwick envisions this centerpiece as a way to take all of the visitors to the square and “sort of sprinkle them into the air,” encouraging them to interact with each other and with their surroundings in a new way.

Influenced by images of Indian stepwells, which use hundreds of flights of stairs to descend beneath ground level, this observation deck uses flights of stairs almost like building blocks to reach into the sky.

hudson yards heatherwick 2

The ‘Vessel’ design is made up of 154 interconnecting flights of stairs, with nearly 2,500 individual steps and 80 landings, and if you want to walk the whole thing, you’ll travel an entire mile while remaining in the air above Hudson Yards. It’s 50 feet in diameter at the feet, blooming into 150 feet at the top, and gleams appealingly in polished copper.

hudson yards heatherwick 3

hudson yards heatherwick 4

The square at Hudson Yards is a collaboration between Heatherwick Studio and landscape architecture firm Nelson Byrd Woltz, set to feature 5 acres of trees, perennial gardens, pathways, seating and a 200-foot-long fountain mimicking a flowing river.

hudson yards heatherwick 5

The square will be surrounded by a whopping 16 brand new skyscrapers containing nearly 13 millions square feet of office, residential and retail space. The largest development in New York City since Rockefeller center was built in 1939, it’s currently under construction, and estimated to be fully completed by 2023.

hudson yards heatherwick 6

“We put ourselves under this vast pressure because we felt, intuitively, that it should be something that you haven’t experience already before,” says Heatherwick. “It has no commercial job to do. It’s not based on electronics. It’s not based on advertising. it’s extremely interactive but it’s properly using your physicality. There’s something that is timeless about humans and our physicality. The project, in a way, is a big invitation. It’s just there to hopefully mean things to different people, to not tell you how you’re supposed to think. It’s like a platform for life.”

Share on Facebook


[ By SA Rogers in Architecture & Cities & Urbanism. ]

[ WebUrbanist | Archives | Galleries | Privacy | TOS ]


WebUrbanist

 
Comments Off on Vessel: Climb This Sculptural NYC Landmark to Look Out Onto Hudson Yards

Posted in Creativity


The Slingshot by Syrp wants to bring a new look to your time-lapses

15 Sep

Syrp is a New Zealand-based company that has introduced a product for shooting unique time-lapses called the ‘Slingshot.’ It’s a cable based dolly system that utilizes things like trees, rocks and other natural (or man made) anchor points to support two cables that the dolly runs on.

After finding your anchor points and running the cables between the two points, the system is tightened using a winch – no tools required. The cable system can be transported to and from location in a backpack included in the kit.

The Slingshot can be configured with Syrp’s Genie to add motorized control, and additional accessories make it possible to create multi-axis time-lapses over distances up to 300ft. Three different kits are offered, starting at $ 989 without a Genie and up to $ 3,102 including several accessories for added motion control.

Articles: Digital Photography Review (dpreview.com)

 
Comments Off on The Slingshot by Syrp wants to bring a new look to your time-lapses

Posted in Uncategorized


Book City: Retail Space for Reading Mimics the Look of Urban Spaces

01 Sep

[ By SA Rogers in Design & Fixtures & Interiors. ]

book city 1

The appearance of the city outside – complete with crosswalks and grids resembling aerial views of urban blocks – acts as a transition space between the entrance of a bookstore and the quiet, private spaces beyond. This space by XL-muse, located on the fourth floor of the Réel Mall in Shanghai, references the orderly aspects of urban aesthetics, carrying them from the sunny, exposed main room into the darkened alleys full of floor-to-ceiling shelves.

book city 2

book city 5

book city 6

Street lights gently illuminate the rows of books in these tranquil hallways, organized like pedestrian promenades complete with central park benches and displays. Mirrors are employed to visually double the height of the shelves, making them feel as if they continue up into the sky and stretch far deeper into the building than they really do. Paths direct you from one ‘house’ of books to the next as you explore the shop.

book city 4

book city 7

book city 3

In these atmospherically-lit areas bursting with dark-stained wood, shoppers feel like they’re navigating the city late at night, when the traffic has died down and the streets are eerily silent. The crosswalks continue into the small cafe, stepping right up onto the ceiling and then back out into the showroom, where white pegs inserted into the concrete walls can be pulled or pushed to create display niches.

Share on Facebook


[ By SA Rogers in Design & Fixtures & Interiors. ]

[ WebUrbanist | Archives | Galleries | Privacy | TOS ]


WebUrbanist

 
Comments Off on Book City: Retail Space for Reading Mimics the Look of Urban Spaces

Posted in Creativity


How to Add a Soft Focus Look to Your Images for a Unique Style

21 Aug

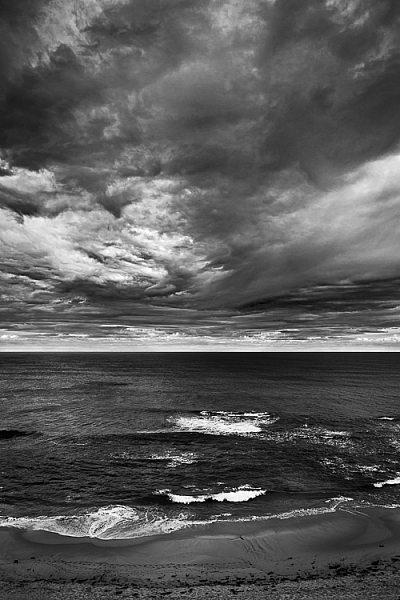
Soft focus photographs present themselves with a tranquil and almost dream-like effect. They have become quite popular, and can be found to some extent in many genres of photography, from portraits to landscapes.

In reality, what many of us think of as soft focus photos, aren’t actually soft focus at all. The more accurate term is soft contrast. Soft focus is essentially the blurring of an image, which is not exactly the same as soft contrast. The softening effect can be achieved a number of ways using softening filters mounted in front of your lens, or in post-processing. With the powerful digital editing tools we have today, a soft contrast effect is both easily achieved, and infinitely adjustable.

Before and After

In this example, you will see at a step-by-step workflow for applying a soft focus, or soft contrast, look to a photograph in Photoshop using our old friend the High Pass Filter. You might be familiar with using the High Pass for sharpening, but in this case it will be used on the opposite end of the spectrum. We will begin with a RAW image file and work our way to a finished product ready for publishing.

Don’t worry. All these edits are incredibly easy, fast, and will give your images a little creative boost if used correctly. Let’s get started!

Here have the RAW file or as I affectionately call it the “Genesis Image”.

Raw

Make basic edits first

We will begin with some basic edits in Adobe Lightroom, then transfer the image to Photoshop to apply the soft contrast magic. It’s best to perform your core processing first, before beginning the soft contrast process. I like using Lightroom because it makes for a super simple transfer, for working in tandem with Photoshop.

For this photo I performed some global exposure adjustments, as well as made some selective adjustments. I also made use of the HSL panel to bring the color saturation and luminance closer to my visualization.

LR Adjustments

Open in Photoshop and duplicate the background layer

Once you’ve finished the foundational processing it’s time to bring your image into Photoshop. Right click it in Lightroom and choose “Edit in Photoshop”.

Now that you have your file open in Photoshop, you can begin the easy process of applying the soft contrast effect. To begin, you need to duplicate the base layer. Do this by right clicking the base layer and selecting Duplicate Layer, or by pressing control+J (command+J for Mac).

Duplicate Layer

Apply the High Pass Filter

Next, select the High Pass Filter. To do this, select from the top menu: Filter > Other > High Pass. The image before you will transform into a garbled mass of gray muck.

High Pass Filter Select

You will be given the option of adjusting the radius of the High Pass. I have found that for most images, a radius of 10-20 pixels is appropriate, but in the end it will be up to you and your creativity to decide. After you’ve selected the radius, click OK.

Next, go to: Image > Adjustments > Invert. You can save some some time by using the keyboard shortcut Ctrl+I (Command+I for Mac).

High Pass Invert

Change the layer blend mode

And vola! Wait…the photo still looks like a moldy piece of bread. Everything is okay, though! The next step is one of the most important, and it will make all the difference. In your layers panel, change the blending mode to Softlight.

High Pass Softlight

Boom!

High Pass Softlight Effect

The image looks like a photo again. The soft contrast effect has now been applied to every part of the image. If you like how everything looks, great, you’re completely finished and can go on your way. Most often though, additional fine tuning will be needed to bring out the best of your photograph. This is the real power of Photoshop, because you can now selectively choose what areas will benefit most from the softening. To do this you need to add another layer mask, but don’t let this intimidate you.

Add a layer mask to refine the effect

At the very bottom of the layers panel you will see a small row of icons. The layer mask icon is the white rectangular box with the gray dot inside, click that. A layer mask will be added to your adjustment layer. This way, you can choose exactly where you want your effect to be applied using the brush tool.

Add Mask

Now I can really get creative. I want to leave the softening effect on some areas, but remove it from some of the key points of the composition; namely the rock face and the ground surrounding the waterfall. Use the brush tool (paint brush icon) and a layer mask to show or hide your edit. Be sure the two black and white squares at the far left bottom of the tool panel show the black square above the white one (hit D on your keyboard to set them to default and X to swap the colors). This means you are hiding the effect from the image by masking it.

If you click the two sided arrows above the squares (switch to put white on top – or click X on your keyboard to do this) you will be able to paint back in the effect, in the case you remove too much (using a mask is non-destructive editing, you are not removing pixels just hiding or showing parts of one layer). Also, remember the the brush tool is completely customizable as far as size, flow, and opacity are concerned.

Layer Mask Adjustments

Final edits back in Lightroom

In the case of this photo, I save and close it in Photoshop, and it will automatically import back into Lightroom where I will finish up some minute details. The final edits include mainly selective sharpening and a slight vignette.

Final Adjustments

And it’s done! In what amounts to a few short minutes, I have gone from a RAW file, to an image that artistically captures what I saw when I clicked the shutter.

Before and After

As with any type of post-processing, it’s important to remember that less is often more. Be judicious with your edits and only go as far as you need, in order to reach the image you want to make.

Have a soft contrast or soft focus image you’ve edited in Photoshop? Feel free to share them in the comments below.

googletag.cmd.push(function() {
tablet_slots.push( googletag.defineSlot( “/1005424/_dPSv4_tab-all-article-bottom_(300×250)”, [300, 250], “pb-ad-78623” ).addService( googletag.pubads() ) ); } );

googletag.cmd.push(function() {
mobile_slots.push( googletag.defineSlot( “/1005424/_dPSv4_mob-all-article-bottom_(300×250)”, [300, 250], “pb-ad-78158” ).addService( googletag.pubads() ) ); } );

The post How to Add a Soft Focus Look to Your Images for a Unique Style by Adam Welch appeared first on Digital Photography School.


Digital Photography School

 
Comments Off on How to Add a Soft Focus Look to Your Images for a Unique Style

Posted in Photography


Throwback Thursday: a fresh look at the Sony Mavica FD-91

04 Aug

The year was 1999. Y2K loomed large, people actually used America Online via 56K modems, and I had just been taken out of school early by my parents to see Star Wars: The Phantom Menace at the Cinerama. As a fifth-grader, I remember thinking it was mostly alright.

People in 1999 probably thought the Sony Mavica FD-91 was mostly alright, too. Phil Askey certainly thought so. It has an optically stabilized zoom lens with plenty of reach, abundant external controls, a viewfinder, and… XGA resolution. As such, the image quality was pretty poor, even by contemporary standards. Now that’s saying something.

So, with the benefit of seventeen years of hindsight and experience (yes, I know now that the Phantom Menace was pretty terrible), what stands out about this quirky camera today?

High on the list of things I will never be nostalgic about – garish stickers adorning my high-end electronics. The 20-cent stamp on the ‘e-mail’ portion is a nice touch, though.

One thing’s for sure: there’s only so much detail you can get when you’re talking XGA resolution. My favorite part of having this camera in the office so far (apart from the amazing Gameboy-esque beeps it makes – listen to them in the video at the end of the page) was Sam opening up some images in Adobe Bridge, going full-screen to see the image at 100% – and it actually shrank compared to the filmstrip view.

But that resolution did allow you to use floppy disks as storage, and depending on your settings, you can fit anywhere from 6-13 images on one. If you work in corporate America, I can all but guarantee you that there’s boxes of unused floppies sitting at the back of some copy room drawers. And guess what? You can still read them.

1.44MB, in all its floppy glory. The sound of the camera spinning these up and writing images to them – now that’s something I can get nostalgic about.

So the image quality generally stinks, and when light levels approach dusk, you may as well be shooting with the lens cap on. But despite that and the wonky (but comfy-to-hold) form factor, the FD-91 is remarkably well-specced.

You get a 14x optically stabilized zoom (the big block at the front of the camera is the stabilizer unit), auto and manual focus, white balance control, full manual controls (the slowest shutter speed is 1/60 sec), a selfie-friendly flip screen and a built-in flash. It even records movies to floppy disk at a maximum resolution of 320×240 pixels. Amusingly, the clips max out at five seconds long. And we thought the original three minute limit on 4K for the D5 was questionable. 

How did Sony know to make a top-hinged selfie screen way back in 1999? With foresight like that, we should all have been using Betamax.

In the end, the Mavica FD-91 is a fun toy, or a great conversation piece. Or you can use it to teach your kids about the upsides and downfalls of technologically ancient storage solutions (what, am I the only one who thinks about that sort of thing?). The batteries are still easy to find, even. But as a fun, classic digital camera to actually use for photography – there are better options out there.

Did you ever have a camera that used floppy disks? How about the follow-up models that used CDs or DVDs? Let us know in the comments!

$ (document).ready(function() { SampleGalleryV2({“containerId”:”embeddedSampleGallery_6427989411″,”galleryId”:”6427989411″,”isEmbeddedWidget”:true,”standalone”:false,”selectedImageIndex”:0,”startInCommentsView”:false,”isMobile”:false}) });

Hear the sounds of the past

Articles: Digital Photography Review (dpreview.com)

 
Comments Off on Throwback Thursday: a fresh look at the Sony Mavica FD-91

Posted in Uncategorized


How to Look at Other Photographers’ Images to Improve Your Work

04 Aug

When you’re starting out in photography, it’s quite easy to become obsessed with getting critique and feedback on own work to help you improve. Your peers may suggest a different crop, highlight issues with composition, and help you along your journey with camera settings and post-production techniques. Receiving feedback from your peers also provides a fantastic forum for you yourself to ask questions about specific items that have been brought up in discussion, and clear up any little issues that you may have.

While these are always very helpful methods of improving your photography, they are not the only ways. Another method is to simply look at others photographers’ work and ask yourself questions about it. You can even share websites of other photographers on social media, where you and many of your peers can have fantastic discussions about the work. Here are some tips for learning by reviewing other photographers’ work.

Fig.4

Discussion Points

Some great topics to discuss may be:

How do you think the photograph was made?

For help on this read: 4 Steps on How to Read Images and Learn to Replicate the Results

We all like to discuss camera settings and possible post-production techniques, so this is an important question to ask. Reverse-engineering an image will help you understand how the photograph was made, and give you a better insight. It will help you replicate a particular technique for you to try on your own.

Fig.2

What compositional techniques have been used?

How has the photographer composed the image? Have they used the Rule of Thirds (or as I like to call it, the Guide of Thirds!) or is the subject in the centre of the frame? How has the composition and placement of the subject helped the photograph? From what vantage point have they photographed the subject – straight on, from up above looking down, or down low looking up? How does this vantage point influence the impact of the subject (looking down on someone makes them look more vulnerable, for example).

Fig.6

How does the photo make you feel?

What emotions does the image evoke in you, and why does it make you feel that way? For example, if the image has a blue colour-cast, this could make you feel cold. Or does the image have a lot of vibrant, warm colours which can make you feel warm and happy? How does the composition techniques employed affect how you feel?

For this, if the image has been photographed from above looking down, the viewer will feel more powerful where the subject will look more vulnerable – it is the opposite if the photograph has been taken from down low looking up.
Is the image confronting? Knowing how you feel about and image and why, are very important for you to be able to achieve the same result in your own work.

Fig.1

What elements have been included in the frame?

Has the photographer kept the frame clear of any distractions and gone for a minimalist look, or have they included extra elements in the frame? How do these elements work together with the subject; do they complement it, or do they clutter the frame and distract from the subject?

What is the light like?

Discussing the light will help you see light better in your own work. Is the light hard or soft? To answer this, look for the shadows; the more defined a shadow is the harder the light (sunny day versus overcast day). How much light is there, and in what direction is it coming from? The direction of the light will influence the shape and form of a subject, as well as its colour. For example, if an object is backlit, this can create a silhouette.

Fig.3

Places to Look for Images

Now that you have a list of discussion topics, it’s time to look around for some images to discuss! The internet is full of fantastic websites where you can view the work of other photographers. Websites such as 500px.com, 1x.com and Flickr all have some fantastic images, that span a wide range of genres.

Here is a list of some websites, and photographers, that I often look at: (this list is by no means exhaustive!)

  • Getty Images: fantastic collection of sport, editorial, and entertainment images photographed by some of the world’s best photographers.
  • Time Lightbox: nice collection of images and projects from Time Magazine. The content often changes, so it’s always a good idea to check often.
  • Instagram: I’m not going to give you a list of accounts to follow, but Instagram as some fantastic photographers on it sharing some amazing work. Follow dPS on Instagram here.
  • Adam Pretty: an Australian sports photographer.
  • Trent Parke: an Australian documentary photographer. His style is something that I often like to incorporate in to my own work. He is also a member of Magnum Photos.
  • Clive Brunskill: a UK based sport and commercial photographer and someone I have been luck enough to work with.
  • James Nachtwey: the world’s best documentary and war photographer. He has taken some amazing images across his almost 30-year career!
  • Vladimir Rys: European sports photographer. I really like his style of photographing through objects.
  • Rob Cianflone: Australian based photographer with Getty Images.
  • Quinn Rooney: Australian based photographer with Getty Images.
  • Al Bello: Getty Images Chief Sports Photographer – North America.

Editor’s note: you can also come join the new Digital Photography School Facebook group where we encourage lots of images sharing and commenting. 

Fig.5

Over to You

While feedback on your own work is important, in many ways looking at other photographers’ work will help you more. These are just a few suggestions on what you can discuss about an image, and where to look for images, and they are by no stretch of the imagination exhaustive!

Do you have a favourite place to look at images? It would be great to hear about them in the comments below.

googletag.cmd.push(function() {
tablet_slots.push( googletag.defineSlot( “/1005424/_dPSv4_tab-all-article-bottom_(300×250)”, [300, 250], “pb-ad-78623” ).addService( googletag.pubads() ) ); } );

googletag.cmd.push(function() {
mobile_slots.push( googletag.defineSlot( “/1005424/_dPSv4_mob-all-article-bottom_(300×250)”, [300, 250], “pb-ad-78158” ).addService( googletag.pubads() ) ); } );

The post How to Look at Other Photographers’ Images to Improve Your Work by Daniel Smith appeared first on Digital Photography School.


Digital Photography School

 
Comments Off on How to Look at Other Photographers’ Images to Improve Your Work

Posted in Photography