RSS
 

Posts Tagged ‘lightroom’

Using Smart Previews in Lightroom 5

10 Oct

Smart Previews in Lightroom opener

If you’ve ever encountered a “The Folder Could Not Be Found” message in the Lightroom Develop module or seen a question mark over a folder name in the Library module you’ll love the new Smart Previews in Lightroom 5.

Smart Previews are an editable preview image and they make working with Lightroom when you are using removable drives a cinch.

Here I’ll explain what smart previews are and why you might use them.

Understanding the problem
Lightroom can only work with images that have been imported into its catalog. When your import your images Lightroom notes where the images are on your disk so it can access them when you want to edit them.

As Lightroom doesn’t store the actual images you will encounter problems if the drive the images are stored on is not connected to your computer when you try to edit them. In this case, you will see a preview of the image in the Library module but if you select the image and open the Develop module you will see a message saying “The folder could not be found”. The editing tools are all disabled and you can’t proceed.

Lightroom 5 smart previews 2

If you look at that same folder of images in the Library, the folder name will appear in the Folders panel but with a question mark over it. This is because the folder is on a drive that is not currently attached to your computer.

Lightroom 5 smart previews 2

In earlier versions of Lightroom, the only solution for this issue was to reattach the drive so the original images would be available to Lightroom.

With Lightroom 5 the situation has changed to the extent that, with a little forethought and some spare disk space, you can edit images even if they are stored on a disk not attached to your computer. The solution is provided by the new Smart Previews feature.

What are Smart Previews in Lightroom?

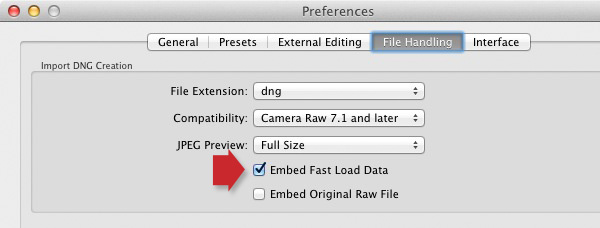
Smart Previews are lossy DNG files which are a maximum size of 2540 pixels on their longest edge. They are created from the original raw files and they are stored in a folder in the same location as the Lightroom catalog.

You can use these Smart Previews if the original images are not available not only in the Library module but also in the Develop module.

If you have Smart Previews rendered for an images you will still see a question mark in the Library module indicating that the folder is not available but below the histogram there will be a small white icon indicating that a Smart Preview is available for this image. The Smart Preview can be edited in the Develop module just like the original image and it can be exported too.

Lightroom 5 smart previews 3

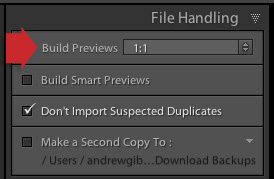
Smart Previews can be created for DNG and for Camera Raw images as well as for TIF and JPG. You can create them on import by selecting the Create Smart Preview checkbox in the Import dialog.

Lightroom 5 smart previews 4

You should note that Smart Previews and regular Previews are two different types of previews so you should continue to choose the same option in the Render Preview list that you have chosen in the past. So, I choose to Render Standard previews at a size appropriate for my monitor size – as well as rendering Smart Previews for those images I want to be able to edit even if the drive they are stored on is not connected.

You can also create Smart Previews at any time – provided the original images are available at the time you are making them – using a menu option in the Library module. To do this, select the images to build Smart Previews for and choose Library > Previews > Build Smart Previews. You’ll be prompted to build smart previews for all photos or just one. Select Build All to create smart previews for all the selected images.

Lightroom 5 smart previews 5

You can also build smart previews using an icon in the histogram. For example if you select either a folder of images or a selection of images in the Library module you can learn the smart preview status of those images by reading the information below the histogram. You’ll see the number of images without smart previews and the number with.

Lightroom 5 smart previews 6

Click the originals without smart previews box and you’ll be prompted to build smart previews for these images. There is a slight glitch with the numbering – if you have a large number of images selected then the actual numbers in the histogram won’t be correct but the process still works for all the selected images.

Lightroom 5 smart previews 7

If you have rendered Smart Previews for your images and if you later decide you no longer want them you can delete them by clicking the smart preview indicator below the histogram.

Editing Smart Previews

You can edit an image for which you have rendered a Smart Preview in the Develop module. The smart preview will only be used if the original image is not available. Any changes you make to the smart preview will be written back into the original image when it is next available in Lightroom.

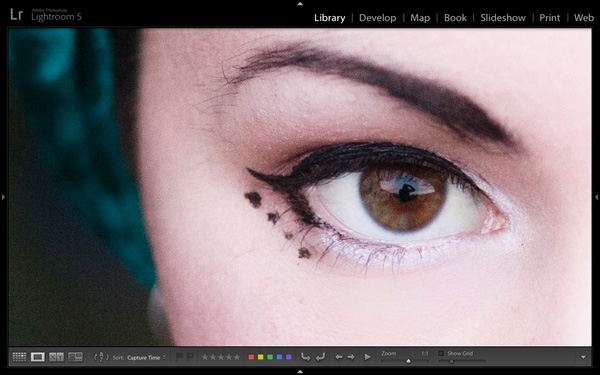
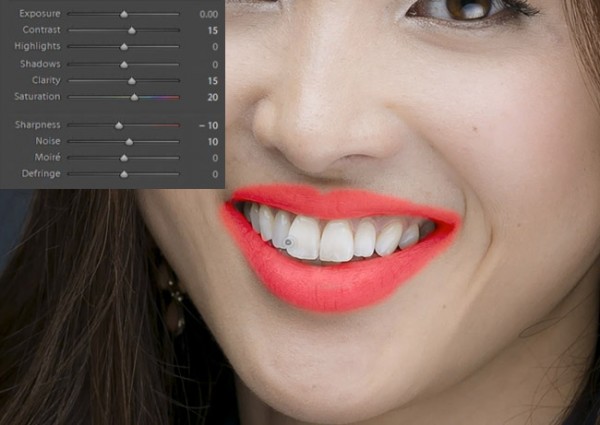
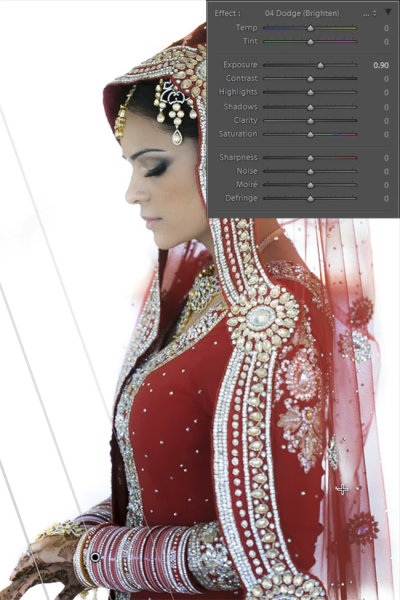
In this case I am editing the Smart Preview as the original is not available:

Lightroom 5 smart previews 8

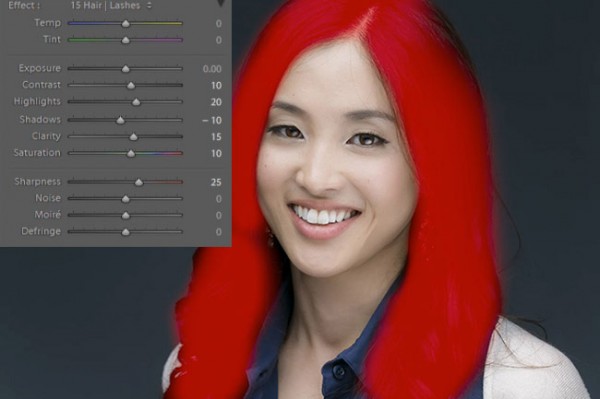
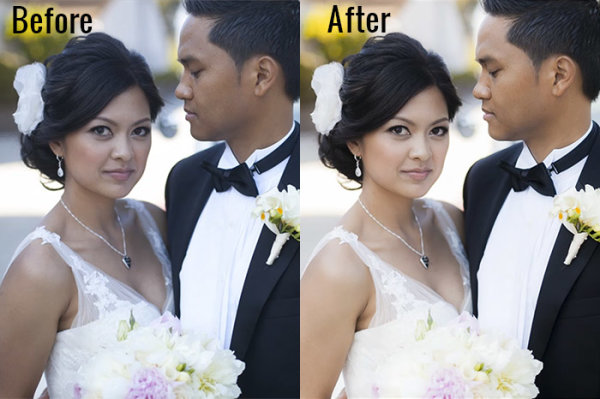
Here both the original and smart preview are available, so the original is being edited:

Lightroom 5 smart previews 9

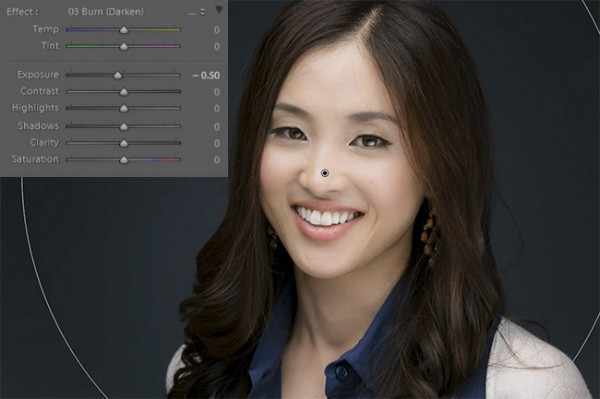
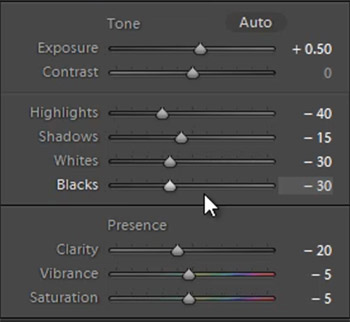
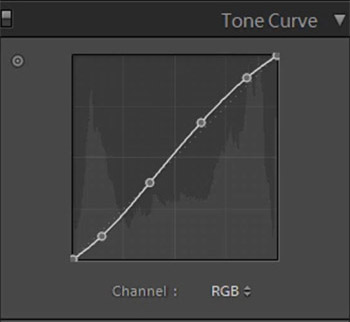
In this case there is no smart preview available, the original is being edited and if it were not available, then editing would not be possible:

Lightroom 5 smart previews 10

If you store all your photos on the same drive as you store your Lightroom catalog then you may find you have no use for smart previews. However if you, like me, store your images or some of them on a drive other than the one on which your Lightroom catalog is stored then you’ll find that smart previews useful. Create smart previews for those images that are not stored on the same drive as your Lightroom catalog and you will have those images accessible and editable even when the originals are not available.

Post originally from: Digital Photography Tips.

Check out our more Photography Tips at Photography Tips for Beginners, Portrait Photography Tips and Wedding Photography Tips.

Using Smart Previews in Lightroom 5

The post Using Smart Previews in Lightroom 5 by Helen Bradley appeared first on Digital Photography School.


Digital Photography School

 
Comments Off on Using Smart Previews in Lightroom 5

Posted in Photography


Make Lightroom Faster by Using DNG

03 Oct

Using DNG in Lightroom

A question about Lightroom that often arises is how to make it run faster. On my computer the biggest bottleneck comes when I’m looking at images in the Library module’s Loupe view or in the Develop module. Even images for which Lightroom has created 1:1 previews can take a few seconds to render properly. This may not sound much, but it’s annoying when flicking through images trying to decide which ones to process. It’s even more frustrating when zooming in 100% to check details which are important to me, such as that the eyes are in focus in portraits (above).

Luckily, there’s a relatively easy fix – and it doesn’t involve upgrading your computer or adding RAM (although those things may help). You can put it into action without spending money, and you should see a benefit regardless of how low- or high-spec your computer is.

Fast Load Data

The key is to convert your Raw files to the DNG format. You may not like the sound of it (I’ll explore some of the pros and cons later on the article) but it really does help. Why? It’s all to do with something called Fast Load Data – a partially processed preview of the image that enables Lightroom to render previews faster than it can from a non-DNG Raw file or a DNG file without Fast Load Data.

The net result of converting your Raw files to DNG and including Fast Load Data is that it enables Lightroom to rapidly display previews of your images. That means less time waiting and less frustration for you.

Converting to DNG

Using DNG in Lightroom

The best time to convert your Raw files to DNG is when you import them from your camera’s memory card. To ensure you get the full benefit of using DNG, make sure you go to the File Handling tab in Preferences and tick the Embed Fast Load Data box (above). Do this before you convert any Raw files to DNG, otherwise you will miss out on the speed increase that DNG can give you.

These are the key steps to follow during the import:

Using DNG in Lightroom

  • Select the Copy as DNG option in the Import window (above). This tells Lightroom to copy the Raw files from the memory card to the specified folder on your hard drive, converting them to DNG as it does so.

Using DNG in Lightroom

  • Set Build Previews to 1:1 in the File Handling panel (above).

Using DNG in Lightroom

  • After the import, go to the Catalog panel and select Previous Import. Then go to Library > Validate DNG files. Lightroom checks the files you have just imported and converted to DNG to ensure they are not corrupted. Any corrupted files are placed in a Temporary Collection that appears in the Catalog panel. I’ve yet to see a corrupted DNG file, so I don’t think it happens often.

Other pros and cons of DNG

If you read around on the topic of DNG you will find that opinion varies widely as to whether it is good idea to convert your Raw files to the format.

Note that some Leica and Hasselblad cameras use the DNG format already – so if you are lucky enough to own one of those then the discussion is irrelevant. There’s also at least one Pentax camera that gives you the option of using either DNG or Pentax’s own Raw format (.PEF). If you own one, selecting DNG saves you having to do it at the import stage (if you choose to use DNG).

Bear in mind that camera generated DNG files don’t contain Fast Load Data – only DNG files created by Adobe software do so.

First, the case against using DNG:

  • It takes longer to convert your Raw files to DNG than it does to simply copy them. This is true – but as long as you’re happy to go away and do something else while your computer gets on with it, it won’t be much trouble. I often leave mine running overnight, especially if I have a lot of images to import and convert.
  • Not all applications open DNG. If you ever use, or think you may use, your camera maker’s proprietary Raw conversion software (such as Canon’s Digital Photo Professional) you should probably stick with your camera’s native Raw format, as the majority of these programs don’t recognise DNG. Check the documentation if you are unsure.

Using DNG in Lightroom

Using DNG purely to increase Lightroom’s speed is little use if you don’t use 1:1 previews. By default Lightroom discards 1:1 previews after 30 days (you can change that under the File Handling tab in Catalog settings), so even if you tell Lightroom to create 1:1 previews when you import your images, they will eventually be deleted by Lightroom. Not sure if an image has a 1:1 preview? Just select the image (or images) and go to Library > Previews > Build 1:1 Previews (above). Lightroom will build 1:1 previews for any selected images that don’t currently have them.

Now, some other benefits of DNG:

  • DNG files are smaller than other Raw formats. Converting your Raw files to DNG upon import reduces the amount of space they take up on your hard drive by up to 20 percent. That could be useful, especially for high volume shooters.
  • You may own a new camera with Raw files that aren’t recognised by your version of Lightroom or Adobe Camera Raw (ACR) if you are using Photoshop (not all readers will have upgraded to the latest versions). In this situation you can use Adobe’s free DNG Converter application to convert them to DNG. Adobe usually updates the DNG Converter to work with files from new cameras before Lightroom and ACR.
  • Embedded file verification. A DNG file contains a checksum that enables Lightroom to check if the original source data is corrupted. DNG is the only Raw file format that does so. It means that you can check your images after you have converted them to DNG to make sure there are no issues with corruption.

Mastering Lightroom Book One: The Library Module

Using DNG in Lightroom

My latest ebook Mastering Lightroom Book One: The Library Module is a complete guide to using Lightroom’s Library module to import, organise and search your photo files. You’ll learn how to tame your growing photo collection using Collections and Collection Sets, and how to save time so you can spend more time in the Develop module processing your photos.

Post originally from: Digital Photography Tips.

Check out our more Photography Tips at Photography Tips for Beginners, Portrait Photography Tips and Wedding Photography Tips.

Make Lightroom Faster by Using DNG


Digital Photography School

 
Comments Off on Make Lightroom Faster by Using DNG

Posted in Photography


How to Professionally Retouch Portraits in Lightroom

22 Sep

The Following is an excerpt from the SLR Lounge Lightroom Preset System v5 and accompanying workshop from the Lightroom Workshop Collection v5.  The Lightroom Preset System is designed to take you from Ordinary to Extraordinary photos in just a few seconds and clicks.

In this article we’re going to do a headshot retouch to show how capable Lightroom is. Of course for a professional headshot retouch Photoshop is necessary, but Lightroom is also surprisingly capable. We’re going to utilize one of our “Soft Portrait” presets, similar to the one we used in our Color Portraiture with Retouch and Enhancement Tutorial, and then we’re going to utilize our brush presets to make our retouches. The complete written tutorial is below, and you can also watched the video tutorial at the end of this article.

Here’s a sneak peak at what our image will look like before and after the retouch.

beforeafter


Read the Written Tutorial

The first thing we’re going to do is select our “01-10 BASE – SOFT: 11a. Extra Soft – Skin Desat” which will soften the skin by decreasing the Clarity and adjusting the Noise Reduction settings. The preset also adjusted the Red and Orange in our HSL, lowering them slightly so we get desaturated skin tones. We also added a little bit of contrast using the  “03-40 ADJUST – SHADOW BLACKS: 43 Darken – Light (+10,-20)” preset. The Tone Curve is set in s subtle “S” shape, giving us a slight contrast boost, and we have our standard amount of Sharpening applied to this photo. We’re going to set our Color Temperature to 4900 and add +0.40 to the Exposure to give the skin a nice bright look. For those that don’t have the Preset System, here are what our Develop Settings look like after our presets and adjustments are applied.

alldevelopsettings

The first brush adjustment we’re going to be making is for her skin. We’re using our “21 Skin Softener” preset, and you can see settings of our brush in the photo below. These settings will smooth skin without destroying skin texture. We want to make sure we’re only applying this brush to the skin, and you can press “O” to bring up the overlay so you can see exactly where the brush is being applied as shown below. You can also delete  areas of brush application by holding down “alt on a PC or “opt” on a MAC to erase the adjustments.

skinbrush

Moving on, we’re going to hit “New” to  make new brush adjustments, and we’re going to select our “23 Line Diminisher” preset. We want to diminish some of the smile lines and lines under the eyes. This part of the retouch should be subtle, diminishing the lines and not removing them completely. Once again, you can see the brush preset settings and the area of affect in the image below.

linediminisher

Now we’re going to hit “New” and select the  ”24 Eye Brightener” preset. We’re going to brighten up the eyes and we want it to be subtle because if the eyes are too bright it will have an abnormal look. The best way to check if eyes are too bright is to simply zoom out to a thumbnail view and check to see if the eyes look like they are glowing or unusually bright based on the surrounding tones.

eyebrightener

Furthering our edit on the eyes, we want to brighten up the iris’ to add nice colors to them and to exaggerate some of the nice catch light. We’re using our “25 Iris Enhancer” and we want to make sure we’re only making adjustments on the iris’ and nothing else.

irisenhance

Now we’re going to move onto our lips. Our “26 Lip Enhancer” preset adds nice color and contrast to the lips.

lipenhance

The last brush we’re going to use is for the hair. With our “15 Hair | Lashes” preset, we’re going to pull out some nice color and texture from her hair.

wendyhair

At this point we’re done with our retouches. If you like you can do some additional blemish removal. When doing blemish removal we recommend keeping blemishes that are apart of their look. The last thing we’re going to do is add a Radial Filter with the Exposure set to -0.50.

radialfilter

And now we are left with our final image. Here’s a before and after of our portrait.

Before

lightroom-5-tutorial-professional-headshot-retouch-0001

After

lightroom-5-tutorial-professional-headshot-retouch-0002

Watch the Video Tutorial

[EMBED VIDEO HERE]

If you would like to see exactly how all of the settings and adjustments were applied, please watch the video below from the SLR Lounge YouTube Channel.

Conclusion and Learn More

We hope you all enjoyed this tutorial. If you are interested in learning more or purchasing the SLR Lounge Lightroom Preset System v5 or the newly released Lightroom Workshop Collection v5, please click any of the links in this article.

Post originally from: Digital Photography Tips.

Check out our more Photography Tips at Photography Tips for Beginners, Portrait Photography Tips and Wedding Photography Tips.

How to Professionally Retouch Portraits in Lightroom


Digital Photography School

 
Comments Off on How to Professionally Retouch Portraits in Lightroom

Posted in Photography


Adobe releases Camera Raw 8.2 and Lightroom 5.2

17 Sep

shared:AdobeLogo.png

Adobe has released Camera Raw 8.2 and Lightroom 5.2, as final versions of updates that were originally posted as ‘release candidates’. ACR 8.2 is designed to work with Photoshop CC but, as promised, is also compatible with Photoshop CS6. It brings support for 16 additional cameras, including the Canon EOS 70D, Fujifilm X-M1, and Sony RX100 II, along with new lens profiles and big fixes. For users of older Photoshop versions, Adobe DNG Converter 8.2 is also now available. Click through for more details and how to download.

News: Digital Photography Review (dpreview.com)

 
Comments Off on Adobe releases Camera Raw 8.2 and Lightroom 5.2

Posted in Uncategorized


PhotoSmith app for iPad offers image organization, syncs with Lightroom

12 Sep

TC4x3AS520x0~cms_posts-3244247666-1_Photosmith_main-1.PNG

The PhotoSmith app for iPad lets photographers catalog and filter their photos on the move. There are no editing capabilities, but users can add ratings, labels, keywords and other metadata, and group photos into collections. It can export to Facebook, Flickr, Dropbox and iPad Albums, but its party trick is the ability to sync tags and ratings with Lightroom. Read more in our full review on our sister site, connect.dpreview.com.

News: Digital Photography Review (dpreview.com)

 
Comments Off on PhotoSmith app for iPad offers image organization, syncs with Lightroom

Posted in Uncategorized


11 September, 2013 – Grading CinemaDNG in Lightroom, Camera Raw and Capture One

11 Sep

It hasn’t happened yet in still photography, but there is a growing movement to adopt a standardized raw format for video. It’s called CinemaDNG.

In my newest tutorial I show how these files can be processed in your favourite raw processing program; Lightroom, Camera Raw or Capture One. But – slowly.

Better alternatives are DaVinci Resolve (free up to 1920X1080), or better yet, the just announced update to Adobe’s Premier Pro CC, which will handle CinemaDNG files natively without the need for rendering or transcoding – coming October, 15.

Find out more about this is Grading CinemaDNG in Lightroom, Camera Raw and Capture One.

"Having been to Antarctica with Michael and Kevin, I would say after having traveled the world and shot nearly my entire life as an exhibiting photographer,  it was one of my highlights in my life and I talk about it, all the time.  The images and experience of seeing something visionary and nearly extinct from the world, to see and experience the wildlife and scenery that does not fear humans is amazing.  The images I shot there won me two Smithsonian awards and nearly 18 other international awards". – Tim Wolcott

 Find Out More Now
These Expeditions Will Sell Out Quickly. They Always Do


The Luminous Landscape – What’s New

 
Comments Off on 11 September, 2013 – Grading CinemaDNG in Lightroom, Camera Raw and Capture One

Posted in News


Adobe introduces cheaper Creative Cloud with Photoshop + Lightroom

05 Sep

shared:AdobeLogo.png

Adobe has added a new pricing tier to the Creative Cloud product, possibly in response to the negative response from the photography community when it announced that all Creative Suite products would require a monthly subscription. The Photoshop Photography Program gives users Photoshop CC, Lightroom 5, Bridge CC, Behance, and 20GB of storage for $ 9.99 per month. That’s not a promotional price, either, as long as you sign up by the end of this year. You must already own Photoshop CS3 or newer to be eligible for this offer.

News: Digital Photography Review (dpreview.com)

 
Comments Off on Adobe introduces cheaper Creative Cloud with Photoshop + Lightroom

Posted in Uncategorized


Color Portraiture with Retouch and Enhancement in Lightroom 4 and 5

25 Aug

The Following is an excerpt from the SLR Lounge Lightroom Preset System v5, a preset system designed to take you from Ordinary to Extraordinary photos in just a few seconds and clicks.

In this article, we have a beautiful bride who designed an amazing red dress with a lot of great details and jewelry. We want to edit this photo so that she has a nice soft portrait look and the details in her dress remain sharp and crisp. To do this, we’re going to be utilizing similar techniques in production as we covered in the previous Soft Flattering Color Portrait tutorial. But, we are going to go through the added step this time of utilizing our brush presets to make the image details pop. The written article is below, and if you like, you can also watch the original video tutorial towards the end of the article.

Here’s a quick sneak peak of our image before and after we’re done with our edit.

beforeafter copy

Read the Written Tutorial

Since this is a portrait, we have a preset that gets us to a nice soft portrait look quickly which we discussed in detail in the previous Soft Flattering Color Portraits tutorial. This preset adjusts the develop settings so that portrait skin tones looks nice and soft, and it also desaturates skin tones via a slight modification to Vibrance and Saturation to help even out skin tone colors. We also increased our exposure to +0.70 because an overall brighter image will look more flattering on our bride. Personally, I want to go with a more neutral/white look for the image, so that the red in the dress truly pops. So we’re going to adjust our Temperature to 4500. Here’s what our develop settings look after our preset and manual adjustments are applied.

developesettings

In the HSL our Red and Orange have been decreased slightly because once again, we want to subtly even out skin tone colors.

HSL

  • Red: -20
  • Orange: -10

In the Details our preset gave us the perfect amount of Sharpening and Noise Reduction. The Sharpening settings are doing a great job of showing the intricate details in the dress, while using a little bit of Noise Reduction to smooth out pores and fine detail in our subjects skin.

Sharpening

  • Amount: 70
  • Radius: 1.5
  • Detail: 10
  • Masking: 30

Noise Reduction

  • Luminance: 15
  • Detail: 70
  • Contrast: 0
  • Color: 25
  • Detail: 50

Our preset also adjusted our Lens Vignetting to +30, because we want a nice even edge to edge toning.

Lens Vignetting

  • Amount: +30
  • Midpoint: 30

Now we’re going to do some more post processing with our Brush. The first thing we want to focus on is the beautiful red dress. We’re going to set our Brush settings for Clothing and Texture and apply it everywhere but her skin. If you press “O” you can bring up the brush mask overlay and see where the brush is being applied. (See video tutorial below for reference)

When you apply a brush onto your image, a “pin” will appear on your image (Press “H” on your keyboard to hide/reveal pins). If you click on the pin you can decrease or increase the strength of the brush settings by left-clicking and dragging to the left (weaken) or right (strengthen). We want our adjustments to be a little more subtle so we slightly decreased the strength of the brush.

bothclothingbrushsettings

Original Brush Settings on Left, Lowered Brush Strength Settings on Right

We like the window in the background because it helps compose our frame, but there’s a distracting bar in the middle. For this particular image, we could keep the frame since it does a great job framing our subject. But, just to illustrate how capable Lightroom is, we’re going to remove the window entirely, making this a high key image with a nice bright background. To do this we’re going to use our Brush with strong dodge settings and apply it to the window.

Screen Shot 2013-08-21 at 1.12.48 PM

If you have additional questions, watch the video tutorial below to see exactly how this affect was applied.

Dodge Brush Settings

  • Exposure: 4.00
  • Contrast: 1.00
  • Highlights: 1.00

We want to apply the brush to the inside of her hands, but it’s a tough spot to reach because the area is very small. This is a great place to use Lightroom’s Auto Mask function.

automask

Her hands are slightly underexposed so we’re going to add a graduated filter and set the exposure to +0.90. We are then going to drag the filter from the bottom left of the image to her bracelets.

firstgraduatedfilter

We also want another subtle graduated filter for the back of her veil, so we’re going to set the exposure on this filter to +0.30. We want to drag this up from the bottom right of the image to her bicep area just as we did for the previous graduated filter shown above.

Now that we’re done with the dress, we’re going to go back and touch up some details on our bride. The first thing we’re going to do is select our “Hair and Lashes” preset. This will give some nice contrast and sharpness in her eyes and eyebrows.

Hair and Lashes Brush Settings

  • Contrast: 10
  • Highlights: 20
  • Shadows: -10
  • Clarity: 15
  • Saturation: 10
  • Sharpness: 25

After the eyes, we’re going to move onto the lips. We’re going to select our Brush preset for lips which will give us some nice color and contrast on the lips.

Lip Brush Settings

  • Contrast: 15
  • Clarity: 15
  • Saturation: 20
  • Sharpness: -10
  • Noise: 10

And now we are left with our final image. Here’s a before and after of our portrait.

Before

lightroom-5-tutorial-high-key-retouch-0001

After

lightroom-5-tutorial-high-key-retouch-0002

Watch the Video Tutorial

If you would like to see exactly how all of the settings and adjustments were applied, please watch the video below from the SLR Lounge YouTube Channel.

Conclusion and Learn More

We hope you all enjoyed this tutorial. If you are interested in learning more or purchasing the SLR Lounge Lightroom Preset System v5

Post originally from: Digital Photography Tips.

Check out our more Photography Tips at Photography Tips for Beginners, Portrait Photography Tips and Wedding Photography Tips.

Color Portraiture with Retouch and Enhancement in Lightroom 4 and 5


Digital Photography School

 
Comments Off on Color Portraiture with Retouch and Enhancement in Lightroom 4 and 5

Posted in Photography


Talking Lightroom & Photography

22 Aug

I was privileged to have a chance to take part in the Lightroom on the Road Google Hangout last week discussing Lightroom 5 and photography with Julieanne Kost, Chris Chabot and Brendan van Son.  It was great to talk photos, photography & Lightroom 5 with talented and like minded individuals. There’s some great tips and ideas in the video around LR5 so be sure to check it out.

Note: At 12:39 I show and discuss some new unreleased photography so if short for time at least check that out.

Copyright Jim M. Goldstein, All Rights Reserved

Talking Lightroom & Photography

The post Talking Lightroom & Photography appeared first on JMG-Galleries – Landscape, Nature & Travel Photography.


Related Stories

  • Talking Lightroom & Photography – Enclosure
  • Recommended Reading: Search Engine Optimization
  • Recommended Reading: Search Engine Optimization – Enclosure


JMG-Galleries

 
Comments Off on Talking Lightroom & Photography

Posted in Equipment


Soft Flattering Color Portraits in Lightroom 4 and Lightroom 5

05 Aug

Introduction

The Following is an excerpt from the SLR Lounge Lightroom Preset System v5, a preset system designed to take you from Ordinary to Extraordinary photos in just a few seconds and clicks.

We have just launched the new Lightroom Preset System v5, and in this first tutorial we want to create a soft and flattering look for color portraits. We want to maintain good overall contrast, while flattening out highlights and smoothing out the details a bit for a more flattering look. Each one of you will probably have different preferences in regards to overall contrast and color temperature, but this Base preset and modification are pretty much our foundation for all of our color portraits within the Lin and Jirsa Photography studio. Here is what the photo looked like before and after the effect is applied.

beforeafter

Lightroom Preset System v5 Mixology Recipe

For those that own the SLR Lounge Lightroom Preset System v5, you can follow this two click recipe. If you like, you can save it as a new custom Mixology, however, since it is only a 1-click modification on our existing Base Preset, we will not be adding this to a new custom Mixology Preset.

Develop Mixology
1) 01-10 Base-Soft 11a. Extra Soft-Skin Desat
2) 03-40 Adjust Shadows Blacks 42. Darken-Medium -15, -30

Adjust Exposure, Temperature and Tint to taste.

Local Adjustments
We used the Graduated Filter and used the “04 Dodge (Brighten) +.5 stop” to brighten up the bottom left of the photo. To see exactly how it was applied, watch the video tutorial below.

Watch the Video Tutorial

If you would like to follow along with the Video Tutorial, watch the video blow.

Complete Written Tutorial

This written tutorial is meant for those who don’t have the SLR Lounge Lightroom Preset System v5. If you follow along you’ll be able to edit your photos with the same settings we used to edit this one. For any photo we edit we like to check the EXIF data by pressing “i”. This will show us exactly what camera the photo was taken one, what lens, and the settings. You can customize what EXIF data you want to see by pressing “CMD + J” or “CTRL + J”. This photo was taken on a 5D Mark II at 1/800 sec at f/2.0 ISO 100 with a 50mm lens.

The first thing we did was go into our “01-10 Base – Soft” preset folder and applied the “11a. Extra Soft – Skin Desat preset”. This preset does most of our work for us, adjusting our exposure, highlights, shadows, whites, and blacks the way we would want them for a portrait like this. The clarity, vibrance, and saturation have all been dropped, giving us a nice soft portrait look. Here’s what our settings look like on the right side panel.

developsettings

Our “1) 01-10 Base-Soft 11a. Extra Soft-Skin Desat” preset lowered our Red and Orange levels, desaturating the skin and taking out the red and orange highlighting that can appear in shadows and highlight areas of our subjects skin.

  • Red: -20
  • Orange: -10

In the Tone Curve we have a standard “S” curve, giving us a subtle contrast boost by raising the highlights and dropping the shadows.

tonecurve

We add a bit of Noise Reduction Luminance in our portraits because it does a great job smoothing out the pores and making skin look great. We had to raise the sharpening a bit on this photo because it was shot at such a wide aperture, making the depth of field very shallow. Here are what our “Sharpening” and “Noise Reduction” settings look like.

sharpening

The vignetting in this photo underexposed her skin slightly in the corners of the photo. This is a great opportunity to use a graduated filer. You can simply go to the Graduated Filter and raise your exposure to “0.50″. Then raise the graduated filter from the bottom left of the photo and come up to the strap of her dress. Watch the video tutorial to see exactly where we put it. After the graduated filter we’re left with our final image, here’s a before and after.

Before

before

After

after

Conclusion and Learn More

We hope you all enjoyed this tutorial. If you are interested in learning more or purchasing the SLR Lounge Lightroom Preset System v5

Post originally from: Digital Photography Tips.

Check out our more Photography Tips at Photography Tips for Beginners, Portrait Photography Tips and Wedding Photography Tips.

Soft Flattering Color Portraits in Lightroom 4 and Lightroom 5


Digital Photography School

 
Comments Off on Soft Flattering Color Portraits in Lightroom 4 and Lightroom 5

Posted in Photography