RSS
 

Posts Tagged ‘lightroom’

Lightroom for mobile for iOS 2.1 brings iPad Pro support and Point Curve

17 Dec

Adobe has today launched version 2.1 of Lightroom for mobile for Apple iOS devices. The update comes with a number of new features, some of which take advantage of new hardware in the Apple iPad Pro and the new iPhone models 6s and 6s Plus. Read more

Articles: Digital Photography Review (dpreview.com)

 
Comments Off on Lightroom for mobile for iOS 2.1 brings iPad Pro support and Point Curve

Posted in Uncategorized


Today Only: 70% Off Our 101 Lightroom Presets Pack

16 Dec

Presets coverToday is Day 3 in our 12 Deals of Christmas and we’re slightly worried about server capacity on this one because it’s 70% off our most popular dPS product of 2015 – our very own Lightroom preset collection!

Grab them before the deal ends here.

For just $ 10 USD this deal gets you 101 useful Lightroom* presets. That’s less than 10 cents per preset!

These presets are simple to use, are exceptional quality and will enable you to transform your images in a click. Full instructions are included, so you’ll be walked step-by-step how to install and use them in Lightroom.

Preset bundles like this might set you back upwards of $ 100 on other sites but for today only this pack can be yours today only for just USD $ 10!

Grab yours before time is up.

Note: Even though these presets are just $ 10 each, they are still fully backed by our 60-day money-back guarantee. If you don’t find them useful simply contact our support team within 60 days and we’ll return your $ 10.

*All 101 presets in this pack work flawlessly with Lightroom versions 4, 5 & 6, or Lightroom CC. Lightroom is required to use these presets.

googletag.cmd.push(function() {
tablet_slots.push( googletag.defineSlot( “/1005424/_dPSv4_tab-all-article-bottom_(300×250)”, [300, 250], “pb-ad-78623” ).addService( googletag.pubads() ) ); } );

googletag.cmd.push(function() {
mobile_slots.push( googletag.defineSlot( “/1005424/_dPSv4_mob-all-article-bottom_(300×250)”, [300, 250], “pb-ad-78158” ).addService( googletag.pubads() ) ); } );

The post Today Only: 70% Off Our 101 Lightroom Presets Pack by Darren Rowse appeared first on Digital Photography School.


Digital Photography School

 
Comments Off on Today Only: 70% Off Our 101 Lightroom Presets Pack

Posted in Photography


5 Essential Things You Need to Know About the Lightroom Library Module

16 Dec

Essential things Lightroom

For those of you who have been following my Lightroom articles I thought it would be fun to test your knowledge. We’ll start with the Lightroom Library module because the work you do here, lays the foundation for everything you do inside Lightroom. Master the Library module and you’ll be well on your way to becoming an expert on the entire program.

Ready? Let’s start with what is probably the most important thing of all – backing up your Catalog.

1. How to back up your Catalog

This is really important. Your Lightroom Catalog is absolutely essential because it’s where Lightroom stores every piece of information it has about your photos. Not only does this include the location of your photos (i.e., where they are saved on your hard drive) but any metadata associated with them (from camera settings to keywords), Lightroom specific information (such as which Collections a photo belongs to) and any edits you have made in the Develop module. Yes, these are all stored in the Catalog.

How much of a disaster would it be if you lost all this data? I’m sure it would be a major loss. That’s why it’s so important that you back up your Catalog regularly. You should also back it up to an external hard drive, not to an internal one, in case your computer is lost or stolen.

You can check your back up settings by going to Lightroom > Catalog Settings. Click the General tab – Back up catalog should be set to Every Time Lightroom Exits as shown below.

Essential things to know about Lightroom

Connect the external hard drive on which you back up your Catalog, then exit Lightroom. Before Lightroom closes down, it displays the Back Up Catalog window. The Backup Folder setting should point to a folder on your external hard drive. If it doesn’t, click Choose and change it now.

Essential things to know about Lightroom

When you exit Lightroom is the only time you will see this popup box, and the only place you can change where it saves the backup of your catalog.

Make sure the Test integrity before backing up and Optimize catalog after backing up boxes are ticked. When you’re done click the Back up button. Lightroom will save a backup of your Catalog to your external hard drive before closing. This may take some time, especially for a large Catalog, so be patient.

Some important things to note about Catalog backups:

  • You only need to keep the last two or three backups. You can delete older ones to free up hard drive space.
  • If you have Lightroom 6 or Lightroom CC the backed up Catalogs are compressed, saving hard drive space.
  • You should always back up your Lightroom Catalog to a different hard drive than the one the main Catalog is stored on. That way, if your main hard drive fails, the backed up Catalog is safe.
  • Once a month (or more often if you like) copy the latest backup to Dropbox, Google Drive or another cloud storage solution. This is to protect you in case you lose both your computer and your external hard drive to theft or fire. The location and name of your Lightroom Catalog are recorded in Catalog Settings.

Essential things to know about Lightroom

2. How to back up your photos

This is important to mention because I want to make sure you understand that your photos are not stored inside Lightroom, or in the Catalog. Your photos are saved on your hard drive (or drives) and you need to back them up yourself. It is your responsibility – Lightroom doesn’t do it for you.

There are many ways of backing up photos, you need to find the method that works best for you. However I’m sure it will help if I share my method. Feel free to use, adapt or ignore it.

  • Create a folder called Raw. All your Raw files are stored in there (I shoot everything in Raw – you could simply call your folder something like Photos if you shoot a mixture of Raw and JPEG).
  • In that folder create a new folder for every year you take photos.

essential things about Lightroom

  • In each of those folders, create 12 folders, one for every month of the year.

essential things about Lightroom

  • Whenever you import photos into Lightroom, select the correct destination folder depending on the month and year the photos were taken.
  • Place each shoot into a folder of its own. You can either give it a name or organize the folders by date.

essential things about Lightroom

This system works because it’s easy to see whether your Raw files are backed up. Want to back up all your Raw files to another hard drive? Just copy the Raw folder. Want to see whether you’ve backed up all the photos you’ve taken this month? It’s easy to do so with this system.

By the way, I keep my Raw files backed up to four different external hard drives, one of which is stored off-site. That way, if one of the hard drives fails, I have three other copies.

3. How to set up File Handling in Catalog Settings

The File Handling settings are important because they help you strike a balance between optimizing Lightroom’s performance speed, and using hard drive space.

The first thing you need to look at is the total size of the cache. This tells you how much hard drive space your previews take up. For example, looking at mine (see below) I can see my Lightroom previews are currently taking up 28GB.

Essential things to know about Lightroom

It’s important to keep some of your hard drive free (at least 10%, but preferably more) otherwise Lightroom will slow down (as will everything else your computer does). If you are running out of hard drive space, come and have a look here to see if your preview files are too large.

There are two steps to keeping your previews file under control.

1. Make sure Lightroom is generating the optimum size Standard Previews. These are used to display your photos in Loupe View and don’t need to be any larger than your monitor’s resolution.

If you have Lightroom 6 or Lightroom CC you can set the size to Auto. Lightroom will calculate the optimum size for you. In Lightroom 5 or earlier pick the size that best matches your monitor’s resolution.

Set Preview Quality to Medium – it gives you the best balance between quality and size.

Essential things to know about Lightroom

2. Set Automatically Discard 1:1 Previews to After 30 Days. You need 1:1 previews for zooming in to photos, and working on them in the Develop module. However, they are very large. If you generated 1:1 previews for every photo in your Catalog, and never deleted them, you would eventually run out of hard drive space. To be honest, it doesn’t really matter which setting you choose here as long as it’s not set to Never. You can always regenerate discarded 1:1 previews if you need them again later.

4. How to search for images

One of the benefits of building the Lightroom architecture on a database is that it is easy to search your photos. You do this in the Filter Bar, which is displayed above the Content Window in Grid View (press ‘\’ on the keyboard if you don’t see it).

There are three types of searches:

  1. Text: Search keywords, filenames, titles, captions, etc., for text sequences.
  2. Attribute: Filter by flag, star rating, colour label or file kind (master photo, virtual copy, or video).
  3. Metadata: Search by date, camera, lens, camera setting (ISO, shutter speed, aperture, etc.), aspect ratio or any of the dozen or so search options listed there.

Have a play with these options to see how it works. Just bear in mind that Lightroom is searching the selected folders or Collections, not your entire Catalog when you do so (select All Photographs to search your entire library).

Essential things to know about Lightroom

5. How to use Collections

Collections are virtual Folders, which you use to organize your images. Folders are limited because a single photo can only be stored in one Folder at a time. The same photo can be stored in as many Collections as you like, making Collections the easiest, and most flexible, way to organize your photos.

An example of this is a photo taken of a person called Jenny in Rome in November 2015. The photo can only be stored in one Folder, but it can be added to a Collection called Jenny, another one called Rome, another called 2015 – in fact as many as you need.

Your folders should be set up to make backing up easy (see earlier point). Your Collections should be used to organize your photos. My article Use Lightroom Collection to Improve your Workflow will help you with this.

Your turn

Of course, this list is not exhaustive, but I’d like to hear your thoughts as well. What do you think is essential to know about the Library module? Do you have any questions about the points raised in this article? Please let me know in the comments below.


The Mastering Lightroom CollectionMastering Lightroom ebook bundle

My Mastering Lightroom ebooks are a complete guide to using Lightroom’s Library and Develop modules. Written for Lightroom 4, 5, 6 and CC  they  show you how to import and organise your images, use Collections, creatively edit your photos and how to work in black and white.

googletag.cmd.push(function() {
tablet_slots.push( googletag.defineSlot( “/1005424/_dPSv4_tab-all-article-bottom_(300×250)”, [300, 250], “pb-ad-78623” ).addService( googletag.pubads() ) ); } );

googletag.cmd.push(function() {
mobile_slots.push( googletag.defineSlot( “/1005424/_dPSv4_mob-all-article-bottom_(300×250)”, [300, 250], “pb-ad-78158” ).addService( googletag.pubads() ) ); } );

The post 5 Essential Things You Need to Know About the Lightroom Library Module by Andrew S. Gibson appeared first on Digital Photography School.


Digital Photography School

 
Comments Off on 5 Essential Things You Need to Know About the Lightroom Library Module

Posted in Photography


24 Hour Deal: Become a Lightroom Expert Quickly and Easily

15 Dec

Today we have an amazing deal for you as deal 2 in our 12 Deals of Christmas.

It’s 85% off Cole Joseph’s Lightroom Training Workshop.

NewImage

Cole Joseph has processed over half a million photos in his career and so certainly knows a thing or two about Lightroom.

In this workshop he’ll share his best tips and tricks with you to help you prices the highest quality final edits to your images in no time at all.

Walking you through Lightroom step by step, Cole will demonstrate exactly how to use Lightroom to its full potential. You’ll not only learn how to edit more quickly, but see how to get the same results he does.

Buy today at a crazy 85% off, and by this time tomorrow, you’ll be a Lightroom master!

PS: Cole is offering this training with a no risk 30 day money back guarantee. If you buy it and don’t find it meets your expectations – simply ask for your money back. What could be better than that!

googletag.cmd.push(function() {
tablet_slots.push( googletag.defineSlot( “/1005424/_dPSv4_tab-all-article-bottom_(300×250)”, [300, 250], “pb-ad-78623” ).addService( googletag.pubads() ) ); } );

googletag.cmd.push(function() {
mobile_slots.push( googletag.defineSlot( “/1005424/_dPSv4_mob-all-article-bottom_(300×250)”, [300, 250], “pb-ad-78158” ).addService( googletag.pubads() ) ); } );

The post 24 Hour Deal: Become a Lightroom Expert Quickly and Easily by Darren Rowse appeared first on Digital Photography School.


Digital Photography School

 
Comments Off on 24 Hour Deal: Become a Lightroom Expert Quickly and Easily

Posted in Photography


Lightroom plug-in for Pentax 645Z tethered shooting now available

10 Dec

Ricoh has announced a software plug-in for Adobe Lightroom supporting tethered shooting with the Pentax 645Z medium-format camera. Creative Cloud Lightroom subscribers can also take advantage of integration with Lightroom Mobile, making it possible to comment on and adjust photos remotely via the cloud. The Pentax Tethered Capture Plug-In is available now from Ricoh.


Press release:

Ricoh Imaging Delivers Tethered Capture to its Acclaimed PENTAX 645Z Camera

Highly requested software plug-in to enhance the PENTAX 645Z’s in-studio photo-shooting with Adobe® Lightroom® capabilities available today

DENVER, December 9, 2015 – Ricoh Imaging Americas Corporation today announced the immediate availability of the highly anticipated PENTAX Tethered Capture Plug-In for use with Adobe® Lightroom®. The software plug-in enhances the tethered capture capabilities of the PENTAX 645Z medium-format camera by enabling files to easily be uploaded into Adobe Lightroom during a studio session, where they can readily be viewed, shared and edited.

Adobe Lightroom is the digital photo processing and editing software favored by many professional and advanced amateur photographers, making the use of the new PENTAX Tethered Capture software both cost effective and efficient as there is no additional software package to purchase and learn. In addition, with the new capabilities of Lightroom Mobile, uploaded images may be viewed and adjusted by a photographer’s colleagues or clients from any remote location, anywhere in the world.

“Since Lightroom is already the de-facto standard for many photographers to edit and develop their images, this new plug-in is especially welcome. It makes studio use of the PENTAX 645Z camera easier, more efficient and, ultimately, faster than ever,” said Chris Knight, a New York-based portrait photographer. “Using Lightroom, I am able to quickly share photos with my clients, who are even able to view and comment from remote locations.”

Since its launch in June 2014, the PENTAX 645Z camera has been embraced by a wide range of photographers. The PENTAX Tethered Capture Plug-In is being offered to further enhance the user experience, and is a free option that can be downloaded starting today at: http://www.ricohimaging.co.jp/english/support/download_digital.html

Main Features

  • The PENTAX 645Z camera supports industry-standard Adobe DNG (Digital Negative) RAW files, which ensures optimal image quality. The in-camera DNG file format effectively eliminates any RAW file incompatibility issues, thus allowing the photographer to confidently import DNG RAW files during a tethered session.
  • Adobe Lightroom Creative Cloud users can use Lightroom Mobile to connect to tethered sessions via cloud services to comment and adjust photographs and return those edits to the photographer from anywhere in the world.
  • Adobe Lightroom offers an exceptional cataloging system that allows photographers to capture and catalog tethered sessions with confidence.
  • The PENTAX Tethered Capture Plug-in for Adobe Lightroom is an easy-to-install, powerful and streamlined tethering solution that allows any photographer to manage their own workflow from capture to output.
  • Adobe Lightroom users can download and apply presets to any tethered capture session thus eliminating the need to process every raw file individually.

Articles: Digital Photography Review (dpreview.com)

 
Comments Off on Lightroom plug-in for Pentax 645Z tethered shooting now available

Posted in Uncategorized


How to Reduce Editing Time by Automating Your Lightroom Workflow

09 Dec

Don’t you hate when you realize that you spend more time in front of the computer than actually taking photographs? The realization is even more depressing when you are a travel and landscape photographer and, by definition, you are supposed to travel and discover the world’s beauty.

Sunset Ride (San Francisco)

The Crisis

This is how I felt about 12 months ago during my second ever processing crisis as a photographer.

The first crisis happened about 10 years ago when I became more serious about photography, and started taking more photos. This was a time when 100% of my editing was done in Photoshop, which quickly led me to feel like I was drowning in gigabytes of digital images. What I did not realize at the time was that a majority of photographers who had switched to the digital realm, shared my pain.

This is when Adobe saved us all by releasing Lightroom, an application designed specifically for digital photographers. Lightroom not only offered non-destructive photo editing but a complete digital photography workflow with streamlined digital asset management as well.

I immediately embraced Lightroom by starting with the beta version, which allowed me to cut my photo editing time in half. With every new version, Lightroom became more sophisticated and versatile, almost completely replacing Photoshop in my workflow. After Adobe released Lightroom 6, I recognized that I could complete 90% of my processing in Lightroom, and my need for Photoshop was minimal (10%).

But, sophistication and versatility had its own price. Lightroom became much slower and its complexity skyrocketed.

Another factor that contributed to my second processing crisis was my switch from a Canon DSLR, to a Sony mirrorless. The new Sony camera (A6000) had a bigger sensor and produced much bigger file sizes, which slowed my editing down even more.

After a long trip to Hawaii, California, and the Southwest, I brought back more than 5,000 brand new photos. The process of Lightroom editing was slow and painful, making it obvious that I had to come up with the completely new workflow to reflect a higher volume of larger files.

Swallowtail Light (New Brunswick)

The Solution

I started by analyzing my Lightroom editing habits, and soon enough, I made a discovery that became the foundation for my new workflow. Perhaps less of a discovery and more like a simple realization, I noticed that 80% of my edits are identical for every single photo I process, with only 20% varying from photo to photo.

The solution was obvious. By automating the 80%, I could radically reduce the time I spend in front of the computer. The use of preset functionality in Lightroom was an obvious choice.

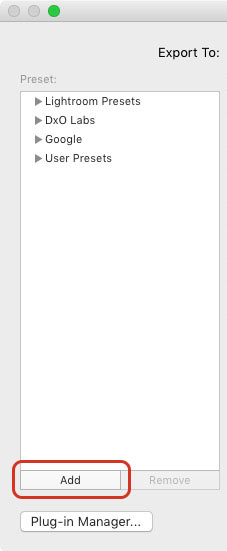
I dove into my Lightroom Portfolio Collection and selected the images that best reflected my personal style and artistic vision. I then created presets based on those selected photos.

At that point, I faced a challenge. As you have probably noticed, LR presets usually do not work out of the box; their settings are too specific for a particular photo to work with every image. Depending on the lighting condition of the scene, contrast level, shadow depth, and color saturation, the same preset can produce a completely different result across different images.

I managed to overcome this challenge by separating my presets into two categories, and using a two-level editing approach.

  • Level One: I use presets from a STYLE category, to define an artistic style or the “LOOK” in a photograph. For example: cool or warm, cross processed or natural, contrasted or soft.
  • Level Two: I use ADJUSTMENT presets to fine-tune a photo, compensating for the lighting of the scene, without changing the STYLE that I defined in the previous step.

Okay, enough theory, let’s get to the practical demonstration – here’s my new Lightroom editing workflow in action:

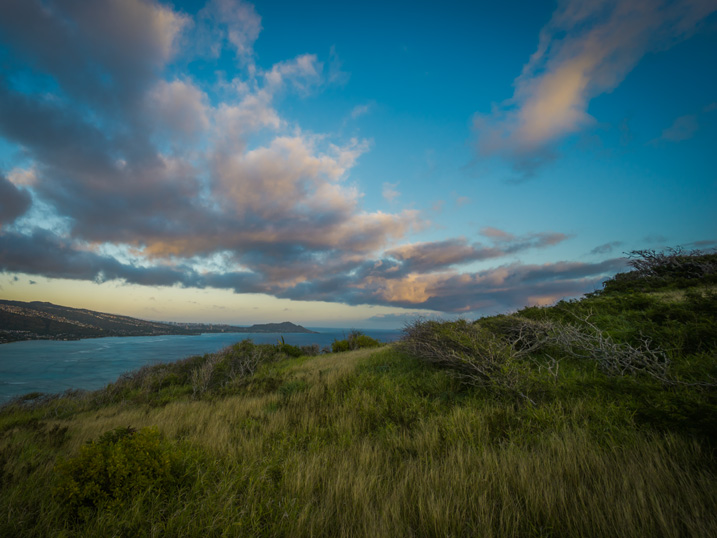
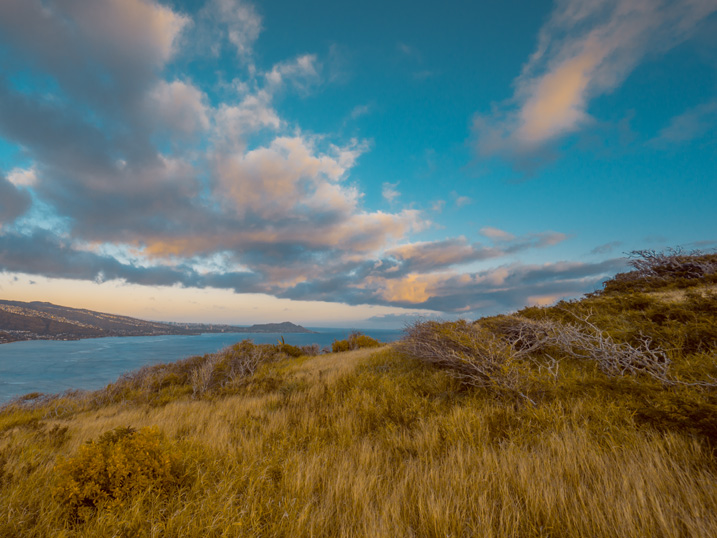
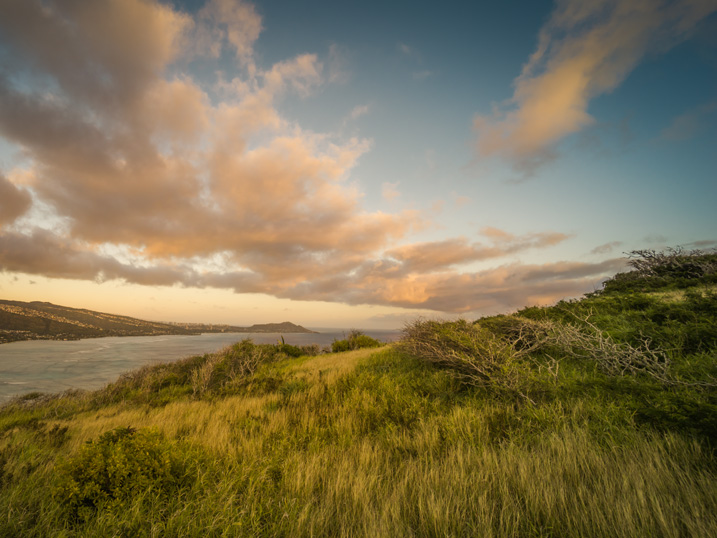
Here is a photo I took in Hawaii at sunrise. This is a typical landscape photo featuring the open sky and water, mountains, and foreground vegetation. In order to preserve the details in the highlights, I set the exposure for the sky area, as I normally do for the majority of landscapes. It resulted in an underexposed capture.

how_I_educed_my_photo_processing_time_in_half_03

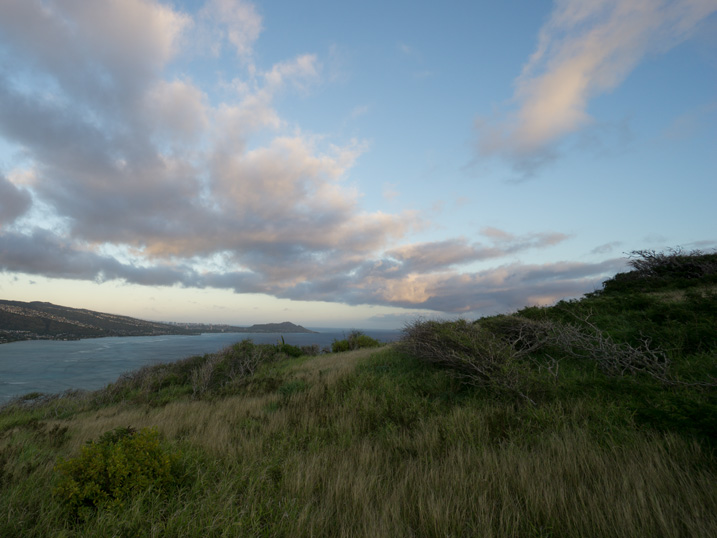
The goal here is to correct the exposure, recover the shadows, and bring back the rich colors of the tropical sunrise.
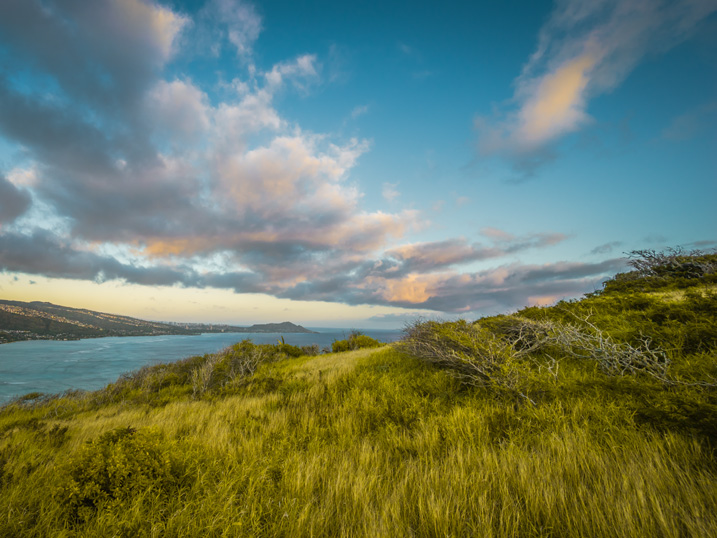
STEP ONE

I always start my landscape editing by trying to achieve a natural look first by applying the NATURAL preset from my STYLE collection.

how_I_educed_my_photo_processing_time_in_half_04

Even though I managed to boost the colors and define the sky, the result is far from exciting, as the photo is much too dark.
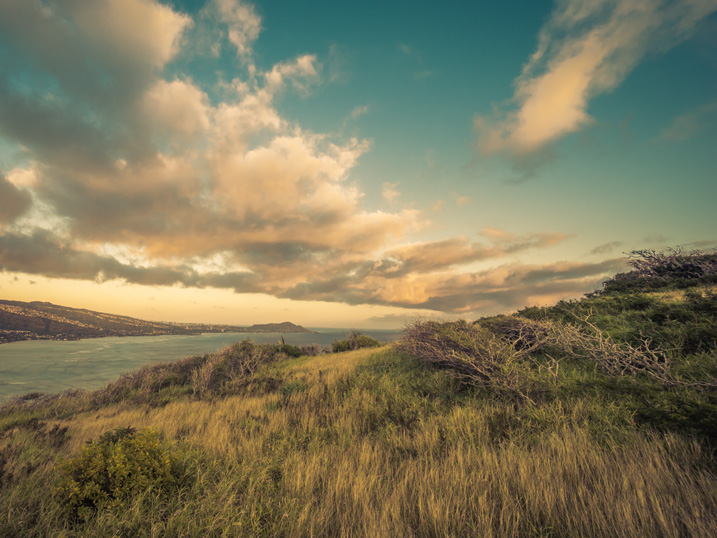
how_I_educed_my_photo_processing_time_in_half_05

STEP TWO

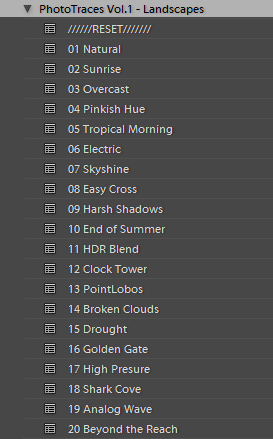
This is when my ADJUSTMENT collection, which I call the TOOLKIT, comes into play.

The TOOLKIT is a selection of 40 presets where each is responsible for changing only one specific parameter, without changing the style of the image. Together, they help to fine-tune different aspects of the photo.

how_I_educed_my_photo_processing_time_in_half_06

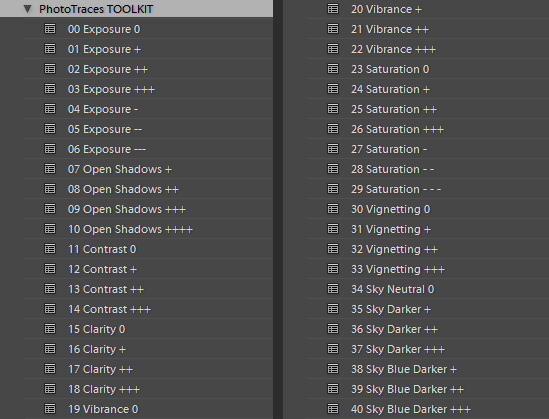
The TOOLKIT presets are stackable, which means that you can apply multiple presets to the image without the presets overwriting each other.

  • To make the image brighter, I apply preset 02. Exposure ++
  • To open up the shadows, I apply preset 10. Open Shadows +++
  • To increase the local contrast, I apply preset 17. Clarity ++

how_I_educed_my_photo_processing_time_in_half_07

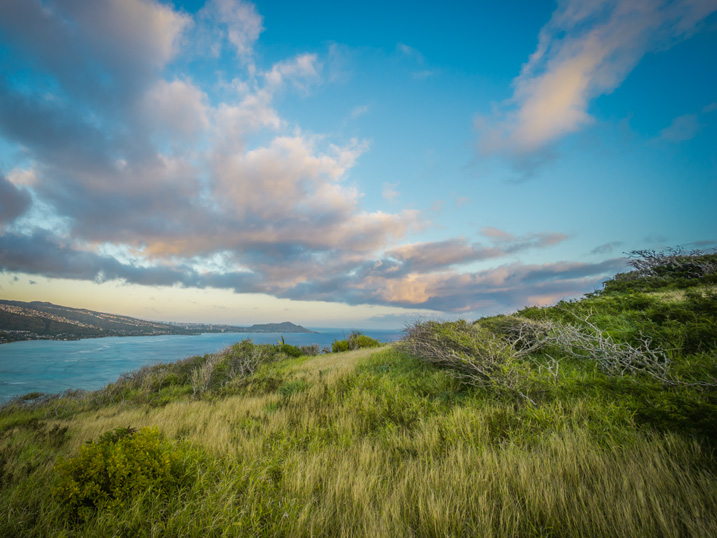
This is all I had to do. As you can see, I managed to complete 80% of my entire editing in five clicks, without touching the right panel of Lightroom where all of the editing tools are housed.

STEP THREE

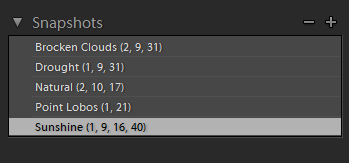
The last step is to record the editing steps. I use the Snapshot functionality of Lightroom to save my editing steps as a new Snapshot. For the name, I use “Lightroom Editing Formula”.

how_I_educed_my_photo_processing_time_in_half_08

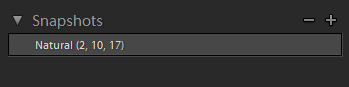
The Lightroom Editing Formula starts with the name of the preset and follows with the numbers inside the brackets, where each number represents a specific ADJUSTMENT preset from the TOOLKIT collection.

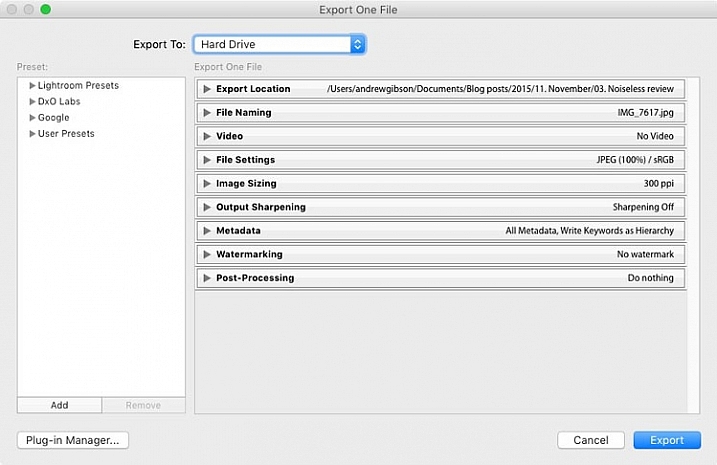
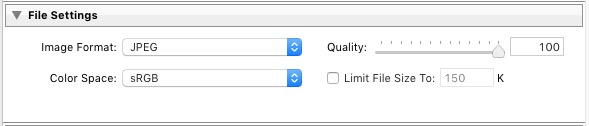
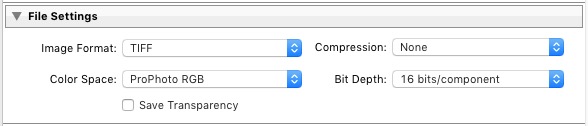
If I edit a photo for my blog, I might stop here and export it as a JPEG; but, if I am working on a portfolio piece, I try to explore a variety of artistic styles. I follow a similar approach by going through the three steps of my workflow, but each time select a different STYLE preset.

Every time I achieve a result I like, I save it as another Snapshot.

how_I_educed_my_photo_processing_time_in_half_09

By the time I am done, I might have anywhere from four to five different editing versions for the same image.

how_I_educed_my_photo_processing_time_in_half_11

how_I_educed_my_photo_processing_time_in_half_10

how_I_educed_my_photo_processing_time_in_half_12

how_I_educed_my_photo_processing_time_in_half_13

Here is the most exciting part; I get to select the most interesting version for my portfolio and perhaps another one for Instagram.

From here, I normally jump to Photoshop and perform the remaining 20% or so of the editing process. In Photoshop, I mostly clean up the image with the help of the Stamp Tool, and do noise reduction using Topaz DeNoise plugin.

Conclusion

The entire process of producing five different versions of the featured photo took me less than 10 minutes, and all without having to touch the main editing tools in Lightroom. I call it Lightroom Rapid Editing.

By streamlining and automating my Lightroom workflow, I managed to reduce the total editing time by more than half.

How can you use these tips to reduce your editing time? Do you have any other time savers you’d like to share? Please do so in the comments below.

googletag.cmd.push(function() {
tablet_slots.push( googletag.defineSlot( “/1005424/_dPSv4_tab-all-article-bottom_(300×250)”, [300, 250], “pb-ad-78623” ).addService( googletag.pubads() ) ); } );

googletag.cmd.push(function() {
mobile_slots.push( googletag.defineSlot( “/1005424/_dPSv4_mob-all-article-bottom_(300×250)”, [300, 250], “pb-ad-78158” ).addService( googletag.pubads() ) ); } );

The post How to Reduce Editing Time by Automating Your Lightroom Workflow by Viktor Elizarov appeared first on Digital Photography School.


Digital Photography School

 
Comments Off on How to Reduce Editing Time by Automating Your Lightroom Workflow

Posted in Photography


Lightroom Mobile for Android is now free to use

08 Dec

In October, Adobe released Lightroom 2.0 for iOS which, unlike previous versions, can be used as a stand-alone app on your Apple mobile device, without a paid subscription to the company’s Creative Cloud services. Apparently customer response to the move has been very positive and Adobe has decided to do the same with the Android version of the app. Read more

Articles: Digital Photography Review (dpreview.com)

 
Comments Off on Lightroom Mobile for Android is now free to use

Posted in Uncategorized


How to Identify Three Common Image Problems and Fix Them in Lightroom

06 Dec

I hear it over and over, “I have a nice camera but my pictures just don’t come out as good as I expect.”

What ensues is an interrogation first about equipment selection, settings, and general technique. More often than not when we finally get down to the nitty gritty, the fact is that many people not only have a difficult time identifying what’s wrong with their photos, let alone determining how to prevent it, or fix it in post-processing.

jumping through hoops

Common problems that plague your images might be able to be fixed, but you might have to jump through some hoops to do it.

Although there are two sides to this topic (one side being nailing the shot in-camera), we are going to take a look at some common image problems that might be plaguing your photos, and ways to fix them in post-processing. This may be helpful if you want to revisit images you have in your library that may be salvageable.

I’ll be referring to Lightroom (LR) as the post-processing software, although the general adjustments can be adapted for use in other software.

#1 Washed Out

The term washed out refers to a photo which seems to have been shot through a translucent fabric. There is a uniform haze which reduces color saturation, sharpness, clarity, and contrast. There are several factors that can contribute to your pictures being washed out. It could be anything from poor quality lenses, to ghosting from shooting directly into a light source (lens flare).

The good news is that with the features and power that we have in LR, this problem can often be overcome.

Let’s look at this photo of a beautiful wave, shot early in the morning. It was shot at 200mm with a 2x teleconverter (an effective focal length of 400mm). Teleconverters increase focal length, but are notorious for eating light, and reducing contrast and sharpness.

washed out image

Although teleconverters can wreak havoc on your images, all is not lost.

As you can see, the original shot is not very appealing. In an attempt to bring it back from the brink of unacceptability, I have made the following adjustments:

Basics panel

  • Contrast increased (+)
  • Highlights decreased (-)
  • Shadows decreased (-)
  • Whites increased (+)
  • Blacks decreased (-)
  • Clarity increased (+)
  • Vibrance increased (+)
  • Saturation increased slightly *+)

Tone Curve panel

  • Lights decreased
  • Darks decreased
  • Shadows increased

The trick here is to go back and forth between the different sliders that control darks and lights. For example, I will adjust the Highlights and Whites sliders, go to the Tone Curve panel and adjust the Highlights and Lights, then return to the Highlights and Whites again to fine tune how I want that end of the spectrum to look.

#2 Color or Tint

In my opinion, this is one of the strongest arguments for shooting in RAW format. Shooting in RAW allows you way more control correcting White Balance in post-processing, opposed to other file formats – and incorrect White Balance is the primary cause of off-colored images, or ones with a color tint.

If you haven’t developed an eye for identifying this problem, you might miss it. I see many really nice photos that have a slight tint, which is unintentional. The key is to look at areas of the image which are a neutral color, or white – this is where it is easiest to notice the off-color tint. Note that editing on a monitor which is not color calibrated may limit your ability to achieve correct White Balance.

incorrect white balance and tint

Sometimes noticing if an image has incorrect White Balance, or a color tint, can be tricky. I used LR’s White Balance eye dropper tool where the red square is (top image) – it got pretty close, but still a bit too magenta.

The first line of defence is to give LR’s Auto White Balance tool a shot. I find it to be somewhat inaccurate, but a good starting point nonetheless. Once activating the eye dropper tool, a pop-up window will show a magnified view to allow you to select pixels as close to a neutral color as possible.

From this point, you can use the White Balance and Tint sliders to fine tune the image. If there are people in the photo, your goal should be making the skin tones look as natural, and pleasing as possible.

#3 Too Much Variation in Contrast

Being confronted with a drastic contrast range is one of the most common problems you are likely to face in your shooting. After all, this is why many photographers are equipped with a polarizing filter, and why new camera models strive for an expanded dynamic range.

Luckily, you are not stuck with the image that you download onto your computer. If you are shooting in RAW there is a lot of information about details, color, etc., which you can exploit in post-processing.

Let’s take a look at this photo I snapped from inside a bookstore. It was pretty dark inside with the midday sun shining outside the window. Sure, I could have shot bracketed photos to merge into an HDR (high dynamic range) image, used a flash to balance the dark interior with the lighter exterior, or used a polarizer to darken the window portion of the scene. But I only had my camera with one lens, just grabbing some snapshots while out and about for the afternoon, so I didn’t have the means.

high contrast image

The camera struggled with this high contrast scene, but a little work in LR breathed new life into it.

So to what extent can this image be salvaged?

As you can see, the camera actually captured a lot of information, and it was just a matter of telling LR what to do with it. Here is a list of changes made to this image to give you an idea of how to do this yourself:

Basics panel

  • Contrast decreased slightly (-)
  • Highlights decreased (-)
  • Shadows increased (+)
  • Whites decreased (-)
  • Blacks decreased (-)
  • Clarity increased (+)
  • Vibrance increased slightly (+)
  • Saturation increased slightly (+)

Tone Curve panel

  • Highlights decreased
  • Lights decreased
  • Darks increased
  • Shadows decreased

Lastly, I used the Adjustment Brush to mask off the window portion and made these adjustments:

  • Exposure decreased (-)
  • Contrast increased (+)
  • Highlights increased (+)
  • Shadows decreased (-)
  • Clarity increased (+)

Conclusion

Of course, there are a host of other problems you can run into while out shooting, but these are a few of the most common you’re most likely to encounter. Don’t overlook the fact that you should try and get the best image possible while out in the field. Although editing software is very powerful, you will get best results when you don’t have to push the limitations of your editing software.

Hopefully this article has given you some guidance on how to salvage images that you may once have considered lost. Show us some examples of photos that you have saved in the comments below.

googletag.cmd.push(function() {
tablet_slots.push( googletag.defineSlot( “/1005424/_dPSv4_tab-all-article-bottom_(300×250)”, [300, 250], “pb-ad-78623” ).addService( googletag.pubads() ) ); } );

googletag.cmd.push(function() {
mobile_slots.push( googletag.defineSlot( “/1005424/_dPSv4_mob-all-article-bottom_(300×250)”, [300, 250], “pb-ad-78158” ).addService( googletag.pubads() ) ); } );

The post How to Identify Three Common Image Problems and Fix Them in Lightroom by Jeremie Schatz appeared first on Digital Photography School.


Digital Photography School

 
Comments Off on How to Identify Three Common Image Problems and Fix Them in Lightroom

Posted in Photography


5 Questions to Help You Make sure Your Photos are Safe Inside Lightroom

29 Nov

Lightroom quiz lead image

New Lightroom users often get into trouble because of a lack of understanding as to how Lightroom works. Unfortunately the result of these misunderstandings is often that their precious photos are lost, either permanently or temporarily. When you are new to Lightroom it can help if you understand some basics about how Lightroom works to ensure that your precious photos are safe.

Here’s a quick five question quiz to see if your photos are safe in your hands.

Question 1: True or False?

Lightroom stores a copy of your photos for you. When you delete a photo from Lightroom even if you opt to delete it from disk, the original is still safe.

What happens when you select to Delete from Disk in Lightroom

Answer: False

Lightroom simply keeps an record of where your images are on your hard disk. It does not actually store any images. So, if you remove a photo from Lightroom, and when prompted select Delete from Disk, then then you’re deleting the original of that image. If that was your only copy you’ll have deleted that forever.

Question 2: True or False?

You have deleted all the photos from a folder inside Lightroom. This means that there are no photos left in that folder so it’s safe for you to open Finder or Windows Explorer and delete the folder itself.

Is an empty folder in Lightroom really empty?

Answer: False

Lightroom can only handle photo and video file formats. Even if you delete all the photos and videos from a folder in Lightroom there may still be other files in that folder that Lightroom can’t handle, such as PDF files, Microsoft Word, Excel and Quicken files. You cannot know that a folder is empty of files unless you check it by opening it in Finder or Windows Explorer.

Question 3: True or False?

Your photos are safe because every time you see a prompt to backup Lightroom you always click to do so.

Does Lightroom backup your photos when you select to Backup?

Answer: False

When you choose to backup upon exiting Lightroom, all you’re doing is backing up the Lightroom catalog, NOT your photos. Your photos are never backed up by Lightroom, so you will need to set up some other routine for backing up your image files. Also note that, in most cases, Lightroom saves the catalog backup on the same drive as the original catalog is stored so, if your drive crashes, you’ll lose the original catalog and all backups – so make sure you change it to save the backup on an external drive. (Note: you can only do this in the dialog box above when it pops up)

Question 4: True or False?

When you make changes to a file in Lightroom those changes are written to the file so, if you open the file in Bridge, Photoshop or some other graphics program you will see the image as it was edited in Lightroom

Are edits always saved to your Lightroom files

Answer: Not necessarily True

Whether or not the changes that you make to a photo in Lightroom are written to the photo files will depend on how your Lightroom preferences are configured. Choose Lightroom > Catalog Settings (Edit > Catalog Settings, on the PC) and select the Metadata tab. There are two settings of concern here: Include Develop settings in metadata inside JPEG, TIFF, PNG, and PSD files and Automatically write changes into XMP – for the edits you make in Lightroom to be written to the files themselves, both checkboxes should be checked.

Question 5: True or False?

You have moved or renamed some folders on your drive which contain photos. When you next open Lightroom you see that Lightroom can’t find those photos any longer. You must now reimport those photos into Lightroom.

how to resolve issues where you changed files outside Lightroom

Answer: False

When you move or rename folders outside Lightroom it is true that Lightroom will report the images as missing. However, instead of importing the images again, you simply need to tell Lightroom where the images now reside. To do this, click the exclamation mark icon, and choose Locate. Navigate to the folder that you renamed or moved, and select the image that matches the one that was missing (you need to find the exact image that was marked as missing). Click the image, and make sure that the Find nearby missing photos checkbox is checked, then click Select. The Lightroom catalog will be updated with the new location of the image and any other images that are in close proximity to it.

Note: You can also do this by right-clicking on a missing folder in the left panel of the Library module. Then navigate to find the entire folder and relink it to Lightroom.

In future, it is best to move images and folders, as well as rename folders, inside Lightroom. Changes such as this, that you make inside Lightroom, are written to your drive automatically. The benefit is that when Lightroom makes the changes, it always knows where your photos are, and won’t report them as being missing.

How did you do?

If you answered any of these questions incorrectly, your lack of understanding of how Lightroom works might be putting your photos at risk. Spending some time learning how Lightroom operates will help you keep your photos safe.

Now if you got all these questions right and if you are a Lightroom expert – what questions would you ask of a new user to help them keep their photos safe? We invite you to pose these as True/False questions – but remember, to help folks out – you should give them the answer, as well as pointing them in the direction of keeping their photos safe.

googletag.cmd.push(function() {
tablet_slots.push( googletag.defineSlot( “/1005424/_dPSv4_tab-all-article-bottom_(300×250)”, [300, 250], “pb-ad-78623” ).addService( googletag.pubads() ) ); } );

googletag.cmd.push(function() {
mobile_slots.push( googletag.defineSlot( “/1005424/_dPSv4_mob-all-article-bottom_(300×250)”, [300, 250], “pb-ad-78158” ).addService( googletag.pubads() ) ); } );

The post 5 Questions to Help You Make sure Your Photos are Safe Inside Lightroom by Helen Bradley appeared first on Digital Photography School.


Digital Photography School

 
Comments Off on 5 Questions to Help You Make sure Your Photos are Safe Inside Lightroom

Posted in Photography


How to Save Images Using Export in Lightroom

26 Nov

Reader feedback tells me that some people are confused by Lightroom’s Export process. I think the confusion is caused by not completely understanding how Lightroom works, especially when processing Raw files. So let’s start by recapping the process that a single Raw file goes through when you import it into Lightroom.

How to export photos from Lightroom

1. Lightroom adds the Raw files to the Catalog

The Catalog is a database containing information about all the photo files you have imported into Lightroom (for further clarification on this process read my article How to Import Photos into Lightroom). Lightroom keeps track of the location (where it is saved on your hard drive) and metadata of each imported Raw file.

2. Open the Raw file in the Develop module and process the photo

The key thing to understand here that Lightroom keeps track of every single edit you make in the Develop module by storing them as a series of text commands in the Catalog. This means that (a) the Raw file itself remains unchanged and most importantly that (b) at this stage even though you can see it on your computer screen, you haven’t yet converted the Raw file into another format that other programs can use. This is where the Export function comes in.

JPEG and TIFF files

By the way, it’s a similar process if you are processing a JPEG or TIFF file. Lightroom saves the edits you make in the Lightroom Catalog, and doesn’t change the original file in any way. This only happens at the export stage, where you create a new version of the file that incorporates the changes. This is important to note, because it is different from the way Photoshop and Photoshop Elements work.

Exporting image files

All this means is that if you want to view or use your photos in a program other than Lightroom, you need to export them first and save them in a format that other programs understand.

There’s just one exception to this. If you go to Catalog Settings > Metadata and tick the Automatically write changes into XMP box, Lightroom will save the Develop settings in a .xmp file in the same folder as the original file. These files can be opened successfully using Adobe Camera Raw in Photoshop.

Note: Export in Lightroom simply means: Save As! Just like in MS Word or any other program. 

The Export process

Now that you understand why you have to export photos, let’s see how to do it.

Start by selecting the photo, or photos, to be exported. It is easiest to do this in Grid View. Then go to File > Export to start the export process and bring up the Export window. This is what it looks like.

How to export photos from Lightroom

The Export to menu at the top defaults to Hard Drive. You can also choose to export the photos as email attachments, burn them to a CD/DVD or export them to a plug-in. For this article I am going to work on the basis that you have selected Hard Drive. The settings change slightly if you choose one of the other options.

Export Location

This is where you tell Lightroom where to save the exported files. Select “Ask what to do” or “Choose a new name” for the exported file from the Existing Files menu, to avoid accidentally overwriting existing files with the same name. Tick the Add to This Catalog box if you want to add the exported images to the Lightroom Catalog. This saves time that would otherwise be spent re-importing the new images.

How to export photos from Lightroom

File Naming

When exporting you can opt to keep the original file names, or create new ones. What you choose to do here depends partially on whether you created new file names at import, or kept the original names made by your camera. The most obvious use here is creating a naming format for images to be sent to clients. If you are exporting photos to send to a stock library, for example, the stock library will have its own file naming requirements that you need to stick to. You have the option of selecting one of Lightroom’s naming presets, or you can create your own by choosing Edit from the Rename To menu.

How to export photos from Lightroom

Video

Only applies if you are exporting video.

File Settings

This is where you select the format, quality, and colour space of exported files. It is important to get these settings correct, otherwise you risk creating files that are unsuitable for the intended purpose. There are five Image Format options to choose from:

JPEG: This format is for creating small files for sending to other people or uploading to websites.

For web use: Set Quality to between 60 and 80 and Color Space to sRGB. You may also wish to tick the Limit File Size box to ensure that files are below a certain size. If you are exporting photos to use on a web page, restricting file sizes to less than 150kb will help the page load faster in a browser. You also need to set the pixel size of the exported files under the Image Sizing heading.

For full size images: Set Quality to 100 and Color Space to sRGB. You should only select a Color Space other than sRGB if you instructions to do so (for example, you are sending the files to a magazine publisher who wants them in the AdobeRGB (1998) colour space).

How to export photos from Lightroom

PSD: This is for creating PSD files to work on in Photoshop. For maximum quality set Color Space to ProPhoto RGB and Bit Depth to 16 bits/component. This gives Photoshop all the available information for that image, and the highest quality possible.

How to export photos from Lightroom

TIFF: These files are large, 16 bit files similar to PSD files. For maximum quality set Compression to None, Color Space to ProPhoto RGB and Bit Depth to 16 bits/component. The assumption here is that you are creating the file to work on in Photoshop or another plug-in.

How to export photos from Lightroom

Note that the reason I recommend using ProPhoto RGB for both TIFF and PSD files is because I’m making the assumption that when you’re finished editing the photo you will then convert it to either sRGB or AdobeRGB (1998) afterwards. If you’re not sure what colour spaces are or how they work then my article Everything You Need to Know About Lightroom and Colour Space will help.

DNG: Use this setting to convert native Raw files to the DNG (Digital Negative) format. Tick the Embed Fast Load Data box to create DNG files that load faster in Lightroom.

How to export photos from Lightroom

Original: Retains the original photo file format. If the original is a Raw file, Lightroom exports the unmodified original, with a sidecar .XMP file containing the changes made in Lightroom.

How to export photos from Lightroom

Image Sizing

This option lets you alter the size of the image and set the resolution. Use this to upscale the photo for printing, or to create a smaller file for uploading to a website. If you simply want to export a full size version of your photo, you won’t need to alter any settings here.

How to export photos from Lightroom

Output Sharpening

Lets you add sharpening for display (Screen) or printing (Matte Paper and Glossy Paper). Select from three levels: Low, Standard and High. There is no need to sharpen if you are exporting photos to edit in another program such as Photoshop.

How to export photos from Lightroom

Metadata

Here you choose whether to include all metadata in the exported image, or just some of it. You may want to leave out Person Info (keywords that include people’s names) for privacy reasons, and Location Info for security or privacy reasons (for example, if you post a photo of your home online).

How to export photos from Lightroom

Watermark

Tick the Watermark box to add a watermark to your images. Select Edit Watermarks from the menu to create your own watermark. The main purpose of this is to add a copyright logo to photos that are going to be published online.

How to export photos from Lightroom

Post-Processing

Tell Lightroom what to do after exporting the images. Do Nothing is the most appropriate setting most of the time, but you may find the other options useful from time to time.

How to export photos from Lightroom

Export Presets

If you find yourself using the same export settings a lot, you can save them as a User Preset. Click the Add button in the bottom left corner of the Export window to do so. You’ll be prompted to enter a name for the Preset, and to select the folder to save it in (the default is User Presets).

How to export photos from Lightroom

As you can see, the export process in Lightroom is quite simple. If you have any questions about it, or indeed any questions about Lightroom, please let us know in the comments.


The Mastering Lightroom CollectionMastering Lightroom ebooks

My Mastering Lightroom ebooks will help you get the most out of Lightroom. They cover every aspect of the software from the Library module through to creating beautiful images in the Develop module. Click the link to learn more or buy.

googletag.cmd.push(function() {
tablet_slots.push( googletag.defineSlot( “/1005424/_dPSv4_tab-all-article-bottom_(300×250)”, [300, 250], “pb-ad-78623” ).addService( googletag.pubads() ) ); } );

googletag.cmd.push(function() {
mobile_slots.push( googletag.defineSlot( “/1005424/_dPSv4_mob-all-article-bottom_(300×250)”, [300, 250], “pb-ad-78158” ).addService( googletag.pubads() ) ); } );

The post How to Save Images Using Export in Lightroom by Andrew S. Gibson appeared first on Digital Photography School.


Digital Photography School

 
Comments Off on How to Save Images Using Export in Lightroom

Posted in Photography