RSS
 

Posts Tagged ‘lightroom’

Understanding the HSL Panel in Lightroom for Beginners

02 Mar

Understanding the HSLPanel for Beginners

There are many things involved in post-processing an image, that might seem a little bit daunting at first. That doesn’t mean that they are difficult to learn, or hard to understand. The HSL panel in Adobe Lightroom (or similar editing software that uses Adobe Camera Raw), tends to bring about feelings of anxiety, when it comes to making sense of all those sliders. Some photographers choose to pretend it doesn’t even exist, just because it looks a little complicated. Nothing could be further from the truth!

Simply put, those three little letters stand for Hue-Saturation-Luminance. What makes the HSL panel so powerful, is that it allows you to control different colors independently. HSL adjustments will enable you to brighten, or emphasize specific saturations, and control the hue of only certain colors. Like working with black and white? Then you should definitely make use of the HSL panel, and take your black and white conversions to a whole new level. Let’s get started!

HSL Dropdown

We’ve already talked about what the letter HSL stand for, so now let’s break it down, so that you will really understand how each one affects your image.

H – What is hue?

Admittedly, trying to discern the functional difference between the words hue and color, can form a little bit of a gray area (haha color humor). But generally, we think of hue in terms of the shade of a color on a gradient and is dependant on the wavelength of the light reflected. Don’t worry, that’s about as scientific as we will get.

Let’s say that I see a flower out in a field. The flower has beautiful yellow petals. What shade of yellow are the petals? Are they actually yellow, or are they maybe a dark yellow with a little bit of orange? Maybe a brighter, more greenish yellow? This subtle gradient of color is what we might describe as hue, and it varies infinitely across the color wheel. Controlling the hue of the colors in your image is a great way to bring realism to your photo, or even depart from it using psychedelic alternatives to the actual colors within the scene.

S – What is saturation?

Saturation is much simpler to comprehend. When we talk about saturation, we are referring to the intensity of a color. Saturation can play a central role in controlling the mood of a photograph. Highly saturated colors generally convey brighter emotions, whereas muted, desaturated color can lend a sense of brooding or sadness. What the HSL panel allows you to do is control the saturation of only the colors you choose, which will really expand your creative range.

L – What is luminance?

This may very well be the most easy part about HSL to understand, and requires the least amount of explaining. Luminance is simply the reflective brightness of colors. It is extremely useful when there are certain colors within the image that you feel should be either darker, or brighter. This comes in handy, especially when working with black and white images (converted from color), but more on that in just a moment.

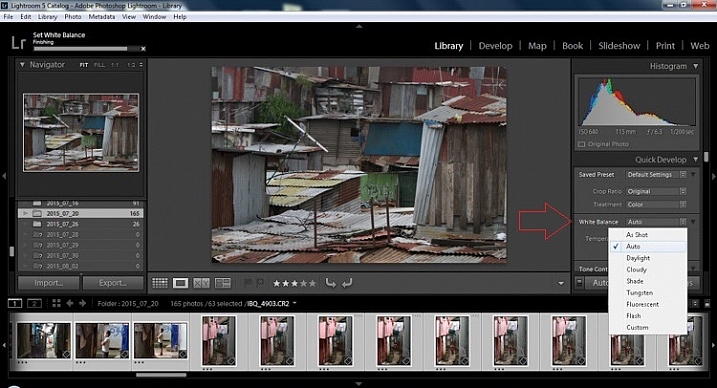
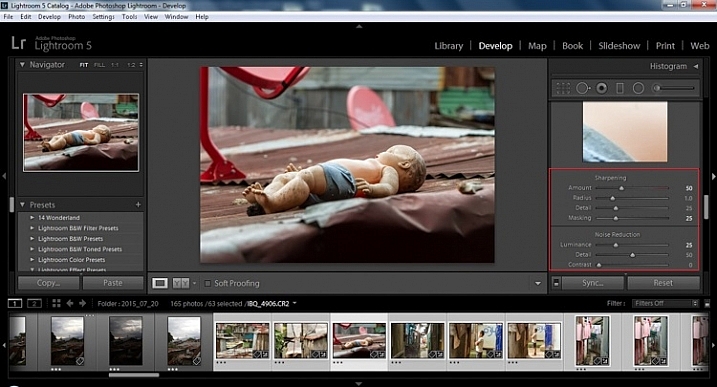
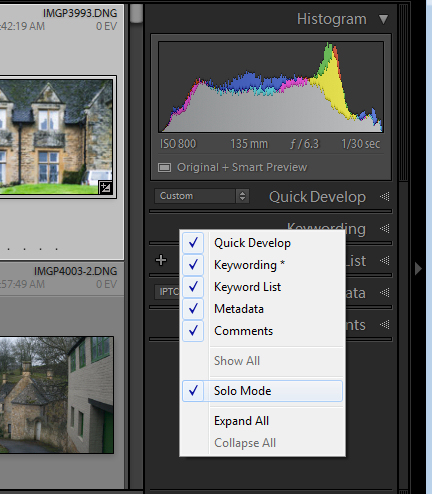
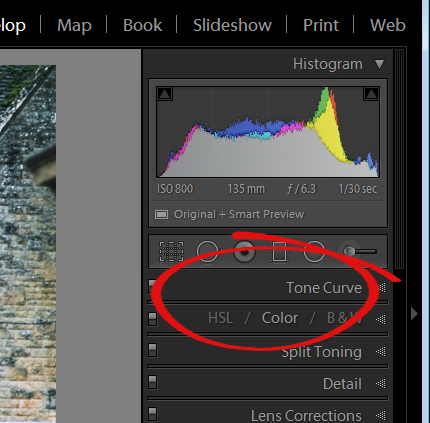
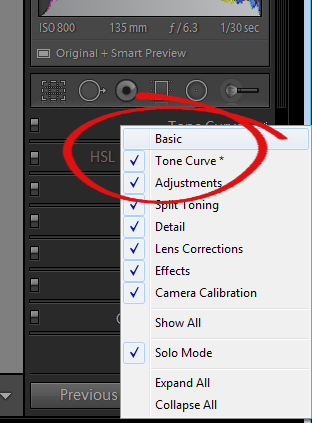
There are a couple of ways to configure the HSL panel, but I prefer to leave each adjustment section open while I work. True, it takes up a fair amount of space in the develop module, but it also let’s me make quick adjustments as I go without switching back and forth between the dedicated hue, saturation, and luminance panels.

HSL All

Adjusting specific saturations

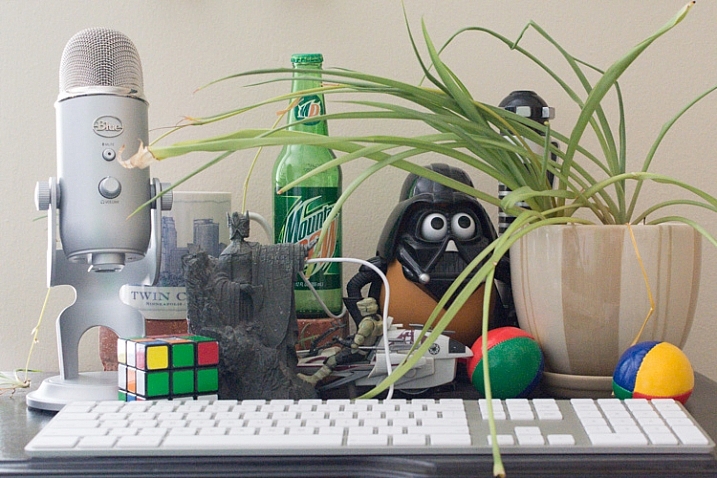
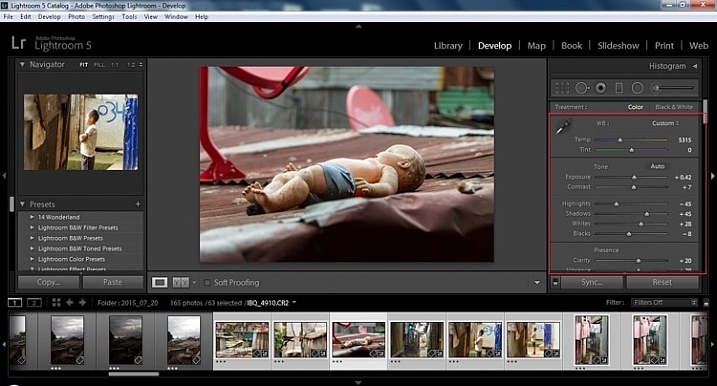
Let’s say you have an image that you want to bring out only certain colors. You can do this by using the saturation slider. An easy way to select the color you want to adjust, is by using the color picker. It eliminates the guesswork of deciding what color is actually which. In this case I want to increase the saturation, brightness, and hue of the leaves, without affecting the blues of the background.

Original Image

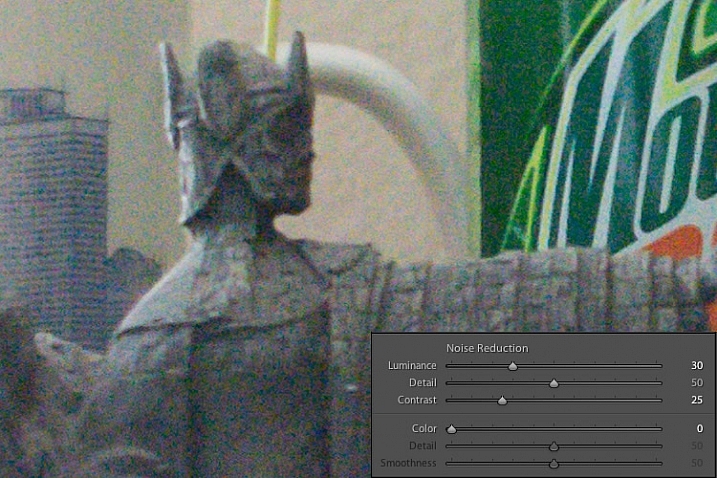
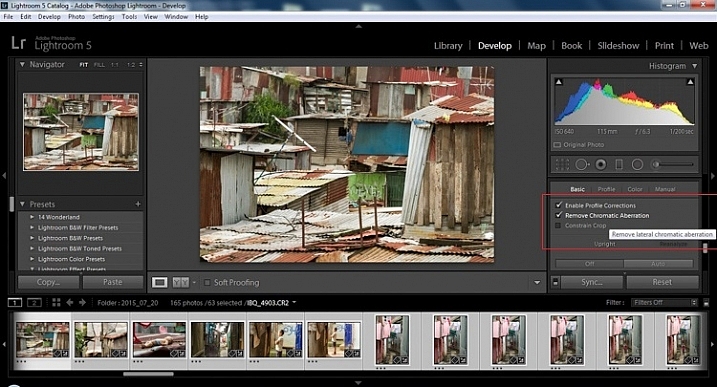
Find the saturation section of the HSL panel, and select the picker tool (see red arrow below to locate it).

Color Picker

Hover over the color you want to saturate or desaturate. Notice that this will subtly highlight the corresponding color values in the saturation section of the HSL panel. Then simply click and hold while you drag up or down.

Saturation Image

The change here is barely perceptible for the time being, but after some more adjustments, it will be obvious.

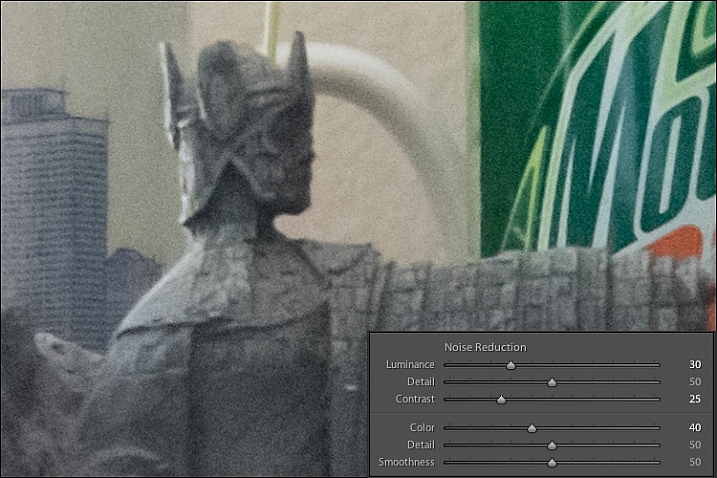
Adjusting specific luminance

Next, we will make the leaves a little bit brighter, so that they stand out from the blue background even more. They mainly consist of oranges and yellows. Go to the luminance section, and again select the color picker tool. This time it will control the brightness of the selected color.

Click and drag (up to lighten, down to darken).

Luminance Image

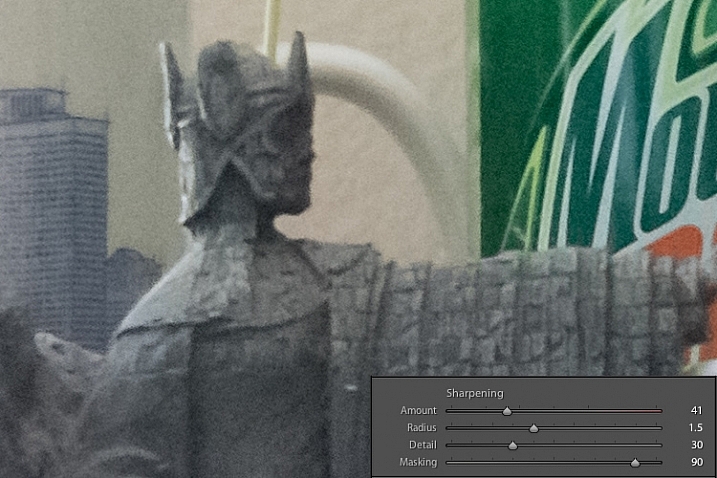
Adjusting specific hues

I like saving the hue adjustments for last, because it’s easier (for me at least) to decide the final color tone, after it has reached the desired brightness and saturation. For this picture, I want to make the leaves more orange than yellow in hue. As above, locate the hue adjustment section and the color picker and then…you guessed it, click and drag.

Hue Image

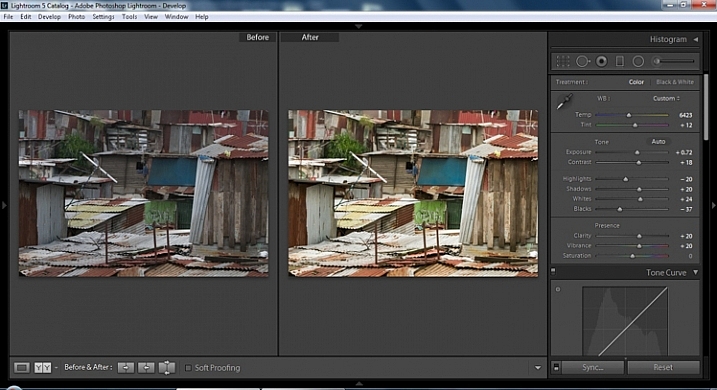
After you finish, make sure to go back and perform any fine tuning using the sliders, in order to get everything just right.
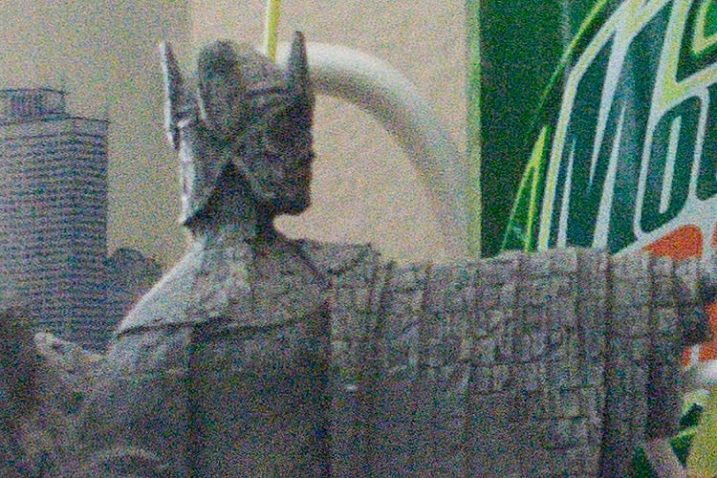
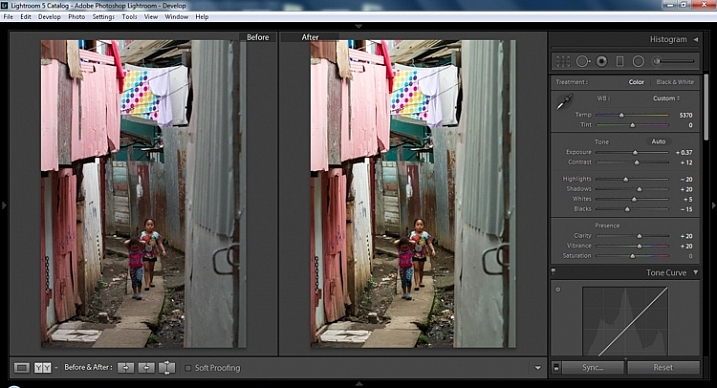
Original Image

Before adjustments

Final Image

After – final image

HSL with Black and White

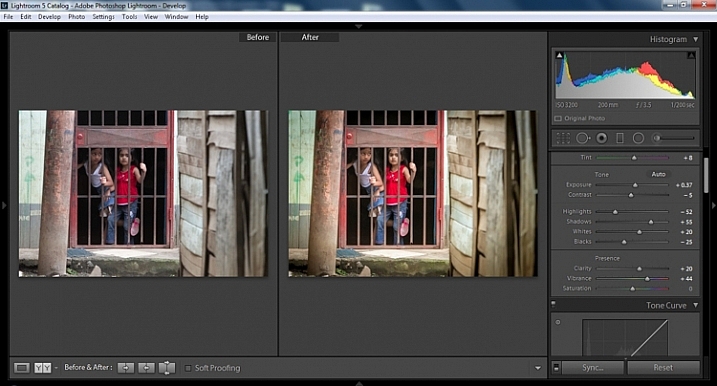
When it comes to black and white, the HSL panel can work wonders. Of course, seeing as the image is black and white, there won’t be any effect on the hue or saturation of the colors. Rather, Lightroom gives you a completely different set of controls, which is virtually a stand-alone luminance adjustment panel.

BW Panel

Even though you are working with a monochromatic image, the color information is still stored, so the program knows what color was there, before the conversion to black and white. Keep in mind, this does not apply to images shot in non-RAW format (like JPG) using your camera’s black and white setting, or images which you previously converted to grayscale in Photoshop. Doing so removes all the color information from the image file, making the option for working with individual color luminance in Lightroom unavailable.

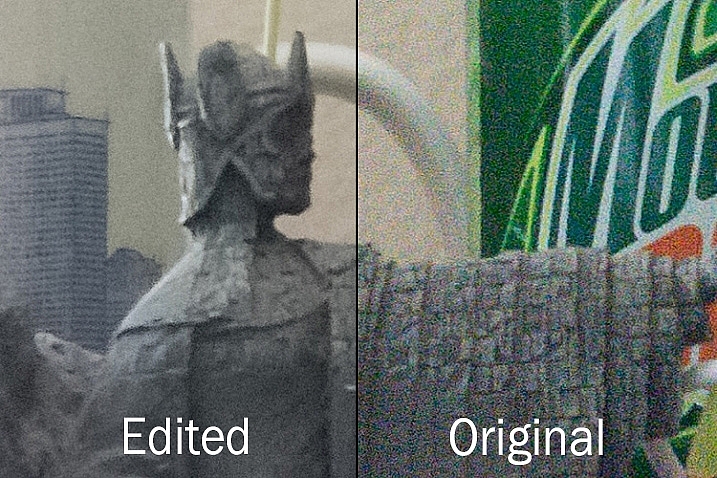
By being able to selectively adjust the brightness of each color, you will now be possible to adjust the luminance of your black and whites very creatively. This way, you can really control the contrast and mood of your image much better and easier. Adjusting the luminance of certain colors, within a converted black and white image, can drastically change the way the photo appears to the viewer. Here is color image after being converted to black and white.

Black and White

Here you see the same image, after some selective adjustments in the black and white section of the HSL panel.

HSL Black and White 2

Working with the HSL panel may look overwhelming, but once you understand how each adjustment affects your photo, it becomes a lot less scary. By being able to adjust the hue, saturation, and luminance of colors, independently of one another, will allow to take a huge amount of creative control over your post-processing. Don’t be reluctant to experiment with HSL and have fun with your photography!

Have you used the HSL panel before? What other tips or tricks to you have for using it? Please share in the comments below.

googletag.cmd.push(function() {
tablet_slots.push( googletag.defineSlot( “/1005424/_dPSv4_tab-all-article-bottom_(300×250)”, [300, 250], “pb-ad-78623” ).addService( googletag.pubads() ) ); } );

googletag.cmd.push(function() {
mobile_slots.push( googletag.defineSlot( “/1005424/_dPSv4_mob-all-article-bottom_(300×250)”, [300, 250], “pb-ad-78158” ).addService( googletag.pubads() ) ); } );

The post Understanding the HSL Panel in Lightroom for Beginners by Adeel Gondal appeared first on Digital Photography School.


Digital Photography School

 
Comments Off on Understanding the HSL Panel in Lightroom for Beginners

Posted in Photography


Tips for Removing Digital Noise in Lightroom

17 Feb

One of the most significant advantages that modern cameras have over their film-based counterparts of days gone, by is their ability to change how sensitive they are to light with the touch of a button.

Back in the days of film you had to decide ahead of time whether you wanted to shoot at ISO (then called ASA) 100, 200, 400, or in extreme cases, 800. If you were going to take pictures outdoors, a roll of 24 or 36 exposure, 100 or 200 film would work fine, but woe betide the unsuspecting photographer who wandered inside a dimly-lit building with that same film still in his or her camera. To change sensitivity, and shoot in the new lighting conditions, you had to shoot the rest of the pictures on a given roll of film, remove it from your camera, and hope you brought some ASA 400 or 800 film with you.

Nowadays you just spin a dial on your camera to instantly switch between ISO values like 100 or 200, that work great in broad daylight, to ultra-high values like 6400 or 12,800, that would be positively unthinkable with film. It’s not all sunshine and roses though as one of the biggest issues with high ISO values is that of digital noise. Even the newest cameras produce pictures with noise and grain when shooting at high ISO values, but thankfully Lightroom can help mitigate some of the effects of this noise.

Shot at ISO 5000, the original image was too noisy for practical use. Lightroom enabled me to clean things up significantly.

Shot at ISO 5000, the original image was too noisy for practical use. Lightroom enabled me to clean things up significantly.

To get started with the noise reduction options click on the Develop module, then find the Detail panel on the right side. Note: this process works best if you shoot in RAW, not JPG.

You will find several options that can seem a bit confusing and overwhelming at first. You can experiment all you want, by just moving the sliders around to see what effects they have on your pictures, but it also helps to examine each one individually, to know precisely what they do. You will also see the Sharpening options, which are related to noise reduction, but I’m not going to focus on them specifically just yet. Before you look at the sliders themselves in the noise reduction area, it’s important to understand the two types of noise that are produced when taking a picture, Luminance and Chroma.

lightroom-noise-reduction-develop-panel

Luminance noise

This kind of noise affects the brightness, but not the color, of individual pixels. If you had a picture of a dark grey piece of paper with a great deal of luminance noise it would appear similar to old-school television static with lots of light and dark fuzz.

Chroma noise

This shows up as oddly-colored pixels, scattered throughout an image, almost like someone has tossed a handful of red, blue, and green grains of sand at it. Lightroom calls this “Color” noise, but it’s just another term for Chroma noise.

Both types of noise are byproducts of how digital image sensors capture data, and while they can be corrected somewhat in Lightroom and other post-processing software, it’s almost impossible to completely remove noise from a picture while still ending up with a usable image. Lightroom does give you some tools to get your digital noise under control, and if you know what you’re doing you can get some fairly decent results. Using separate controls for luminance and chroma noise, in combination with some sharpening adjustments, can help you salvage what you may think is a useless picture. As an example, here’s a picture that I took at ISO 6400, without any noise reduction applied.

35mm, f/5.6, 1/60 second, ISO 6400

35mm, f/5.6, 1/60 second, ISO 6400

Not bad, right? If this is what ISO 6400 looks like, you might as well shoot like this all day long! Well, before you go and spin your ISO dial all the way up to Ludicrous Mode, you might want to take a look at the same 24-megapixel image zoomed in to 100%.

lightroom-noise-reduction-scene-no-noise-reduction-100-percent

Ow, my eyes! The noise, it hurts! Not only is the picture full of color blotches, but shooting at ISO 6400 has resulted in an image that is far less sharp than it could be at a lower ISO. A great deal of color noise is evident on the torso of the figure, as well as the slanted lines on the left side, and you can see lots of luminance noise in the green letters on the right side too.

This noise is not always visible when you shrink  your files down to share online, but if I were to print this picture it would look like my cat threw up on the paper. Lightroom can help us fix things, and a good place to start, in this case, is with the luminance slider at a value of 30.

lightroom-noise-reduction-scene-luma-noise-reduction-100-percent

Much of the black and white static has been removed, but there are still splotchy patches of color scattered throughout the image, which can dealt with using the color slider next. Before you start thinking that this is a magical cure-all for your noisy images, take a closer look at the picture. Much of the details have been lost, or blurred, such as the lines on the side, and the patchwork of the figure’s tunic.

You can mitigate these effects somewhat by using the detail and contrast sliders, but again the results are not going to be ideal. Detail acts as sort of a threshold control, allowing you to tell Lightroom what should be treated as noise and what should be left in. I usually leave this slider at 50 but you can experiment with it to get the results you need. The contrast slider helps bring back some of the edges that have gotten blurry, thanks to the noise reduction algorithm, and even though I have set it to 25 in this example, you can clearly see that much of the edge contrast is not as good as the noisy original. Move this slider too far though, and your photo will start looking fake and artificial, so you’ll have to find a good balance depending on your needs.

To continue with the noise reduction, the color slider can be used to get rid of the weird splotches of red, green, and blue, but again you are going to see some tradeoffs.

lightroom-noise-reduction-scene-chroma-noise-reduction-100-percent

The results look fine at first, and you may notice that Lightroom automatically applies some degree of Color noise reduction (value 25) to every photo by default. This is because low-grade Color noise reduction is almost always good to have, and generally won’t result in too many tradeoffs for the image as a whole. In this case I used a value of 40, to show the effects a bit more. Even though the result is decent, you might notice something else that’s missing, if you look at the soda bottle label on the right-hand side. Compare it to the original picture and you will see that along with removing some of the color noise Lightroom has actually removed some color from the whole photo.

The Detail slider slider, similar to its counterpart in Luminance noise reduction, acts as somewhat of a threshold so you can tell Lightroom what is, and is not, noise to remove. The Smoothness slider is a fairly recent addition to Lightroom, and can be used to control what’s known as “low-frequency” color noise. Basically, slide it to the right to remove larger splotches of noise or to the left to keep these more intact.

Every time you use Lightroom’s noise reduction tools you will deal with tradeoffs, and one of the most significant of these is the overall sharpness of the image. Photos with more noise reduction will almost always be softer, particularly where there are sharp contrasting edges, and you can bring a bit of this back by using the sharpening tools.

Here’s yet another 100% crop of the image above with the same noise reduction employed in the previous image, but with added sharpening.

lightroom-noise-reduction-scene-sharpened-100-percent

After a bit of sharpening, the detail in the lines on the left side has returned, and so has the texture of the tunic, but the lower-left corner is still a muddy mess of grey, whereas in the original noisy picture it was more defined. Here’s both the original and edited image side-by-side which might help you get a macro view of how these noise reduction and sharpening tools can affect a picture.

lightroom-noise-reduction-scene-both

At first glance you might not notice too many differences, but one of the most glaring problems with the edited picture is the complete lack of texture on the wall behind the scene, as well as a smoothness to the plant that is almost unnatural. Here’s a side-by-side zoomed in to 100%.

lightroom-noise-reduction-scene-no-noise-reduction-100-percent-before-after

Is it worth these tradeoffs to get a photo with less noise? That question can only be answered by you, but one rule of thumb I like to follow, is that a noisy image can be corrected and edited in postproduction, albeit somewhat imperfectly. A blurry image cannot be fixed.

So, if there is a situation in which I find myself having to choose between a faster shutter speed and higher ISO (i.e. more noise), or a slower shutter speed and lower ISO (i.e. less noise) I’ll usually err on the side of noise, if the slower shutter speed would result in an image that is too blurry.

I also make liberal use of my camera’s auto-ISO feature, which allows me to set a minimum shutter speed and a maximum ISO value. That way I can concentrate on adjusting the aperture to get the composition I want, and always know that my pictures will be free of blur, even if does mean there will be a bit of noise I have to clean up in Lightroom.

The light here was quite dim which required a high ISO value. I didn't mind a slightly noisy image that was sharp and in focus, because I was able to get rid of most of the noise in Lightroom.

The light here was quite dim, which required a high ISO value. I didn’t mind a slightly noisy image that was sharp and in focus, because I was able to get rid of most of the noise in Lightroom.

One final note worth mentioning is you can also use Lightroom’s local adjustments like the Radial Filter, Graduated Filter, and Adjustment Brush to apply noise reduction in specific areas of an image only. However, this is a bit limited, in that these adjustments only perform luminance noise reduction, so you might still be left with some ugly colored spots, that can only be removed using the global adjustments in the detail panel of the develop module.

What are some of your favorite tips and tricks for removing noise? I’d be interested to hear any thoughts you have in the comments section below.

googletag.cmd.push(function() {
tablet_slots.push( googletag.defineSlot( “/1005424/_dPSv4_tab-all-article-bottom_(300×250)”, [300, 250], “pb-ad-78623” ).addService( googletag.pubads() ) ); } );

googletag.cmd.push(function() {
mobile_slots.push( googletag.defineSlot( “/1005424/_dPSv4_mob-all-article-bottom_(300×250)”, [300, 250], “pb-ad-78158” ).addService( googletag.pubads() ) ); } );

The post Tips for Removing Digital Noise in Lightroom by Simon Ringsmuth appeared first on Digital Photography School.


Digital Photography School

 
Comments Off on Tips for Removing Digital Noise in Lightroom

Posted in Photography


40+ Free & Premium Lightroom Presets You Shouldn’t Miss

11 Feb

Presets can be a Lightroom user’s best friend. When you are editing hundreds or thousands of photos any time you can save in post processing is extremely valuable. Making use of presets is one of the best ways to streamline your workflow and save time in the editing process. You can either create your own presets, download free presets, or Continue Reading

The post 40+ Free & Premium Lightroom Presets You Shouldn’t Miss appeared first on Photodoto.


Photodoto

 
Comments Off on 40+ Free & Premium Lightroom Presets You Shouldn’t Miss

Posted in Photography


Adobe Lightroom CC 2015.4, Lightroom 6.4 and ACR 9.4 now available for download

28 Jan

Adobe has made updates available to its subscription and standalone Lightroom applications as well as Camera Raw. The updates bring with it a feature called ‘Boundary Warp,’ a tool that helps to straighten the curved edges of stitched panoramas so that the image is rectangular. Lightroom CC 2015.4, Lightroom 6.4 and ACR 9.4 bring support for Fujifilm’s newly announced X-system cameras, including the Fujifilm X-Pro2 and X70, as well as bug fixes – see the details below.


New Camera Support in Lightroom CC 2015.4 / 6.4

  • Fujifilm X70
  • Fujifilm X-E2S
  • Fujifilm X-Pro2
  • Leica M (Typ 262)
  • Leica X-U (Typ 113)
  • Panasonic DMC-ZS60 (DMC-TZ80, DMC-TZ81, DMC-TZ85)
  • Phase One IQ150
  • Sony ILCA-68 (A68)

Additional Updates in Lightroom CC 2015.4 / 6.4

  • Nikon 1 J4 Camera Matching Profile added
  • The panorama merging process should complete roughly twice as fast as Lightroom 6.3
  • Improved quality when applying Auto Straighten and Upright “Level” mode
  • A preference was added to the Mac to prevent accidental “speed swiping”
  • Metadata is added to merged panoramas to support Photoshop’s Adaptive Wide Angle filter
  • Customers can now set the location of where photos are stored when downloaded from Lightroom mobile or Lightroom web in the preference panel or contextually in the folder panel
  • Thumbnails update much quicker when copying and pasting settings in the grid view
  • Images load faster in the Library module when you are zoomed in and navigating images
  • Tethered support added for the Nikon D5500 and Nikon D7200

Fixed Bugs

  • Auto Sync of some settings failed when using smart previews
  • Lightroom would ignore model-specific custom default settings for some cameras, including some Leica and Sony models.
  • Crop resets to image bounds when adjusting rotation via slider
  • In Lights Out mode, an image would “disappear” if a customer uses the Undo functionality
  • SIGMA 50mm f1.4 ART lens was incorrectly identified as Zeiss Milvus 50mm f1.4
  • Soft Proofing RGB readout values differed for same file between 5.7.1 and 6.x
  • Import from iPhoto would result in all photos receiving a “pick” flag
  • Comments from Lightroom web come in to Lightroom on the desktop as already “read.”
  • Lightroom would not display the correct EXIF metadata for some video files generated by Canon, Fuji and Panasonic cameras
  • Vertical panoramas created using Merge could appear with the wrong orientation
  • The video cache did not respect the maximum size specified in the preferences
  • Customers experienced issues importing video files in some scenarios
  • Tethering Nikon cameras on Mac OS X 10.11 (El Capitan) did not work properly
  • Installation Instructions

New Camera Support in Camera Raw 9.4

  • Fujifilm X70
  • Fujifilm X-E2S
  • Fujifilm X-Pro2
  • Leica M (Typ 262)
  • Leica X-U (Typ 113)
  • Panasonic DMC-ZS60 (DMC-TZ80, DMC-TZ81, DMC-TZ85)
  • Phase One IQ150
  • Sony ILCA-68 (A68)

Additional Updates in Camera Raw 9.4

  • Nikon 1 J4 Camera matching profile support added
  • The panorama merging process should complete roughly twice as fast as ACR 6.3
  • Improved quality when applying Auto Straighten and Upright “Level” mode.
  • Metadata is added to merged panoramas to support Photoshop’s Adaptive Wide Angle filter
  • DNG Converter 9.4 now supports HiDPI displays on Mac

Fixed Bugs and Other Changes:

  • Fixed issue where vertical panoramas created using Merge could appear with the wrong orientation.
  • Addressed a bug that would ignore model-specific custom default settings for some cameras, including some Leica and Sony models.
  • Corrected occasional crash using Crop tool after a Merge operation completed.
  • Fixed an issue where state of HSL controls would be rendered incorrectly in GPU mode when applying Contrast or Saturation local control adjustments.
  • Addressed the issue of the SIGMA 50mm f1.4 ART lens incorrectly identified as Zeiss Milvus 50mm f1.4.

Articles: Digital Photography Review (dpreview.com)

 
Comments Off on Adobe Lightroom CC 2015.4, Lightroom 6.4 and ACR 9.4 now available for download

Posted in Uncategorized


Tips for How to Find Lost or Missing Photos in Lightroom

23 Jan

Lightroom is a popular choice for post-processing software for many photographers. There are many common mistakes newbies make when using it – and losing some of their photos is one of those.

In this video Phil Steele will show you how to find lost or missing photos and prevent it from happening again:

If you enjoyed that and want to learn even more about Lightroom you can check out Phil’s Lightroom course here.

googletag.cmd.push(function() {
tablet_slots.push( googletag.defineSlot( “/1005424/_dPSv4_tab-all-article-bottom_(300×250)”, [300, 250], “pb-ad-78623” ).addService( googletag.pubads() ) ); } );

googletag.cmd.push(function() {
mobile_slots.push( googletag.defineSlot( “/1005424/_dPSv4_mob-all-article-bottom_(300×250)”, [300, 250], “pb-ad-78158” ).addService( googletag.pubads() ) ); } );

The post Tips for How to Find Lost or Missing Photos in Lightroom by Darlene Hildebrandt appeared first on Digital Photography School.


Digital Photography School

 
Comments Off on Tips for How to Find Lost or Missing Photos in Lightroom

Posted in Photography


13 Steps for Editing Street Photography in Lightroom from Start to Finish

20 Jan

Favorite editing tools for street photography

I admit it, I take too many photos. I know it, and I have too many images to deal with, and unless I am getting paid to finish them and send them out to a client, they may never get processed. Are you in the same boat? Do you too have some images that have just been sitting there in your digital desk drawer?

With digital photography, and especially because of how cheap memory is (don’t forget to include web hosting sights and the cloud), more and more photos are just there and never used.  The best solution is to be more decisive, and just take fewer photos. But we all get out of hand, and sometimes just come home with more images than we know what to do with.

image

Final product after the simple steps followed below—a workflow that you can adjust to your own tastes too!

So the best thing to do is get to the grind and produce something. But it doesn’t need to be so much of a grindstone as you might think. I love taking photos more than processing and unless I am flying solo, I think I’ve got lots of people onboard with me. As you know, photography is not about broad strokes, and details are important. This set of instructions is specifically designed for street photography. But, are most of your photos from your travels? Well, streets (along with the convenient airplane) is maybe how you got there. Much of what we do as photographers crosses over into different genres of style and art. So have a go at the following tutorial, and you may find that with your own adjustments this is a recipe for more than just the street.

image

Final image of two young girls walking in the slums of San Jose Costa Rica, all editing was done following the steps below.

These instructions begin in the Library module of Lightroom, and then progress into the Develop module. There are countless modifications that can be made upon importing, categorizing them, giving them tags, etc. As the point of this tutorial is to streamline your workflow, the tips for editing will also be streamlined. So let’s get at it!

Library Module

Step 1 – Select images

Select a batch of images that are preferably in similar lighting conditions, and which have a similar theme. For example, choose a set of photos that were all shot outside over the course of a few hours, but not all night. Or a group of photos that were all shot in the rain. Lighting and theme conditions can vary, but greater variations will have potential greater variations in results.

Step 2 – White Balance

In the Quick Develop Panel (at the top of the right panel in the Library Module) Select White Balance and choose Auto. Before you turn away, let me assure you that there have been more Ph.D.s awarded, and dissertations given, in creating the algorithms behind this button. If you compound the interest in dollars that has been invested in this Auto algorithm it would sustain many third and fourth quarter GDP figures for entire nations.

image

Step 3 – Warm images

Next, push the single arrow pointing right under the temperature heading indicated by the Make Warmer hint that appears if you hover over it. The single arrow will increase your warmth tone by +5. If you want plus +10 push it twice, using the double arrow will increase it in increments of +15.

2015.09.25 Street Editing Tips Lightroom 002

Step 4 – Auto Tone

I know it is scary, and it does make me cringe sometimes too, but anything can be shifted, tweaked, and tuned later (and should be) to your liking. This will Auto Tone your exposure, highlights, shadows, whites, and blacks to each photo individually, so it is not the same as batch editing which will be covered later.

2015.09.25 Street Editing Tips Lightroom 003

Step 5 – Decrease exposure

Select the single arrow to the left, decreasing the exposure by a 1/3 of a stop. It is minor, but keeps your darker tones (especially things like black asphalt) a little darker. Note: this is assuming you have a correct exposure to begin with – if it’s a bit out you can adjust later on a per image basis as needed.

2015.09.25 Street Editing Tips Lightroom 004

Step 6 – Decrease Highlights

For the Highlights, use the double arrow to the left, decreasing the highlights, and select it once. Be patient, as depending on how many pictures you select and your computer speed, it may take more than a few seconds. This can be monitored by looking in the top left of the screen above the Navigator window (progress bar).

2015.09.25 Street Editing Tips Lightroom 005

Step 7 – Shadows

For the shadows, use the double arrow on the right, decreasing the shadows, and click it once.

Step 8 – Whites and Blacks

Increase the white clipping by +5, by clicking the single right arrow once. Decrease the black clipping by -5 by clicking the single left arrow once.

2015.09.25 Street Editing Tips Lightroom 007

Step 9 – Clarity

Increase the clarity by +20, by pressing the double arrow to the right once (for more information about clarity please look near the end of the article which describes it in more detail).

2015.09.25 Street Editing Tips Lightroom 009

Step 10 – Vibrance

The final step in the Library module is to increase the vibrance by pressing the double arrow to the right (for more detailed information about vibrance please see below).

Develop Module

Now we will be moving into the Develop module. To this point, all the changes that you’ve made, have been applied to all the photos in the group, which you originally selected. Looking at the image below, you can see that despite the simple clicks made in the Library module, many delicate changes have been made. Again, all of these changes can be fine-tuned to your liking later. There are hundreds of modifications that can be made, but let’s keep those for later.

2015.09.25 Street Editing Tips Lightroom 011

Notice the sliders have moved based on the changes you made in the Library Module Quick Develop panel.

Step 11 – Lens Corrections

This step requires you to scroll down to the Lens Corrections Panel, and select two checkboxes. The first is Enable Profile Corrections, and the second is Remove Chromatic Aberrations. Both of these will allow Lightroom to make changes to the photo based on the lens used, and the inherent flaws that exist in that lens. A variety of corrections may or may not be included like, barrel distortion, vignetting, and as the second suggests, green and purple colors that result from diffraction in the lens.

2015.09.25 Street Editing Tips Lightroom 012

Step 12 – Detail Panel

Next is to scroll up and go to sharpening, increase it to +50,  then increase your masking to +25. Finally you may or may not need to reduce noise. For this example, because the ISO was 640 the noise reduction was increased to +25. To understand, sharpening and masking in more detail and their relationship to noise reduction please read below.

2015.09.25 Street Editing Tips Lightroom 013

Are you still with me? Here is where you will thank some of those computer science majors for creating the AUTO button. This is why they get the big bucks, and it saves us large amounts of time. We don’t need to apply these changes individually.

Step 13 – Sync settings

At the bottom of the Develop module there is a rectangular button that says Sync. PUSH IT! Make sure all your images are still selected before you sync (highlighted in the thumbnail strip at the bottom).

2015.09.25 Street Editing Tips Lightroom 014 sync

When the Synchronize Setting window pops up, select Check None. This will ensure that no unwanted changes will be made to your previous adjustments.

2015.09.25 Street Editing Tips Lightroom 015 sync check none

Now check the boxes labeled Sharpening, Noise reduction (which will subsequently select both boxes below it), Lens Profile Corrections, Chromatic Aberration, and finally Process Version. Notice these are the same adjustments that you had made in steps 12 and 13.

2015.09.25 Street Editing Tips Lightroom 016 sync check which apply

Finally, press the “Synchronize” button.

2015.09.25 Street Editing Tips Lightroom 017 verify sync

Looking at the screenshot above, you can see that the all of the selected photos have had the changes made to them.  If I were to go back and make all the individual changes to the potentially tens, hundreds, or even in bizarre cases thousands of photos, it would have taken me time that I don’t have, and neither do you. Looking at the image below you can see that the exposure, shadows, lights, whites and blacks have remained unique to the individual photo.

2015.09.25 Street Editing Tips Lightroom 018 verify sync basic settings

Below are simple side by side comparisons. In the last one I actually made a few additional small adjustments, and added a -10 vignette. Other than that, it is ready for export, along with almost all of the other photos that were just individually and batch adjusted. It is a bit of mix and match magic that keeps your photos natural, and true to the street.

2015.09.25 Street Editing Tips Lightroom 019 compare

2015.09.25 Street Editing Tips Lightroom 021 compare

2015.09.25 Street Editing Tips Lightroom 020 compare

Clarity

Clarity increases the contrast where two different tonal values meet. It is like contrast but on a micro scale, makes the image seem to be sharper. The lights will get lighter and the darks darker, but only where the different tone values meet, not broadly across the whole tonal range of the image.

Vibrance

Vibrance increases the tone of colors that are not already saturated. It is like a balancing scale for color. Saturation on the other hand, increases the intensity of all spectrums of light. Thus, vibrancy helps to bring out subtleties in the colors. For street photography, it brings out richness, without creating an over-saturated look. Sometimes I pull the vibrance up, and push the saturation down, to maintain an urban feel but doing so without making it look over-worked.

Sharpness

Just as I said, clarity is like contrast on the micro scale, sharpness is like clarity on a micro scale. Thus, it is like micro-micro scale. So we are still dealing with tonal values, but in even more detail. So be careful how much you increase your sharpness. Never try to rescue camera shake or blur in the photo using sharpness. “The devil is in the detail,” and this is no truer than in the sharpness slider. Because what you gain in sharpness you also increase the amount of noise (not desirable). If you have a high ISO, sharpness is more of an enemy than a friend.

EXTRA

Final image all adjustments applied

Masking

Textures will become more enhanced, but smooth surfaces will not be affected, resulting in less excess noise being introduced. This will help the street photography mood, without giving it an overly grainy feeling, or your shadows having too much noise. So how much of this movement left and right on the Masking slider is helping or hurting all your hard work? Thanks to those “AUTO guys” the Alt key on windows (Opt on Mac) will give you a grayscale impression of exactly where, and how the sharpening is impacting your photo. White indicates the area on the photo where sharpening is being applied, and black shows where it is not. You will notice that the contrasts and textures deserve most of the sharpening, alleviating your smooth tones and surfaces from the ill effects of sharpness.

Summary

So hopefully that will give you some things to try out with your images to process your street photography faster and consistently. Do you have any other tricks and tips you use? Please share in the comments below.

googletag.cmd.push(function() {
tablet_slots.push( googletag.defineSlot( “/1005424/_dPSv4_tab-all-article-bottom_(300×250)”, [300, 250], “pb-ad-78623” ).addService( googletag.pubads() ) ); } );

googletag.cmd.push(function() {
mobile_slots.push( googletag.defineSlot( “/1005424/_dPSv4_mob-all-article-bottom_(300×250)”, [300, 250], “pb-ad-78158” ).addService( googletag.pubads() ) ); } );

The post 13 Steps for Editing Street Photography in Lightroom from Start to Finish by Branson Quenzer appeared first on Digital Photography School.


Digital Photography School

 
Comments Off on 13 Steps for Editing Street Photography in Lightroom from Start to Finish

Posted in Photography


5 Lightroom Develop Module Secrets Revealed

16 Jan

5-lightroom-develop-module-secrets-revealed

When you’re new to Lightroom, some features of the program aren’t immediately apparent, or easily discoverable. In this article I’ll introduce you to five Lightroom Develop module secrets that will help you get more out of photo editing in Lightroom.

#1 Smarter Virtual Copies

Often when you’re working in Lightroom you’ll edit an image to look one way, and then decide you’d like to try to edit it in a different way – without losing your work. The trouble is, that once an image has been edited, any virtual copy that you create will use the current look of the image as its starting point. So the first entry in the History Panel will be the creation of the Virtual Copy and you can’t, using the History Panel, wind the photo back to how it looked out of the camera.

You can, however, use the Reset button at the foot of the right panel of the Develop module. Click Reset to reset your new Virtual Copy, so it is the original out of camera image with all edits removed. Of course, the edits will remain on your original image (just the Virtual copy will be reset).

reset a virtual copy to the original image state in Lightroom
So far, so good. But what if you want to create a Virtual Copy that starts partway through the editing process? Well, that can be done too. Start with the original image, open the History Panel on the left, and click on the entry which shows the image looking as you want for your virtual copy. Note that the most recent edit is at the top of the History panel.

make a virtual copy from a partially edited image in Lightroom

Notice the History panel is opened, and a state other than the current one is chosen to make the Virtual Copy.

Now right click the image and choose Create Virtual Copy – Lightroom will create a new virtual copy and switch to it. Immediately after you do this, click back on the image that you made the copy from – the original image – and in the History Panel, click the topmost entry. This reinstates your edits to the original image, back to your last edit. It’s important to do this before you start working on the new Virtual copy as it is easy to forget to perform this step and, in doing so, you may lose your edits if you subsequently make changes to the original image.

#2 Comparing Before and After

In Lightroom you can compare the before and after editing state for an image by clicking on the image in the Develop module and pressing the backslash key on your keyboard (\). Press once to see the Before state and once again to return to the current edited state of the image.

So far, so good. But what if you want to compare the current edited state with an earlier edited state – not with the original out of camera image? You can do this if you open the History panel, then right click the entry in the History list that you want to compare with the current state of the image – you can choose any of the states in the list. From the popup menu choose Copy History Step Settings to Before. Now when you press the Backslash key to compare the before and after, you’ll be comparing a previous state but not the original out of camera image.

change the starting point for a before/after comparison in Lightroom

#3 Reverse Engineer Presets

A Lightroom preset is a set of slider settings that have been saved in such a way that they can be applied to any image, at any time. That said, there is nothing that can be applied using a preset that you cannot also apply manually to an image, by using the tools in the Develop module. This means that Presets contain valuable information for editing images which you can discover by reverse engineering them. So, if you like a preset that ships with Lightroom, or if you have downloaded and installed other presets that you like, use the process that follows to learn how they work.

Start with an image that is in its original out of camera state, and apply the preset to the image. Now look through the settings in the Develop module panels on the right to see what adjustments have been made to the image.

To see if there are any Graduated Filter or Radial Filter adjustments included in the preset, click the Graduated Filter tool, set the Show Edit Pins setting to Always and see if any pins appear on the image. If so, click to see where they have been applied and what their settings are. Repeat this step with the Radial Filter to see if any radial filter adjustments have been made to the image. As presets cannot contain Adjustment Brush edits there’s no point in checking that tool.

reverse engineer a preset in Lightroom

It’s best to study presets without first making any changes to your image, except for applying the preset. This way you will know that all the edits that have been applied to the image are part of the preset, and none of them are your own edits.

#4 The Alt Key works nearly everywhere

The Alt key is the biggest hidden secret keystroke in Lightroom. When you press it, various things appear on the screen that previously were not visible. For example, in the Basic panel you can use the Alt key to display Reset Tone and Reset Presence options. The Exposure, Whites, Blacks and Split Toning sliders all display visual feedback when you hold the Alt key while adjusting them. So too do the sliders in the Sharpening panel. To learn more about using the Alt key in the Lightroom Develop module, check out this post: Lightroom Tips for the Develop Module – the magic Alt key.

alt key provides visual feedback for many sliders in Lightroom

#5 Keyboard Adjustments

If you find it difficult to adjust the sliders in Lightroom using your mouse, then try adjusting them using the keyboard instead. To do this, click on a slider to target it and then use the left and right arrow keys to adjust the slider in small increments. To move in larger increments hold the Shift key as you press the arrow keys. You will find that the Up and Down arrow keys work identically to the Left and Right arrow keys.

adjust Lightroom sliders using the arrow keys

If you want to continue to use the sliders to make your adjustments, but you find that they travel too fast for you to get an accurate adjustment, hold the Shift key as you drag on a slider. This slows its movement down and makes it easier for you to make small adjustments. You can also click on the numeric value that a slider is currently set to and use the Up and Down arrow keys to adjust the value in small increments.

To reset a slider – double click its name and it will return to its default value for that type of image.

Watch the video

Here is a video version of this article so you can follow along as I walk you through each point.

googletag.cmd.push(function() {
tablet_slots.push( googletag.defineSlot( “/1005424/_dPSv4_tab-all-article-bottom_(300×250)”, [300, 250], “pb-ad-78623” ).addService( googletag.pubads() ) ); } );

googletag.cmd.push(function() {
mobile_slots.push( googletag.defineSlot( “/1005424/_dPSv4_mob-all-article-bottom_(300×250)”, [300, 250], “pb-ad-78158” ).addService( googletag.pubads() ) ); } );

The post 5 Lightroom Develop Module Secrets Revealed by Helen Bradley appeared first on Digital Photography School.


Digital Photography School

 
Comments Off on 5 Lightroom Develop Module Secrets Revealed

Posted in Photography


50 Photoshop & Lightroom Photo Editing Tutorials to Enhance Your Images

04 Jan

Photoshop and Lightroom are awesome tools for photographers, professionals and amateurs alike. While Lightroom is considered the most comprehensive tool to do some basic image editing, such as fixing exposure, white balance, and contrast, Photoshop is often chosen by photographers for further creative processing. Without a doubt, Photoshop is a powerful program with huge possibilities. However, once you really dig Continue Reading

The post 50 Photoshop & Lightroom Photo Editing Tutorials to Enhance Your Images appeared first on Photodoto.


Photodoto

 
Comments Off on 50 Photoshop & Lightroom Photo Editing Tutorials to Enhance Your Images

Posted in Photography


How well do you know the Lightroom interface? Take this quiz and find out

03 Jan

lightroom interface quiz lead image

When you’re new to Lightroom there are lots of things about the Lightroom interface that contribute to its steep learning curve. Most Lightroom users can tell you a story or two of being caught by items appearing, or disappearing, without warning. With experience these are minor inconveniences, but when you are new to Lightroom, they can be overwhelming. So, just how much do you know about the Lightroom interface? Take this quiz and find out:

Question #1

What is this and how do you get it back if it disappears?
Lightroom Interface Quiz - image for question 1

Answer:

That is the Toolbar, and you can display or hide it by pressing the letter T on your keyboard. You can also choose View > Hide Toolbar or View > Show Toolbar depending on whether it is currently visible or not. There is a toolbar in every module in Lightroom.

Question #2

When you used Lightroom recently, you recall seeing small indicators like this in the bottom right corner of some of your images. What are they and how do you get them back if they’re not showing in grid view?

Lightroom Interface Quiz - image for question 2

Answer:

These are Thumbnail Badges, and they indicate whether or not an image has been cropped, has develop presets, keywords added, and so on. In the Library module pressing the letter J will toggle through a number of options for your grid view, two of which include thumbnail badges.

Question #3

Most panels show filled in triangles like the one on the left (below), but one of the panels has a triangles like the one on the right (also below). Why is it different?

Lightroom interface quiz - image for question 3

Answer:

The second panel on the right is set to what is called Solo Mode. When this option is enabled, and you click to open any of the panels, all other panels will close automatically (essentially leaving only one opened at a time). The Navigator and the Histogram are exceptions to this rule and they operate independently of Solo Mode. To enable or disable Solo Mode, right click on the name of any panel (the actual word not the triangle) and choose Solo Mode from the options given (see below).

Lightroom interface quiz - image for question 3

Question #4

This is the Develop module and the Basic panel is missing. What has happened and how do you get it back?

Lightroom interface quiz - image for question 4

Answer:

Any panel can be enabled or disabled in Lightroom. If you’re missing a panel, right click another panel in that same sidebar to display the panel list. Any panel name without a checkmark isn’t visible, so to make it visible, just click the panel name.

Lightroom interface quiz - image for question 4

Question #5

This is the list of Lightroom modules. A module is missing, what is it and how do you get it back?

Lightroom interface quiz - image for question 5

Answer:

The Develop module is missing. You get it back the same way as you would a missing panel, right click any of the module names to show a list of modules. Any that do not have checkmarks beside them are not visible. Select that one to display it.

Lightroom interface quiz - image for question 5

Question #6

There used to be a panel here in Lightroom just above the thumbnails in grid view in the Library module. It’s disappeared. What is it, and how would you get it back?

Lightroom interface quiz - image for question 6

Answer:

This is the Filter bar, and you can display or hide it by pressing the Backslash key (\). You can also display or hide it by choosing View > Show Filter Bar.

Lightroom interface quiz - image for question 6

Question #7

Here just above the filmstrip you recall that at one stage you saw Star, Flag and Color options, but they now seem to be missing. How do you get them back?

Lightroom interface quiz - image for question 7

Answer:

Click the word Filter and the filters will reappear. Click Filter again and they will disappear.

Lightroom interface quiz - image for question 7

Question #8

What is this called and how can you get rid of it or choose what information is showing?

Lightroom interface quiz - image for question 8

Answer:

This is the Loupe Info Overlay and you can display and hide it by pressing the I key on your keyboard. There are three states for this: Info Overlay 1, Info Overlay 2, and turning it off entirely. To edit what information is displayed click CMD+J (Control+J on a PC) or go to:  View > View Options.

Question #9

This is the right hand corner of the Lightroom screen and the controls for Maximize, Minimize and Close are all missing, as are all the Lightroom menus on the left of the window. How do you get them back?

Lightroom interface quiz - image for question 9

Answer:

To redisplay the Lightroom menu and the Windows controls press Shift + F. This is a toggle switch which displays and hides full screen mode. There are three states for full screen mode so press Shift + F repeatedly until the Lightroom menu and the Window controls reappear.

Question #10

Here, in the Develop module, you don’t see any stars on the toolbar when you are viewing this image at full size. The stars only appear on the toolbar when you are in Grid view. Where did they go and how can you get them back?

Lightroom interface quiz - image for question 10

Answer:

The toolbar in the Develop module has two states, one for the Grid View, and one for the Loupe (single image) View. To display and hide the various options on either toolbar, switch to that view, and click the arrow in the far right of the toolbar to display the options available in that view. Click any unchecked option to display it on that toolbar, likewise you can click any checked options that you want to hide.

Lightroom interface quiz - image for question 10

If you got 10 out of 10 on this quiz, well done! You have a good understanding of the basics of the Lightroom interface.

If you missed any of these questions, hopefully you’ve learned something about using Lightroom that you did not know before.

googletag.cmd.push(function() {
tablet_slots.push( googletag.defineSlot( “/1005424/_dPSv4_tab-all-article-bottom_(300×250)”, [300, 250], “pb-ad-78623” ).addService( googletag.pubads() ) ); } );

googletag.cmd.push(function() {
mobile_slots.push( googletag.defineSlot( “/1005424/_dPSv4_mob-all-article-bottom_(300×250)”, [300, 250], “pb-ad-78158” ).addService( googletag.pubads() ) ); } );

The post How well do you know the Lightroom interface? Take this quiz and find out by Helen Bradley appeared first on Digital Photography School.


Digital Photography School

 
Comments Off on How well do you know the Lightroom interface? Take this quiz and find out

Posted in Photography


104 Brand NEW Hacking Photography Lightroom Presets for $10 [Save 94%]

19 Dec

Ever looked at a stunning image and wondered “why don’t mine look like that”?

Here’s the secret: great photo editing – achievable with this ALL-NEW collection of 104 Lightroom presets from Hacking Photography!

DPS Xmas Bundle Promo

Today’s deal in our 12 Deals of Christmas is deal #7 and it’s our biggest one yet with a whopping 94% off the normal retail price.

This preset collection from Mike Newton at Hacking Photography has never been released before – in fact Mike created it specifically for today’s deal!

Created specially for dPS, this deal includes:

  • The Evolution collection – 54 presets that turn up the volume of color adjustment and creativity (48 color, 6 black and white)
  • The Light Leaks collection – 25 special effects presets that emulate Holga-style, instant film, film burns and toy camera effects
  • The Custom Vignettes collection – 25 presets that add custom vignette styles around your images, in both black or white

Head over to Mike’s site to see lots of before and after examples of these presets

Screen Shot 2015 12 18 at 9 41 30 AM

And with an INCREDIBLE discount of 94% for today, it works out to be just over 10 cents per preset!
To be clear – these presets have never been available in any previous collections – they’re all brand new for you to grab today – but only at this price for 24 hours only!

FAQ: These presets are for use in Lightroom and work on Lightroom 4, Lightroom 5, the standalone Lightroom 6 version (non Creative Cloud), and the Lightroom Creative Cloud version. They come with step by step instructions on how to install them.

googletag.cmd.push(function() {
tablet_slots.push( googletag.defineSlot( “/1005424/_dPSv4_tab-all-article-bottom_(300×250)”, [300, 250], “pb-ad-78623” ).addService( googletag.pubads() ) ); } );

googletag.cmd.push(function() {
mobile_slots.push( googletag.defineSlot( “/1005424/_dPSv4_mob-all-article-bottom_(300×250)”, [300, 250], “pb-ad-78158” ).addService( googletag.pubads() ) ); } );

The post 104 Brand NEW Hacking Photography Lightroom Presets for $ 10 [Save 94%] by Darren Rowse appeared first on Digital Photography School.


Digital Photography School

 
Comments Off on 104 Brand NEW Hacking Photography Lightroom Presets for $10 [Save 94%]

Posted in Photography