 LIGHT MODIFIERS
Hello FashionPhotographyBlog.com readers! The past couple of days we’ve discussed different types of light sources, lights and meters. Now the fun stuff: Light Modifiers! (Please, try to contain your excitement.)
Light Modifiers are anything that can be used to alter and shape the output of light. There are three ways to modify light: block, bounce and diffuse. Light modifiers don’t have to be store bought- technically, a modifier is anything that alters the light. It can be a piece of tinfoil from your kitchen or some fabric thrown over a flash to diffuse the light.
BOUNCING LIGHT
Reflectors The most commonly known types of reflectors are bounce reflectors. These are typically white, silver or gold. With these, you literally bounce the light off of the reflector and back onto your subject. Be careful not to bounce light at a funny, unflattering angle. Different colors create different effects. A silver reflector will create a cooler color of light while a gold reflector will “warm up” the light bounced back onto your subject.


Gold vs. Silver Reflector
BLOCKING LIGHT
Rather than using a reflector to bounce light into an image, you can hold up a black card or board, this will take light away. It works the same way as a reflector, but instead of bouncing light onto your subject, it will cut down on light reflected back to the subject. Black absorbs light, thus resulting in less light on the subject when a black bounce board is held up to it.
Black velvet is the best fabric you can use if you want to not reflect light. Want a pitch black background? Get a giant piece of black velvet!
Cinefoil is great for manipulating light. It works in conjunction with the light modifiers we’ve previously discussed. Cinefoil is like really thick black aluminum foil which can tolerate high heats. It can be clipped directly onto a light source and used to control where the light falls.

Roll of Rosco Cinefoil

Using Cinefoil to turn a Softbox into a Striplight
DIFFUSING LIGHT
By placing material in between a light source and the subject, you’re diffusing it. By placing some form of diffusion material in front of a light, you take away it’s specular qualities. The light will now be softer with gradual transitions between light and shadow (see Light, Part I – The Science of it All for more on diffused and specular light).
You can buy diffusion material at a store, which can get pricey, or you can look around your house for diffusion materials. As long as light passes through the material it can act as diffusion. Shower curtains, tissue paper, lightweight fabrics and sometimes sheets act as great diffusers.
Often times, the inside of a reflector will be made of diffusion material. By taking the reflective covering off you now have a diffuser!

Scrims are fantastic when trying to diffuse light on location. A scrim is essentially a large piece of diffusion material stretched over a frame. You’ll typically need some sort of stand system or an assistant to hold it up while you shoot.

Scrim in use on Annie Leibovitz's set
These next modifiers are technically defined as Light Shaping Tools because they’re placed on the light to modify it’s output. These are not all the modifiers out there, but a summary of the most common types.
There are several different types of light modifiers on the market, they include but are not limited to:
Umbrellas create a large diffused light. The light hits the umbrella and bounces back to the subject. It can be hard to control. There are two common types of umbrellas: reflective (which come in silver, white or sometimes gold) and shoot through. Umbrellas are typically held onto a light by sliding the rod through the reflector which holds it in place.

On light Reflectors are not to be confused with bounce reflectors. All strobe lights come with a device called a Reflector. The purpose of the reflector is to guide the light. If you use a flash unit bare bulb (no source of modifier on it) the light goes everywhere. A reflector is used to direct the spread of light into one direction. They create a specular (hard) light source.

Profoto "Zoom Reflector”
Soft Boxes directly diffuse light and create soft shadows. They are black on the exterior and lined with silver reflective material. A white diffusion material goes over the front which creates soft diffused light. A good softbox won’t “leak” any light to the outside world. They’re held onto the light source with something called a Speed Ring. All speed rings are specific to their light manufacturer (not all lights use the same speed ring). Softboxes are collapsable and are put together by inserting metal rods into the speed ring, which holds it in place. There are many types of softboxes, and they come in all different sizes, but they essentially all do the same thing.
The most common soft boxes are either square or rectangular.

Profoto 2'x3' Softbox
Striplight or Stripbank is a thin softbox. Think of it as taking a full softbox and cutting it in half.

Profoto 1'x4' Striplight
Octaboxes or Octabanks are octangular softboxes.

Profoto 36' Octabox

Lit with a large Octabank to the right of the camera
Beauty Dishes are another form of a reflector. They bounce onto a circular piece of metal which reflects the light back into a large bowl like reflector and then onto the subject. Beauty dishes come in white or silver. A sock (form of diffusion material) can be placed over the front to diffuse the light. They create a contrasting light. Beauty dishes are a personal favorite of mine!

Profoto Softlight Reflector in white

Taken with Beauty Dish to camera right and Background light with grid
Grids (Honeycombs) are put on a light and act like a spotlight. Grids direct light from a wide beam to a certain spot. Generally grids are placed in reflector, but you can also get a grid for your beauty dish or soft box. Grids come in different degrees which determine how condensed the light becomes.

Profoto 10° honeycomb grid


Shot with 20° grid
Snoots turn a larger light source into a narrower light, similar to a spotlight by controlling and condensing the cone of light.

Profoto Snoot

A Snoot was the only light source here, camera right
Barndoors control the direction of a light. They either clip onto the light or a reflector and each of the four doors can be moved independently. Careful, they get hot!

Profoto Barndoors for Zoom Reflector
That pretty much sums up the basics of lights and light modifiers. Keep your eyes open for the next week’s lighting tutorial, where we’ll dive into some standard lighting techniques.
Be sure to check out Zack Arias blog for an EXCELLENT comparison of light modifiers and their effect on a model.
If there is anything at all you don’t understand or are curious about, feel free to email me at alana@alanatylerslutsky.com.
– A
IMAGE SOURCE:
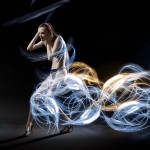
Feature image & image 1: photography by Alana Tyler Slutsky from her Surrealia series. To view the rest of the photos from this series visit her website.
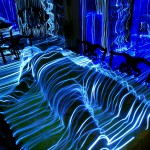
Image 2: alasmedia.wikispaces.com
Image 3, 5-13, 15, 17, 18, 20 & 22: Alana Tyler Slutsky
Image 4: bhphotovideo.com
Image 14, 16, 19 & 21: Alana Tyler Slutsky Photography


 How To: Silhouette Photography / Self Portraits
 Tips for Photographing in Different Weather Conditions
 Let’s Talk About Light – 3 Types of Lighting Conditions and how to Use Them
 Choosing the Right Color Reflector for Your Photography


You must be logged in to post a comment.