
Holding onto Light, originally uploaded by hitkaiser.
In this Adorama TV video Gavin Hoey takes you on location to learn how to balance flash and ambient light to create some stunning portraits in the forest.
After going through three different setups outdoors he takes you inside for the post-processing stage so see how he completes the images in Photoshop.
Some of the items Gavin used and demonstrated in the video for your convenience:
You can get the free light ray brushes he mentions in the video here.
Have you tried any location portraits using both the natural or ambient light combined with flash? If you have any other tips or want to share your images, please do so in the comments below.
The post How to Balance Off-Camera Flash and Ambient Light on Location by Darlene Hildebrandt appeared first on Digital Photography School.
Even for photographers who would not even think about taking pictures with a smartphone camera, with the right accessories your phone can be a very useful photographic tool. The Lumu light meter is a great example – it plugs into the headphone socket of a smartphone and, with the help of the dedicated Lumu app, turns your smartphone into a fully-fledged light meter that can help enhance your understanding of a scene’s lighting situation. Click through to read more
Articles: Digital Photography Review (dpreview.com)
[ By Steph in Design & Fixtures & Interiors. ]

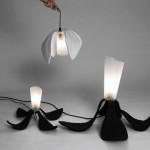
Chances are good that if you keep your phone nearby while you’re working, you’re going to be tempted to pick it up every now and then, checking Instagram and sending texts. Get in the habit of doing it compulsively, and you’re sucking away a lot of time that you should probably spend focusing on the tasks at hand. This lamp by designer Weng Xinyu aims to solve that problem by forcing you to give up your phone in order to illuminate your desk.

Consisting of a balancing lamp pole on a simple wooden tripod, the lamp leans its light source to the desk when it’s turned off. If you want light, you’ll have to insert your phone into the slot on the end of the pole. This turns the light on automatically and balances the lamp to its proper position.

Sure, you could cheat and find some other object that fits into the slot so you don’t have to give up your precious smartphone. But as we all heard from authority figures throughout our childhoods, the only person you’d be cheating is yourself.
“Superfluous information is flowing from everywhere,” says Xinyu. “The sense of priority is fading, resulting a precarious Balance between work and amusement, true and virtual life. It is time we ask the question, what do we really want? ‘Balance’ might help us find the inner balance in this information exploding society.”
Lamps are usually used to illuminate other, more interesting objects – but these 15 designs deserve their own spotlight.
Click Here to Read More »»
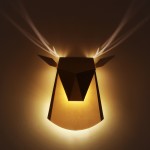
A classy alternative to hanging animal parts, this deer head wall lamp started as a design concept, went viral as a prototype and has just been funded for full …
Click Here to Read More »»

This creative lamp is not only a functional lighting piece for the home – it also serves as a handy place to pin reminders that can’t be ignored.
Click Here to Read More »»
![]()


[ By Steph in Design & Fixtures & Interiors. ]
[ WebUrbanist | Archives | Galleries | Privacy | TOS ]

You would probably love to have ideal lighting conditions for every shoot, especially if you are strictly an outdoor, natural light photographer. However there are many situations when the lighting is not ideal. Think winter, rain or even harsh midday sun. Sometimes you are stuck indoors, or your client wants to have a photoshoot inside their home. When used correctly, natural light indoors can be just as pleasing as outdoor lighting and can also provide opportunity for some creative portraiture with contrast, shadows, and drama. Here are some tips to get the most out of your photography using natural light shoot.
Like any situation, do your research before you start photographing indoors. Many times the direction of the house, the position of the windows, along with the time of year plays an important part in the amount of light coming through. Is your house North-South facing or East-West? What are sunrise and sunset times where you live, or where you are going to be photographing? Does the room have a sunroof that lets in additional light? Light also changes depending on the time of day. As light changes, so does the color of light. This directly affect the white balance (WB) of the image. If your camera has the ability to shoot in RAW use it, as white balance can then be adjusted in post-processing. If you really want to get it right in camera, experiment with the Kelvin scale.
When planning a shoot in your home, take several shots the day before to analyze what time is best for the light. Sometimes this is not possible especially if you are going to a client’s home or photographing a venue. But this is where a little prep work goes a long way. Don’t be afraid to ask these questions or even google the venue to check it out online.

One of the best sources of natural light indoors are windows. Learn how to use them to your advantage. In general, the closer you are to the window, the more light you will have to use and work with. Where you place your subject in relation to the window light will affect the image dramatically. There are three different scenarios for using window light:


Remember your exposure triangle; the relationship between ISO, f-stop (aperture) and shutter speed. This plays an important role in indoor photography. Choosing a fast enough shutter speed will eliminate any camera shake if you are not using a tripod. Choosing a wide aperture (low f-stop number) will provide a shallow depth of field and blur out the background (particularly useful if there is some clutter around the house). Choosing a larger ISO provides more light; particularly useful if there isn’t much natural light coming indoors. Most of the newer DSLRs have a large range of ISO and handle high ISOs really well. Plus there are tools to help reduce noise in the image during post-processing if you want a less grainy look.
If for some reason you are not able to use window light to illuminate the subject (due to inaccessibility to a window ), you can use open hallways, doorways or even a garage to emulate a situation of open shade. Have the subject sit close to the edge of the doorway and face the light.

A reflector and diffuser are great tools to use for indoor portraits. A diffuser softens the window light just like a white curtain or blinds. It is particularly useful for windows that have harsh midday sun streaming through. A reflector used in conjunction with window light, can add just the right amount of light bounce-back to dramatically improve your indoor portraits (especially for sideand backlit images).

The next time the weather gods decide to ruin all your perfectly laid out plans to have an outdoor, natural light, photoshoot, don’t rush to reschedule your session. Try and experiment with natural light indoors and diversify your portfolio. If you want to use other forms of indoor lighting check out the article from the dPS archives on creating indoor portraits without flash.
For another dPS writer’s tips for using natural light read Melinda Smith’s Tips For Great Indoor Portraits Using Natural Light.
Do you have any other tips for using natural light indoors? Please share those and your images in the comments section.
The post 5 Tips for Photography Using Natural Light Indoors by Karthika Gupta appeared first on Digital Photography School.

You don’t have to have an amazing dedicated photography studio to get great shots indoors. Most homes have at least one or two spots that work just fine. You don’t have to have a lot of additional equipment, in fact, these tips will help you take indoor photos with just your camera and natural window light (and even incandescent light in a pinch).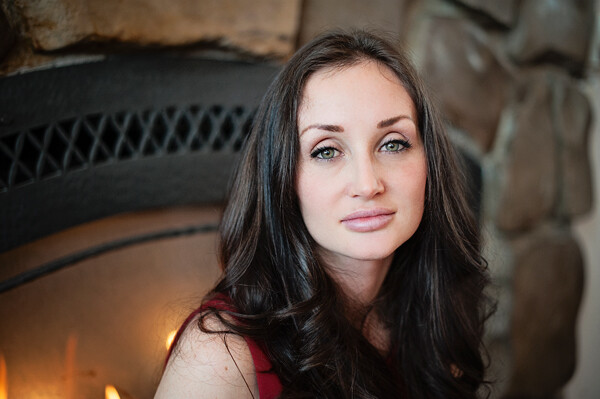
Take a tour of the home you are going to shoot in to scout out the best light. I’ve done newborn sessions in a kitchen multiple times because that’s where the light was best. Often times bedrooms are little havens of sunshine as well. It might not be the room with the prettiest furniture, but that’s okay. Light is most important to me, and the other things in the room are secondary.
Once you’ve found some nice light, do all that you can to eliminate clutter in the area you are going to shoot. Move distracting objects if possible; it’s much easier to move them before you shoot than to try to take them out later in post-processing. If you can’t avoid clutter, try getting in close to your subject.

Most of the time I shoot indoors with my 50mm f/1.4 lens on a full-frame body (try a 35mm lens on an APS-C or cropped sensor). It gives me enough space to get everything in the photo that I want, and gives me the ability to open the aperture wide enough to take photos in poorly lit rooms, if needed. Other lenses can work just as well, depending on what you are trying to achieve, but this is the lens that I have found has the most versatility for my indoor shooting.
You will often need to push the ISO higher if you don’t have a lot of natural light coming in. I prefer some noise, or grain, to the look of a flash, so this doesn’t bother me too much. Ideally you’ll want to shoot on days with plenty of sunlight, and a time of day when you have plenty of light indoors. This isn’t the situation to shoot in the golden hour, right before sunset. You might want to try late morning or early afternoon for more natural light.

When you are shooting with natural window light, pay attention to the direction the light is coming in, just as you would when shooting outdoors with the sun. You can have a beautiful hazy backlit photo, or a dimensional dramatic side-lit photo, or a flattering crisp photo lit directly from the front. Decide what mood you’d like in your photo, and also pay attention to the space you have to maneuver, and any clutter that may be in the background. 
Sometimes you have to just work with what you’ve got. If you’re forced to shoot with incandescent lighting, you can still get some meaningful photos. Try not to have incandescent lighting and natural window lighting fighting to light your subject at the same time. It usually creates a crazy white balance issue, and it’s hard to make right, unless you just convert the photo to black and white. I’ll usually turn overhead lighting off, unless there is absolutely not enough light without it, or I’m shooting in a situation where I don’t have control over where the action happens.
At times I have had to be very creative to get everything in the photo that I need to include. You can always use a wider angle lens, but that can distort things, and you might not want that look. I’ve stood on counter tops in the kitchen, on beds (watch out for ceiling fans-I’ve had a couple of close calls when I wasn’t paying attention), and wedged myself behind furniture. Anything for a good shot, right?

One last tip: Sometimes you may not be sure exactly where the best spot is for the lighting you’re hoping for. Don’t be afraid to experiment, and move your subject around until you’re happy with the way everything looks. If I have a newborn on a blanket, it’s a simple thing to rotate the blanket around until I like the way the light rests on his face.
Don’t be afraid to get your camera out indoors! With some practice and experimentation, you’ll find lots of ways to make great photos without any extra equipment.

The post Tips For Great Indoor Portraits Using Natural Light by Melinda Smith appeared first on Digital Photography School.

Recently, a number of dPS readers have asked the question on Facebook, “How do I use a flash and not have my images look so harsh?”.
Let us first understand the difference in using natural or ambient light and using a flash. With natural light you have little control over intensity, direction, or color. With a flash, you have a lot more control if you can grasp the fundamentals of light and exposure. Using a flash you can control the direction, intensity, color and distribution of the light.
A good understanding of how your flash affects the way the subject is lit, and how it will appear in the final image is important.
The properties of light include: quality of light, quantity of light, and also color of light, but we will exclude that from this article.
Brightness: is a relative expression of the intensity of energy output of a visible light source.
Contrast: is the difference in light between parts of an image.
Shadows and highlights: consider that the absence of light is shadow, so shadows are parts of your subject that are not lit, and highlights are the parts that are lit.
The quality of light: here we use the terms “hard” and “soft” to define the quality of light. Hard light is found on a bright, sunny day. It creates very bright and very dark areas in the same scene. Another good example of hard light is an on-camera flash. When it is used as the only light source it results in a brightly lit subject and a very dark background. Soft light on the other hand can be defined as smooth, diffuse and evenly distributed. This type of light creates few shadows. Cloudy days and shaded areas are examples of this quality of light.
Size of the light: small light sources produce hard light while large light sources produce soft light.
Distance: the farther the light source is from the subject, the harder the light it will produce.
Example: although the sun is very large, its relative size to us is small and it produces a hard light. However, on a cloudy day the light becomes a relatively large light source and the sun is no longer a hard light. Not only do the clouds make the light source relatively larger, they take that bright light source and diffuse it. As a result there is no direct light falling on anything in the scene you are photographing.
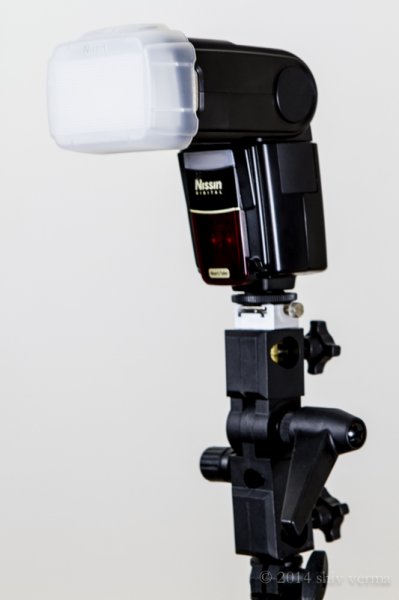
Nissin Flash with Diffuser
You can conclude that on a cloudless day, the light source is small, it is distant, it is bright and therefore is hard light. This light will create sharp shadows that define high contrast. On a cloudy day the relative size of the light source is large, it is much closer (the cloudy sky), less bright, and diffused. This light will create soft shadows and thereby lower contrast.
Photographing different types of subjects require different types of light. In response to the question asked, lets consider people photography. Your portraits will be far more pleasing when they are photographed with less contrast using a soft light. Yet in some cases, like for dramatic portraits of actors, high contrast looks great. High contrast using hard light is good when you want to show texture of the skin in older people. Contrast will exaggerate texture and facial features as the shadows are well defined. Less contrast, or the use of soft light (diffuse light), will deemphasize the texture and give skin a smoother appearance. This is what you are looking for, particularly with the female portrait.
When you use a flash, on or off camera, you are using a relatively small, hard, directional light source. This is a problem, since you end up with high contrast and a harsh appearance to your portrait. To solve this problem you have to make the light softer by making it larger. Remember, soft light is a large, light source, so the key to making your light softer is to make it larger.
Here are some ways to make the on-camera flash into a soft light source. We will start with the simplest without using additional products, and move on to the more complex options using modifiers.
Bounce the flash: Bouncing is one way to make the light source larger but the light will also lose intensity. By bouncing the light off of walls and ceilings, the light falling on your subject will originate from a much larger area as compared to a directly aimed flash. Outdoors this may not be possible so you may have to find other means to bounce the flash. You can use large white foam core boards, umbrellas or you can buy a reflector. Reflectors come in various sizes and can have multiple surfaces that bounce or reflect the light. These can be twisted and folded into very compact and portable bags. If all you have is a white business card or an index card on hand, use an elastic band and affix the card to the top of your flash. This will serve as a small bounce and help provide catch lights in the subject’s eyes.
Tips:
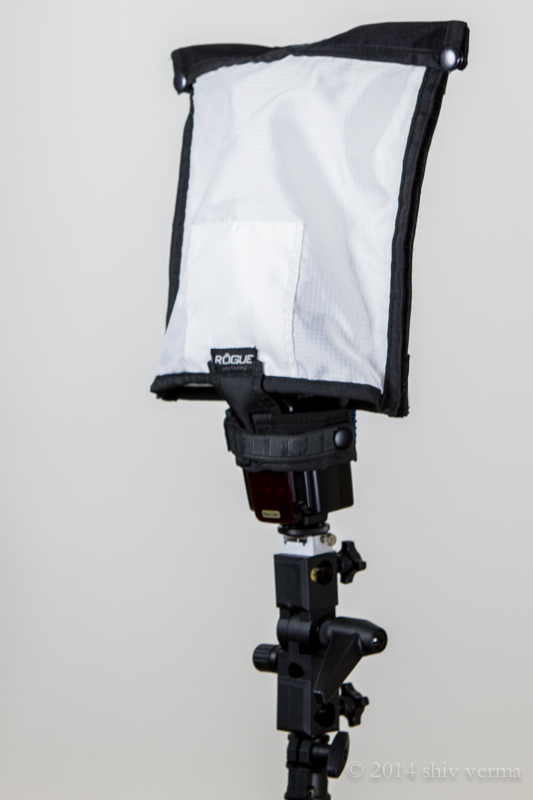
Rogue FlashBender Large
Use a Diffuser: The simplest diffuser is a piece of tissue paper taped in front of the flash lens. Plastic diffusers that either fit over the flash head or are fastened using Velcro or elastic bands, are the next step up. Stofen makes these diffusers in various sizes to fit most flash heads. A number of products that will bounce and diffuse light are available – Rogue Flash Bender products are a good example. A number of manufacturers make small portable soft boxes designed for use with a flash.
Diffusers work well for indoor flash photography but are not that useful when outdoors. In addition, just as when using bounced light, diffusers also require higher power to achieve the same exposure.
There is one other problem that needs solving – flat lighting. The on-camera flash sits near the axis of your lens, so when you use a diffuser the light will still be coming from the same angle and you portraits will have little dimensionality. The images will appear flat. It gets worse if there is no diffuser. You will get red-eye or the deer in the headlights look.
The position and direction of the light source has a great impact on the appearance of your subject. We covered contrast and how contrast is defined, but the visibility of this contrast (visibility of shadows and highlights) depends on the position of the light source, be it diffused or not.
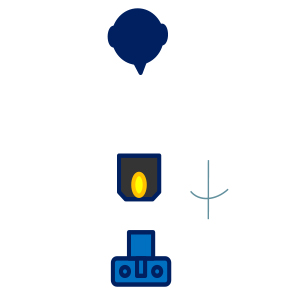
Any subjects, no matter how much texture and dimension it may have, when lit and photographed from the same angle will look flat as shown in the diagram below left. In order to show dimension and texture, the flash direction and the angle of the camera lens must not be coincidental, as shown below right.
 |
 |
The maximum dimension theoretically would be when the light source and the camera are at 90 degrees. However, this is a bit extreme. See the diagram below.
If the flash is mounted on-camera the camera will see and capture the side of the subject that is blasted with head-on light. As a result there are few if any shadows and you get the appearance of a harshly lit subject.
It may not always be possible to use the flash off-camera. Even small extensions using flash brackets to either side or above will help. A flash mounted on a light stand and controlled via wireless trigger is ideal. Flash heads mounted in small softboxes (see below) or with a Rogue Flash Bender style product will defuse the light well.
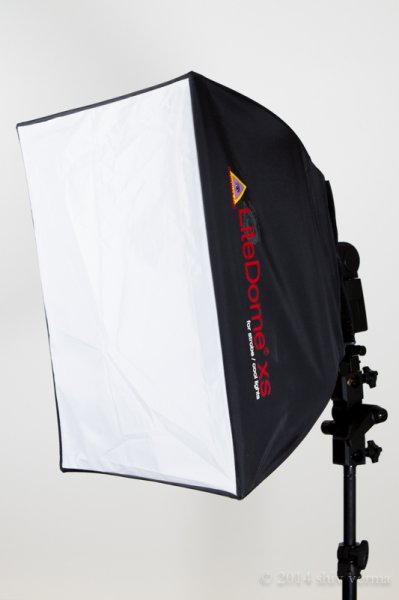
Photoflex LiteDome XS
If you are in a studio like environment or even at home you can increase the relative size of your flash by directing it through a translucent (white not clear) shower curtain. You can build a PVC pipe frame and drape a shower curtain over it, or buy ripstop nylon and use it as diffusion material.
Finally, remember that the closer the light source is to your subject, the softer the light. The edge of the light source is softer than the center. Keep these tips in your arsenal. Armed with the information in this article you will hopefully make better portraits when using a flash and have a better understanding of controlling the light from your speedlight.
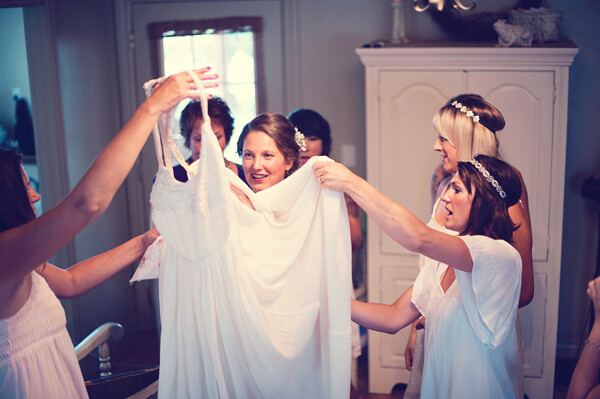
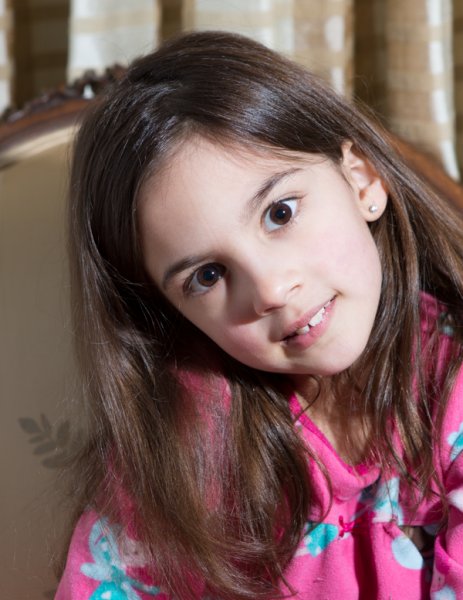
The following two portraits were shot in a casual setting with a white foam core board serving as a fill from the left side of the camera. For the first image a diffuser that comes with the flash head was used. As you can see that despite the use of a diffuser the light source is still small and relatively harsh. The second portrait was shot using the light dome. Notice how much softer the light is on the subject. Both images are straight from the camera – no post-processing was done.
Single flash on-camera using a manufacturer supplied diffuser

Same flash mounted in a Photoflex LiteDome XS Softbox
The post How to Soften the Light When Using Flash by Shiv Verma appeared first on Digital Photography School.
[ By Steph in Art & Street Art & Graffiti. ]

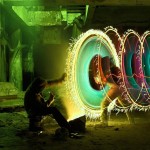
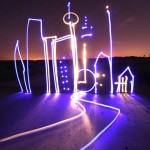
Swirls and pillars of light hover in fields or against dark urban backdrops like phantom monuments, captured on camera in a way that just can’t be perceived by the human eye. UK-based artist Sola literally paints with light, his amorphous creations seeming to take on three dimensions for just a split second as if the light itself has gathered up a mass of its own.


Looking for an outlet for personal expression led Sola to professional photography, documenting the sports, bands and lifestyles that he was into. Eventually, though, he wanted something that would give him more control over the creative process.


“Then I found light painting. Quite by accident one night while shooting landscapes of the urban environment and instantly I knew it was what I’d been looking for. I like to keep things real. I shoot with digital cameras, yes, but I employ principles of analogue film technology – in that once I’ve made an image I don’t change it any more than I could in a darkroom and therefore what you see, is what I shoot.”


“I believe there’s a real magic to creating something wondrous that’s ‘real.’ Sure, there’s a place for post production in this world but on the whole, you won’t find any here. To the point that even if I am caught in the scene the image is thrown away. I aim to create images that allow the viewer to suspend their reality and simply enjoy the energy and mystery of the image.”


See lots of more Sola’s work, including collaborations with NIKE and other brands, at LightBombing.com.
German duo Jan Wöllert and Jörg Miedza of LAPP create incredible light graffiti using complex choreography, light sources and photography.
Click Here to Read More »»
Like traditional graffiti and street art, light art comes in many forms. Unlike most graffiti, however, there is no one to complain about being tagged!
Click Here to Read More »»
Melbourne street artist TigTab uses stencils to create light graffiti as you’ve never seen it before – crisp and still yet dynamic and otherworldly.
Click Here to Read More »»
![]()
[ By Steph in Art & Street Art & Graffiti. ]
[ WebUrbanist | Archives | Galleries | Privacy | TOS ]
 Extra photos for bloggers: 1, 2, 3 Extra photos for bloggers: 1, 2, 3 |
|||
Hey you! Yes, hue!
Color your world one photograph at a time by painting with light.
Our guide will show you how to amp up your photos with color in a flash, without any fancy equipment or software.
Follow the light, friends. A whole chroma of possibilities await.
Learn How To Light Paint With Rainbow Photo Filters
![]()
You’ve always wanted to take these photos but didn’t have the know how – ’til now. Also, color rules! Beige drools.

To give yourself enough time for these effects, set your camera’s shutter speed to around 5 seconds (5″) and adjust the aperture and ISO accordingly. You can either do this on your camera’s Manual (M) mode (you set the aperture), or Time Value (TV) mode (it’ll choose aperture for you).
To make sure your image is sharp, mount your camera on a tripod or put onto a flat surface. Using the self timer option is also a good idea, to avoid shaking your camera when you press the shutter button.
 Press that button and get ready. When the shutter opens, you’ve got 5 seconds to work!
Fire the flash to the left of your subject with your first colored filter, then (QUICKLY!) switch filters and fire a second flash to the right of your subject. Experiment with even more flashes in different part of the scene for an even more psychedelic result.
If you don’t have an external flash, don’t despair. You can use a bright flashlight by turning it on and off quickly.
 Time to get your drawing on, Da Vinci.
Grab your flashlight (or your phone’s flashlight mode) and cover it with a color filter (we used 2 flashlights with different color filters simultaneously to get this effect).
While the shutter is open, do a dance and move your arms around like crazy. Or write a message, or draw a love heart. Either or.
 Ever thought your photos need more of you? We’ve got your back. Or front.
Starting from one side of the scene, fire the filter covered flash (or flashlight) around your subject’s face, then ask them to move sideways. Repeat with different colors until you run out of time and/or space.
Ooooohhhhoohh.

© Erika for Photojojo, 2014. |
Permalink |
No comment |
Add to
del.icio.us
Post tags:

For light stands I like LumoPro for many of the same reasons I like the LumoPro LP180 speedlight. Their stands are well-built, reasonably priced and guaranteed out the wazoo. LumoPro has good service, too, should you need to replace a broken knob or bolt or whatever.
Honestly, it makes me wonder why other manufacturers don’t warranty their grip gear like this. Seems like a no-brainer, if you are making good stuff.
For normal, full-sized stands, I like the 10-foot LumoPro LP608. It is air-cushioned, has a five-year warranty and costs $ 45. It is a solid value choice and you can certainly spend more but get less.
Most stands are pretty interchangeable. That’s not to say that there aren’t some cool designs to be had. For a “splurge” light stand I’d consider Manfrotto stackers. They have a unique design that allows them to snap flat together for easy transport and space-saving storage. They are more expensive ($ 84 for 8-foot version and $ 115 for the 12-foot) so you’ll have to make that call. But they are a great upgrade if you frequently lug around a flock of light stands.
If you don’t need all of that functionality, skip the stackers. In fact, many speedlight folks who don’t need a lot of stand height prefer to use “compact” 5-section stands. They rise to about 7 feet and collapse to about 21″.
For that, my recommendation is easy and clear-cut: get the LumoPro LP605, seen above. It is the best-built of the five-section stands, includes ground spikes for more stability in wind and has LumoPro’s outsized warranty.
For $ 40, it is hard to go wrong here. There are more expensive versions of this, but they are not as well-built, have no ground spikes and you won’t get a five-year warranty either. Done deal.
__________
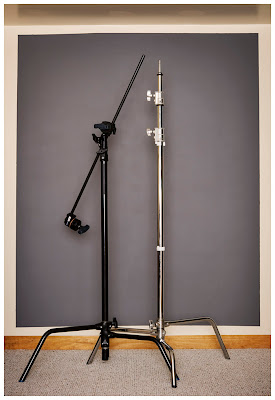
As far as C-stands go (more on what they are, here) they are pretty much all built like tanks. Which is part of their weighty charm. LumoPro C-stands ($ 100 for the riser and another $ 35 for the arm—make sure to get both pieces) are a good value choice as they back up the build quality with their five-year warranty.
If you want to get fancy, Kupo C-stands offer a quick-release mechanism for faster setup. But both are all but indestructable.
__________
While we are on the subject of stands, please do this: Take $ 20 and buy some sand bags. Get the bags from Amazon ($ 13 for 2, shipped). Get a few to start.
And don’t fill them with sand but rather “pea gravel,” from your local home improvement store. It’s super cheap ($ 3.50 worth will fill three sets of sandbags) and way less messy than sand.
You won’t need these cheap insurance policies until a stand comes down in the wind, breaking your flash or your mod or your subject’s noggin. Then you will have needed the sand bags retroactively.
Start with three or four. You’ll probably end up getting more as you go. Cheapest insurance (and piece of mind) policy you’ll ever buy.
NEXT: Soft Modifiers
You must be logged in to post a comment.