RSS
 

Posts Tagged ‘Light’

Natural Versus Artificial Light: Which Do You Prefer Working With?

16 Jul

Many photographers at one point or another are faced with this question; is it better to use natural or artificial light when taking photos? There is definitely not a right or wrong answer, although as a photographer, you’re sure to have your own strong opinions. In this article, we’ll review the key differences between natural and artificial lighting sources, as well as the pros and cons of using them.

Defining Natural and Artificial Light

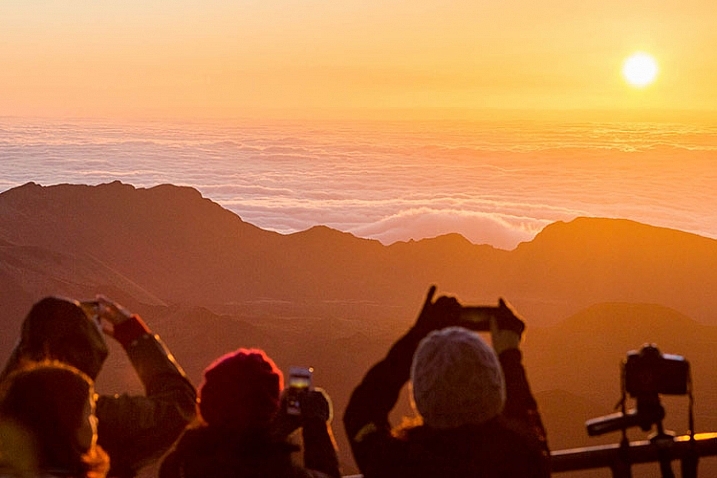
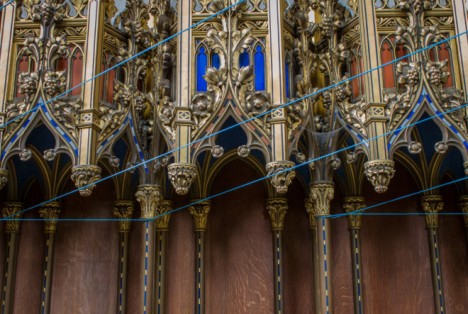
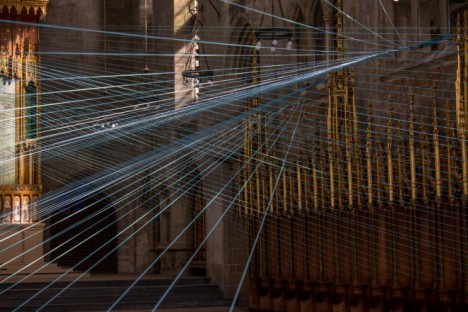
To begin, let’s clarify the definitions of natural and artificial lighting. To keep things simple, natural lighting can also be thought of as available light, such as that produced by the sun or the moon. Artificial lighting is produced via another source, such as a studio strobe, speedlight, LED light, your camera’s pop-up flash, or even a streetlight or lamp.

Natural light2

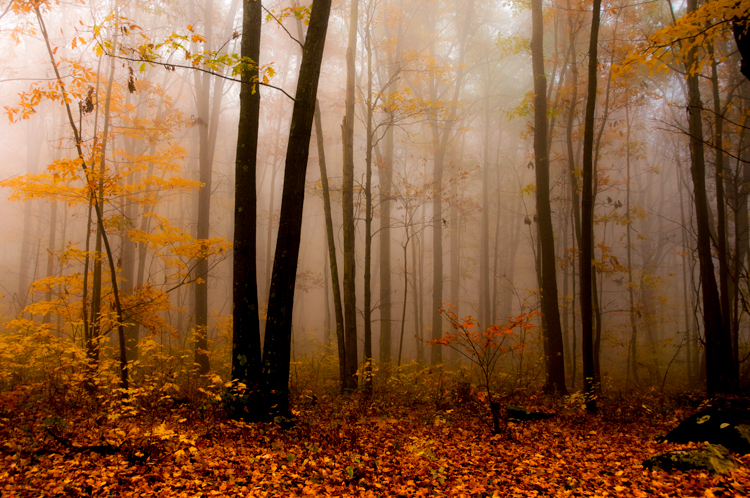
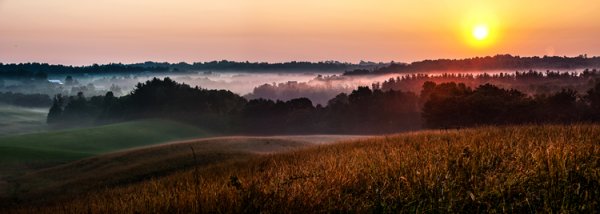
Benefits of Using Natural Light

The biggest benefits of using natural lighting is that it is free, abundant, and very easy to find. There’s no need to make huge investments in lighting equipment to find gorgeous natural light to pull off brilliant shots. All you need is a camera and some sun or moonlight, and you can begin shooting immediately! If you ever choose to upgrade your natural lighting approach, the tools of the trade are also very cheap, consisting mainly of reflectors and diffusers to bounce or manipulate the available light. Due to the ease of use and acquisition of natural lighting, it’s generally recommended that beginning photographers start experimenting with natural light before introducing artificial light to help understand how light works.

Cons of Using Natural Light

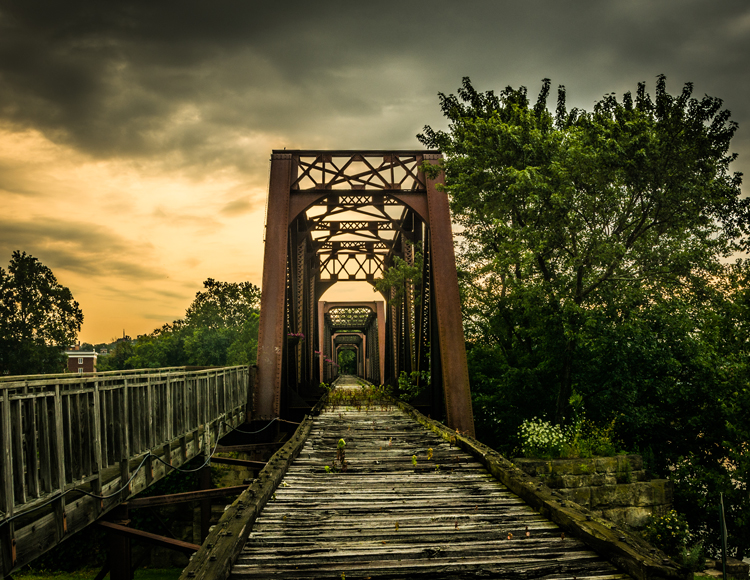
While natural lighting is abundant and easy to incorporate into photography, it can be challenging for the simple fact that sunlight varies greatly. Depending on location, season, weather, and time of the day, natural lighting can produce differing colors and contrast in your images. For example, midday sun tends to produce neutral white colors and extremely high contrast, while golden hours of sunrise and sunset have very warm colors and medium contrast. Thus, the look you’re going for will determine the time and location of your photo shoot, unless you harness additional tools such as reflectors, diffusers, and lens filters.

Natural light1

Benefits of Using Artificial Light

If you’re a fan of being able to manipulate and control every aspect of your photo shoot, artificial light will better suit your needs. Since artificial lighting has little to do with natural sources, it is a ceaseless light source that is available at any time of the day, meaning you don’t necessarily have to plan your photo shoot around the weather, or availability of sunlight. Depending on the artificial light source you choose, sunlight or even moonlight can be replicated, creating images that appear to have been shot with natural light, but at a time of your choosing.

While artificial light may have a reputation for sounding complicated and expensive, there’s a wide range of lighting gadgets available for photographers; ranging from cheap DIY solutions to top-of-the-line professional grade strobes, and lots of options in between. Some lights can have tricky settings, but many are relatively straightforward, especially continuous lighting sources such as LED lights that have simple dimming switches.

Off camera flash portrait photography

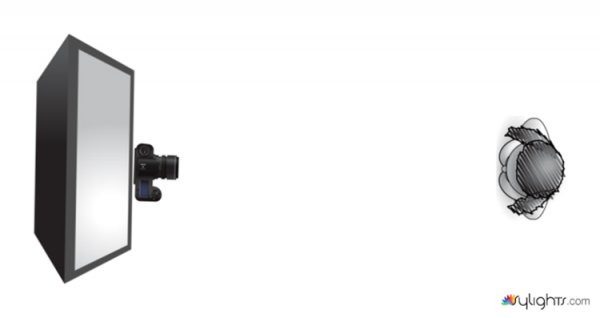
Off-camera flash portrait photography

Cons of Using Artificial Light

Even though artificial light sources offer you more control over photo shoots, it comes with the burden of needing more gear, and time to set it all up. Unlike the sun, artificial lighting costs money, even if you opt for DIY solutions such as candles or desk lamps. Professional grade artificial lighting sources will also need to be held in place with light stands, and possibly even modified with umbrellas, beauty dishes, and soft boxes.

Depending on the photo you have in mind, you may need multiple artificial light sources to balance your image out. There are also other accessories needed such as batteries or power cables and plugs, and you’ll need a dedicated studio or space to set your lights up. Long story short, artificial lighting can adds lots of extra moving parts to your photo shoot, that cost additional time and money, not to mention require lots of practice.

When to use Natural or Artificial Lighting?

What type of lighting you use will ultimately come down to your personal preference and experience as a photographer, as well as your budget and the ideal image you’re trying to create. Artificial lighting typically takes some time and practice to begin using properly; whereas natural lighting is much easier to get started with from the get-go. There are of course exceptions to these rules, but generally natural lighting is usually easiest to use for documentary, street, or run-and-gun photography when you don’t have a lot of time to set up a controlled photo shoot. On the flip side, artificial lighting is usually preferred for commercial, product, and fashion photography when there’s both a budget, and ample resources to create the photo.

Off camera flash portrait photography

Which do You Prefer?

As noted earlier, there are very strong opinions for and against using natural and artificial lighting for photography. Which camp do you fall into, and why?

googletag.cmd.push(function() {
tablet_slots.push( googletag.defineSlot( “/1005424/_dPSv4_tab-all-article-bottom_(300×250)”, [300, 250], “pb-ad-78623” ).addService( googletag.pubads() ) ); } );

googletag.cmd.push(function() {
mobile_slots.push( googletag.defineSlot( “/1005424/_dPSv4_mob-all-article-bottom_(300×250)”, [300, 250], “pb-ad-78158” ).addService( googletag.pubads() ) ); } );

The post Natural Versus Artificial Light: Which Do You Prefer Working With? by Suzi Pratt appeared first on Digital Photography School.


Digital Photography School

 
Comments Off on Natural Versus Artificial Light: Which Do You Prefer Working With?

Posted in Photography


On Assignment: The Light You Don’t See

12 Jul

This photo is 100% flash, 0% ambient. But it almost looks like the reverse. And for this portrait of soprano Robin Steitz, a timeless available-light look was what we were going for.

But when you are working with flash (a single speedlight) and controlling your light (a scrounged “fill blanket” from the couch) you can keep the best of both worlds of strobe and ambient.

Knock it Down, Build it Back Up

The first thing we did was to get rid of everything that we didn’t want. In this case, our available light and everything in the background.

Robin sat at our dining room table, is a ~100 yr old oak farm table. As such, it has a great patina and texture. And it creates a wonderful, simple environment for a portrait.

But the background—a hall and a front door with windows—is distracting. So that went away first. Using a C-stand and arm, I hung a roll of 53″-wide Thunder Gray background paper. Thunder Gray has long been my favorite background paper for portraits—be they in color or B&W. It’s a versatile, deep neutral tone that you can do a lot with.

And today, it takes my visually cluttered hall and turns it into… nothing. Maybe a wall? It just kinda disappears. Background solved.

Now, let’s kill the ambient. Going to ISO 200 and my max sync speed (a rather slow 1/180th of a sec) on my Fuji X-E2 and kit zoom, I dialed down my aperture down to f/6.4. Which finished off my ambient light. Nice and black.

The kit zoom is plenty sharp wide open (love that lens) but as a bonus will be even better in the middle of the aperture range. Most lenses are.

So as of now we have a distilled blank slate. A background that disappears, and an ambient exposure that is pure black. Let’s build from there.

I’m shooting black and white to make a quieter, more timeless photo. Something that could easily have been done in the 1970’s with a 35mm camera and a roll of Tri-X. And that is one of my favorite things about my Fujis. As well as they do color, their black and white looks like film right out of camera.

Even better: turn on the built-in yellow filter setting (red is a bit much for me) and tweak the contrast curves (in camera) until the the B&W look is what you want. To an old-timer like me, it feels a lot like watching a print come up in the Dektol.
__________

Let’s Bring in Some Light

We’re gonna light this with a single speedlight (an LP-180) and my favorite go-to soft mod (a 60″ Photek SoftLighter II).

Using a second C-Stand and arm, the soft light source is floated top and center in front of Robin. And this is where perception meets reality.

What you want: soft light bathing her from all around. Control over the shadows. A light that disappears.

What you get: Soft light, but deep shadows. It’s soft, but it definitely looks “lit,” which ruins the feel of an available light B&W photo.

Here’s the problem. That oak table is very dark, and is giving nothing back to the shadows. We need a big fill card… [looks around the living room] or… a white fill blanket.

That’ll help.

But it didn’t help. It just wasn’t getting enough energy from that flash, even though I had placed it on the table as close as possible—just out of the bottom of the frame.

It was still all key light. Too much key, not enough fill.

But we can solve both of those problems at one time by literally taking the light off of Robin, and pushing it down into the fill blanket. (Don’t laugh. I have used weirder things for fill.)

And that was all it took. Not only do we get a better ratio, but we get total control over the ratio. The more you pull the light away from Robin (and push it down into the fill) the more the key light drops and the fill light rises.

Yes, you are losing key light on your subject. But all you have to do to get the exposure back is to power up your strobe a little. No prob.

Think of that light from the perspective of Robin’s face. It’s sort of a top/bottom clamshell, but not in the traditional beauty light sense. It’s more of a zone of top/bottom light that has a boundary to it. And she is emerging into the edge of it.

So the light pushes into her features without really calling attention to itself. It is not even leaving a signature in her eyes.

And that makes it look not lit. Even though it totally, 100% is lit.

Which in turn makes it look even more like something made out of ambient light and Tri-X, back in the day.


Strobist

 
Comments Off on On Assignment: The Light You Don’t See

Posted in Photography


Light Lines: Stunning String Installation Inside Abandoned Church

04 Jul

[ By Steph in Art & Installation & Sound. ]

abandoned church installation 1

What seems at first to be narrow rays of turquoise light streaming in through the stained glass windows of a vacant Gothic Revival church turn out to be over 6,500 feet of paracord painstakingly wound around ornate posts and columns. Artist Aaron Asis temporarily transformed West Philadelphia’s St. Andrew’s Collegiate Chapel, which has been closed for more than 40 years, with a geometric string installation that shifts the spatial perception within its darkened nave.

abadoned church installation 2 abandoned church installation 3 abandoned church installation 4

Entitled Ci-Lines, the project re-opened the disused chapel for three days over three weekends so visitors could take in both the grandeur of the church itself and the surreal sight of criss-crossing string creating new geometries within the negative space. Built in 1924, the chapel was used for sermon lessons and school services until 1974, and though the larger complex has been reclaimed for other uses, the chapel remains vacant.

abandoned church installation 5 abandoned church installation 6 abandoned church installation 7

“The geometry of Ci-Lines is like an artistic exercise in connecting the dots, crisscrossing overhead and inviting visitors to visually explore a sculptural form as a portal into the nuances of a vacant environ,” says Asis. “The resultant series of cords in tension draws direct inspiration from the existing architectural form inside the chapel. These cords literally render a woven and symmetrical connection between the ornamental posts lining the chapel walls and architectural columns featured along the balconies above, combining to act as a temporary catalyst for observation, investigation, conversation, and realization of spatial majesty in vacant context.”

abandoned church installtion 9 abandoned church installation 10 abandoned church installation 8

Asia hopes that the project will renew interest in the historic structure, helping to preserve it as the cityscape around it shifts and changes. Making use of vacant spaces for art installations helps the public see them in a new light and can spur ideas for revitalization.

Share on Facebook


[ By Steph in Art & Installation & Sound. ]

[ WebUrbanist | Archives | Galleries | Privacy | TOS ]


WebUrbanist

 
Comments Off on Light Lines: Stunning String Installation Inside Abandoned Church

Posted in Creativity


8 Tips For Baby Photography Using Natural Light

12 Jun

Babies. Do you find them a challenge to photograph?

They gurgle, spit, vomit, laugh, cry, smack their hands together… They do a whole lotta things that we don’t need to see forever in a photograph!

But in between all that uncontrollable baby-behaviour are those moments that parents see every day and would love to keep alive forever in beautiful photos – the big eyes, cute smiles, tiny fingers, soft skin, and round cheeks – all those wondrous little details that only come with brand new life. Those are the things that connect to a parent’s heart in the moment, they happen and what they long for once their children have grown up.

00 Copyright Beth Jennings Photography Digital Photography School Baby battle 5932

Ruby, 3 months – ISO 1600, f/2.8, 1/250th

It’s the reason why, in the whirl-wind madness of baby’s first year, that your friend or family member may call on you to ask you to photograph their beloved treasure.

Maybe on one hand you feel honoured to be asked, but also that dreadful, pit-of-the-stomach feeling – do you worry they expect you to swaddle their baby up Anne Geddes style, and photograph him or her with stunning studio lighting and an elaborate set? Do you feel the pressure to create something amazing in the small window of only a couple of hours that you’ll have with them?
How are you going to maximize on the time you’re given, while baby goes through his sleep-awake-feeding cycle?

How are you going to interrupt that cycle to create something amazing, when the last thing you want to do is disturb the baby, wake him up, move him too much and make him cry? How the heck are you going to do it at all?

01 Copyright Beth Jennings Photography Children Photography 2310

Cody, 2 months – ISO 200, f/2.8, 1/200th

Let’s assume you don’t have the studio lighting and equipment to set up in the parent’s home. All you have is you, and your camera, and you’ll work with natural, available lighting. It may sound like it’s not enough, but actually, it’s more than enough if you know how to make do with what you’ve got.

The formula to successfully capturing babies within a limited time frame, one camera and no additional equipment, comes in eight tips total:

02 Copyright Beth Jennings Photography Children Photography 2173

Eliette, 9 months – ISO 1000, f/5, 1/160th

Part 1 Planning

Plan well, and it sets you up for your best chances of success on the day. Follow these steps in the one to two weeks before your shoot:

Step #1 Timing

Babies set their own criteria that rotates around a 1-2 hour schedule of sleeping, eating, crying, playing and nap time. Find out from the parents what that current cycle is, and build your plan from there.

Step #2 Lighting

Will you be photographing at their home? If so, this can include where their baby sleeps in a dimly lit room, by a window in Mom’s arms, perhaps also out in the backyard through dappled light if your shoot will include play time. Stay out of direct sun and just work with soft, diffused lighting. Find out what time of day is best for available lighting in their home and backyard.

Step #3 Clothing

It’s special for the parents to have you there to photograph their baby because it’s something they can’t actually do themselves. Advise them on having their baby’s preferred outfit clean and ready in advance, and a back-up in case of accidents. In order to feel safe and warm, babies also do well with accompanying blankets, bottles, beanies and soft toys. Check that the items all marry well together in terms of colours. If you have some clashes on the day and can’t change it, then shoot anyway and consider black and white for post-production to help strip it back a notch.

Step #4 Schedule

03 Copyright Beth Jennings Photography Children Photography 2195

Anna, 8 months – ISO 400, f/2.8, 1/200th

As best you can, plan the order of mini-events that the parent would like captured. For example, at noon baby will wake up, so you’ll be there from 11:45 and be quietly ready. That will be followed by feeding in the kitchen, and then tummy time in the backyard. If it all comes undone on the day, that’s okay. Just go with the flow of what is presented to you in the natural order that it happens.

Part 2 On the Day

It’s likely you won’t have much time with your subject, so follow these steps to be as prepared as possible before you actually start shooting:

Step #1 Look for the light

See where it is coming from, and where it is falling. For each of the baby pictures in today’s lesson, take note of the light source. Look at the shadows, as they indicate where the light source is positioned. Also observe the catch light (the little reflected glint) in the baby’s eyes which gives life and character. Notice that the pictures here are all created inside by window light, or outside in shaded areas.

Step #2 Compose for the background

Once you’ve established where the best light is coming from, then think about your composition, building up from the background first. See the picture of Cody above? What surrounds him? The rug and white blanket, with small elements of his sister and mother protectively surrounding him.

Step #3 Set up your shoot flow

While the parent is still preparing their baby to be photographed, get your technicals for ISO, shutter speed and aperture established with a test shot, and quick histogram check, to ensure you are achieving technically beautiful captures. Once in place, they are unlikely to change much because the light is constant, and baby won’t move much unassisted. (Shoot Flow is my seven step process for setting up your camera correctly in manual mode).

Step #4 Time to shoot

Once you’ve covered steps one to three, then position the baby (with the parent’s help) in the scene. Time is of the essence now, but it’s also the part you can’t control. All you need to do is be calm and observe what’s actually playing out in front of you in real time. Remember you can move, so keep yourself flexible and mobile. Compose your images, one by one, and keep your camera near your eye, finger at the shutter. When you see something worth capturing, be quick and go for it. One stunning capture is worth so much more than 10 average ones. Imagine your budget is $ 1 a shot and take your time.

04 Copyright Beth Jennings Photography Children Photography 6370

Olivier, one month – ISO 100, f/3.2, 1/160th

What to do with a sleeping baby?

Sometimes you don’t have the luxury to control all the set-up elements. See baby Bent (it’s a German name) below? He was already placed in the stroller and sleeping beautifully, and it would have been cruel to wake him!

  • Where is the light coming from?
  • Is the light play pleasing? Yes it is. It’s soft and softly coats the baby’s face – so the moment is worth capturing.

Then compose the image for what you want to say – in this one, it’s all about those gorgeous cheeks and button chin, as well as the nestling, safe space of the bassinet. So come in close and make your composition for that.

05 Copyright Beth Jennings Photography Children Photography 8987

Bent, newborn – ISO 1600, f/2.8, 1/160th

Technical tips for successful baby photography

Have a look at the technical settings for all of the pictures in this article.

ISO – whatever the light gives you is what you’ll use for ISO. If you’re shooting indoors, place the child nearer to window light than away from it, watching all the time how the highlights are rendering (ie, keep the tones gentle and not too hot).

Aperture – isolating the beautiful child from the background is the perfect approach if you want to make your pictures about their gorgeous details.

Shutter speed – for easy mobility you will likely be hand held when photographing babies, so make sure you are at least using your safe shutter speed of 1/125. Remember that children move quickly, so a faster shutter speed like 1/200 is recommended if they’re up and actively moving around.

06 Copyright Beth Jennings Photography Children Photography 2478

Rupert, 1 year – ISO 1000, f/4, 1/160th

Three final notes for creative observations:

  • Look for the light: Where is it coming from and travelling to? How does it illuminate the subject and where are the shadows?.
  • Observe the composition: Close-up? Horizontal? Low camera angle? Why?
  • The decisive moment of capture: What was happening at the exact moment that the shutter actually fired?.

How do these three elements come together in each photograph?

Have you ever had a friend or family member ask you to photograph their baby? Were you pleased to be asked, or hesitant? How did you handle it? Let us know in the comments section below.

googletag.cmd.push(function() {
tablet_slots.push( googletag.defineSlot( “/1005424/_dPSv4_tab-all-article-bottom_(300×250)”, [300, 250], “pb-ad-78623” ).addService( googletag.pubads() ) ); } );

googletag.cmd.push(function() {
mobile_slots.push( googletag.defineSlot( “/1005424/_dPSv4_mob-all-article-bottom_(300×250)”, [300, 250], “pb-ad-78158” ).addService( googletag.pubads() ) ); } );

The post 8 Tips For Baby Photography Using Natural Light by Beth Jennings appeared first on Digital Photography School.


Digital Photography School

 
Comments Off on 8 Tips For Baby Photography Using Natural Light

Posted in Photography


Take Your Light With You – the Power of Speedlights

10 Jun

Off-camera flash is a huge part of lighting used in photography today. Of course you can’t compare it to studio lighting, but the question is, how close can you get? In this article I will talk about portable lighting, and how to control it with some simple accessories and light modifiers to achieve the big lights look.

As a serious off-camera flash fan, when the Canon 600EX-RT Speedlite was put out on the market, I immediately went out to buy it. I have to say, I love the way it performs and the upgrades it has, compared to its predecessor, the 580EX II. After testing it for a couple of weeks, I started thinking about buying another one so I could take advantage of the built-in radio triggers that are one of the major selling points of these units. But the thing is, they don’t come cheap. After some searching around, I realized that for the price of another Canon 600EX-RT, I could buy two Yongnuo 600EX-RTs plus one ST-E3-RT controller, which are really similar to the Canon units and use the same radio-triggering system. So this is what I ended up with:

01

You can see from the image how similar they look, and the functions and menus are pretty much the same as well. It’s the perfect solution for good equipment on a low budget.

They are a Chinese-made product and I wouldn’t trust them for serious on-camera work as they’re reported to have some overheating and TTL metering problems. But surprisingly, the build quality is much better than I expected, so for the price, I decided to give them a go for off-camera lighting.

You don’t really need three speedlights as a starting point to do off-camera flash. All you need is a simple flash that allows manual power control, a couple of cheap triggers, and you’re in business. This setup is a step forward in the off-camera flash world, as it allows you to control up to five groups of flashes in slave mode, through a master unit in manual or TTL mode.

02

The shooting session you are about to see was my first time trying out this setup, and it was all about getting familiar with the controls and trigger functions, which I found very intuitive and user-friendly. It took place in a high-end car stand with no prior scouting or production. So the idea was to get to the venue and work with what I had; two beautiful models, a great clothing collection, and a few exotic cars.

All the images were made with simple light modifiers like shoot-through umbrellas, softboxes and snoot grids that are simple and fast to assemble, making the job a lot easier if you’re doing it alone. The light stands are the 001B by Manfrotto, which are ultra-compact, and support enough weight to use with speedlights and simple modifiers.

I also carry around some gels for simple colour temperature correction, or for when I want to go crazy with colour and party like it’s the 90s all over again.

03

This image is a good example of how you can achieve a high-end fashion look with this equipment and a simple two-light setup.

04

The ambient light plays an important role in this image and it should always be the starting point. A quick reading with the camera light meter told me that the ambient light was – f/2.8, 1/125th at 100 ISO. So my flash power was set to complement that lighting without overpowering it; a main light with a shoot-through umbrella, and a hair light with a grid.

A lighting ratio of 1:2 is usually a good proportion. The ability to control everything from a master transmitter on top of your camera is priceless, as it allows you to adjust things as you go, without having to constantly move and change settings in the units themselves. This is a great way to keep it simple and effective. When you have control of this basic setup, then you can start to play around with it. Change the light modifiers and add more light sources to fill out different areas in your image. Like the setup used in this second image where the light positioning is similar to the first, but I added a third flash to add a little more light to the background.

05

Besides power and ratio control, the next important thing is to control the direction of your light. One simple way to do that without a modifier is to use the internal zoom control in the flash. In these units it ranges from 20 to 200mm which enables you to control the angle the light is going to reach from a wider to a narrower beam.

You can also use grids, or just make your own snoot or flag with some cardboard, or whatever you have with you that will do the trick. Usually I use black cinefoil which is completely malleable, and allows me to get the shape I want for greater light control.

06

This next image is all about grids, and critical light placement to keep the light focused on the model to allow for a dark background.

07

The trick here is the HSS (high-speed sync) function of these flashes which allows the use of shutter speeds higher than 1/200, freezing fast action movements and blocking the ambient light that would otherwise illuminate some of the background.

The major drawback of off-camera lighting is, of course, the power output these units provide. Even with the powerful guide number of 197′ at ISO 100 and 200mm of the Canon 600EX-RT, which is probably the most powerful on the market in its range, it’s still not enough to compare to a studio strobe.

But that doesn’t mean you can’t cheat. One easy way is to group flashes together and try to squeeze more juice out of them. I use a triple bracket inside a soft box to fake it, and get the look of a more powerful light source.

08

This way you can use different settings on your camera and make the light work your way, giving you more depth of field, for instance.

09

So, how close can you get to studio strobes with off-camera speedlights? Well, pretty darn close if you ask me, as long as you’re able to accept its limitations and just get the most out of it. How do you use your speedlights?

googletag.cmd.push(function() {
tablet_slots.push( googletag.defineSlot( “/1005424/_dPSv4_tab-all-article-bottom_(300×250)”, [300, 250], “pb-ad-78623” ).addService( googletag.pubads() ) ); } );

googletag.cmd.push(function() {
mobile_slots.push( googletag.defineSlot( “/1005424/_dPSv4_mob-all-article-bottom_(300×250)”, [300, 250], “pb-ad-78158” ).addService( googletag.pubads() ) ); } );

The post Take Your Light With You – the Power of Speedlights by Ivo Guimaraes appeared first on Digital Photography School.


Digital Photography School

 
Comments Off on Take Your Light With You – the Power of Speedlights

Posted in Photography


How to Shoot in Low Light – 9 Commonly Asked Questions

03 Jun
DSC_4289-Edit-Edit

This image of Moon Rise over Marietta, Ohio was taken 20 minutes after sunset during the Blue Hour when the sun had set and the sky was a dark blue. Here the city lights make a great warm glow over the city.

According to British photojournalist Donald McCullin, “There is no such thing as bad light, just misunderstood light.” Many photographers consider low light to be bad light. The purpose of this article is to encourage you to not consider low light as inferior or unusable, but rather to look for subjects to photograph that react well to the available light.

Keep in mind that low light photography is not exclusively night photography. Low light photography opportunities may appear any time of the day as well. For instance, shooting waterfalls in low light allows you to shoot with a slow shutter speed, prevents over-exposure of the white water of the falls, and thereby creates a beautiful silky effect capturing the moving water. Using a flash will light up any subject, of course, but let’s take a look at how to improve your photography in naturally occurring low light. Some frequently asked questions about low light photography are addressed below.

Low Light Photography FAQs

14595250669_30c342a792_o

Low light create very dramatic scenes. Dark storm clouds turned this potential sunrise into a great low light opportunity

My low light images are blurry. Would a better lens alleviate the blur?

The short answer to this question is YES, a fast lens with maximum f-stop of 1.8 for instance, will give you better results than a kit lens with a maximum f-stop of 3.5 or 5.6. But even the faster, more expensive lens, will give you undesired results with the wrong settings. The wider aperture opening will allow you to use a faster shutter speed resulting in a sharper image. These lenses with larger maximum apertures are called “fast” because they allow you to shoot with faster shutter speeds, due to more light that is entering your camera through the bigger opening.

What are the best camera settings for shooting in low light?

Manual Mode

Shooting in manual mode is paramount to successful low light photography as it allows you to control every functional aspect of your camera. You basically have three ways to get more light on your camera sensor: Shutter speed, Aperture and ISO. These three controls are called The Exposure Triangle, and each of these can have a positive or negative result to your image’s exposure. Therefore, learning how to use them for the best result is the key to low light photography. Your in-camera light meter will reveal where adjustments should be made to the camera settings, and well-exposed images will be the result.

Shutter Speed

If you are shooting handheld, a good rule of thumb is to set your shutter speed to match your focal length. For example, if you are shooting at 50mm your shutter speed shouldn’t be any slower than 1/50th of a second. Of course, if the subject of your photo is moving, then you will need to increase your shutter speed to be fast enough to freeze the action. Therefore, choosing a slower shutter speed will allow more light into your camera, but with that setting, the possibility of a blurry picture occurs.

Great Blue Heron in Fight was the subject of this low light image. Exposure 1/250 of a second, f/5.6, ISO 1250. Here using the combination of slower shutter speed and a higher ISO to create the blur of the wings and panning to match the speed of the fight of the heron.

Great Blue Heron in fight was the subject of this low light image. Exposure 1/250 of a second, f/5.6, ISO 1250. Using the combination of slower shutter speed and a higher ISO to create the blur of the wings and panning to match the speed of the fight of the heron.

Aperture

In most low light situations you will probably need to shoot with your aperture wide open. But if there is enough light to allow you to shoot with a smaller f-stop, it will increase your depth of field. The principle to consider: choosing a wider aperture will let more light into your camera, but will decrease your depth of field, which could lead to an important portion of your image being out of focus.

ISO

The higher the ISO number the more light your camera will record. The trade-off here is, the higher the ISO, the more digital noise you are adding to your image. Keep your ISO as low as possible and only increase your ISO after you have maxed out your shutter speed and aperture.

Shoot in RAW

For best results, shooting in RAW is recommended, for the simple reason that your camera will save more shadow detail in RAW format compared to the compressed format of jpg.

It is very helpful to learn how to check your histogram, and not just rely of what you see on your camera’s LCD screen. Use the histogram to check your exposure, and avoid clipping the highlights and shadows.

11943436386_0912d70961_o

Using the low light at Huntington Beach California to create this black and white image with a five second exposure.

How do I take low light action shots?

Shooting action in low light can be very challenging and is almost always going to require you to shoot with your aperture at its widest setting. When your aperture is set, then your shutter speed should be adjusted to match the action that you are trying to freeze. Of course, depending on how low of a light situation you are shooting within, there may simply not be enough light. If this is the case, adjust the ISO to a higher setting until a good exposure is set. If your ISO setting is so high that you are getting an unacceptable amount of digital noise, you have two options: either add light with a flash or some other source, or live with the noise and try to remove some of it in post processing. Sometimes with the noise issue, it comes down to getting the shot with noise, or not taking the shot at all.

How do I reduce the digital noise level in low light images?

The simple answer to this question is to shoot at the lowest ISO that you can. But it is also a good idea to know the ISO at which your camera produces noise that you consider unacceptable. Always make sure that your exposure is correct. Even at a low ISO, if your image is underexposed you will have some noise in the shadowed areas.

4016735972_59e71999ac_o

An over casted  cloudy day at Blackwater Falls West Virginia allowed for this long exposure without blowing out the highlight.

How do I focus in low light?

Another reason for blurry images in low light is the fact that some cameras just aren’t manufactured to focus properly with less light. Try shining a light on your subject to give your camera enough light to focus. You also may use you manual focus ring to fine-tune your focus. Using the center focus dot may also help as it is usually a cross-point type which focus faster and more accurately than others.

How can I take pro-like images in low light?

Four things that most pros are going to do in low light:

  1. Use a tripod
  2. Shoot in RAW
  3. Shoot in Manual Mode
  4. Use the histogram
8038775792_361ab83c88_o

Low light makes great silhouettes.

How do I choose the best white balance for low light?

Set your white balance to match you environment –  Tungsten for indoors with light from a regular lightbulb, Fluorescent for light from fluorescent bulbs, Cloudy for low light created by an overcast day, and Shade for shooting in a shaded or shadowy area. But, one thing to remember if you are shooting in RAW format is that you can adjust your white balance later in post-processing. But if you are shooting JPGs it is very important to get your white balance correct in-camera. For this reason you should not shoot Auto white balance, it’s very hard, sometimes impossible, to correct later from a JPG.

Should I raise my ISO or lower my shutter speed in low-light?

Assuming that you are shooting with your aperture wide open, in most situations this is an easy one to answer. Adjust your shutter speed and raise your ISO as a last resort. Remember that raising your ISO is going to add more noise into the image. Most new DSLRs do a much better job with the noise levels in their higher ISO settings, but as mentioned earlier, it is a good idea to know at what noise level you are unwilling to accept, and what ISO that is for your camera. In situations where your subject is moving, it may become necessary to adjust the ISO to keep your shutter speed fast enough to freeze the action.

DSC_0101-Edit

Fog created the low light in this fall image.

Why aren’t my low light shots sharp even when I shoot using a tripod?

Remember in most low light you will be shooting with your aperture wide open (or nearly so), hence your depth of field will be very shallow. Be extra careful to lock your focus (even try back-button focus) on the part of your image that needs to be in sharp focus. Case in point: when shooting a low light portrait, it is important to have the subject’s eyes in focus. If your subject is in motion, increase your shutter speed until it freezes the motion of the image. Also, make sure your camera’s vibration reduction is turned off, as this can actually create blur in your image even if shooting with a tripod.

Bonus tip

In low light the LCD screen on the back of your camera is going to look much brighter than the actual conditions. So, if your camera has an adjustment for the brightness of your LCD screen, turn it down so that your image will not appear to be overly bright when you view it, even if it is underexposed.

7496092624_15c8de2ffe_o

Conclusion

The trick to low light photography is to take control of your camera, and know that every action or setting will have a reaction. So, how is that different than photography in any light? It’s not, really. Just consider photography in low light as an opportunity to be creative. What subjects do you like to shoot in low light?

googletag.cmd.push(function() {
tablet_slots.push( googletag.defineSlot( “/1005424/_dPSv4_tab-all-article-bottom_(300×250)”, [300, 250], “pb-ad-78623” ).addService( googletag.pubads() ) ); } );

googletag.cmd.push(function() {
mobile_slots.push( googletag.defineSlot( “/1005424/_dPSv4_mob-all-article-bottom_(300×250)”, [300, 250], “pb-ad-78158” ).addService( googletag.pubads() ) ); } );

The post How to Shoot in Low Light – 9 Commonly Asked Questions by Bruce Wunderlich appeared first on Digital Photography School.


Digital Photography School

 
Comments Off on How to Shoot in Low Light – 9 Commonly Asked Questions

Posted in Photography


Photosynthetic Furniture: Living Fixtures Produce Light & Heat

01 Jun

[ By WebUrbanist in Design & Fixtures & Interiors. ]

bio furniture

Employing natural processes to illuminate and warm interior spaces, this series of algae-based furnishings combines beautiful glass vessels and organic matter to create lovely yet functional home objects. Each fixture generates light, heat and oxygen using methods similar to those seen in bio-adaptive architectural facades.

bio interior space installation

bio heat light design

Designed by Jacob Douenias and Ethan Frier (photos by Tom Little Photography LLC.), objects in the Spirulina series utilize cyanobacteria, “chosen for its rich green hue, light absorbency, and culinary qualities,” set in alkaline water housed in shapely glass vessels. Found all over the world, this versatile algae can survive and thrive in all kinds of environments and is already widely used in other forms of biotechnology.

bio adapative green fixture

In this commissioned series, a set of spaces show off the various ways these organic home furnishings can be deployed in living and dining areas, popping up from tables, sprouting from walls, sitting on the floor or hanging from the ceiling. The various units are linked by a half mile of hidden plumbing and wiring and controlled via a concealed computer system that both analyzes results and controls each appendage. Living Things is now installed at the Mattress Factory Museum of Contemporary Art in Pittsburgh, Pennsylvania until March 27, 2016.

living hanging lamps heaters

But how does it work? “The 3D printed nylon knobs embedded in the surface of this workstation actuate eighteen valves which allow for the harvesting of Spirulina when the culture becomes dense enough, and the supply of fresh liquid media to each vessel. Inside the cabinet the pumps, tubing, manifolds, LED drivers, air pumps, heater connections and filters which comprise the heart of the life support system”

bio furnishings fixtures living

More from its creators: “The morphologies of hand-blown glass vessels function both as lighting and heating elements for the human occupants, and high functioning photobioreactors which provide heat, light, agitation, air supply, nutrient and waste control to the living algae inside.”

Share on Facebook


[ By WebUrbanist in Design & Fixtures & Interiors. ]

[ WebUrbanist | Archives | Galleries | Privacy | TOS ]


WebUrbanist

 
Comments Off on Photosynthetic Furniture: Living Fixtures Produce Light & Heat

Posted in Creativity


Understanding Light for Better Portrait Photography

29 May

A solid understanding of light can make you stand out from an average photographer. In fact, in portrait photography, light is even more important than the subject and location. This is because without the proper use of light, you can ruin the shot, even with the best looking subject, at the most awesome location in the world!

In this article, I’m going to break down the understanding of Light for you into six simple terms. Once you understand and apply these concepts, you will immediately notice the improvement of quality in your portrait photographs.

The six principles of light are: intensity, dynamic range, direction, diffusion, White Balance and reflection.

1) Intensity of Light

Intensity of light resized

Intensity is the brightness level of light and it brightens up your subject. For both natural light and studio light, you can modify the light source to change the intensity. I’ll cover the basics of light modifiers later, but the most important fact about intensity is that the distance between the light source and your subject has a massive impact on the intensity of light.

This is also known as the Inverse Square Law.

It is an equation that dictates the intensity of light produce at a given distance. It states that the intensity of light changes in inverse proportion (one over that number) to the square of the distance from the source. Meaning:

  • At one foot it is 1 over the square of one or 1/1 or 100%
  • At two feet it is 1 over the square of 2 (2×2) or ¼ or 25%.

In plain English, that means if you double the distance from one to two feet, the light intensity will decrease by 75%. On the other hand, if you bring the light source closer from two feet to one foot the intensity of light is going to increase by four times.

With the knowledge of inverse square law, you will be able to determine the placement of your subject for better portrait photography.

2) Dynamic Range

Dynamic range and stops have a very close relationship. Dynamic range is the difference between the lightest and darkest tones of an image, and a stop is the measurement of this range. Since a stop measures light in representation of numbers, what’s the relationship between the two?

The difference of one stop of light means the light is twice (or half) as intense. Human eyes can detect roughly 10-14 stops of light, while a DSLR camera can only detect around 8-10. With that said, your camera sees a lot less than your eyes. Dynamic range issues occur when this range goes beyond what the camera can record in details. These areas come out as pure white or pure black in the photograph.

Generally, most people tend to avoid pure white and black in portrait photography unless it is for artistic reasons. Otherwise, it may look like as if you exposed the picture incorrectly.

Dynamic range resized

3) Direction of Light

The position of your light source is very important because it determines how light hits your subject. It has a great affect on the quality of your photograph and a few small inches of light misplacement could bring your shot down to a snapshot.

A common question people always ask is, “Why do I need to worry about the direction of light when the subject is properly exposed?” Everyone has different opinions, but my point of view is that this is how you create mood, define shadows, and shows depth to your subject.

The biggest thing to avoid in portraits is flat images (which is created by lighting your subject directly from your camera angle). Reach into your wallet now and grab your driver’s license. That is an example of a flat image. The picture is either too bright or too dark; there is no shadow on your face (or a very harsh one) because the flash was pointed straight at you; and the worst thing is you probably look 10 years older! Without saying any further, I am almost certain that it is one of the worst pictures of yourself.

So what are some ways to light your subjects? Below are two of the most common ways:

Split Lighting – This direction of light divides the face equally in half so one side is in shadow while the other is toward the light. You can simply place the light source 90 degree to the left or right of your subject. If you are using natural light, just ask your subject to turn to such an angle. It creates a very deep dramatic shadow that casts strong moods for your subject. It is great for artistic type portrait shots.

James Willamor

By James Willamor

Loop Lighting – Perhaps the most common lighting method for portraits. Simply place the light source about 45 degrees to your subject. The shadow it casts is going to show nice depth; this method is great for single portraits. Make sure you place the light just slightly above eye level to make the best of this lighting style.

Dragos Jianu

By Dragos Jianu

There is no right or wrong direction of light in portrait photography. They are more personal preference, mixed with different style and purpose. The main thing is that you make your subject look good in front of the camera.

4) Diffusion of Light

Diffusion relates to hardness and softness of light. It also determines the intensity of the shadow. As a general rule, the bigger the light source and the closer it is to the subject, the softer the light.

When photographers talk about hard light, it means there is a rapid falloff between bright and dark areas in the photograph creating harsh, sharp-edged shadows. As such, the photograph doesn’t look as appealing to the viewer.
An example of hard light would be taking picture under a bright sunny day or when you overexpose studio light photographing your subject. Generally, hard light is not something you should be looking for in portrait photography unless for artistic reasons.

Diffusion of light resized

As you might have guessed, opposite hard light, there is soft light. This kind of light has mild falloff between bright and dark areas in a photograph. The light is evenly spread and it looks like it wraps around the subject.
An example of soft light would be taking pictures under an overcast day or using studio light with modifiers. The portrait looks more pleasing to the viewer and the photograph does not show much contrast.

5) White balance

White balance is the color temperature of your camera’s setting. Matching the right color temperature in the environment you are shooting is very important. This is how you remove an unrealistic colorcast, so that your photograph represents true color that you see in real life.

Depending on your camera model, you should have a different white balance presets to choose from: Tungsten, Fluorescent, Daylight, Flash, Indoor, Cloudy, Shade, Custom (PRE), and Kelvin (K).

As the photographer you need to make sure white appears white and not yellow/orange on the hot end, and blue/green on the cold end on the Kelvin scale.

If you shoot RAW, you can modify the white balance during post-processing of your images. This can also be changed easily in Adobe Lightroom or Photoshop. By the way, this is one of the reasons why it is important to shoot RAW instead of JPEG.

6) Reflection of light

Light has one very distinct behaviour; it travels in straight lines. Which means no matter whether you are using natural light or studio light, it is only going to travel in one direction until it reaches a surface.

Once the light reaches a surface it reflects off at the same angle it hits. The amount of light being reflected is going to be determined by the color and texture of the surface.

So why is reflection of light important for portrait photography?

Once you understand light behaviour you can then modify it to control how much light you want for your subject. For example, if you want soft light and you have no other equipment, you can bounce light off a wall. As mentioned before the larger the light source the softer the light, you can now control both the direction and intensity of light for your portrait photographs by doing so.

Reflection of light resized

Another common way to modify light is using a softbox such as a brolly box (umbrella softbox). This is a type of softbox where the external flash is placed inside of it. When the flash fires, light bounces all around inside the box until it exits out the white diffuser on the front. If you have an assistant to hold the brolly box you now have a portable light source producing soft light everywhere you go. This is a must-have for portrait photography.

I hope by breaking down the understanding of light into six categories they are going to be able to level up your skills as a portrait photographer. Be sure to practice as much as you can, but most importantly, enjoy this process and have fun in photography.

googletag.cmd.push(function() {
tablet_slots.push( googletag.defineSlot( “/1005424/_dPSv4_tab-all-article-bottom_(300×250)”, [300, 250], “pb-ad-78623” ).addService( googletag.pubads() ) ); } );

googletag.cmd.push(function() {
mobile_slots.push( googletag.defineSlot( “/1005424/_dPSv4_mob-all-article-bottom_(300×250)”, [300, 250], “pb-ad-78158” ).addService( googletag.pubads() ) ); } );

The post Understanding Light for Better Portrait Photography by Gary Lun appeared first on Digital Photography School.


Digital Photography School

 
Comments Off on Understanding Light for Better Portrait Photography

Posted in Photography


Your Light Problems, Illuminated at Last

18 May

We’ve gathered up your most pressing light issues and found the perfect solutions for them. Dare we say we shed light on the situation? Oh yeah, we totally dare.

Check out all the products you’ll ever need for light perfection and our best tutorials for shooting in tricksy light. You’ve got the ‘light’ stuff now baby!

Choose the “Light”!
(…)
Read the rest of Your Light Problems, Illuminated at Last (291 words)


© Erin for Photojojo, 2015. |
Permalink |
No comment |
Add to
del.icio.us

Post tags:


Photojojo

 
Comments Off on Your Light Problems, Illuminated at Last

Posted in Equipment


5 Easy Studio Setups With One Light

13 May

Studio lighting is one of the most versatile tool sets available to you as a photographer. Apart from 24 hour access to a quality light source, there is a vast quantity of modifiers, accessories, and techniques that allow you to design and shape the light exactly as you need to fulfil your creative vision. However, all of this choice that is available to you can often result in confusion and indecision. The sheer amount of stuff available can also lead you to believe you need more than you already have.

Fortunately, in the case of lighting, less is often really more. In this tutorial I am going demonstrate five ways to use a single light source to good effect, with a variety of subjects. Even though each of these images was created with a specific modifier, each setup will work with most any modifier of your choice. For example, you could swap a softbox for a beauty dish. This will alter the shape and softness of the light but you will still get good results. Some of the techniques also use a silver reflector.

If you don’t have a reflector, you can get a large piece of cardboard and glue a sheet of aluminium foil to it. Another option is to use a mirror. You don’t even need a strobe or flash to make these techniques work; window light, with a bit of extra effort can produce the same effects.

Here are five easy studio setups with one light you can try yourself.

Setup #1

Amb john mcintire photography 0049

Simplicity in technique is the aim of this first image. The light source is a strobe fitted with a medium sized softbox. It is positioned about five feet away from the subject, elevated about four feet above, and pointed down at a 45 degree angle. The camera is directly under the softbox (this is called Butterfly lighting).

lightingdiagram1

Lighting diagram for light placement

The centre of the softbox is pointed to the left of the model (camera right) with only the edge of the light source directly falling on her. This technique is called feathering. It is useful for controlling and fine-tuning the light in a scene, and helps to soften light from a harder modifier such as an 110 degree reflector.

If you don’t think you’re ready to try feathering just yet, try to aim your light source at your subject’s nose instead.

Setup #2

Greyhounddalmatian john mcintire photography 0795

lightingdiagram2

To create dramatic lighting in your photos, try lighting your subject from behind. This image of my dog is lit by a softbox placed at a 45 degree angle behind her at camera left. The softbox is just out of the left-hand side of the frame and is very close to the subject. Because she is black and white, there is a huge amount of contrast in the scene. This left the shadow areas closest to the camera very dark. To fix this, you would introduce a reflector. The reflector is also only just out of the frame on the right-hand side. Bringing it in close allows you to increase the amount of reflected light filling in the dark shadows.

Setup #3

Pastry john mcintire photography 6968

For added versatility, you can combine the previous two techniques. This image is again lit by a softbox six feet behind the pastry and elevated about five feet above. Instead of pointing the light source at the pastry, it is aimed straight ahead so that the softbox is not directly illuminating the subject. This is a more extreme version of feathering that creates beautifully soft light.

lightingdiagram3

When you feather the light in this way, be aware that you are lighting the scene with a only a tiny fraction of your flash’s output. You will need to compensate by altering your ISO, increasing the flashes power output or altering your aperture.

To fill in the shadows created by the backlighting, use your silver reflector.

Setup #4

Romey john mcintire photography 0971

lightingdiagram4

If you want to create images with more contrast in your light than a softbox provides, try using a silver beauty dish. The light source in this photo is slightly to the right of the camera and is three feet away from the subject. The bottom edge of the beauty dish is lined up with the top of the model’s head, again creating the feathering effect. To fill in the shadows, ask your model to hold the reflector pointed towards her chin and just out of the frame.

Setup #5

Monika john mcintire photography 5347

If you prefer really soft light, you need to increase the size of your light source in relation to your subject. The obvious ways to do this are to move your light source closer to your subject, or to use a bigger modifier.

Alternatively, you can bounce your light into a wall or a ceiling, converting that surface into your light source.
To imitate the lighting in this image, fit your light source with a bare reflector and point it into the corner of a room. Be wary of off-coloured walls though; the slightest deviation from white can cause colour casts in your images that take a lot of time to correct. If you’re shooting black and white, then colour casts are irrelevant and you can bounce your light from just about any surface you can imagine.

lightingdiagram5

As you can see, you don’t need piles of equipment to get the most out of the studio. A single strobe, a modifier or two, and a reflector will provide you limitless creative opportunities for your photography. Go ahead and alter these suggestions to suit your needs and style and don’t be afraid to experiment, there really are an infinite number ways to use this modest amount of equipment.

googletag.cmd.push(function() {
tablet_slots.push( googletag.defineSlot( “/1005424/_dPSv4_tab-all-article-bottom_(300×250)”, [300, 250], “pb-ad-78623” ).addService( googletag.pubads() ) ); } );

googletag.cmd.push(function() {
mobile_slots.push( googletag.defineSlot( “/1005424/_dPSv4_mob-all-article-bottom_(300×250)”, [300, 250], “pb-ad-78158” ).addService( googletag.pubads() ) ); } );

The post 5 Easy Studio Setups With One Light by John McIntire appeared first on Digital Photography School.


Digital Photography School

 
Comments Off on 5 Easy Studio Setups With One Light

Posted in Photography