Using the surprisingly simple technique of light painting you can create a wide variety of portrait styles using only a small flashlight as your light source. I should warn you though, light painting of all kinds can be highly addictive. Once you start, you may not be able to stop.
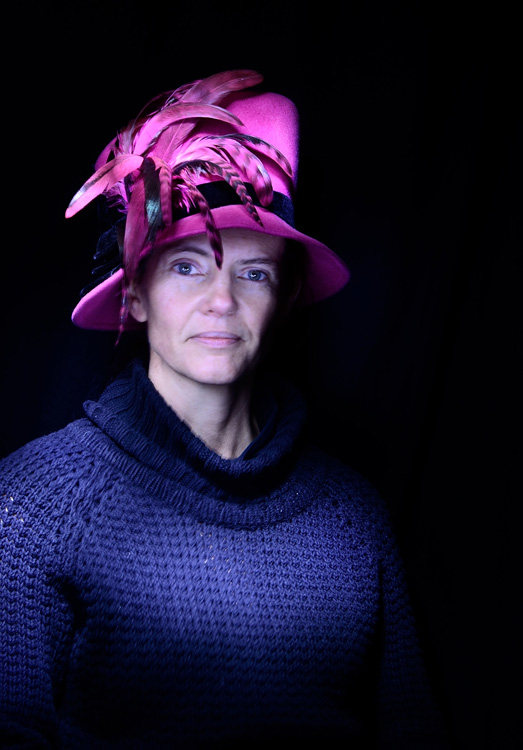
Light painted portrait
One of the main things to understand with light painting is that the camera sensor only reads light, if there isn’t any light hitting the person shining the flashlight, they simply do not show up in the image. This allows you to move around in front of the camera while the shutter is open, and gives you ultimate control of what areas of your subject are lit. This is great for portraiture, especially in situations where you might have a complicated background, or one where you only want to light certain sections.
Below is a list of what you will need for any light painting, and a guide on how to use the technique specifically for portraiture. For a more detailed information on light painting have a look at this two part tutorial .
What you will need:
A hand held light source. Any cheap flashlight or LED light will do, you can even use your mobile phone.
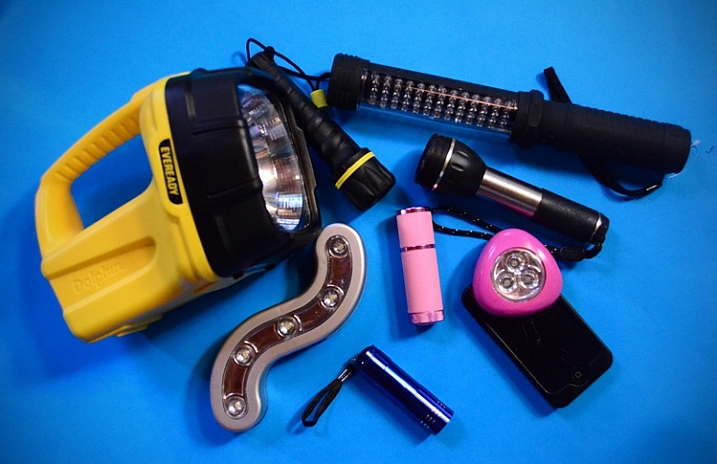
Any small LED or flashlight will do, even your mobile phone.
For light painting a portrait subject a directional beam of light is best, non-directional (or diffused) light will illuminate you as well. Different flashlights give off different types of light. Some have blue cast, which isn’t great for portraiture so you might want to experiment with your white balance, or add a warming filter in post-processing. You can also add color to your light source with cellophane (colored gels) or colored sheer fabric.
Tripod and camera settings
Light painting needs a long exposure, so you will need your camera set up on a tripod. Setting your shutter speed somewhere between 10 and 30 seconds is a good place to start, then play around from there. Your ISO should be at its lowest to avoid the grain (noise) caused by a long exposure.
The cover of darkness
You’ll need a completely dark room or studio, or you can shoot outside at night. If shooting outside, you’ll have to be careful of incidental light, such as street or car lights, overexposing your image. But these things can be used to your advantage in creating interesting backgrounds for your portrait subject.
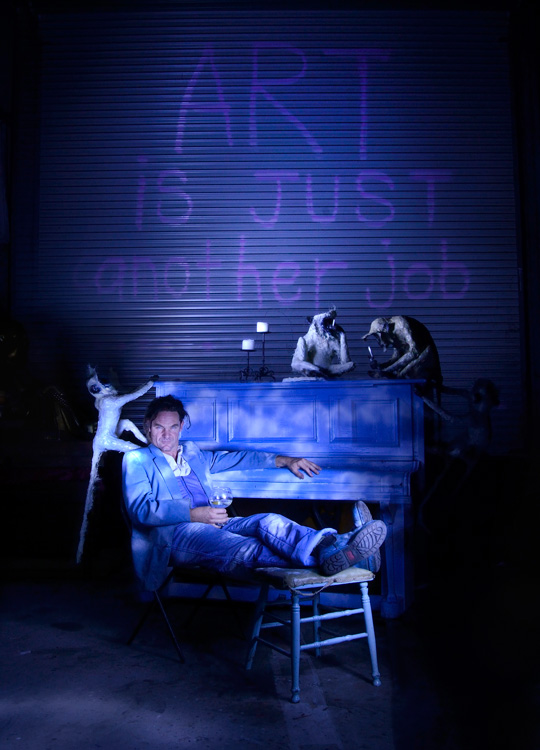
Light painting a portrait outdoors
Ready, set, light paint
Have your portrait subject in position and turn all lights out. Shine your light source on your portrait subject to help you get focus. You’ll want to focus on the face, so it’s possibly best to have your subject close their eyes before you shine your light directly into their face.
Note: to keep the focus locked when you press the shutter button, you will either need to switch it to Manual Focus or use back button focus.
Then click the shutter, and try not to trip over anything in the dark as you move in toward your subject. How close you get to your subject depends on your light source strength, how fast you move it, and the effect you are after. You’ll have to experiment, but for a small LED, a few inches from your subject is a good starting point. Keep the torch (flashlight) moving constantly, and pointed away from the lens.
Getting sharp images of people when you are using long exposures usually doesn’t work so well due to people’s inability to sit perfectly still. With light painting, you are only exposing a small part of them at a time, and only for a brief moment, so while it can be a bit tricky with fidgety subjects, for the most part you will be able to get sharp images. Sometimes a bit of motion blur can also be effective.
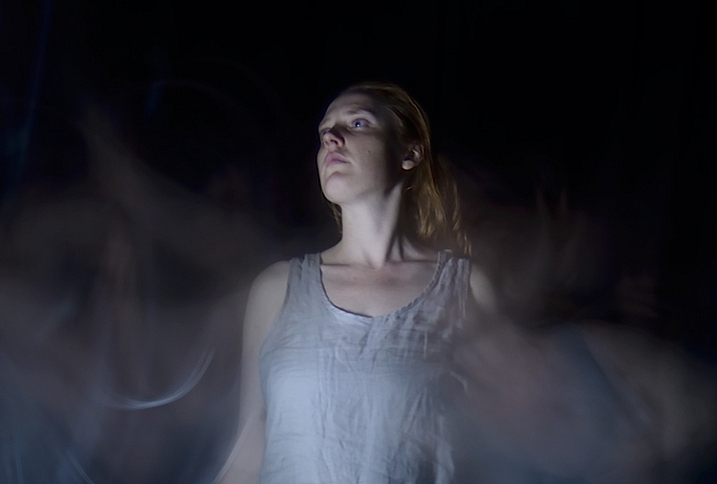
Making the most of motion blur
Help your subject stay still during the exposure by letting them know when you release the shutter, and when you are about to shine your light on them. They’ll be in the dark, literally, so they won’t know what you are doing.
Have them take a deep breath in and out just as, or after, you release the shutter. Don’t have them hold their breath, you don’t want them to look strained. Start your light painting with the face so they don’t have to hold their head still for your entire exposure.
Letting your portrait subject have a look at your camera preview can help them to understand what you are trying to do. If they are unfamiliar with the technique, it can seem a bit odd, all this waving a torch in their face in the dark.
You can set a flash to a slow sync so it fires off at the beginning of the exposure (or you can just set your flash to manual mode and fire it using the Test button), sharply lighting your subject, and then move in with your light source or have your model wave it around. Alternatively you can give a quick burst from a studio light.
While still technically a light painting portrait this method is more of portrait with some light painting added in as opposed to light painting the portrait subject themselves.
It will probably take you and your portrait subject a few attempts to get the hang of it, but once you’ve got the general idea, and have tested out how your light source plays on your subject, you can then experiment. Below are some ideas to try out.
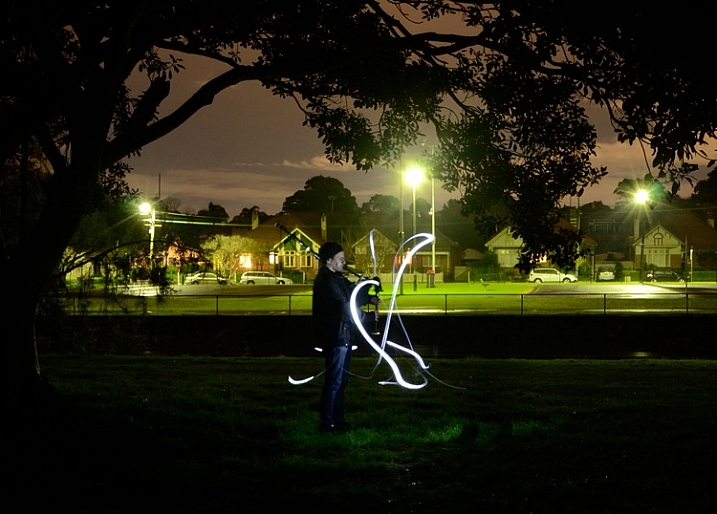
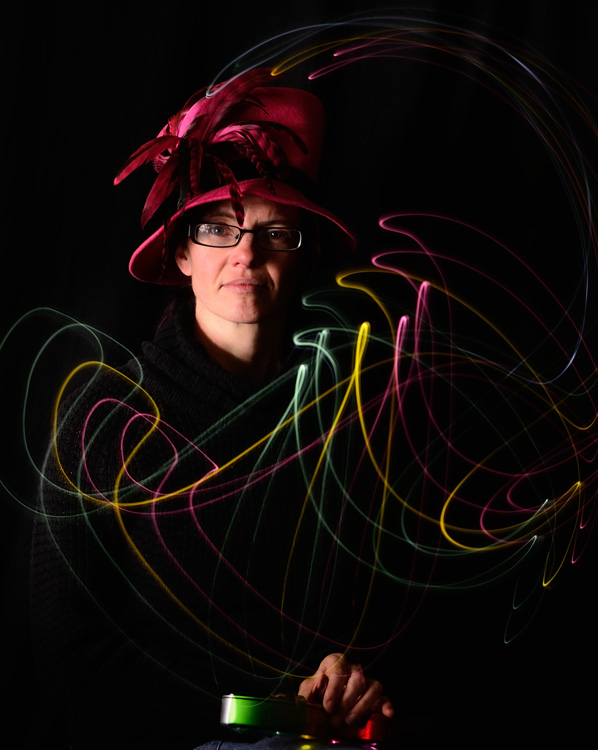
Creating light trails
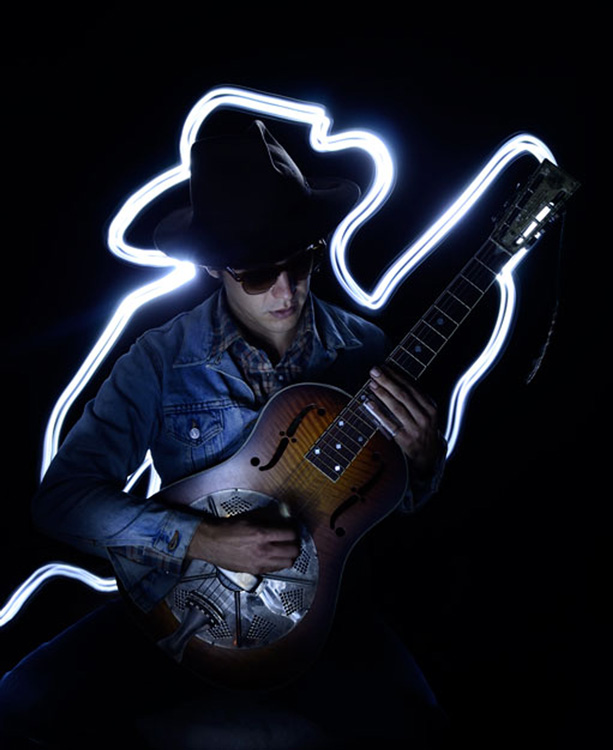
Adding light trails
To get trails of light, shine the torch directly at the lens as you move it. You can move it anywhere, including in front of your subject.
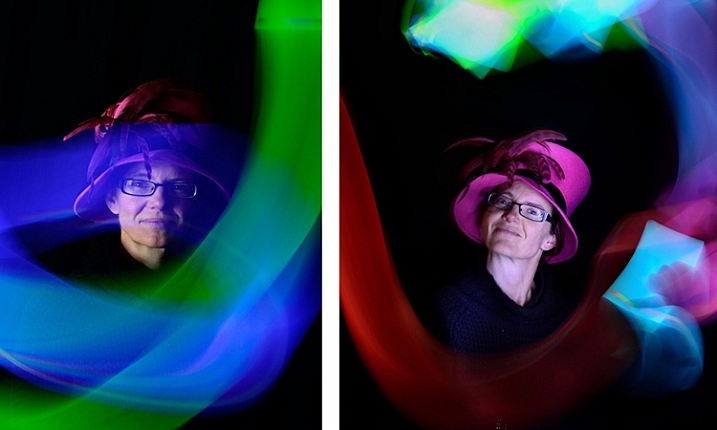
Multiple sources of light
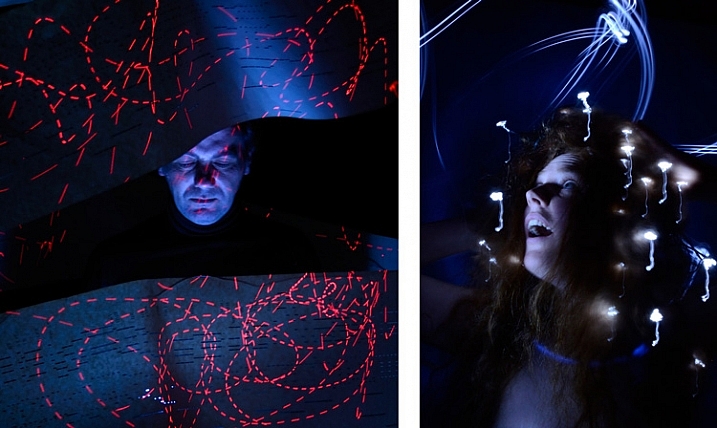
In the first image above I’ve used a small LED light to paint the face, and a laser pointer for the red patterns. The laser pointer shines in very short bursts creating the broken lines. In the second image on the right, I put fairy lights in the model’s hair. The subtle movement as I light painted the rest of the model caused the fairy lights to take on the wiggly forms.
Using an iPad or tablet
For this effect I downloaded an app for my tablet that lit the screen with a solid block of bright color. The colors could be changed with a slider, so with a few attempts I managed to get coordinated enough to change the colors as I moved the tablet around the subject.
Have fun with movement
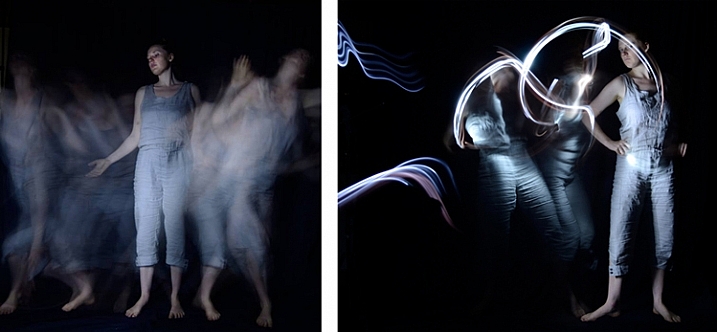
For both these images I shone the light over the model in one position, then had her move to the side and lit her again. As you can see, two fairly different effects using exactly the same process.
I confess I am thoroughly addicted to light painting portraits. I love that no two shots are alike, there’s plenty of room for getting creative and having happy accidents. You can use it for many styles of portraiture, and it costs basically nothing in lighting gear. So what are you waiting for? Grab a flashlight and get started! Share your results in the comments below.
googletag.cmd.push(function() {
tablet_slots.push( googletag.defineSlot( “/1005424/_dPSv4_tab-all-article-bottom_(300×250)”, [300, 250], “pb-ad-78623” ).addService( googletag.pubads() ) ); } );
googletag.cmd.push(function() {
mobile_slots.push( googletag.defineSlot( “/1005424/_dPSv4_mob-all-article-bottom_(300×250)”, [300, 250], “pb-ad-78158” ).addService( googletag.pubads() ) ); } );
The post How to Make Unique Portraits Using Light Painting by Lea Hawkins appeared first on Digital Photography School.

Digital Photography School


You must be logged in to post a comment.