RSS
 

Posts Tagged ‘Light’

23 Dazzling Dawn Images with Magic Light

01 Apr

The time of day you shoot at can make a huge difference to the images you capture. Often photographers are shooting at the coveted golden hour – early morning or late evening – when the sun is low and the light is special.

Here is a set of dazzling dawn images that use this magic golden hour light.

Timothy Neesam

By Timothy Neesam

James Jordan

By James Jordan

Guy Mayer

By Guy Mayer

William Warby

By William Warby

Gideon Chilton

By Gideon Chilton

Susanne Nilsson

By Susanne Nilsson

Howard Ignatius

By Howard Ignatius

Kylie_Jaxxon

By Kylie_Jaxxon

Loco Steve

By Loco Steve

Neil Howard

By Neil Howard

Thomas Hawk

By Thomas Hawk

Enric Martinez

By Enric Martinez

Nicolas Raymond

By Nicolas Raymond

Chuddlesworth

By chuddlesworth

Loïc Lagarde

By Loïc Lagarde

Nicki Mannix

By Nicki Mannix

Bobby Giggz

By Bobby Giggz

David Yu

By David Yu

Sarah Horrigan

By Sarah Horrigan

Mike Warot

By Mike Warot

Susanne Nilsson

By Susanne Nilsson

James Jordan

By James Jordan

Susanne Nilsson

By Susanne Nilsson

RobinTphoto

By RobinTphoto

googletag.cmd.push(function() {
tablet_slots.push( googletag.defineSlot( “/1005424/_dPSv4_tab-all-article-bottom_(300×250)”, [300, 250], “pb-ad-78623” ).addService( googletag.pubads() ) ); } );

googletag.cmd.push(function() {
mobile_slots.push( googletag.defineSlot( “/1005424/_dPSv4_mob-all-article-bottom_(300×250)”, [300, 250], “pb-ad-78158” ).addService( googletag.pubads() ) ); } );

The post 23 Dazzling Dawn Images with Magic Light by Darlene Hildebrandt appeared first on Digital Photography School.


Digital Photography School

 
Comments Off on 23 Dazzling Dawn Images with Magic Light

Posted in Photography


Nikon D5 real-world low light, high ISO samples

01 Apr

Nikon’s new flagship DSLR, the D5, has landed and it offers some serious high ISO reach. Natively, you can push the camera all the way to ISO 102,400 and in extended settings it goes all the way up to the 3 million mark. We’ve already seen what it looks like in the studio, so to put the camera’s low light capabilities to the test in the real world we brought the D5 with us to the Crocodile, a much-loved Seattle concert venue, followed by a late night stroll through the cherry blossom-lined streets of the Emerald City’s Capitol Hill neighborhood.

Please note, we’ve indicated which images are straight out of camera and which are Raw conversions (with ACR edits noted). We’ll be updating with daylight shots for a full sample gallery soon.

Articles: Digital Photography Review (dpreview.com)

 
Comments Off on Nikon D5 real-world low light, high ISO samples

Posted in Uncategorized


Review: Manfrotto 5001B Nano Light Stand

27 Mar

Rating: 10/10

Among the most essential parts of a photographer’s lighting kit, is a sturdy light stand. While there are a wide variety of options that definitely fall into the sturdy category, many of these light stands are also heavy, bulky, and difficult to travel with. One light stand that is pretty much the complete opposite of every other option out there, is the Manfrotto 5001B Nano. Compact, lightweight, and surprisingly tall for its size, this light stand is my go-to favorite that accompanies me on every one of my photo shoots, however it won’t necessarily meet the needs and expectations of every photographer. Here are some reasons why you might love this light stand, and why you might opt for another option.

Manfrotto 5001B Nano Lighting Stand 1

Manfrotto Nano 5001B shown next to the Canon 70-200mm f/2.8 lens and light stand adapter (neither of these is included and must be purchased separately).

Manfrotto 5001B Nano Specifics

Weighing in at a mere 2.2 pounds (1kg), this aluminum light stand stands at just around 19-inches (0.48m) when it is collapsed, and can extends up to 74.8 inches (1.9m) tall when all of its 5-sections are fully extended. According to the product manual, it has a maximum payload of 3.3 pounds (1.5kg) . Compared to other light stands, most of these stats aren’t particularly impressive, and it should now be apparent why the Manfrotto 5001B Nano won’t be suitable for every photographer. But, here are some situations when this light stand absolutely shines.

Manfrotto 5001B Nano Lighting Stand 1

Lighting stand as seen with a Speedlight adapter attached. Adapter sold separately.

Extremely Compact and Travel-Friendly

The main benefit of this light stand is its compact size, which makes it easy to carry when shooting on location, or in situations when you need a stand or two without carrying an excessive amount of gear. When pairing this light stand with a speedlight, and simple lighting modifiers like an umbrella or any of the Westcott Rapid Box series, you get a simple yet effective lighting setup that won’t take up a ton of room when assembled for use, and when transporting it.

Flexible Light Stand Legs

Unlike most other light stands, the Manfrotto Nano’s legs have little rubber tips to prevent sliding, and the legs themselves are very thin and not rounded, allowing the stand to fold down to 19 inches. The method of folding the stand can take some getting used to, but another unique aspect of the stand is its ability to get extremely low to the ground, thanks to the unusual folding of the legs. This increases the light stand’s overall footprint, offering increased stability, as well as the option of lighting areas close to the ground, without taking up a ton of floor space.

Manfrotto 5001B Nano Lighting Stand 1

Light stand with adapter, speedlight, and umbrella attached. The ideal use for this stand.

Trading Stability for Compact Size

As mentioned earlier, not every photographer will be in love with the Manfrotto 5001B Nano, as it often trades stability for its compact size. Flexible legs are great for packing up small, but also a recipe for disaster if the gear it holds is not balanced or is too heavy. Being very lightweight, without the option of suspending sandbags, this stand is also susceptible to being knocked over by even a slight bump or gust of wind, so outdoor photographers will want to have an assistant to hold it in place.  It’s definitely not as sturdy or as beefy as other light stands, meaning you won’t want to rely on it if you use heavy strobes, or big lighting modifiers.

In Summary

If you’re a location shooter, who doesn’t carry a ton of camera gear and has compact lighting equipment, the Manfrotto 5001B Nano will be your new best friend. Having one or two as travel light stand alternatives, will give you the flexibility to do a quick and easy lighting setup in tight spaces, without carrying extra weight. However, steer clear of these light stands if you prefer uncompromised stability and/or have heavy, valuable lighting gear.

amzn_assoc_placement = “adunit0”;
amzn_assoc_enable_interest_ads = “true”;
amzn_assoc_tracking_id = “dpsgeneral-20”;
amzn_assoc_ad_mode = “auto”;
amzn_assoc_ad_type = “smart”;
amzn_assoc_marketplace = “amazon”;
amzn_assoc_region = “US”;
amzn_assoc_linkid = “6710d26f550e9793f41475ee806fee9e”;
amzn_assoc_emphasize_categories = “13900861”;
amzn_assoc_fallback_mode = {“type”:”search”,”value”:”digital cameras”};
amzn_assoc_default_category = “Photo”;

googletag.cmd.push(function() {
tablet_slots.push( googletag.defineSlot( “/1005424/_dPSv4_tab-all-article-bottom_(300×250)”, [300, 250], “pb-ad-78623” ).addService( googletag.pubads() ) ); } );

googletag.cmd.push(function() {
mobile_slots.push( googletag.defineSlot( “/1005424/_dPSv4_mob-all-article-bottom_(300×250)”, [300, 250], “pb-ad-78158” ).addService( googletag.pubads() ) ); } );

The post Review: Manfrotto 5001B Nano Light Stand by Suzi Pratt appeared first on Digital Photography School.


Digital Photography School

 
Comments Off on Review: Manfrotto 5001B Nano Light Stand

Posted in Photography


Stacking Light Trails for Night Photography Special Effects

18 Mar

In Melbourne there is an intersection that’s iconic for taking light trails phtos. It is the corner of Flinders Street and Swanston Street, in front of Flinders Street Station.

15-Leanne-Cole-Light-Trails

Light Trails in front of Flinders Street Station. There are 23 images in this stacked light trail.

It isn’t a hard image to take, you just need a camera and a tripod. To get a really good photo, you want to pick a time when there is going to be a lot of traffic. You want the traffic to be moving, as cars caught in a traffic jam will not give you the light trails you’re after. The cars need to be moving constantly, and not standing still for too long.

Pick a place that you think will give you the best advantage. Set the camera up on the tripod, and try to take as long of an exposure as you can. To get the trails, you need to have exposures for several seconds, up to 30. You could do them for longer, but you would need other equipment (like a neutral density filter to cut the light). Most of the images shot for this article had an exposure of around eight to 10 seconds.

Sounds fairly easy, but there are many things that can make it hard. The time of year can inhibit you, as daylight savings will affect when the best time for traffic is, and how busy the roads are. If you go to a place on the weekend, you might find there aren’t as many cars as there would be during the week.

To get the light trails in front of Flinders Street Station, you need to be there at dusk, or after the sun has gone down. In summer that means not many cars or trams. However, there are ways to get around that.

Stacking Light Trails

One of the best ways to get light trails, is to stack many images together.

From the intersection that was mentioned previously, the corner in front of St Paul’s Cathedral is the most popular. There are other places, but that seems to be the one that most use. You will have to work out a great place to photograph them where you live.

14-Leanne-Cole-Light-Trails

A single image, and as you can see there aren’t that many light trails.

Set your camera up on the tripod, this is necessary so you will get identical photos. Set the aperture to what you want. The ISO can be low, on 100 or 200, so you can get longer exposures. If you want longer, remember you can put your aperture to the smallest possible, like f/22.

Once you have a shutter speed that is several seconds, it is time to start taking your photos. Take one photo, then repeat until you have at least 10. You can do this with as many images as you like, however, Adobe Photoshop might not like you using too many. I’ve done it with four images, and as many as 23.

When you get home

Put all your photos onto your computer. You can use Lightroom to do this, but to do the actual stacking you will need Adobe Photoshop or any program that allows you to use layers.

Once you have all the images ready to use, select all the ones you want. If you are using Lightroom to begin with, go to: Photo > Edit in > Open as Layers in Photoshop. In Photoshop open Bridge and select the images you want to use.  Go up to Tools > Photoshop > Load files into Photoshop Layers.

01-Leanne-Cole-Light-Trails

Select all the images you want to use for the light trails.

It can take some time for the layers to all open, especially if you are using raw files, and there are a lot of them.

02-Leanne-Cole-Light-Trails

All the layers are opened in Photoshop.

The magic happens

Once the layers are all loaded, you need to select them all. You can do this by selecting the bottom layer, then pressing the shift key and clicking on the top layer. This will select them all.

03-Leanne-Cole-Light-Trails

Select all the layers so they can be used.

Once selected, go to the Blending Mode Options in the Layers panel. The default setting is Normal. Click on it for the drop down menu, select Lighten, and click.

05-Leanne-Cole-Light-Trails

Select the lighten blend option.

You should notice that the image now has far more light trails. All the trails, from all of the images have come through now.

06-Leanne-Cole-Light-Trails

Lots more light trails apply.

You now have a stacked light trail image.

Getting rid of unwanted lights

Sometimes when you do this, it can change a lot more than just the light trails, it may lighten other buildings too much as well. You can correct this.

Select all the layers, except the bottom one, and put them into a group. You can do this by dragging them down to the group icon at the bottom of the panel, or right click on the select layers, and when the menu pops up click on Group from Layers.

07-Leanne-Cole-Light-Trails

Put all the layers, except for the first one, into a group.

Add a mask to the group from the bottom of the Layers panel. Select the brush from the tools on the left, or press Ctrl b (just B on Mac). Make sure foreground colour is set to black. Making sure the mask is selected, paint over the areas where there is too much light to mask those areas.

08-Leanne-Cole-Light-Trails

Once the mask is added you can use the brush to remove the unwanted lights.

10-Leanne-Cole-Light-Trails

If you alt click on the mask you can see what you have done. The black is where you have removed the unwanted lights.

Finishing the image

The image is now completed, unless you want to do more to it. But, as far as the light trails go, you really don’t need to do any more.

11-Leanne-Cole-Light-Trails

The final image.

This is a great technique which can be applied to many areas. You could use it for ships on the water, or trains going in and out of the city. It can also be used on waterfalls to make them seem fuller. Why don’t you try and see how else you can use this technique.

Here are some other images to give an idea of how to use this technique.

12-Leanne-Cole-Light-Trails

Boats on the water in the foreground of the Manhattan skyline. Four images.

13-Leanne-Cole-Light-Trails

Trains coming into and out of the city. Three images.

This article is part of a series that we will be featuring this week on dPS all about special effects. Check out the others that have already been published here, and look for another new one every day:

  • How to Photograph the Full Band of the Milky Way
  • Fire Spinning with Steel Wool – A Special Effects Tutorial
  • Special Effect – How to Create Multiple Flash Exposures in a Single Frame

googletag.cmd.push(function() {
tablet_slots.push( googletag.defineSlot( “/1005424/_dPSv4_tab-all-article-bottom_(300×250)”, [300, 250], “pb-ad-78623” ).addService( googletag.pubads() ) ); } );

googletag.cmd.push(function() {
mobile_slots.push( googletag.defineSlot( “/1005424/_dPSv4_mob-all-article-bottom_(300×250)”, [300, 250], “pb-ad-78158” ).addService( googletag.pubads() ) ); } );

The post Stacking Light Trails for Night Photography Special Effects by Leanne Cole appeared first on Digital Photography School.


Digital Photography School

 
Comments Off on Stacking Light Trails for Night Photography Special Effects

Posted in Photography


Ribbon of Light: Replacing LA’s Most Iconic Historical Bridge

16 Mar

[ By WebUrbanist in Architecture & Cities & Urbanism. ]

bridge from above

Quite possibly the most filmed and photographed bridge in the world, the Sixth Street Viaduct, spanning the Los Angeles River, is a challenging icon to replace, but the Ribbon of Light aims to try.

sixth street viaduct original

The famous Art-Deco viaduct in question, built in 1932, has been featured in dozens of films, television shows, music videos and video games, including Grease, Gone in 60 Seconds, Terminators 2 and 3, Madonna’s ‘Borderline’ video and episodes of Lost and 24.

Some sequences show most recognizable part (directly over the LA river) being driven across, but many are shot from the river below. Unfortunately for fans, its was deemed seismically unstable thanks to compromised concrete supports, despite its historic landmark status with the city.

sixth street viaduct replacement

Architect Michael Maltzan, responsible for its replacement, has made his design an epic ode to its iconic curves, reprising and repeating them across a much longer portion of the new structure.

bridge at night

The new structure features arched trusses to be illuminated at night, suspended over a series of parks and paths being developed below and alongside it. A series of staircases and ramps will allow pedestrians and bikers to move up, down and across it as well.

new viaduct and park

The architects are clearly cognizant of the landmark they are replacing, and, in a way, are preserving its visibility through these repetitive forms, which actually extend much further out on either side than the original arches.

under bridge park

From the architects: “The project foresees a multi-modal future for the city, one that accommodates cars, incorporates significant new bicycle connections, and also increases connectivity for pedestrians to access the viaduct, not only at its endpoints, but along the entirety of the viaduct, linking the bridge, the Los Angeles River, and future urban landscapes in a more meaningful relationship.”

la river ribbon bridge

“These pairs of repeated concrete arches and cable-supported roadway deck are simultaneously elegant and efficient. The design approach unifies and optimizes the architecture of the viaduct through repetition, creating a unique configuration through the repeated use of arches, roadway and pier forms: an iconic structure.”

Share on Facebook


[ By WebUrbanist in Architecture & Cities & Urbanism. ]

[ WebUrbanist | Archives | Galleries | Privacy | TOS ]


WebUrbanist

 
Comments Off on Ribbon of Light: Replacing LA’s Most Iconic Historical Bridge

Posted in Creativity


A Journey From Novice to Natural Light Portrait Photographer

01 Mar

I’m here to share my photography journey that started few years ago as a novice, to where I stand today. As am amateur or hobby photographer, you may relate.

The journey from novice to advanced photographer

About two years ago, I bought an entry level DSLR, to use it as an expensive point and shoot camera. The camera decided the fate of most of my pictures. On innumerable occasions, the pictures were blurry, under or overexposed, and were of poor quality.

The urge to work on my photography skills blossomed, when I was blessed with a little girl. An utmost desire to take only the best pictures of my angel, had taken roots in me. As you may also do, I started searching the internet fervently, for ways to capture the best shots.

Dps fb ca viks photogrphy

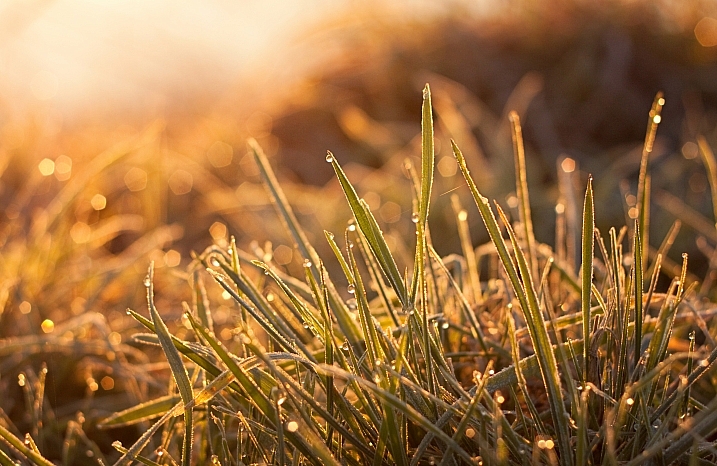
This is the kind of natural light photography I do now, but that’s not where I started. Read on to find out how I got here, and you can too.

I realized, other than going through basic photography tutorials on YouTube, the thing that helped me the most was Flickr’s discussion groups. It has large community of knowledgeable professionals, and semi-professionals, who love to take a look at your picture and provide valuable feedback. Positive suggestions and encouragement I received on the forums, helped me to experiment further, and escape out of automatic mode. If you are in the same mode as I was two years ago, I strongly recommend getting feedback for your photos, through the online forums.

Moving out of auto mode and kit lens limitations

The very first step towards improvement for me, was shifting to Aperture Priority (Av/A) mode. Initially, pictures were blurry even in Av mode, but I could see that inside my home, my kit lens at f/4.5, ISO 6400, was still unable to shoot faster than 1/30th of a second. Such a slow shutter speed caused the motion blur. Shooting outdoors normally helped me to avoid blurry pictures, but I was not sure why my images didn’t have a blurry background like I saw online. Eventually, I understood the limitations of my kit lens, in not being able to shoot at a larger f-stop, to achieve shallower depth of field.

500px Photo ID: 53404702 -

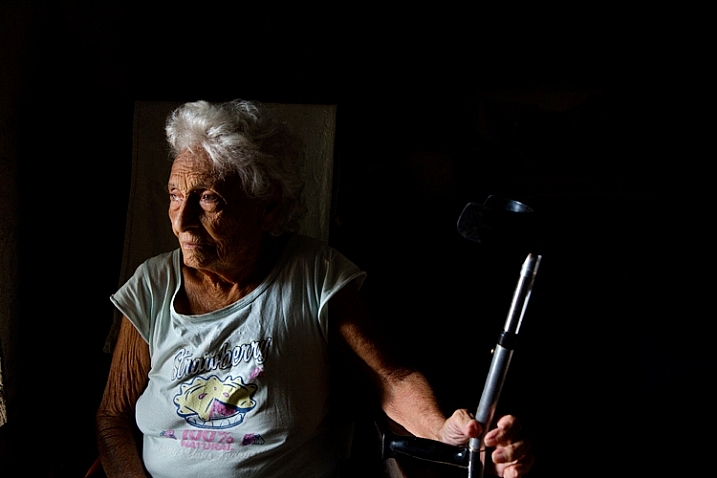
This image is very noisy, focus is on her dress rather eyes/face, the out of focus raised hand actually distracts the viewer a lot.

One thing I would realize after many months of shooting, is that the exposure triangle (aperture, shutter speed and ISO) is easy to comprehend theoretically, but really hard to apply in the field. I went out for a shoot almost every day, and started experimenting with aperture and shutter speed to get a more desired shot. On returning home, I always got an impression I should have used a different aperture or shutter speed for a better shot. The ability to learn through your mistakes is a major milestone in your journey.

Branching out

Once you are bit confident in your understanding of the basics, you start enjoying it – which is what I experienced. I started devoting time to reading topics such as composition, photography tips, and subscribed to sites like Digital Photography School. Another thing that helped me a lot, was connecting to local events and activity pages via Facebook. I started showing up at many local events and offering free photography to the organizers.

The experience of shooting events was quite chaotic and challenging, especially when there were far more people posing in front of the camera, and many arbitrary things happening – kids running around, or folks dancing to tunes of the festivities. Every such shoot gave me lot more insight into concepts of understanding concepts like plane of focus, controlling focus points, exposure compensation, tips to hand hold the camera firmly, etc.

One of my early event photos. The face and overall image is poorly lit and the face looks orange. Overall image is noisy and the eyes are not in focus. The person behind her is very distracting.

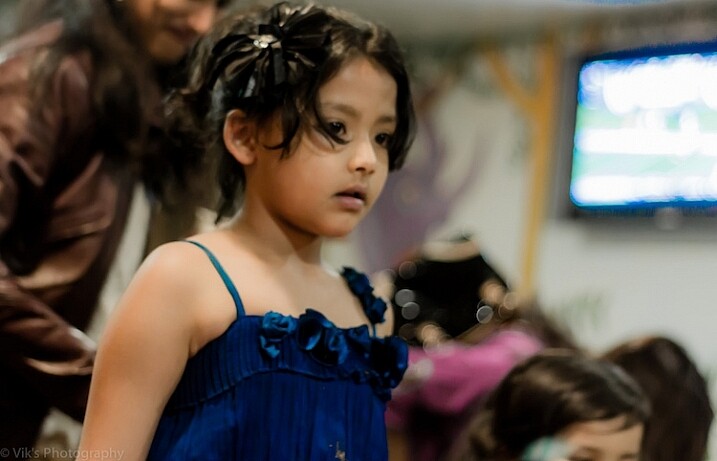
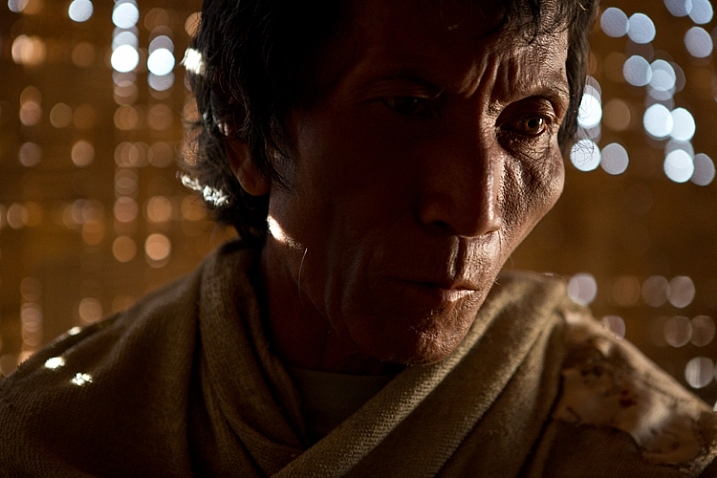
One of my early event photos. The face and overall image is poorly lit, and the face looks orange. Overall, the image is noisy, and the eyes are not in focus. The person behind her is very distracting.

Upgrading gear

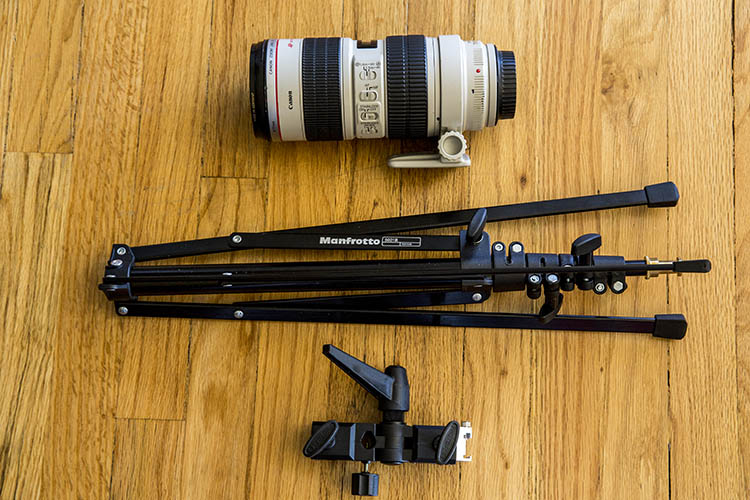
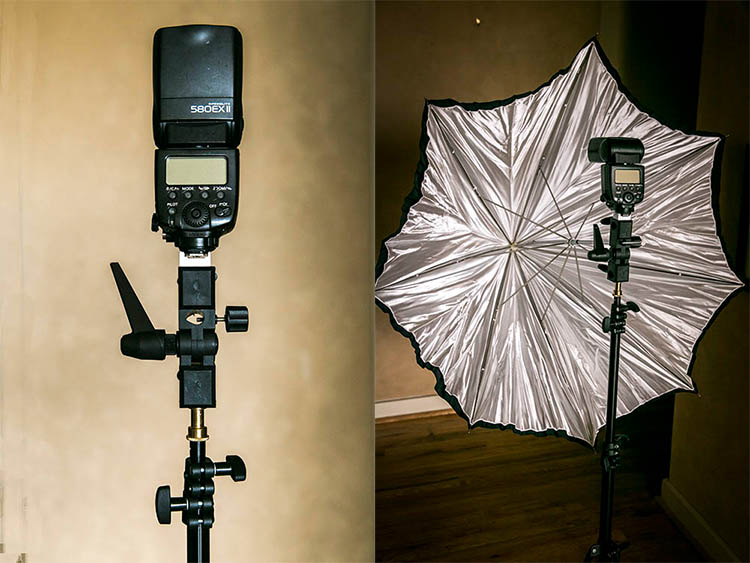
It’s very easy to get overwhelmed when reading about, or watching, the type of gear that pros are using in the field. My advice would be to start with minimum possible gear, and upgrade only when you clearly understand the limitations of your existing gear. Be it body, lens, tripod, or anything. After understanding that I couldn’t shoot with very low noise in ambient light during evenings, or achieve huge shallow DOF with my canon T3i and a kit lens, I moved up to a 6D after few months, and bought a prime lens. Though I love to shoot 100% natural light, I added a flash to my gearbox as well, to use as a fill light in some situations.

Here are few things I learned so far, that you can also apply in your photography. Then I will move on to what kind of work I produce these days, and some explanation about how the results are achieved.

Understand the basics:

Read a lot about aperture, shutter speed, ISO, and other beginner tutorials. Apply them as much as you can. These concepts are simple but take a lot of hands-on practice to start making some sense.

Very noisy, Focus is on the shoulder, a very bright area in the background is a huge distraction, very messy environment.

Very noisy, Focus is on the shoulder, a very bright area in the background is a huge distraction, very messy environment.

Participate:

Do share your everyday shots and learning, to online discussion groups and forums, without worrying about the quality of your work. Google knows a lot. Give it a try by typing the question the way you would ask someone in person. Once you get some clue, make sure to try it out, to experiment and confirm your understanding. As I said earlier, do volunteer photography for local charity or non profit, etc., as that is a sure way to learn, and it is much more fun.

Avoid GAS (Gear Acquisition Syndrome):

Avoid the mindset that you cannot do good photography without expensive gear. In the beginning, your cheapest camera is enough to get you started. Photography is not 100% driven by expensive gear. There are way many areas to catch up like composition, understanding of light, angle of shooting, etc. Learn the basics and how to use the gear you have first.

Shoot, shoot and shoot:

There is no shortcut to get good at photography. You have to keep shooting to learn, and learn more to confirm your understanding and get better.

Understand Light:

Taken in the middle of the day when sun was overhead with caring about harsh shadows. From composition point of view the image has a very busy background and viewer will be completely distracted at other elements of the image.

Taken in the middle of the day, without caring about harsh shadows when sun was overhead. From a composition point of view, the image has a very busy background and viewer will be completely distracted by other elements of the image.

It doesn’t matter what genre of photography you shoot; you need a firm understanding of light. This is a key ingredient for a good picture. So, read about the direction and quality of light, and how it affects the shape, size, shadows, and contour of objects it falls upon.

Master your camera:

This tip is especially important if you aim to shoot events, happening at fast pace like kids photography, birds, action, sports, etc. You will really miss opportunities if you are unable to change settings quickly on the fly, without looking at the controls.

Go Manual:

This needs to be your ultimate destination in terms of shooting modes. It’s true that 80% or more time you may be happy with Av mode, but ideally you should have no hesitation in switching to the manual mode in a blink.

Depth of Field:

Technically, in simple terms, aperture controls the depth of field. However, this is the area that took me the longest time to get a good grip on. It’s very hard to stop the desire to shoot at f/1.2, if you own a lens capable of that. However, lenses are not the sharpest at so small f-numbers, plus the depth of field is so thin, that it could be unusable if you are not at the right distance from the subject.

Though there is a nice catch light but looking at the distance it has been shot the f stop should have been chosen higher. The face is not completely in focus and the image does not appeal the viewer. The subject should have been moved a bit to get rid of uneven shadows.

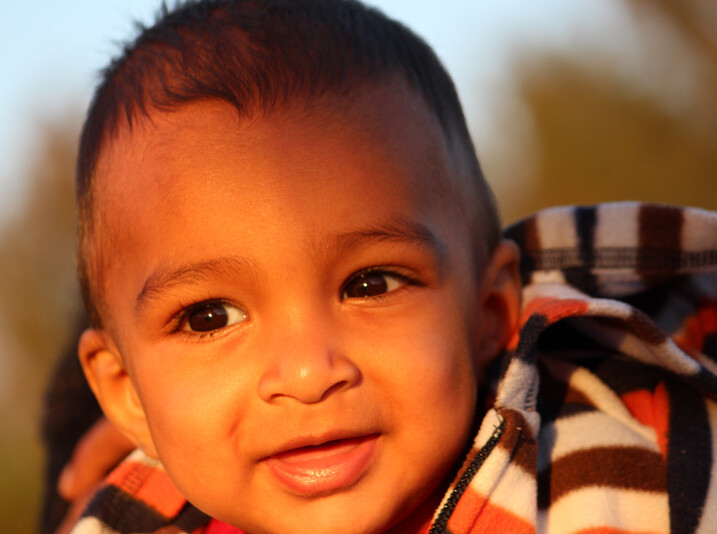
Though there is a nice catch light, but looking closer, it has been shot with an f-stop that should have been higher. The face is not completely in focus, and the image does not appeal the viewer. The subject should have been moved a bit, to get rid of uneven shadows on his face.

Positioning the Subject:

Another key point I have seen even very mature photographers lacking, is realizing the importance of where you should ask the subject to stand. Key mistakes are: placing subject in front of a very busy background, having undesired points of interest in the frame, a brighter large light source behind the subject, etc.

I hope you find the above tips useful. In the final part, I would like to show some images, and a bit about my thoughts on post-processing. All the below images have been published in one or the other magazine.

Dps fb ca viks photogrphy 5

85mm, f/1.6, 1/1600, ISO 800

Location: Milwaukee, WI. This was taken at golden hour, with the sun facing the subject. The trees with some fall colors, are very far behind her.

Dps fb ca viks photogrphy 3

85mm, f/3.2, 1/400, ISO 400

Location: Redwood Shores, CA. This was taken at golden hour with sun facing her. The intensity of the light was low, as only partial light was passing through the tree. It was shot from above at about a 45-degree angle.

Dps fb ca viks photogrphy

70mm, f/2.8, 1/320, ISO 800

Location: Los Angeles, CA. This was taken in the middle of the day, in an apartment, where model was facing window light.

Dps fb ca viks photogrphy 6

135mm, f/2.8, 1/400, ISO 400

Location: Palace of fine arts, CA. Taken in the middle of the day, where plenty of ambient light was available. Behind the subject is a little darker area, due to trees and pillars. I positioned her at a spot where light was just right to avoid on her face which were too dark.

Dps fb ca viks photogrphy 484

85mm, f/1.8, 1/6400, ISO 100

Location: Fremont, CA. Again taken during golden hour, with a bit of shade from the door structure.

Dps fb ca viks photogrphy 4

85mm, f/2.8, 1/2000, ISO 800

Location: San Jose, CA. Taken in the middle of the day, using the shade from the ceiling above the model, and avoiding sunlight falling directly her.

Importance of Post-Production:

As a beginner you will surely hear or read a lot something similar to these statements, “I love straight out of camera pictures” or “I hate editing pictures”. However, I have found that you can delay getting into the post-processing of images, but cannot avoid it.

The extent you go to post-processing an image, is totally a different debate. Some do it to enhance the existing elements of an image, and others do it to make it into a totally different image. I am in the first category, and spend time doing things that improves the overall image appeal.

For beginners, I would advise that you stay away from it until you are comfortable with your gear and the basic concepts of photography. Always aim to get the image right in the camera.

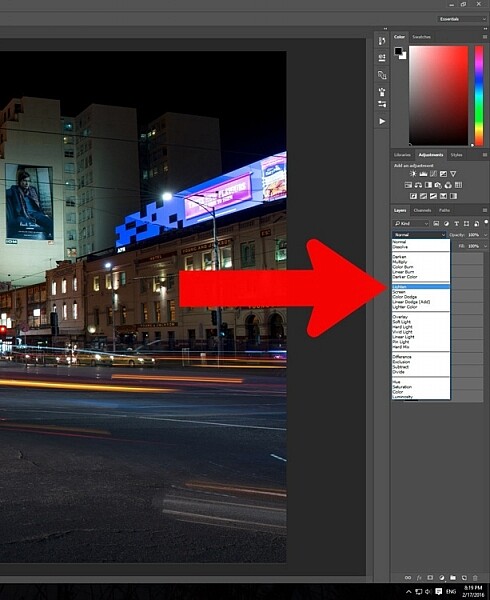
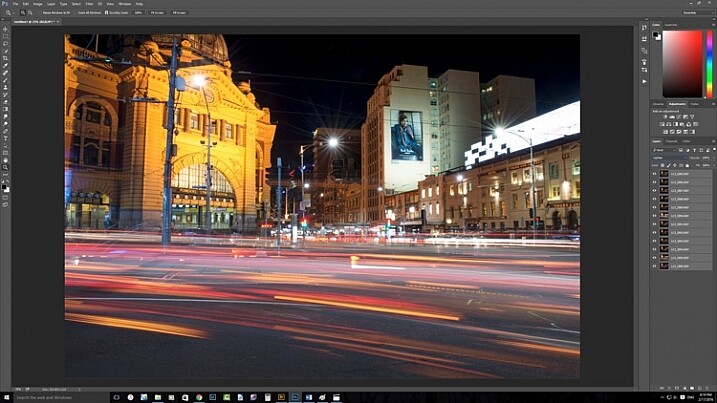
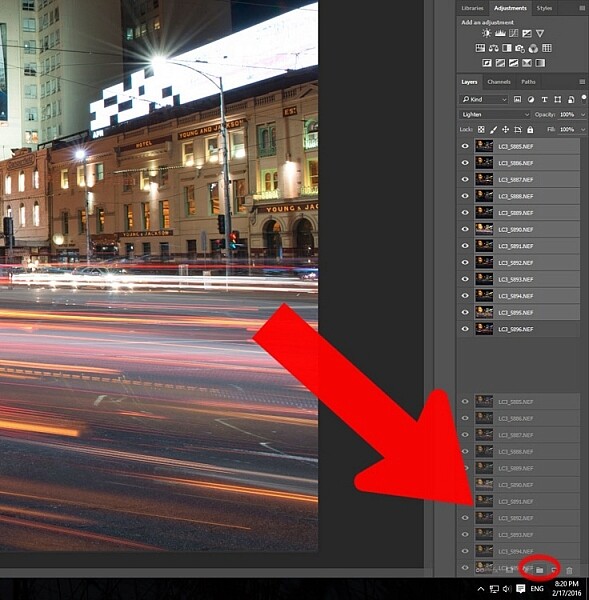
The first step for post-processing, you can start with Adobe Lightroom, which is a great piece of software to enhance your images. Spend time in achieving mastery with Lightroom, and, once you understand its limitations, then start exploring Adobe Photoshop on a need only basis. In my typical workflow, all the images go through Lightroom, then for some final touches in Photoshop.

Your journey

So where are you in your photography journey? Did you just pick up a camera and can relate to my early experiences? Have you been practicing for a while? What is your experience, please share in the comments below.

Author Bio

Vik (Vivek) Kumar is a photographer and a software engineer. Hi started his photography a couple of years ago as an amateur landscape photographer. The hobby became serious portrait photography fun. His images are used by reputed hotel brands like Hyatt. He has been published numerous times in various fashion magazines like ICON, PUMP, Surreal Beauty Magazine, etc. See more of his work on his website or on his Instagram profile. His landscape photography work can be explored on 500px.

googletag.cmd.push(function() {
tablet_slots.push( googletag.defineSlot( “/1005424/_dPSv4_tab-all-article-bottom_(300×250)”, [300, 250], “pb-ad-78623” ).addService( googletag.pubads() ) ); } );

googletag.cmd.push(function() {
mobile_slots.push( googletag.defineSlot( “/1005424/_dPSv4_mob-all-article-bottom_(300×250)”, [300, 250], “pb-ad-78158” ).addService( googletag.pubads() ) ); } );

The post A Journey From Novice to Natural Light Portrait Photographer by Vik Kumar appeared first on Digital Photography School.


Digital Photography School

 
Comments Off on A Journey From Novice to Natural Light Portrait Photographer

Posted in Photography


Let there be light: Photographing Yosemite’s elusive ‘Firefall’

27 Feb

$ (document).ready(function() { SampleGalleryV2({“containerId”:”embeddedSampleGallery_8698705739″,”galleryId”:”8698705739″,”isEmbeddedWidget”:true,”standalone”:false,”selectedImageIndex”:0,”startInCommentsView”:false,”isMobile”:false}) });

Once a year, photographers turn their lenses toward Yosemite’s Horsetail Fall and hope for the best. If the conditions are right, the waterfall will be transformed into a spectacle known as ‘Firefall’ as the mid-to-late February sun casts a blazing orange glow on the water – that is, if the water is flowing, and if the horizon isn’t too cloudy. And that’s not to mention the difficulty of nabbing a coveted spot in view of the falls, as well-informed photographers claim their spaces early in the day.

After years of drought, the falls in Yosemite are finally flowing this month and photographers like Taylor Gray have been able to capture the event with a lot of patience and a little luck. It’s quite the effort to put in to get the shot, but the results are truly spectacular. Read Gray’s recounting of capturing the magic moment at the falls over at Resource Travel. You might just want to book a trip to Yosemite this time next year…

Articles: Digital Photography Review (dpreview.com)

 
Comments Off on Let there be light: Photographing Yosemite’s elusive ‘Firefall’

Posted in Uncategorized


How to Create Dynamic Images with an LED as Your Only Light Source

02 Feb

With a limited budget it’s easy to feel limited by your gear (or lack of gear I should say) but with time, and experimentation, you can discover ways to use the gear you have now, to make compelling images. In this tutorial you will be given a few pointers on how you can use just one LED light to make beautiful and dynamic images.

Equipment

For this tutorial you will need:

Intro image 1

  • An LED light. The light used here is a Neewer CN-126 LED Video Light which was bought on Amazon for under $ 35.
  • A DLSR – Canon, Sony, or any other brand is suitable. I used a Canon 5D Mark II.
  • A tripod or stable surface.

Direct light

Let’s start with the easiest setup: Placing your LED light directly on top of your camera, or on a light stand directly in front of your subject, may seem fairly basic. On its own, it can create a standard, flatly, lit image, which may not seem very exciting to your viewer. However, placing an item that has an interesting pattern or shape directly between your light and your subject can give a unique and creative result.

You can, for example, place a lace tablecloth between your LED light and your model/subject. Playing around with the fabric’s distance from the light, causes the pattern’s shadow to change size, and sometimes even shape. Adjust the distance and placement of your fabric (or other item) until you find a combination that works for you.

DL image 1

DL image 2

DL image 3

For the image above, I used my 50mm lens with an ISO of 2000, and my exposure set manually with shutter speed at 1/50th and aperture at f/1.4. My LED light was adjusted to medium brightness.

You can also use movement to add interest to your image as shown below. A slow shutter speed along with quick movements can make your images a real conversation piece. Try experimenting with moving your body, or an object like a colourful scarf or umbrella in your image.

DL image 4

Side light

Taking your LED off-camera, and placing it at an angle to your subject is another easy way to create a beautiful image with this simple setup. Keep your LED light setting between low and medium, and angle it at roughly 45 degrees from your subject, can give a nice soft light cascade across your image.

SL image 1

If you try placing your LED light directly to the right, or left, of your subject, you will get a pretty cool effect as well. This placement creates an interesting shape in the natural shadow your subject makes. In the image below, the LED is propped up at eye level, on a bookshelf to my left. The angle of the light, coupled with a delicate pose, created an image that was both compelling, and visually interesting. Camera settings for this image were ISO 1600, f/3.2 and 1/160th of a second with a 50mm lens.

SL image 2

Playing around with overlays and textures in Photoshop can further enhance your photo.

SL image 3

Backlight and overhead light

For small objects you can do a simple backlight setup, using your LED light. If you place a sheet of white letter sized printing paper directly over your LED light, and place your subject directly on top of it, the result is pretty interesting. When using this method try to choose a subject that you think would have an interesting silhouette. You can also try items that are slightly translucent and may possibly glow when back lit. Try capturing your final image by shooting from an overhead angle, but don’t be afraid to experiment with other camera positions as well.

BL image 1

BL image 2

Interesting images can also be created by putting your LED light directly above your subject. In the first image below, the light was angled slightly above the rose. This created a nice, softly angled, light effect that gave the rose a different dimension.

OL image 1

Coupling the overhead LED placement with interesting poses gives really striking results. Posing your subject with their face turned upward, in the direction of the light, for example, creates some really nice shadows along the contours of the face. Some creative editing in Photoshop resulted in these final images.

OL image 2

OL image 3

With this simple tool and a little imagination, you can create dynamic, visually appealing images for your portfolio. The key here is to experiment, play and have fun.

Let me know other creative ways you have used an LED light to add interest to your photography in the comments below.

googletag.cmd.push(function() {
tablet_slots.push( googletag.defineSlot( “/1005424/_dPSv4_tab-all-article-bottom_(300×250)”, [300, 250], “pb-ad-78623” ).addService( googletag.pubads() ) ); } );

googletag.cmd.push(function() {
mobile_slots.push( googletag.defineSlot( “/1005424/_dPSv4_mob-all-article-bottom_(300×250)”, [300, 250], “pb-ad-78158” ).addService( googletag.pubads() ) ); } );

The post How to Create Dynamic Images with an LED as Your Only Light Source by Tricia Bent appeared first on Digital Photography School.


Digital Photography School

 
Comments Off on How to Create Dynamic Images with an LED as Your Only Light Source

Posted in Photography


Yongnuo announces YN360 LED light wand

27 Jan

Chinese lighting manufacturer ShenZhen Yongnuo Photographic Equipment Co has announced a variable temperature LED wand for still and video photographers. The Yongnuo YN360 features a 39.5cm/15.5in light board that is equipped with 160 LEDs designed to match daylight, 160 LEDs to match tungsten lighting and 40 further LEDs that are RGB SMD lamps. The wand can be used to produce light that blends in with ambient lighting in a wide range of conditions by varying the mix of 3200K and 5500K LEDs, and also be used to create a spectrum of colors by mixing the red, green and blue LED sources. 

The company says that the color of the wand and the brightness of its illumination will be controllable via a smartphone app and physical dials on the wand’s handle, and claims that its technology and encoders allow the light to be dimmed without altering its color. 

The YN360 will be powered by Sony NP-F type lithium-ion cells, and we should expect two hours at its 2560-lumen brightest output in the color temperature mode, and four hours in RGB mode, from a single charge of the recommended NP-F770 battery. A mains adapter will also be available. 

The Yongnuo YN360 should go on sale by the middle of February, though the company has yet to release information regarding its price. For more information see the Yongnuo store blog. 

Articles: Digital Photography Review (dpreview.com)

 
Comments Off on Yongnuo announces YN360 LED light wand

Posted in Uncategorized


Understanding Natural Light Part 3: Direction of Light

21 Jan

Light has different qualities, and by understanding those differences and using them in your favour, you can become a better image maker.

In two previous articles I covered:

  • Understanding Natural Light Part 1: Quality of Light
  • Understanding Natural Light Part 2: Color of Light

Mix1
In this third chapter, you will learn:

  • How to control the direction of natural light in the field.
  • How to understand the different effects the direction of light will have on your portraits. How to mix light colors to create depth.
  • A few advanced techniques, like using reflectors or flags.
  • How to practice using exercises.

Please note that as a portrait photographer, I will be discussing portraits, and using them as examples. However, this knowledge applies to any kind of photography.

Working with natural light does not mean compromising

Most people will tell you that while working with artificial lighting will allow you to fully control the lighting situation in your shooting, working exclusively with natural light will limit your ability to control the lighting to almost zero. In my opinion, this false assumption is leading many photographers to mediocre images. Stating that the lighting is poor, because “that’s how it was” when they made the photo, is not acceptable.

So, the first step in controlling natural light is to carefully plan your time of the shoot. In the preview articles, we have discussed how the quality and color of light are affected by time, and weather, during the day. Now, let’s understand how the direction of light will change throughout the day, and how it will affect the lighting situation in our portraits.

Frontal lighting

Frontal lighting refers to light which comes directly in front of your subject (the light source is behind you and the camera). The situation is possible or when your subject is facing the light source (for example face directed to a setting or a rising sun). Another possibility is with reflected light. Like in this image, Dialsiz was standing in the shade, but in front of her was a bright sunny wall, reflecting the sunlight directly on her face.

1b

Pros: Frontal lighting will usually illuminate your subject’s face evenly, without any shadows. It will create an aesthetic and balanced look, which is why this setup is very popular in fashion and beauty shoots.

Cons: The lack of shadows will create a lack and depth and drama.

45 degree lighting

As the name suggests, this refers to a situation where the light comes from an angle of 45 degrees from the nose of your subject. This is extremely popular lighting setup in portrait photography, which is sometimes called Rembrandt lighting. It can be easily achievable with side light coming from a rising or setting sun, or by positioning your subject at a 45 degree angle to a window.

26b

Pros: in this lighting setup, you will note how the light illuminates your subject’s face gradually. Creating a gradual shadow, and in our two dimensional art form, shadows usually mean depth and volume. That is the reason this setup is so appealing in the eyes of most viewers.

Cons: The dramatic effect of shadowing parts of the subject’s face might not be suitable for your visual story.

90 degree lighting

As the name suggests, this refers to a situation where the light comes from an angle of 90 degrees from the nose of your subject. It can be achievable with side light coming from a rising or a setting sun or by positioning your subject at a 90 degree angle to a window.

F11A1636

42


Pros: Extremely dramatic effect, which is almost impossible to ignore.

Cons: This dramatic lighting setup can be a little over dramatic, and with the right subject, this lighting can be scary! It all depends of course, on what you want to evoke in your visual story.

Backlighting

This refers to a situation where the light comes from behind your subject, and in front of you.

IMG 9185b

Pros: Backlight will create highlights in the contours of your subject, and unlike with frontal lighting, this will create a sense of depth, and a clear separation between the subject and the background. Unless the light source is very dim and fully covered by your subject’s body, working with backlight will force you to be creating with your photography, as it will make the exposure a bit more difficult. This is where switching from the automatic mode can be handy. While overexposing can be good for creating a burned out background or a lens flare, underexposure will usually result in a nice silhouette (as above)

Cons: As mentioned, this one is a bit more advanced to handle, and will mostly require switching out of your camera’s automatic mode, but again, a great opportunity for some creative photography.

Light from above

This refers to a situation where the light comes from directly above your subject, like during midday.

F11A0035b


Pros: This interrogation room style lighting setup will not be flattering to most faces. Light coming from above will result in deep shadows on your subject’s face, making the forehead shadow the eyes, and making the nose shadow the chin. However, it can be used as a way of creating a very dramatic image. Oscar-winning Cinematographer Gordon Hugh Willis, did a groundbreaking work in Francis Ford Coppola’s movie, The Godfather, with the combination of underexposing and positioning the lighting source above the actors’ faces. He managed to support the dark and mysterious sense of this movie, with the audience was unable to see most eyes throughout the movie.

Cons: As mentioned, when handled right, this lighting setup, can lead to great and creative results. Otherwise, you subject will look like he or she is going to answer some tough questions.

Controlling natural light

Basic: in the simplest form, controlling natural light is first in the planning. Choose the right time to be outside, or take your subject indoors to use the soft light coming from a window.

Advanced: You can control natural light almost like controlling artificial lighting, with the help of reflectors or/and flags.

Reflectors are used to bounce light into the subject’s face. For example, if you are dealing with light coming from above, you can overcome the problem of dark eyes by illumining them using a reflector. It can also lighten the dark side of the face, if needed, in the case of lighting from a 45 or 90 degree angle.

F11A1258b 1

2
You can see the reflection of the reflector used to bounce light back into this man’s face.

A flag is usually a piece of black fabric that can be used to block unwanted light and create shadows (shadows mean a sense of depth remember?) on the subject’s face. To use a flag properly, you will need somebody or something that can hold it. That is the way I use all kind of flags in the field. I have used my hat (which I was holding in my left hand) to shadow an overexposed forehead numerous times, or using the help of an innocent bystander that was asked to stand in one spot for a moment, to create a shadow when needed.

Exercise #1:

Christmas (or just after it) is the best time to ask for a favor. Bring your favorite friend, family member, or pet, and position it in front of a window. While moving your subject, practice the concepts of frontal, back, 90 degree and 45 degree lighting setups. Examine the images, and get a deeper understating of how light direction will affect your portrait.

Exercise #2:

Reflectors are effective and fun to use. You can buy yourself a reflector, or prepare one with a small piece of cardboard and a simple aluminum foil.

googletag.cmd.push(function() {
tablet_slots.push( googletag.defineSlot( “/1005424/_dPSv4_tab-all-article-bottom_(300×250)”, [300, 250], “pb-ad-78623” ).addService( googletag.pubads() ) ); } );

googletag.cmd.push(function() {
mobile_slots.push( googletag.defineSlot( “/1005424/_dPSv4_mob-all-article-bottom_(300×250)”, [300, 250], “pb-ad-78158” ).addService( googletag.pubads() ) ); } );

The post Understanding Natural Light Part 3: Direction of Light by Oded Wagenstein appeared first on Digital Photography School.


Digital Photography School

 
Comments Off on Understanding Natural Light Part 3: Direction of Light

Posted in Photography