RSS
 

Posts Tagged ‘Light’

Initial impressions of the Manfrotto Spectra LED Light 500S

12 Jan

I wanted a small portable LED for video work primarily to either pop on the hot shoe of my camera or use on a light stand off camera. I also really like the white light emitted from a LED source. So I purchased the Manfrotto Spectra LED 500s.

Manfrotto Spectra LED 500S

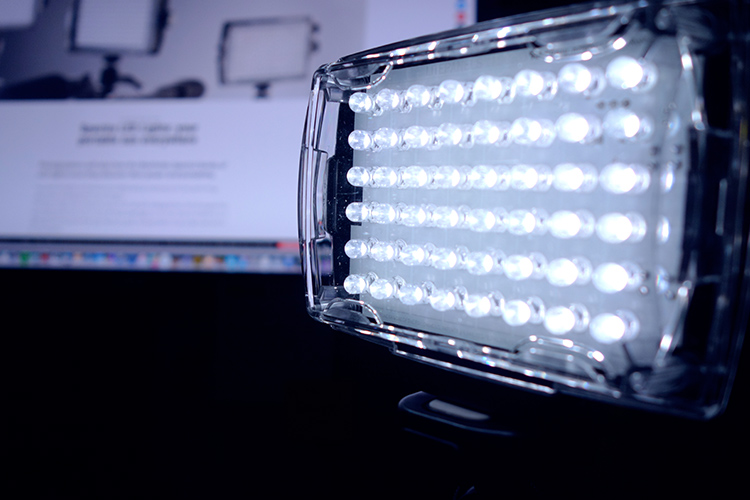
The portable Manfrotto Spectra LED 500S

Why did I purchase it?

LEDs are becoming more popular in photographers’ studios where continuous lighting is used. The main advantages of LEDs are they don’t get hot, unlike tungsten or incandescent lights. Another important factor is that LEDs use less power (watts) per unit of light generated (lumens). So they are extremely eco-friendly.

In this article, I will describe my initial impressions of using the Manfrotto Spectra 500s light for photography. I haven’t had it for long enough to give it a more comprehensive review.

Most of my work is location based, so portability is essential and plays an important role when choosing my photography gear. Nothing irks me more than going to a shoot and feeling like some poor-beast-of-burden overloaded with camera equipment!

I could have purchased a cheaper similar model off Amazon. However, I sourced online with a local company that had it in stock. I got this particular model at a discounted price and more importantly if I had any problems with the light I could easily return it with minimum fuss. Plus, I have built a trust with the brand over the years.

Disclaimer: I bought this Manfrotto Spectra light. I wasn’t sponsored to write this article. The opinions expressed in this article are mine alone.

What’s in the box?

manfrotto-spectra-light-box

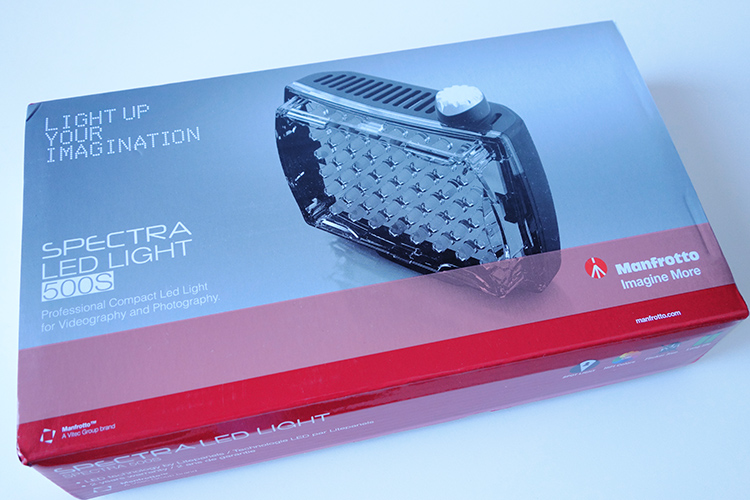
The Manfrotto Spectra LED 500s box

The unit itself is really compact and measures 3.7 x 4.4 x 1.7″ (including the on/off knob). It has one power switch which also acts as a variable dimmer, very cool. It is daylight balanced at 5600 Kelvin. Also included with each light is a set of filters, including one ¼ CTO, one ½ CTO, and one opal diffuser. It also comes with a ball head shoe mount.

Manfrotto Spectra LED 500s in the box

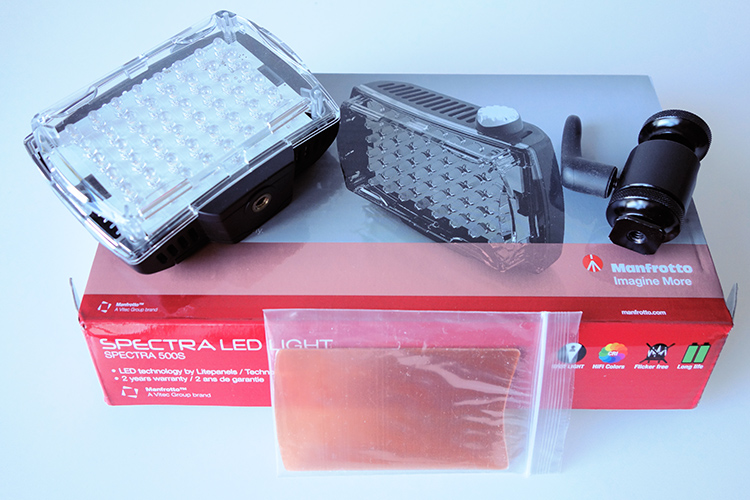
The Manfrotto Spectra LED 500s light comes with 2 CTO gels and one opal diffuser. It also comes with a ball head adapter for mounting on a hotshoe or tripod.

I did find this mini ball head adapter a bit clunky to use. I had to fiddle with the lever to release the tension to get it to move and then lock it back in place. Not ideal when you’re on a shoot, time is of the essence, and you just want your equipment to work effortlessly.

This unit is slim and very compact, as you can see in comparison to my Sony RX100 camera (below).

Manfrotto Spectra LED 500s Sony RX100

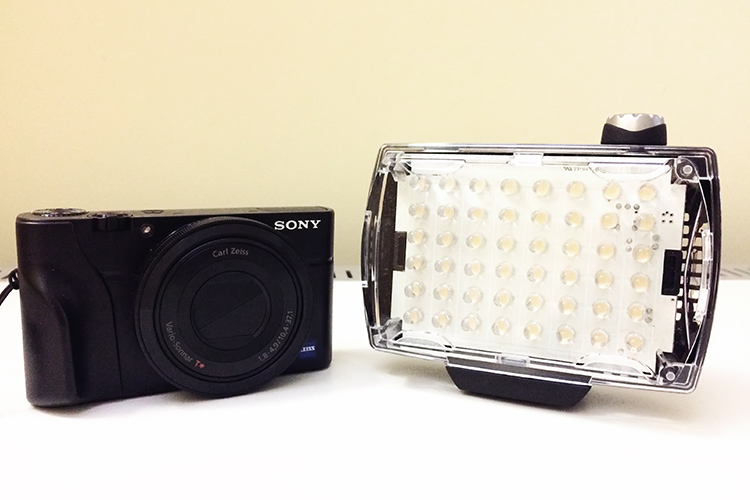
Side by side size comparison of the Manfrotto Spectra 500s LED Light with the Sony RX100.

Manfrotto Spectra LED 500s size

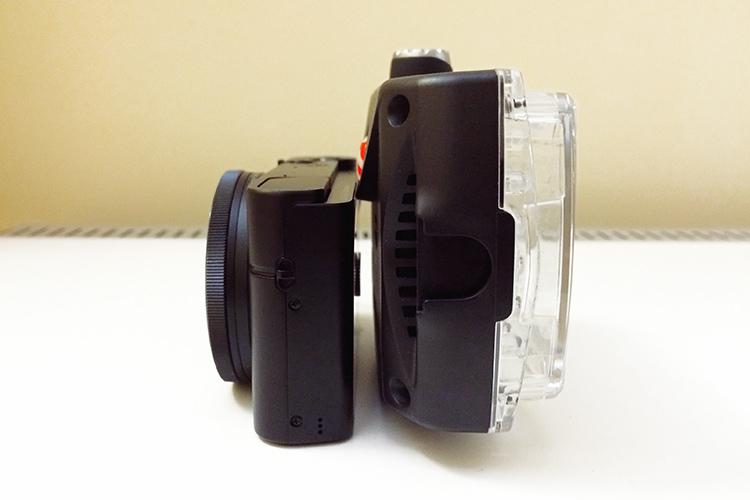
The Manfrotto Spectra LED 500s is quite compact and slim.
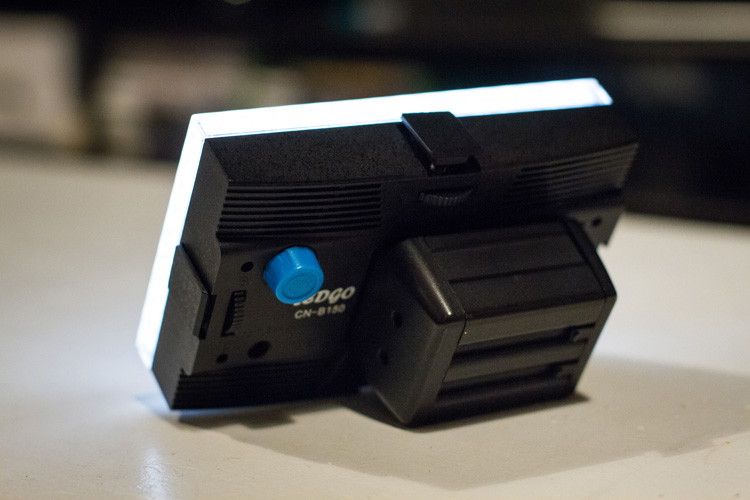
How is it powered?

This little unit, the 500S is the smallest in the range of five models by Manfrotto. The S stands for spot, as a beam of light emits at a 30-degree angle. It produces 300 lux at one meter. The Spectra 500s takes four Alkaline AA batteries. It is simple to use, turn the knob to switch it on. It is also dimmable which makes really useful to control the amount of light being powered.

Rechargeable AA and Lithium-Ion AA batteries can be used as well. It can also be powered by an AC adaptor (ADAPTOR12V0.5A) to use through the mains. I can’t see myself bothering with this but the option is there. You can also purchase an adaptor (Manfrotto  L7.2V-Battery Adapter) which mounts at the back of the spectra unit and uses Sony L-Type batteries. Again, another alternative.

 Manfrotto Spectra LED 500s

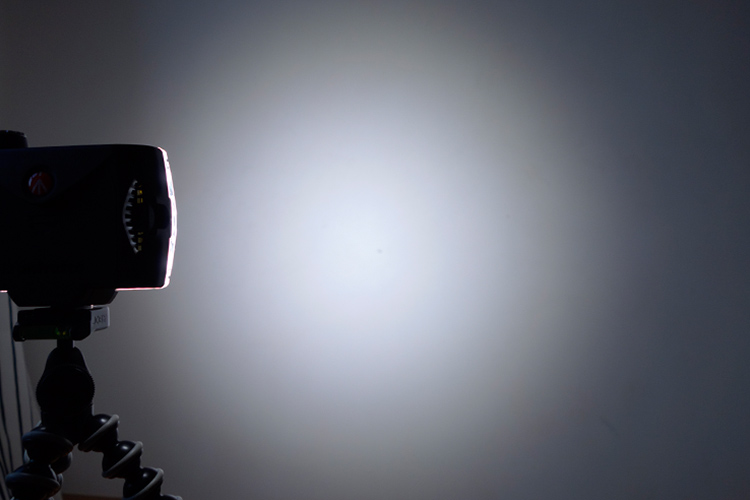
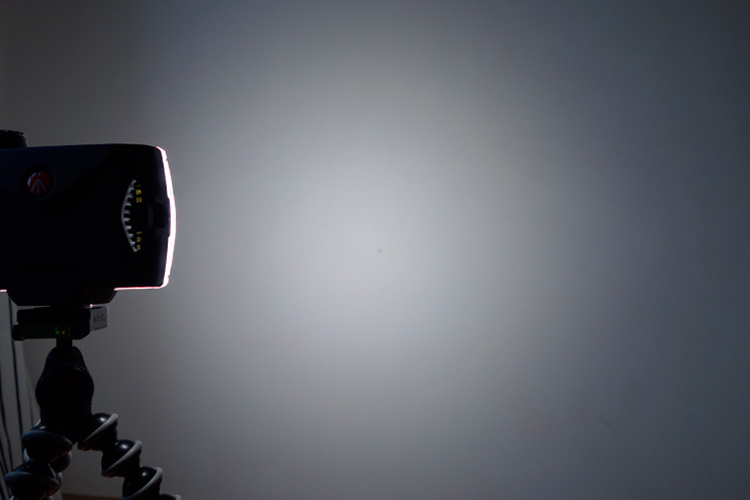
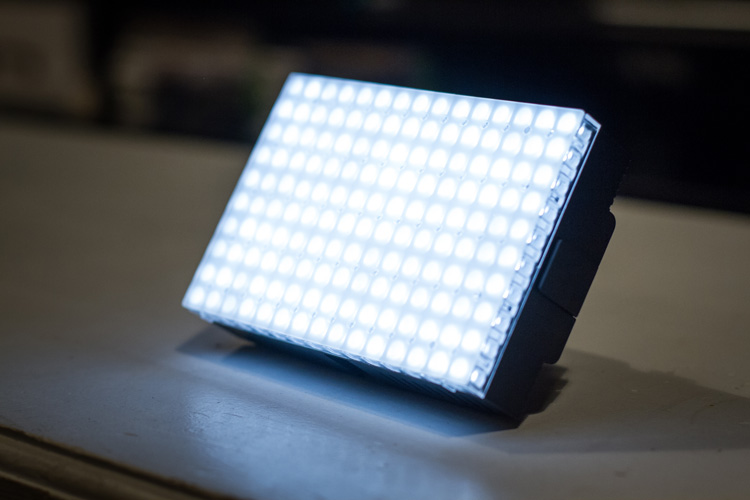
The Manfrotto Spectra LED 500s on full power at one meter.

lighter-cto-gel

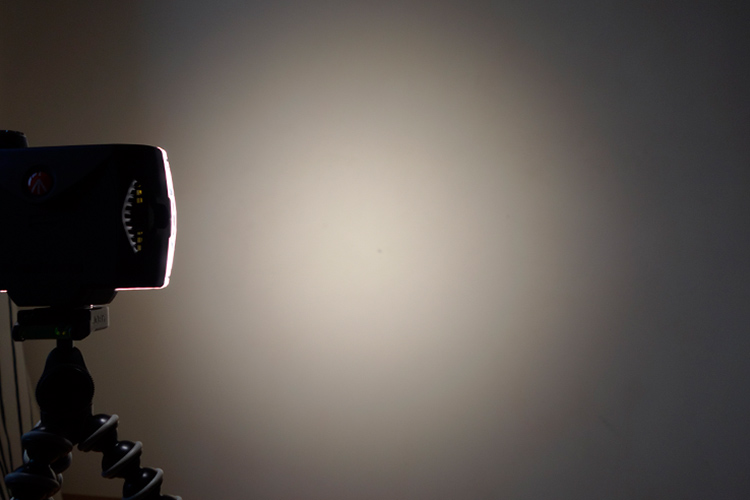
Here, the the 1/4 CTO gel has been applied over the light.

 Manfrotto Spectra 500s LED

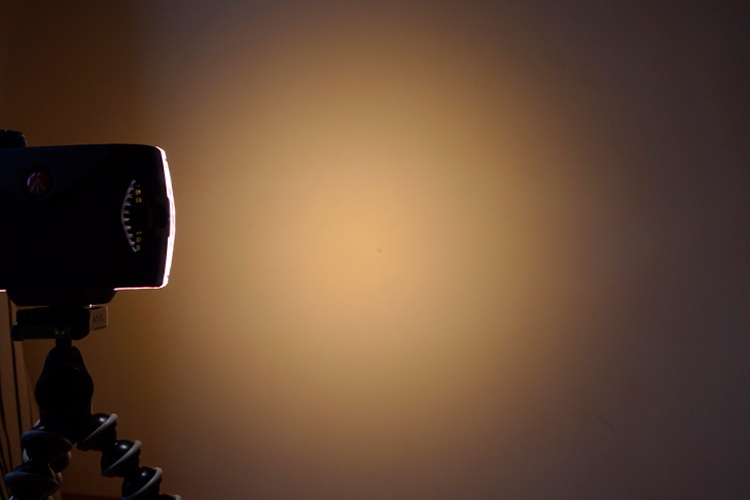
The Manfrotto Spectra 500s LED light with a CTO gel.

 Manfrotto Spectra 500s LED opal diffuser

The Manfrotto Spectra 500s LED light with the opal diffuser.

LED versus flash lighting?

To see how using speedlights fared against this little LED I did a quick test. I didn’t set out to pitch one light source over the other, as that would be like comparing apples to oranges. I only wanted to get a comparison to see the results.

The speedlight is way more powerful, I know that. For the shot below, I used a speedlight with a shoot through umbrella, which was about two feet away from the subject at an angle of 45 degrees. The power on the flash was only at 1/8th power. I kept the ISO the same at 200 for both. Shutter speed was at 1/60 second and the aperture was f/7.1.

In contrast to the Spectra light, I had the light switched to full power and I had to get really close, 10-12 inches away from the object. The camera settings were 1/15th of a second at f/5.6. I didn’t put a diffuser on the Spectra light as a result, there is a harsh shadow under the air blower.

speedlight versus Manfrotto Spectra 500S LED

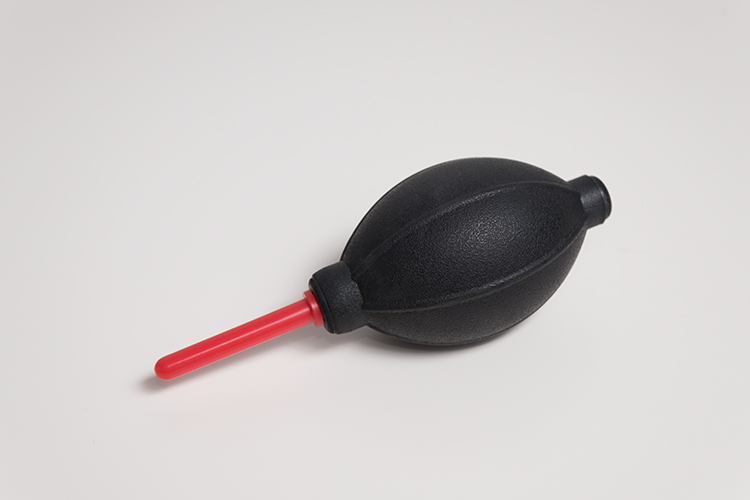
This was shot using flash with a speedlight.

Manfrotto Spectra 500s LED

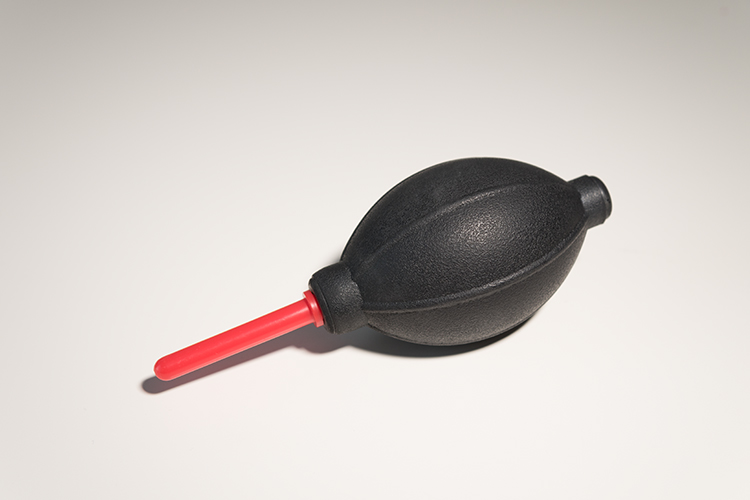
This was shot using the Manfrotto Spectra 500s LED light.

What to look for when choosing LED lights

First, CRI (color rendering Index) is important when choosing an LED light. The closer it is to 100, the more ideal it is. Less than 90 is considered not great. The Manfrotto Spectra LEDs claim >90. What does this really mean? Natural light is classified as having a CRI of 100, the best possible.

Secondly, make sure the LED is flicker free.

Pros of LED lights

  • Extremely portable
  • Lightweight and compact, even with the batteries
  • Easy to use
  • Don’t overheat
  • Can be used for both video and photography
  • Great for small product shots
  • Handy in low light conditions
  • As it is a portable continuous light source, this makes LED lights ideal for beginners to learn about how light affects the subject/model
spectra-light-unde-pendant-shade

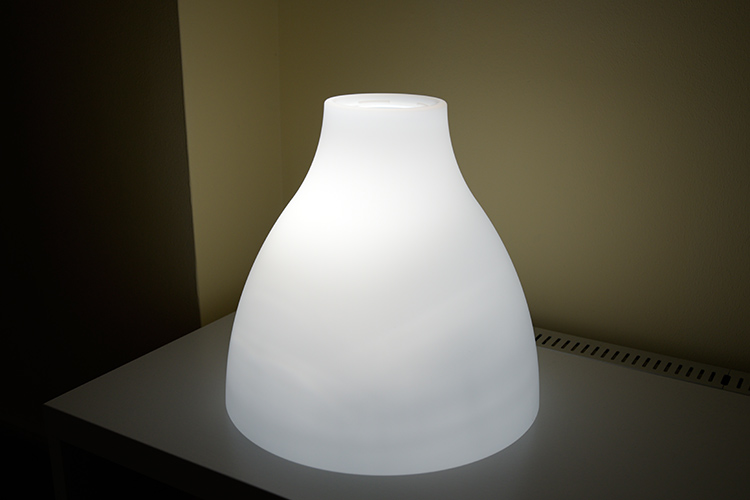
I put the Spectra light inside this pendant shade. This is where the LED light could come in handy by mimicking other light sources to create atmosphere or mood in your shot.

spectra-light-in-shade

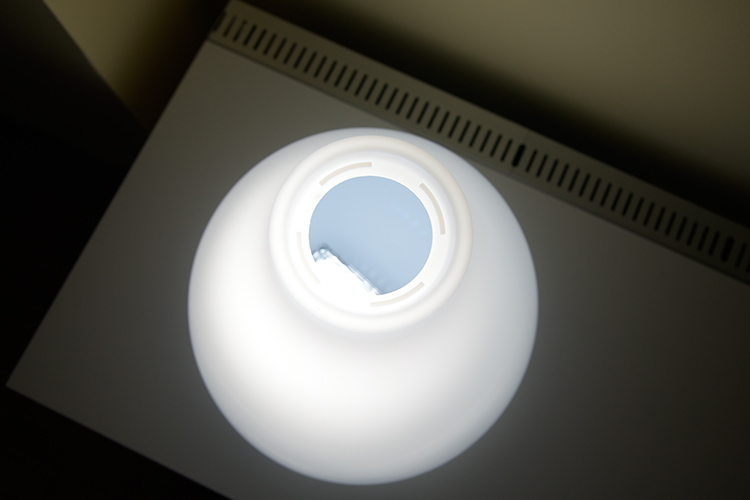
I just placed the Spectra LED LIight under this shade to see how effective it could be to mimic another light source to add atmosphere in your shot.

Cons

  • A little pricey, unless you get a discounted price
  • The white light may not be appealing to some – but the gels included compensate for that
  • The mini ball head adaptor is clunky and fiddly to use – not a deal breaker but annoying nonetheless
  • Not powerful enough in some situations where there is a lot of ambient light to balance against.

Conclusion

As I stated at the beginning of this article I set out to describe my initial impressions so far to date. As this is a very recent purchase, I have yet to test it out fully. But so far I give it 3.5 stars out of five. This may seem a bit harsh but I took a half star away for each of the following:

  • The mini ball head adapter is quite cumbersome to use.
  • It’s fairly expensive compared to other similar less expensive models.
  • This light is not really powerful enough in certain situations and other cheaper models are more powerful.

In terms of photography use, LEDs are terrific and so easy to use. The Manfrotto Spectra 500S is the smallest but not as powerful as its siblings in the Spectra range. That said, I won’t be putting away my speedlights just yet.

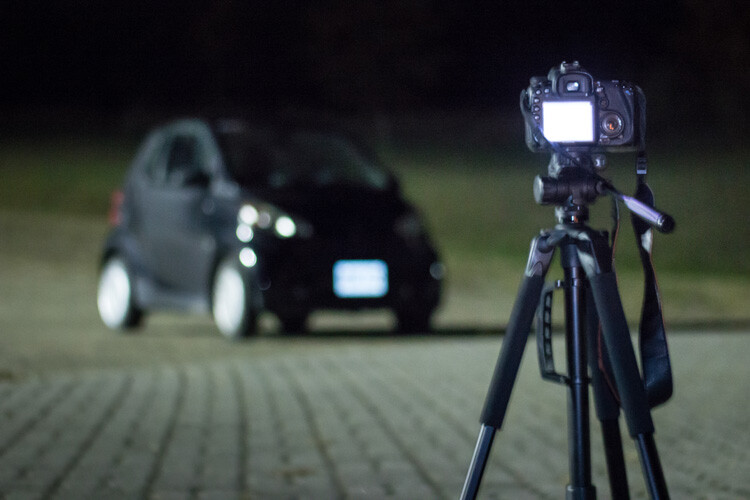
So, if you are new to LEDs lights and you would like to test them out for your photography. Check out my article here on how to use an inexpensive LED flashlight to take shots.

Do you use LED lights in your photography? Please leave a comment below, and tell us more.

googletag.cmd.push(function() {
tablet_slots.push( googletag.defineSlot( “/1005424/_dPSv4_tab-all-article-bottom_(300×250)”, [300, 250], “pb-ad-78623” ).addService( googletag.pubads() ) ); } );

googletag.cmd.push(function() {
mobile_slots.push( googletag.defineSlot( “/1005424/_dPSv4_mob-all-article-bottom_(300×250)”, [300, 250], “pb-ad-78158” ).addService( googletag.pubads() ) ); } );

The post Initial impressions of the Manfrotto Spectra LED Light 500S by Sarah Hipwell appeared first on Digital Photography School.


Digital Photography School

 
Comments Off on Initial impressions of the Manfrotto Spectra LED Light 500S

Posted in Photography


3 Reasons to do Headshots with Natural Light

10 Jan

I love natural light. I’ve probably said this before, but I prefer it to using studio lights. There’s something soft and beautiful about using the light generated by Mother Nature that makes it perfect for every occasion. I use natural light every chance I get. I even use it for my headshot sessions. You may be surprised by this but I’ve got some great reasons why. Read on to find out more.

Shoot Headshots with Natural Light

I have a 9-foot window in my studio. It’s perfect for natural light photography.

#1 – Natural light flatters every skin tone

From pale milk-white skin to dark chocolate brown, natural light makes everyone look beautiful. No matter the skin tone or the facial features natural light enhances everyone. Now I’m not talking about direct sunlight at midday. That type of light is too harsh. It washes out skin tones and creates harsh shadows. Set up your shoot in open shade. Use the side of a building or under a tree. You can even set up a canopy and shoot underneath. You will love the results, just be creative in how you use it.

Shoot Headshots with Natural Light

While the lighting behind this young woman isn’t natural. The light on her face comes from my 9-foot window. She used this shot in her modeling portfolio.

#2 – Natural light is cheap

If you are just starting out as a photographer, natural light doesn’t cost a whole lot to use. You can create beautiful head shots without fancy studio equipment. It’s a way to get your foot in the door. You might also be unique in your area. Think about branding and how being a natural light photographer might be a way to capture attention from potential clients. You could be the trendy alternative to the typical studio headshot.

Shoot Headshots with Natural Light

Taken outdoors against an old building. My client was looking for relaxed looking headshots for her LinkedIn profile.

#3 – Shooting outdoors is less intimidating

Think about all those giant light stands and softboxes. For someone who may be a little nervous about having their portrait taken, shooting outdoors can take off some of the pressure.

I find that generally, clients who are self-conscious or uncomfortable in front of the camera will relax more easily when I take them outdoors for a session. We chat for a while and generally need to walk a short distance to a location. It gives me a chance to take some of the pressure off them. The client starts to feel more comfortable and the overall look of the headshot is much better.

Shoot Headshots with Natural Light

While not your classic headshot pose, my client was relaxed and comfortable. She looks confident.

Professionals need to exude confidence in their images. They won’t be successful in their business if they look nervous or uncomfortable in their marketing materials.

As photographers, we have to visually communicate our client’s abilities

Remember headshots are all about creating an image. We are a part of the branding process for a company or a freelancer. You are helping to promote an actor or build a brand for a home stager. Your images should help attract potential business. It’s your job to tell people all about your client and their amazing abilities.

Shoot Headshots with Natural Light

As a real estate agent my client wanted a photo that associated her with the local area.

You can do this by taking beautiful and bright images that promote your client as a capable and highly skilled professional. Try using natural light in your headshot jobs. I think you will be pleased with the results. Also, remember that if you are offering a service that seems unique from all the others you can think about charging a little more for your highly specialized product.

Natural light is a great tool. I highly recommend utilizing it whenever you can. Please share your natural light headshots or any questions you may have, in the comments section below.

portrait_headshot

googletag.cmd.push(function() {
tablet_slots.push( googletag.defineSlot( “/1005424/_dPSv4_tab-all-article-bottom_(300×250)”, [300, 250], “pb-ad-78623” ).addService( googletag.pubads() ) ); } );

googletag.cmd.push(function() {
mobile_slots.push( googletag.defineSlot( “/1005424/_dPSv4_mob-all-article-bottom_(300×250)”, [300, 250], “pb-ad-78158” ).addService( googletag.pubads() ) ); } );

The post 3 Reasons to do Headshots with Natural Light by Erin Fitzgibbon appeared first on Digital Photography School.


Digital Photography School

 
Comments Off on 3 Reasons to do Headshots with Natural Light

Posted in Photography


Street Light Art: Traffic Signals Emit Surreal Rainbow Streams in Hazy City

10 Jan

[ By SA Rogers in Art & Photography & Video. ]

lucas-zimmermann-traffic-lights-5

It’s almost a cliche at this point to highlight the beauty that can be found in everyday items, like that scene in the movie ‘American Beauty’ where Wes Bentley and Thora Birch stare at a plastic bag waving around on a sidewalk like it’s the Mona Lisa. But sometimes, it just can’t be helped. Have you ever gazed at a traffic light and marveled at the accidental art it was producing? You’re about to.

traffic-lights-eries-3

lucas-zimmerman-traffic-lights

lucas-zimmerman-traffic-lights-2

Being such a humble and unremarkable object, installed at countless intersections in countless cities, the traffic signal is an unlikely subject of the internet’s flighty attentions, but the magic here is really in photographer Lucas Zimmermann’s vision – and in the fog that clings to the town of Weimar, Germany.

lucas-zimmerman-traffic-lights-3

lucas-zimmerman-traffic-lights-6

lucas-zimmerman-traffic-lights-7

Zimmermann first captured his ‘Traffic Lights’ series on a particularly hazy night, noting that the light streaming from the red, yellow and green lamps was stretching out into rainbows. He wondered how the effect would be enhanced by long-exposure photography, and the results show the streams of light almost seeming to take physical form.

lucas-zimmerman-traffic-lights-8

traffic-lights-series-1

traffic-lights-series-2

“I have been waiting for two long years to finally go out again and progress on my traffic lights series,” says Zimmermann. “It was worth the wait.”

The new addition to the series is just as striking as the first, supporting Zimmerman’s belief that photography can show us things we might otherwise overlook, “such as a simple traffic light on the street.”

Share on Facebook


[ By SA Rogers in Art & Photography & Video. ]

[ WebUrbanist | Archives | Galleries | Privacy | TOS ]


WebUrbanist

 
Comments Off on Street Light Art: Traffic Signals Emit Surreal Rainbow Streams in Hazy City

Posted in Creativity


STC offers clip-on light pollution filter for full-frame Nikon DSLRs

24 Dec

Taiwan-based filter maker STC is offering an Astro-Multispectra Clip Filter for several full-frame Nikon DSLR cameras, aiding photographers in filtering light pollution during astrophotography sessions. The filter is designed to clip over the camera’s sensor, and is made with Schott B270 optical glass coated using IBAD technology, including an anti-smudge nanocoating. When used, the Clip Filter ‘significantly reduces’ artificial lighting produced by things like street lights.

The STC Astro-Multispectra Clip Filter is compatible with the Nikon D4, D4s, D800, D800E, D810, D810A, D750, D600, and D610. The item is sold by Cyclops Optics for $ 1,620 Hong Kong dollars, or about $ 209 USD. The company offers worldwide shipping.

Editor’s note: An earlier version of this article incorrectly stated that the filter was made by Cyclops Optics.

Articles: Digital Photography Review (dpreview.com)

 
Comments Off on STC offers clip-on light pollution filter for full-frame Nikon DSLRs

Posted in Uncategorized


Luminous Loops: Interactive Light Display Inspired by the Zoetrope

17 Dec

[ By SA Rogers in Art & Installation & Sound. ]

loop-montreal-1

Take a seat inside this human-sized zoetrope, pull the bar back and forth and watch as fairytale imagery come to life around you. ‘Loop’ is the main installation at this year’s Luminothérapie, an interactive public art installation competition that takes place in Quebec each year. Developed by artists Olivier Girouard and Jonathan Villenueve in collaboration with Ottoblix, ‘Loop’ tells 13 different stories in each of the oversized illuminated circles placed along a street in Montreal.

loop-montreal-5

The zoetrope, in case you’re not familiar, is a pre-film animation device that displays a sequence of images within a cylinder to produce an illusion of motion; users look through slits in the cylinder to watch it. ‘Loop’ takes this traditional object and updates it with interactivity and light, asking users to power the spinning cylinder themselves. A flickering strobe light illuminates the monochrome images lining the inside.

‘Loop’ took three months of design work and 800 hours of assembly to complete. One of the designers makes a living building Lego sets, while the other has been designing since he was just a child. Explaining how they came up with the concept, Olivier Girouard says Villanueve took inspiration from mechanical interventions at Berlin’s Technology Museum.

loop-montreal-2

“Thinking of hamster wheels, we decided to build a vertical zoetrope. So we combined three mechanical elements: the railway push-car (like the ones made famous by Bugs Bunny cartoons), the music box and the zoetrope. We came up with the idea and sketched out the project just one week before the deadline for submitting proposals!”

loop-montreal-3

“Our invention reminds me of the Chimera, the mythological three-headed beast born of the intersection of different universes,” says Villanueve. “I like this more or less unclassifiable hybrid machine. Is it a toy? A projection device? A kind of lighting? Looking at previous Luminothérapie pieces, we noticed that installations that were not only participatory but also collaborative, where participants had to act together to produce a result were – in our opinion – the more successful projects and the most appreciated by the public.”

Loop will light up the Place des Festivals in Montreal until January 29th, when it will take off on a tour of Quebec cities. Check out last year’s installation – a series of illuminated see-saws.

Share on Facebook


[ By SA Rogers in Art & Installation & Sound. ]

[ WebUrbanist | Archives | Galleries | Privacy | TOS ]


WebUrbanist

 
Comments Off on Luminous Loops: Interactive Light Display Inspired by the Zoetrope

Posted in Creativity


How to See and Photograph Light – 6 Tips to Help you Take Better Photos

13 Dec

I was teaching a class recently and someone asked me how they could have made a particular set of landscape images better. Should they have used a different aperture, shutter speed, etc.? “You couldn’t have made those photos any better because the light was terrible.” I explained. You must learn to see and photograph light to take better photos.

How to See and Photograph Light - 6 Tips to Help you Take Better Photos

Blossoms at dawn, Paris.

There are times when interesting photos can be made in bad light. But I will unequivocally say that in most cases (as there are always exceptions to the rules, right?) when you have boring light you will have boring photos.

Interesting light transforms any subject. It reveals and enhances the subject’s natural qualities. In many ways, it brings your subject to life. If you follow only one piece of advice in photography it should be this:

“Light makes photography. Embrace light. Admire it. Love it. But above all, know light. Know it for all you are worth, and you will know the key to photography.” George Eastman.

How to See and Photograph Light - 6 Tips to Help you Take Better Photos

Moonset on the Seine.

In this article, I am going to explore light in many forms, but it’s not a technical article. This is about the how you compose with light, how its different forms affect your subject, the emotions that light communicates, and how when you really chase light you’ll learn to create more compelling and memorable images.

In every single one of these photos, I will say that the subject is the light. The light might be subtle, or very obvious, but what compelled me to snap that shutter was what the light was doing. Here are some tips to get you more involved with capturing the mesmerizing qualities of light.

1) Notice light

“It’s not what you look at that matters, it’s what you see.” Henry David Thoreau

How to See and Photograph Light - 6 Tips to Help you Take Better Photos

This first step seems like a stupidly simple piece of advice right? I mean who doesn’t notice light? Most people notice the obvious aspects of light – it’s a sunny day, it’s stormy, it’s twilight. There is so much more to light, though. It’s a rich, varied and complex entity. Light is creating hundreds of different effects all around us all the time.

The first piece of advice I always give to all my students is – look for what the light is doing and look for light sources. You’re out and you see a beautiful shaft of light on a wall. Ask yourself – where is it coming from? Is it direct or is it being reflected off of something? Is it bouncing off the wall and doing something else?

As you move around light alters – as you enter a square, go under a tree, move behind a building – it’s bouncing and reflecting off so many things. Light is being filtered through leaves, through different urban and natural materials. It’s this constantly changing aspect that you need to become very familiar and intimate with. Light is always changing – as clouds drift across the sun, as the hours pass, as weather systems move.

How to See and Photograph Light - 6 Tips to Help you Take Better Photos

See the shadows on the clouds?

Become a light detective

There are, of course, many times when the light is super flat. We have many days in London where cloud cover is very dense and the light is very flat and gray. Or back in California, where I grew up, in the height of summer at midday the light is hard and almost flat in its piercing white intensity. Then you have to work harder to look for alterations in light. But like life itself, change is something we can consistently rely on.

You’ll also start to notice that when the light outside changes, it also changes the light inside. A drop in the vibrancy of the light outside will make the light inside seem warmer and stronger.

Becoming a good photographer is like becoming a light detective. What is light doing to your subject? What is it revealing about your subject?

How to See and Photograph Light - 6 Tips to Help you Take Better Photos

Los Angeles downtown at dawn.

2) Use light to create emotion in your images

“A great photograph is a full expression of what one feels about what is being photographed in the deepest sense and is thereby a true expression of what one feels about life in its entirety.” Ansel Adams

For me, light always creates an emotion, a feeling, or a sense of mood. It doesn’t have to be a strong feeling or even a positive one, but it does have to create an impact with me that goes beyond the initial pleasingness to the eye. I am constantly searching to capture a feeling in my images. Light is a very powerful way to communicate emotions.

So I want you to look at the light in the following photos and ask yourself – how do they make me feel? Light can be a powerful and dramatic element in your photos, creating a deep feeling of awe, about the grand beauty of the world.

How to See and Photograph Light - 6 Tips to Help you Take Better Photos

Dawn over the Grand Canal Venice, Italy.

Light enhances the subject

Of course, the photo above would have been interesting without the dramatic sunrise, after all, it is Venice and the subject is incredible. What the beautiful light adds, though, is a big pop of color, adding a layer of depth and enhancing the awe-inspiring feeling of these amazing buildings. The dramatic color and light matches and enhances the dramatic subject.

It doesn’t have to be big subjects, though. This simple shot of pretty flowers would be quite boring if it didn’t have this lovely dappled light on it. It’s simple but very evocative. If you are starting out, or trying to refresh your basic skills, focusing on detailed shots like this, and what light is doing to the elements in the world around you, is a fantastic way to start playing with, and capturing the magic of light.

How to See and Photograph Light - 6 Tips to Help you Take Better Photos

Tulips in bloom Istanbul Gulhane park

I have mentioned interesting and beautiful light. So what is interesting light? Well, to me it’s any light that communicates an emotion, a feeling, or a mood. It’s light that makes you feel something. Even if that’s melancholy.

How to See and Photograph Light

Lone tree on a foggy morning on Hampstead Heath London, at dawn.

I shot the photo above on a cloudy autumnal morning. The light was very diffuse, very subtle, but it was still pretty and interesting to me. It matched the location I was in – the wild heathers and grass along with the stark leafless tree standing alone.

Can you see how the light emphasizes the natural qualities of the tree? How the amazing wild branches, stripped bare, almost like someone’s mind going crazy, are enhanced by the soft light?

In the photo below, to me, the light is offering an amazing feelingof foreboding.

How to See and Photograph Light - 6 Tips to Help you Take Better Photos

Dark days ahead, London.

3) What is the color of light?

“Light, that first phenomenon of the world, reveals to us the spirit and living soul of this world through color.” Johannes Itten

Color from light is produced when white light is split by a prism into the colors of the rainbow. You also get artificial effects created by the myriad of things that light reflects onto and bounces off.

For me, color is the second most powerful force in my photography, and getting a sense of the color of light is a great way to start using light and color in your compositions.

Compare the color of the light in the following three images.

How to See and Photograph Light - 6 Tips to Help you Take Better Photos

Dawn over Death Valley, California

How to See and Photograph Light - 6 Tips to Help you Take Better Photos

Sunrise over the Bosphorus, Istanbul Turkey at dawn.

How to See and Photograph Light - 6 Tips to Help you Take Better Photos

Near Hackney Wick station London at dawn.

Light is always full of color – even if it’s piercing white. And it’s doing something to the color of your subject.

4) Light can make even dull and boring subjects interesting

“In the right light, at the right time, everything is extraordinary.” – Aaron Rose

Interesting light doesn’t have to just be natural, or even beautiful. Light of all kinds creates mood and feeling within a photo. Your aim is to ensure that the light helps to create a story of some kind for your image, that it tells you something about what it’s like to stand right there, where you were.

How to See and Photograph Light

Hotel room, Madrid, Spain.

Above is a great example of harsh light that usually I wouldn’t go near – but it works in this photo because it works well for the subject. I rarely take photos using such unflattering hard lighting. But in a grim hotel room in Madrid, it enhances the feeling of loneliness that the twin (disconnected) beds give off, with the bleak looking paint color. That burst of light wraps up the photo into a nice melancholy package. See, even horrible light can be interesting (in the right circumstances)!

Then you also have the issue of beautiful, gorgeous light making rather dull subjects suddenly quite interesting.

How to See and Photograph Light - 6 Tips to Help you Take Better Photos

Gas pumps for boats in Venice, at dawn.

Without the rich blue light, this would not be an interesting photo. Plus what gives it another layer of interest are the pops of artificial light.

This following photo has a fascinating subject. But imagine this scene on a gray, drab Parisian morning, when all you want to do is dive into a cafe and eat several pains au chocolat?

How to See and Photograph Light - 6 Tips to Help you Take Better Photos

A dawn Idyll on the Seine, Paris.

The light is bringing everything to life – the gray stone buildings, the grayish-green water, the black and browns of the boats. This would be a totally boring photo without that magical light and sky.

5) Use light to tell a story

“There is only you and your camera. The limitations in your photography are in yourself, for what we see is what we are.” – Ernst Haas

I think photographs are at their strongest when they enhance the inherent qualities of the subject you are photographing when they add another layer of story to the photo.

What story do you want to tell?

I photograph a lot of cities at dawn; it’s my main subject at the moment. Dawn, though, becomes very repetitive to photograph. It’s often so pretty, but just how many epic sunrises can you photograph? So one of my favorite things to do is to juxtapose that beautiful, ethereal light of dawn with the broken, used or decaying elements of our cities.

How to See and Photograph Light - 6 Tips to Help you Take Better Photos

Ancient vista, Istanbul at dawn.

I think it says so much. The hopeful light of dawn, with the heavy feeling you get from the urban scene, and feeling of human impact.

I also love to photograph dawn when the street lights are still on. That mix of the best light nature produces, with that hard functional light we humans create for our cities, is a very interesting thing to play with. The light is telling you more about what it’s like to be exactly where you are – it’s helping to tell the story of your subject.

How to See and Photograph Light - 6 Tips to Help you Take Better Photos

Last light on gravestones, Stroud, England.

In the photo above I was in this graveyard on a winter’s afternoon. I noticed that the sun was starting to set and realized that if I waited, the sun would fall perfectly between the trees, lighting up the gravestones. This stream of light through the trees only lasted a minute or two, but it shows that when you really pay attention to light you can start to anticipate what it’s going to do, and how it will affect your photos. Without that stream of beautiful light the scene would have been really boring.

6) Chasing light is an adventure

“Photography is a love affair with life.” – Burk Uzzle

Photography is such an amazing creative pursuit. I love how it connects me so much more to the world around me. Learning to pay attention to light and how to capture it is one of the best ways to elevate your photography. Becoming intimate and familiar with light will help you become really present with the beauty and wildness of this amazing world.

How to See and Photograph Light - 6 Tips to Help you Take Better Photos

I would encourage you to photograph light – just for the sake of it. It’s a wonderful, thrilling adventure to always be chasing the light.

I’d love to know if you how you go about capturing light and use it in your photos. Please comment below, I love hearing your ideas.

googletag.cmd.push(function() {
tablet_slots.push( googletag.defineSlot( “/1005424/_dPSv4_tab-all-article-bottom_(300×250)”, [300, 250], “pb-ad-78623” ).addService( googletag.pubads() ) ); } );

googletag.cmd.push(function() {
mobile_slots.push( googletag.defineSlot( “/1005424/_dPSv4_mob-all-article-bottom_(300×250)”, [300, 250], “pb-ad-78158” ).addService( googletag.pubads() ) ); } );

The post How to See and Photograph Light – 6 Tips to Help you Take Better Photos by Anthony Epes appeared first on Digital Photography School.


Digital Photography School

 
Comments Off on How to See and Photograph Light – 6 Tips to Help you Take Better Photos

Posted in Photography


Threading Rainbows: Spectral String Art Looks Like Strands of Light

11 Dec

[ By WebUrbanist in Art & Sculpture & Craft. ]

light-string-art

Using a simple material palette of thread, wood and nails, artist Gabriel Dawe‘s latest cascading color creation combines thousands of threads to make a remarkable interior rainbow.

twisted-thread-art

Plexus #35 is on display at the Toledo Museum of Art (images by Andrew Weber), a featured highlight in the center of the Great Gallery illuminated against dark red walls and framed oil paintings via a skylight above.

interwoven-museum-installation

The entire color spectrum is represented, meticulously organized strand by strand — a single twist between a pair of origin and termination lines ensures that the work appears different from every angle.

soectrum-color-art

Other works by Dawe feature similar themes in different hues and shades, often intricately woven to create overlaps. By comparison, this is one of his simplest pieces yet arguably one of his most powerful.

color-art-twist

“Originally from Mexico City, Gabriel Dawe creates site-specific installations that explore the connection between fashion and architecture, and how they relate to the human need for shelter in all its shapes and forms.”

“His work is centered in the exploration of textiles, aiming to examine the complicated construction of gender and identity in his native Mexico and attempting to subvert the notions of masculinity and machismo prevalent in the present day.”

Share on Facebook


[ By WebUrbanist in Art & Sculpture & Craft. ]

[ WebUrbanist | Archives | Galleries | Privacy | TOS ]


WebUrbanist

 
Comments Off on Threading Rainbows: Spectral String Art Looks Like Strands of Light

Posted in Creativity


4 Tips to Leverage Natural Light Using Just your Camera and One Lens

29 Nov

In photography light is everything. Without light, whether that be artificial or natural, there is no photography. The problem is that sometimes there is just too much or too little, and in both cases, artificial light may need to be added. But what if you don’t have any artificial light available to you? And what if all you have is literally a camera with a lens and nothing else? This article focuses on how you can leverage natural light using just one lens and working without a reflector or a speedlight.

#1 Position your subject in relation to the light

Let’s take a look at these photos below. It was a very sunny day and I wanted to capture the blueness of the sky and the sea as well as the people in the shots. I had a D700 which has a base ISO of 200 and the 50mm 1.4 lens. I have provided the settings below for each photo.

creative-ways-available-light-with-the-50mm_0000

f/5.6 ISO 200, 1/2000th

creative-ways-available-light-with-the-50mm_0000

f/5.6 ISO 200, 1/1250th

creative-ways-available-light-with-the-50mm_0000

f/6.3 ISO 200, 1/2000th

These settings are okay on a very sunny day if you shoot with the sun positioned behind you shining towards your subject. In this case the sea and sky, which also illuminated the people that I wanted to be in the photo.

Lighting position

While these photos are fine, there are a few issues. First, put simply, when this is the lighting position, anyone, and any camera can take these types of photos. You can shoot in automatic mode and the photos would look the same. Mobile phones nowadays can take even more amazing photos in this situation where there is a huge amount of light hitting the subject and the background directly.

I love these types of photos for travel photography, high contrast shots and snapshots that would make me remember such scenes. But if I am after portraits, would I hire a professional photographer who would give me photos that anyone can take? Definitely not! Sure, the occasional lifestyle snapshot in this lighting is acceptable such as this one directly below shot at f/2.5 ISO 200, 1/2500th. But I would not want proper portraits of my family to be taken in this lighting situation.

creative-ways-available-light-with-the-50mm_0000

creative-ways-available-light-with-the-50mm_0000

creative-ways-available-light-with-the-50mm_0000

Harsh shadows

The second issue is the harsh shadows. As a professional photographer, this would never be my lighting position for people or portraits. Even if the sun was coming in at a side-angle, undiffused sunlight directly hitting the subject still produces harsh shadows and hotspots. I would prefer for the sun to be behind the subjects, also known as backlighting, rather than directly in front of them.

If your intention is to take nicely lit portraits with a background that is not blown out, for backlighting to work, you would need to have a big enough flash or reflector to illuminate your subject to avoid silhouettes. Conversely, you can simply expose for your subject but you will have to blow out (overexpose) the background. Therefore, you end up with a white sky rather than a blue sky.

An example of backlighting is this sunset photo below. The houses and the boats were not illuminated. I was too far away for my pop-up flash to be of any help, and I didn’t have a tripod for a long exposure and smaller aperture. But I still wanted to capture some of the soft sky color along with the sunset. Balancing the exposure was tricky and I ended up shooting this image with the following settings; f/5, ISO 200, 1/320th. While the ambient light of the sunset was captured, the other elements in the photo were too dark and ended up almost like silhouettes.

creative-ways-available-light-with-the-50mm_0000

What if you have nothing else but a camera and lens with you? You do not want all your photos to be silhouettes when shooting backlit, or too dark when shooting in the shade. So what you can do is leverage your surroundings by positioning your subject carefully in relation to the light. If you have to shoot backlit portraits in a situation similar to above, shoot an intentional silhouette or use your flash for fill light (more on this below).

If you’re doing portraits where you want to focus on well-exposed faces, avoid positioning your subject where they are facing the sun which results in harsh light and shadows. On a very sunny day, you may want to wait for the golden hour – the time shortly after sunrise or before sunset –  when the sun is much lower on the horizon and the light is much softer. This yields a light that is much more flattering for portraits. If it is a bright but overcast day, the clouds act as a huge diffuser and the shadows are not as harsh so it is easier to photograph portraits in those conditions.

#2 Look for ideal light

Ideal light is often indirect, reflected, or subtractive light. This can take various forms:

  • Indirect lighting can be the soft diffused light coming from a window.
  • Reflected light can be that bouncing off a white floor, wall, bright sand, or from white or light-colored clothing you are wearing.
  • Subtractive light can be achieved by blocking the light with a diffuser, umbrella or a flag (any flat black object large enough to block any direct light hitting your subject).

Get out of the sun

As this article does not involve any equipment other than your camera and lens, instead of blocking the light, I positioned my subject in the shade. So that instead of subtracting light from my subject, I subtracted my subject from the light and put her in the shade.

In this example below, it was a very bright day and I did not want any direct light falling on my daughter’s face. I put her completely in the shade but deliberately next to the caravan wall which was light beige. There is some reflected light from the side that helps illuminate her face and the generally shadowed area we were in.

creative-ways-available-light-with-the-50mm_0000

In this photo below taken in the zoo, there was no natural light at all. A fluorescent light illuminated the box where the snake was. You can see this white light reflected on the top part of the snake’s eye (catchlight). I waited for the snake to get into this position and used the light which was bouncing from the ceiling onto him to get this shot.

creative-ways-available-light-with-the-50mm_0000

In this photo below, there was no ideal light! We were in a pretty darkly shaded area and the enclosure was mottled with spots of sun and shade. I positioned myself where I knew I could catch a good close up of the tiger in complete shade and waited for it to pass by.  The contrast between the light and shade was so strong that had I taken the photo of the tiger with his body in half sun and half shade, it would not have come out well at all.

creative-ways-available-light-with-the-50mm_0000

#3 Use your pop-up flash as fill light

Now I know that photographers are sometimes funny (and snobby) about using the camera’s built-in pop-up flash. I am one of those photographers, with good reasons. The camera’s pop-up flash blasts light directly onto your subject. It gives you a rather flat and unflattering light with a harsh shadow around the jaw and head to boot. Unless your intention is to shoot like this such as some fashion houses do (and they do it so professionally by the way), then this is a no-no in portrait photography. Ideally, you want the light bounced and angled – anything but aimed directly from the camera toward the subject.

However, I do use my pop-up flash quite a bit! In fact, I use it when I don’t have a flash gun (speedlight) and I’m shooting backlit, especially when the sun is strong. And I have no qualms using it as a direct light in this situation because the camera’s flash is not strong enough to overpower the sun anyway. So the most you get out of it is a little bit of fill light.

Take this photo of the monkeys below. Had I not used my pop-up flash, there would have been no detail captured on the monkey’s face at all. The sun was too powerful that the pop-up flash could never have flattened the face and created harsh shadows anyway, and I was also too far away from the monkeys for that to happen.

creative-ways-available-light-with-the-50mm_0000

Using the pop-up flash is a fast and easy way to add light. Just be mindful of the caveats and be circumspect when using it.

#4 Try long exposures to capture natural light

Shutter speed has everything to do with ambient light regardless of whether you are doing long exposures or using on-camera, off-camera, or pop-up flash. In fact, with regards to the latter three, flash exposure is completely unaffected by shutter speed.

With long exposures, you can take photos even when very little light is available. You need a tripod, or something steady and flat to rest your camera on like a table or chair, and you’re good to go. So why would you want to slow down your shutter speed and when must you do it? Do it when you want to capture the ambient light.

Armed with just a 50mm and the camera placed on a steady surface, I slowed my shutter speed right down to a few seconds using the bulb setting. I may have captured the moon rising but the sky is pitch black and not enough ambient light was captured. My shutter speed might have been slow but not slow enough. Ambient light was very crucial here because there were stars in the sky.

creative-ways-available-light-with-the-50mm_0000

In contrast to the above, the photo below is the same scene photographed with a much slower shutter speed so that the stars are visible.

creative-ways-available-light-with-the-50mm_0000

Even with just the 50mm you can photograph the starry sky such as below. However, don’t go over 10 seconds as you would then start capturing the star trails.

creative-ways-available-light-with-the-50mm_0000

Using shutter speed wisely and skillfully is a great tool for capturing mood, color, and ambient light, even when there is very little of it. There is some light you don’t ever want to kill such as the soft evening light just after sunset. These photos were taken simply with a camera with a 50mm lens at a slow shutter speed, a wide aperture, and a fairly high ISO (as I was on a slow moving boat). These images were shot at;  f/2.5, ISO 2500, 1/100th. A faster shutter speed would have killed this light and rendered the sky pitch black. Too slow I would have run the risk of blurry photos due to the moving boat.

creative-ways-available-light-with-the-50mm_0000

creative-ways-available-light-with-the-50mm_0000

creative-ways-available-light-with-the-50mm_0000

creative-ways-available-light-with-the-50mm_0000

googletag.cmd.push(function() {
tablet_slots.push( googletag.defineSlot( “/1005424/_dPSv4_tab-all-article-bottom_(300×250)”, [300, 250], “pb-ad-78623” ).addService( googletag.pubads() ) ); } );

googletag.cmd.push(function() {
mobile_slots.push( googletag.defineSlot( “/1005424/_dPSv4_mob-all-article-bottom_(300×250)”, [300, 250], “pb-ad-78158” ).addService( googletag.pubads() ) ); } );

The post 4 Tips to Leverage Natural Light Using Just your Camera and One Lens by Lily Sawyer appeared first on Digital Photography School.


Digital Photography School

 
Comments Off on 4 Tips to Leverage Natural Light Using Just your Camera and One Lens

Posted in Photography


How to Use Light Painting to Take Incredible Car Photos

28 Nov

Whether you drive a beat up station wagon from the 80s or a finely tuned Porsche, light painting is an excellent way to photograph your car and truly make it shine! Light painting results in incredibly unique and impressive images. With a bit of persistence and creativity, you can create pictures that look like commercial photoshoots – even without heavy editing.

A photo of a car taken using the light painting style

The reason that a light painted picture looks so incredible is because the light is literally wrapping around the subject. Normally, we see objects lit from only one angle, often the sun, which can get a bit dull at times. In addition, there will be cool reflections on the body of the car that trace the path of your light, giving the shot a highly commercial look.

Getting started

What’s the first step? Clean the car! Light makes every speck of dirt and grime become immediately visible. Unless you are going for a grungy style, you’ll want to make sure the car is squeaky clean.

Since light painting involves leaving the shutter of the camera open for some time, you will need to wait until it is dark outside. If you try light painting during the day, you will get a completely white image as the sensor collects all the sunlight.

Alternatively, if you have room in your garage, you could park your car in there and cover all windows so that there is no ambient light.

Your light source

One of the cool things about light painting is that you don’t need to invest thousands or even hundreds of dollars in equipment to get started. Literally, any light source can be used, whether it is a professional video light or simply a flashlight app on your mobile phone.

For my example picture, I will be using an LEDGo Portable Video Light, which is a small but powerful light that I can hold in my hand.

video-light-for-light-painting-1

video-light-for-light-painting-2

One drawback of this type of light source is that it throws light everywhere, including back at the camera. If possible, you will want to find some way to shield the light so that it is directed only at your subject. Professional light painting lights, like the Westcott Ice Light, have flaps that prevent the light from spilling everywhere.

A light painted car where the light source is visible

In this example, the light source was seen by the camera, which created a unique halo effect around the car.

A light painted car with the light source not visible in the final image

In this image, the light was shielded from the camera and pointed only at the car, so that the light path isn’t visible.

Setting up the shot

Perhaps the most important piece of equipment you will need for light painting is a sturdy tripod. This is because you will be taking a picture that lasts for many seconds. A tripod that shifts over the course of the picture, or that is blown around by wind, will result in some serious frustration and blurry images.

You don’t need a special or expensive lens for light painting – any lens will do! When you are setting up your tripod, remember how zoom influences a picture. Shooting from close with a wide angle lens will make the car look fatter. Shooting from a distance with a bit of zoom will lessen the distortion.

Behind the scenes of light painting car photography

Behind the scenes of the setup. There is some light filtering in from the left from a streetlight, but I can use my camera settings to reduce the effect of that ambient light.

Exposure settings

The first goal will be to get a base exposure. This requires that you go full manual on the settings. If you leave the camera on auto, it will try to compensate for the low light and may pop up the flash.

To make an image with a black background like the one in my example, you will want your base exposure to be very dark. If you want more of the surroundings to be visible, you can make your base exposure lighter. Be aware, however, that will mean that you are more likely to show up in the final image as you walk around the car with your light.

  1. First, select a low ISO so the sensor doesn’t collect much light from the surrounding area. As an added benefit, using a low ISO will also result in a very high-quality image.
  2. Next, you will want to choose a fairly narrow aperture. This will keep a large portion of the image in focus. It will also help to make the image darker, as needed.
  3. Last, choose a shutter speed that gives you a bit of time to paint the car. For my purpose, I chose 25 seconds.

As you can see below, this base image is nearly completely dark. This is perfect. Now the final image will only be what I paint with my light.

The base exposure for a light painting car image

The base exposure for my image was ISO 100, f/9, 25 seconds.

Let there be light (painting)

Now we’re ready to start painting!

You can either have a friend press the shutter button, or you can put the camera on a short timer so that you can start light painting immediately after the shutter releases.

There will inevitably be a bit of trial and error as you try to find the right angles at which to paint the car. Pay close attention to how the light is reflecting in the body of the car and try to find ways to make it look flattering. Typically this involves moving the light at a uniform level so that there is a clean and crisp line of light reflected on the car.

light-painting-example

Chances are you’ll have to throw away a lot of images because parts of the car weren’t lit well enough, or the reflections looked messy. Don’t let this discourage you. The more you practice, the more you will get a feel for how to move the light.

Don’t forget to play a little bit. Waving your light around in circles, for example, can make some cool light trails and some memorable images.

A light painted car with light trails

A light painted car with light trails

How come you don’t show up in the final image?

A camera can only see objects that have light shining on them. When you aim the light source away from yourself and keep moving the entire time the picture is being taken, you simply won’t be in one place long enough for the camera to record your image.

If you do see yourself faintly in the final image, this can be due to one of three things:

  • You might have been caught in the light reflecting off of the car (or accidentally lit yourself up).
  • There might be too much ambient light. Try adjusting the settings to make your base exposure a bit darker.
  • You stood still in one place for too long, keep moving.

Typically, these ghostly appearances can be fixed easily enough with Photoshop later on, though you may want to adjust some settings to save yourself some time in the editing room.

Controlling the power of your light

If you find that your light isn’t having so much of an effect on the final image, there are two ways to control this.

To effectively make your light more powerful, you can choose a wider aperture (lower f-stop number) or raise the ISO. Either of these options will make the camera more sensitive to all light, including the light in your hand. Be aware that these changes will also affect your base exposure for the ambient light conditions. So you may also need to change the length of the shutter speed in order to keep the image properly dark.

If all else fails, your last option might be to simply to purchase a more powerful light. Yes, it is possible to do light painting with a small flashlight, but if you are serious about light painting, it might be a good idea to upgrade to something with a bit more power and control.

Making some final edits

Often, light painted pictures look pretty awesome right out of the camera. By pulling the picture into an editing program like Lightroom, you can make some simple tweaks to complete the image.

The original, straight from camera image of a light painted car

This is the image straight from the camera. It has a really unique look, even before we do any edits. You can see that my feet were caught in the reflected light and will need to be edited out.

It’s a good idea to shoot your light painting images in RAW. Shooting in RAW as opposed to JPG gives you some extra flexibility when it comes time to edit.

General adjustments

First, you’ll want to find a nice looking white balance. Light painted cars often look very sleek with a steely, cold white balance, but you can experiment to find a nice balance for the car you are working with.

As I mentioned earlier, it’s important to make sure the car is clean before you photograph it. Any minor imperfections or dirty spots that might still be visible can be removed using the spot healing tool in Photoshop or similar editing programs. You may also want to use this tool to reduce or remove bright and distracting glare reflecting off the car. I used this method to remove a harsh reflection in the example picture just above the front wheel.

Selective adjustments

Next, you may want to take some time to selectively lighten or darken parts of the image. In the course of your light painting, it is possible that you might have spilled some light into an area of the picture that you wanted to leave dark. You can control this by using gradients or adjustment brushes to precisely control the amount of light on different areas of the image.

For my picture, I wanted the light to quickly fall off around the car. I was able to emphasize this by using gradients and a vignette to darken the edges of the image.

The final edited image of a light painted car

As you can see, the final image isn’t drastically different than what came out of the camera! This final image in a combination of two of the images, borrowing some features from both shots.

Get out there and start light painting

Light painting is a very fun, simple and rewarding style of photography. It doesn’t take any special equipment to get some incredible and truly creative results that will amaze your friends. Give it a try and share your light painted car images in the comments below.

googletag.cmd.push(function() {
tablet_slots.push( googletag.defineSlot( “/1005424/_dPSv4_tab-all-article-bottom_(300×250)”, [300, 250], “pb-ad-78623” ).addService( googletag.pubads() ) ); } );

googletag.cmd.push(function() {
mobile_slots.push( googletag.defineSlot( “/1005424/_dPSv4_mob-all-article-bottom_(300×250)”, [300, 250], “pb-ad-78158” ).addService( googletag.pubads() ) ); } );

The post How to Use Light Painting to Take Incredible Car Photos by Frank Myrland appeared first on Digital Photography School.


Digital Photography School

 
Comments Off on How to Use Light Painting to Take Incredible Car Photos

Posted in Photography


The Red Line: Moody Neon Light Installations in Remote Places

26 Nov

[ By SA Rogers in Art & Installation & Sound. ]

La Linea Roja

Red neon lights arranged in geometric shapes or casting eerie illumination onto darkened trees almost seem like a natural phenomenon in the vein of the aurora borealis, captured by photographers who manage to be in the right place at the right time. A glow coming from a slit in a snowy landscape or just under the surface of the sea hints at the presence of life forms just out of sight.

red-line-2

red-line-4

red-line-3

‘La Linea Roja’ by photographer Nicolas RIVALS carries on a longstanding tradition of introducing artificial lights to natural spaces for high-impact temporary art installations, but adds a little something extra in the form of a strikingly limited color palette, moody skies, black lines of tree silhouettes and surprisingly natural-looking compositions.

La Linea Roja

red-line-7

La Linea Roja

La Linea Roja

The Paris-based photographer installed the lights in various landscapes while on a trip through Spain, capturing the effect using long-exposure photographs.

La Linea Roja

La Linea Roja

red-line-12

Here’s what RIVALS has to say about the series:

“A red line woven over a journey through Spain, to connect Man with nature. A red line to fix a moment of poetry. Unreal scenes which existed for a night to disappear in the morning. An installation left as a proposition to the natural world. A luminous harmony between will and chance. Between tribute and sacrilege. Between the beautiful and the range. An aesthetic research on shapes engaging in dialogue with an asymmetrical nature.”

Share on Facebook


[ By SA Rogers in Art & Installation & Sound. ]

[ WebUrbanist | Archives | Galleries | Privacy | TOS ]


WebUrbanist

 
Comments Off on The Red Line: Moody Neon Light Installations in Remote Places

Posted in Creativity