RSS
 

Posts Tagged ‘Lens’

Time to Go Macro With the Canon EF 100mm f/2.8L Macro IS USM Lens

25 Oct

Just Wait Until Midnight

While the EF 135mm f/2L USM is my favorite Canon L Series lens, one thing it does not do is macro photography.

With a minimum focus distance of 3 feet, the EF 135mm lens can do a great job with a lot of flowers or other traditional macro subjects, but it really cannot do traditional macro work.

If you want a very high quality portrait lens that can also do macro work, the EF 100mm f/2.8L Macro IS USM is the lens for you. Like the EF 135mm lens, this lens is an Image Stabilization lens which is helpful to minimize camera shake when you take those super close very precise macro shots. This is my favorite lens to make abstract macros of flowers with. If you are into shooting insects or flowers or a close up of the human eyeball or really anything macro you can imagine you will love this lens.

What I like most about this lens though is that it is not *just* a macro lens. It takes such nice portraits and is great to use for all other sorts of photography. This makes this lens suitable for use as a primary prime lens for just about every type of photography that can also produce stunning macro work.

Just Wait Until Midnight

Shooting food is one of my favorite subjects these days. I shot the photo of caviar in this post with this lens at Michael Minna’s excellent spot in the Bellagio hotel. Be sure to try the tasting menu there on your next visit to Vegas, it’s worth it!

I also own the earlier non-L series generation of this lens and I’ll say that I’m so much more impressed with the results I get out of the newer L series version.

As a reminder, my analysis of my Canon gear is being done in partnership with Canon and I am receiving compensation for this work with them. More on Canon macro lenses here.

Just Wait Until Midnight

Just Wait Until Midnight

Just Wait Until Midnight

Just Wait Until Midnight


Thomas Hawk Digital Connection

 
Comments Off on Time to Go Macro With the Canon EF 100mm f/2.8L Macro IS USM Lens

Posted in Photography


Optics Matter — Camera and Lens Guide for the New Canon DSLR Shooter

15 Oct

Waking Up With You in Vegas

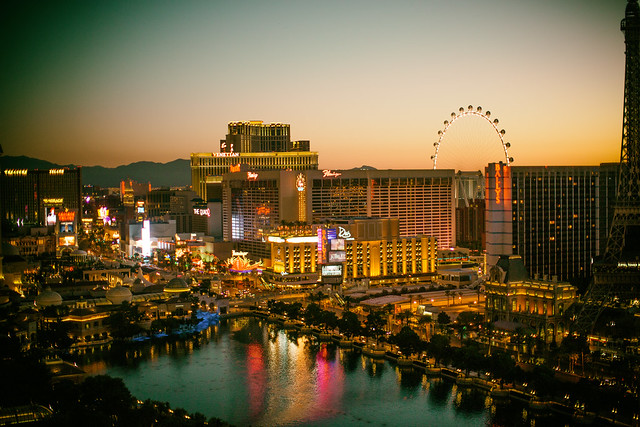
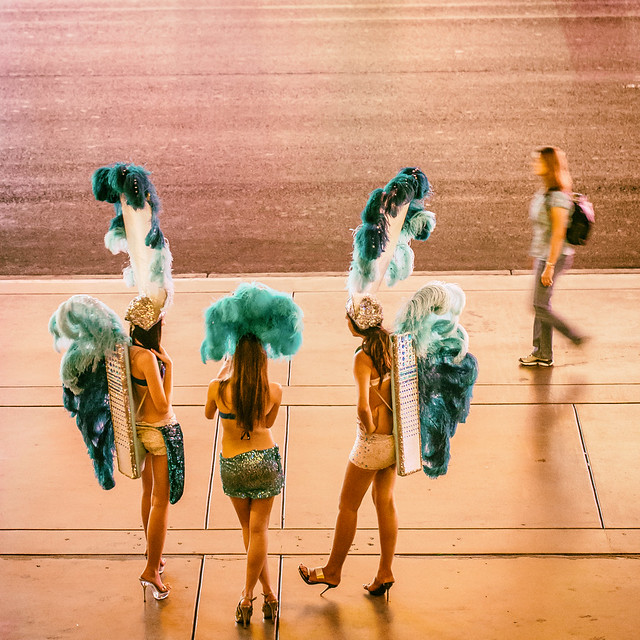
Last month I spent four glorious days shooting the lights and sights of fabulous Las Vegas. As always, I packed my camera bag full of my favorite lenses and other accessories. I haven’t done a “what’s in my bag,” type post in a while, so I thought I’d use this trip to talk about what camera/lens combinations I used on this trip and why.

In today’s day and age, I hear many photographers talk about ditching their DSLRs for other sorts of setups. I am not one of those photographers. Simply put, I believe that optics matter. I believe that there are things you can do with a DSLR and lens that simply cannot be done as well with other setups. There are unique qualities and characteristics of a well made piece of glass that cannot be replicated with micro compact software based algorithms.

The light going through the glass is primary and fundamental in my opinion, and I refuse to give up the high quality I demand for the convenience of something tiny that I can fit in my shirt pocket, text my friends with or strap to my helmet.

Each photographer must find their own way when it comes to what works best for them, but for me the glass is what matters most of all and there is just no substitute for high quality Canon lenses.

I’ve been shooting Canon digital SLR cameras for over 10 years now and it’s the lenses that allow me to get the shots that I need to get and that allow me to accomplish what I need to accomplish photographically speaking. Like everyone else these days, I’ll snap off mobile shots and post them to Instagram, but what I feel is my more important body of work comes from my DSLR.

To start with, I’ll inventory what I brought with me on my recent Las Vegas Trip — what’s in my bag:

1 Canon EOS 70D camera body
1 Canon EOS 5D Mark III camera body
1 Canon EF-S 18-135mm f/3.5-5.6 IS STM lens
1 Canon EF 135mm f/2L USM lens
1 Canon EF 50mm f/1.2L USM lens
1 Canon EF 100mm f/2.8 Macro USM lens
1 Canon EF 8-15mm f/4 Fisheye USM lens
1 Benro Carbon Fiber Tripod
1 Sandisk 64GB SDXC Extreme Pro Flash Memory card
1 Sandisk 32GB SDHC Extreme Plus Flash Memory card
1 MacBook Pro
1 Drobo Mini

All of my camera gear fits comfortably into my LowePro CompuDaypack bag. I keep the MacBook Pro in the hotel room and it is where I dump my photos to at the end of each day of shooting. The Drobo Mini is used as backup, so that I always have two copies of my image files before clearing off my memory card. It easily fits in the hotel room safe, while I am out shooting during the day and night and connects via Thunderbolt so backup copies are quickly made.

So this is my system, but what’s right for you may be a different story.

The number one question I get from people on social networks is, “what camera should I buy?” The advice I give is pretty much always the same — some sort of Canon DSLR set up, depending on your budget.

Part of why I recommend Canon, is because that’s the gear that I love, use and know. I am simply blown away with the high quality I personally get out of the system. For the life of me, I cannot imagine living without the crisp, sharp perfection of my EF 135mm f/2L USM lens (my favorite lens).

While there are other systems out there, this is the system that I’ve adopted and mastered. It does a remarkable job of getting me the images that I want and need.

There are lots of other reasons why I recommend Canon as well though.

When you are a new DSLR user, I believe one of the best things you can do is try lots of different lenses. Because there are more DSLR Canon shooters out there than any other kind, I find that borrowing friends’ lenses is a great way to stretch your experience, then learn and try new approaches.

Over the years I’ve lent my own lenses on photo walks to hundreds of different people and am always pleased when someone gets to try one of mine out. Likewise when I’m out shooting, I always like running across a different Canon lens and being able to swap with a friend for a few hours to try something new. Chances are if you are going to get into photography you will end up with photographer friends, and chances are that more of them will be shooting with a Canon DSLR system than any other.

For example, this past year at Coachella I shot with some very serious high end professional lenses that my pal Robert Scoble got from a lens rental site, the Canon EF 200mm f/2L IS USM and the Canon EF 400mm f/2.8L IS II USM.

If I wasn’t a Canon shooter, the fact that my buddy Robert Scoble brought those really nice lenses would have been worthless to me. As it was though, I was able to borrow these great lenses just like Robert was able to borrow my EF 8-15mm fisheye lens too to get some awesome crowd shots.

Canon’s range of lenses is remarkable and unmatched. There is a reason why the pros primarily shoot Canon. Even if you can’t afford many of the most expensive professional grade lenses, you can borrow them or even rent them from many places online. Their line up is unmatched, which is optimal for expanding your work with new lenses or renting specialty lenses from time to time.

Another positive about Canon is their great service and support. Many times I’ve sent my Canon bodies in for cleaning, my overworked lenses in for minor repairs, the service has always been quick and top notch. Although I’m more self taught and don’t have as much patience for training and education, Canon does have some great resources for the new DSLR user with the Canon Live Learning Center and Canon Live Learning.

These days I usually recommend new users go one of two ways when they want to take the next step with their photography and invest in a DSLR system.

For those on a bit tighter budget, I recommend getting the Canon EOS 70D Digital SLR Camera with the EF-S 18-135mm STM Lens. This is a perfect starter combo and runs around $ 1,500. While there are other cheaper Canon set ups, I think the EOS 70D provides significantly better quality for a little bit more in cost. This camera holds its value well and is a great camera to learn on. If you decide you want to spend more, you can always sell it back on eBay or somewhere else and upgrade to my next recommendation, the Canon EOS 5D Mark III.

The Canon EOS 5D Mark III, is the camera that I personally use the most. It is the workhorse of digital SLRs. It is the best camera I have ever owned. It also costs around $ 3,400 for the body alone though — so this camera is either for people who have that sort of money to spend, who are very committed to honing their DSLR skills (and maybe even selling photos to offset the cost), or who have tried another Canon system, like the EOS 70D and are ready to take the next step up.

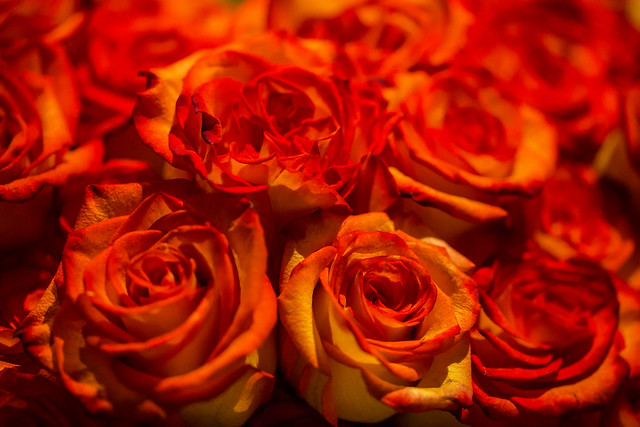
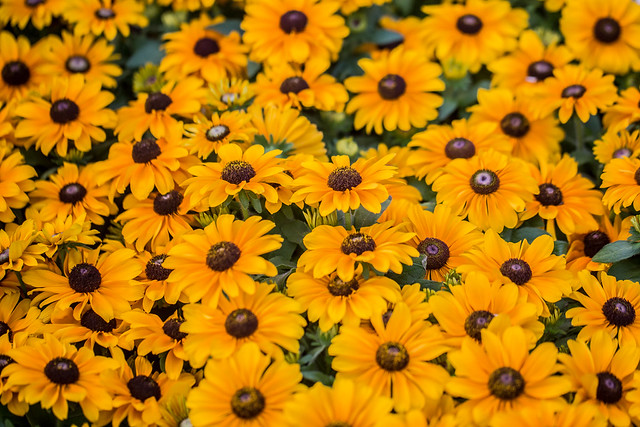
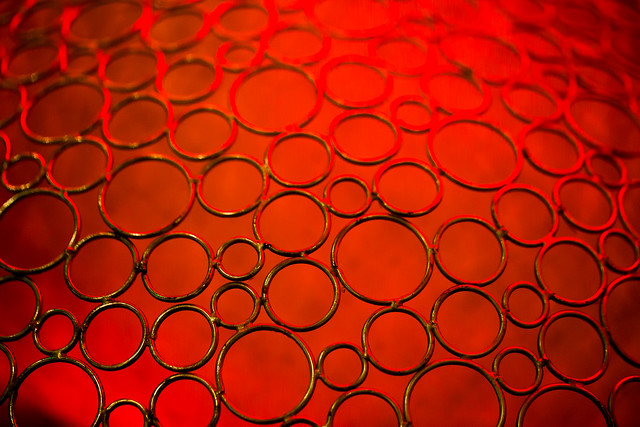
Over the course of the next few weeks, I am going to give more detailed reports on the gear that I use in 5 different blog posts, one on the EOS 70D EFS 18-135mm STM lens set up for starters, and then one each on the four professional grade lenses I took on my Vegas Trip. I’ll provide photographic examples from these different set ups and talk about why I would recommend you consider each.

Although I’ve written several “what’s in my bag” type posts before, by way of full disclosure, I want to disclose that part of the reason for my writing this post now is because Canon recently contacted me about working closer with me as a Canon photographer. They have agreed to sponsor this post and I’m receiving compensation from them.

While I’ve turned down many sponsored type posts from other products in the past, because I’ve been such a passionate Canon user for so many years prior to being approached, I had no problem saying yes to this sort of arrangement with them. When I love a product I’m happy to endorse it. It’s exciting to me to be working closer with Canon and especially exciting to me that Canon is interested in the various social networks and what social photographers working on the web are doing today.

I’m also very open to this post being a conversation about the current state of photography gear — so feel free to give your own input on what works best for you and why. I’m happy to consider your input and also to answer any questions you may have about my gear or recommendations from my perspective.


Thomas Hawk Digital Connection

 
Comments Off on Optics Matter — Camera and Lens Guide for the New Canon DSLR Shooter

Posted in Photography


Review of the Tamron 16-300mm F/3.5-6.3 Macro Lens

14 Oct

Tamron1All test images are presented with no alteration in color, sharpness, contrast, or clarity except where indicated. Only small adjustments in exposure were made to test images. Gear used for this review and tests – Canon 7D and a Manfrotto 190 tripod.

There is no denying that any lens capable of shooting in a wide range of conditions will always be in high demand and very popular. So called “all-in-one lenses” are most definitely a great way to be flexible in more situations without lugging around a lot of gear.

Tamron2

One of Tamron’s latest additions to this category is the 16-300mm F/3.5-6.3 Di II VC PZD Macro. Don’t worry, all of those letters will meet with explanations shortly. It is a lens that is marketed as a go-to option for shooting wide angle scenes, as well as zooming in very tight for those dramatic close-ups. It is intended for those who want to pack as little gear as possible, but still keep consistent quality through a huge range of focal lengths.

Lens Specifications

Here is the nitty gritty for this lens. The specifications are taken directly from the Tamron USA website. Please note that the lens I worked with was a Canon mount and these specifications are for Nikon mounts, but the numbers should be very similar.

Specs

Let’s talk about all those letters on the side of the lens that were mentioned earlier and go over their meanings. The “Di-II” designation simply means that the lens is intended for use with digital SLR cameras. The “VC” means that the lens is equipped with a vibration compensation (image stabilizer) feature and the “PZD” indicates the lens has Tamron’s proprietary Piezo Drive autofocus mechanism.

Fit and Finish

The lens shipped from Tamron USA, included a nice hood, and of course front and end caps. Taking the lens in hand, you really get a feel for the weight. My first impression was that it felt somewhat heavy but after further handling I prefer to call the weight of the lens substantial rather than heavy. Tamron lists the lens as weighing 19 ounces (540g) which is actually lighter than some other lenses of similar zoom range and aperture.

Tamron4

Tamron8

Tamron9

For the amount of zoom power that has been packed inside, I was very surprised at the shear compactness of this lens. Tamron’s 16-300mm is just under four inches in length at 3.9 inches (9.9cm). Here is a side-by-side comparison with my trusty Canon 28-135mm.

Sidebyside

The lens feels very solid in hand and fits securely to the camera with no rattles or gaps. All of the on-lens controls are very crisp in their function and are well placed for easy no-look operation.

Lensswitches

The rubber used for the zoom and focusing ring has just enough bite to securely adjust the lens, without the overly rubberized and sticky feel of some manufacturer’s lenses. Straight out of the box I did notice the the zoom was very tight – and I do mean tight. However, over the course of using the lens for a few weeks the tightness quickly lessened, and the zoom remained very responsive and firm for the duration of use.

Balance and Weight

The balance on the lens is acceptable even when fully extended to 300mm. I attribute this to the relatively slender profile that keeps most of the weight close to the camera and makes this lens very nimble. That being said, you will still definitely know it is attached to your camera. Always practice good camera holding mechanics when using this and other larger lenses in the field for long periods of time.

Tamron6

Performance and Image Quality

Now, on to the good stuff. I was quite impressed with the overall image performance of the Tamron 16-300mm lens. The sharpness was much better than I had expected for such a wide range variable zoom lens, even when shooting at the maximum f/3.5. Color reproduction was very good bordering on superb, and the bokeh was surprisingly creamy.

Grass

Pond

This roll of tape was shot wide at 16mm and then again at 300mm.

Tapewide

Tapezoom

There was very little vignetting around the edges of photos and little discernible chromatic aberration. The lack of this aberration is possibly due to the choice by Tamron to include three aspherical lens elements within the internal glass array. Though debated, aspherical lenses are known to produce less optical distortion and aberrations than conventional round lens elements. Still, at the widest angle of 16mm, there is some small but noticeable barrel distortion and edge darkening of images taken at or near the minimum focusing distance of 15.3 inches (38.9cm).

Bricks

Also, at wider apertures, again there is a small but still discernible edge softening of images. Here are five images shot over varying apertures. Notice the increasing edge softness as the size of the aperture increases.

Printf44

f/44

Printf22

f/22

Printf16

f/16

Printf10

f/10

Printf6 3

f/6.3

The proprietary Piezo Drive autofocus seems to live up to the manufacturer’s acclaim. Autofocus is very fast and accurate. The focusing mechanism itself is very quiet but there is a somewhat audible clicking sound that is present when operating in AF-Servo (continuous AF) mode but it is not loud enough to cause panic for wildlife and nature photographers.

Tamron has possibly hit a home run with the image stabilization system on this lens. Referred to as Vibration Control by Tamron, the image stabilization on this lens is outstanding.

VC Diagram

When looking through the viewfinder while engaging and disengaging the VC, you can truly see an immediate and substantial smoothing out of camera shake. Though definitely not a replacement for a good tripod and steady hands, the VC made a noticeable difference in the sharpness of images taken at slower shutter speeds in low light.

Small Details

As with most gear, people place varying degrees of importance on minute details. Here are a few small points that impressed me about the Tamron 16-300mm.

  • Tips for better shooting included – Tamron has chosen to include tips for better shooting with the paperwork that ships with the lens. Although these tips are very basic I found it be a positive gesture from the company to educate the people who purchase their product. Shootingtips
  • Zoom-lock function – A lockable zoom is very useful when you find yourself hiking or walking with a larger lens fixed to your camera. Gravity and vibration will slowly extend a downward pointing lens. The lock eliminates the constant pulling in of the lens barrel. I do, however, wish the lock could be used throughout the entire zoom range and not only at 16mm. Lenslock
  • Deeper finger grips on the lens cap – I know, this is an extremely small and neurotic detail. In any case, it seems that Tamron has improved their lens caps with more pinchable clips making them easier to attach and remove from the lens. This feature also reduces the chance of fumbling a cap removal.
  • Aspherical lens elements – The pros and cons of aspherical lenses is delightfully arguable among photographers. Still, the aspherical lens elements in the Tamron 16-300mm do seem to reduce some distortions. Lensstack
  • Manual override autofocus – This is a handy feature. It allows you to micro adjust focus manually while still in autofocus mode. This saves you a little time and also makes it easier to maintain your mental focus while composing.

Tamron7

Bottom Line

All in one lenses are loved, hated, and everything in between. Regardless of your inclination, the Tamron 16-300mm F/3.5-6.3 Di II VC PZD Macro seems to be a strong candidate for those looking to have one lens to cover most everything they will be shooting. It is a well constructed, reasonably compact, zoom lens that can shoot landscapes and high zoom with good image sharpness and color. Wildlife and street photographers will find this lens to be outstanding for long range subjects where camera shake can make or break a photograph. Overall, this is a lens that I would be happy to have in my bag.

These are some sample images taken with the Tamron 16-300mm F/3.5-6.3 Di II VC PZD Macro and processed in Adobe Lightroom 5.

Leaves

Moon

Jamie

Colordrops

The post Review of the Tamron 16-300mm F/3.5-6.3 Macro Lens by Adam Welch appeared first on Digital Photography School.


Digital Photography School

 
Comments Off on Review of the Tamron 16-300mm F/3.5-6.3 Macro Lens

Posted in Photography


DSLR Lens Reviews 2014: Which Lens To Buy?

01 Oct

For many photographers, a beautiful portrait shot combines two essential elements: a flattering view of the subject set against a blurred background. This is easy to achieve if you have the correct lens. If you want to zoom up to a subject that is rather far away you’ll need a telephoto lens. These lenses are also ideal for sports and Continue Reading

The post DSLR Lens Reviews 2014: Which Lens To Buy? appeared first on Photodoto.


Photodoto

 
Comments Off on DSLR Lens Reviews 2014: Which Lens To Buy?

Posted in Photography


Ready to Upgrade Your Kit Lens? Tips for Which Lens to Invest in Next

01 Oct

Most cameras come with a kit lens that generally works well as a decent all-around workhorse. A common focal range for these lenses is 18-55mm, which means they are capable of wide-angle shots as well as medium-telephoto pictures, and everything in between. The tradeoff for this zoom range, however, is a limited maximum aperture range of roughly f/3.5 when zoomed out (18mm), and f/5.6 when zoomed in to 55mm.

Of course some kit lenses cover a longer focal range and have different maximum apertures, but overall most kit lenses are designed for the types of all-around shooting conditions in which you may often find yourself. While this is not necessarily a bad thing, it does mean that the kit lens is more of a jack of all trades while being the master of none, and after a while you might start wondering what other options are available to you and how they will affect your photography. This all begs the question: which lens should you buy when you want to upgrade from the one that came with your camera?

Child bear

A 35mm or 50mm lens can work well for shooting portraits

Lenses are like apps

Think of lenses like different apps for your camera, and just as apps on your smartphone or tablet have specific functions, each lens is designed to meet a specific set of photographic needs. Next, think of the kit lens as a basic set of apps you might find on a device. It does many things well, but doesn’t really unlock the true potential of your camera. For some people, that’s fine: they don’t feel the need to install new apps (i.e. buy new lenses) and instead only use the ones that come with their device.

But when you start exploring the myriad of apps available for phones and tablets you might wonder how you ever lived with your device’s basic apps at all! The same holds true for lenses, but there is one key area where the analogy breaks down – price. When you start looking around for lenses, you might find that your vision quickly outstrips your budget! The choice, then, is this – which lens should you buy after exhausting the possibilities of the kit lens that came with your camera?

Montana

Wide-angle lenses are great for capturing photos of natural landscapes and other outdoor scenery.

Know what you need for the photography you do

The answer, unfortunately, is not as black and white as it might seem. While there are hundreds of options available, what you buy ultimately comes down to your unique needs and style as a photographer. After using your kit lens for a while, you will hopefully have an idea of what type of photography you enjoy most: landscapes, architecture, portraits, nighttime long exposures, pets, sports, weddings, etc. Or maybe you do a combination of everything! Before spending hundreds of dollars on another lens it’s important to know what will suit your needs – much in the same way that purchasing a vehicle is a matter of finding one that works for you, as opposed to simply buying the same car that all your friends have.

Grapes

A lens with a wider aperture will enable you to shoot get nice blurry backgrounds that are not always possible with a kit lens.

Prime lenses pros and cons

My first bit of advice, though, is to find a prime (non-zooming) lens that can accommodate your shooting style. If you take a lot of landscape and outdoor shots, you will likely want a wide-angle lens with a focal length of around 10-20mm (for cropped sensors, 15-35mm if you have full frame). For portraits, anything between 50-100mm is a good choice. Sports and wildlife shooters tend to use lenses that are on the telephoto end, such as 100-300mm. Remember the tradeoff between zooming and aperture I mentioned in the first paragraph? If you eliminate the zoom functionality you will find plenty of lenses with much larger apertures, which will let in much more light and allow you to use faster shutter speeds, as well as capture pictures in low-light situations that might not otherwise be possible without the use of a flash.

Church

Prime lenses can’t zoom, but you gain the ability to shoot in dimly-lit situations without the need for a flash because they often have large apertures.

It admit it can be a bit nerve-wracking to use a lens that can’t zoom in and out, but once you try it you may find a whole new world of photographic possibilities that you never knew existed, thanks to the larger aperture. Remember that you haven’t lost the ability to zoom, you can still move yourself around physically, which is another fantastic way to explore and stretch yourself as a photographer. You can often find prime lenses for a couple hundred dollars that will suit your needs exceedingly well, though even prime lenses with longer focal lengths could easily push the limits of your budget.

40mmPancake

It might be small, but Canon’s 40mm f/2.8 pancake lens packs a big punch.

If you would like to upgrade from your kit lens but are not entirely sure exactly what your individual needs are, I would recommend one of the following. All are fairly inexpensive as far as lenses go, and will suit a variety of photographic situations, though they are not the best for sports and wildlife due to their somewhat short focal lengths:

  • Canon 24mm f/2.8 – and the newly released pancake version at only $ 149 US
  • Canon 40mm f/2.8 (pictured on the right)
  • Canon 50mm f/1.8
  • Nikon 35mm 1.8G – get the DX if you have an APS-C or cropped sensor, get the ED if you have full frame.
  • Nikon 50mm 1.8G

Zoom lens options

You can buy prime lenses with longer focal lengths, but they can easily cost many times that of their cheaper counterparts. If you decide you absolutely cannot live without the zoom functionality, I would recommend going with a lens that covers one end of a focal range (i.e. wide-angle to medium telephoto) rather than one that covers both ultra-wide and ultra-telephoto. Of course this is all subjective, and there are as many opinions on this topic as there are photographers. In my experience lenses that try to cover as many focal lengths as possible are generally not as sharp as their more limited counterparts, unless you are willing to spend hundreds or even thousands of dollars. Lenses I would recommend include:

55 300mm

[caption: Nikon’s 55-300mm picks up where most kit lenses leave off and is a great option if you are interested in shooting sports and wildlife.

  • Canon 75-300mm f/4-5.6
  • Canon 28-135mm f/3.6-5.6
  • Canon 24-105mm f/4
  • Nikon 18-105mm f/3.5-5.6
  • Nikon 55-300mm f/4.5-5.6G

There are also many other really good third party options available. The options are almost endless so I’ve stayed with the two big brands here, but you can also look at Sigma and Tamron who both make some really good lenses also.

Deciding

The more you are willing to spend on a lens, particularly a zoom lens, the more features it will have like: image stabilization, higher-quality glass elements, weather sealing, and larger maximum apertures. These lenses are just the beginning. The sky’s the limit when it comes to upgrading your lens, and it’s important to not overlook options like simply borrowing one from a friend, buying older gear, renting, or even looking online for used equipment. Whatever you decide, it’s important that the lens is right for you and your photography goals, but chances are if the kit lens is too limiting there is a fantastic one out there with your name on it, waiting for you to come and explore what it can do for you.

The post Ready to Upgrade Your Kit Lens? Tips for Which Lens to Invest in Next by Simon Ringsmuth appeared first on Digital Photography School.


Digital Photography School

 
Comments Off on Ready to Upgrade Your Kit Lens? Tips for Which Lens to Invest in Next

Posted in Photography


Updated Leica X (Typ 113) APS-C compact boasts F1.7 lens

17 Sep

Leica has announced a new X-series camera with an F1.7 lens. The Leica X (Typ 113) continues to use a 16MP APS-C sensor and offer a 35mm equivalent lens but now with a considerably faster aperture than the F2.8 of its forebear. The existing X2 model will essentially live on as the Leica X-E. The Typ 113 will cost around $ 2,295/£1,550.

Articles: Digital Photography Review (dpreview.com)

 
Comments Off on Updated Leica X (Typ 113) APS-C compact boasts F1.7 lens

Posted in Uncategorized


Zeiss introduces Distagon T* 35mm F1.4 ZM lens

16 Sep

Zeiss has announced its new Distagon T* 35mm F1.4 ZM portrait lens for Leica M-mount bodies. 

Articles: Digital Photography Review (dpreview.com)

 
Comments Off on Zeiss introduces Distagon T* 35mm F1.4 ZM lens

Posted in Uncategorized


Sony unveils FE PZ 28-135mm F4 G OSS cinema lens

12 Sep

Sony has unveiled another full-frame compatible lens for its E-mount, the FE PZ 28-135mm F4 G OSS. With an emphasis on its capabilities in video production, it offers three separate control rings for zoom, focus and aperture. The lens is dust and moisture-resistant and uses a Super Sonic Wave Motor for fast and quiet autofocus and iris control. Read more

Articles: Digital Photography Review (dpreview.com)

 
Comments Off on Sony unveils FE PZ 28-135mm F4 G OSS cinema lens

Posted in Uncategorized


CAMS wants to change how you carry your camera with new ‘Pro’ camera and lens plates

06 Sep

Delaware-based company CAMS is raising money to create a range of mounting plates for DSLR users to carry their gear from a mount on the bottom, rather than the top of the camera. The low-profile CAMS Pro Camera Plate and Lens Plate attach to the tripod screws on the bottom of your camera (and lenses with a tripod collar) and provide a firm mounting point for the company’s quick-release neoprene straps, allowing your gear to be carried comfortably at hip level, ready to be brought quickly into the shooting position. Read more

Articles: Digital Photography Review (dpreview.com)

 
Comments Off on CAMS wants to change how you carry your camera with new ‘Pro’ camera and lens plates

Posted in Uncategorized


Testbericht: Lomography x Zenit Petzval Lens

31 Aug

Ein Beitrag von: Tamara Skudies

Lomography startete im Juli 2013 auf Kickstarter das Petzval-Projekt. Mit Hilfe von über 3.000 Unterstützern und mit Zenit konnten sie die Petzval produzieren! Die Linse ist eine Neuauflage des legendären Petzval-Objektivs aus dem Jahr 1840, das in Wien entworfen wurde.

Das Petzval-Objektiv war die erste Portraitoptik in der Fotogeschichte und wurde von Josef Maximilian Petzval konstruiert. Die Linse hatte damals zwei Verbesserungen gegenüber den schon vorhandenen Objektiven. Zum einen war es mit einer Blende von 3.6 etwa 22 Mal lichtstärker und zum anderen wurde die Zusammensetzung der Linsen zum ersten Mal berechnet anstatt nur geschätzt.

Das von Voigtländer produzierte Objektiv wurde bis 1862 60.000 Mal hergestellt. Ein Nachteil der Konstruktion war ein starker Schärfeabfall an den Rändern, der heutzutage aber zugleich den Charme des ganzen Objektives ausmacht.

Das neue Petzval-Objektiv wird aus Messing gefertigt und verfügt über eine Glasoptik von Zenit. Der „Nachteil“ der alten Konstruktion wurde natürlich beibehalten, denn ein modernes Objektiv, das die Feldkrümmung minimiert, sollte es ja nicht werden. Das verleiht den Bildern den besonderen Look.

Petzval-Objektiv

Möchte man weiche Bilder, nimmt man eine offene Blende und will man mehr Schärfe, nutzt man eine der kleineren. Mit einer Brennweite von 85 mm ist sie perfekt für Portraits geeignet. Zudem passt die Linse je nach vorliegendem Anschluss auf (analoge und digitale) Canon-EF- und Nikon-F-Kameras. Man bekommt zu der Linse ein Paket verschiedener Steckblenden von f/2.2 bis f/16 und kann vier weitere experimentelle Steckblenden zusätzlich erwerben.

Technische Details

Fokuslänge: 85 mm
Maximale Blende: f/2.2
Blenden: Waterhouse Blendenset, bis zu f/16
Bildkreis: 44 mm
Bildfeld: 30°
Linsenaufsätze: Canon EF und Nikon F
Elektronische Kontakte: Nein
Geringste Fokusdistanz: 1 m
Fokus Mechanismus: Gear Rack Focusing
Filtergewinde: 58 mm
Bildkreis: 44 mm

Portrait einer Frau mit Sonnenbrille.

Bunte Blätter.Grashalme.

Das Auspacken der Linse war schon toll, denn wenn man sie in die Hand nimmt, gibt sie einem das Gefühl einer besonderen Wertigkeit. Die Verarbeitung war bei meinem Modell gut und die Aufmachung war sowieso atemberaubend schön.

Ich hatte die messingfarbene Variante und wurde glatt gefragt, ob das eine Leica sei, obwohl hinten ein hässlicher schwarzer Canonklotz dran hing. Das ist eigentlich der einzige Nachteil, denn ich hätte die Optik viel lieber für M42 oder meine Pentacon Six, denn Adapter auf Canon- oder Nikonmodelle sind ja heutzutage kein Problem. Mit dem Wunsch bin ich, glaube ich, auch nicht die einzige.

Blonde Frau in einem Magnolienbaum.Frau in Unterwäsche.

Äste mit Blüten vor blauem Himmel.

Ich testete die Linse mit meinen analogen Canons (EOS 1000 oder EOS 500) und mit meiner digitalen Canon 5D Mark II. Für Portraits machte ich ein paar Termine aus, um zu sehen, wie die Bilder damit werden. Am meisten machte ich jedoch mit ihr Naturaufnahmen. Für beides ist die Linse geeignet.

Bei Portraits würde ich aber zu einer geschlosseneren Blende raten. Meine meisten Bilder sind mit f/2.2, f/2.8 oder f/4 gemacht. Die Blende 6 hatte ich nicht und 8 war mir zu klein, da ich ein Freund von geringer Schärfentiefe bin. Somit hatte ich ein paar unscharfe Ergebnisse, mit denen ich aber gut leben konnte.

Mit der Zeit bekommt man aber ein Gefühl dafür, mit der Linse und ihrem besonderem Einstellrad links unten am Objektiv scharf zu stellen. Mich hat diese Art des Scharfstellens begeistert und ich finde es sogar praktischer als die übliche Variante. Etwas umständlich ist eher die Blendeneinstellung, da man für jede Blendenöffnung eine Stecklinse besitzt, die man oben in das Objektiv stecken muss.

Auch daran gewöhnt man sich mit der Zeit und meistens habe ich auch nicht oft gewechselt. Die Steckblenden haben an den Seiten zwei schmale Stücke, die man an seine Optik anpassen kann, damit sie nicht herausfallen können. Ich konnte dies beim Testgerät natürlich nicht machen und habe die Optik immer auf unendlich oder ganz nah gestellt, damit ich die Stecklinsen nicht verliere.

Reh wird ein Kastanienblatt hingehalten.

Ast mit grünen Blättern und roten Beeren.

Leider habe ich keine Tests mit Blende 8 oder aufwärts gemacht, was mich wirklich ärgert. Dafür baute ich mir aus einem festen schwarzen Papier meine eigene experimentelle Steckblende mit Herzform, die mir sehr viel Spaß bereitet hat.

Zudem nutzte ich die Optik im botanischen Garten mit einer +2-Nahlinse, die es mir ermöglichte, näher an meine Motive ran zu gehen. Der „Swirl“-Effekt ist zum Glück nicht bei jedem Hintergrund möglich, was auch das Fotografieren mit einem schönen weichen Bokeh ohne die runde Unruhe ermöglicht.

Beachten sollte man auch die Unschärfe im Randbereich, die das Scharfstellen erschwert oder sogar unmöglich macht. Der Schärfepunkt sollte also eher zentral liegen. Wer absolute Schärfe wünscht, sollte sich eine andere Linse kaufen. Für mehr Schärfe ist es wohl besser, mit geschlossener Blende zu fotografieren, aber ich wollte ja den Charme der Linse unbedingt haben mit der ganzen Unschärfe. Im offenen Blendenbereich sind die Ergebnisse eher weich und haben einen geringen Schärfebereich.

Ein Ast

Bunte Äste im Gegenlicht.

Die Optik ist eher was für Fotos mit Charme als für technisch perfekte Bilder. Aber gerade deshalb habe ich mich in sie verliebt. Wäre der Preis nicht 549 €, würde ich mir sicher auch eine kaufen. Der Andwendungsbereich der Optik liegt meines erachtens hauptsächlich bei Portraits und Naturaufnahmen. Dafür finde ich den Preis etwas zu hoch, aber sie lässt mir nach wie vor keine Ruhe. Im großen und ganzen ist der Preis okay für die Optik, sie ist nun einmal etwas ganz Besonderes und mit keiner anderen Linse zu vergleichen.

Als die Linse vorgestellt wurde, hätte ich sie schon am liebsten gehabt. Dann bekam ich die Möglicheit, sie zu testen und hatte die Angst, dass wenn ich sie erst einmal hätte, ich sie auch wirklich unbedingt brauche. So ist es nun auch und mein Verstand kämpft mit meinem Herzen.

Moosbewachsene Äste.

Ich hatte nicht wirklich irgendwelche Erwartungen an die Linse, außer daß ich sie wohl noch schöner als mein Helios 58 mm ist, das ja auch einen leichten Swirl-Effekt hat. Viele fragen ja, warum man sich ein teures Petzval kaufen sollte, wenn es das Helios günstig gibt. Ich konnte jetzt beides vergleichen und muss sagen, dass das Petzval noch mal einen stärkeren Charme auf Fotos bannt als das wirklich tolle Helios.

Falls sich ein edler Spender findet oder jemand sein Petzval günstig verkaufen will – ich nehm’s gern! Jetzt gibt es ja bald die Möglichkeit, die Optiken in den Geschäften zu begutachten und sicher auch mal an seiner Kamera zu testen. Macht dies aber nur, wenn Ihr den passenden Geldbeutel dafür habt!


kwerfeldein – Fotografie Magazin | Fotocommunity

 
Comments Off on Testbericht: Lomography x Zenit Petzval Lens

Posted in Equipment