RSS
 

Posts Tagged ‘Learn’

Learn How To Connect With Your Subject

26 Oct

I was reading through the comments left on a recent post that I wrote here on DPS and one of them really spoke to me and ultimately inspired me to write this post for you today. For reference I’ve quoted the comment below by Justin Donie.

p165722407-4

All the tips given here are relevant and true. And I won’t minimize the value of any of these tips. They will all help you have a better experience and create something closer to what you want than if you don’t follow them. I thank the author of this post for sharing these practical tips … they are all good and useful. But let’s also remember that we need to spend time … and not just a little time … on our inner preparations as well.

All the technology, technique and work-flow management in the world can’t make up for what will be missing from our images if we never learn how or take the time to infuse the power of our personal inner experience of life into uniquely expressed, emotionally moving visions. I believe, as photographers, we must begin focusing more of our time and energy and even money on these aspects of our art.

Preparing for a successful shoot … a REALLY successful shoot … must include a powerful immersion in our personal relationship with the subject, a passionate exploration of different ways of visualizing and of sharing our individual inner experience, and a careful nurturing of the emotional connection we’re creating with our intended viewers.

Over the last 40 years of my creative experience it has gradually become clear to me that we photographers face a challenge in our art that most other artists do not. We can far too easily let “the gear” and “the work flow” and our fascination with them get in the way of the core and essence of all art … “the experiences of life we’re exploring … what we have to express … and how we choose to expressing it.”

All art utilizes some form of media, directly or indirectly. But in other arts, the act of creating may actually put the artist more closely in touch with the thoughts or feelings they are trying to explore and express. In photography, the very tools of creativity are so numerous and so complex that they can distance us from the raw experience of self-exploration and self-expression, ESPECIALLY because vast majority of photographic instruction tends to focus on technology and technique and not self awareness, other-awareness, emotional honesty and ever-more creative modes of revealing our inner selves to the outer world. I believe it’s time for that to change.

Justin Donie

What really stuck out to me was the way Justin closed his comment – “…photographic instruction tends to focus on technology and technique…” he’s got a point. Just look around DPS or any other blog related to photography training and you’ll find post after post teaching you how to use your camera, how to compose your scenes better, how to use Lightroom or Photoshop or some other software to enhance the images you have captured – the list goes on. However, when you look for information on how to actually dig deep into the emotional side of capturing a piece of art and translating that emotion to a still image – it gets a bit more difficult to find.

This is not a bad thing so don’t get me wrong it’s just something we have to be aware of. As Justin mentioned at the start of his comment these techniques and skills are important and will help you make better photographs in the end, but like Justin, I think the point here is that to truly capture powerful images we have to learn how to translate our emotions from the scene we’re photographing through the camera and into a still image.
p471780900-4-1
I’ve thought about how I was going to write this article for quite some time. I knew it wasn’t going to be an easy piece to write, but I wanted to bring attention to the concept that Justin brought up and try my best to get us, at least started down the road to, an answer for it.

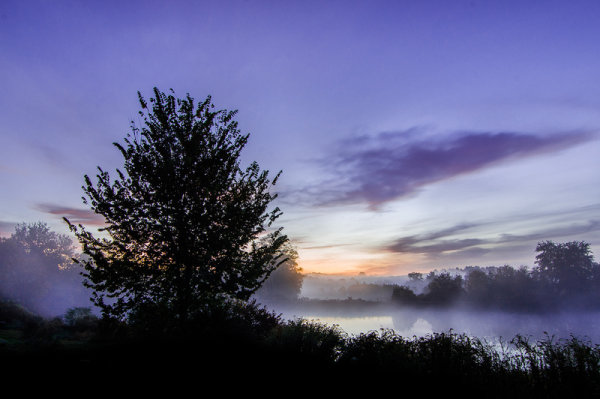
My hope is that through the community here at DPS we can come up with a massive list of ideas for connecting with our subjects – Whether you photograph the stars that fill our skies, shoot macros of the smallest insects or anything in between – How do you connect with your subject?

Here are a few ideas that I’ve come up with – I hope you’ll continue to add to the list in the comments below.

A Four Step Process On How To Connect With Your Subject and Better Your Photography

1.) Put Down the Camera

The first step in this process is to put down the camera and step back from the scene. The camera in some instances is very much like a security blanket it’s a buffer between us and our subject, by putting it down, you remove that buffer and you start to see the scene differently. The idea here is simply to free yourself from the camera for a minute and remove yourself from the need to adjust your settings.

2.) Define Your Subject

Next on the list is to truly define the subject of your photograph. If you can’t tell me what the photograph your taking is about then you probably shouldn’t be taking a photograph of the scene after all.  If you’re photographing a model it can be quite easy to do this, but when you’re in a vast and open landscape, sometimes the subject is so big it’s hard to find a way of defining it within the limits of the camera’s frame.

Spend some trying to describe what it is you’re trying to capture to yourself or to a friend. The more you do this the better you’ll be at being able to pick out the little things that really will start to help you tell a story with an image.

3.) Meditation

This is something I haven’t done yet, but I’m actually going to attempt to give it a try on my next shoot. My idea here is going to be to show up extra early to the location I want to photograph. Set up my camera and determine my subject. After that I’m going to sit down, close my eyes, and drift away for a few minutes to clear my head. Once this meditation is over I’m going to once again return to step two and see if anything has changed or if I’ve noticed any finer details of the scene.

I do this before  I write long articles or when I find myself struggling for ideas to write about. So the thinking here is that if it can help clear my head for writing, maybe, just maybe, it can help clear my head on a shoot.

4.) Talk it Through

This tip tends to shadow the idea of number two, but here rather than specifically talking about the subject you’re capturing, talk about everything on a whole. What kind of photograph are you looking to make? Is it black and white? Is it an HDR? What do you want your viewer to feel – what are you currently feeling?

Whether you’re with another photographer, a model or alone in the wilderness it’s amazing to simply put words to the emotions that you’re feeling. Describing the scene out loud might seem strange at first, but it will help you see it better in your mind.
Connect with your subject
It’s so important to never forget that gear, software and knowledge of what we should do in the scene can only take us so far. To truly capture the world around us we have to connect with the scene that we are capturing and transfer the emotions that we feel into the still image. Without this connection – we might end up with technically sound photographs that lack power or purpose and ultimately that is what gets people to stop and look at the photographs that you’ve created.

Now – I’d love for you to take a moment, or a day, and come up with a few of your own techniques for connecting with subjects and leave the answers you find in the comment below so others might be able to learn how to connect with their subject and ultimately take better photographs.

Post originally from: Digital Photography Tips.

Check out our more Photography Tips at Photography Tips for Beginners, Portrait Photography Tips and Wedding Photography Tips.

Learn How To Connect With Your Subject

The post Learn How To Connect With Your Subject by John Davenport appeared first on Digital Photography School.


Digital Photography School

 
Comments Off on Learn How To Connect With Your Subject

Posted in Photography


Learn Modern Architecture Principles with New LEGO Kit

01 Aug

[ By Steph in Design & Products & Packaging. ]

LEGO Architecture Studio 1

If you’ve always wanted to design modern buildings, but don’t have any plans to attend architecture school, LEGO has just the tool you’re looking for. The toy company has revealed a LEGO Architecture Studio kit aimed at adults with an interest in design, which includes over 1,200 white and transparent blocks in 73 shapes along with a 272-page guide book full of architecture designs and tips from leading contemporary architects.

LEGO Architecture Studio 2

LEGO Architecture Studio 3

Endorsed by REX Architecture, Sou Fujimoto Architects, MAD Architects, Tham & Videgård Arkitekter and Safdie Architects, the set features techniques, examples and hands-on exercises to strengthen your design sensibilities. It could also be used by working architects to build models.

LEGO Architecture Studio 4

While there are some sample designs in the book, the idea is for you to put your imagination to work and come up with your own masterpieces. Among the topics explored in the book are modules and repetition, creating surfaces, working in a context, mass and density, and symmetry.

Lego Architecture Studio 5

The set retails at $ 149.95 and will be available for purchase on the LEGO website on August 1st.

Share on Facebook


[ By Steph in Design & Products & Packaging. ]

[ WebUrbanist | Archives | Galleries | Privacy | TOS ]


WebUrbanist

 
Comments Off on Learn Modern Architecture Principles with New LEGO Kit

Posted in Creativity


Learn How to Use the Sharpening Tools in Lightroom

23 May

There’s no question that Lightroom is a powerful piece of photo processing software, but due to that power sometimes it’s not as easy to wrap our heads around everything it has to offer, that’s in part why I started my Let’s Edit YouTube series a weekly segment in which I share my own editing workflow for viewers to learn from.

After starting this series one of the most commonly asked questions was to go into more detail on how the sharpening tools in Lightroom work. Sharpening in Lightroom is broken down into four different sliders – Amount, Radius, Detail and Masking – and they each work together to help you achieve the perfect amount of sharpness in your photograph. Today, rather than simply answer this question to the comparatively small group of people over on my site, I thought I’d bring these tips to the dPS community as a whole. I know there are a lot more people out there looking to master the art of sharpening images and I’m happy to help explain them.

Before We Get Started

There is one thing I’d like to mention before we dive into the tutorial and that is that these tools are designed to help improve an image that is sharp to begin with. They won’t fix camera shake, missed focus points, or poor DOF choices, but rather improve upon an already sharp image. So with that said if you’re struggling to get your image tack sharp you might want to check out this great DPS article on five tips to achieve sharper images first and then head back here to learn how you can make them even better.

The Amount Slider

As the name implies the amount slider is a broad and general addition or subtraction of the amount sharpening applied to your image. The more you slide to the right the sharper your image will become. It works by increasing the contrast between different pixels in a fairly general way. The next three sliders can help us refine how the amount of sharpening is applied throughout the image.

Amount

Before we get into those other sliders though I do want to mention that each of these four tools has an extra option attached to it. By using the Alt (windows) or Option (Mac) key on your computer you will be shown an overlay that will help aid you in making better decisions with your sharpening.

For the amount slider this option removes the color from the image letting us use a simple gray scale image for sharpening. This is important because some colors can give false sense of sharpness when placed next to each other and can make it difficult to determine the true level of sharpness in the image.

The Radius Slider

Next in the detail panel is the Radius Slider which lets you control how far away from the center of each pixel the sharpening effect occurs. This is great for determining if you’d prefer a more airy feel (smaller radius) or a more hard edge feel (larger radius).

Radius

Each photograph is different and often times in portraiture the radius is left rather small, while in architecture or landscape, the radius can be made a bit larger to truly define the edges of your scene.

With the radius slider the option key will create an overlay that allows you to see the effect of the edge sharpening in a visual and easy to understand way. The edges that are being effected become clearly defined and the areas of the photograph where this effect is not being applied will be left hidden behind a gray overlay. In the screen-capture above you’ll see with the radius slider maxed out the trees along the horizon are clearly defined in the overly.

The Detail Slider

I like to think of the detail slider as a fine-tuning slider or even just simply as picking up from where the radius slider left off. Rather than focusing on the hard edges of the image the detail slider is designed more for bringing out the finer textures of the images.

Detail

It does this by controlling how the high frequency data is displayed.

The further you push the detail slider to the right the more high frequency data will be displayed resulting in more textures in your image. Be warned, if you push it too far in some cases the outcome will be overly sharp or you may start sharpening unwanted noise. These negatives are things you’ll want to watch out for as they can start to make your photograph too harsh for your viewer and distract from the overall story you’re trying to tell.

To help you determine the optimum positioning of the detail slider the option overlay available works in much the same way as the radius slider showing you where your detail is being applied by showing you the areas effected by your changes.

The Masking Slider

Finally we’re down to the last one of the four. The masking slider allows you to in a sense control where your sharpening is to occur. By sliding it to the right you reduce the areas of the photograph that sharpening will occur by ignoring less important edges and only sharpening the more obvious ones.

Masking

Again with the alt or option key held down you are presented with an overlay for this slider which shows you where everything is occurring The areas in black are being masked out, while the areas in white are where the sharpening will take effect. As you can see above here the hard edges of the dog around her ears, muzzle and eyes are being sharpened where as the areas in black are not. It’s a great way to keep you background filled with creamy bokeh, but sharpen the face or focal point of your subject.

Well that’s it – I hope this quick look into Lightroom’s detail sliders has helped you learn a bit about how to sharpen your photographs, if you’d like to see it in action check out this video where I go through the above steps while sharpening a Macaw from a recent trip to the local zoo.

John Davenport is an avid amateur photography who shares his photography on Facebook. He also runs a weekly series called “Let’s Edit” which focuses on editing photos in Lightroom.

Post originally from: Digital Photography Tips.

Check out our more Photography Tips at Photography Tips for Beginners, Portrait Photography Tips and Wedding Photography Tips.

Learn How to Use the Sharpening Tools in Lightroom


Digital Photography School

 
Comments Off on Learn How to Use the Sharpening Tools in Lightroom

Posted in Photography


20 HDR Photography Tutorials to Learn This Technique in One Day

27 Apr

HDR photography is successfully used by amateur photo masters as well as professionals.There are 5 HDR video tutorials and 5 text tutorials with detailed screenshots.

The post 20 HDR Photography Tutorials to Learn This Technique in One Day appeared first on Photodoto.


Photodoto

 
Comments Off on 20 HDR Photography Tutorials to Learn This Technique in One Day

Posted in Photography


Seeing Double: Learn How to Clone Yourself

04 Apr

Extra photos for bloggers: 1, 2, 3

Have you ever had a dream where you looked around the room and everyone looked exactly like you?

Wait, was that a dream?

Either way, you can turn your camera into the ultimate cloning device and make like a million clones of yourself!

With our guide, you can learn how to make carbon copies of yourself (the best photo subject around).

Lay on the couch while vacuuming, or build a human pyramid out of 10 versions of yourself.

You can make images where you (appear to) do it all. You’ve always wanted a stunt double, right?

Go Ahead, Duplicate Yourself

p.s. Learn the elements of lighting and sweet power-moves you didn’t know your phone had in our Phoneography 101 course. All the cool kids are doin’ it. Sign up!

Why it’s cool:

ingred-sm We thought about actually cloning ourselves, which would be awesome in so many ways.

But then we thought digital clones might be better, and a lot less complicated in the long run.

Duplicating yourself is easier than you think.

And you can fool everyone into thinking you have a twin, or a triplet.

Ingredients:

paint-sm

  • A model (yourself or a friend)
  • Camera
  • Tripod
  • Computer
  • Editing Software
  • Props (optional)

STEP 1: Find Your Scene:

paint-smFirst, find the scene you want to photograph.

Set your camera up and compose your image.

Think about where you will place your carbon copies and what each figure will be doing.

It is best to use your camera on a tripod, so that your background stays exactly the same throughout this process.

If you don’t have a tripod, place your camera somewhere stable, like on top of a bookshelf or stool.

Make an exposure to check your composition.

Step 2: Meter Your Scene:

paint-smPlace your model in the scene.

Make another exposure to check the light falling on the person.

You can use the light meter in your camera, or if you want to be more specific, use a hand held light meter.

Did you know there’s a light meter app for the iPhone and Android?

For our first shot, we metered the light for the furthest distance from our lens to make sure it wouldn’t be too dark.

Step 3: Make Your First Image:

paint-sm With your camera on a tripod, get ready to take your first photo.

Focus on the area where your model will be.

For focusing self portraits, place something in the scene that can be easily moved. You could prop up a pillow or set a stool where you are going to be.

If you are using yourself as a model, set your camera to self-timer mode.

Once you’ve got your camera set, make sure your model is in place.

Make an exposure.

Step 4: Make your Second Image:

paint-smThe important thing here is to make sure your model is the only thing that moves in the scene.

Move your model to the another part of the scene.

Make sure to focus on your model in the new part of the image.

If your camera has a live view mode, you can use the zoom button on the back of the camera to make sure your focus is precise.

Make your second exposure.

Step 5: Repeat:

paint-sm Place your model in a third part of the scene.

Check your focus and make an exposure.

Repeat this as many times as you’d like to have multiple individuals throughout your scene.

Step 6: Import Images:

paint-smOnce you have made your exposures, it’s time to put them on the computer.

Open the photos you want to combine in Photoshop or another photo editing software.

Hold off on cropping or editing just yet.

It’s best to work with images straight out of the camera before making any color, brightness, or white balance adjustments.

For this tutorial, we’ll be using Photoshop CS6. Other editing programs, such as Gimp, will have similar methods, but the commands and tool placement may be slightly different.

Step 7: Copy and Paste:

paint-sm Starting with the second image from your series, select the entire image.

Use the copy function to copy the image (Command + C on macs, Control + C on PC’s).

Paste that image as a new layer onto the first image from your series.

You can use keyboard shortcuts (command or control + V), or go up to “Edit” in the menu, and select “Paste in Place.”

“Paste in place” ensures that the images will be lined up on your canvas.

Step 8: Make a Layer Mask:

paint-sm Now, looking at your image, the photo you just pasted is Layer 1. Your first image is the “Background”.

By adding layers stacked right on top of each other, you will be able to erase parts of the Layer 1 to reveal the background image underneath.

This is how you will appear to be in multiple places at the same time.

Because you left your camera on a tripod, the background of each image should line up perfectly.

Erasing part of the layer will reveal what is different between the photos (i.e. yourself within another part of the frame.)

To make things easier in the long run, create a layer mask for Layer 1 by clicking the layer mask icon at the very bottom of the layers palette. It looks like a square with a circle in it.

By making a layer mask, you’ll be able to erase from your layer and paint parts back in with the Paintbrush tool if you mess up.

If you don’t use a layer mask and you accidentally erase something important, you won’t be able to paint parts back in.

Here’s a little more info on layer masks if you’ve never used them before.

Step 9: Erase:

paint-smSet your eraser to a pretty decent size to start with.

Erase all of Layer 1, except your model.

You will see your background image and first figure start to appear

Use a large brush for the background, and zoom in close and use a smaller brush to get the details and edges.

Step 10: Brush Tool:

paint-sm When using a layer mask, it’s okay to make a mistake.

If you happen to erase too much, like we did here with the model’s hand, it’s not a big deal.

Use the brush tool to paint that part of the layer back in.

By working back and forth with the eraser and the brush tool, you can remove what you want from the image with precision.

Step 11: Repeat:

paint-sm Repeat steps 7-10 for your third image.

Select it, copy it, and paste in place.

Don’t forget to make a layer mask for this new layer as well.

Erase the extra info from your layer, revealing the figures underneath.

Step 12: Save your Layers:

paint-sm It’s always important to save your work as you go along.

Saving your image as a PSD (photoshop file) or a TIFF will allow you to save the layers and layer masks.

This way, you can come back and edit them at any point.

Step 13: Share:

paint-sm Once you’re satisfied with your photo, save your final version as a jpg.

When you go to File, select “Save As”, then select JPG. Doing this automatically flattens the image into one layer, and compresses the file size a bit.

JPG is more friendly with websites and social media sites, and will make emailing your creation easier.

Take it further

  • Make elaborate scenes, like the one above, with the live-view zoom to focus method.
  • Create composite photos on your phone! Photoshop Touch lets you work with layers.
  • Use this layering technique to create levitating photos.

Related posts:

  1. Learn How To Mat. Matting Gives Photos Teh Snappiness! There’s no question about it, a mat and frame make…
  2. The Fastest Way to Learn Keyboard Shortcuts for Photoshop, Aperture, FCP, and more This Photojojo made possible by… ~Have a cool photo product…
  3. Double Exposures: A DIY Project That Brings Friends Together With Photos! Extra photos for bloggers: 1, 2, 3 We love hanging…


Photojojo

 
Comments Off on Seeing Double: Learn How to Clone Yourself

Posted in Equipment


Deciphering Photo Jargon – Learn to Speak “Photographer”

08 Feb

If you’ve ever been a little lost while reading your camera’s manual, or a photography magazine it could be that you just need to learn to speak “photographer” language. In this article I’ll go over some of the most common technical terms, as well as some less common slang or photographer jargon. By the end I promise you will have a better grasp on the language and be able to have a conversation with a seasoned pro and hold your own!

Speaking “Photographer” – the Basics

These are the terms you’ll find in your camera’s manual and in most beginner tutorials on how to use it. Hopefully this will help you get a better grasp on them so the manual isn’t quite so foreign.

  • Photography – the word photography comes from two old Greek words “phos” meaning light and “graph” meaning to draw.  So photograph literally means to draw with light, or a drawing made with light.  So photography is the art of drawing with light.
  • Aperture – the variable opening in the lens through which light passes to the film or digital sensor.  Measured in  f-stops. I like to compare it to your pupil which opens and closes to allow more or less light to enter your eye depending on the brightness level of the room.
  • Bracketing – taking a series of images at different exposures or EV. You may see a setting on your camera that says AEB (auto exposure bracketing). This is often used when creating HDR images or in difficult lighting situations where you may want to have a range of exposures from light to dark.
  • Bulb – the “B” setting on your camera where the shutter remains opened as long as the button or cable release (remote trigger) is pressed. On a Canon it may be on your mode dial on top of the camera, or at the low end of the shutter speed settings (also where it is on a Nikon)
  • DSLR – digital single lens reflex camera. Any digital camera with interchangeable lenses where the image is viewed using a mirror and prism, and the image is taken directly through that lens. What you see in your viewfinder is what the lens sees.
  • EV – Exposure Value is a number that represents the various different combinations of aperture and shutter speed that can create the same exposure effect.
  • Exposure compensation – modifying the shutter speed or aperture from the camera’s recommended exposure to create a certain effect (over or under exposing) – usually used in the Shutter Priority or Aperture Priority modes. Represented by a little +/- button on your camera. Your camera reads light bouncing off your subject and is designed to expose for medium grey. So when photographing a subject that is lighter or darker than 18% grey, you can use this setting to tell the camera the proper exposure (- or + respectfully)
  • Exposure – the total amount of light reaching the digital sensor. It is controlled by setting the aperture, shutter speed and ISO.
  • F-stop – is a measure of the aperture opening in the lens defined by dividing the focal length of the lens by the aperture diameter. Sequence of f-stops are multiples of the square root of 2 (1.414…): 1, 1.4, 2, 2.8, 4, 5.6, 8, 11, 16, 22, etc. Even though these numbers are rather cryptic, just remember that each step is double the amount of light. Know that and it’s half the battle.
  • ISO – stands for International Standards Organization and represents the sensitivity of your camera’s digital sensor to light. The lower the number (ISO 100), the less sensitive, the higher the number (ISO 3200) the more sensitive. A higher ISO allows you to shoot in low light conditions.
  • Shutter speed – the amount of time the shutter is opened during an exposure. The shutter speed controls motion. Use a fast speed (like 1/2000th of a second) to freeze motion, or a slow one (1/4 of a second or longer) to blur moving objects.
  • Zoom lens – any lens that has variable focal lengths such as a 24-70mm or 18-55mm. You zoom in or out by rotating the barrel of the lens.
  • Prime or fixed lens – any lens that does not zoom and is a set focal length such as a 50mm lens.
  • Remote trigger or digital cable release – a device that allows the camera to be fired without pressing the button or touching the camera. Helps eliminate movement of the camera during long exposures.
  • Macro lens – one that focuses very close to the subject allowing for 1:1 reproduction size of the object or larger.
  • “Normal” lens – generally a 50mm lens (on a full frame sensor camera) is considered to be a “normal” lens because it is closest to what the human eye sees.  If you have a cropped sensor that will be closer to 35mm.
  • Telephoto lens – simply stated a telephoto lens is one that is longer than a normal lens, eg., 70-300mm. The dictionary says: a lens with a longer focal length than standard, giving a narrow field of view and a magnified image.  Super telephoto is usually 300mm and longer lenses.
  • Wide angle lens – again simple answer is a lens that shows a wider field of view than a normal lens, which allows more to be fit into the frame. Depending on the degree of wide angle there may also be edge distortion (super wide angle), and if you get wide enough the image will become a circle (fish-eye).
  • Tilt shift lens – a lens that attempts to recreate the movements available when using a view camera. Being able to tilt the front lens element allows for realignment of the plane of focus. Shift allows adjusting the placement of the subject within the frame without angling the camera, thus keep parallel lines from converging. This is a popular lens for architectural and landscape photographers, and is becoming more widely used by portrait photographers for creating a unique stylized look.
  • Camera resolution – expressed in megapixels is the dimensions your camera’s sensor is capable of capturing. For example Canon’s new 6D has a resolution of 5472 x 3648 which equals 19,961,856, which they’ve rounded off to 20 megapixels. This is not the only factor in image quality, but generally the large the number, the larger prints you can produce from it without loss of quality.
  • File format jpg versus RAW – most DSLR’s have the ability to shoot both formats. If you choose JPG, the camera will shoot a RAW file, process it using the picture style you’ve selected in your menu, save it as a JPG and discard the RAW version. If shot in RAW the resulting file will be larger, carry more information (but the same pixel resolution, see above) and require software to process. It gives you the photographer more control over the final look of your image. For more on the subject see this article
  • Full frame vs cropped sensor – I get asked about this in my classes all the time. A full frame sensor is roughly the size as the “old” 35mm frame of film. Lenses are made to create a circle of light just large enough to cover that area (covering power). In a cropped sensor camera the physical size of the sensor is smaller so it only captures a portion of the entire image the lens is projecting, effectively cropping part of the image out. For more information on this see “Crop factor explained“. Common crop factors are 1.5 or 1.6x so if you put on a 50mm lens it is more like a 75mm with a 1.5x crop factor.
  • Camera modes – manual: full manual the user is setting the ISO, shutter speed and aperture. Shutter priority (Tv on a Canon or S on a Nikon) the user is selecting ISO and shutter speed, the camera is then choosing the aperture to make a correct exposure. Aperture priority (Av for Canon users, A for Nikon) the photographer selects the ISO and aperture and the camera picks the shutter speed.

Lighting and Portrait Photography Terms

  • Ambient light – also referred to as available light, is the light that is occurring in the scene without adding any flash or light modifiers. This could be daylight, or man made light such as tungsten or fluorescent bulbs.
  • Main light or key light: is the main light source for a photograph. It could be the sun, a studio strobe, a flash, a reflector or something else. But it is the source of light that is producing the pattern of light on the subject with the most intensity.
  • Fill light: is the light source that is secondary to the mail light. It is used to “fill” in the shadows to a desired degree. It can be produced by using a flash, a reflector, or a studio strobe.
  • Lighting pattern: this is the way the light falls on the subjects face. A particular pattern of light and shadow that is created.
  • Lighting ratio:  is a comparison between the intensity (brightness) of the main light and the fill light and thus the difference of the lit and shadow sides of the subject’s face.
  • Incident light meter: is a handheld device separate from your camera that measures the amount of light falling on a subject (as opposed to the reflective reading your camera takes which is light bouncing off the subject back to the camera). The incident meter is not fooled by the brightness range of the subject, where as in camera reflective meters can be fooled.
  • Speedlight (speedlite for Canon users): small portable flash which can attach to your camera’s hot shoe, or stand alone if activated remotely.
  • Reflector – a device that is used to reflect light, generally back towards the subject. It can be a specialized factory made reflector (I recommend getting a 5-in-1 if you get one) or as simple as a piece of white cardboard.
  • Light meter – a device that measures the amount of light in a scene. Your DSLR has one built in, it uses reflective readings (light bouncing off the subject coming back through the lens [TTL])
  • Remote flash trigger – a device used to fire speedlights off camera. Pocket Wizard is a popular brand.
  • Subtractive lighting – as the name implies it is the taking away of light to create a desired affect. Commonly it involves holding a reflector or opaque panel over the subject’s head to block light from above and open up deep eye shadows cause by overhead lighting. It can also mean holding a black reflector opposite your main light to create a deeper shadow, in essence reflecting black onto the subject instead of light.
  • Hard light – harsh or undiffused light such as produced by bright sunlight, a small speedlight, or an on-camera flash. It produces harsh shadows with well defined edges (edge transfer), contrast, and texture (if used at an angle to the subject). Emphasizes texture, lines and wrinkles, and used to create a more dramatic type of portrait (character study).
  • Soft light – diffused light such as from an overcast sky, north facing window with no direct light, or a large studio softbox. This type of light produces soft shadows with soft edges, lower contrast, and less texture. Generally preferred by most wedding and portrait photographers as it flatter the subject more.
  • Edge transfer – where the light turns into the shadow, the edge transfer is how quickly it goes from dark to light. If using harsh light the edge transfer is very defined and sudden, almost a clear line. When using soft lighting the edge transfer will be much more subtle, almost imperceptible as it gradually changes from light to dark.
  • Flash sync – simply put is the synchronization of the firing of an electronic flash and the shutter speed. You need to know what shutter speed your camera syncs at, otherwise if you shoot too fast a shutter speed you may get a partially illuminated image. For most cameras that is around 1/200th of a second, but it can be adjusted if you have a flash that can be set for fast speeds.

Slang and Photography Jargon

Here’s a few other terms that are a bit more advanced, and even completely made up jargon. Become familiar with them so you can walk among the pros with confidence!

  • Fast glass – refers to a lens with a very large maximum aperture such as f1.8 or f1.2. “Fast” as in, it allows you to shoot at a fast shutter speed due to the large aperture.
  • Chimping – slang term meaning looking at the back of the camera after every image. Spending too much time reviewing images on camera, not enough time shooting.
  • Bokeh – often mispronounced “bow-kay” or “bow-kuh” it is correctly pronounced as “bo-ke” like the ke in kettle. It is used to described the out of focus blurred bits in the background when “fast glass” is used. Most often bokeh occurs where small light sources are in the background, far in the distance.
  • Depth of Field (DOF or DoF)- the distance between the nearest and farthest objects in your scene that appear in focus.  It is controlled by many factors including the aperture, lens focal length, distance to subject, film or digital sensor size, and camera format. Read about how to use aperture to adjust depth of field.
  • Circles of confusion – closely related to the above bokeh, the textbook definition is:  the largest blur spot that is indistinguishable from the point source that is being rendered. Objects outside the depth of field of an image that the human eye can determine as “out of focus”.
  • Hyperfocal distance – often used by landscape photographers, it is the focus distance providing the the maximum amount of depth of field. Older prime lenses for film cameras usually had hyperfocal distance marks to aid in finding this magic sweet spot. With today’s lenses it is possible to calculate, just takes a bit more work and a hyperfocal distance calculator.
  • Gobo – something used to block unwanted or stray light from falling onto the subject. Often a reflector (using the black side) can serve a dual purpose and act as a gobo as well.
  • Scrim – a translucent device used to diffuse and soften the light, could be a reflector with a translucent panel or option. Also used on movie sets scrims can be made extremely large, several feet across, and clamped in place to create shade where these is direct sun without it.
  • Shutter lag – every camera has a slight delay from the time you press the shutter button to the time it actually fires and opens. In DSLR’s it is minimal and almost unnoticeable. In smaller point and shoot cameras the delay is more pronounced such that it may actually cause a missed shot of a fast moving subject.
  • Chromatic aberration – in terms of lens optics it is the failure of the lens to focus all colours (RGB) at the same point. It shows up as colour fringes in areas of the image where dark meet light (think edge of a building against the sky). It is more common in wide angle lenses, and those of inferior optics (kit lenses). It is correctable, to some degree, using Photoshop, Lightroom or software of your choice.
  • Rear shutter curtain sync – by default most cameras are set to front curtain sync which means that if the flash fires, it does so at the beginning of the exposure time. By setting to rear shutter curtain sync it fires the flash at the end of the exposure time. The difference in some cases me be negligible, but in shooting a moving subject front sync will put any motion blur in front of the subject, where as rear sync will place the blur behind the subject. Neither is wrong, just preference.
  • Camera shake – this is a blurry image which has resulted from an insufficiently fast enough shutter speed, while hand holding the camera. So how slow is too slow? Many teachers will say that 1/60th of a second is the rule of thumb. I tend to recommend 1 over the focal lens of your lens instead, as the longer the lens the more amplified any shake will become.
  • Lens flare – occurs when the light source hits the lens directly, it can manifest as a hazy looking image or artifacts such as circles of light. Some photographers actually desire lens flare and position their camera to create it and use it as a compositional element.
  • Kelvin – is the absolute measurement of colour temperature. On your camera under the White Balance settings you make see a “K” setting. This allows you to adjust the colour manually by degrees kelvin. The lower numbers represent warmer colours like orange (tungsten light) and the higher numbers are cooler (blues). Play with this scale to create different affects.
  • ND filter – stands for neutral density filter which is a filter designed to go in front of the lens to block out some of the light entering the camera. Often used by landscape photographers to be able to get slow shutter speeds when photographing waterfalls and streams in full daylight.
  • Panning – the act of using a slow shutter speed, and moving the camera in the same direction as a moving subject, during the exposure to create a blurred background. See panning tips here.
  • Stopping down – the act of closing down the aperture to a smaller opening.  EI going from f5.6 to f8.
  • TTL and ETTL – stands for Through The Lens, refers to the metering system in regards to flash exposure. The flash emits light until it is turned off by the camera sensor. ETTL is evaluative through the lens metering and fires a “preflash” to evaluate and calculate for lost light then compensates and fires the main flash. It happens so fast you do not see two flashes.
  • Photog – short for photographers, something pros often call each other
  • Glass – lens, as is “what glass do you own?”
  • Golden hour – also called “magic hour” is the hour right before sunset or right after sunrise. The sun is low on the horizon and it is an optimal time for photography.
  • Spray and pray – shoot as many images as possible and that hope and pray you got something good. Not a philosophy I personally recommend.
  • Blown out – having highlights that are off the chart on the right side of the histogram, having no detail in the white areas.  Eg: “the bride’s dress is blown out”
  • Clipped – similar to blown out being off the histogram, but it can also apply to shadow or blacks areas of the image.
  • Grip and grin – often used to describe a quick photoshoot at an event or set up with two people shaking hands. Most photographers have had to shoot these during their career.
  • Selfie – a self portrait
  • SOOC  – straight out of camera, no post processing or editing done
  • Dust bunnies – dark spots that appear on the image, caused by bits of dust on the digital sensor
  • Pixel peeper – someone that spends too much time looking at images at 100% size in Photoshop
  • Nifty 50 – an old school prime 50mm lens, great to have
  • ACR – Adobe Camera Raw
  • Flash and drag – the method of using a slow shutter speed combined to flash to capture more of the ambient light in proportion to the flash
  • Wide open – using your lens with the aperture at the widest setting (f1.8 for example)

Enjoy and get out there and start practicing your Photographer Speak. This list is not exhaustive by any means, and if there’s any I missed please mention them in the comments section below.


Post originally from: Digital Photography Tips.

Check out our more Photography Tips at Photography Tips for Beginners, Portrait Photography Tips and Wedding Photography Tips.

Deciphering Photo Jargon – Learn to Speak “Photographer”


Digital Photography School

 
Comments Off on Deciphering Photo Jargon – Learn to Speak “Photographer”

Posted in Photography


Photography Tutorials – Landscape Photography Tips – Learn How To Use Your Camera In Manual Mode

19 Jan

Hi Everyone. Welcome to another landscape and seascape photography tip. Heaps of people when they are starting out are unsure how to find correct exposure when taking photos. This little trick should help you get correct exposure when taking your landscape photographs. Its easy and takes about 10 seconds to do. Let me know what you think! Jamie Paterson


7 Elements of Photography We Can Learn From The Hobbit

01 Jan

THE-HOBBIT-AN-UNEXPECTED-JOURNEY-a-560x241.jpg

1. Dramatic Lighting

You will notice that in the majority of good portraiture, dramatic lighting is often a key element. It’s not too often you’ll find ‘flat’ lighting in a great picture (not to say it can’t be done however). It will either result in the lighting that appears directly on the person or dramatic lighting between the subject and the foreground or background. For example, in the images of Bilbo and Thorin Oakenshield, there is dramatic, directional lighting on their faces. There are many ways that dramatic lighting can manifest itself or be achieved.

2. Deep Blacks and Good Highlights

You may also notice in images created by someone who knows how to process their images, they’ll have excellent tonal range. The images from The Hobbit capitalize on this. Proper images have some deep blacks and some highlights as well. This is also another way to avoid having your image appear ‘flat.’ It doesn’t necessarily have to be a great deal of each, just so long as you’re touching on both ends of the spectrum. Some photographers like to use filters or they have a style of slightly muting everything which minimizes tonal range. This is fine. There are times when the photographer can make a decision not to have a high contrast image. They still produce a great image, however this style is to be intentional and purposeful.

11glamdring.jpg

3. Interesting Foregrounds and Backgrounds

Another element that can really enhance an image is including interesting foregrounds or backgrounds. These are two things that always need to be considered one way or the other. It’s very easy, especially if you’re new to photography, to forget about these and end up with distracting backgrounds or foregrounds. However, do not simply avoid them; they are useful tools to achieve a stronger image. Look at every example image from the movie. Don’t the backgrounds give interest, setting, and help tell a story? That’s what we’re wanting.

4. Find Unique Angles

Don’t be afraid to try new angles. It’s easy to get stuck in a rut of taking pictures from the same angle or height. Try spicing it up some; you may be shocked. Get high. Get low. Back away. Get close. This can add some variety to your shots and help you find a real keeper.

5. Be Color Smart

Be very aware of how your colors and image temperatures are telling a story. Are your colors too bright and vibrant or too muted? How does this affect the mood? Is the image temperature cold and moody or warm and cheerful? These are things that can be fined-tuned to help narrate your image. If you’re wanting a dramatic image like Gandalf’s photo, then a warm temperature would not be desired. Chances are you could put more thought into these details to improve your images. So often we take the picture concerned only with composition, lighting direction, and subject when the color can be considered more thoroughly.

The_Hobbit__An_Unexpected_Journey_70.jpg

6. Mind the Sky

If shooting outdoors, instead of allowing the sky to be a blown-out nuisance, view it as a resource, and use it to your advantage. Now, this may not always be possible due to equipment, desired effect, or setting. But there are ways that you can properly capture the clouds or the blue of the sky. You could either expose for the sky and light the subject with additional lighting, use HDR, or find a proper exposure with natural light that works for both your subject and the sky. But don’t always avoid the sky; learn to tame it. Notice the drama it adds to Gandalf and Bilbo’s images.

7. Don’t Use Shallow Depth of Field Every Time

Using a very large aperture and creating a shallow depth of field can be a great affect for portraiture and many other types of photography. This doesn’t mean, however, that it is the only effective use of DOF. Use a large DOF every so often, especially if your background could amplify the effect of the image. Make the image sharp throughout the entire image. Play around with both and learn in what situations it works best.

David Wahlman is a wedding and portrait photographer from Redding, CA. He works all around California and is aiming to get into destination photography. You can see his best work at www.wahlmanphotography.com and follow his updates on his facebook page.

Post originally from: Digital Photography Tips.

Check out our more Photography Tips at Photography Tips for Beginners, Portrait Photography Tips and Wedding Photography Tips.

7 Elements of Photography We Can Learn From The Hobbit


Digital Photography School

 
Comments Off on 7 Elements of Photography We Can Learn From The Hobbit

Posted in Photography


Learn the Secrets of a Pro Photographer’s Workflow: 33% Off Today Only

15 Dec

photographers-workflow.pngIt’s time for Deal #3 in our 12 Days of Christmas and today is a great brand new product that we’re really excited about from renowned Freelance Travel Photographer Gavin Gough.

Gavin has recently released an eBook (with some other great bonuses) that is getting great reviews by the name of The Photographers Workflow. and for the next 24 hours you can get it with a 33% discount by using the coupon code of photowork33 when checking out.

This great resource is perfect for anyone looking for a system to manage the digital photos that they take and if you’re anything like me, that’s quite the task due to the number of images that I take on a given week!

What Gavin describes is based upon use of Lightroom (an amazing tool that I use and recommend) and once you set yourself up with the principles described in this eBook you’re going to save yourself a heap of time and will also put your mind at ease your images will be safe and backed up too!

What do You Get with the Photographers Workflow?

This is more than just an eBook – here’s what you’ll receive:

  1. a 10 chapter eBook (130 pages) – a comprehensive guide to establishing a reliable and consistent digital photography workflow.
  2. 65 Lightroom 4 Development Presets to help give your processing a more consistent linear structure
  3. A series of Lightroom Smart Collections which build a step-by-step workflow for managing digital photographs
  4. Links to a series of free, online video tutorials to help you visualise what Gavin teaches in the eBook

The thing that I particularly love about Gavin’s approach is that he not only gives you the theory but he gives you tools and also scatters through his eBook practical exercises for you to DO that will help you set up your own workflow.

Not only that you get to see what he’s talking about with the videos and many diagrams and screenshots in this eBook.

The Photographers Workflow_wp-content_uploads__2012_12_400x1600.png

Download Your Copy Today and Save 33%

The Photographers Workflow is normally priced at $ 30 but today you can pick it up with a 33% discount and get all of the above parts of this great resource for just $ 20 when you use the coupon code photowork33 during the checkout process.

The Photographer’s Workflow is Gavin’s professional workflow. It’s the system he use every day to manage his digital photographs. In it he shares the structure, principles, presets that he’s acquired over ten years as a professional photographer and it will literally save you hours of time and give you a lot of peace of mind!

Revolutionize the way you store, manage and backup your photo’s today with this great new resource at this special 12 Days of Christmas price.

Get full details of what is included and order your copy at this special price here (remember to use the coupon code photowork33 as you checkout to get the 33% discount).

As with all the deals this week – this one is available for just 24 hours!

Post originally from: Digital Photography Tips.

Check out our more Photography Tips at Photography Tips for Beginners, Portrait Photography Tips and Wedding Photography Tips.

Learn the Secrets of a Pro Photographer’s Workflow: 33% Off Today Only


Digital Photography School

 
Comments Off on Learn the Secrets of a Pro Photographer’s Workflow: 33% Off Today Only

Posted in Photography


Learn Photography – The Exposure Triangle

08 Dec

This video explains the three basic camera controls. Shutter speed, ISO, and aperture.

 
Comments Off on Learn Photography – The Exposure Triangle

Posted in Nikon Videos