RSS
 

Posts Tagged ‘Learn’

4 Things You Can Learn From Film and How to Apply Them to Your Digital Photography

15 Apr

Since the introduction of digital cameras, photography is becoming more and more popular amongst everyone. This is largely due to the fact digital has dramatically reduced the cost of taking photos, as they no longer required to be developed, and the recording media (SD or CF cards) can be reused. Another fantastic advantage of digital, is the instant replay it gives you of the photo just taken, giving you the option to correct any flaws in the image. This is something that could not be done with film, and each photo taken would cost money; regardless of how great it was, or was not.

Digital Film

Digital technology has come so far in the last several years that it is out-performing film on almost every level; for example, camera’s can now go up to ISO 3.2 million – an ASA (film equivalent to ISO) level that was never even considered during the films days.

But does this mean that film is useless, and has nothing to offer? Absolutely not. Regardless of whether film is making some sort of a resurgence or not, there are still many things that film can teach you about photography, that digital simply cannot. Here are some thing that shooting with film can teach you better than what digital capture can do:

1. SELF CONFIDENCE

With the immediacy of the feedback that digital cameras provide you, it is all too easy and tempting to continually check your camera’s LCD to see how your photo has turned out. This tendency to keep looking at the LCD is often referred to as chimping. You may chimp for various reasons, ranging from ensuring your photo is correctly exposed (the most common reason), in focus, or seeking self-gratification that you’ve done a good job.

Now, imagine you were photographing with film. You would not be able to see your photos straight away; you’d have to wait a week or even two! You would not be able to see if the photo was correctly exposed, or pat yourself on the back about getting a great frame – at least not right away!

Film taught photographers to read the light and tones within their environment, and to learn how to use their tools correctly. This built confidence within photographers to trust in their own abilities and decisions. It meant that photographers would worry less about receiving positive reassurance on the photo they’d just taken; they knew that they had exposed and focussed correctly and kept going. There was no ,”Hold on, I’ll just check to make sure your wedding dress is correctly exposed”, or “I missed that shot because I was checking my exposure.”
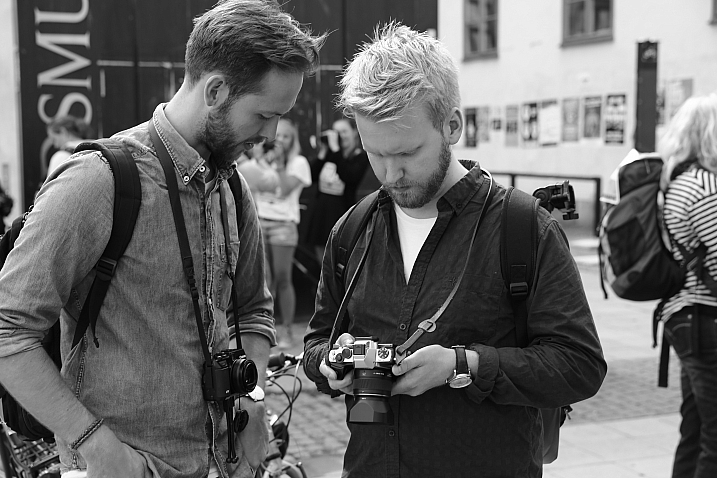
Fredrik Holmberg

By Fredrik Holmberg

So why is chimping a bad habit? Because it says that you are not that confident in your own abilities and judgement, and you need the constant reassurance that you are doing a good job. It results in you potentially missing a great opportunity for a photograph, as your attention has now shifted from your subject to your camera. Wedding, sport, and action photographers may miss a critical moment, a defining moment, if they are always looking at their screen. If you’re looking at your screen, you’re not ready for the moment and you most certainly are not taking photos.

For portrait photographers, taking your camera way from your eye breaks that connection between yourself and your subject. It also says that you’re more interested in the result than you are them.

Apply this to your digital photography

To increase your confidence in your own abilities, I challenge you to only look at your LCD once or twice the next time you’re out photographing. These times should really only be to help you achieve the exposure you wish. If the lighting conditions are consistent, there is no reason you should need to look at your LCD again.

2. PUSH YOURSELF MORE

All too often you may see an outstanding result on the back of your camera. You stop taking photos because you are convinced that it cannot be bettered; only to see your friend take a better image right next to you. The instant replay of your work on the back of your camera can often prevent you from pushing yourself just that little bit further, and getting that great shot. That instant replay didn’t exist on film cameras, so photographers didn’t know if they had “the shot” or not; they had to keep pushing themselves to ensure that they did get it.

Calvinnivlac

By calvinnivlac

If you’re tempted to keep looking at your screen, I’d encourage you to turn preview or replay to off in your camera menu. If you are still tempted to press play and have a sneaky peek, tape a little piece of paper or card over the screen so you cannot see the image.

Apply this to your digital photography

Do not be tempted to keep looking at your screen, and being satisfied with what you see after the first one or two frames. Keep going. Perhaps you could try different angles, settings, lighting etc., but you should always keep pushing a little further to get a better shot. Even if it is just three or four additional frames.

3. YOU THINK MORE

Taking a photo with digital cameras costs nothing; just the minuscule amount of electricity the camera needs to operate and a little bit of storage. Memory cards can hold thousands of photos – far more than the 36-exposure roll of film. But that limitation of 36 exposures can teach you something that digital cannot – discipline.

John Goode

By John Goode

Think about the last time you went out taking photos. How many did you come back with? I would bet that you might have hundreds of photos to go through, maybe even thousands. Now, divide that number by 36. That’s how many rolls of film you went through. When you have such a limited number of exposures until you have to change your roll (which takes a lot more time than switching memory cards, by the way), you don’t just take photos every time you see something you like. You look at the subject or scene and consider it more carefully. In doing this, you evaluate if it is indeed worth taking a photo of or not.

Apply this to your digital photography

Try shooting with a smaller memory card like 1gb, or even smaller if you can find some old cards. Limit yourself to 36 shots per day or per outing. Do not delete images as you go, only fill the card or your limit of shots and no more. It will help you be more intentional with your shooting. If you are always deleting images, that defeats the purpose of having a smaller card!

4. GREATER VARIETY IN YOUR WORK

Have you ever gone through photos that you’ve taken and realized that you took so many images of the same thing, with little or no difference between many of them? Do you find it boring going through your photos sometimes because there is such little variation in so many images? With film, each frame cost more money than digital, so photographers made each frame count.

Phil

By Phil

Apply this to your digital photography

Do you really need 10 photos of the same object, from the same angle? No, you don’t – those 10 frames are all the same, so therefore are really just one photo taken ten times. You can still have 10 photos of the same subject, but vary them; try different angles, focal length, exposures. Even try photographing it with a different lens (wide angle versus telephoto). Make each frame different to the next, and make each frame count. Not all the images will work out, but you will have much more variety in your work from the same number of subjects. It will also help you greatly in the future when deciding on what approach to take for your next subject.

Summary

So there you have it, some simple and practical things that shooting with film can teach you better than digital. If you have a film camera laying about collecting dust, why not pick it up, put a fresh roll of film in (extra points if you shoot on slide film) and start using it? It will be quite a strange sensation using a film camera and the the images you take may not be that fantastic to start. Should you stick with it, it will help you on your journey to improving you photography and in my experience, nothing is more satisfying that nailing a photo on film over digital.

googletag.cmd.push(function() {
tablet_slots.push( googletag.defineSlot( “/1005424/_dPSv4_tab-all-article-bottom_(300×250)”, [300, 250], “pb-ad-78623” ).addService( googletag.pubads() ) ); } );

googletag.cmd.push(function() {
mobile_slots.push( googletag.defineSlot( “/1005424/_dPSv4_mob-all-article-bottom_(300×250)”, [300, 250], “pb-ad-78158” ).addService( googletag.pubads() ) ); } );

The post 4 Things You Can Learn From Film and How to Apply Them to Your Digital Photography by Daniel Smith appeared first on Digital Photography School.


Digital Photography School

 
Comments Off on 4 Things You Can Learn From Film and How to Apply Them to Your Digital Photography

Posted in Photography


Do These 5 Quick Exercises to Learn What Your New Camera Can Do

13 Jan

new=-camera-experiments-1Have you learned everything your new camera can do yet? If not, then you’ve found the right article.

I present you with five quick exercises you can try right now, to help you better understand your new camera, and how it captures light. I’ll give you some hints about what is happening, but you will need to come to your own conclusions.

If you get stuck after running the experiment, there are answers at the bottom of the article. Don’t cheat! You have to try to come to the conclusion yourself first, you will learn more if you can do that.

To do these exercises your camera will need to have a shutter (although mirrorless cameras will work here), variable aperture, and adjustable ISO. It will also be helpful if you have a Program Mode, Aperture Priority, Shutter Priority, and Manual Mode. Check your user manual to see if these exist on your new camera.

1. Play with depth of field using the aperture

You might have learned a little about your camera’s aperture in this DPS article: Seeing in Depth of Field: A Simple Understanding of Aperture. If not, take a quick look.

This first exercise is easy. I want you to line up three objects on a table in front of your camera. Make sure the objects are something easy to focus upon (have lots of lines or contrast). If you need to, borrow toys from your kids, I find those work best.

During this exercise your camera will not move, so set it on the table in one spot. Place your first object directly in front of the camera, about two feet (0.6 meters) away. Your second object should be one foot (0.3 meters) beyond the first, and the third object, another foot beyond the second. It should look something like this:

new-camera-experiments-2

The objects should be staggered sideways to ensure they are all visible from the camera angle.

Set your camera to Aperture Priority mode. You may need to reference your camera’s user manual to find the setting. Usually it is the A or Av label on your camera’s main dial. Then set your ISO to Auto, and your focus dot to the camera’s central focus point. Again, you may need to reference the manual as all cameras are a different in how they choose focus points.

Point your camera at the first object (so the active focus point is on it), so that your camera focuses there. Set your aperture to the smallest f-number your lens can achieve; it will around f/1.8 or f/3.5. If you are using a zoom lens, pick a focal length somewhere in the 40-60mm range.

new-camera-experiments-3

Now take a picture. Without moving your camera, change the aperture to f/8. Take another picture. Then change your aperture to the largest number (smallest opening) your lens can achieve; this might be f/22 or even higher. Take a third picture.

Next, point your focus point at the second object, so it is sharp, and repeat the steps above so you have three new images at a low number aperture (f/3.5), a medium number (f/8), and a high number (f/22).

Lastly, focus on the third object and repeat the steps again.

You should now have nine images; three of each of the objects in sharp focus, at three different apertures.

The aperture on your camera controls the depth of field. What do you notice as the aperture number (or f-number) gets larger? Are more or less things in focus? What about when you focus on an object further away and look at the same aperture setting as a close object? Is more or less in focus?

BONUS EXPERIMENT: Run this experiment again and set your focal length to a smaller number (wide angle view) such as 18mm. What differences do you notice now?

2. Exposure compensation when the exposure is wrong

new-camera-experiments-5
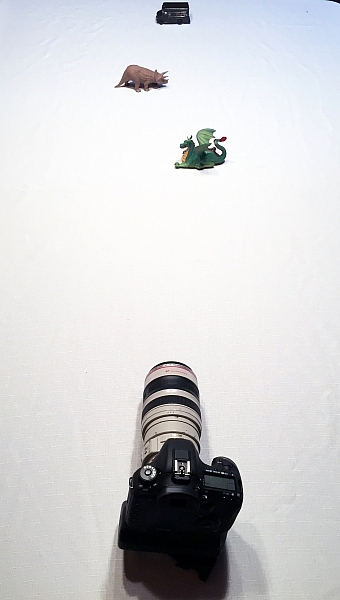
This may be disappointing to find out, now that you have a fancy new camera; but your camera is often wrong with its automatic settings. I’m sorry, but it just is. It’s not human and it has limits, but you can get around them.

Choose two objects for this experiment. One should be predominantly white, and the other should be predominantly black. Set them side by side. I chose a black iPad cover and a dish towel in this case.

Set your camera to Aperture Priority and choose the lowest f-number you can (e.g. f/1.8 or f/3.5). Set your ISO to 400 and turn autofocus on. Reference your user guide to set your camera’s metering to Spot or Center Weighted. This is typically signified by a small circle in the middle of the viewing area.

new-camera-experiments-4

Set up your camera in one position so it doesn’t move much, and point that center metering spot at the black object, so it fills the entire metering area. If you are using Center Weighted metering, fill as much of the center area with the black object. Take a photo.

exposure-compensation
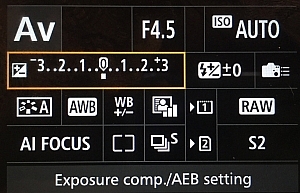
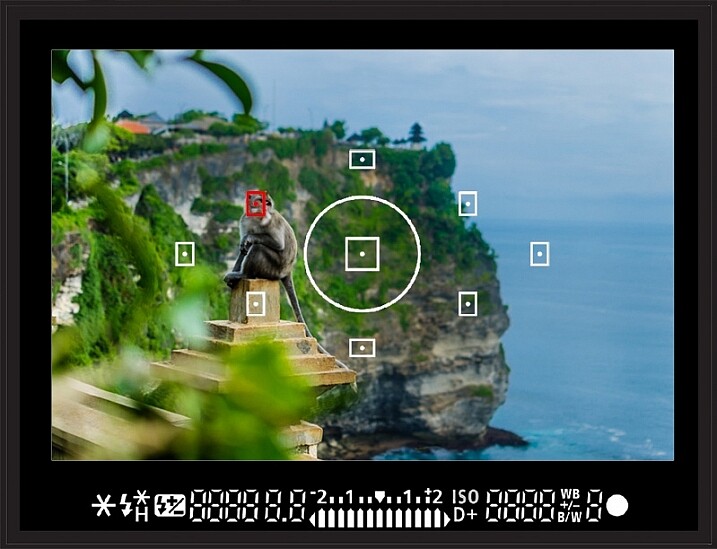
Now find the exposure bias (or exposure compensation) feature on your camera. It will look something like this:
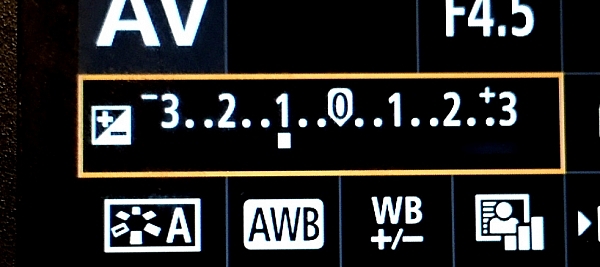
Change the exposure bias/compensation so it is set to underexpose by one stop. This will either look like “-1” or on some cameras there will be a scale with tick marks and one should be labeled “-1”. Move to that point. Take another identical photo of your black object.

new-camera-experiments-6

Reset your exposure bias to zero (0) and point your camera over to the white object, so that it fills the metering area; take a photo. Then change the exposure bias/compensation to “+1”.

You now have four images. Looking at the two shots of the black object, which one makes the object look more like its actual color? What about the white object?

3. Test your ISO

Modern cameras have an awesome range of ISO settings, but they still have their limits. Don’t get fooled into thinking you can just shoot at ISO 6,400 in a dark room and things will be peachy. This experiment is set to help you understand what happens when you change ISO, and what your personal limits might be for your camera.

new-camera-experiments-7

Set up a few objects on a table, at one end, and set your camera at the other end. Zoom in so the viewfinder is mostly filled with the scene in front of you. Include white and black objects, and some other colors. Have a couple of lights on in the room so it is normally lit, make sure the camera’s flash does not fire for this exercise.

Set your camera to Aperture Priority and your aperture to f/5.6. Set your ISO at 100 and take a photo. Without moving your camera much, change to ISO 200 and take another photo. Then ISO 400, take photo, ISO 800, take another shot, and so on (doubling the ISO each time) until you run out of ISO settings.

Examine the images, preferably on a computer screen, or use the zoom feature when reviewing images on your camera. You want to zoom in on the darker areas.

new-camera-experiments-8

What do you see happening from low ISO settings to the higher ones? Do you notice a big difference between white areas as compared to black areas?

If you need a hint about what is happening read: 6 Tips for Using ISO Effectively With Your Camera.

4. Add some blur with a slow shutter speed

This one is easy and quick. You may need a willing assistant, or you can find cars moving on a city street. You will want objects moving past your field of view, from side to side (not front to back) at a fairly consistent speed.

Set your camera on a solid object; this can be a tripod, desk, the hood of a car, etc. Point your camera toward the moving objects. Set your camera to Shutter Priority (S or Tv) Mode, ISO should be 100, and set your shutter speed to 1/500th.

Take a photo of the objects passing in front of your camera. Change your shutter speed to 1/60th and take another photo as the objects move.

new-camera-experiments-9

Lastly, set your shutter speed to 1/10th and take another photo. What do you notice happened in the three photos?

BONUS EXPERIMENT: What happens when you keep the slow shutter speed of 1/10th and move with the subject while you shoot?

5. White Balance is important for good color

White Balance is very important if you shoot in a file format other than RAW, such as JPEG. Your camera will usually do a good job of guessing the correct White Balance settings, but it is important to know how to control your camera if it messes up.

You will need a place with three different light sources to make this one work. It’s okay if they are not in the same spot, you can walk around. You will also need a piece of white paper with writing on it, to help focus.

Set your camera on Program Mode. This allows your camera to handle shutter speed, ISO and Aperture automatically, but you are going to take control of the White Balance. Again, you may need to reference your camera’s manual as each manufacturer handles these changes differently.

new-camera-experiments-12

First, find a scene that is lit by daylight. Set your camera’s white balance to the Daylight Preset. It’s setting looks like a little sun in the image above. Take a photo of your white paper with the daylight hitting it. If you can only manage cloudy daylight, that will be okay as well.

Without moving much, set your White Balance to incandescent or tungsten (looks like a little lightbulb). Take the exact same photo you did before. Lastly, set your White Balance to shade (a little house icon with shade next to it). Take the exact same photo.

new-camera-experiments-11

Which White Balance preset under daylight conditions produces this color?

Next, move to an area lit by incandescent or fluorescent light. This would also include compact fluorescent bulbs. You can hold your paper close to the light source for these next photos, just make sure the light is falling on the page and not coming through it.

Run through the same three White Balance settings as before; daylight, incandescent and shade.

new-camera-experiments-10

Which White Balance preset under incandescent lighting produces this color?

What happens to the color of the white paper when each of these changes are made? Its color changes, doesn’t it? When you shot with the shade setting, did things get more blue or more yellow? Think about  how you can use this in your photography once you understand how it works.

Answers and Helpful Hints

Now that you have played around a little, let me help clarify what you should have seen in each exercise.

1. In the first exercise you should see more depth of field (more things in focus, front to back) as the aperture number increases. As you focus further away from the camera, the depth of field also increases at the same aperture. This might be hard to see in this limited of a test, but it is explained better here: How to Control Aperture and Create Images You Love.

2. Your camera is set to expose the world as if it were 18% gray. This means objects that are black are exposed to make them more gray; the same goes for white things. If you are taking pictures of something already gray, like pavement, then there is no adjustment needed. Otherwise, to make white things white, you need to tell your camera to overexpose (that was the “+1”) and to make black things black, you need to under expose (“-1”). More info on exposure compensation is available here: Using Exposure Bias To Improve Picture Detail.

3. As ISO increases, digital noise (not the same as grain in the days of film, but similar) increases. Noise is usually not desired but as time goes on, camera manufacturers get better at reducing it. That’s why camera owners five years ago were told not to go over ISO 800, or there would be too much noise. Now, I regularly shoot at ISO 2000 with results that work for me. It’s important to know the limits of your camera so you are okay with exceeding them in certain circumstances.

4. As your shutter speed gets slower, the chance for blur increases. This can be blur from you moving the camera (we have all done this before) or from your subject moving. Blur is not an inherently bad thing, it can be used with great affect. But it’s important to know when, and how much, works best for you. Play around on this one a little with different subject speeds and shutter speeds.

5. White Balance can be trickiest when there is more than one light source and it’s helpful to know which way to adjust the colors. A lower temperature (incandescent and fluorescent) give more of a yellow/green cast while cloudy and shady gives your more of a blue tone. If you want to eliminate that color cast in your images, move the White Balance toward those settings.

The great thing about photography is it is highly reproducible. When you do this, that happens – and when you do this again, that happens again. That makes it a great art form, in which experimenting can teach volumes, if you keep control of the variables. You might note that only one variable was allowed to change in each of these exercises, that was on purpose.

Go forth and experiment more with your new camera. The more you shoot and the more you experience through the lens of your camera, the more you will learn!

googletag.cmd.push(function() {
tablet_slots.push( googletag.defineSlot( “/1005424/_dPSv4_tab-all-article-bottom_(300×250)”, [300, 250], “pb-ad-78623” ).addService( googletag.pubads() ) ); } );

googletag.cmd.push(function() {
mobile_slots.push( googletag.defineSlot( “/1005424/_dPSv4_mob-all-article-bottom_(300×250)”, [300, 250], “pb-ad-78158” ).addService( googletag.pubads() ) ); } );

The post Do These 5 Quick Exercises to Learn What Your New Camera Can Do by Peter West Carey appeared first on Digital Photography School.


Digital Photography School

 
Comments Off on Do These 5 Quick Exercises to Learn What Your New Camera Can Do

Posted in Photography


6 Photoshop Tools Every Newbie Should Learn

13 Dec

In the days before digital imaging, if you truly wanted to elevate your photography to the level of art, you learned how to process your images in the darkroom. You learned dodging, burning, masking, sandwiching negatives, flashing and fogging – all designed to get the most out of your images, and deliver your artistic vision to your viewers.

Photoshop-tools

The finished image after Photoshop, using the tools discussed below.

With the advent of digital imaging, photographers have a new way to bring their artistic vision to life, known as the digital darkroom. While there are several different applications available for photographers, one has become synonymous with photo editing, and that is Adobe Photoshop.

Many of the tools in Photoshop can trace their origins to the wet darkroom of yesteryear. If you’re new to Photoshop, it can seem overwhelming the first time you open an image in the program. I’ve created this list of six must-know Photoshop tools to help you get started editing your images. These aren’t by any means the only tools needed, and there are of course tools within the tools to figure out, but this list should give you some idea of where to start. The great thing about most tools in Photoshop is that there are a lot of sliders, meaning you can experiment and see what each tool does, then undo it if you don’t like it.

1 – Adobe Camera Raw

Adobe Camera Raw is a series of sliders and tabs used for processing RAW files. The beauty of the RAW file is you can make changes to the file non-destructively and change them again later if you choose.

Adobe Camera Raw is a series of sliders and tabs used for processing RAW files. The beauty of the RAW file is you can make changes to the file non-destructively and change them again later if you choose.

It is my personal belief that if you aren’t photographing RAW images, you are doing yourself a disservice as a photographer. When you allow your camera to process your image into a JPEG, you are throwing out potentially critical information from your image. You are trusting your camera to make creative decisions for you about the color, contrast, tone, and more, with regards to your image.

To get the most out of your image, you’ll want to set your camera to capture the image as a RAW file. A RAW file contains unprocessed, uncompressed, grayscale data from your camera’s image sensor, as well as metadata about how the image was captured. Adobe Camera RAW is the plugin for Adobe PhotoShop that can take this information and process a color image.

When you open a RAW image in Adobe Camera RAW, you’ll be presented with a toolbar across the top, and a tool palette on the right side. The tool palette is divided into 10 tabs: Basic, Tone Curve, Detail, HSL/Grayscale, Split Toning, Lens Corrections, Effects, Camera Calibration, Presets, and Snapshots.  The tabs I use most in my workflow are Basic, Lens Corrections, Effects, and Camera Calibration.

The beauty of a RAW file is that you can change the settings using the sliders, and other tools, as often as you like. If you don’t like what you’ve done, or you want to try something different, you can always revert the image back to the original settings, and the file is the same as it was when you downloaded it from your camera. Don’t be afraid to play with the sliders and see what they do. You can’t ruin the RAW file, so you might as well see what everything does. For more on using Adobe Camera Raw, check out Understanding the Basic Sliders In Adobe Camera Raw.

2 – Layers and Layer Masks

I created a duplicate layer to warm up the sunrise a bit and look more like it appeared when I was there. But since I still wanted the cooler tones on the rocks, water, and the rest of the sky, I used a layer mask to show only the warmer tones where I wanted them.

I created a duplicate layer to warm up the sunrise a bit and make it look more like it appeared when I was there. But since I still wanted the cooler tones on the rocks, water, and the rest of the sky, I used a layer mask to show only the warmer tones where I wanted them. The white area of the mask for the layer called, “Warmer Tones” shows the area of that layer that is showing through.

I consider this number 2a and 2b. If you’re going to learn layers, you’re going to have to learn layer masks as well. In Photoshop, one of the first things you’ll notice when you open an image is the Layers Palette on the right side of the screen. Initially, it will likely only have one layer called “Background” which contains your image.  You can add new layers as needed. You can also add empty layers which will allow you paint, draw, or copy portions of the image below onto them, and you can use layers to create a composite from multiple images. Layers can be adjusted to different opacities using the opacity slider at the top of the palette, so they can be made partially translucent which allows the layers underneath to show through.

In addition, you can create layer masks, which allow you show or hide portions of a layer, and allow you to see the layer or layers beneath. You do this simply by painting with black on the layer mask to hide that part of the layer, or painting white to show that part of the layer.

Layers give you room for quite a bit of creativity, allowing you to edit areas of an image non-destructively. If you don’t like what you did, simply delete the layer and start over. You can sandwich together two separate images, much the way you’d sandwich negatives in a wet darkroom, and create photo composites. For more on using layers, read A Beginner’s Introduction to Using Layers.

3 – Blend Modes

This image shows two different blend modes. On the left, Normal is selected, so the white box with the black text appear as I drew it. In the center, the blend mode is set to Multiply, so the white disappears and the black remains. On the right, Screen is selected, which shows the white area and shows the black.

This image shows three different blend modes. On the left, Normal is selected, so the white box with the black text appear as I drew it. In the center, the blend mode is set to Multiply, so the white disappears and the black remains. On the right, Screen is selected, which shows the white area and hides the black.

As mentioned above, the Opacity Slider allows you to blend the active layer with the layers beneath. The Blend Modes, found in a drop-down menu to the left of the Opacity Slider, work in a similar fashion, but use different mathematical calculations to change the appearance of the layer being blended for different things. For instance, if you simply duplicate the image on a new layer and set the Blend Mode to: Multiply it will darken the image by about a stop, and Screen Blend Mode will lighten the image by a stop. If you create a layer on top of your image with black text inside a white box, using Multiply will eliminate the white box, and allow the layer below to show through. Screen will do the opposite (see image above).

As of Adobe Photoshop CC 2015, there are 27 Blend Modes. The two modes I noted above are ones I use often, usually adjusting the opacity slider as well to get to my final look. Knowing what each mode does will help in choosing which one to use for your particular purpose. Darren Rowse put together a great tutorial, An Introduction To Blend Modes In Photoshop to give you a more in depth look at Blend Modes. You can also check out The First 3 Blend Modes You Need to Understand.

4 – Adjustment Layers

I used an Adjustment Layer on the cooler layer to bump up the color saturation a bit.

I used an Adjustment Layer on the cooler layer to bump up the color saturation a bit.

Photoshop Adjustment Layers are a great way make changes to an image, without actually changing the original file. It’s an easy way to try things, such as adjusting contrast or saturation, so that you can go back and change it again later – as long as you’ve kept the layers in tact by saving as a PSD or a TIFF file, formats that both support layers.

There are 19 different adjustment layers, which can be combined to create different effects on your image. Some basic uses are color adjustment, contrast adjustment, saturation, and black and white conversion. In addition, you can use Layer Masks to apply the effects in specific areas only, rather than the entire image, if you so choose.  You can also adjust the Opacity of an adjustment layer to reduce the effect of the adjustment on your image.

Adjustment layers provide a ton of flexibility when editing an image, without forcing you into a change that can’t be undone easily. For more on Adjustment Layers, check out Photoshop: Applying Fixes using Adjustment Layers and Masks and Burning and Dodging with Adjustment Layers and Layer Masks.

5 – The Spot Healing Brush

There were a few stray star streaks in the sky that I wanted to eliminate, so I used the Spot Healing Brush to quickly remove them.

There were a few stray star streaks in the sky that I wanted to eliminate, so I used the Spot Healing Brush to quickly remove them.

The Spot Healing Brush is one of the primary retouching tools in Photoshop, allowing you to remove blemishes and errors, or other parts of your photos. In the digital age, the bane of all photographers’ existence is dust on the imaging sensor, and the Spot Healing Brush provides a quick and easy way of removing those fromyour images.  The Spot Healing brush works similarly to the Cloning Stamp tool, in that it samples from one area of the image to correct other areas.

The Spot Healing Brush automatically detects the content or texture of the surrounding area, and attempts to replicate it wherever you click in the image. There are several options to work with which appear at the top of the screen. These include brush size and hardness, Blending Mode, and the type of fix you want to use, such as Content Aware, Create Texture, or Proximity Match. Each image will have different needs, depending on the content, so it’s best to experiment with the various settings if you find you’re not happy with the results you’re getting.

The Clone Stamp Tool

I had a few dust spots on my sensor. This one in the water, circled in red, did not respond well to the Spot Healing Brush, so I used the Cloning Stamp to sample and area of the water and stamp it over the dust spot.

I had a few dust spots on my sensor. This one in the water, circled in red, did not respond well to the Spot Healing Brush, so I used the Cloning Stamp to sample an area of the water and stamp it over the dust spot.

As I mentioned above, the Clone Stamp Tool and the Spot Healing Brush are similar in that they are both used for retouching images, and both use sampled areas of the existing image. The Clone Stamp, however, allows you to select the area from which to sample by holding the Command key and clicking (on Mac) or CTRL and click (on Windows), and creates an exact copy of the area you sample. Then you simply click on the area you want clone out and a copy of the area you sampled appears.

Again you have some options at the top of your screen, including Blend Modes, Opacity, and whether or not to sample a specific layer, or use all layers. You can also change the edge hardness and size of the stamp. The clone stamp works well when you have a well-defined edge to maintain, such as the wall of a building. The Healing Brush tries to blend edges, which can cause a blurred mess when you really need a clean edge. For more on using the Clone Stamp, head over to 12 Tips for Mastering the Clone Stamp Tool in Photoshop

These six tools in Photoshop are my go-to tools for editing my images. I would estimate that about 90% of my image editing is done using these tools. What are some of your tried and true Photoshop tools?

googletag.cmd.push(function() {
tablet_slots.push( googletag.defineSlot( “/1005424/_dPSv4_tab-all-article-bottom_(300×250)”, [300, 250], “pb-ad-78623” ).addService( googletag.pubads() ) ); } );

googletag.cmd.push(function() {
mobile_slots.push( googletag.defineSlot( “/1005424/_dPSv4_mob-all-article-bottom_(300×250)”, [300, 250], “pb-ad-78158” ).addService( googletag.pubads() ) ); } );

The post 6 Photoshop Tools Every Newbie Should Learn by Rick Berk appeared first on Digital Photography School.


Digital Photography School

 
Comments Off on 6 Photoshop Tools Every Newbie Should Learn

Posted in Photography


6 Phrases to Help you Learn Photography Faster

13 Sep

5 simple photography tricks for accurate shots

Learning all the ins and outs of photography is a never ending challenge. For some, the technical side of photography seems more difficult to understand. Others feel they are challenged by the creative side of understanding composition and light. When learning any new skill, the understanding of fundamentals is always most important. The complexity of settings, along with endless creative options is what makes photography so challenging. That’s where these six sayings come in. These simple phrases will bring you back to the basics, helping you to create quality images quickly, allowing for more time to experiment creatively.

1. ISO: Set it first – change it last

Set it and forget it until you have to remember.

Many people get confused by the purpose of ISO, and how to use it when controlling light. Unlike the other two big settings (aperture and shutter speed) when used properly, ISO gives your photograph the ability to be more sensitive to the available light. When you are setting your ISO, remember to choose a setting based on the amount of available light you happen to have in your scene. Don’t set it because the shot you took before was too dark and you want to brighten the exposure.

ISO - Set if first. Change it last.

ISO 2500, f/1.8 at 1/125th of a second

Every time you enter a scene, before you take a shot, ask yourself, what kind of light is there?

Here are some starting ISO settings, adjust as necessary for your scene:

  • Bright sunny day: ISO 100-200
  • Shade/clouds: ISO 400-800
  • Indoors: ISO 800-1600
  • Little/no light: ISO 1600 and up

Don’t forget the negative side of ISO. Most camera models go above 1600 ISO now. However, if you choose 1600, or higher, you will most probably see noise (digital grain) in your image. There are many post-production techniques to remove noise, but it’s always best to capture your best shot in the camera. Consider this when choosing a higher ISO in dimly lit areas.

2. Set an intention

Both shutter speed and aperture measure and control how much light the camera takes in. But they each also have a creative aspect that must be considered when choosing your settings. Knowing their distinct qualities, and creating an intention when you shoot, are two extremely important fundamentals of photography.

Set an Intention

ISO 200, f/4.0 at 1/5000th

Ask yourself, “What is my purpose?” Why are you taking that photo? Be clear on what you want to capture. Give yourself a moment to set an intention or two, then keep it in mind the whole time. Once you have figured out your main purpose, you can use that to choose which setting you will set first. As aperture affects the depth of field and shutter speed affects movement, which aspect is more important for creating the image you want?

Let’s take a look at two more awesome phrases to easily remember the different purposes of aperture and shutter speed.

3. Shutter speed: fast freezes – slow shows

Shutter speed is all about capturing (or not capturing) motion. When you want to show movement in the photograph, use a slower shutter speed. If a subject is moving and you want to freeze that movement, use a higher (faster) shutter speed. The faster the subject is moving, the higher your shutter speed must be to freeze them/it.

Quick Tip: Do not hand hold and shoot below 1/60th of a second. You are a vibrating creature, you are always moving. At about 1/60th of a second, the camera might capture the movement (called camera shake) you create just by pressing the shutter button.

Shutter Speed

Image #1 (left): ISO 1000, f9.0, 1/20th
Image #2 (right): ISO 1000, f/4.0, 1/125th

Here are some starting points to freeze moving subjects. Start here and adjust as necessary:

  • Moving cars: 1/4000th of a second or faster
  • People running: 1/1000th or faster
  • Kids playing: 1/500th or above
  • Person sitting still: 1/100th or faster
  • Still object: 1/60th or faster
  • Night scene: (tripod) 1/60th or slower

4. Aperture: High number = more in focus. Low number = less in focus

This setting is all about depth of field, the distance between the front and back of a focal plane. The focal plane is determined by the spot where you tell your camera to focus. The higher the f-number, the larger the distance of that plane. This means, more depth of the scene is within the focal plane, thus it is in sharper focus. The opposite is also true. The lower the f-number, the smaller the distance between the front and the back of the focal plane and less is in focus.

If you want everything in the photo to be fully in focus you will need to choose a higher f-number. If you want to create a shallow depth of field bringing only one part into focus, you will use a smaller f-number.

Aperture Photography Trick

Image #1 (left): ISO 160, f/11.0, 1/400th
Image #2 (right): ISO 160, f/1.8, 1/4000th

Here are some aperture starting points, same as before, adjust as necessary:

  • Close-ups or detail shots: f/2.8 or lower (larger)
  • Portraits: (one person) f/1.8 – f/5.6
  • Groups: (2 or more) f/5.6 – f/8.0
  • Local scene: (less distance) f/8.0 – f/11
  • Landscape: (more distance) f/11 – f/22

5. Frame your finder

Witness your scene through your viewfinder, as you allow your eye to examine every inch of what you can see through the lens. Look from top left, across and down to the right. What is in each corner? Notice the edges of the frame. When examining everything you see, slightly move your camera around as you prepare for finding the best version (framing) of this shot. This will give you a greater sense of what you do, or do not want to be in the shot. You will notice if you have cut something off, or added something into the shot you do not want.

When you make a habit of always re-framing your viewfinder as you are shooting, you will gain a greater sense of awareness, allowing for more shots from other vantage points you hadn’t considered before. Even more importantly, as you practice this, every shot you take will be closer to what you want to capture in the first shot you take.

Frame your finder

See what is in every inch of your frame before snapping the shutter!

6. Count your clicks

Once you have your desired exposure based on the purpose of what you are capturing, you can choose to change your purpose (capture a different effect) by going up or down the range of either aperture or shutter Speed. To make sure you keep a proper exposure like you had before (assuming you are shooting in Manual Mode), just count your clicks. If you click six times in one direction on shutter speed (because now you want to show motion), you will need to click six times in the other direction for aperture to keep a proper exposure.

For example: When photographing a birthday party, you may go from focusing on close-ups and details, to kids running around, to capturing a sunset. In this case, the first intention is creating a shallow depth of field to capture a non-moving object. Set your aperture to a low f-number. Using your meter, now set your shutter speed for correct exposure and snap away. ISO will already be set because that’s the first trick to remember.

Now it is time to capture the kids running around. You will  switch focus from aperture to shutter Speed. To make sure you freeze their movement (no one likes a photo of a blurry kid), you will change your shutter speed to 1/1000th of second.

Photography tricks

But wait! Before you start moving the dial, remember to count how many clicks you are going. If you clicked down four times to get to 1/1000th of a second, then you will click UP four times using your aperture dial. Now your exposure will be the same, but you quickly changed your settings to creatively capture something entirely different. Note: if you are using Aperture or Shutter Priority modes the camera will do this adjustment for you automatically.

There you have it

The best thing you can do now is turn these tricks into habits by jotting down these simple phrases and stuffing them in your camera bag. Next time you are ready to shoot, read over them once or twice before you begin. As you practice using these tricks in order to become more accurate and efficient behind the lens you will create more stunning eye-catching photographs of any subject you choose to capture.

Do you have any other cool phrases that you say to yourself when you are shooting? If you know any other great tricks that are easy to remember and simple to understand, let us know in the comments section below. Together, it will be fun to build a compilation of great photography learning quotes!

googletag.cmd.push(function() {
tablet_slots.push( googletag.defineSlot( “/1005424/_dPSv4_tab-all-article-bottom_(300×250)”, [300, 250], “pb-ad-78623” ).addService( googletag.pubads() ) ); } );

googletag.cmd.push(function() {
mobile_slots.push( googletag.defineSlot( “/1005424/_dPSv4_mob-all-article-bottom_(300×250)”, [300, 250], “pb-ad-78158” ).addService( googletag.pubads() ) ); } );

The post 6 Phrases to Help you Learn Photography Faster by Danielle Werner appeared first on Digital Photography School.


Digital Photography School

 
Comments Off on 6 Phrases to Help you Learn Photography Faster

Posted in Photography


4 Tips to Learn to Live Through Photography

28 Jun

The magic of an instant

What is photography anyway? It is a fraction of a second of eternity that you try to capture, with better or worse technique, with deeper or shallower depth of field. But, in short, that’s all about photography, and it is this magic what makes photography an art. The essence of why many of us like photography, goes beyond what we can capture with our DSLR and show to others. It is the experience of the moment, and how one learns through the years to be aware of the present. It was just a few months ago when I learned what mindfulness was about, and I immediately noticed the similitude with how I experience photography. It is all about being present in the moment that one is trying to capture.

The journey back home

The journey back home – something so magnificent like ephemeral cloud formations could pass right away if you are immersed in past or future thoughts instead of being present.

1) Be there

To be present involves being aware of oneself in the present moment. The fact that one is observing and capturing a situation is not enough to take a great picture. I am a visual person. There is large chance that since you like photography, you are as well. That means that you learn better by watching a film than by reading a book. You then may prefer a figure or infographic, rather than its explanation. In my case, long before I got my first serious camera, and committed myself to learn the techniques and nuances to show other people the way I see the world, I already enjoyed looking at other people’s pictures. However, it was seldom that I actually observed the world around me.

Photography teaches us that those amazing pictures we love viewing from other photographers, are actually out there if you dare to look. I don’t remember a particular moment when I realized I was alive. There was no such an experience. But I somehow learned through photography that the best camera obscura that I can count with is my eyes. The best film is my memory. And it is awesome because it also comes along with many other senses. Once you realize that, you discover that the difference between a snapshot and a great picture is that: for the latter you acknowledge all the angles of the scene, you walk your picture before you take it, you breathe it, you feel it, and then compose it. You ARE in the picture as the one capturing it. And you want somebody else to BE there with you seeing the same scene.

2) Chase the moments

Daddy when will it stop

Daddy, when will it stop?: This is my daughter’s frustration for not being able to go outside on a long, boring summer Sunday. It wasn’t until I realized her feelings that I knew what to photograph.

You have to be quick if you are for example, a street photographer, but that’s how life is in cities, right? However, there is not much difference than, let’s say, a fashion production in the sense that it is a fraction of a second, just a moment that you are able to transmit into a picture. We have to learn to chase the moments… to do so we have to BE in the scene.

If you run out of battery, or you find yourself without your bulky DSLR with you, then simply capture it in your mind. I literally make the sound “click” in my mind. You don’t need to, that is my own mental issue. But whatever it is that you like to chase and capture, whether it is your cat, a pint of beer, or the garbage on a street – be there. Paraphrasing Henri Cartier-Bresson, most of the situations that you see around you will repeat if you wait long enough. Yes, even those pictures that you missed because you didn’t bring your camera with you. Be present to know what you are after. Learn about your subject, revisit the site and you will get the shot you want.

3) Know what you feel

Xmas eve in Oslo

Christmas eve in Oslo – This time, it was my feeling of confinement on a cold Christmas eve that I tried to capture. Me and my friend (in the picture) are used to warm and sunny Christmas festivities. Not this time.

If the scene you are watching makes you angry, then be angry and capture angriness. Be aware of the weight of the camera in your hands. Be aware of your finger pressing the shutter in the moment you do. Reflect about why did you choose to press it just then, and not before. Watch the object’s geometry, its beauty. Do you really want to be there? Does the marriage of that couple you are photographing make you happy? What is it that makes you happy? Their smiles? All the people celebrating together? You don’t need to do anything else with those feelings. Let them be in you, and let them go away. But just when you realize them, capture that moment in a picture. Capture with the camera the pictures you would like to share, but capture for yourself every fraction of a second of your life. BE there where you are.

4) Use your other senses

Smelly shoes

Smelly shoes – When I see this picture I can’t stop feeling the heat coming from these shoes that have walked who knows how long under the sun.

To some extent, you can also transmit with a picture, what your other senses were capturing. This is one of the biggest challenges of photography. Smell, listen, feel, taste. To me, the perfect picture is one that transmits all those other sensations, smells, noises, emotions, and temperature apart from what you are just watching. That takes a level of mastery that not everyone achieves. But if you are still there like me, on your long way to becoming a great photographer (even if we may never become a renown one), learning photography in its broader sense is an excellent way to learn to be present in that short lapse of time that our lives are meant to last.

Rotten fly

Rotten fly – What are your feelings about this dead fly?

googletag.cmd.push(function() {
tablet_slots.push( googletag.defineSlot( “/1005424/_dPSv4_tab-all-article-bottom_(300×250)”, [300, 250], “pb-ad-78623” ).addService( googletag.pubads() ) ); } );

googletag.cmd.push(function() {
mobile_slots.push( googletag.defineSlot( “/1005424/_dPSv4_mob-all-article-bottom_(300×250)”, [300, 250], “pb-ad-78158” ).addService( googletag.pubads() ) ); } );

The post 4 Tips to Learn to Live Through Photography by Alejandro Ruete appeared first on Digital Photography School.


Digital Photography School

 
Comments Off on 4 Tips to Learn to Live Through Photography

Posted in Photography


Learn How to Setup Studio Lighting in 15 Minutes

29 May

Do you find studio lighting daunting? Understandable. When I got my first set of lights I played with it for half an hour. Intimidated and confused, I shoved it back in the box where it stayed for six months.

Don’t worry though, mastering exposure with studio strobes is easy; in fact it’s probably one of the easiest of the photographic skill sets. By following this tutorial, you can go from no experience with studio lighting, to getting a correct exposure on your first frame, without the aid of expensive and unnecessary light meters. This isn’t a crash course in complicated theories and physics; our goal is to get you using strobes and creating photographs as quickly as possible. You can return to the theories at your convenience. I am a firm believer in the idea that it’s easier to learn the why, when you’ve already figured out the how.

Warpaint john mcintire photography 0754 2

Getting Ready

Before we start, you’ll need to do a few things in preparation:

  1. Setup your studio strobe on its stand, set it to full power and make sure it works.
  2. You should know how to connect your strobe to the camera and make it fire by way of remote trigger, pc sync cable, slaved to your on-camera flash, or by way of an in-camera system. Refer to your manuals if you need help.
  3. Have your strobe’s instruction manual at hand.
  4. Settings: Set your camera to manual mode, your shutter speed to 1/125th of a second, and your ISO to 100. (If you have an older model, or a film camera, then default to 1/60th of a second.)
  5. Have a calculator at hand will make things easier.
  6. Finally, I recommend that you start to think in full stops, which I’ll cover in the next section.

Thinking in Full Stops

Most of our modern cameras are capable of setting the aperture in increments of 1/3 or 1/2 of a stop. This is extremely useful for fine tuning the exposure in most situations; however, for the purpose of this exercise, it is much easier to ignore them for now and concentrate on the full stop values as indicated in the chart below.

Fstops

Finding Your Guide Number

The next step is to flip through your strobe’s manual and find where it lists the Guide Number (also check whether the guide number is listed in feet or meters; this is vital). This magic number is a rather complicated thing and steeped in the brain-wracking Inverse Square Law. As promised, you don’t yet need to know why it works; you only need to know how to use it at this point.

There are two main ways to use the guide number, that will be useful to you. You can choose your aperture based on the desired outcome of your photo and calculate where to put your strobe, or you can place your strobe for a desired lighting effect and calculate the correct aperture.

Calculating Aperture

Some lighting effects require strobes to be in certain positions, and distances from your subject and other strobes. In other circumstances, your strobe might be in a fixed position and it cannot be moved.

In these events, to calculate the aperture for a correct exposure all you have to do is measure the distance between the light source and your subject in feet or meters (whichever your guide number is listed as). Now divide your guide number by that distance. For example a guide number of 66 with a distance of 6 feet between your subject and the light source would result in: 66 divided by 6 for a result of 11. Your answer is your aperture for a correct exposure: f/11.

Most guide numbers never divide so evenly into full stops. For example, if you get a result along the lines of f/9.2, just round it off to the nearest full-stop for the moment and we’ll learn how to fine-tune the exposure shortly.

Calculating Strobe Distance

Conversely, if you know what aperture you want to use, for a creative effect perhaps, simply divide the guide number by your desired aperture. My tendency for studio portraits is f/8, so if you divide our previous example of 66 by 8 (66/8) you get 8.25. To get a correct exposure for this setup, you would just place your light source 8.25 feet away from your subject. It really is that easy.

One caveat: if you have a high powered strobe in a small place, you’re not going to be able to set your camera to something ridiculous like f/64. If your power output is too high, just turn your strobe down to half power and divide the guide number by two.

Fine Tuning Exposure without Changing Your Settings

As you learned, there are instances where you want your aperture to remain constant. You also don’t want to mess with the power settings on your strobe so much that they completely change your guide number and negate your ability to calculate your exposure with ease. Yet subjects move, or you might want to over or underexpose your image for creative effect. The way to do this is simple.

To underexpose or reduce the amount of light falling on your subject, you would move your strobe further away. If your light source is really close to the subject and you move it back about a foot, you will lose 1-2 stops of light (smaller f/number). If your source is farther away from the  subject and you move it back one foot, you will lose less light. This is caused by the Inverse Square Law which states:  In physics, an inverse-square law is any physical law stating that a specified physical quantity or intensity is inversely proportional to the square of the distance from the source of that physical quantity.  (and link to the wiki definition). Just know that closer in you lose more light as you back it away, than if the light is situated farther from the subject to begin.

This is also why I asked you to consider thinking in full stops rather than fractional increments. Moving a strobe or a model one or two feet is much easier to judge on the fly than the four inches (10cm) a third of a stop increment would require.

Notes on Modifiers

The most common modifiers in studio photography will affect the output of the strobe in terms of exposure. You may need to increase or decrease your aperture, or the distance of your light source, depending on which modifier you choose.

Soft boxes and white or translucent umbrellas, which all produce a softer, more diffused light, will decrease the amount of light falling on your subject. To combat this, choose a larger aperture (smaller f/number) or move your light source closer to your subject.

Beauty dishes, silver umbrellas and reflectors, which all produce a harder, more defined light, will increase the amount of light falling on your subject requiring you to choose a smaller aperture (larger f/number) or to move your light source further from your subject.

Modifierexamples john mcintire photography

If you choose to alter your aperture in these situations, feel free to revert to your 1/3 stop increments. A modifier will rarely alter the output of a strobe by a full stop.

You will quickly learn how your modifiers affect the output of your strobes and within a few sessions you should find yourself automatically compensating for them without thinking about it.

Putting it into Practice

I set up a quick portrait session to help demonstrate how to employ these techniques. Gemma graciously volunteered for the task.

The only preparation was the setup of a paper background and fitting the strobe with a beauty dish. After she arrived, I asked Gemma to stand two feet from the background and I placed the light source straight in front of her and as high possible with the beauty dish pointed downward at her face.

All that was required to start shooting was the correct aperture. The Bowens GM400 I used has a guide number of 76. I measured how far away the light source was; which was 7.5 feet. Dividing 76 by 7.5 gives a result 10.133. Because I was using a silver beauty dish, we know that I need to stop down the aperture to get a precise exposure so I set the camera to f/11 and took a test shot. As you can see from the histogram, these simple calculations gave me the correct exposure and it took less than a minute to get there.

Gemmahistogram

In this image you can see that from the first frame to the last, the exposure remained constant leaving me free to concentrate on other aspects of the images.

Gemmacontactsheet

Finally, here you can see the end result.

Gemma john mcintire photography 1692

I hope you’re still with me, and that I’ve convinced you that studio strobes are nothing to be afraid of. With a little practice, the techniques outlined in this article will quickly become second nature, allowing you to concentrate less on the technicalities of exposure, and more on aesthetic variables such as composition and establishing rapport with a client or model. As with most things, the key is practice. Snag a friend, a pet or even a bowl of fruit and run through the whole process again and again, until calculating the correct exposure becomes reflex, and you’ll find yourself spending more time and energy on the creative processes rather than the technical ones.

googletag.cmd.push(function() {
tablet_slots.push( googletag.defineSlot( “/1005424/_dPSv4_tab-all-article-bottom_(300×250)”, [300, 250], “pb-ad-78623” ).addService( googletag.pubads() ) ); } );

googletag.cmd.push(function() {
mobile_slots.push( googletag.defineSlot( “/1005424/_dPSv4_mob-all-article-bottom_(300×250)”, [300, 250], “pb-ad-78158” ).addService( googletag.pubads() ) ); } );

The post Learn How to Setup Studio Lighting in 15 Minutes by John McIntire appeared first on Digital Photography School.


Digital Photography School

 
Comments Off on Learn How to Setup Studio Lighting in 15 Minutes

Posted in Photography


5 Great Ways to Learn Photography

28 May

All images ©Gina Milicia

“Every Artist was first an Amateur”- Ralph Waldo Emerson

Learn 1

If you’re just starting out as a photographer, congratulations! There’s never been a more exciting, or easier time to learn the art of photography. Today’s market is flooded with tertiary courses, books, workshops, websites, podcasts and online courses that didn’t exist as little as ten years ago.

When I began my career 25 years ago, there were only a few options. You could learn photography at a university or technical college, you could complete an apprenticeship or internship with a photographer, or you could teach yourself through trial and error and by studying the work of other photographers. I combined all three of these techniques and found a way that worked really well for me.

Today there are dozens of ways of developing your photography skills. None of them is right or wrong; just find the one that best suits your personality and learning style. This is a surefire way to fast track your development as a photographer.

Learn 2

What is your learning style?

There are three different ways you can learn a new activity. Most people are a combination of all these styles of learning, so that’s why it’s best to try several different styles to help you learn new techniques.

1. Visual

A visual person will learn best from seeing something demonstrated and looking at photos, maps and diagrams.
Watching “how to” videos and reading books and online blogs really support your learning style if you are a visual learner.

2. Auditory

Auditory style people learn through listening to lectures or audio presentations, talking things through and listening to what other people have to say. Listening to podcasts and audio books would be a great way to support your learning style.

3. Kinesthetic

Kinesthetic people like to learn by doing activities. You prefer to be hands-on and try things out and discover how they work. Attending practical workshops would really suit your learning style

So if you really want to cover all bases read, watch, listen and do.

I know for a fact that my weakness is auditory. I can’t sit still in a lecture or presentation for very long before I get fidgety, but if I listen to information while I’m doing a menial task I find I retain far more information. That’s why I love podcasts and audiobooks so much. I’m able to learn so much while I’m out walking, driving or burning, I mean cooking dinner.

Learn 9

Here are five options worth considering:

1. University/college degree or photography diploma

This is the traditional road, and the one that many people take. You’ll learn a wide variety of photographic styles, in a structured environment, from experienced teachers and industry experts. You’ll also have access to state-of-the-art studios with all the latest cameras, lighting equipment, accessories and software.

Learning in school also has the advantage of being in a group learning environment. This will help you develop networks and social skills that you’ll use in the future. Sharing the journey with your new friends will make learning more fun.

The downside is the expense. Depending on where you live, a degree or diploma can cost tens of thousands of dollars or more. There’s also a significant investment of time. This can be difficult to manage for older students who may have families to support.

The school’s location will also be a factor. Many of the better photography courses are located in capital cities, so you’ll also need to consider travel or relocation expenses.

If you think you’re suited to this style of education, thoroughly research the schools in your area. Find out who the teachers are, who the past students have been, and what they’ve gone on to achieve. If it’s feasible, attend an open day and ask current students what they think. I’ve known students who’ve been miserable and have even failed classes because their personality didn’t match their schools’ cultures. After transferring to schools better suited to their learning styles, they thrived.

Learn 4

2. Assisting – apprenticeship – internship

Apprenticing is a traditional, and often overlooked, way of learning the ropes and breaking into photography. This is how many of my peers and I, worked our way up the ladder.

After graduating from art school, I started out as an unpaid intern with a celebrity and fashion photographer. At the end of my eight-week internship, I was offered a full time job. I couldn’t have landed such a sought-after position based on my portfolio and by cold-calling photographers alone. I learned more in my first month on the job than in four years at art school.

The 18 months I spent assisting taught me tons of lessons about how to light, direct, pose and talk to models. It also taught me how to work with makeup artists and stylists, and how to deal with difficult clients. But most importantly, I witnessed first-hand the ups and downs of running a business. Had I gone straight out on my own without working as an assistant, I never would’ve realized that ALL photographers experience downturns in their business, and that nobody — no matter how amazing or in-demand — is immune. That lesson was gold and saw me through many quiet times through my career.

In some cases interning with the right person can be more valuable than doing a course. But that person needs to be generous with their knowledge, and should be an encouraging teacher. The wrong kind of internship can find you stuck in a tiny office filing, answering phones, and performing menial non-photography jobs without the opportunity to ever learn anything.

Learn 8

3. Workshops

Workshops are a great way to refine and advance your skills. One of the advantages of workshops is that you can select the style of photography and techniques you want to improve, and the photographers you want to learn from.

Some workshops are local, and only last a couple of hours. Others last longer and are held in exotic locations. These are great for travellers who want to shoot on location, but are reluctant to travel on their own.

Whatever course you’re thinking of attending, read up on it. Read testimonials and find out how much experience the teacher has. But most importantly, find out the class size. Larger classes are fine for software workshops such as Lightroom and Photoshop, but when it comes to learning the craft of photography, smaller groups are much better. You’ll get more one-on-one time with the instructor.

Learn 7

4. Online courses

Online course are great for learning at your own pace and in the comfort of your own home. Look for courses that are taught by professionals you respect and in a style you can relate to. The more you enjoy and relate to your teacher, the easier it’ll be for you to learn. Many of the really good courses offer money back guarantees, making them a zero-risk investment.

Learn 6

“When the student is ready, the teacher appears” – Buddhist Proverb

5. Mentors

A mentor can be anyone who’s realized the goals you want to achieve. This includes both friends who can help you understand some of your camera’s settings, and professionals with five, 10, 20, or more years of experience. Their skills may vary, but anyone who’s farther down the path than you has valuable information that will save you time, money and effort in reaching your goals.

A great place to start looking for mentors is in your friendship and social media circles. It isn’t as daunting as it sounds. Look for someone whose work and working style you admire and respect. Follow them on social media and look for ways you can add value to the relationship. Retweet their posts, comment on their photos, share their work, refer clients to them, and send them links to great locations or items that may be interested in.

Give the relationship time to develop before you ask them to mentor you. That will increase the chance that they say yes, because they will have had a chance to get to know you. A mentor is far more likely to want to give up valuable time to work with you if they can see you show initiative, and are respectful of their time.

I’ve been lucky enough to work with several mentors in my career and I know their knowledge and guidance has saved me years of extra work and opened many doors I may never have walked through had I have stumbled along on my own.

Learn 5

“The journey of a thousand miles begins with a single step.” – Lao Tzu

Finally, there is plenty of great information out there, and lots of amazing teachers, but in the end it’s up to you to take the first step.

What have been the most successful ways for you to learn photography? Do you have any other suggestions I may have missed? I’d love to hear from you, please leave a comment below.

googletag.cmd.push(function() {
tablet_slots.push( googletag.defineSlot( “/1005424/_dPSv4_tab-all-article-bottom_(300×250)”, [300, 250], “pb-ad-78623” ).addService( googletag.pubads() ) ); } );

googletag.cmd.push(function() {
mobile_slots.push( googletag.defineSlot( “/1005424/_dPSv4_mob-all-article-bottom_(300×250)”, [300, 250], “pb-ad-78158” ).addService( googletag.pubads() ) ); } );

The post 5 Great Ways to Learn Photography by Gina Milicia appeared first on Digital Photography School.


Digital Photography School

 
Comments Off on 5 Great Ways to Learn Photography

Posted in Photography


5 Reasons You Should Learn Long Exposure Photography

12 May

Long exposure imagery is an interesting and highly satisfying technique of creating images. It requires you to use the manual mode or sometimes shutter priority mode to control your shutter speed.

Normal vs Long exposure

Shutter priority mode is marked on Nikon camera with ‘S’ and on Canon systems with ‘Tv’. They mean the exact same thing. When you switch to shutter priority mode you can select the shutter speed while the camera selects the appropriate aperture.

Obviously if you need a bit more flexibility, you should use the manual mode, where both shutter speed and aperture value are in your control. That helps you to maintain a long shutter speed while also controlling the depth of field.

At this point you would probably be asking yourself why you would need to shoot long exposure images. Wouldn’t shooting such exposures risk your images to be washed out? This is because there are some other tools and techniques involved in the process as well. Such as using ND filters or using exposure compensation to find the right aperture / shutter speed combination that allows sufficient light over a long period of time without risking a washed out image.

So why should you learn how to shoot long exposure images?

1. You can record an image over a long period of time.

Something that evidently means an action is recorded as it unfurls in front of the camera. For example, clouds moving across the sky in a landscape image creates a beautiful blurred effect that gives the hint of time passage. The same thing happens when you shoot an image of a pier and the surf coming back and forth is recorded over a long period of time. The final result will be a beautiful misty look.

2. You can make waterfalls become silky.

Water fall

If you love nature photography there are probably a million different subjects that you could shoot using the long exposure technique. Waterfalls are often shot using a slow shutter speed which basically results in a long blurred line of water and accentuates the overall surreal look of the image. I call this “silky waterfalls”.

3. You can capture trails of lights.

Light trail

Long exposure technique is perfect for night time photography as well. You can shoot star trails, light trails, light painting, or even fireworks. All of these subjects require a long shutter speed which allow the sensor to be exposed to the light movement. These topics, when doing right, can capture a beautiful pattern of light in the final image easily.

4. You can make the annoying pedestrians disappear.

There are certain unique perspectives to get if you are prepared to use the long exposure technique in broad daylight. It is not difficult, you will just need an ND filter. What I have in mind primarily is street photos. Let’s say you are photographing a busy street at noon. You want a look when nobody is around. On a busy street right in the middle of the day, it is seemingly an impossible task. Not if you know how to use an ND filer.

A ten stop ND filter, something like a Lee big-stopper, is what you need. You can first meter for the scene, then attach the filter to the front of the lens. A ten-stop filter will allow you to use a shutter speed of up to 10 stops slower than what you metered initially, without the filter. That will make everybody simply disappear. If you do it the right way, what you will get in your image is a city completely devoid of people! Like a postapocalyptic
scene, it will be an amazing image.

5. You can easily create B&W fine art photographs.

Another reason you would want to shoot long exposure photos is to enhance your black and white compositions. Black and white images are somehow more powerful than color images.

Sydney bridge

It is the contrast, the different shades of grey, ranging from pure white to pure black, the shapes, the forms, everything seems to appear more interesting. The greatest disadvantage of B&W images is that, well, they are devoid of color. That, however, is also the greatest advantage. Because without color, the essential aspects of composition and the underlying story comes to the forefront.

Do you have any other compelling reasons to do long exposure photography? Please share in the comments below.

googletag.cmd.push(function() {
tablet_slots.push( googletag.defineSlot( “/1005424/_dPSv4_tab-all-article-bottom_(300×250)”, [300, 250], “pb-ad-78623” ).addService( googletag.pubads() ) ); } );

googletag.cmd.push(function() {
mobile_slots.push( googletag.defineSlot( “/1005424/_dPSv4_mob-all-article-bottom_(300×250)”, [300, 250], “pb-ad-78158” ).addService( googletag.pubads() ) ); } );

The post 5 Reasons You Should Learn Long Exposure Photography by Kevin Choi appeared first on Digital Photography School.


Digital Photography School

 
Comments Off on 5 Reasons You Should Learn Long Exposure Photography

Posted in Photography


Street Photography: Easy To Learn, Impossible To Master

30 Mar

Of all the different fields of photography, street photography might be the most difficult. However, it’s also an area that many aspiring photographers jump into first. Street photography almost seems like the reason photography was created for in the first place. Unlike taking photos in a studio, shooting landscapes or working with models, street photography entails a bit of chaos. Continue Reading

The post Street Photography: Easy To Learn, Impossible To Master appeared first on Photodoto.


Photodoto

 
Comments Off on Street Photography: Easy To Learn, Impossible To Master

Posted in Photography


Learn From The Masters: Muybridge To Witkin

28 Jan

The Masters


Hey FashionPhotographyBlog.com readers! 

Alana Tyler Slutsky is back on FashionPhotographyBlog.com, after sharing some of the inspiring works of the great photography masters, to reveal the works of some more masters who have pioneered the photographic craft. We are all ready Alana!


Need some more inspiration? Look no further! Here are some more Masters of Photography. Tried and tested, these photographers have withstood the test of time. Am still a firm believer that you can’t really call yourself a photographer unless you study the history of the photographic medium and have an understanding of the masters – who they are and what they did that sets them apart from the rest. In my opinion, this applies to all areas of life, so here’s more names to add on the cheat sheet of names of those commonly referred to as “The Masters”;  who they are, what they did and why they’re still so awesome (names have been sorted alphabetically for your convenience).


Eadweard Muybridge


Muybridge used multiple cameras to stop and study motion. A popular debated question, whether or not all four of a horses feet leave the ground as it gallops, was answered with Muybridge’s studies – proving that all four feet did indeed leave the ground.  Muybridge managed to take over 100,000 images capturing the motion of animals and humans.

The work of Eadweard Muybridge featured on Fashion Photography Blog (FashionPhotographyBlog.com)

Helmut Newton


Newton is one of the most famous fashion photographers to date.  His works are often vert provocative and erotic in nature. Newton’s images are a reflection of the sexual revolution occurring during his time. There is much to be said about Newton, but even more to be learned by viewing his images. Take a peek, they’re sure to not disappoint! “If a photographer says he is not a voyeur, he is an idiot,” Newton once said.

The work of Helmut Newton featured on Fashion Photography Blog (FashionPhotographyBlog.com) The work of Helmut Newton featured on Fashion Photography Blog (FashionPhotographyBlog.com)

 Irving Penn


Irving Penn is another one of those prolific fashion photographers. He is one of the first photographers to photograph a subject against a stark grey or white background. His prints are known for deep contrast and a crisp feeling.  He’s also known for shooting interesting still life images composed of trash found on the street and cigarette butts. Penn is known for his immaculate control and attention to detail.

The work of Irving Penn featured on Fashion Photography Blog (FashionPhotographyBlog.com) The work of Irving Penn featured on Fashion Photography Blog (FashionPhotographyBlog.com)

Stephen Shore


Shore is the other big pioneer of color photography. Shore went on a series of road trips and documented his way across America and Canada. Initially what started as photography on a little 35mm Mickey Mouse camera transformed into a new way of seeing when he eventually changed over to a large format camera (first 4″x5″ then 8″x10″). Shooting with an 8″x10″ camera completely changes the way one sees and composes an image, this is greatly reflected in Shore’s work.  Shore is known for his dead-pan shooting style which often depicts interiors and landscapes with no people in them, almost as if they’re a Hollywood set that has emptied out for the day.


The work of Stephen Shore featured on Fashion Photography Blog (FashionPhotographyBlog.com) The work of Stephen Shore featured on Fashion Photography Blog (FashionPhotographyBlog.com)

Edward Weston


Another member of Group f/64 (along with Ansel Adams), Weston is known for his close ups of natural forms, landscapes and nudes.

The work of Edward Weston featured on Fashion Photography Blog (FashionPhotographyBlog.com) The work of Edward Weston featured on Fashion Photography Blog (FashionPhotographyBlog.com)

Now, these next two may not formally be considered “Masters,” but they are in my book! Two of my favorite fine art photographers, these guys are quite the intellects.


Joel-Peter Witkin


Witkin creates tableaux often relating to the idea of death.  Often Witkin uses corpses and often incorporates dwarfs, transvestites, hermaphrodites and the physically deformed into his work.  It’s dark, it’s twisted, pretty creepy stuff.  In fact, it’s the things that nightmares are made of.  But at the same time, it’s downright awesome!

The work of Joel-Peter Witkin featured on Fashion Photography Blog (FashionPhotographyBlog.com) The work of Joel-Peter Witkin featured on Fashion Photography Blog (FashionPhotographyBlog.com)

Hiroshi Sugimoto


Sugimoto views his work as “time capsules” of an event or series of events. This is most evident in his “Theatres” series, my personal favorite, where Sugimoto will leave the shutter of his camera open during the screening of a movie and allow the light that emanates from the screen to fill the room and in turn illuminate his image. There is a beautiful simplicity to his work. Both Sugimoto’s theatres and seascapes are absolutely stunning.  If anyone is looking to buy me a holiday gift, I wouldn’t refuse a Sugimoto print, or original, *hint hint*)


The work of Hiroshi Sugimoto featured on Fashion Photography Blog (FashionPhotographyBlog.com) The work of Hiroshi Sugimoto featured on Fashion Photography Blog (FashionPhotographyBlog.com)

Take notice that majority of the Masters shoot with large format 8″x10″ cameras. This causes them to slow down and really look at their image, see what they’re composing. Unlike photographers now-a-days, shooting large format and film causes a photographer to shoot much slower, causing them to be more precise. This also means less shots taken. Next time you want to take 300 images of one look, slow it down, think of the Masters and try to really think through your shot. A quick description really doesn’t do these guys justice.  Take some time, Google them, get inspired. Hey, maybe you’ll learn a thing or two!


– Alana


Did you find Alana’s post about the Masters of Photography interesting? Do you agree with the selection? Is there any that you would add that we have missed out that we should include? Please leave your comments below in the comment section. We would like to know what you thought about this article. If you enjoyed this post and interested in learning about the Photography Masters, check our post on Fashion Photography Blog titled “Learn From The Masters: Adams To Meatyard“.


IMAGE SOURCE: 

Feature image & images 1-13: courtesy of Alana Tyler Slutsky.


Fashion Photography Blog

 
Comments Off on Learn From The Masters: Muybridge To Witkin

Posted in Uncategorized