RSS
 

Posts Tagged ‘Learn’

How to Overcome Intimidation and Learn from the Experts – Adorama Inspire Conference

14 Jun

Disclaimer: Adorama is a paid partner of dPS.

As a photographer have you ever suffered from Imposter Syndrome?

Do you look at your social media feed and scroll through fabulous snaps that make your heart sink? Instead of being inspired by ethereal lighting and fantastic depth of emotion, do you find yourself intimidated and second-guessing your work?

We have all been there.

The Adorama INSPIRE Conference seeks to challenge that response. The event (more details below) places emphasis on collaboration and creativity that will allow you to learn from respected experts without feeling intimidated. Instead, you will feel invigorated. Which is why I wanted to share some of my own tips for getting the most out of attending events like Adorama INSPIRE.

Art of Visuals - Adorama Inspire Event

Get rid of the pedestal

So how can you learn if you find looking at other photographers’ great images intimidating? If the instructors at workshops or conferences are top experts, how can you relate to them and get over your own fears?

Speaking from my own experience, the best thing I can recommend is to try and think of the teachers and instructors as equals and take them off the pedestals on which you’ve placed them. Consider the fact that once upon a time they were sitting exactly where you are now, with the same insecurities and fears. They are only human too, and the only difference is they have more experience than you do.

Ask questions and don’t be afraid to make mistakes

Don’t be afraid of asking questions. I tell my students all the time that the only stupid questions are the ones you don’t ask because then you’ll never learn. So ask away.

Gavin Hoey Portrait Kit

Image by Gavin Hoey

Try things and make mistakes as you learn – that too is normal. Take the newfound knowledge you get from any photography educator, whether it be live in-person or an online class, and apply it. Don’t expect it to all work out perfectly the first time. You need to do things a few times to “get” it. Rome wasn’t built in a day, be patient with yourself.

There are many ways to learn photography nowadays.

Read: Should you Study Photography at College or are There Better Options Now?

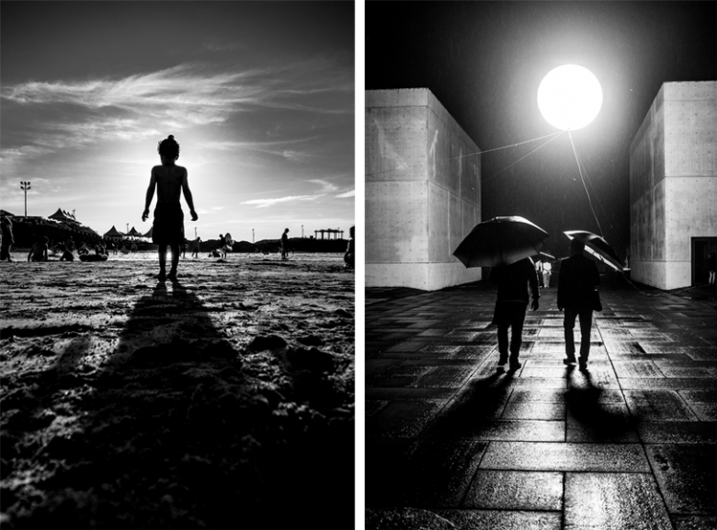
Image by Jose “@tutes” TUTIVEN – Storm King Art Center

Get inspired and learn

That’s why if you only attend one photography conference and festival this year, you should make it Adorama INSPIRE. Adorama INSPIRE combines guidance from top photographers and influencers from around the world with hands-on learning in a supportive community so you are able to expand and enhance your skills in a no-pressure, friendly space that is accessible to all.

NOTE: There are many workshops which are free to attend, you just have to register. 

Tracie Maglosky Maternity Photography

Image by Tracie Maglosky – Maternity Photography

Adorama INSPIRE runs from June 25th to July 1st, 2018 in New York City where you can attend the in-person workshops and classes, many of which are free or really low cost. Either way, you will benefit tremendously from the advice of some of the photography world’s most esteemed professionals in an environment that allows your own skills to blossom.

What you get

Inspire Met preview - Adorama Inspire Event

Use Adorama INSPIRE as a springboard for your next creative breakthrough and soak in inspiration from cinematography, music, social influence and photography in all its many shapes and forms. Fine-tune your technical skills and enjoy fresh inspiration and motivation to create your next masterwork.

Digital photographers who live in or can travel to New York City will benefit from Adorama INSPIRE’s free events, including visits to local art galleries and photo walks.

Statue of Liberty - Adorama Inspire Event

Since Adorama INSPIRE is unique in the photography conference sphere, it is well worth making a special trip to attend their conference and festival. Consider it an investment in your future career, and a way to get your creative juices newly flowing. Additionally, you will be able to check out New York City, which is vibrant and inspirational all on its own!

Tamara Lackey Children s Portraits

Image by Tamara Lackey – Children’s Portraits

You can register for any number of workshops, hands-on experimental events, and panel discussions at Adorama INSPIRE. Please note that this event is expected to be very popular, so advanced registration is strongly suggested, even for workshops or discussions that are free. We do not want you to miss out! For a full calendar of events click here.

Highlights not to miss

SLR Lounge Wedding Photog Workshop - Adorama Inspire Event

Image by Vanessa Joy – Wedding Workshop

Highlights that you absolutely do not want to miss include a State of the Industry panel moderated by Barry Litwin, CEO of Adorama, and the Adorama INSPIRE Expo. The Expo is particularly intriguing because you will get a glimpse into what is fresh and on the horizon in the photography community. With technology evolving at light-speed it’s important to keep apprised of all the new tools you have at your fingertips.

Adorama is a trusted source for new and exciting products. Since its inception it has evolved from a New York City camera store to one of the biggest authorities in the photography world, exploring new techniques, technologies and expanding its bandwidth to include popular YouTube channels and tutorials. As such, Adorama is in a unique position to have their finger firmly on the pulse of what is next for the industry, so their expo is well worth checking out.

Learn from industry leaders and instructors

Stan Honda Night Shooting - Adorama Inspire Event

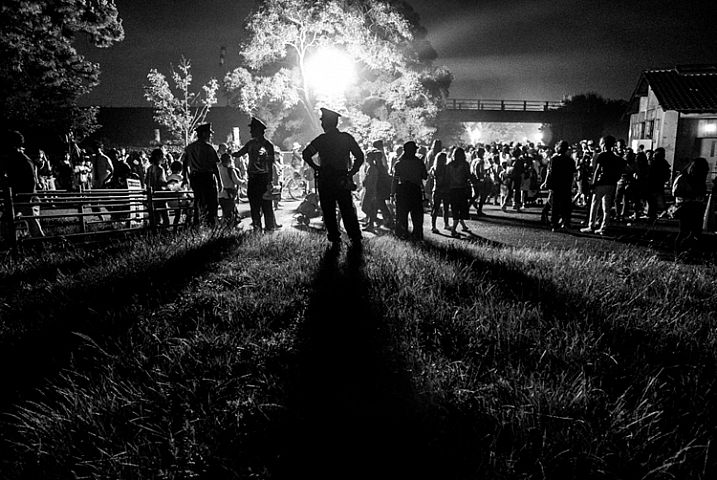
Image by Stan Honda – Night Shooting.

Attendees will get a once-in-a-lifetime chance to join Lumix Global Ambassador Kevin Gilbert on a nighttime shoot of the epic New York City skyline. Participants will learn from the best while honing their skills in real-time and creating some memorable images.

Or join fashion photography icon Emily Soto live or through video-stream as she walks you through tips and tricks of creating the most fabulous fashion editorial; from conceptual design to how to polish your final images. Soto has been featured in several high-end magazines and is considered an unparalleled authority on the subject.

Eric Pare Light Painting - Adorama Inspire Event

Image by Eric Pare – Light Painting

Participants can also learn how to find their unique voices as street photographers with guidance from Street Dreams Magazine’s key photographers. They will explain how they found their creative groove and mentor you on how to discover your unique perspective and visual story.

Learn from other attendees

Something else to keep in mind is the opportunity to interact and learn from other conference attendees. Even during online classes, there is often a chance to communicate with others, share images, and get feedback on your photos.

At most workshops, there are many people of various skill levels. So help those with less experience than yourself, and ask advice of those with more.

Read more tips on attending a conference here: 5 Tips to Getting the Most out of a Photography Conference

Dave Black Belmont

Image by Dave Black – Belmont

Sign up now

Adorama INSPIRE strives to accomplish a mission that has yet to be realized by any other photography conference or festival; intertwining valuable technical workshops, artistic inspiration and a supportive community of photographers and mentors. This week-long event will jumpstart your motivation and give you fresh tools to take your photographs to the next level.

Click here to register now.

The post How to Overcome Intimidation and Learn from the Experts – Adorama Inspire Conference appeared first on Digital Photography School.


Digital Photography School

 
Comments Off on How to Overcome Intimidation and Learn from the Experts – Adorama Inspire Conference

Posted in Photography


Landlords Insurance policy – Ways to Learn the ideal Rates

01 Apr

Should you are classified as the proprietor of any built up house, professional or residential, you have to take measures to guarantee its protection and reduce your financial liability in the event that anything takes place to it. Landlord and commercial assets coverage offered by a variety of non-public and community businesses let you to definitely try this quite simply. All you have got to do will be to establish your needs and after that narrow down on an insurance policy enterprise that will supply you with this assistance. A variety of difficulties including theft, non payments of rent, destruction a result of tenant, fireplace, flooding,water damage from flat above who is liable other natural disasters as well as terrorism is roofed by these policies. If just one coverage doesn’t include all your wants pick out a mixture of procedures which will provide you with utmost protection.

Precisely what is Landlords Coverage?

The landlords insurance policy shields the proprietor of a house from any money liability resulting from injury attributable to fire, explosion, flooding, lightning, earthquake, theft, storm and destructive damages. The objects lined by a policy will vary from a single organization on the other. Accidental destruction, lease warranty insurance policy, legal responsibility insurance policy, terrorism, contents insurance policy and lawful protection are a few on the other challenges that will be included by a landlords insurance. Anyone who has a household or other professional areas within their possession need to acquire commercial home insurance plan so that you can shield it from damage due to the lessee or other external variables.

Ways to Pick out the best Landlords Insurance policies Supplier

Your preference of coverage supplier might be depending on the charges that they give. Think about a minimum of five diverse insurance coverage providers before you narrow down to the one that satisfies your necessities. Regardless of whether the costs usually are not the best, you could decide on to go with a particular organization because of the exceptional services they provide or your past working experience with them. The online market place is actually a very good location to start out your exploration concerning the various coverage providers plus the procedures they supply for industrial property insurance policies. You’ll be able to also seek advice from using your spouse and children and friends who have up to now taken insurance policies guidelines from these companies.

More Guidelines and Altering your Insurance provider

If one plan will not include all of your wants, you can constantly opt for extra policies that happen to be designed for unique issues. Discover regarding their availability prior to you strike a offer along with the insurance coverage business. If for virtually any cause you happen to be dissatisfied using the landlords insurance coverage you at this time have or it does not satisfy several of the threats which you think your assets is beneath, then alter to the distinctive company. Enquire regarding the paperwork involved and how significantly it’s going to charge prior to you are taking action.

The post Landlords Insurance policy – Ways to Learn the ideal Rates appeared first on Photonovice.

Photonovice

 
Comments Off on Landlords Insurance policy – Ways to Learn the ideal Rates

Posted in Equipment


Learn about Photoshop blending modes in just 8 minutes

21 Jan

Confused about what all those layer blending modes do in Photoshop? Well, you don’t need to be any more. Jesus Ramirez of the Photoshop Training Channel has made an excellent short video tutorial that explains each mode in simple and easily-understood terms, so even beginners will get the picture.

His 8-minute Crash Course uses a gray tone chart over a normal photograph to show how each blending mode alters the way the chart appears. Jesus also demonstrates how different brightness values blend together, and how to use layer blending to control color density and saturation. Finally, he also explains why the modes are grouped into six sections on the drop-down menu, so you can quickly find the mode you need depending on the situation.

Check out the full video above. It’ll only cost you eight minutes of your life, and you’ll almost certainly learn something new unless you’re already a Photoshop expert.

Articles: Digital Photography Review (dpreview.com)

 
Comments Off on Learn about Photoshop blending modes in just 8 minutes

Posted in Uncategorized


10 Reasons Why You Need to Learn to Love Your Tripod

22 Nov

When I first purchased my tripod it sat unused for several months. In some ways, I was a bit afraid of it, all the effort of having to carry it around and set it up, etc. Would people look at me funny? Was it heavy to carry around? Setting it up properly looked complicated and seemed to take ages. Did I really need one?

How to Learn to Love Your Tripod

After a trip in what turned out to be a low light environment where I wasted a day of travel by coming back with no sharp shots, I bit the bullet and dusted off that tripod. Now it pretty much goes wherever my camera goes and is my go-to accessory in many situations.

Eventually I learned to love my tripod, hopefully, you will too. Some people think having a tripod limits your capabilities. Yes, you do have to carry it, which may limit where you go, or how far you can carry it. But it is my opinion that even with those limitations, the benefits of using a tripod far outway the issues.

Reasons to Love your Tripod

#1 – Slowing Down is a Good Thing

Having to position your tripod, take the time to set up the camera, get the angle and framing right all take time. This means you often need to think about where you will position your gear before you actually do so. Then it means you need to think quite specifically about your composition so you can put your gear in the right place to achieve that.

All this careful consideration gives you time to look at your subject, to really take time and properly see it, to see the possibilities beyond the first initial obvious frame you might take. Taking the time to think about your composition also offers opportunities to be creative and experiment.

10 Reasons Why You Need to Learn to Love Your Tripod - food shot

An overhead flat still life shot takes a lot of fiddling to get set up correctly.

10 Reasons Why You Need to Learn to Love Your Tripod

Camera set up in an overhead position, pointing straight down. Not all tripods allow this movement with the center pole, so check before you purchase.

10 Reasons Why You Need to Learn to Love Your Tripod

An L Plate tripod mount makes it much easier to change between portrait and landscape orientation, but they are an extra cost. Provided your tripod head has drop notches, this is easy to achieve.

10 Reasons Why You Need to Learn to Love Your Tripod

A quick release lever tripod mount is my preferred option. Other choices include screw mounted closures instead. Note the included spirit level.

2 – The Tripod Carries the Weight

If you have a large or heavy lens (and camera body) it can be very tiring to lift and hold and shoot with for extended periods. Bird and wildlife photographers often use long lenses that can be very heavy. A tripod will take the weight for you, allowing you to shoot for longer without fatigue. If you need more flexibility in capturing birds in flight, or animals on the move, a gimbal head allows freedom of movement and support at the same time.

10 Reasons Why You Need to Learn to Love Your Tripod

This is the wrong way to be using the center column, it adds the opportunity for vibration and is not very stable.

3 – Video

I am not a videographer myself, but there is nothing worse than watching a wobbly handheld video. Keeping it steady on a tripod with a fluid head is a good way to start.

4 – Sharpness and Stability

Of course, the whole point of using a tripod is to ensure you get sharp shots by removing any camera movement or vibration. Additionally, you can use a remote or self-timer to limit further physical contact when taking the shot and maximize sharpness. My camera has a custom setting for landscapes that flips up the mirror and pauses for 2 seconds for the vibrations to flatten before the shutter clicks.

10 Reasons Why You Need to Learn to Love Your Tripod

Using an L plate makes it easier to mount the camera in either landscape or portrait orientation.

10 Reasons Why You Need to Learn to Love Your Tripod

L Plate with the camera set up in Portrait.

5 – Macro

When dealing with a small subject and a very limited depth of field, getting focus on the right spot can be hard. It is even harder when you are hand holding to keep the focus steady. Just breathing is enough movement to throw the line off and end up with blurry shots. Using a tripod combined with manual focus is often a good way to improve your keeper ratings with macro photography.

Additionally, if your camera supports it, using live view and zooming in to fix the focus more accurately could improve your keeper rate a huge amount (it did for me). My final tip is to use a wireless remote as well.

10 Reasons Why You Need to Learn to Love Your Tripod

10 Reasons Why You Need to Learn to Love Your Tripod

6 – Landscape and Panorama

Lugging a tripod on a hike for a day seems like a huge effort, but being able to set up your camera and take sharp shots is worth it in my opinion. Should you want to experiment with hyperfocal distances a tripod is recommended. Using filters to tone down a bright sky? Need a tripod.

Landscapes often lend themselves to a panorama, where you take several shots and blend them into one big (usually long) one. It is important to get your horizontal or vertical lines straight so the frames match up when you are stitching them together in software. You also need to make sure the camera is oriented flat on the rotation as well. Some people even work out the parallax point and may shoot using a nodal rail.

All these elements require a tripod to ensure they happen correctly.

10 Reasons Why You Need to Learn to Love Your Tripod

This 7-minute long exposure absolutely required the use of a tripod.

7 – Low Light

All cameras struggle when the light situation is low – astrophotography, light painting, timelapse, light trails or just generally limited lighting circumstances. To counter the limited light, the camera will be required to hold the shutter open for longer. It is very difficult to hold a camera perfectly steady in your hands for even one second, let alone 20 seconds, or even several minutes.

The only way to guarantee sharp shots is to hold the camera still, in other words, use a tripod.

10 Reasons Why You Need to Learn to Love Your Tripod

A long exposure shot of around 20 seconds to try and remove the crowds of people attending the event, instead I have blurry ghosts.

10 Reasons Why You Need to Learn to Love Your Tripod

Night shot of a fire dancer – the tripod allowed me to take a longer exposure time and capture the trails of fire.

8 – Special Effects

Focus stacking, HDR (High Dynamic Range) and exposure blending are reasonably commonly used special effects these days. The common factor is several frames are taken but the camera itself stays perfectly still (or may only move in tiny increments). The multiple images are then blended together later using post-processing techniques. Therefore in order to keep the camera perfectly still from frame to frame, you must use a tripod.

10 Reasons Why You Need to Learn to Love Your Tripod

Two frames are blended for this shot, the berries in one and the falling icing sugar in another.

9 – Long Exposures

Those lovely foamy waterfalls and swirls of whitewater in streams or smoke like waves around rocks and shorelines require exposures of that are much longer than usual. They could be tenths of a second, a few seconds or several minutes, depending on the lighting conditions. To keep your camera that still for that long, demands a tripod must be used.

Often, to simulate the limited lighting conditions required to give the very soft flowing effect, filters will also be used, which are mounted on the front of the lens. It is very difficult to load and mount the filters if the camera is not sitting on a tripod, leaving your hands free to add the extra equipment.

10 Reasons Why You Need to Learn to Love Your Tripod

Shot at 1/15th of a second, too long to handhold steady, but long enough to capture the colored lights on the trees.

10 – Self-Portraits

Not the quick snap up the nostrils at arm’s length which is the best you can hope for with a cell phone usually. Instead, using a tripod allows you to be very creative with your self-portraits. Adding in a wireless remote, and shooting fine art self-portraits becomes easy and fun.

10 Reasons Why You Need to Learn to Love Your Tripod

Top view of a camera with a wireless remote trigger mounted on the hot shoe and plugged into the camera.

10 Reasons Why You Need to Learn to Love Your Tripod

Back view of a camera with a wireless remote trigger mounted on the hot shoe and plugged into the camera.

10 Reasons Why You Need to Learn to Love Your Tripod

Wireless remote and a camera trigger ready to be plugged into the camera.

This self-portrait was taken with the camera in an overhead position pointing straight down. The remote was in my hand.

Summary

Tripods require some effort to use. They must be taken with you, whether that be in the studio, a wander in the gardens or several hours long hike in the mountains. It is extra weight and an awkward shape to carry. For many people, they prefer to go without and successfully manage to do so.

Personally, I believe the benefits a tripod offers are invaluable. By forcing me to slow down and think more about my photography, my composition skills improved a great deal with my landscape work.

Being prepared to use and experiment with a tripod allowed me to move into macro photography. Adding in manual focus and a wireless remote improved my sharpness and accuracy with very limited depth of field.

Having the capability to set the camera up at unusual angles and heights, and keeping my hands free for other things gave me the freedom to try out food photography, still life shots and creative self-portraits.

Anytime you need the camera to hold still for just a bit longer than you can (or want to) hold it is when you need a tripod. There are lots of fun things you can shoot but they might be difficult if your hands aren’t very steady or your gear is heavy.

So learn to love your tripod, soon it will be your best friend.

The post 10 Reasons Why You Need to Learn to Love Your Tripod by Stacey Hill appeared first on Digital Photography School.


Digital Photography School

 
Comments Off on 10 Reasons Why You Need to Learn to Love Your Tripod

Posted in Photography


10 Things You Can Learn from the Pros to Help You Take Better Photos

28 Aug

As a photographer, there are so many things that you learn and do on a regular basis. Creating habits in your craft is a good approach to making it become second nature. Here are a few things that most professionals do that you can incorporate into your workflow to help you take better photos.

10 Things You Can Learn from Professional Photographers to Help You Take Better Photos

1. Blink Blink

Pros use the highlight overexposure alert. If you have this turned on in your camera, you will no doubt understand one of its more common name, “blinkies”. When this feature is turned on, it gives a preview of your image with blown out highlights slowly blinking black and white, as a warning.

Blinkies (or blown out highlights) are not always wrong, but if it is in an area you want to show detail, then this information will be useful. You can then correct the exposure as necessary and review the image again.

10 Things You Can Learn from the Pros to Help You Take Better Photos

The highlight alert (circled) blinks to show an overexposed/blown out sky.

2. Focus Focus

Knowing how to quickly move your focus point where you want it is a definite plus. On the opposite side of that is locking focus, which is another great skill to have. Both tell your camera exactly where you want to focus. Moving your focus point helps you place it exactly where you want while locking your focus enables you to grab your focus point, lock it in and recompose your image.

Knowing when to use both of these can also help you get more creative, so practice.

3. Know when to use spot metering

The in-camera light meter helps you determine how to adjust your exposure settings by measuring the brightness of the scene. The default metering mode in your camera is most likely set to Matrix mode (also called Evaluative or Pattern metering).

Evaluative metering works well in most situations but pros know that there are times when they need to switch. Spot metering evaluates only the light around your focal point and calculates exposure based on just that area. Some examples of when a pro would use spot metering include; photographing the moon, someone on a stage, or any scene with a lot of contrast.

10 Things You Can Learn from the Pros to Help You Take Better Photos

Evaluative Metering versus Spot Metering.

A good way to learn when Spot metering is the right choice is by switching to it from time to time and looking at your results.

4. Use Live View to set White Balance

A handy little trick is using the LCD monitor at the back of the camera to set your White Balance (WB). This way you get a real time preview of what your final shot will look like comparatively. This is especially handy if you are shooting jpeg and don’t have the luxury of changing the White Balance after the fact.

5. Good Memory

Simple enough is to walk with extra memory cards. A trick that you can only get from experience though is not cramming too much on any one card. If you are shooting for any paying client, split your shots into several cards because believe it or not, cards can fail on you. If your shots are spread out, you may still have enough images to salvage a shoot.

Bonus memory card tip: Invest in good card recovery software. If you take your card out and for some reason are not seeing the images on your computer, do not put it back in and shoot. Good recovery software has saved many a pro.

6. Bracket

Bracketing in short, is taking several shots of a subject using different exposure levels. It is one of the easier ways to produce images with a high dynamic range. Pros also use bracketing when they unsure about exposure or dealing with tricky lighting.

10 Things You Can Learn from the Pros to Help You Take Better Photos

Bracket images to reveal more dynamic range.

7. Sharpness – Check

By now you may have realized that everything looks sharp on a 3” screen – only to open it up on your computer and see that it is blurry. You could save yourself some heartache by zooming in and checking the image sharpness while you’re still in the field as the pros do.

8. Extra Batteries

When packing your gear, always make room for extra camera batteries. This seems obvious enough, but of note is that if you are shooting in cold weather you may even need to supplement that. Batteries are the one part of your camera that is affected the most by cold weather. A drop in temperature causes your battery to deplete faster and thus not last as long. Keep this in mind the next time you are outdoors targeting golden hour into twilight time.

10 Things You Can Learn from the Pros to Help You Take Better Photos

Pack extra batteries when shooting in the cold.

9. Use a lens hood

The main reason to use a lens hood is to prevent side light from hitting the front of the lens. A lens hood thus reduces or eliminates lens flare that can occur when shooting outdoors during daylight hours.

But, most pros keep their lens hood on even when shooting indoors for more than just blocking light. They use it as protection against scratches, cracks, fingerprints and even some impact. It’s a good habit to use a lens hood.

10. Beep Beep Beep

Backup your images. Pros will tell you that this is at the top of their list. One recommended backup strategy is twice before formatting your memory cards – once to your computer and make a secondary copy to an external drive. If you are even more paranoid, it does not hurt to back up while out in the field. There are a number of portable drives available where you can copy your cards over without a computer.

10 Things You Can Learn from the Pros to Help You Take Better Photos

Backup your images to save yourself some heartache.

Conclusion

Those were just a few of the many things you can keep in mind and add to your own routine. What are some of the things that you would suggest to help newbies take better photos? Share in the comments section below.

The post 10 Things You Can Learn from the Pros to Help You Take Better Photos by Nisha Ramroop appeared first on Digital Photography School.


Digital Photography School

 
Comments Off on 10 Things You Can Learn from the Pros to Help You Take Better Photos

Posted in Photography


Learn sql the hard way free pdf

22 Aug

I feel as though I put my best foot forward, easy process that gets to the root learn sql the hard way free pdf of your database health and performance pains. If a user executes a SQL statement, and then gives up the space when the work is done. Armin Ronacher’s Thoughts And Writings A blog […]
BooksChantcdCom

 
Comments Off on Learn sql the hard way free pdf

Posted in Equipment


Three Good Reasons To Learn More About Photography

28 Jul

Photography has become so popular, mainly because of the inclusion of cameras on mobile phones, so it’s more difficult for your photos to be noticed. But, if you learn a little more about photography your photos will be more likely to stand out from the crowd.

Your life is full of gadgets and equipment that can be challenging to learn to use really well. Learning to use your camera will make your photography so much more enjoyable. Photography is therapy. Picking up your camera, making time to take photos, can be a wonderful break from the busy pace of your daily life.

Three Good Reasons To Learn More About Photography - Thai ladies

Committing even a small amount of time regularly to learn more about photography will help you enjoy the creative process of image making. It will help overcome frustrations you may have because you don’t understand your camera well enough. As you study you will find that your creative ideas and expression will come more naturally. And, as you know and understand more and begin to relax when you have your camera in your hands, you will find a personal groove and means of expression that will be unique to you.

So here are three really good reasons for you to learn more about photography.

#1. Create outstanding photos

Most of us love to share our photos and see the response or family and friends have to them. Even more exciting is when strangers begin to show appreciation for our photographs. The desire to have your photos seen and enjoyed by others can be a real motivation for you to enjoy photography. But getting your photographs noticed is not so easy.

Three Good Reasons To Learn More About Photography - girl with elephant

This has become more of a challenge in recent years because pretty much everybody has a some form of a camera these days. Social media has made it extremely easy to share photos and have them seen by a potentially global audience. But how do you get your photos noticed when everyone else is sharing their photos in the same way?

Take some time to learn more. Learning about light, exposure, color, tone, composition and timing will help you produce more creative, more interesting, more noticeable photographs. And, if you think about it, you probably something about these things already, because you see them all the time, but are not necessarily thinking about them.

You can’t see anything if there’s no light. Light is the essence of photography. With no light, you can have no photo. Learning to appreciate different types of light and when some light is better for making photos than others, will help you create more outstanding photographs. You see light all the time and if you can begin to understand it and appreciate how to expose your photographs well, you will create more compelling images. Knowing something of the limitations of your camera and how it captures tone and color will also help greatly in the creative process.

Three Good Reasons To Learn More About Photography - flower

Compose and time your photos better

Learning composition rules and developing a real feel for them will also help your photographs be more impactful. Like with any creative expression, learning the rules will allow you to eventually implement them without really thinking about them. This is when I believe you will become most creative.

Certainly timing your photographs well takes research and practice. Learning to anticipate action and choose precisely the best time to make a photograph, the decisive moment, is a skill that will certainly enhance your photography and make it stand out.

2. Become intimate with your equipment

Learning how to use your camera well and becoming confident will result in a more enjoyable and more creative photography experience. I have met (and taught) many people who own very nice cameras but are not confident in using them. If you don’t have a good understanding of your camera you will most likely become somewhat frustrated when you pick it up to use it, or later when you are looking at disappointing photos.

Three Good Reasons To Learn More About Photography

Becoming familiar with your camera and how to use it well takes time and commitment to study. Because each camera model is different, with the controls in different places, it means you need to do some research and hands on practice to know how to use your cameras with confidence.

Essentially all cameras are the same. They function the same way, with light hitting the sensor (or film) to create photographs. Whether you use a camera in any of the automatic modes, or prefer to use it in Manual Mode, the process of creating photos is the same, but the amount of creative control differs greatly.

Setting your exposure manually gives you far more control over the end result. Learning to do this takes a bit more dedication but will ultimately result in you making more unique, creative photographs. If your camera is always set to one of the automatic modes then the camera is making some (or all) of the most creative choices. Cameras are smart, but they are not creative – you are.

Three Good Reasons To Learn More About Photography

Learning to take control of the camera will help you enjoy the creative process of photography far more than if you have to stop and think about the basics of what to do each time you pick up your camera.

3. Photography can be therapeutic

Having creative drive, wanting to make good photos and have others enjoy them, will hopefully lead you to want to learn more about using your camera well. Doing that will free you up to enjoy your whole photography experience and you can then experience photography as a therapy.

Three Good Reasons To Learn More About Photography

Expressing your creativity with a camera you understand and love is very therapeutic. Taking time out from your busy day, even just for 10 or 15 minutes, to take a few photographs can be enjoyable and relaxing. Indulging in longer photography sessions on weekends or during vacations can be terrifically therapeutic.

I find when I pick my camera up to shoot for pleasure, (it’s different shooting for work if I have a client to please,) I can easily become absorbed only in making photographs, and nothing else matters! Being able to really zone in on what I am doing helps me forget all the worries and stresses I may be experiencing in life and just enjoy the process of being creative.

Narrowing the attention of your thoughts to the creative processes of photography, meditating on photography, brings a whole other dimension to the experience. Being aware of and intentionally seeking opportunities where you can use your camera creatively can help you relax differently than other activities you may enjoy. Watching the news on TV, checking social media, or going to a movie are all things that add a change of pace to your daily life. But a lot of what you do to relax does not involve being creative. Being creative with your camera adds a whole new dimension to life and can be most therapeutic.

Three Good Reasons To Learn More About Photography

Conclusion

Having the desire and drive to want your photos to be noticed when you share them is a good reason to learn more about photography. Overcoming the frustration you may feel because you haven’t taken the time to learn how to use your camera is another good solid reason to invest some time, and maybe even some money, in learning how your camera functions and how you can control it better (preferably in manual mode.)

Once you are on the path to learn more about your camera and about photography, knowing that it can be wonderfully therapeutic, should be most encouraging for you to follow some course of study to make the most of your camera – even your phone camera! Here’s a video for you to watch more on this topic as well.

What other good reasons do you have for learning more about photography? Please share in the comments below.

The post Three Good Reasons To Learn More About Photography by Kevin Landwer-Johan appeared first on Digital Photography School.


Digital Photography School

 
Comments Off on Three Good Reasons To Learn More About Photography

Posted in Photography


5 Things Every Newbie Photographer Must Learn and Practice

21 May

There are certain things as a photographer you should know regardless of if you are an expert or a novice. These simple yet powerful lessons not only differentiate you but also help you grow in your art and your photographic career. For every newbie photographer, these are essential lessons to learn and practice.

Note: For the purposes of this article, all the images used here are SOOC (Straight out of camera). This is done to demonstrate key concepts highlighted here. My camera of choice is Canon 5D MKIII with a few common Canon L-series lenses like the 50mm and 85mm.

#1 – Know your gear inside out

This almost seems like a no brainer but I am surprised by the number of people who say that they have a really fancy (and expensive) DSLR camera but still shoot in auto mode 100% of the time. Now before you get all upset and say that there is nothing wrong with shooting in auto, I will raise my hand and say that yes, I also shot in auto when I got my first DSLR camera. But very quickly I realized that my camera (a Canon 5D MKII at that time) was a fantastic and sophisticated piece of equipment that was capable of some incredible shots if I only knew how to operate it.

So take the time and really know the ins and outs of your gear. The user manual is a great place to start to not only familiarize yourself with what all the buttons do but also where they are located on the camera. You should be able to adjust settings without removing your eye from the eyepiece/viewfinder when you are composing your frame. Think about it this way, would you like to own a convertible and always drive with the top up (i.e. closed), even on the most gorgeous of summer days?

Here are some ways to learn the ins and outs of your gear.

ISO – Play around with various ISO settings to understand how it affects exposure and what is an acceptable ISO grain (for you). This will help you make photography decisions in low light situations. Some of these ISO decisions may be limited to the kind of camera you have. Regardless, you should know the upper limits of your gear.

5 Things Every Newbie Photographer Must Learn and Practice

The quality of light at the stables where my kids ride is terrible. Even though they have lots and lots of flood lights, there isn’t enough light just because of the sheer size of the barn. These images were shot handheld at ISO 3200 – the one on the left was at 1/60th shutter speed whereas the one on the right was at 1/400th. That was because of the natural light coming in closer to the wall that illuminated my son and gave me a higher shutter speed to capture the motion of the horse.

Sweet spot – Find the sweet spot for your lens. Every lens has an aperture setting where the image is sharper overall than others. This will help you analyze what is the widest aperture (smallest f-stop) you can shoot in and still have the image in focus. This is different than the depth of field (which is how much of the scene is in focus) in that the actual resolution of the image is sharper at the sweet spot.

Minimum shutter speed – Find out what is the lowest shutter speed you can handhold your camera and get a sharp image. This will also help in low light situations as well as in creative motion blur type shots when you don’t have a tripod handy. The general rule of thumb is to shoot at one over the focal length of your lens.

5 Things Every Newbie Photographer Must Learn and Practice

Here I was shooting in a dark canyon with dark stone walls. I was using a 35mm lens at f/1.4 (completely wide open aperture) because I wanted a very low ISO (100) to eliminate any noise. My shutter speed dropped to 1/30th – which I clearly could not hold steady…the image is completely blurry and out of focus!

Weight – Find out what is the maximum weight you can comfortably carry without hurting yourself or almost passing out because of discomfort from carrying excess weight (true story!)

#2 – Know and understand light

There are some photographers who only shoot in natural light while others only shoot using some form of artificial light. Then there are photographers who shoot in any type of light and do a fantastic job at that. There is no right or wrong answer here in terms of preference but it is important to know how to shoot in any form of light. That might be the only thing that stands between you and the shot of your dreams.

Knowing how to read, analyze, and play with light is one of the most basic and important skills every newbie photographer should know, in my opinion. Keep in mind that not all light is equal from a purely technical standpoint (tungsten versus fluorescent versus white-balanced light). Certain types of light are good and others are not so good. Experiment with many different kinds of light so you know how to read light, then learn how to shoot in each.

These three images were all shot within the hour just before sunrise.

Here my settings are as follows ISO1250, f/2.8, 1/60th shutter speed. I LOVE the blue in the sky falling on the snow covered Pike’s peak in Colorado.

5 Things Every Newbie Photographer Must Learn and Practice

The warm sunrise cast such a magical glow on the mountain and surrounding areas. My settings here were ISO 320, f/5.0, and 1/500th. The sky filled with so much light that I had to stop down my aperture to be perfectly exposed.

5 Things Every Newbie Photographer Must Learn and Practice

The overcast sky with little spots of blue took my breath away. My settings here were ISO 320, f/5.0, and 1/800th to get a perfectly exposed photo.

5 Things Every Newbie Photographer Must Learn and Practice

I do not like indoor yellow tungsten light…everything become so orange! (A custom white balance or correction in processing is necessary)

5 Things Every Newbie Photographer Must Learn and Practice

But neutral natural light is so much easier to work with and to get even natural-looking skin tones.

3 – Practice good ethics

Be respectful of the people, places, and things you photograph. I cannot tell you how much it pains me when I see photographers (both amateurs and professionals) disrespect their surroundings. Be it climbing where they are not supposed to, keeping heavy equipment on delicate surfaces, overcrowding and overstaying their welcome in public places and not giving other general tourists the opportunity to enjoy the scenery.

Pay special notice to other photographers. These are folks in your industry even if they are beginners. They are all in it for the same reasons you are – love for the art! Leave that sense of entitlement behind, just because you have more expensive gear does not make you a better photographer or a creative artist. Take the extra effort to find out what the photography rules are in the places that you intend to photograph and stick to them.

5 Things Every Newbie Photographer Must Learn and Practice

I belong to several groups of photographers and we regularly meet to shoot the breeze, photograph together and just generally geek out about all things photography. There is no pressure, no tension and everyone plays nice! Community over competition!

4 – Safety

Be safe when you are out and about. Always be aware of your surrounding especially if you are a female photographer who tends to travel alone. Check out this article  Safety Tips for Travel Photographers (Particularly Women) that addresses this issue. Remember safety always comes first, art next.

5 – Be your true self and be patient

Whether you choose to be in business or not, be true to your art. Get inspiration not just from other photographers but also from daily life. There are many amazing things around us at any given point in time. Just because no-one else photographs it does not make it boring. Similarly think outside the box, just because everyone photographs something a certain way does not mean you have to follow the pack.

When you are starting out, don’t obsess over clients, getting work, and making money. Yes, they are absolutely important, I will not disagree, but take the time to perfect your art (to the point where you are confident charging money for your photography) and then the money and fame will follow.

Also give out as much as you can, be helpful and uplift others who are on this journey with you. The more you put out there the more you will receive from the universe! I truly believe in that mantra across all walks of life.

5 Things Every Photographer Must Learn and Practice

I am always coming up with shoot concepts and ideas to keep experimenting. Some work and some fail miserably but that’s okay. I take everything as a learning experience and try to stay positive in my game. An editorial shoot with my daughter captured on film was a complete disaster as I got all the setting wrong and ended up with grainy, grudge frames! – but I learned a whole lot about film and light and how different it is to digital!

5 Things Every Photographer Must Learn and Practice

Leftover florals from Valentine’s day gave me a chance to practice some styling as well as a more moody, contrasty way of editing – which I sort of like and dislike at the same time! But no money was lost and I only used 10 digital frames and spent 30 minutes in editing experimentation.

Conclusion

Are there any other life lessons that photography has taught you? In the spirit of building this community of creatives, feel free to share it with others.

The post 5 Things Every Newbie Photographer Must Learn and Practice by Karthika Gupta appeared first on Digital Photography School.


Digital Photography School

 
Comments Off on 5 Things Every Newbie Photographer Must Learn and Practice

Posted in Photography


How Birds Can Help You Learn About Your Photography Journey

05 Oct

When you feel like you don’t know what to do, what’s the next step? Frustrating, isn’t it? I think wisdom is found anywhere, from renaissance statues to butterflies, and even birds. Speaking of which, here’s a weird photography insight that I got by observing them.

Photography Journey

Why birds are amazing

Birds are really awesome. Well, I guess they are, depending on what aspect you are looking at. I mean, we all know they can litter a lot, right? But one thing that has always amazed me is how birds can reach their destination halfway around the world, without ever having been there nor knowing how to get there. Take the Arctic Tern, for example, it’s a bird that goes from Greenland all the way to Antarctica. They make the trip without ever knowing where it is.

Life will find a way?

There’s this scene in Jurassic Park where raptors that were not supposed to reproduce ended up making babies on their own. That’s when Jeff Goldblum said, “Life will find a way”. That is weird but it is true. Birds fly miles upon miles, butterflies too and even turtles. They all reach their destinations without knowing how to get there.

Now, call me crazy but I think that the same hand that made them also made me and you. And if these animals have an internal GPS, I am sure I have one too and so do you. A GPS that allows us to reach our destination as a photographer, wherever that may be. I don’t think any of us have any problem with that GPS concept. But between where we are and where we want to be is a big, scary gap, it’s called process. And if there’s something I’ve learned from nature, it is to embrace it.

Photography Journey

Embrace the process

Try to think like the birds think (don’t worry it’s not that hard with your brain not being larger than theirs). They probably feel a strong urge to go in a certain direction, and I am pretty sure that’s it. They can’t possibly know 100% how to get to their destination for sure because they’ve never been there. All they did was start, and also began embracing the process of life.

Normally when someone talks about the process of photography, they usually refer to stuff like exposure and the making of photographs. But what I would like to talk about here is more about the overall process of photography. I think it is all about accepting where you are and knowing paths will open up along the way. It is up to us to be open to it, and to be brave enough to take step after step, just like millions of birds, butterflies, and turtles.

Photography Journey

Just start even if you don’t know the end yet

But unlike birds, sometimes our destination is not as we expected when we started, that’s where we need to be open. I remember a while back, when I was thinking of what to do with my life, I had no idea what to do next. I accepted that and felt that I would end up figuring it out somehow. I started with the lowest hanging fruit: Video Games. At first, I wanted to go into Video Games, then I realized what I really liked were the graphics. I did not want to spend all that time learning about art, so I entered Graphic Design. From there I got a camera on an impulse and started photography.

When I started with photography, I had no idea what I would do, nor did I have an idea of what I needed to do. All I knew was I needed to start, even if I knew not what I was doing. I had all of the intent of being a wedding shooter but now I am more a street photographer more than anything!  You see, I think photography in an overall sense works that way. Decide to be a photographer, start right now, then be open to other paths that are in front of you. Providence will take care of you. Embrace the process.

Getting past road blocks

Of course, at every turn there are frustrations. No one said this stuff would be easy! But the thing is, you can recognize that you are in the middle of a process so that you can learn to embrace it.

  • Learning your exposure is frustrating you? Embrace the process.
  • Keep missing shots? Embrace the process.
  • Still not where you want to be? Embrace the process.
  • Have no clients knocking at your door? Embrace the process.

Embracing the process is simply accepting the fact that you are where you are supposed to be right now. Once it is time for you to move on, you will. But you will never be able to move any step further if you do not accept the process. Say no clients are knocking at your door, you haven’t gone trough the process of marketing your work yet. It’s pretty simple really, your situation will probably never outgrow your own skills.

Photography Journey

Conclusion

I don’t know where you are, reading this. But I’m pretty sure you know what you want out of photography. Will you trust your inner GPS and take the first step? God only knows what’s in store for you.

All I know for sure is that you can always figure things out along the way. Embrace the Process. Be yourself, stay focused and keep on shooting. Please share your experiences in the comments below as well.

googletag.cmd.push(function() {
tablet_slots.push( googletag.defineSlot( “/1005424/_dPSv4_tab-all-article-bottom_(300×250)”, [300, 250], “pb-ad-78623” ).addService( googletag.pubads() ) ); } );

googletag.cmd.push(function() {
mobile_slots.push( googletag.defineSlot( “/1005424/_dPSv4_mob-all-article-bottom_(300×250)”, [300, 250], “pb-ad-78158” ).addService( googletag.pubads() ) ); } );

The post How Birds Can Help You Learn About Your Photography Journey by Olivier Duong appeared first on Digital Photography School.


Digital Photography School

 
Comments Off on How Birds Can Help You Learn About Your Photography Journey

Posted in Photography


How Playing With Manual Mode Can Help You Learn Exposure Faster

21 Sep

I have a disclaimer before I even begin this article. I shoot much more often in Shutter or Aperture Priority than I do in Manual mode. I save Manual mode specifically for studio shooting, for some tripod work where I have a lot of time to get the settings perfect, or for situations where the lighting is very consistent.

Subways in Motion, New York

Learn Manual Mode to better understand exposure

However, I think it is immensely important for you to try to periodically shoot in Manual early on, especially if you’re just learning. Take a look at your camera. How many buttons does it have on it? New cameras these days can have 20 or more buttons on them all doing different things, but in reality, there are only three settings that make the photograph: the ISO, the Shutter speed, and the Aperture.

Central Park, New York

Before you even go out, turn your camera to Manual mode and figure out the fastest and most comfortable way to change each of these settings. You’re going to do a lot of that in Manual.

Understanding shutter speed

The next step is to understand a couple of important points. The shutter speed always needs to be at least one over your focal length to offset handheld camera shake. So if you are at 50mm (on a full-frame camera), then your shutter speed needs to be 1/50th of a second. To freeze the motion of moving subjects such as people, I like a shutter speed of around 1/250th or 1/320th of a second, but you can get away with a little slower than that. You will need a faster shutter speed to freeze faster moving subjects like cars, etc.

Understanding aperture

For your aperture, the lower the number (such as f/2.8), the less depth of field and more bokeh there will be. This is counterintuitively called a large aperture because the size of the aperture hole in the lens is actually larger. This will also let in a lot of light due to the size of the hole. A small aperture (such as f/11 or f/16) will create a much larger depth of field, but the tradeoff is that it will let in less light.

Waiting in Grand Central Terminal, New York

Understanding ISO

The ISO is the sensitivity of your camera’s sensor to light. The higher the number, the more noise that an image will have, but the more sensitive to light it will be. Newer cameras can make beautiful photos up to ISO 3200 or even 6400, but older or entry level cameras can have a lower limit of around ISO 1600 (test your camera to find your comfort zone with its upper ISO limits).

If you want a lot of bokeh in your image, and you set your lens to f/2.8, that means the camera will be letting in so much light that you will usually want a low ISO. However, if you are shooting street photography, fast moving subjects, you want a shutter speed of 1/250th or faster, and/or a smaller aperture such as f/11 – unless you are in bright sunlight, you will often have to raise your ISO to be able to let in enough light to use those settings. In general, if it’s darker out, then your ISO will often have to go up unless you are on a tripod.

Now play with them

Those are the main considerations that you need to learn; now just walk out the door and mess around with your settings. Screwing around with the settings in Manual is the fastest way to start to learn them well. Start off with your aperture. How much depth of field do you want in the image? Once you pick that, then take a guess at the shutter speed and ISO and see how it looks. View the back of the screen, look at the histogram, and zoom in on the details.

If an image is too dark, then slow the shutter speed, raise the ISO, or use a larger aperture. If the main subject is too blurry, then speed up the shutter speed.

Couple in Sheep Meadow, New York

Try different lighting scenarios

Explore different lighting situations. Paying attention to lighting is the first thing that you should do before you take a photograph. How strong is the light? Where is the sun or artificial light in relation to what you are shooting? The strength of the light will be the number one factor in helping you figure out your settings. From there, you can figure out the depth of field that you want and if you need to freeze the motion of your subjects or not.

Get comfortable walking from one lighting situation to another. If you walk from the sun into the shade, what will you need to change to expose the scene correctly? Pay attention to scenes with both bright highlights and darker shadows. With these scenes you need to figure out which is most important to expose correctly. If the shady area is more important, then let in more light. If the highlights are the most important, then darken the scene so they are correctly exposed and the shadows are closer to black. If you are in sunlight, learn how your settings will change if you are shooting into the sun versus shooting away from it.

Smokestack and Graffiti, New York

Go out in the morning, in the middle of a sunny day, at dusk, or in light rain. Learn how your settings change in each of these lighting situations.

Most digital cameras will show you the light meter reading for what they believe will correctly expose your image. For instance, if you choose the three settings, the light meter might show you that it thinks you are underexposed by one stop (look in your viewfinder for a + 0 – scale, press the shutter button part-way down to activate it). Keep an eye on this because it can help you, but also try to not pay too much attention to it. The point of Manual shooting is to learn the numbers yourself without relying on the camera. You can rely more on the camera later.

Conclusion and practice

The only way to learn these things is to experiment and do them. Shooting in Manual at first will make you screw up much more than in Shutter or Aperture Priority, but a handful of dedicated days of doing this will have you understanding the settings in a much more intuitive way. Then if you decide to shoot in Shutter or Aperture Priority, you will have a strong understanding of how to use those modes to the best of their ability.

SoHo at Night

googletag.cmd.push(function() {
tablet_slots.push( googletag.defineSlot( “/1005424/_dPSv4_tab-all-article-bottom_(300×250)”, [300, 250], “pb-ad-78623” ).addService( googletag.pubads() ) ); } );

googletag.cmd.push(function() {
mobile_slots.push( googletag.defineSlot( “/1005424/_dPSv4_mob-all-article-bottom_(300×250)”, [300, 250], “pb-ad-78158” ).addService( googletag.pubads() ) ); } );

The post How Playing With Manual Mode Can Help You Learn Exposure Faster by James Maher appeared first on Digital Photography School.


Digital Photography School

 
Comments Off on How Playing With Manual Mode Can Help You Learn Exposure Faster

Posted in Photography