RSS
 

Posts Tagged ‘Landscape’

8 Tips to Avoid Crowds at Popular Landscape Locations

11 May

Photographing popular tourist destinations can at times be a great challenge. Hundreds of people are walking within your frame, and regardless of the direction you’re facin,g it’s nearly impossible to capture an image without people in it.

1

I often visit beautiful landscapes, many of which are popular among tourists, even though I prefer to shoot more unique locations, and enjoy photographing in quite areas where it’s nothing but nature and me. So when I visit extremely crowded landscapes, I get slightly stressed. But these touristic places are popular for a reason.

When I visited the famous Svartifoss, Iceland a few weeks back, I left without taking more than a couple snapshots, most with my phone. Even though the roughly 40 minute long hike is considered challenging by some, I was amazed to see the amount of people gathered around the waterfall, not to mention the bunch of tripods placed all over. It seemed to be impossible to take the classic image with the river leading up towards the falls, as a group of tourists had occupied the entire place.

Even though it might seem impossible to take professional looking landscape images from these places, there are ways to avoid the crowds and enjoy them alone. It all comes down to planning and prioritizing.

1 – Choose the Hour Wisely

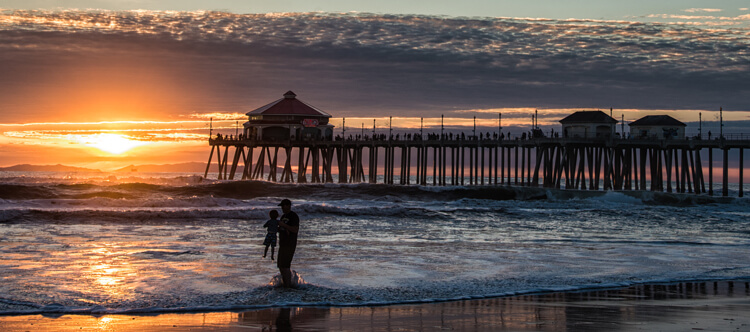
If you’re into landscape photography you may already know that the best time to photograph is during the Golden Hour. This is the time of the day where the sun’s position in the sky is at the lowest, which creates a soft light ideal for photography.

2

2 – Wake Up Early

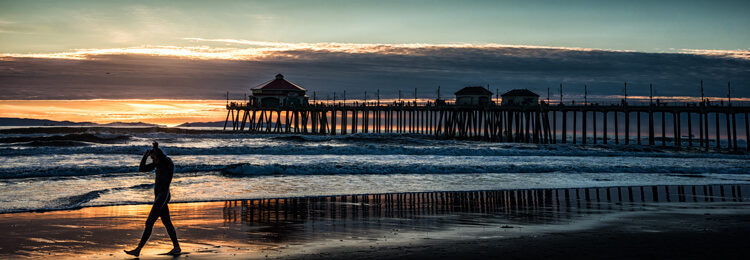
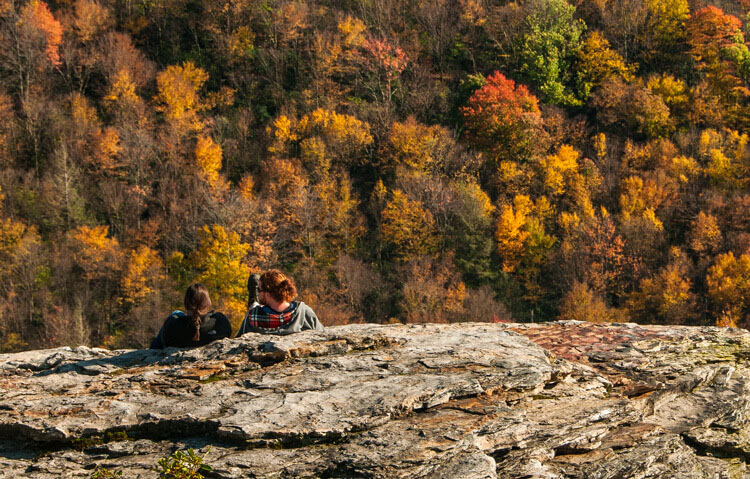
Since many tourists aren’t dedicated photographers, most of them won’t be awake and out in nature for sunrise. Normally they prefer spending a couple extra hours in bed and having breakfast at the hotel.

3

This is a great advantage for us who wish to capture the beautiful landscapes in optimal light. It’s rare that you meet large crowds this early in the morning, but you may meet a fellow photographer or two. Usually most photographers, and non-photographers, that are up for sunrise try not to get in each other’s way.

About one or two hours after sunrise, depending on what time of the year it is, the first busses filled with tourists begin to arrive. This gives you a lot of time to enjoy these places, and take the images that will be difficult to capture when it gets annoyingly crowded.

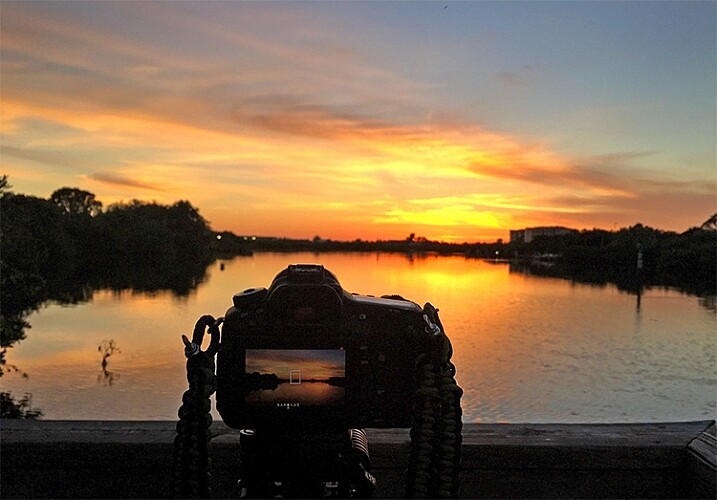
3 – Enjoy the Sunset

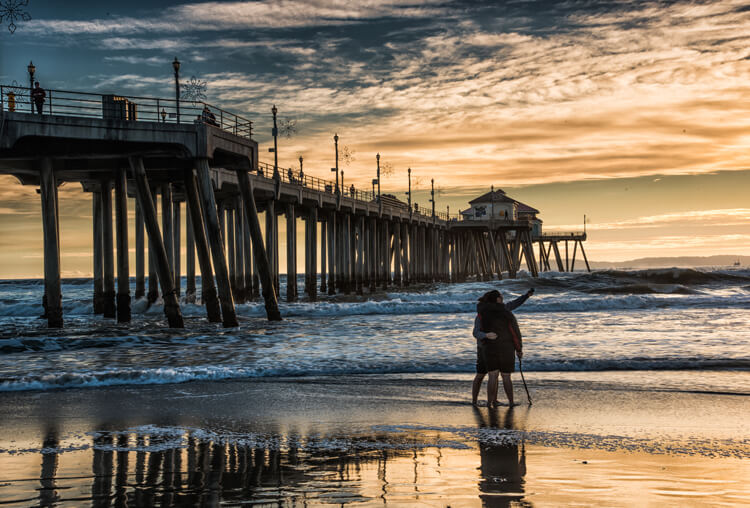
It’s no secret that it’s more normal to be awake for sunset than for than sunrise. Accordingly the crowd will be a larger during this hour, and if you’re photographing close to a large town it might even be very crowded. Since I’m a landscape photographer and this article is mainly focused on avoiding crowds at popular landscape destinations, I won’t get into cityscapes, etc.

4

What you will see when you are photographing landscapes during sunset is that most people present are fellow photographers. Most normal tourists tend to head back towards the town or hotel, for dinner or other activities.

4 – Photograph the Night Sky

If you haven’t photographed landscapes at night yet, I strongly recommend you try it. Be aware though, as it is highly addictive!

Images captured during the night can often be quite different than what you normally see from these touristic locations, since the majority of people prefer to sleep at this time. I would say the lack of sleep is part of a landscape photographer’s life (for both beginners and professionals).

5

Another benefit of photographing at night is that you might witness certain astrological events, such as meteorite showers, or the northern lights in the northern hemisphere. Be sure to bring something warm to drink as it may get chilly throughout the night.

5 – Choose the Month Strategically

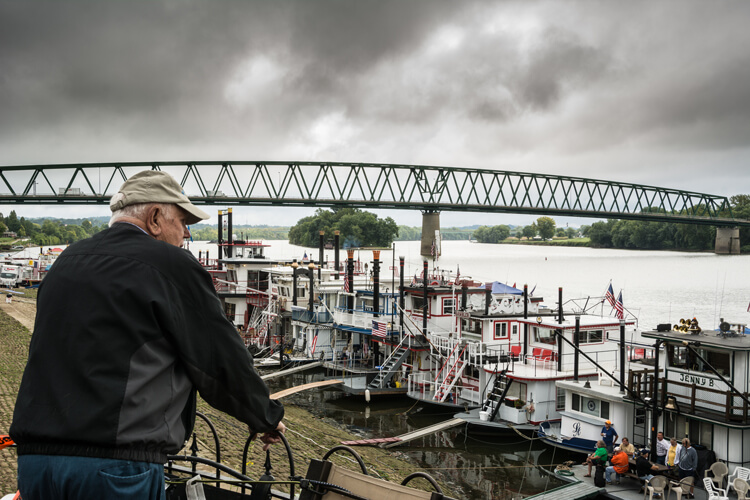
I know that getting vacation days outside the normal holidays might not be possible for everyone, and some locations are definitely best to visit during certain times of the year. But, visiting during low-season is the best method to avoid the crowds.

6

If you want to photograph events such as the Tulip Festival in the PSNW (Washington/Oregon), or the Cherry Blossom in Japan, you have to visit during a specific time of the year, and most likely it’s going to be crowded with both photographers and tourists. While the tips above still will be beneficial, you will most likely not be at these places alone.

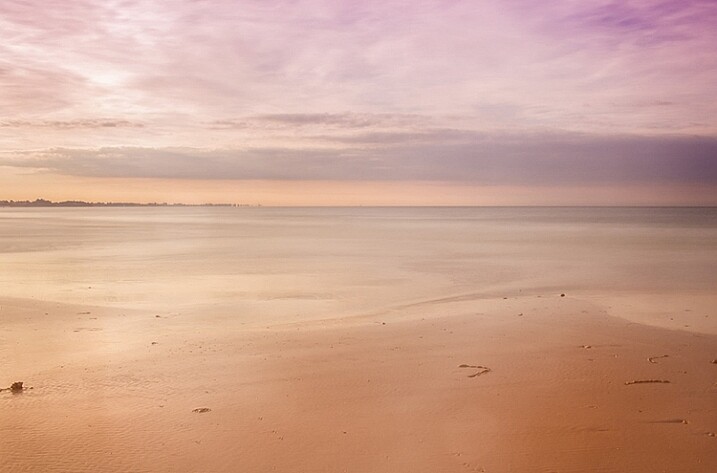
However, if you’re not photographing a specific event, visiting during low season can be a great choice. Not only will you avoid the biggest crowds, you may also be rewarded with some unique scenery and weather.

7

I’ve visited Iceland during low season a couple times, and the results have been great. Yes, it has been challenging with the harsh weather but when the light is good, it’s GOOD!

6 – When the Crowds Won’t Leave

But what if you’re not able to go during low season, sunrise, or sunset? What if there is still a large crowd even during these times? Should you just give up and head back home? Of course not! There’s always a solution, so don’t worry.

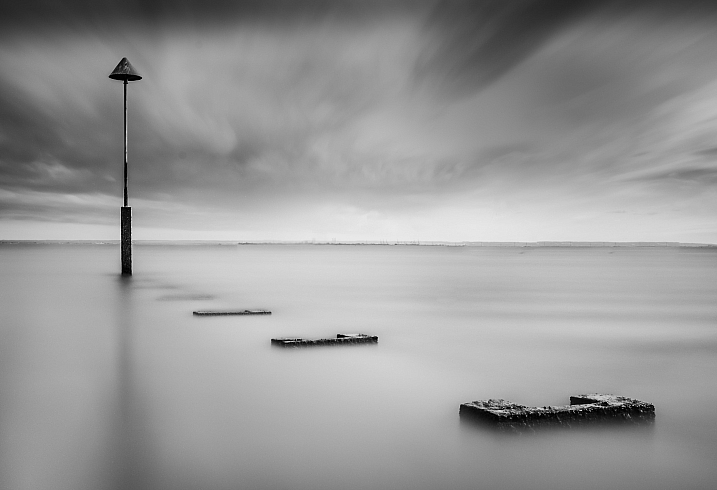
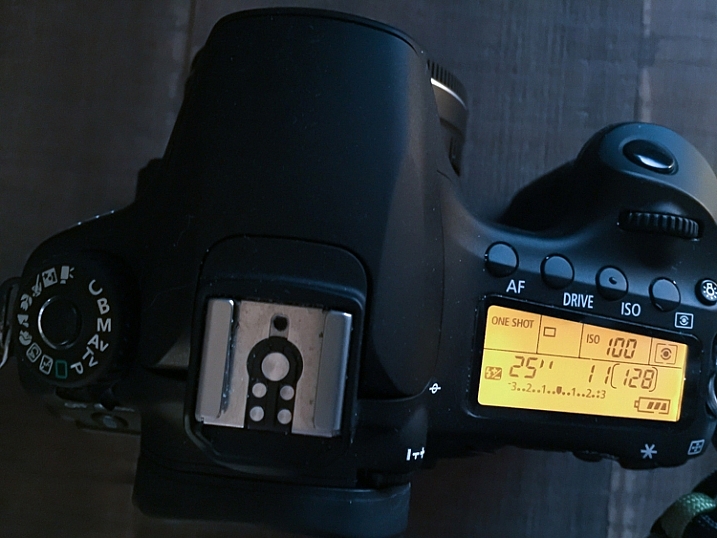
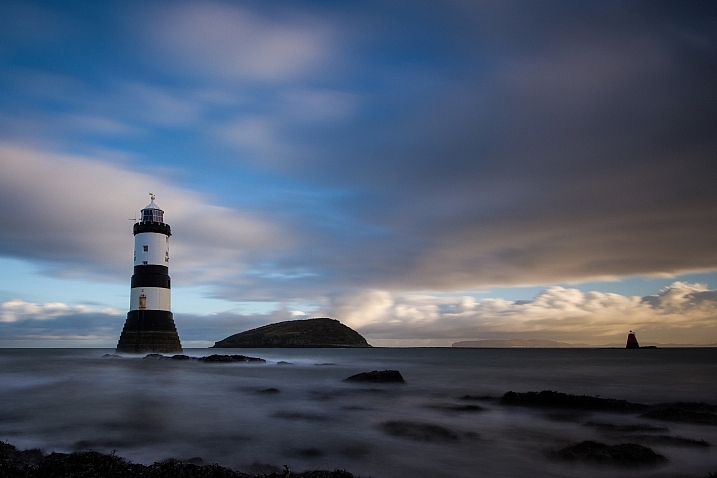
7 – Use a Neutral Density Filter

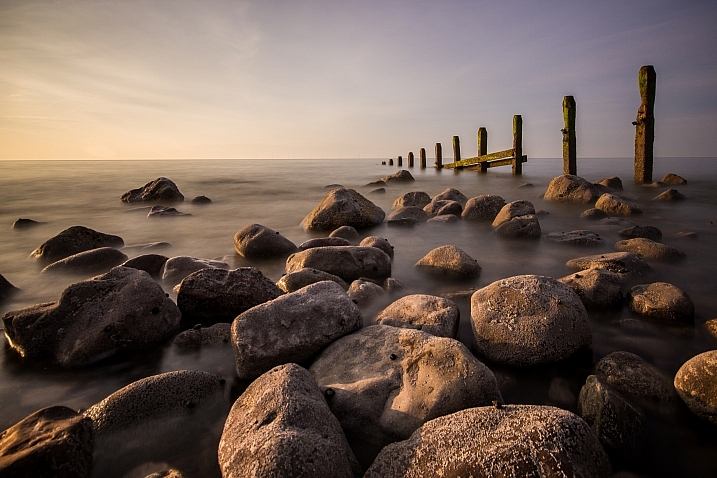
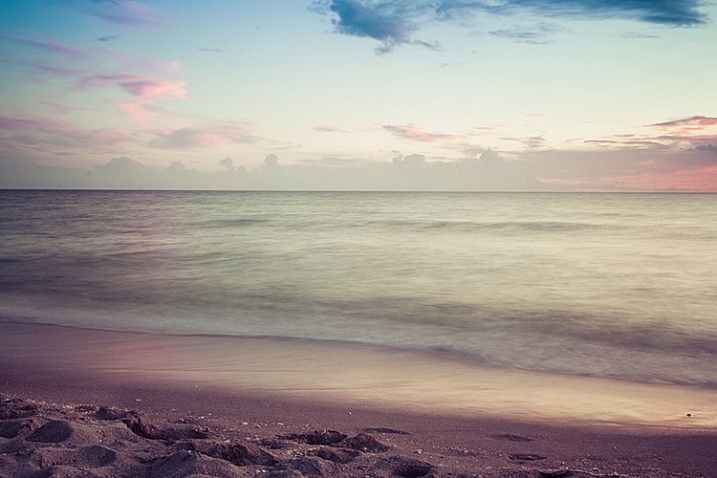
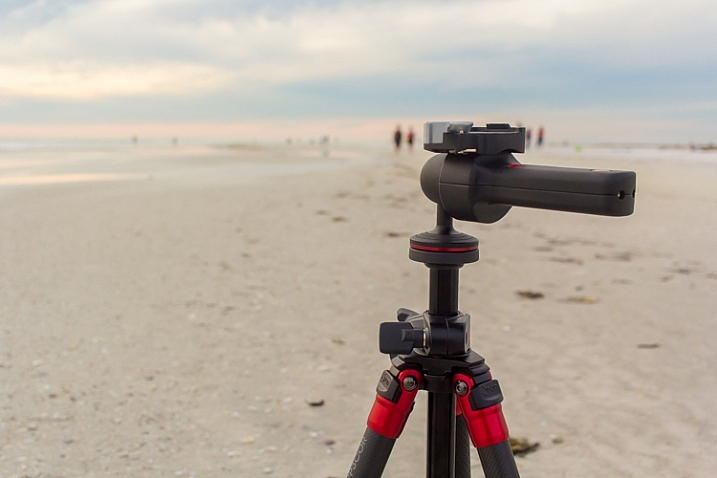
While I won’t get too into the technical aspects of Neutral Density Filters, they allow you to use a longer shutter speed. By placing the dark piece of glass in front of your lens, you need a longer shutter speed to get the correct amount of light to reach the camera sensor. Just be sure to bring a tripod, I doubt you will be able to hold your camera completely still for several seconds or minutes.

8

Why it’s Beneficial to use an ND Filter at Crowded Locations

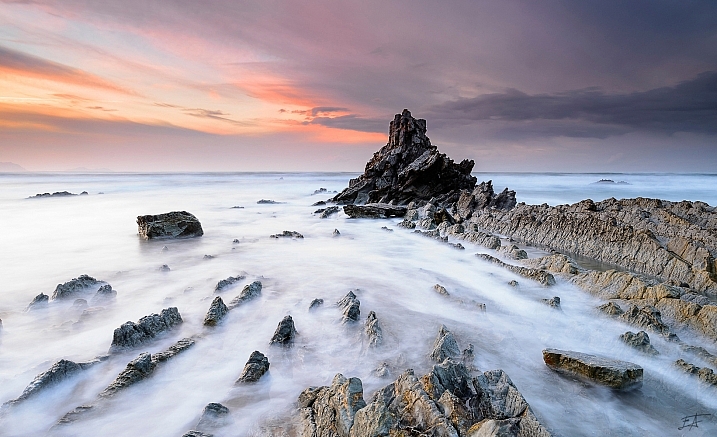
When you are using a long shutter speed, all motion within the frame will become blurred. The longer your shutter speed is, the less visible people will be. In fact, if you set the shutter speed to a couple minutes, you may even completely remove all people from your image.

8 – Stack Multiple Images

Stacking multiple images is another method to remove crowds from your pictures. This is a little more advanced than using an ND Filter, and requires that you have an image editing software such as Adobe Photoshop. Let’s do this step by step:

  1. Take a set of images from the exact same position. Ideally you should use a tripod so that the frame is the same on each image. Try to take 20-25 images with an interval of roughly 20 seconds. Having this interval will allow people to move a little between each shot.
  2. Import the images to your computer.
  3. Open Photoshop
  4. Click File > Scripts > Statistics
  5. Choose Median as your Stack Mode in the box that appears, and check the box for “Attempt to Automatically Align Source Images”.
  6. Go to YouTube and watch funny videos until Photoshop is done processing…
  7. When the image is done, zoom in to 100% and look for any spots where the script wasn’t able to do a perfect job. If you find such spots select the Spot Removal Tool and carefully heal these places.

9

This is a great technique to remove people from your images. My experience is that the script works well on 99% of images, and even on the remaining 1% it does a decent job.

Final Words

I think most of us have experienced being frustrated due to the large crowds more than once. Personally I think it’s important to remain respectful to both fellow photographers and other tourists when we are at these popular places. Sometimes all you need is a little patience.

10

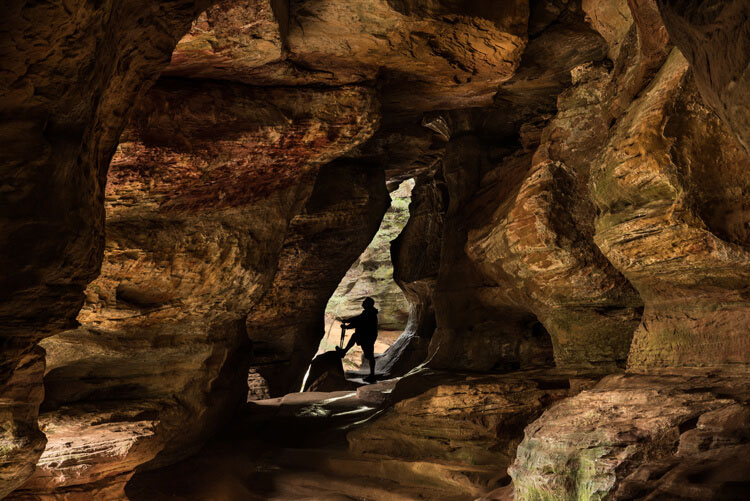
On another note, the best way to avoid the crowds is to go somewhere less known. I know it’s scary for many to go explore new locations, as you already know how beautiful the popular spots are, but the best images are often taken at less known locations.

What do you do when photographing these popular locations?

googletag.cmd.push(function() {
tablet_slots.push( googletag.defineSlot( “/1005424/_dPSv4_tab-all-article-bottom_(300×250)”, [300, 250], “pb-ad-78623” ).addService( googletag.pubads() ) ); } );

googletag.cmd.push(function() {
mobile_slots.push( googletag.defineSlot( “/1005424/_dPSv4_mob-all-article-bottom_(300×250)”, [300, 250], “pb-ad-78158” ).addService( googletag.pubads() ) ); } );

The post 8 Tips to Avoid Crowds at Popular Landscape Locations by Christian Hoiberg appeared first on Digital Photography School.


Digital Photography School

 
Comments Off on 8 Tips to Avoid Crowds at Popular Landscape Locations

Posted in Photography


A Landscape Photography Tutorial (from a Portrait Photographer Trying Something New)

06 May

landscape-photography-tutorial

Sometimes when you’re in a rut the best way to get out of it is to do something completely out of the box and try something new – something a little risky.

Portrait photographer Sean Tucker changed things up recently but setting out on a landscape photography road trip.

He videos the experience and I think the result is fascinating – both to see how he approached his landscape photography but also to hear his insights on stepping outside his comfort zone to approach a new type of photography for him.

I like what he wrote in his blog about the experiment:

“There was no guarantee the trip wouldn’t be a waste as I’m not a professional landscape photographer by any means, but I think the best creativity will always come out when you are taking risks.”

Grab a cup of your favourite beverage and settle down to journey with Sean. The end results are at the end of the video.

Have you ever stepped out of your normal type of photography to try something new like Sean did?

Further Reading for helping you to break out of a photography rut:

  • 10 Tips to Motivate You out of a Photography Rut
  • 5 Ways To Break Out of a Creative Photography Rut
  • Are You in a Photography Rut? 11 Tips to Get Out of It!

googletag.cmd.push(function() {
tablet_slots.push( googletag.defineSlot( “/1005424/_dPSv4_tab-all-article-bottom_(300×250)”, [300, 250], “pb-ad-78623” ).addService( googletag.pubads() ) ); } );

googletag.cmd.push(function() {
mobile_slots.push( googletag.defineSlot( “/1005424/_dPSv4_mob-all-article-bottom_(300×250)”, [300, 250], “pb-ad-78158” ).addService( googletag.pubads() ) ); } );

The post A Landscape Photography Tutorial (from a Portrait Photographer Trying Something New) by Darren Rowse appeared first on Digital Photography School.


Digital Photography School

 
Comments Off on A Landscape Photography Tutorial (from a Portrait Photographer Trying Something New)

Posted in Photography


5 Good Reasons to Add People into Your Landscape Photography

25 Apr

Are you looking for a way to spice up your landscape photography? Many times when we think of making great landscapes image,s we try not to include people. Sometimes we even wait for long periods of time for other sightseers (or other photographers) to exit our view. There are many times this is the best technique for shooting a landscape photo, but adding the human element to a scene can be just the extra touch needed to create a great image. Let’s take a look at 5 reasons to add people to your landscape images.

Sometimes breaking the rules can work. Here the man walking out of the image seems to work with the image of the end of the day on the beach.

This surfer is done for the day. Normally it is preferable that a person faces into the photo, but exceptions may work too.

#1 Tell a Story

Adding a person to your landscape can help your image tell a story. People, or even a single individual, may add mystery and adventure to your landscape, causing your viewers to wonder who, what, and why about the person in your image. When your viewers ask these questions, their eyes will stay engaged with your image, adding entertainment value to the photo. An image of a person standing in front of a grand mountain range may cause the viewer to wonder what that individual is doing there. If the person has a backpack and a walking stick, the viewer may imagine a hike in the mountains is about to commence. Or maybe the person in your shot is carrying a rifle and wearing camouflage, leading the viewer to imagine a hunter heading into the woods in search of adventure. A person can be the subject of the image or interact with the landscape of the image; but either way, if the person fits into the image’s story, your landscape will draw the viewer in and the photo will tell a successful tale.

This image seems to tell the story of a man thinking about the yester-years working on a river boat.

This image tells the story of a man thinking about his former career working on a river boat.

#2 Composition

Placing a person or persons in an image in negative space can add balance to your landscape. A person in the foreground, or mid-way into your scene, will help create a sense of depth in the image. When you have the opportunity to position the person, take care to place them in the image in a way that draws the viewer into the image. Place your subject off to the side, preferably on a rule of thirds point, with them facing into the open space. It is almost never a good idea to have a person looking or facing out of your image, as this will cause a viewer’s eye to leave the image rather than explore the image fully. Nevertheless, with every rule of composition there are exceptions that will work. Knowing the rules of composition, when to use them, and when to break them, will help you when adding a person to your image.

The couple taking a selfie is placed in a rule of thirds position and fills a negative space on the beach.

This couple taking a selfie is placed in a rule of thirds position, and fills a negative space on the beach.

#3 Scale of Size

Adding a human to an image is a great way to reveal the size and scale of objects in your image. Without the person in many images, objects like trees and rocks may lack a scene of scale. The addition of a person immediately gives your viewer a point of reference and scale to the landscape.

In this image of Rock House in Hocking Hills State Park in Logan Ohio adding the Silhouetted figure at the end of the cave adds a sense of scale and also adds a focal point to the image.

Adding the silhouetted figure at the end of the cave gives a sense of scale and also adds a focal point to the image.

#4 Drama and Excitement

Silhouetting someone against a sunset or other backlit view, is a perfect example of how a person can help create a more dramatic image. Even the simplest of landscapes can become more interesting and exciting by adding people within the image. Photographing a couple holding hands as they interact with the landscape can add the drama of romance to your image.

This image tells a story of a Father and son playing in the surf at sunset. The sillouhetted figures add drama to an image that could just be another sunset at the beach.

A silhouetted father and son playing in the surf at sunset add drama to an image that would otherwise be just another sunset along the shore.

#5 Focal Point

A successful photo needs a focal point that gives the viewer’s eye a place to land to hold their attention, and adding people can achieve that. It is important to add a point of interest that will change a boring landscape into a striking one. Most landscapes have natural features or buildings as a point of focus, but adding a person can sometimes make for a much more interesting image. As mentioned earlier, at times you may have negative space in the foreground of your landscape, and by adding a person into your scene that negative space is filled, and your image will benefit from the balance. As a focal point, the person in your image can be the subject of the scene, or a complement to your landscape.

A couple sitting on a rock enjoying the Autumn view adds a romantic drama to the fall colors of the West Virginia Mountains

This couple sitting on a rock enjoying the fall color,s placed on the rule of thirds, creates romantic drama.

Tip: When adding a person or persons to your landscape, try to keep their face (s) obscure. This will allow the viewer to imagine themselves as the participant in the image.

Conclusion

Many times adding a person to your landscape image can be as serendipitous as people just wandering into your viewfinder, especially if you are visiting a park or popular scenic area. But if you are out alone in an interesting area, use yourself as the person in the scene. Place your camera on a tripod, set the timer, then add yourself into the image. Next time you are engaged in a landscape photo shoot, look for opportunities to add one or more persons to one of your images, and see if you like the results. You may be surprised at the difference you see.

Many landscape locations are powerful enough to stand on their own, but if your image needs a little spice, try adding a human. What other kinds of landscape scenarios do you think could benefit from adding a person to create a more interesting image? Leave your ideas in the comments below.

People photography week

This week on dPS we’re featuring articles all about different kinds of people photography including portrait, event and travel photography. See all the previous ones below, and watch for more people photography articles over the next few days.

  • How to Take Low Key Head-shots
  • How to Do a One Light Portrait Setup and Use it as Your Back-up Plan
  • Travel People Photography – Tips and Pitfalls
  • 8 Tips for Photographing Men
  • 24 Diverse Images That Showcase People Photography
  • Weekly Photography Challenge – People Photography
  • Tips for Getting Yourself to Relax as a Photographer and Have More Successful Portrait Sessions

googletag.cmd.push(function() {
tablet_slots.push( googletag.defineSlot( “/1005424/_dPSv4_tab-all-article-bottom_(300×250)”, [300, 250], “pb-ad-78623” ).addService( googletag.pubads() ) ); } );

googletag.cmd.push(function() {
mobile_slots.push( googletag.defineSlot( “/1005424/_dPSv4_mob-all-article-bottom_(300×250)”, [300, 250], “pb-ad-78158” ).addService( googletag.pubads() ) ); } );

The post 5 Good Reasons to Add People into Your Landscape Photography by Bruce Wunderlich appeared first on Digital Photography School.


Digital Photography School

 
Comments Off on 5 Good Reasons to Add People into Your Landscape Photography

Posted in Photography


Lightroom Quick Post-Processing Tips for Landscape Photography

30 Mar

Processing a good landscape image is a lot like getting a good haircut…it should look good, but people shouldn’t really be able to tell you’ve had anything done. Now while that may be a slightly funny (hopefully) analogy, it really is a good way to approach the editing of your landscape photos. Ideally, the image should be developed to its full potential in accordance to your vision, while stopping well short of over-processing. The key to pulling off a strong landscape image can sometimes be understanding when to stop.

Before and After Split

In this article, we will go from a straight out of the camera RAW file to a fully processed photograph using Adobe Lightroom CC. We will look at each step, and I will explain why each edit was made. By the end, you will see just how easy it is for you to take full control of your landscape photography with a few simple edits.

Shoot in RAW

Here we have the RAW file as it looked after importing into Lightroom.

RAW Screenshot

As always, the better the ingredients you have to begin with, the better the finished product will be. This means to always strive to make for best exposure, crop, and composition you can, before any processing is applied. Shooting in RAW format helps you immensely when working with landscapes. The greater dynamic range (exposure latitude) will allow you to bring up shadows, and manage highlights, much better than with smaller JPEG files. I know, I know – you’ve heard all of this before – but it doesn’t hurt to hear it again! RAW truly is the best friend of the landscape photographer.

Crop first

The image above is virtually level, but not perfectly so. The first thing we will do is open the crop panel and tweak the alignment before we begin any development. Having a grid overlay will really help you to get the lines of the image just right (with the crop tool activated, press the O key to cycle through all the grids available until you find the one you want). If you wanted to crop the image further, this would be done here as well.

Crop

Add Graduated Filters to adjust sky and foreground

Now that the image has been straightened, it’s time for the real fun to begin. The first thing to do is take control of the sky so that it isn’t quite so bright. To do this, we will use the Graduated filter tool. It’s located just above the Basic Panel in the develop module, in the same row as the crop tool.

GND Indicator

The filter simulates the effect of a graduated neutral density filter. It is an indispensable tool for adjusting landscape photos. Using the Graduated filter, you can decrease the exposure, add a little contrast, and then increase the clarity just to make the clouds more pronounced, which adds a little drama in the sky. In this example I also took town the highlights, and dehazed ever so slightly. The dehaze feature is a relatively new addition to the Lightroom tool box, is available in Lightroom 6 and Lightroom CC, and really helps when clearing skies.

GND Sky

Next, you want to process the foreground but not disturb the edits you’ve just made to the sky. To do this, click new to make a new Graduated filter.

New GND Indicator

To better understand where your edits will be applied with the ND filter, simply hover the pointer over the indicator dot for a second. Everything in red indicates where the filter is working (you can also just press the o key and it will show the mask overlay – it may also show in another color on your screen, press Shift+o to cycle through all the various colors).

GND Red

Using the Graduated filter, I increased the clarity of the foreground grass, as well as illuminated the shadows. This will help to draw the viewer’s eye into the image. I’m careful not to overdo the exposure here. The main subjects of the image are the horses, and the mountains in the background, so I want to keep those emphasized. Speaking of horses…

Do local edits using a Radial Filter

I wanted to really make the horses standout within the photo so let’s make use of another powerful tool in the Lightroom arsenal – the Radial filter. It works virtually the same way as the Graduated filter, except that it is applied in the form of a circle (fully adjustable). It can be set to apply edits either inside or outside of the circular outline.

Circular GND Indicator

With the Radial filter, I raised the shadows around the horses and increased clarify slightly. I also threw in a little extra sharpening there as well. When using the Radial filter, it’s important to remember that the border between what is, and what is not edited, is very controllable. Make use of the feathering slider in order to control the density of your adjustments as they radiate outward or inwards of the circle. Effective feathering will make make your adjustments with the Radial filter seamlessly blend in with the rest of the image. Here you can see exactly where the edits will be applied.

Circular GND Red

Makes global adjustments

So far, the image has been processed using only the Graduated and Radial filter tools for local adjustments (specific areas). Now we will make some final global (whole image) adjustments in the Basic Panel.

I brought up the overall contrast and shadows, and added in a little bit more clarity. Doing this made the highlights a little too harsh so I reduced the exposure by -10. This photograph was made in the waning golden hours of sunset, so I increased the total temperature (white balance) from 4400 to 5200, so that the tone better matched what I was feeling at the time of the exposure.

Global Adjustment

Add an edge vignette

As a final touch, I add in a small amount of vignetting.

Vignette

Vignetting is great because it serves to draw the viewer’s attention into the image. In the case of this photo it works well, but that is not always the case. Just as with any other effect used in post-processing, discretion is the name of the game. When using a vignette, make sure it fits the overall mood of the image. Experiment with the feathering slider (and others) until you achieve the desired effect. As a general guideline, very subtle vignetting usually works best.

See, that wasn’t difficult at all! We have went from a completely unprocessed RAW file to a fully developed image using relatively few edits in Adobe Lightroom.

Before and After

Processing a landscape image doesn’t have to be a massive undertaking. Everything you do to a landscape photograph should compliment the scene and add harmony. You have some incredible processing tools available today which can help you to achieve your creative vision. Be careful that you don’t go too far, though. Every photograph is as unique as a fingerprint, and should be approached individually. Use the techniques in this article as a guide to your processing, and have fun helping your photos reach their full potential.

Finished

If you have any additional landscape post-processing tips that work for you, please share in the comments below.

googletag.cmd.push(function() {
tablet_slots.push( googletag.defineSlot( “/1005424/_dPSv4_tab-all-article-bottom_(300×250)”, [300, 250], “pb-ad-78623” ).addService( googletag.pubads() ) ); } );

googletag.cmd.push(function() {
mobile_slots.push( googletag.defineSlot( “/1005424/_dPSv4_mob-all-article-bottom_(300×250)”, [300, 250], “pb-ad-78158” ).addService( googletag.pubads() ) ); } );

The post Lightroom Quick Post-Processing Tips for Landscape Photography by Adam Welch appeared first on Digital Photography School.


Digital Photography School

 
Comments Off on Lightroom Quick Post-Processing Tips for Landscape Photography

Posted in Photography


Sunken Central Park: ‘Sidescraper’ Wraps Excavated Landscape

28 Mar

[ By WebUrbanist in Architecture & Cities & Urbanism. ]

excavated central park skyscraper

Conceived of as a hybrid, multi-functional work of landscape architecture, this award-winning design proposes digging down to the bedrock beneath Central Park and erecting a reflective “horizontal skyscraper” around its perimeter, providing 7 square miles of peripheral housing with views out over the park.

excavated park design

Designed by Yitan Sun and Jianshi Wu, the concept received first place in eVolo’s annual skyscraper competition. The proposal includes a continguous 1,000-foot-tall (and 100-foot-deep) structure, creating a looping horizontal-and-vertical skyscraper (or perhaps: sidescraper).

excavated landscape architecture nyc

By carving into the ground, new inhabitable areas are created, while mega-structure winds along the freshly-exposed cliff faces. The designers see this move as an inversion of the typical relationship between landscapes and buildings, with architecture forming a framework around outdoor space (versus a plaza surrounding a traditional skyscraper).

ex 1

ex 2

They also maintain that the project would democratize access to the park by providing more people with greater proximity. On the one hand, it would indeed create more housing units with direct access to and views of the park, decreasing distance for many residents. On the other hand, the resulting residential units would no doubt still remain expensive real estate, and, in most regards, the park is already quite open and accessible.

ex 3

ex 4

ex 5

The displaced dirt and rocks from the excavation would be used to create additional three-dimensional topographies around the city, added to parks and open spaces and creating greater variety within the urban park system of Manhattan.

Share on Facebook


[ By WebUrbanist in Architecture & Cities & Urbanism. ]

[ WebUrbanist | Archives | Galleries | Privacy | TOS ]


WebUrbanist

 
Comments Off on Sunken Central Park: ‘Sidescraper’ Wraps Excavated Landscape

Posted in Creativity


8 Steps to Great Long Exposure Landscape Photography

21 Mar

longexposure_landscape2

In this article I will outline eight steps, that will help visualize what you’ll need to capture beautiful, well-planned, and unique images that you’ll be happy with.

Long exposures are the true artworks of photography; a normally static and bland scene can become a dynamic masterpiece when the shutter is left open, and the capturing of movement occurs. Surf on a beach becomes a swirling, cloud-like mass, and grasses flowing in the wind become a single, beautiful entity. This is a situation where what you see, and what you end up with, are usually two very different things, and the results are often breathtaking.

But capturing that beauty can be challenging. So what do you need to focus on to make a long-exposure landscape shot work? Let’s explore that a bit more.

David McAughtry

By David McAughtry

1. Choose your location wisely

Before you even shoot your landscape, you’ll need to decide what type of shot you’ll tackle, and what environment you’d like to shoot in – whether it be a grassy plain, a seascape, or a busy highway.

Long exposure photography is about capturing, and translating movement within a frame. Spend some time deciding what you’re trying to capture, and what movement you want to accentuate. Rolling waves? Swaying grass? Flowing clouds?

Take a moment to envision what your scene will look like, and what parts of it will be stationary, and which parts will be fluid.

Aaron

By Aaron

2. Be patient and wait for the right time

Long exposures, at their very basic premise, require one of two things to work properly. Either very dim light situations such as the golden hour time periods, very early, or very late in the day – OR modifiers added to the camera to diminish the light that is coming in through the lens.

The reason you need one of these is because leaving the shutter open for longer periods of time, monopolizes one corner of the exposure triangle. When a normal amount of light strikes the camera’s sensor for an extended period of time, you’re guaranteed an overexposure. Therefore, you’ll need to change one of the variables to reduce that amount of light.

longexposure_landscape

The solution? Plan your shoot for very early in the morning, and very late in the evening. The darker it is outside, the longer you’ll be able to leave your shutter open, and therefore the more motion you’ll be able to capture in your image.

If you’re unable to shoot at those times, you’ll need to invest in a neutral density filter, preferably one with the ability to reduce the amount of light coming in to your lens by 10 stops, or more. These filters also add an extra layer of uniqueness to your images, because they allow you to shoot these long exposures at times of the day you normally don’t expect to see them.

3. Select the perfect lens

Of course, there are no hard and fast rules about which lens you’ll need to use, but traditionally, landscapes are captured with wide-angle lenses, to broaden the view and translate a sense of expansiveness.

Can you capture a landscape with a standard 50mm lens? Of course you can! But to maximize the open feel of a scene, consider using something wider. Keep in mind that the more you capture within the frame, the more movement it will contain.

070515_

I personally use a 24mm f/2.8 pancake lens for most of my landscape shots. While it’s not as wide as what some people use, I find it gives me a good middle ground, with a wide focal length, and very little of the distortion traditionally associated with super-wide glass.

4. Bring the proper equipment

While we’re speaking about the planning phase of your shoot, it’s a perfect time to consider what gear you’ll need to pull off a long exposure landscape. As it happens, it’s the same equipment you’d need for any other long exposure shot.

A tripod is a invaluable piece of gear for any landscape photographer, and for a long exposure, it’s an absolute requirement. Exposures of several seconds, which are required to produce movement within the image, need a stable base for the camera. The slightest amount of movement can cause blurriness, and that is amplified with longer and longer shutter times. Invest in a good, sturdy tripod, and ensure nothing will blow or bump into the unit while in operation.

013016_

Another essential accessory for this situation is a remote shutter release. There’s really no excuse for any landscape photographer to not have one, as they can be found for your camera model for $ 10, or so. These releases connect to your camera, and allow you to activate the shutter without ever touching the camera body itself. This keeps the vibration during the shutter click to an absolute minimum.

5. Use the correct camera settings

Since you’re using longer exposure times to pull off this type of shot, you’ll need to make adjustments to other parts of the exposure triangle. Generally, this means you need to stop your aperture down as far as you can, while maintaining sharpness, and reducing your ISO to the lowest setting. These two settings will allow you to bump your exposure time up, to long enough to capture movement in your image.

Fortunately this also gives you some bonus advantages; a lower ISO (such as 100), will keep the noise and artifacts in your shot to a minimum, giving you the best possible image quality. In addition, lenses tend to be sharper in the middle aperture ranges. Using apertures such as f/8, f/11 or f/16 will give you a nice, deep depth of field throughout the picture, while also taking a sharper, clearer photo than what you’d generally get with an extreme aperture of f/22 (due to diffraction).

022916_

As always, shoot in RAW. This will capture as much data as possible, and allow you to make non-destructive edits to the file later. Shooting in RAW format also negates the need to fiddle with white balance while shooting, since that can be adjusted in post-production.

If you do set white balance at the time of the shot, it’s usually a good idea to select the Daylight preset, or a custom white balance setting of your own, that counterbalances the extreme warmth encountered at sunset, and vice-versa for a shot at sunrise, which is a cooler time of the day, color temperature-wise.

6. Focus on your composition

Ekaitz Arbigano

By Ekaitz Arbigano

When you have your equipment and settings where they need to be, it’s time to take a moment to compose your shot. What are you capturing? The movement of a body of water like the surf from the ocean? Adjust your composition to allow for more of the water to be in the composition, instead of the sky. Are you trying to focus on the movement of clouds across the sky? Then give that part of the scene more attention within your frame to accentuate it.

7. Envision and anticipate movement

Shooting a moving scene, and attempting to capture that movement involve a bit of foresight, not unlike a marksman leading his target, by visualizing where the target will be when the shot gets there.

longexposure_landscape3

How far will the clouds move in the duration of the exposure? In which direction? Plotting this out before you click the shutter will improve your final image.

For example, capturing the ebb and flow of surf pounding a beach, requires knowing where the surf-line will end, and begin to recede back into the ocean, to properly compose it. Watching the movement of the subject you’re shooting, will help anticipate where it will appear in the final image. It’s always pays to plan ahead!

8. Enhance beauty in post-production

Finally, (and yes, this can be a touchy subject), learn to excel with the post-production process. A long-exposure image will already by eye-catching just by its inherent properties, but it’s important to take time during editing to enhance the beauty you’ve already captured in camera.

This shot initially had a cooler white balance, due to being shot in the morning, as opposed to during sunset.

This shot initially had a cooler white balance, due to being shot in the morning, as opposed to during sunset.

Since you’ll be shooting early or late in the day, tones will most likely already be dramatic, but may require some light boosting of the colors, or dodging and burning in Photoshop to add a bit more.

Since you shot at a low ISO to begin with, you likely won’t have to deal with noise reduction. After your exposure and tones have been taken care of, a little sharpening is all that stands between you and the final image.

Aaron

By Aaron

So that’s it folks, the eight steps to get you started on the path to taking great long exposure landscape shots. What other tricks of the trade do you use to get the perfect capture? Sound off in the comments below, and as usual, let your voice be heard.

This week on dPS we are featuring articles on special effects. Check out the others that have already been published here:

  • How to Photograph the Full Band of the Milky Way
  • Fire Spinning with Steel Wool – A Special Effects Tutorial
  • Special Effect – How to Create Multiple Flash Exposures in a Single Frame
  • Stacking Light Trails for Night Photography Special Effects
  • 26 Unique Special Effects Photos to Spark Your Creativity
  • Weekly Photography Challenge – Special Effects
  • Tips for Shooting Through Objects to Create a Special Effect
  • How to Add Vintage Frame Overlays Using Alien Skin Exposure X

googletag.cmd.push(function() {
tablet_slots.push( googletag.defineSlot( “/1005424/_dPSv4_tab-all-article-bottom_(300×250)”, [300, 250], “pb-ad-78623” ).addService( googletag.pubads() ) ); } );

googletag.cmd.push(function() {
mobile_slots.push( googletag.defineSlot( “/1005424/_dPSv4_mob-all-article-bottom_(300×250)”, [300, 250], “pb-ad-78158” ).addService( googletag.pubads() ) ); } );

The post 8 Steps to Great Long Exposure Landscape Photography by Tim Gilbreath appeared first on Digital Photography School.


Digital Photography School

 
Comments Off on 8 Steps to Great Long Exposure Landscape Photography

Posted in Photography


How to Use Leading Lines Effectively in Landscape Photography

15 Mar

Leading lines composition technique is the easiest to understand and apply in landscape photography.

In fact, we compose some photographs using leading lines unknowingly! You may have done that too, it comes to us naturally. Let me show you, using an example.

Imagine you are driving through a forest, and you see beautiful line of trees on either side of the road. The autumn leaves are so breathtakingly colorful, that you couldn’t help but pull your car to a side. You want to capture that beautiful moment in your camera. Now…how would you photograph it?

Would you stand parallel to the road and just take trees on one side of the road, or would you consider taking a photograph standing right in the middle of the road, with trees on either side?

01 Leading Lines Composition Techniques Landscape Photography by Prathap Skyline Drive

Invariably, you would likely consider the latter approach. Right? Of course, you don’t want to stand in the middle of a busy road, just be careful when you do it. Don’t hang me for this idea.

When you photograph the road running from the bottom, to the center of the image, you are using the leading lines composition technique, and the road serves as the line.

Leading Lines

Simply put, a leading line is a one that leads you from one point to another in your image. Our eyes naturally follow the line unconsciously.

Check it out now. Your eye will invariably follow the line from left to right (or right to left). Look at the examples below. Your eye connects the dot subconsciously. You make a line, a triangle, and a square! That’s the power of the line.

This very nature of ours is exploited in photography, by composing an image using leading lines. By using this technique, you can force the viewer to follow the line, taking them on a visual journey. The journey becomes more interesting when you have some high drama surrounding the line.

08 Leading Lines Composition Techniques Landscape Photography by Prathap Swiss Alps

It is one of the simplest, and most powerful composition techniques used in the landscape photography. Landscape photographers always look for leading lines in nature, to create a sense of depth in the image, and also to lead the viewer to the main subject of interest.

The idea is to lead the viewer into the scene with the help of literal, or imaginary/implied lines, in the scene. The photograph becomes much more interesting when this line leads the viewer to the main subject of interest, or an anchor point.

Some of the important aspects of using leading lines in composition are:

  • Leads the viewer into the photograph.
  • Leads the viewer from one point to another.
  • Leads the viewer to the main subject of interest.
  • Creates the illusion of depth, that is much needed in landscape photographs.

You can make most the compelling landscape photographs, by combining leading line composition technique, with the Rule of Thirds. Below is one such example where I have used leading lines to guide the viewer from the foreground, all the way to the background. Also, I have placed the horizon on the upper third of the frame, following the Rule of Thirds, and creating a dynamic landscape photograph.

02 Leading Lines Composition Techniques Landscape Photography by Prathap Indiana Dunes State Park Beach

The beauty of nature is that there are plenty of elements in nature which can be used as leading lines:

  • Roads
  • Railway tracks
  • Boardwalks
  • Pathways
  • Waterfalls
  • Streams
  • Shorelines
  • Series of trees, poles, etc.
  • Fencing
  • Pebbles or rocks on the shoreline

The list can go on. It’s amazingly simple to use leading lines in your landscape photographs, you just have to look around.

Types of Leading Lines

Leading lines can be straight or curved, and straight lines can also be horizontal, vertical, or diagonal.

A horizontal line induces a feeling of calmness, whereas a vertical line represents strength.

03 Leading Lines Composition Techniques Landscape Photography by Prathap Biltmore Estate

Diagonal lines can be very interesting as they represent energy. If used properly, diagonal lines can make a dull image look more compelling.

04 Leading Lines Composition Techniques Landscape Photography by Prathap Biltmore Estate Closeup

A curved line makes it for an interesting composition, as it spirals around the frame asking for more attention. The viewer will eventually scan more parts of the image.

05 Leading Lines Composition Techniques Landscape Photography by Prathap Blue ridge Parkway Countryside

An s-curve is predominantly preferred by many landscape photographers, for its ability to connect many parts of the image. It gives a soothing feeling in the viewer.

06 Leading Lines Composition Techniques Landscape Photography by Prathap Beautiful Sunrise in Lake Superior

A tighter curve, however, might induce sense of danger.

07 Leading Lines Composition Techniques Landscape Photography by Prathap Blue ridge Parkway

The most important point is to use the leading lines to direct the viewer into the scene. It wouldn’t make much sense, or be effective, if it leads the viewer out of the scene.

Conclusion

Leading line photographic composition is the most powerful natural technique a landscape photographer can use to lead the viewer into the photograph. When combined with the Rule of Thirds, you can make some compelling photographs.

It is by far the easiest method to create a 3-dimensional effect, in a 2-dimensional photograph. Landscape photographers use this very effectively to force the viewer to scan the photograph from foreground to background.

“Lead the viewer in to the scene, not out of the scene.”

Embrace it now, and see how it transforms your landscape photographs into something more realistic and interesting. Think photography! Think Simple!

How do you use leading lines in your photography? Please share in the comments below.

googletag.cmd.push(function() {
tablet_slots.push( googletag.defineSlot( “/1005424/_dPSv4_tab-all-article-bottom_(300×250)”, [300, 250], “pb-ad-78623” ).addService( googletag.pubads() ) ); } );

googletag.cmd.push(function() {
mobile_slots.push( googletag.defineSlot( “/1005424/_dPSv4_mob-all-article-bottom_(300×250)”, [300, 250], “pb-ad-78158” ).addService( googletag.pubads() ) ); } );

The post How to Use Leading Lines Effectively in Landscape Photography by Prathap DK appeared first on Digital Photography School.


Digital Photography School

 
Comments Off on How to Use Leading Lines Effectively in Landscape Photography

Posted in Photography


Wide Angle Versus Telephoto Lenses for Beautiful Landscape Photography

12 Mar

WILLCK 1 SNEFFELS

An easy assumption to make, when shooting landscapes, is use a wide angle lens. After all, most landscape photographers favor wide angle lenses for a reason, they naturally give you the widest view and allow you to get the full landscape into the frame, from the foreground to the horizon. They have the widest depth of field, so you get the whole landscape in focus too. Their distortion enlarges objects in the foreground, letting you show off close-up details. The same distortion also emphasizes leading lines, enhancing your composition, and giving your image a more dynamic feel. But when you default to wide angle, you miss many hidden opportunities offered by telephoto lenses.

Field of View: The Whole and its Parts

This is the most basic difference between the two lens types: wide lenses give you a wide view, telephoto lenses give you a narrow view. And while landscapes look great in their entirety, it’s a good habit to take a moment and look for details. These are beautiful elements of the landscape that might get shrunken, or ignored in the expanse of a wide-angle image. This is where your telephoto lens comes in. Its narrow field of view is perfect for trimming off the extra elements, and focusing right on small, beautiful scenes like the curve of a mountain, a reflection in a far-off pond, or the silhouette of a tree.

WILLCK 2 YOSEMITE

In the two images above, you can see this in action. They were both taken from Olmstead point in Yosemite National Park, one with a wide angle lens and the other with a telephoto. In the first image, the wide angle shows off the total landscape. It includes both sides of the valley, the up-close textures of the rocks and the far off peak of Half Dome. In the second image, the telephoto lens brings the eye right up to the mountains, showing off their shapes and the details of the geology.

Another pair of images (below), shows this effect even more dramatically. The first image is not just wide-angle, but an aerial shot as well, taken from a small airplane over the Okavango Delta in Botswana. From this vantage point all of the individual elements of the landscape become incredibly small, and your eyes pay more attention to their arrangement than their individual shapes. In the second image, also from the Okavango area, but this time on the ground, a telephoto lens is used to draw attention to the beautiful curves of a single Acacia tree.

WILLCK 3 OKAVANGO wide

WILLCK 4 OKAVANGO tele

Depth of Field: Focusing the Eye

The second major difference between wide angle and telephoto lenses is the innate size of their depth of field. Put succinctly, the higher the focal length, the narrower the area of focus. In practice, this means that when shooting wide, it’s much easier for you to get everything in focus, from the grass at your feet to the ridge on the horizon. This is especially true when you’re trying to use your lens’s sharpest apertures (the so-called sweet spot). However, a narrower depth of field is much better for isolating your subject from the background, and this is where your telephoto lens comes into play. Try shooting a close-up detail at a low aperture, using the landscape as a nice creamy bokeh backdrop.

WILLCK 5 FLATTOPS

WILLCK 6 DENVER

The two images above are perfect examples of this effect. In the first image, the wide angle lens brings the whole landscape into focus, from the close-up sunflowers to the far-off mountains. In the second image, shooting with a telephoto blurs out the flowers and mountains in the background, turning them into a nice soft background for main sunflower.

Depth Compression: Playing with Size

It’s no secret that wide angle lenses expand the sense of depth in an image, by enlarging elements in the foreground and shrinking those in the back. This is great for creating images that make you feel like you could step right into the frame. On the flip-side, you run the risk of making towering, awesome mountains in the distance look like puny hills. Telephoto lenses, on the other hand, compress depth, causing objects near and far to appear more similar in size. A compressed sense of depth is great for abstracting a scene, and bringing out its graphical qualities. Colorful forest canopies, layered mountain ridges, and curving sand dunes, are all great subjects for this kind of shooting.

WILLCK 7 MICA

In the first of this pair above, notice how the wide angle lens exaggerates the size of the flowers in the foreground at the expense of the mountains in the background. The mountains are so tall that they’re shrouded in clouds, but the lens keeps them from looking quite as grand. But pull out a telephoto lens and you can zoom straight in on the mountain, showing off the contrast between the rugged outline of the peak and the soft wispy form of the cloud.

WILLCK 8 BIGBEND wide

WILLCK 9 BIGBEND tele

Here are two more images, both taken at the same location in Big Bend National Park, that show off this effect. In the first image, you can see that the wide angle lens increases the size of the plants and rocks in the foreground, while shrinking the large desert mountains in the background. In the second image, a telephoto lens flattens out the depth of the many desert ridges, calling attention to their graphic patterns and outlines.

Summary: Space Versus Object

Have a hard time remembering all these details? Here’s an easy way to summarize it with a simple idea:

Wide angle lenses show off space, telephotos show off objects.

The wide angle lens’s big field of view, ease of uniform focus, and depth-distorting abilities, are great at showing off big, expansive landscapes. However, they take focus away from individual elements within the landscape in favor of showing the whole. Telephoto lenses are naturally the opposite: they’re great at showing off the size, shape, and intricacy, of detail of individual elements within the landscape. But their narrow field of view, small depth of field, and depth-compressing qualities make it hard to capture the landscape as a whole.

WILLCK 10 WILLOW wide

You can analyze this pair of images to see exactly how all of these techniques work together. Starting with the photo above, you can see how the wide angle lens fits the whole landscape into the frame, from close-up rocks, to far off peaks and sky. Because of the lens’s large depth of field, the whole landscape is in acceptable focus as well. The lens’s depth distortion is readily apparent as well: the foreground rocks look very large, creating a pleasing sense of depth, and emphasizing the leading lines that draw the eye from the edges of the frame to the center. Overall, you get a very good sense of the space and the expansiveness of the valley.

WILLCK 11 WILLOW tele

This image was taken in the same place, but the use of a telephoto lens captures it in a very different way. The photo brings out a single element of the landscape – look closely and you can see this peak in the previous image on the top right – and allows the viewer to appreciate its subtle details. Because of the telephoto lens’s narrow depth of field, the sky is slightly out of focus while leaving the details of the peak itself perfectly sharp. And most of all, the compressed sense of depth flattens the image, showing off the rocky mass of the mountain, and calling attention to the beautiful curve of the ridge line. Overall, you get a great sense of the mountain as a solid object, rather than a bounded space.

When to shoot what?

The best way to know which lens to use is to get out there, look, and think. What part of the landscape are you most drawn to? Does the landscape’s expansiveness give it its character? Are there stunning details surrounded by less photogenic elements? Are you shooting spaces or objects?

WILLCK 12 ZODIAC

That said, my personal strategy is to just shoot both, because almost any landscape has enough beauty that just one type of lens isn’t enough to get to all of it.

What is your approach to landscape photography? Do you use a wide or telephoto more often? Please share your thoughts and landscape images in the comments below.

googletag.cmd.push(function() {
tablet_slots.push( googletag.defineSlot( “/1005424/_dPSv4_tab-all-article-bottom_(300×250)”, [300, 250], “pb-ad-78623” ).addService( googletag.pubads() ) ); } );

googletag.cmd.push(function() {
mobile_slots.push( googletag.defineSlot( “/1005424/_dPSv4_mob-all-article-bottom_(300×250)”, [300, 250], “pb-ad-78158” ).addService( googletag.pubads() ) ); } );

The post Wide Angle Versus Telephoto Lenses for Beautiful Landscape Photography by Will Crites-Krumm appeared first on Digital Photography School.


Digital Photography School

 
Comments Off on Wide Angle Versus Telephoto Lenses for Beautiful Landscape Photography

Posted in Photography


Quick Look: Parallelism in Landscape Photography

12 Mar

Part of what can make an image both visually appealing and conceptually interesting is the connection between its different parts. An image is a whole made of differentiable elements, and these elements can either be separate or have a variety of relations between them. To make an image which is indeed a whole and not just different layers on top of each other, a photographer needs to make the layers (or elements) communicate with each other. But how? One way, which I will detail here, is parallelism.

A softly-lit iceberg resembles the contour of Mount Uummannaq, Greenland. An example of simple, low-level parallelism.

When pre-visualizing an image, especially its composition, one needs to take into account the possible similarities, or parallelisms, that the environment offers. For example, it’s very often that there is a lack of connection between the sky and the earth in a landscape shot. But a bold red-colored flower on the ground can parallel a setting sun in the sky, thus strengthening the connection between them and bonding heaven and earth in the image, which has clear philosophical and visual implications.

But it’s not only color – shapes, lines and textures can also parallel each other – light rays in the clouds with lines in the sand, lenticular clouds with rounded pools, the options are endless. The important thing to keep in mind is to make these parallelisms stand out, making the viewer realize our intention in including them in the image.

Parallelism can serve its goals even better if it is of a higher level: more than two parts of the image being parallel to each other in the same way or in different ways, or the same part being parallel in more than one way.

See for example the second image shown here. There are two parallelisms: firstly there’s the one made by the architects who chose to make the famous lighthouse of Kalfshamarsvik, Iceland resemble the basalt columns in the area it was built on. Secondly, the yellow patch in the midst of the dark: on the ground – the yellow vegetation. On top – the light coming out of the lighthouse. Both share color and both stand out of their dark, gloomy, lava-column-shaped surroundings. The choice of dark exposure made these elements stand out even more, strengthening the bond between them and the image’s integrity.

‘Light in the Dark’, Kalfshamarsvik, Iceland

Another good example can be seen in the third image. The parallelism between the shadow cast by the center tree and the flare caused by the sun bonds the ground and the sky, which are in turn both bonded to the main subject – the tree – in different ways: the flare touches and intersects the tree, while the shadow is caused by the tree. The three layers of the image are thus intimately connected, and the image is more interesting and appealing because of this connection.

‘The Valley of the Shadow of Death’, Deadvlei, Namibia

Erez Marom is a professional nature photographer, photography guide and traveler based in Israel. You can follow Erez’s work on Instagram, Facebook and 500px, and subscribe to his mailing list for updates.

If you’d like to experience and shoot some of the most fascinating landscapes on earth with Erez as your guide, you’re welcome to take a look at his unique photography workshops around the world:

Land of Ice – Southern Iceland
Winter Paradise – Northern Iceland
Northern Spirits – The Lofoten Islands
Giants of the Andes and Fitz Roy Hiking Annex – Patagonia
Tales of Arctic Nights – Greenland
Earth, Wind and Fire – Ethiopia

Selected articles by Erez Marom:

  • Behind the Shot: Dark Matter
  • Mountain Magic: Shooting in the Lofoten Islands
  • Behind the Shot: Nautilus
  • Behind the Shot: Lost in Space
  • Behind the Shot: Spot the Shark
  • Quick Look: The Art of the Unforeground
  • Behind the Shot: Watery Grave
  • Whatever it Doesn’t Take
  • Winds of Change: Shooting changing landscapes
  • On the Importance of Naming Images
  • Hell on Earth: Shooting in the Danakil Depression

Articles: Digital Photography Review (dpreview.com)

 
Comments Off on Quick Look: Parallelism in Landscape Photography

Posted in Uncategorized


Most Popular Landscape Photography Articles on dPS in 2015

26 Dec

Landscape photography is a passion many photographers share. You don’t need a lot of special gear like lighting equipment, and you can do it anywhere.


DSC01032edit

The challenge is to make your photos a cut above the rest, so they stand out in a crowd. So, how do you do that? Well for starters you can read through the following articles and get some tips. Then plan a day and go out and shoot some landscapes.

In no particular order here are the most popular articles related to landscape photography on dPS in the last year, 2015:

  1. 7 Landscape Photography Mistakes That Could be Ruining Your Photos
  2. A Super Simple Way to Make Landscape Photos POP Using Lightroom
  3. 5 Quick Reasons to Use the Nifty Fifty for Landscape Photography
  4. 5 Ways to Create Dramatic Landscape Photos at Midday
  5. Why I Switched From LEE Filters to Formatt-Hitech for Landscape Photography
  6. 10 Essential Pieces of Gear you Need for Landscape Photography
  7. How to Process a Landscape Photo in 5 Minutes Using Photoshop
  8. How to Solve 5 Composition Conundrums Faced by Landscape Photographers
  9. 8 Common Landscape Photography Mistakes
  10. One Compositional Technique to Transform Your Landscape Photos
  11. Tips for Creating Landscape Photos during the Golden Hour
  12. 3 Simple Tips for Subtle Landscape Photography Post-Processing
  13. 8 Tips for Fall Landscape Photography
  14. 5 Tips to Take Your Landscape Photography from Good to Great

You can also check out the dPS ebook: Living Landscapes

GreenRocks

googletag.cmd.push(function() {
tablet_slots.push( googletag.defineSlot( “/1005424/_dPSv4_tab-all-article-bottom_(300×250)”, [300, 250], “pb-ad-78623” ).addService( googletag.pubads() ) ); } );

googletag.cmd.push(function() {
mobile_slots.push( googletag.defineSlot( “/1005424/_dPSv4_mob-all-article-bottom_(300×250)”, [300, 250], “pb-ad-78158” ).addService( googletag.pubads() ) ); } );

The post Most Popular Landscape Photography Articles on dPS in 2015 by Darlene Hildebrandt appeared first on Digital Photography School.


Digital Photography School

 
Comments Off on Most Popular Landscape Photography Articles on dPS in 2015

Posted in Photography