RSS
 

Posts Tagged ‘Landscape’

5 Tips for Better Landscape Photos

18 Dec

Landscape photography seems simple to most people – there’s a pretty scene, you walk in, take a couple shots and you’re done … and chances are that you end up with a version of the scene that everyone else has.  So how do you take your “snapshot” to the next level?  Other than the “straight horizon” suggestion that you may have heard before, here are five basic tips you can try out when next you are on the field to help you take better landscape photos:

WinterLighthouse

1. Survey Your Scene

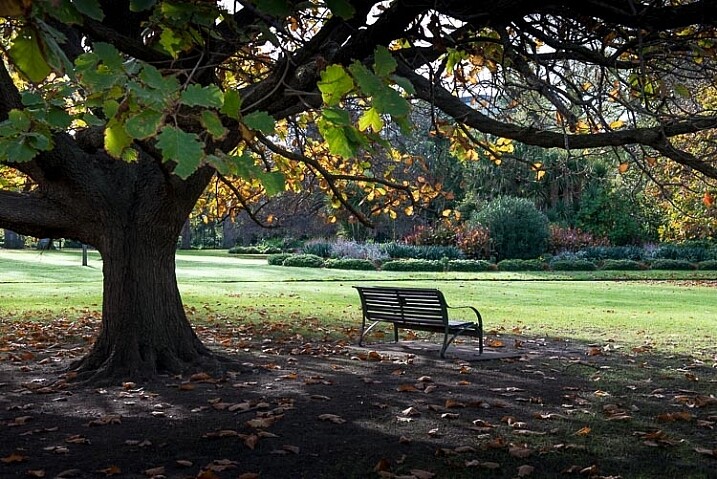
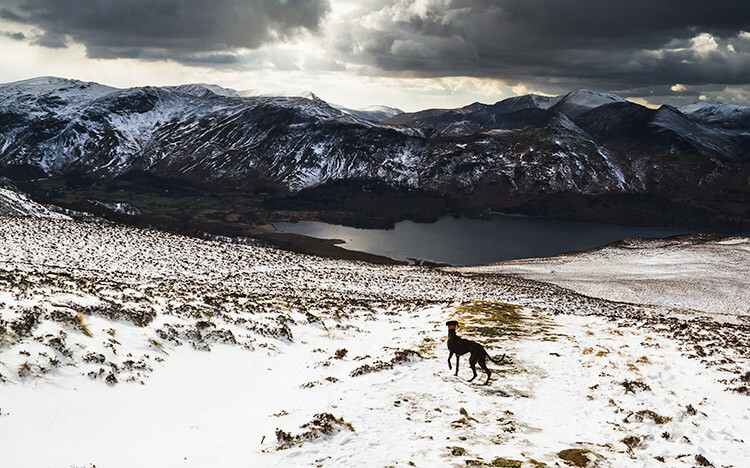
Think about the scene differently. Is there another angle that you can shoot from? Can you get your camera higher or lower? Scouting your location to find different and more interesting vantage points is time well spent.  Also check for elements of interest in the location that can be used to give your photo a sense of scale or add texture. So take a moment, survey your scene, take a chance, shoot from a different perspective and see what you might have missed initially.

CastleHill

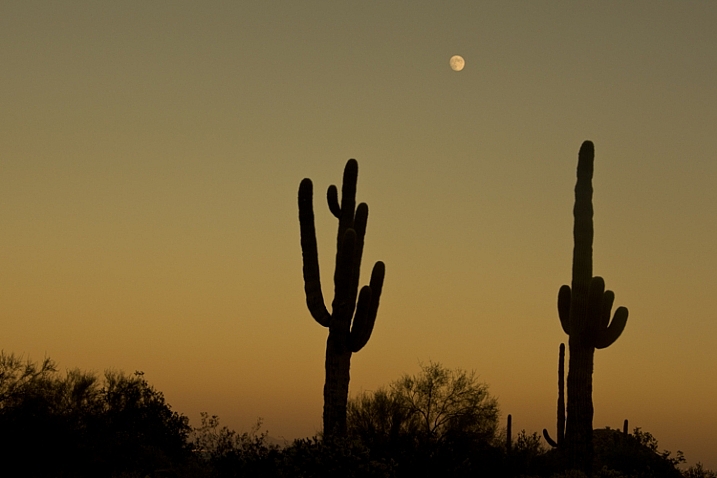
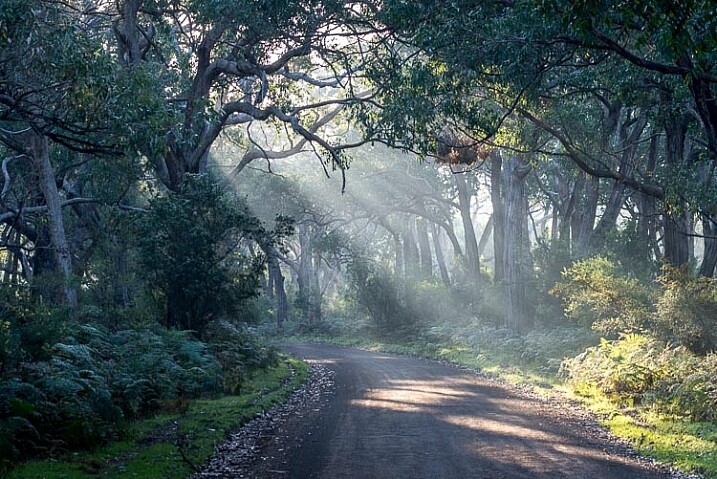
2. Look for the Light

Most surreal landscape photography moments happen in the golden hours (dawn and dusk). Sunrise is definitely worth getting out of your bed for in the wee hours of the morning, and sunset is a nice exercise in patience to catch that ideal, magical light. It certainly helps to do research before you head out to determine where the sun rises and sets, or even which season works well for the area you intend to shoot. If you’re still unsure about your directions, walk with a compass (a compass apps for your phone is an easy way to always have one with you).

DesertSun

SunsetBrickfield

There is no harm in light chasing during the day either – sometimes it’s the only time you have with a scene, and you have to make the most of it. You need to be aware that shooting in harsh sunlight produces very contrasty light, which means that you don’t capture much detail in the highlight and shadow areas. An overcast, or cloudy day, softens the light a bit. Outside of the golden hours, the key would be to find an angle where the light is flattering to your subject, or put the sun to your back and give it a go!

CaribbeanDay

HorseshoeBend

Note: I have found that midday sun works well for infrared landscape photography.

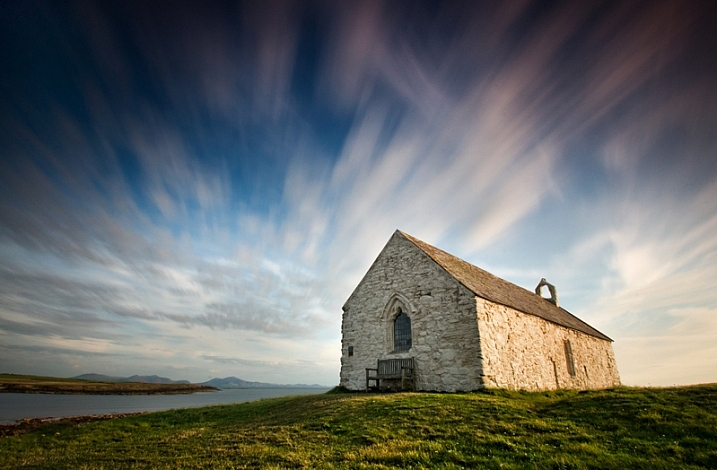
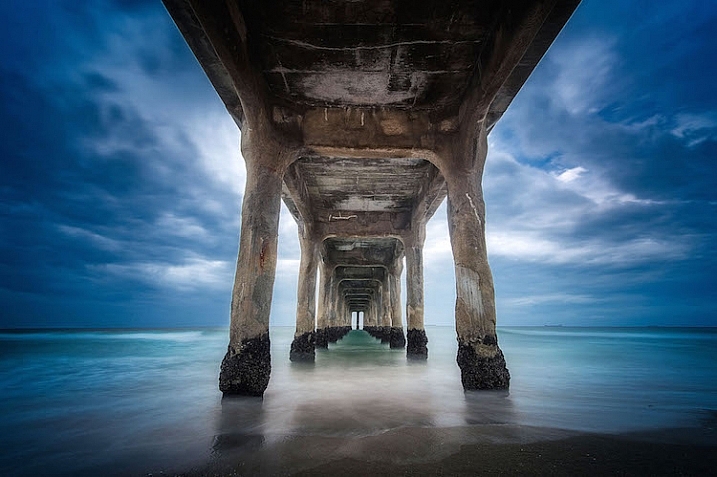
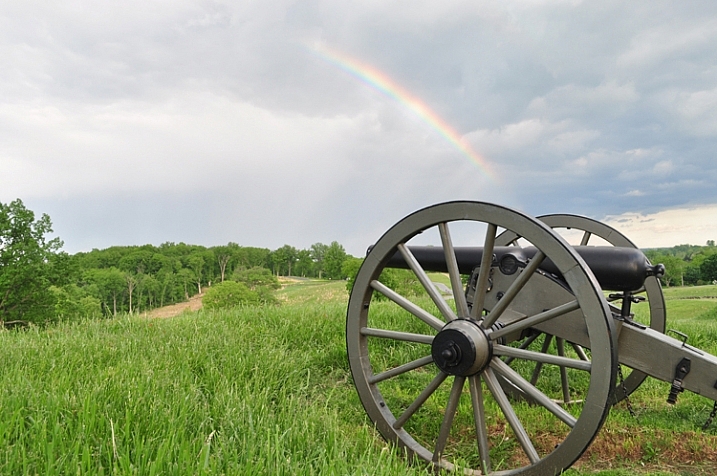
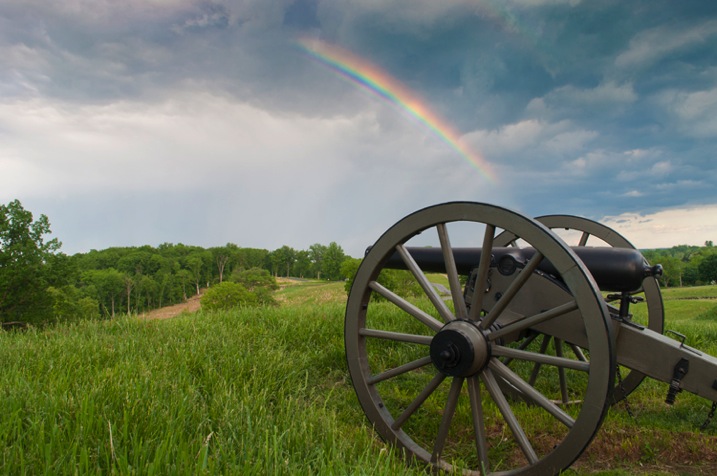
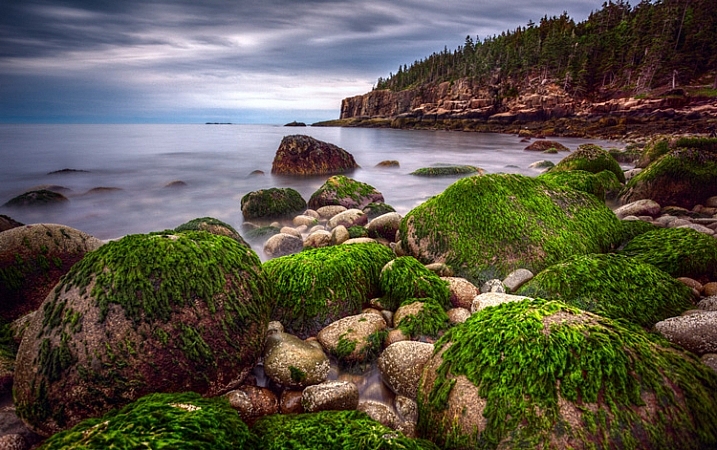
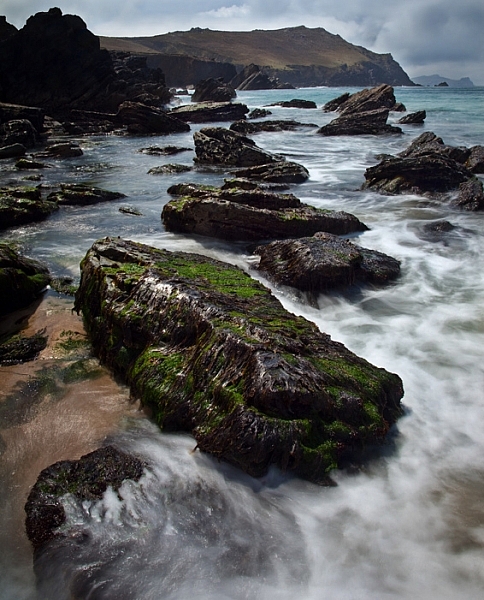
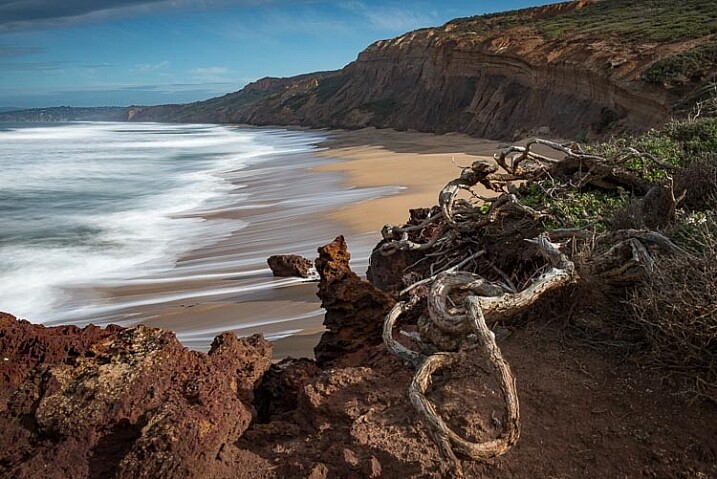
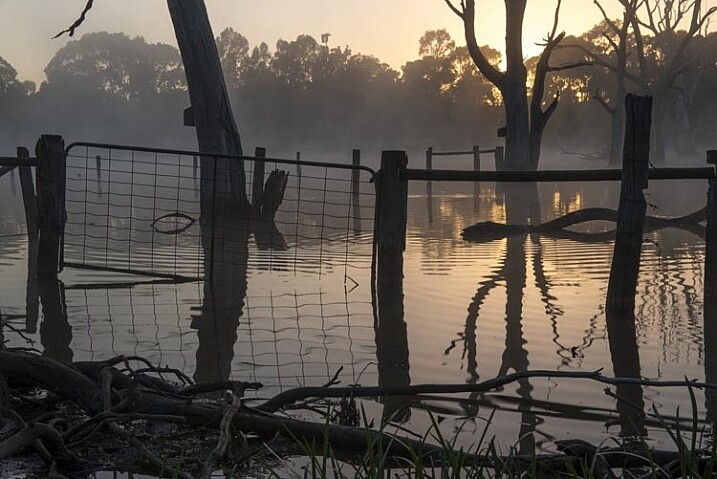
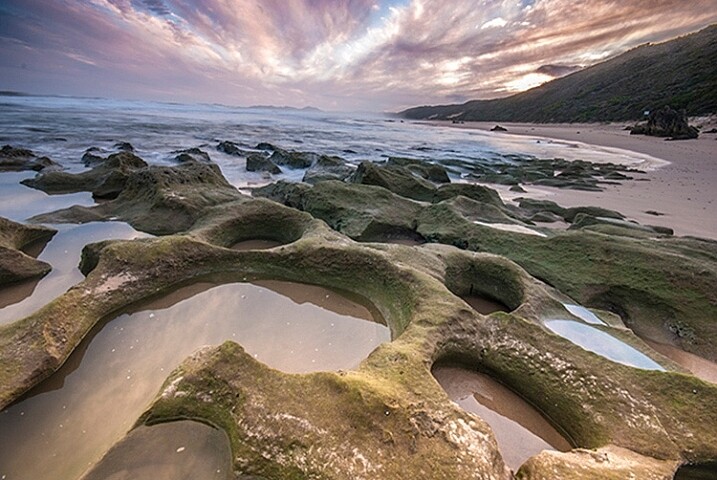
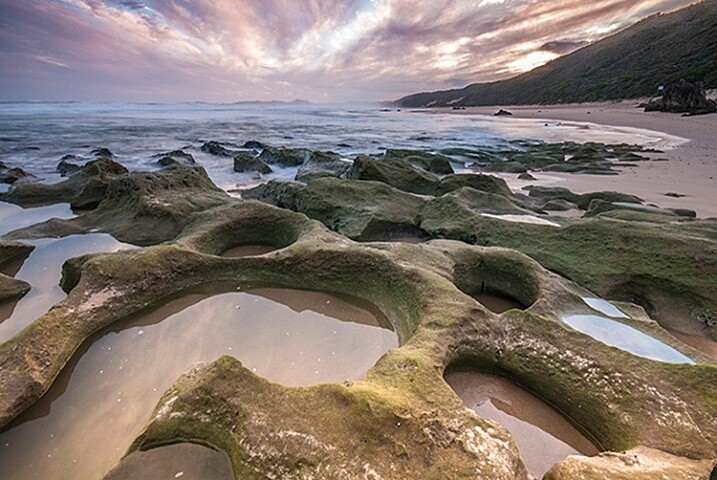
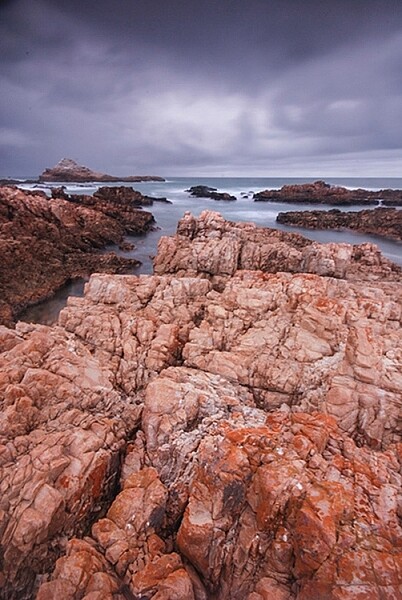
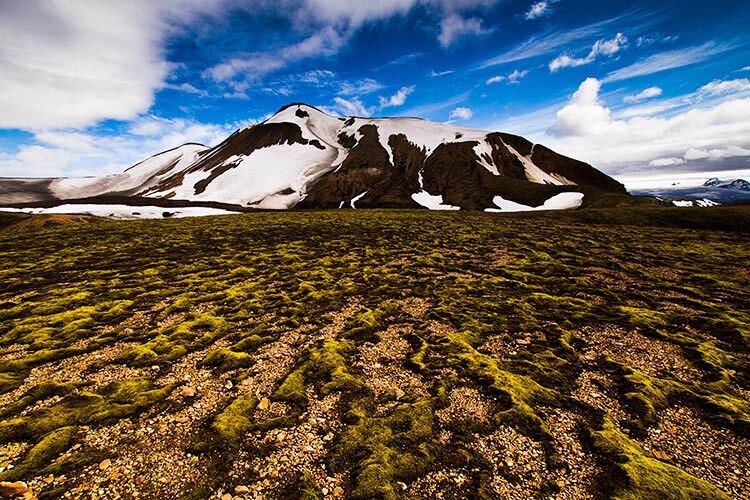
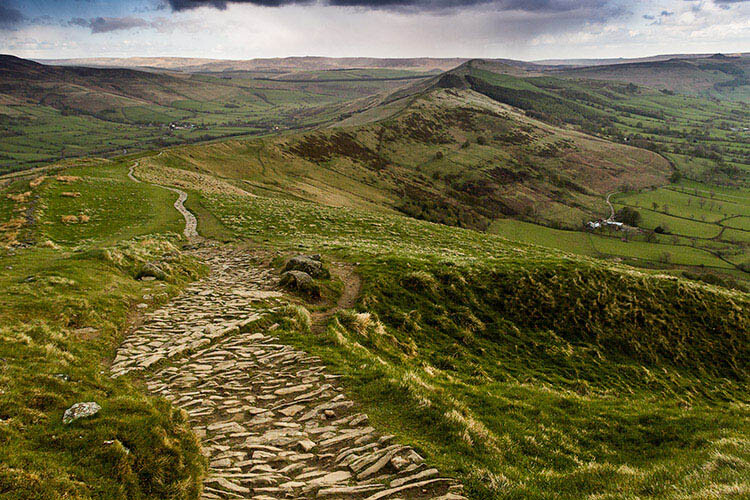
3. Lines and Repetition

Lines and repetition in a scene catch your viewer’s attention almost immediately, and serves to lead them into the photo. Lines also encourages their eyes to wander around the photo, especially if they start at a corner of the frame. Think about photos of roads and fences, and even the angle of the ocean when composing your shot. Repetitive items or patterns also have a way of holding your viewer’s fascination, and they are everywhere – any element that creates a nice line or geometric shape can give your images structure and form – look for them!

BeavertailLighthouse

PathwaytoGoodbye

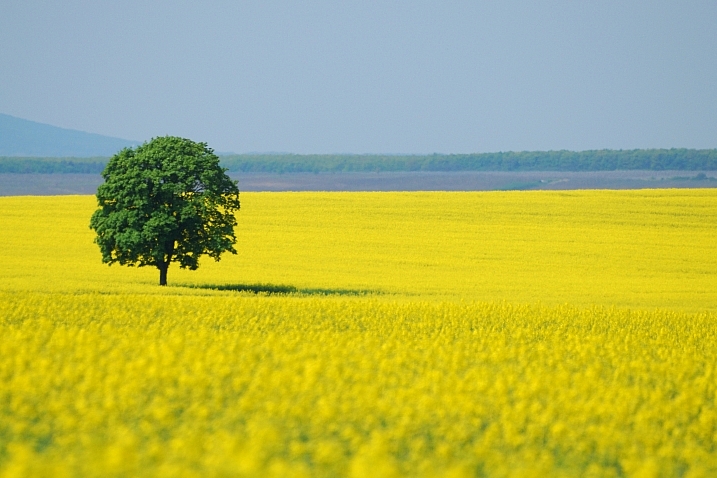
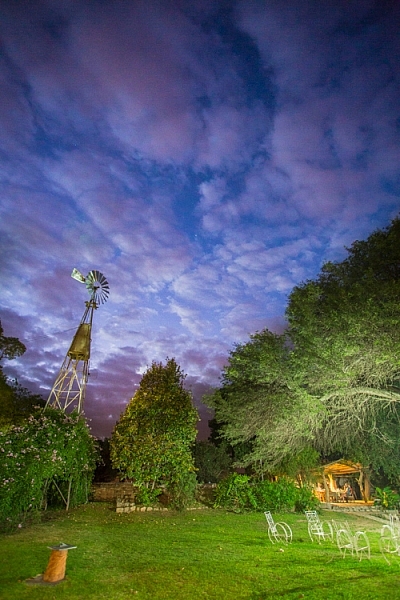
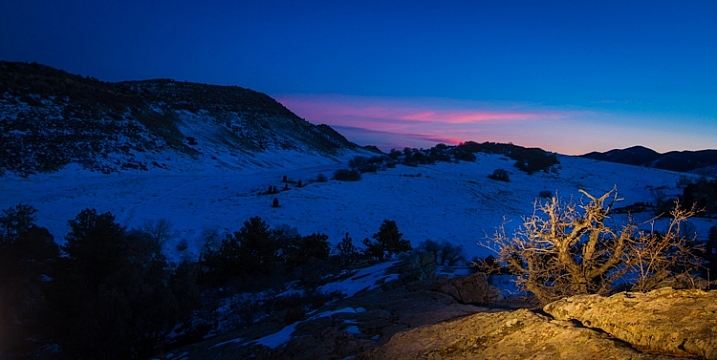
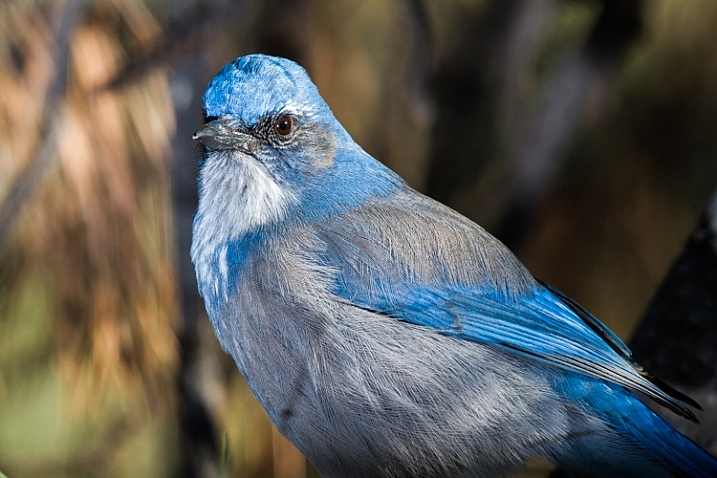
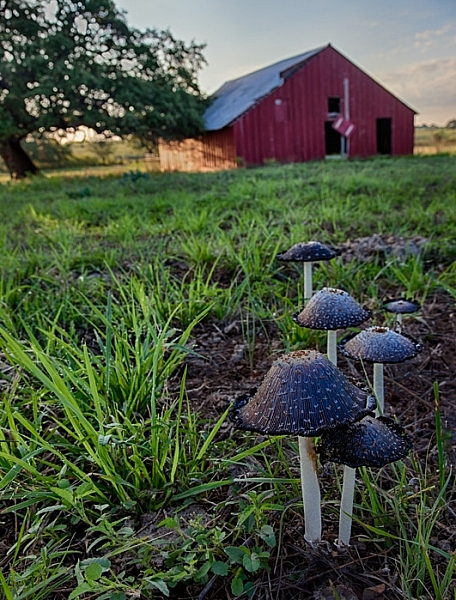
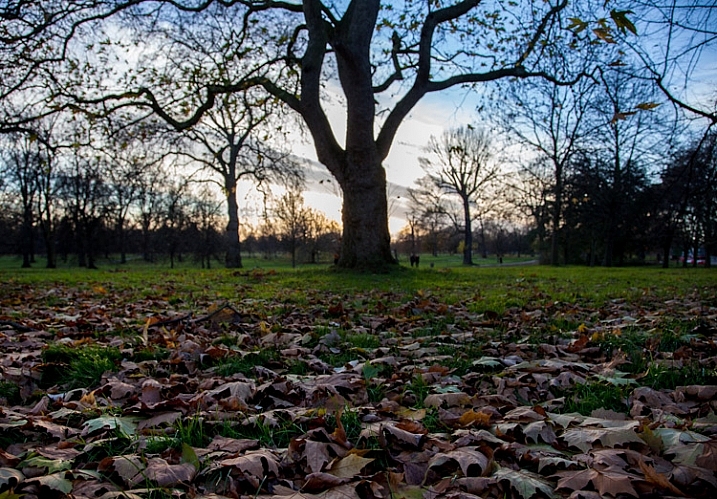
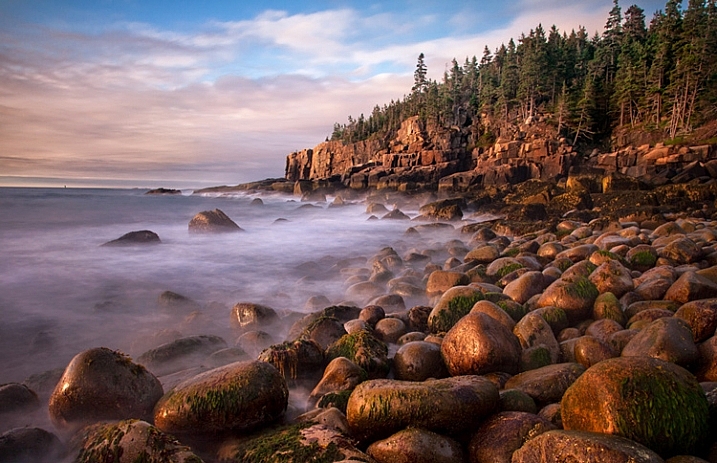
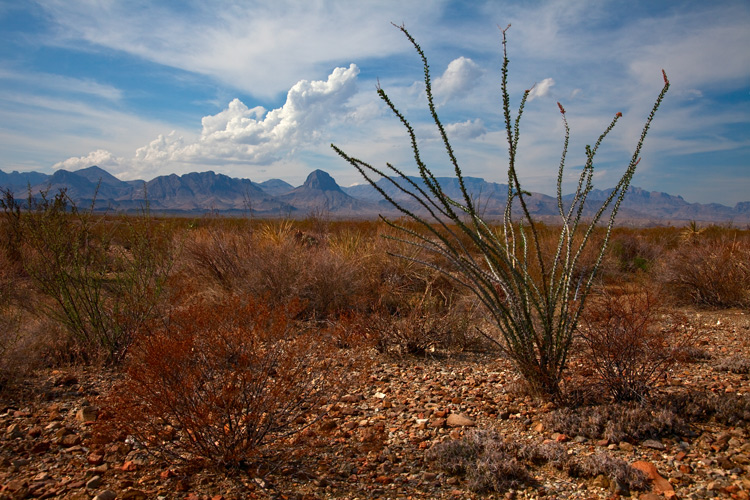
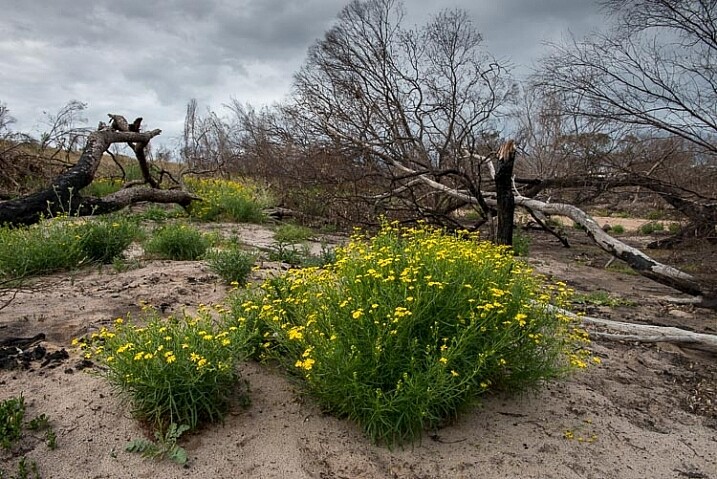
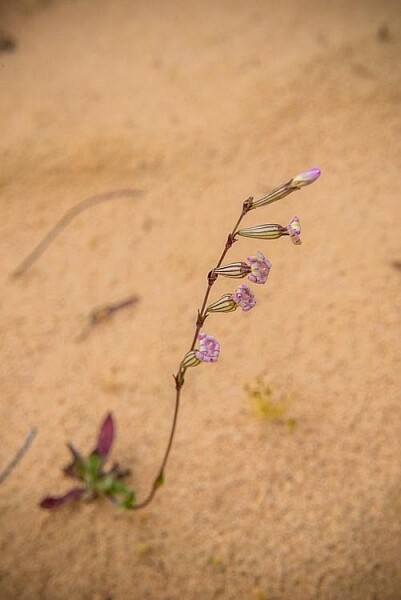
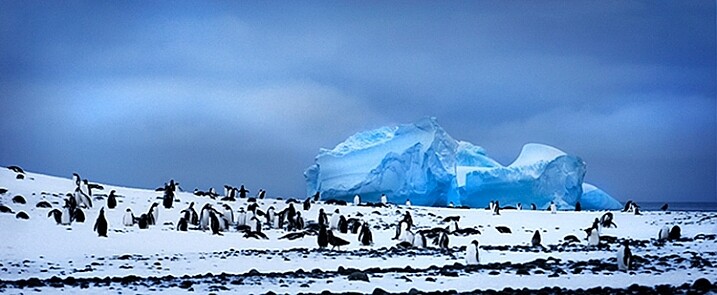
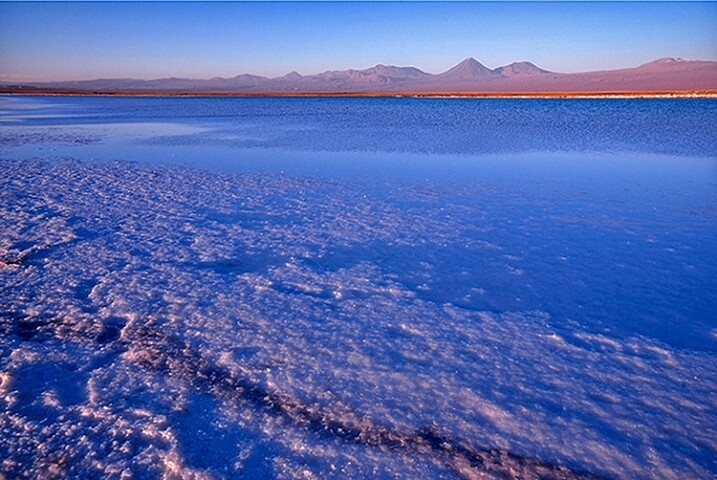
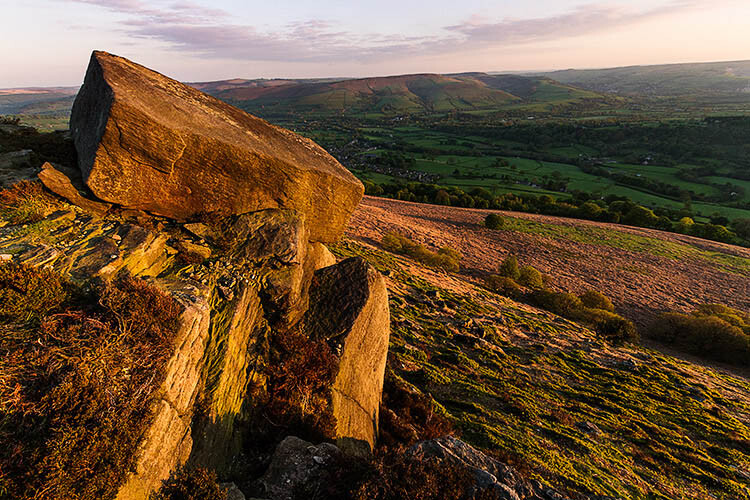
4. Foreground Elements

Placing a foreground element in your shot gives the image extra depth and dimension. It can also be used to convey scale and distance, as well as balance out your photo. A dominant foreground object can draw your viewer in, and quite simply makes your photo a more interesting one.

SunsetWaterloo

SmokyCreek

5. Use a Tripod

There are different schools of thought on the necessity of always having a tripod, and yes there are many times you can get away without having one. However, outdoor photography comes with many elements of movement, from a gentle breeze to crashing waves, to the sun – something is always moving. Sharp images are ideally what you want, and using a tripod is one way to deal with such movements.

Tripods are also a must for when you lengthen your shutter speed. You may do this for several reasons; the most common are when using a smaller aperture (higher f-numbers equals smaller aperture opening, which equals less light hitting the sensor) or shooting long exposures (where moving elements are blurred intentionally, e.g., that silky water effect).

LighteningArches

SmokyFalls

Conclusion

Many of these may not be new to you, but the key is remembering a few when you are out there, and trying to make that scene before you, one that is your own. Maybe you’ll spend a little more time surveying the scene or perhaps looking for lines and repetition?

Feel free to share any of your landscape photos that you think successfully utilizes any one of these tips in the comments below.

googletag.cmd.push(function() {
tablet_slots.push( googletag.defineSlot( “/1005424/_dPSv4_tab-all-article-bottom_(300×250)”, [300, 250], “pb-ad-78623” ).addService( googletag.pubads() ) ); } );

googletag.cmd.push(function() {
mobile_slots.push( googletag.defineSlot( “/1005424/_dPSv4_mob-all-article-bottom_(300×250)”, [300, 250], “pb-ad-78158” ).addService( googletag.pubads() ) ); } );

The post 5 Tips for Better Landscape Photos by Nisha Ramroop appeared first on Digital Photography School.


Digital Photography School

 
Comments Off on 5 Tips for Better Landscape Photos

Posted in Photography


6 Tips for Capturing Dramatic Skies in your Landscape Photography

17 Dec

Don’t let the land in landscape photography fool you–a great landscape photo relies just as much on the sky. Boring gray skies make for boring landscape photos. But capturing a dramatic sky in camera is trickier than it seems. With the sky lighter than the land, the camera will typically overexpose the sky, turning a brilliant blue into a vague and unexciting gray.

But, with a little fine tuning, it is possible to capture a sky that is the cherry-on-top of a great scene on land. Here are six tips for capturing more dramatic skies in your landscape photography.

Desolation Wildernes Sunset Jkatzphoto

Photo Courtesy Justin Katz Photography.

1 – Time it right

Landscape photography may not require the split second timing that’s necessary for capturing a toddler’s smile, or a wide receiver’s catch, but timing is still a big part of the picture. The sky that’s gray one day, could be bright blue the next. When planning out a landscape photo, consider how the timing will impact the sky.

Watch for weather patterns that add could add interest to a shot, like a storm brewing just on the horizon. Weather plays a big role in the overall mood of the image–if you’re hoping to capture a dark and gloomy shot, head out when the sky is stormy. On the opposite end, if you’re hoping to capture a more relaxed or happy feeling, look for blue skies dotted with clouds.

Yosemite Tunnel View Jkatzphoto

Photo Courtesy Justin Katz Photography.

The time of day matters too. While the middle of the day will produce the most shadows on the land, the sky tends to be the bluest then. Just after sunset and just before sunrise is often a good time to capture wispy clouds and a warmer tint of light. Of course, sunrise and sunset makes for a dramatic sky as well.

2 – Try the wrong white balance

Photography rules are sometimes meant to be broken–sometimes, using the wrong white balance setting creates a more dramatic sky. This is especially true when shooting towards the beginning or end of the day–using a different preset will adjust the color in the sky. Auto, cloudy and shade presets will get you an orange-ish sunset with a light blue sky, with a slight variation between the settings. A florescent setting, on the other hand, will typically turn an orange sunset purple, with a brilliant blue sky. Tungsten offers a similar effect, but with even deeper colors.

Whitebalancepresets

Using Kelvin temperatures to adjust your white balance results in an even greater control over the colors in the sky. Around 5500K will usually capture a sunny sky with an accurate white balance–that is, where things that are white are still white in the picture, or neutral tones. A higher temperature, for example 6500K, will give the land an orange glow but also enhance the colors in a sunset. A cooler temperature, on the other hand (say 3000), will play up the blues and purples. By using the Kelvin scale, you have more options for picking a white balance setting that best captures those colors.

White Balance 16,000 K

Photo © Hillary Grigonis – White Balance edited to 160,000 K in post-processing to add orange

While it’s always best to get the shot right in camera, shooting in RAW allows you even more flexibility when it comes to adjusting the colors in the sky (and the rest of the image, for that matter). If you perhaps overdid it by making the shot too warm or too cool, you can easily adjust it to find the color temperature that fits the image the best. If you have a landscape photo that you already shot in RAW, open it and try different white balance presets, or the temperature slider, to see first hand how shooting with a different white balance would have impacted the shot.

3 – Compose for the sky

When the sky is more dramatic than the land, why not use that when determining your composition? Pay attention to where you place the horizon when you are composing your shot. Using the rule of thirds to imagine the image is dived into threes, place the horizon on one of those horizontal lines. If you are shooting a photo with an average looking sky, try placing the horizon on the upper third of the image, so more of the land is included in the photo. But if the sky is really dramatic, take advantage of that and include more of it in the frame by placing the horizon on the lower third.

Darlene Hildebrandt

By Darlene Hildebrandt – The sky is dramatic so the image was composed to show less ground and more sky by placing the horizon toward the bottom.

Ádám Tomkó

By Ádám Tomkó – as the sky is less dramatic, the horizon placed higher helps minimize the sky.


4 – Use a filter

There are two filters every landscape photographer should have in their camera bag in order to capture more dramatic skies. The first is a graduated neutral density filter. A regular neutral density filter is like putting sunglasses over your lens–it limits the light coming in for bright scenes or long exposures. But a graduated neutral density filter places that darkening effect only on a portion of the image. By placing the dark portion of the filter over the sky, you can properly expose the entire scene. Without the filter, the sky will either be overexposed and bland, or the land will be underexposed and dark. With the filter, you can achieve an exposure that works for both in one shot. The only downside is that graduated neutral density filters don’t work as well with an uneven horizon, like shooting a cityscape. Graduated neutral density filters come in both circular and square formats, but the square is often preferred because you can then place the horizon anywhere in the frame.

A graduated neutral density filter doesn’t work in every scenario–like a very uneven horizon, for example. A polarizing filter doesn’t have as much of an effect on the sky, but it can still be used with uneven horizons. Polarizing filters work by adjusting the reflected light rays coming through your camera lens. Since the sky is blue because of these reflecting rays, turning the front of the polarizing filter will adjust the intensity of the blues in the sky. Since it just affects reflected light rays, it can still be used when mountains or buildings make the horizon uneven. Polarizing filters are also great for enhancing reflections off water or other shiny surfaces too.

Lake Tahoe Sunset Nevada Jkatzphoto

Photo Courtesy Justin Katz Photography.

Experiment with motion blur and long exposures

Long exposures aren’t just for photographing waterfalls. If you use a long enough shutter speed, the clouds will blur too, creating a sky of wispy clouds and a slight feeling of motion. To capture motion blur in the clouds, you’ll need to use a long shutter speed. The best settings will depend a bit on the weather and how much motion blur you’d like, but you can try starting with a two minute exposure and adjust up or down from there.

Kris Williams

By Kris Williams (Exposure info: ISO 200, f/22 for 75 seconds)

If you are shooting during the day, you may not be able to balance out a two minute exposure with a narrow enough aperture or low enough ISO, ending up with a photo that’s way too bright. So how do photographers capture motion blur in the clouds when the photo obviously wasn’t taken at dusk or dawn? A neutral density filter helps block out some of that light so you can use a long exposure during the day (that’s the same thing as the graduated neutral density filter from the last tip, only the entire filter is dark instead of just half).

Image used with permission of Matt Kloskowski

Image used with permission of Matt Kloskowski (10 second exposure)


Use the Camera RAW graduated filter tool

While it’s always best to get the shot right in-camera, there are a few editing tools that can improve the sky in your landscape photos. One of those tools is the graduated filter inside Adobe Camera RAW (works the same in Photoshop and Lightroom). Using the tool, you can click over the sky on the image. Like an actual graduated filter, the effect will only cover that portion of the image and gradually fade away, making it possible to create natural looking edits.

The graduated filter tool can be used to adjust the exposure, creating an effect much like using the actual filter. But, the Camera RAW tool can also adjust brightness, contrast, saturation, clarity, sharpness and color. That opens up a lot of possibilities for applying edits just to the sky for more drama that sometimes can’t be done in-camera.

Original imag

Original image

Graduated filter added in post-processing stage

Graduated filter added in post-processing stage

The sky can make or break a landscape photo. From timing and composition to filters, when you consider the sky as you shoot, you’ll end up with more dramatic, frame-worthy shots.

Do you have any other tips for creating dramatic skies in landscape photography?

googletag.cmd.push(function() {
tablet_slots.push( googletag.defineSlot( “/1005424/_dPSv4_tab-all-article-bottom_(300×250)”, [300, 250], “pb-ad-78623” ).addService( googletag.pubads() ) ); } );

googletag.cmd.push(function() {
mobile_slots.push( googletag.defineSlot( “/1005424/_dPSv4_mob-all-article-bottom_(300×250)”, [300, 250], “pb-ad-78158” ).addService( googletag.pubads() ) ); } );

The post 6 Tips for Capturing Dramatic Skies in your Landscape Photography by Hillary Grigonis appeared first on Digital Photography School.


Digital Photography School

 
Comments Off on 6 Tips for Capturing Dramatic Skies in your Landscape Photography

Posted in Photography


Tips for Using Flash to Enhance Outdoor Nature and Landscape Photography

13 Dec

Late on a winter evening, I was photographing atop a ridge in Colorado’s Front Range. I had been working on some landscape shots, but with the light fading from the sky, the thought of beer and food was beginning to overwhelm my desire to stay out. The colors were shifting to the deep tones of blue hour, and the light was long gone from the hills. About to give up and head home, I spotted a lone juniper atop a rocky outcrop, perfectly silhouetted against the deep blue of the mountain sky. I sighed, tempted to ignore the scene, but instead put my camera back on the tripod, walked over and composed a shot. With a click, I snapped the shutter.

CO KenCaryl evening 30Dec2011 6

The image was decent, nice blues with a clean black foreground, but it needed some warmth, an element to contrast with the abundant cool tones. “If only I could get a beam of sunlight to reach back above the horizon…” I thought to myself.

Wait a second… I didn’t need the sun, I had a flash and a remote trigger in my bag. I pulled it out, all thoughts of beer and food forgotten, and placed the flash on a boulder a few feet to my left. I set it low, to 1/4 of full power, then took a shot.

Better, I thought, looking at the image glowing on the back of my camera, but still not right. The light coming from the flash was too cool, lacking the warmth I wanted. Digging back in my bag, I emerged with a pack of gels and slapped a half cut of CTO (color temperature orange) over the flash, and clicked off another.

CO KenCaryl evening 30Dec2011 7

“Now we’re talking”, I muttered. A warm beam of light crossed the rocky foreground to light up the tree. Never mind that the actual sunlight disappeared 45 minutes before, I could re-create it with a little artificial light trickery. A few adjustments to the flash’s positioning and brightness, and I had my keeper shot. Finally, I could go home.

Using Flash Outdoors

For most photographers, flash is relegated to the studio, and if used outside it is usually restricted to portraiture. But there is so much more potential for artificial light. Landscape and wildlife photography can often benefit from a little flash, and with some creativity, it can bring out the best in your images. Here are a few tips to help you get using flash for your outdoor nature and landscape photography.

To get started, you’ll need a few things in your bag:

  • At least one flash
  • Some kind of remote trigger (I use cheap and simple wireless triggers I found on Amazon for a few bucks)
  • A selection of multi-colored gels
  • A flash stand or assistant
  • For night photography, a strong headlamp or hand-held flashlight is a good addition to the kit
A windmill stands in the garden of the Finca Santa Anita in Salta Province, Argentina.

A windmill stands in the garden of the Finca Santa Anita in Salta Province, Argentina.

General Guidelines

As with almost all flash use, for best results, you’ve got to get the light off your camera. On-camera, straight flash, looks weird and unnatural. I like to say that photographic rules are meant to be broken, but this one seems universal: get the flash off your camera.

Get the flash off your camera

Direction of light, and how much to use it, is a matter of your personal vision, but here are my thoughts: Artificial light should either look so natural, you don’t notice it comes from a bulb, or so obvious, that it’s clear the scene was lit for artistic reasons. Anything in between usually doesn’t work.

As with all successful photography, you need to think through your image, and the story you are trying to tell. Do you want a natural-looking scene or are you aiming for an artistic portrayal of your subject? Once you have an answer to that question you can move forward.

Scrubby pines grow from the rocks of the Dakota Hogback in the foothills of Colorado outside Denver, late evening.

Scrubby pines grow from the rocks of the Dakota Hogback in the foothills of Colorado outside Denver, late evening.

Imitating Natural Light on the Landscape

The near-dark hours before dawn and just after sunset, or full night, are the most suitable times to add a bit of light to a scene. A natural look is usually subtle and may rely heavily on the light that is already available to you. In my example of the juniper tree, I kept the flash setting low, and warmed the light with a gel to get a sun-like look. Finding the right balance between flash and ambient light is critical.

The further you get from the flash, the dimmer, and harder the light becomes. A flash aimed toward the ground will be very bright close to the strobe, fading quickly to invisibility. When setting your scene, use the test button to look at the throw of light across your subject. Aim it carefully, and take advantage of the flash’s zoom to consolidate the beam just where it is needed.

A Western Scrub Jay perches in a tree in the foothills of the Rocky Mountains outside Denver, CO, USA.

A Western Scrub Jay perches in a tree in the foothills of the Rocky Mountains outside Denver, CO, USA.

Adjusting Exposure

Once set, pop a shot or two, and check the results on your LCD. Almost always, you’ll find you need to adjust the flash brightness, placement, or the ambient light exposure.

When using flash remember this: adjust ambient light with the shutter speed, and flash with the f-stop (aperture).

For example, if you want to bring out more brightness in the sky, lengthen your shutter speed, if you want to increase the apparent brightness of your flash, open up the aperture. This is effective for small adjustments in camera, and keeps you from having to constantly readjust flash settings.

Lighting Your Vision – Artistic Styles

An artistic look is more straight forward, but light direction, intensity, and color are just as important. I often photograph the northern lights around my home in Fairbanks, Alaska. Often the moon, stars, or aurora itself, are sufficient to illuminate the foreground, but at times, it fades to black as you can see below.

AK FAI aurora 112073 17

In such cases, a splash of light is just what I need. When photographing the aurora, or the night sky in general, I rarely carry an actual flash, but I’m always wearing a headlamp. During a typical 5-10 second exposure, if I need a little extra texture or warmth, I can pan the beam quickly over the foreground, “painting” it with light as I did in this image.

AK FAI aurora 112073 18

Light from a typical LED is very cool, but cover it with CTO gel, and nice warm tones result. Light painting is a popular technique, but one that requires some practice to make sure your subject is evenly lit, and not too bright. Mixing light painting and ambient can be very effective to even out brightness in an image, and compensate for highlights. In Argentina, a few years ago, I was shooting a historic farmhouse during the late evening. Bright porch lights on the house needed to be evened out, so I painted some key parts of the scene.

Arg Salta SantAnita house night 104133 18

A warning: painting light can mess with the color of a digital image. If you use your camera’s automatic settings, as I do, light painted images will often require some color correction in post-processing. Shoot in RAW to be sure you retain this flexibility.

Wildlife

Flash can also play an important role in wildlife photography. Birds in particular are often down low in dark forests, where natural sunlight is rarely found. The flat, boring light beneath the foliage can be replaced by the directional light of a flash.

CO Dec2009 AMRO 3

When using flash with a long telephoto, you can often get away with on-camera, or bracket-mounted flash, as I did of the portrait of the American Robin above. Using camera-mounted flash is easy with TTL (Through The Lens) compatible strobes. In fact, this technique is so easy, that I’m not even going to go into it, because more interesting possibilities exist.

Where I live in Alaska, the winters are long, and during the few hours of daylight, the sun is often hidden behind trees or clouds. The birds I love to photograph are usually stuck in flat, gray light. There are a few trees in my yard that the birds prefer. By setting up a flash (or two), gelled with CTO to emulate the absent sun, I’ve managed to create some well lit portraits of these guys.

RBNU 21Dec2011 2

The method is similar to lighting a landscape. You’ve got to choose your flash placement to avoid shadows, and since there is rarely a chance to replicate a poorly exposed shot, it’s best to get your settings right and then leave them in place throughout the shoot. In this case, I was going for an almost studio-like look, so I took advantage of the white snow as a background, making the final image appear almost as a cut-out.

ORJU 22Dec2011 2

I like to put my flashes atop a tall stand to get them over my head like a low angle sun. Done right, the set up and exposure takes only a few moments, and the results can be great.

Conclusion

Artificial light in the outdoors offers a great opportunity to create unique images. Think through your shots, consider where extra light can be added, and what role it will play in the final image. Not every situation requires it, in fact, most don’t. But there are times when that extra pop of light can take a photo from mundane to extraordinary.

Have you tried using flash with your nature or landscape photography? Please share your tips and images in the comments below.

googletag.cmd.push(function() {
tablet_slots.push( googletag.defineSlot( “/1005424/_dPSv4_tab-all-article-bottom_(300×250)”, [300, 250], “pb-ad-78623” ).addService( googletag.pubads() ) ); } );

googletag.cmd.push(function() {
mobile_slots.push( googletag.defineSlot( “/1005424/_dPSv4_mob-all-article-bottom_(300×250)”, [300, 250], “pb-ad-78158” ).addService( googletag.pubads() ) ); } );

The post Tips for Using Flash to Enhance Outdoor Nature and Landscape Photography by David Shaw appeared first on Digital Photography School.


Digital Photography School

 
Comments Off on Tips for Using Flash to Enhance Outdoor Nature and Landscape Photography

Posted in Photography


One Compositional Technique to Transform Your Landscape Photos

09 Nov

GreenRocks

Turning the corner from taking snapshots into taking actual compositions is a hard thing to do. It doesn’t come naturally, and it takes experience. Another reason it is difficult to learn composition is that there is no one, hard and fast rule. You can get caught up in looking for various shapes, patterns, leading lines, and other compositional elements until your head is spinning.

To avoid all of this, I want to share one concrete technique for you to use when you are out shooting landscape photos. It is one way to go about setting up your shot, that will give you a path to setting up a successful composition. Of course, it isn’t the only way to set up your shot, and you won’t use this all the time, but it is great for helping when you are stuck.

Mushrooms

And the tip is . . .

. . . the next time you are out shooting it a scenic location, just put on your widest angle lens and get right behind something on the ground to take the shot.

I mean right behind it. That something on the ground can be anything from a flower, to a rock, to a pattern in the sand. It does not matter. What matters is that you are down on your knees with your wide-angle lens right behind it.

Clogher

Why it works

The wide-angle lens will give the foreground object an exaggerated sense of proportion, but will also pick up the background. By getting right behind something, you are adding a subject to your picture. You are creating a center of interest. You are going beyond just showing the general scenery. The background will still be in your picture as well, you just do not need to focus on that.

Another benefit is that it gives the viewer a sense that they can walk into the picture. It is providing a real foreground, that adds depth and interest to your photo.

HydePark

What typifies a snapshot, is standing at eye level trying to capture the entire scene before you. For many of us when we are just starting with photography, that just intuitively seems like the way to take pictures. We want to capture the whole scene, and not have it blocked by something on the ground immediately in front of us. The problem is that there is no foreground, subject, or center of interest to speak of. In addition, you are presenting the world in the exact same way as the viewer is used to seeing it, which is bound to be rather boring to them.

Acadia-low

Putting the tip into action

How you determine what items on the ground will work as your foreground elements, that is the hard part. There is no right answer. You will just have to look. In fact, it will not be obvious even when you are out in the field looking around. There are times when you might have to walk around while looking at the LCD in Live View mode, or with the viewfinder to your face to find something on the ground to use as a foreground.

BigBend

Here are some examples of things you can use as foregrounds in different contexts:

  • When photographing water – use a reflection in the water
  • When at the beach or desert – find a pattern in the sand
  • When photographing creeks or coasts – use rocks
  • At midday – use shadows
  • In the fall – use leaves

There are obviously a variety of subjects you can use. Go out and try it next time you are shooting, and if you come across a good item to use in the foreground, leave it in the comments and share your images with us.

googletag.cmd.push(function() {
tablet_slots.push( googletag.defineSlot( “/1005424/_dPSv4_tab-all-article-bottom_(300×250)”, [300, 250], “pb-ad-78623” ).addService( googletag.pubads() ) ); } );

googletag.cmd.push(function() {
mobile_slots.push( googletag.defineSlot( “/1005424/_dPSv4_mob-all-article-bottom_(300×250)”, [300, 250], “pb-ad-78158” ).addService( googletag.pubads() ) ); } );

The post One Compositional Technique to Transform Your Landscape Photos by Jim Hamel appeared first on Digital Photography School.


Digital Photography School

 
Comments Off on One Compositional Technique to Transform Your Landscape Photos

Posted in Photography


10 Tips for Better Landscape Photography

06 Nov

Landscape photography is a very popular genre and many amateur photographers start their hobbies doing it. There is, however, a lot more to it than just going out somewhere beautiful, putting your camera up to your face, and clicking the shutter button.

Have you gone out and taken some landscape photos, then found that they didn’t look that good when you got home? Do you get lost when you go out, and don’t know what to photograph, or how? Here are 10 tips to help you get you do better landscape photography.

leanne-cole-ten-tips-landscape-3611

A bush trying to grow on the edge of some cliffs show how harsh the environment is and leads you to the cliffs.

1 – Work the scene

One thing you see a lot of new photographers doing is walking up to a scene, taking one photo, and think they are done. However, a more experienced person will take a lot more photos, and spend time walking around and seeing what they can get from that scene.

Think about different angles, and different heights. With digital you can take so many photos, and it won’t cost you anything, other than a few minutes. So work the scene, and see what else you can get.

2 – Leading lines and patterns

This is something that we all learn from the beginning, find a leading line that will take your viewer into the image. Fences, roads, or anything that is like a line, that starts at the side of the frame, and takes people into your image. It is the invitation to look at the photo.

Patterns can be a great way attracting attention. If you notice a pattern somewhere, and take a photo of it, there is a good chance that your audience will also find it interesting. Patterns can be anywhere, in the ground, on the bark of trees, how they are planted. They can be fascinating.

leanne-cole-ten-tips-landscape-3836

Roads can be great leading lines to take your viewer into your image.

3 – Time of day

This is something that we all learn at the beginning, time of day is important. It is also dependent on the time of the year. Here in Southern Australia you can shoot all day long in winter. The sun is never high in the sky, the shadows are soft, and it is a great time of the year to take photos. On the other hand, summer is terrible. It is hot, the light is harsh, the shadows are sharp, and often the colors in your images can look bleached.

Think about where you are, and what time of the day is best where you want to take photos. Some people prefer early morning, there aren’t many people around, and you can get what you want before the day starts. Others prefer later in the day, and don’t mind sharing their location.

Some areas that you want to photograph will be better for sunrise, as you may not be able to get a sunset there. Or it could be the other way around. Many coastal areas on the east coast of Australia mean that is it almost impossible to get a sunset, so you need to get up early and aim for sunrise instead.

leanne-cole-ten-tips-landscape-0122

Early morning can mean sunrise, but at certain times you can also get mist on water.

4 – Look at your foreground

The foreground is often forgotten when taking landscape photos, but sometimes what is right in front of you is exactly what you need to make your image stronger.

Some images of landscapes can be a bit more interesting by adding a small plant or something that is in the front, close to the camera. It can also be a leading point to the scene at the back of the image.

leanne-cole-ten-tips-landscape-7254

The foreground plants give interest to the landscape behind.

5 – Look at what other photographers do

Without a doubt, one of the best things you can do is to look at other photographers, and take note of what they do. Don’t underestimate how much you can learn by looking at the work of others. Not just good or professional people, but also amateurs, you can see the good and the bad.

Look work that you like and determine why you like it, exactly what it is that you think makes it work. Can you pinpoint what it is about that image that makes you jealous that you didn’t take it?

Take notes of images that you don’t think are very good. Analyze them and see what it is that you find isn’t working. Learn from them, and make sure you don’t make the same mistakes.

6 – Think about the seasons

It’s very easy to go out one day and take photos of a particular place, then forget it exists, but what about thinking about other times of the year. Some places will look better in summer than they do in winter. Spring could be a time with lots of flowers, while autumn will give you colourful trees.

Photographing the same place throughout the year can give you a different feeling to your images every time you go there.

It is also a good idea to think about where you want to take photos, then consider what will be the best season to show it off. The mountains can look sparse and uninspiring in the summer, but in winter they are covered in snow; it adds a different dimension.

leanne-cole-ten-tips-landscape-1050

Autumn can bring lots of color to your landscape photography.

7 – Look for the smaller landscape

When you are out, it is very easy to put on a wide angle lens, and take all your photos with it. Most landscapes are wide vistas showing the scene that is before you. But, there are other ways to show what is there. Look around for objects or flora that you can use in the foreground. This is especially good if the subject is in the distance. It can give something interesting in front of your image.

Try taking a zoom or macro lens with you. You might be able to photograph something like the flora. Don’t just zoom right in on flowers that may be growing on it, try considering the whole plant and where it is situated. It can you give it some context as to its environment. This can help you tell a whole other story at times.

leanne-cole-ten-tips-landscape-7351

Flowers trying to grow in sand helps to tell the story of the location.

8 – What equipment do you need

You don’t need anything special to photograph landscapes, a camera with a decent lens is enough. You can use a compact camera just as well as a DSLR, it is really up to you.

If you are using a DSLR then you probably want a wide angle lens, or something a bit longer. Landscape photographers tend to use wide angles more, though many also use up to 200mm lenses as well. You don’t need the best camera that is available, and often it’s the lens choice that will give you the best results.

A sturdy tripod is good to have. The best advice is to get the best you can afford, don’t skimp on the price, you will regret it later if you do. A remote shutter release is a great piece of kit to have as well, or you can use the self-timer on your camera.

When you progress, and as you get more skilled at landscapes, the equipment list tends to grow. You will find yourself wanting items like filters for long exposures or better lenses. The list can be endless.

9 – Tripod: when to use or not

There is an opinion that if you are a serious landscape photographer, then you will always use a tripod, no matter what. If you are not, then you can’t be sincere about your craft.

It’s one way of looking at it. But, so many new and experienced photographers, find it can be limiting, or stifle your creative flow; that you can’t move around easily when taking your photos.

The short answer to this is that you have to feel comfortable when you are doing photography, so there is nothing wrong with not using a tripod. Though you also have to accept that, at times, you may not get the sharpest images – so it’s a trade-off.

If you are shooting at night then a tripod is a must, especially if you don’t want noisy photos. A tripod means you can use the best settings on your camera to get the highest quality image.

10 – Look for the story

There is no denying that some places you go to will seem boring, and you will wonder why on earth you went there. It’s one of those times when you will want to consider other tips here, but one tip that can really help is to find the story of the area.

Consider where you are, and why you went. Is there some history that you can see that still remains? How can you incorporate that into the image to show the story?

In many places in Victoria, Australia, you can travel to a town and find very little there. The only thing there might be grain silos, and fields of crops in various stages of growth. Look at the silos up close, and see if you can photograph how long they have been standing there. Look for how they are used. There will always be railway tracks next to them, so shoot how they lead you to the silos (see tip #1 above). Maybe do one from a distance showing the silos standing tall in a flat country. The story becomes all about the silos and that countryside.

Landscape photography is wonderful, and what you can take photos of is endless. Think about all the tips here and they should help you do your best landscape photography.

Please share any other tips you have for landscape photography, and your images in the comments below. If you use some of the tips, let me know how they worked out for you.

googletag.cmd.push(function() {
tablet_slots.push( googletag.defineSlot( “/1005424/_dPSv4_tab-all-article-bottom_(300×250)”, [300, 250], “pb-ad-78623” ).addService( googletag.pubads() ) ); } );

googletag.cmd.push(function() {
mobile_slots.push( googletag.defineSlot( “/1005424/_dPSv4_mob-all-article-bottom_(300×250)”, [300, 250], “pb-ad-78158” ).addService( googletag.pubads() ) ); } );

The post 10 Tips for Better Landscape Photography by Leanne Cole appeared first on Digital Photography School.


Digital Photography School

 
Comments Off on 10 Tips for Better Landscape Photography

Posted in Photography


£10,000 Landscape Photographer of the Year 2015 prize winner announced

20 Oct

A picture of the Dorset coastline on a snowy day has won a UK photographer the £10,000 top prize in the ‘Take A View’ competition. Andy Farrer, a professional photographer from Dorset, England, has become the ninth Landscape Photographer of the Year with his image of ‘Bat’s Head In The Snow’. Read more

Articles: Digital Photography Review (dpreview.com)

 
Comments Off on £10,000 Landscape Photographer of the Year 2015 prize winner announced

Posted in Uncategorized


8 Common Landscape Photography Mistakes

08 Oct

As photographers, we know that there are literally hundreds of small things that need to be done in each scene, that add up to the final magnificent shot. Sometimes when we get behind the camera, and the light becomes amazing, it’s very easy to forget one or two things, and the result is that the shot is not as good as it could have been. There are lots of details to remember, but there often some obvious things that have been forgotten. These are the common mistakes I see in many landscape images. If they were corrected at the time, the image would have been much more dramatic and powerful.

Penguins and iceberg in Antarctica.

Penguins and iceberg in Antarctica.

So here are the eight top landscape photography mistakes make so you can avoid them and improve your images:

1. Stability – use a tripod

In creative images, blurriness can be very interesting. In landscape images however, you usually want your image to be sharp all the way through. The best way to be sure that your image is sharp is to use a tripod. If you are shooting in low light (you mostly will be if you are shooting landscapes) then you absolutely need to be using a tripod.

Now, there are tripods and there are tripods. For landscape photography, you might want to invest in a more heavy-duty one. The small light-weight tripods might do the trick for a while, but if you are shooting on a location and it’s windy, your tripod may get blown over, or might move because of the strength of the wind. A good tripod will also last a long time and take a beating, so buy the best tripod you can afford, and make sure you keep your camera as still as possible when shooting.

Another good piece of equipment to buy is a cable release. You don’t need to buy one of the expensive ones with the intervalometer built-in, no, just a simple cable release. Once you are set up and ready to take your shot, step back from the camera and press the button. There will be no vibration from you pressing the shutter release and your image will be nice and sharp. If you don’t have a cable release, you could use the built-in self timer to release the shutter too.

2. Get the horizon straight

This almost goes hand-in-hand with using a tripod. Many a good landscape image has been damaged by a skewed horizon. Fortunately, this can be easily fixed in Photoshop or Lightroom, so it’s not a very big worry, but you might have to crop out some details to get that right. The idea however, is to get the shot right in camera first, then edit.

You can use a few different tools to make sure your horizon is straight. Firstly, switch on the grid in your camera viewfinder, line up the horizon with the horizontal line, and you should be good. Some tripod heads have a built-in spirit level, make sure this is level and your horizon should be fine. Lastly, use the live view function on your camera, and if you have it, bring up the false horizon dial on the back of your screen, level your camera, and you are done.

I prefer levelling my horizon in camera, as it helps to save time in post production. If you need to straighten the horizon afterwards, you will need to crop the image as I noted earlier, which means your composition may change slightly. I prefer not to crop as far as possible, so getting it level in the camera is a good goal.

A crooked horizon is distracting.

A crooked horizon is distracting.

Looks better now that the horizon is straight.

Looks better now that the horizon is straight.

3. Shooting only in landscape format

Many photographers assume that they should shoot a landscape scene in landscape (horizontal) format. This is normally not a bad idea, but in some cases, a portrait orientation (vertical) can work really well. Think of a forest or mountain scene. If the subject shape is more vertical than horizontal, try it in the portrait format, it can add a dynamic feel to the scene.

Shoot in portrait format too!

Shoot in portrait format too!

4. Not thinking about the aperture

I truly believe that aperture is a composition tool. When you are setting up a scene, you should be thinking about your depth of field. Do you want everything from the foreground to the background to be in focus? Generally, in landscape photography, this will be the case.

If that is what you want, make sure your aperture is f/8, f/11 or higher. That way, you will ensure that everything is in sharp focus. If you are at f/2.8, and you focus on the foreground, the background will be out of focus, and the middle of your scene will be soft. This should be one of your key checkpoints when you set up the shot. If you are using a wide aperture and the mountains in the distance are out of focus, this cannot be fixed afterwards in Photoshop…not yet anyway!

In a landscape image, you will likely want everything in focus.

In a landscape image, you will likely want everything in focus.

5. Shooting using the camera’s landscape mode

Yes, you may have a landscape setting in the scene modes on your camera. As much as possible, try not to use it. Why? Well, it’s not great at making the exposure look good for your scene. What it will do is set your aperture to f/8 or even f/11, but it may not render the scene as effectively as you could do using manual settings. The scene settings are designed to work within certain parameters and in low-light conditions, they are not always the best choice. Try and shoot your landscapes on manual settings as far as possible, that means that you control ISO, shutter speed and aperture.

6. Standing next to other photographers

If you see a group of photographers standing on the top of a hill, it might be a good idea to shoot from somewhere else. This is not to say that other photographers have got it wrong, rather what I mean is, you want to go home with a different image to the others. Sometimes, the best composition or vantage point is at one particular spot, that’s fine, take a shot from there, but look for other places to get a great shot too.

It’s a good idea to scout a scene before you shoot it. Go and take a walk around the day before, look at where the sun will be setting, and decide on your position. Don’t simply follow the crowd, then your images will look like the rest of the images taken there.

A different vista of Machu Picchu.

A different vista of Machu Picchu.

7. Uninteresting negative space

Negative space is the space that surrounds your subject. This space can truly make, or break, your image. In most cases, the sky is the negative space in a landscape scene. A clear blue sky looks great, but some wispy soft clouds can really make the scene dramatic. If the sky has no clouds and is clear, this can make the scene seem uninteresting.

If you find that in your scene, make the sky a smaller portion of your image, if there are some great looking clouds, give it more space in your scene. Sometimes, you don’t have a choice, you may only be able to get some shots on a particular day. In that case you need to get what you can. If you don’t have this constraint, try to go back on another evening, when there are some clouds in the sky. Clouds give the sky detail, they reflect the sunlight, and can look yellow orange against a blue sky. This makes for a much more interesting scene.

The sky had no clouds, so I made it a small part of the image.

The sky had no clouds, so I made it a small part of the image.

8. No clear subject

It sounds crazy, but it is very easy to have an unclear subject in landscape photography. Most often, landscape photography is of a natural scene, mountains, forest, river, seascape, deserts, etc. Whichever one it is, make sure that it is clear to your viewer.

If you are photographing a mountainous scene, make sure you use a lens that works for that scene. Landscape photographers are tempted to think that every image needs to be taken with the wide angle lens. Sometimes, this can cause the mountain range in the background to seem small and insignificant. The same can be true in any of the other types of landscape photography. Be sure that your viewer knows what they are supposed to be looking at, and show them that, and the beauty that surrounds the subject. Get close to your subject, as close as possible, and if it’s not close enough, maybe you need to use a different lens to get closer. A 50mm lens can be used in landscape photography, so can a 200mm lens, it all depends on what you want the viewer to see.

Subject-2

The iceberg in front of the ship is clearly the subject here.

Next time you are planning a landscape photo shoot, run through these points quickly and see how it works out for you. If anything, you will be more mindful and deliberate about what you are shooting, and that will immediately improve your images. Enjoy.

googletag.cmd.push(function() {
tablet_slots.push( googletag.defineSlot( “/1005424/_dPSv4_tab-all-article-bottom_(300×250)”, [300, 250], “pb-ad-78623” ).addService( googletag.pubads() ) ); } );

googletag.cmd.push(function() {
mobile_slots.push( googletag.defineSlot( “/1005424/_dPSv4_mob-all-article-bottom_(300×250)”, [300, 250], “pb-ad-78158” ).addService( googletag.pubads() ) ); } );

The post 8 Common Landscape Photography Mistakes by Barry J Brady appeared first on Digital Photography School.


Digital Photography School

 
Comments Off on 8 Common Landscape Photography Mistakes

Posted in Photography


8 Tips for Fall Landscape Photography

08 Oct

Fall is a fantastic time of year for you to photograph the landscape and really push your creativity. The colors, textures, and soft light provide an amazing palette to create compelling photographs. It’s really easy though to just point your camera at the color and hope the image comes together without thinking about the composition. Here are just a few tips to take with you into the field to make the most of the colorful season in your fall landscape photography:

1. Use a longer focal length lens

Dd tip1

It’s tempting to photograph grand scenes with a wide angle lens, but using a longer focal length lens, 200mm or longer, can really help simplify the scene and make the subject about more than just color. You can also use the longer focal length lens to photograph the intimate details of a forest interior. Look for elements in the scene where there is a break in the pattern or use negative space to help isolate the subject.

2. Use a wide aperture to isolate the subject

Dd tip2

Pick a wider aperture, around f/2.8 or f/5.6, to isolate your subject from its surroundings. This will help create visual contrast between the sharp subject and the background, which will be softer and more abstract. This also adds tension between the real and the unreal, providing you with an image that’s more dynamic and expressive. Experiment with different subjects and backgrounds and get creative with your choices. Pay close attention to your subject and make sure that you have the desired amount of the subject in focus when using a wide aperture.

3. Make fall color the secondary subject

Dd tip3

The temptation is for you to make the primary subject all about the fall colors. Find other primary subjects such as streams and waterfalls that are accented by the fall colors, to make images that have more depth and complexity. Although the color may attract your eye to the scene, ask yourself what the subject might be other than color.

4. Look for patterns and textures

Dd tip4jpg

Color is an obvious design element that you’ll be working with in your images but look, for others like pattern and texture, to create satisfying compositions. Learning to see the world around you as elements of 2-D design (line, pattern, texture, etc.) will help you move forward in your composition skills.

5. Be patient and wait for interesting or dramatic light

Dd tip5

Patience may be the best tool in your camera bag. Fall colors are wonderful, but can be even more stunning when combined with the right light for your subject. Patience usually is a big factor between a good image and a great image. Many times the best light can be short lived, so think through your composition in advance, and be ready for the light to work some magic.

6. Experiment with intentional camera movement

Dd tip6

Definitely experiment with moving your camera vertically as you release the shutter to blur the scene and create an abstract image of lines, textures, and colors. Experiment with different shutter speeds, and the pace of moving your camera, until you find the right amount of blur. This is a great opportunity for you to take your camera off the tripod and just play with camera movement. Darker elements that work well include a rock face, canyon walls, or deep shaded areas in the forest.

7. Look for elements that contrast the fall color

Dd tip7

Fall colors are usually bright and have texture and pattern. Look for opportunities to place the fall colors against darker elements so you can create an image with some dramatic tension.

8. Don’t forget to look up

Dd tip8

The interior of a forest can be an amazing and colorful place to photograph, but it’s often difficult to isolate a subject. If you’re having trouble, look up and explore the canopy. Images that contrast the fall colors with the deep blue sky can be really pleasing and make interesting wide angle photographs. Don’t forget to use smaller apertures like f/22, to create a starburst effect as you shoot through the forest toward the sun.

Summary

Hopefully these tips will help you make the most of your time photographing the amazing colors of the fall season. Take the list with you into the field so you can slow down, think through your compositions, and return home with some compelling photographs.

googletag.cmd.push(function() {
tablet_slots.push( googletag.defineSlot( “/1005424/_dPSv4_tab-all-article-bottom_(300×250)”, [300, 250], “pb-ad-78623” ).addService( googletag.pubads() ) ); } );

googletag.cmd.push(function() {
mobile_slots.push( googletag.defineSlot( “/1005424/_dPSv4_mob-all-article-bottom_(300×250)”, [300, 250], “pb-ad-78158” ).addService( googletag.pubads() ) ); } );

The post 8 Tips for Fall Landscape Photography by Dusty Doddridge appeared first on Digital Photography School.


Digital Photography School

 
Comments Off on 8 Tips for Fall Landscape Photography

Posted in Photography


How to do Landscape Panoramic Photography

28 Sep

Have you ever been somewhere with a great view and taken a picture with your widest lens, but wished you had an even wider one that could capture the whole scene?

That is how panoramic photography was born in the 1840s when the pioneer photographers started using Daguerreotype plates pieced together to form very wide-angle scenes.

01


This panoramic image showing San Francisco from Rincon Hill was photographed by Martin Behrmanx in 1851. It is believed that the panorama initially had 11 plates, but the original daguerreotypes no longer exists.

An image showing a field of view greater than that of the human eye, about 160° by 75° or an aspect ratio of 2:1, or larger may be considered panoramic.

Even thou there is specialized equipment for panoramic imaging, we still find ourselves using the same simple techniques of merging images together more than 150 years later, but now using digital cameras and photo merging software to achieve similar results.

This is a simple and beginner’s approach on how to create a panoramic image like this one:

02


This amazing view of The Dom Luís I Bridge in my hometown Oporto, Portugal, was created by merging four vertical images into a high-resolution panorama.

03


Shooting your panorama

To make sure you get good results in you panorama merging, it’s important to use Manual settings in you camera and try to have similar exposure, focus and white balance in all your images.

In this particular case, the images were photographed with a 20mm lens in a full frame camera body at f/16, 1/125th and ISO100. The focus was set to infinity and the white balance was set at 5500K.

It’s also really important to have at least 30% overlapping between images so that the software can have enough pixels to merge and make the blending seamless.

The more rigorous you are during the image exposure step, the more likely you are to have better results in your final image. The use of a tripod and a bubble level are recommended tools, but on a day with good light you might get away with handheld camera images, as long as you try to follow the horizon line or some reference points for the image overlapping.

The number of images you need depends on the field of view you want to cover, but always try to photograph more area than you need so you can crop after the merging process. Portrait or vertical images are usually a better option because they give a better height and therefore higher resolution to the final image.

Stitching your panorama

As for the stitching process, here are the basic beginner steps in Adobe Photoshop, but keep in mind that there is a lot of software options for this kind of editing that can be taken further with vertical, 360º or multi-row stitching which are a lot more complicated.

  1. Open Photoshop
  2. File > Automate > Photomerge
  3. Browse and select the images for the panorama
  4. Click the “Auto” option in the Layout area
  5. Click the “Blend Images Together” option
  6. Click OK to start the stitching process

You will end up with a final stitched image like this:

04


The layer masks are really helpful if you have moving objects, or difficult areas in your image that look weird after stitching and can be edited to enhance the blending.

Now you can flatten the image and just choose the best crop area for your panorama.

So, just add this technique to your bag of tricks and give it a try next time you spot a panoramic view.

googletag.cmd.push(function() {
tablet_slots.push( googletag.defineSlot( “/1005424/_dPSv4_tab-all-article-bottom_(300×250)”, [300, 250], “pb-ad-78623” ).addService( googletag.pubads() ) ); } );

googletag.cmd.push(function() {
mobile_slots.push( googletag.defineSlot( “/1005424/_dPSv4_mob-all-article-bottom_(300×250)”, [300, 250], “pb-ad-78158” ).addService( googletag.pubads() ) ); } );

The post How to do Landscape Panoramic Photography by Ivo Guimaraes appeared first on Digital Photography School.


Digital Photography School

 
Comments Off on How to do Landscape Panoramic Photography

Posted in Photography


Responsibilities of Landscape Photographers

21 Sep

It is hardly questionable that landscape photography is both rewarding and fun. The whole process from planning and researching an outing, to making your way to a location during ideal conditions and, finally, producing a completed image of an exquisite vista can be so fulfilling it’s easy to see why it is such a popular genre.

Iceberg

Unfortunately, there are costs to this popularity. Even though most landscape photographers do identify as environmentally-minded, the sheer number of visitors to some locations can cause adverse effects despite the best of intentions.

There are a few things you can look out for and practices you can take up to help ensure that you nullify – or at least minimise – your environmental impact on your next photography trip.

Watch your step

Chances are you have heard the often-quoted, “Take only photographs, leave only footprints”. It’s a good starting point that simply means do not intentionally damage your surroundings and do not leave your litter. Sadly, it doesn’t go far enough.

Moss in Iceland takes decades to grow but moments to permanently destroy.

Moss in Iceland takes decades to grow, but moments to permanently destroy.

Many ecosystems are extremely fragile and footsteps alone can cause catastrophic damage. Take Iceland’s mossy lava fields: that moss can take many decades to grow, but it can only handle being stepped on two or three times before it’s destroyed permanently.

There are countless other examples of fragility in the world, such as California’s Mono Lake and its Tufa formations. It is easy, however, to prevent this damage. Just adding a little bit of extra location research before you head out can reveal any extra care you should take to prevent any damage.

If you’re traveling abroad and find that obtaining the relevant information is difficult, don’t be afraid to ask local people or officials. I once listened to an impassioned Icelandic warden rant about a tourist who drove a rented 4×4 and devastated about a quarter mile of moss just to stand at the edge of a lake for five minutes. Just ask around, they will probably be grateful for your concern and may even be able to turn you on to lesser-known opportunities.

Follow local regulations

In areas that you're required to stay on marked trails, the rule is usually to keep you safe.

In areas you’re required to stay on marked trails, the rule is usually there to keep you safe.

People failing to keep to required areas on marked hiking trails is one of the most commonly ignored regulations. Although taking a few steps off a trail can seem harmless enough, often those rules are put into place for safety reasons. Things like unstable terrain, sheer drop-offs and even wildlife can all cause danger to visitors.

While it can be rationalised that using common sense should negate most danger, you should consider that most of these regulations will be the product of insurance policies. If, for the sake of photos, these regulations are seen to be constantly ignored then it isn’t much of a stretch to imagine future access to these areas being limited or restricted to photographers.

Large rock formations, boulders and cliffs all pose a danger to hikers.

Large rock formations, boulders and cliffs all pose a danger to hikers.

Other concerns when it comes to local regulations involve the law as it relates to photography. While in most places you are well within your right to photograph whatever you see, that is not the case everywhere. Belgium and France are both examples of countries where Freedom of Panorama is limited in some way. For example, when the Eiffel Tower is lit up at night it is considered a copyrighted scene and images of it cannot be published without explicit consent.

Now, a quick search on Flickr reveals a huge number of images of the Eiffel Tower at night and further research reveals that the regulation is primarily concerned with commercial usages. As such, this aspect may not seem extreme and probably will not cause any aggravation while you’re travelling, but you should still pre-empt any possible clashes with local authorities by thoroughly researching relevant laws in the country that you’ll be photographing in.

Consideration of others

Sheep worrying causes a significant loss of livestock annually and it can cause farmers to revoke access to their land.

Sheep worrying causes a significant loss of livestock annually and it can cause farmers to revoke access to their land.

Beyond legal and environmental implications, it is important to consider other people who are around you. Courtesy and tact go a long way towards this and will often prevent any conflict before there is even a need for resolution. Simple acts like working as quickly as possible to move out of a prime viewing spot in a crowded space and not blocking the passage of others are simple ways to help ensure that you’re not preventing someone else from enjoying a location. If in doubt, try to ask yourself if there’s any way you are being an imposition on others. If so, consider changing your behavior accordingly.

An incident I witnessed at the popular Svartifoss waterfall in Iceland should drive this point home. The waterfall is at the end of a moderately steep half-kilometre trail. As it’s so short a distance, and the waterfall is so spectacular, it gets very crowded. The closest you can get to the waterfall is a rocky outcrop big enough to fit three or four people. To the left, it’s possible to stand in the stream.

While a large crowd awaited their turn for the best views, a woman and her young daughter had commandeered a position in the stream. The girl was dressed in a leotard and was being directed by her mother to perform a variety of dance poses as the latter took photos on her phone. In the forty-five minutes they were doing this, it was obvious that the girl was extremely uncomfortable among the massive group of tourists, yet her mother’s only agitation was her daughter’s apprehension. With the tension between the pair and the presence of a young girl in a leotard dominating the only view of the waterfall, there was a palpable discomfort among the dozens of tourists.

I don’t believe there is anything wrong with what they were trying to achieve, but the whole situation could have been vastly different with a bit of forward planning. Had they known what they were doing beforehand, and then gotten it done in a few altercation-free minutes, they could have achieved their results and the experience wouldn’t have been tainted for everyone else present.

Conclusion

Landscape photography is a great pursuit. The rewards to the photographer and their audiences are many, but certain behaviors can be detrimental for both the landscape and the people in it. For the most part, common sense and thorough research will steer you in the right direction.

googletag.cmd.push(function() {
tablet_slots.push( googletag.defineSlot( “/1005424/_dPSv4_tab-all-article-bottom_(300×250)”, [300, 250], “pb-ad-78623” ).addService( googletag.pubads() ) ); } );

googletag.cmd.push(function() {
mobile_slots.push( googletag.defineSlot( “/1005424/_dPSv4_mob-all-article-bottom_(300×250)”, [300, 250], “pb-ad-78158” ).addService( googletag.pubads() ) ); } );

The post Responsibilities of Landscape Photographers by John McIntire appeared first on Digital Photography School.


Digital Photography School

 
Comments Off on Responsibilities of Landscape Photographers

Posted in Photography