As a photographer, when you hear the word landscape your mind will most likely conjure up images of lush valleys, looming mountains, and majestic, sweeping vistas. With good reason, as the natural world can be a place of staggering beauty. But done well, a different type of landscape photography, the urban landscape, can produce shots that are equally as compelling as anything Mother Nature can throw your way.
The energy of a major city lends images a vitality that can’t be found anywhere else. There’s so much movement and life in the urban environment, and the best city shots capture that buzzing vibrancy.

Shooting urban landscapes also has plenty of practical advantages too. Every type of photography is all about the light, and that is one thing cities never run out of. You can shoot in the artificial glow of the metropolis long after you’d have been forced to pack up your kit and make your way home from a day in the countryside.
Couple that with the fact that, for the most part, cities are a lot more accessible for the majority of us, and shooting urban landscapes is the ideal activity for photographers during those long winter months.
So here are our top 8 tips for getting the most out of your time pounding the sidewalks.
#1. Research
You wouldn’t embark on a traditional landscape photography outing by jumping in the car, heading for the hills and hoping for the best. Likewise, the success of an urban landscape shoot depends largely on how well you plan.
Your home town
Even if you’re off to capture the town or city you grew up in, putting in the effort to do a little research up front usually pays dividends.

For example, when I wanted to get a shot from high up, overlooking my hometown of London, I didn’t foresee any problems in finding a suitable viewpoint. However, after a little digging, I learned that while London isn’t lacking in tall buildings offering amazing views, the number you can actually gain access to, that are also well suited for photography, can be counted on the fingers of one hand.
The vast majority are either restricted entry or in the case of The Shard (seen at the top of this article), cursed with a viewing gallery shrouded with ultra-reflective windows.A few minutes Googling directed me to a lesser-known church tower on the banks of the Thames with unrestricted views downriver, saving me hours of fruitless searching.
Visiting another city
If you’re visiting a city for the first time, it’s a good idea to spend a little longer familiarizing yourself with the place before you go. Drawing up a shot list of the locations you want to photograph is a good idea as well.
But all that being said, don’t make yourself a slave to it. Few things are more exciting or rewarding in photography than allowing yourself the freedom to meander through a new landscape, get a little lost, and allow whatever happens to happen.
One word of warning: depending on your location, be sure you know where you can and cannot shoot. Many places these days are understandably sensitive about strangers waving cameras around. If in doubt, ask.
#2. Light
The quality, color, and angle of the light can make or break any shot, and this is especially true for urban landscape photography. A subject that looks dull and uninspiring at one time of day can transform into a truly spellbinding image just with the passing of a few hours.

As with any landscape photography, dragging yourself out of bed before the sun puts in an appearance can reward you with the kind of light show that almost makes up for all that missed sleep. The golden hour, that brief a period right after sunrise and before sunset, can present you with views of a city that you may never have seen before.
Plus, you can carry on shooting long after the sun’s gone down. Cities come alive at night. They never get truly dark, and some of the most interesting shots can be taken with the only illumination coming from artificial light.
Just remember to bring your tripod!

#3. Hustle and Bustle
Major cities are fast and frenetic places. Everyone seems to be moving a million miles an hour and there’s always something going on. It’s the perfect environment for photographers.
If you can manage to avoid getting swept along in the tidal wave and stop to look around, you can capture images that convey all that chaotic frenzy. Using a slower shutter speed will help you pick up a real sense of movement, either tripod-mounted or handheld if you’re feeling brave.

#4. Details
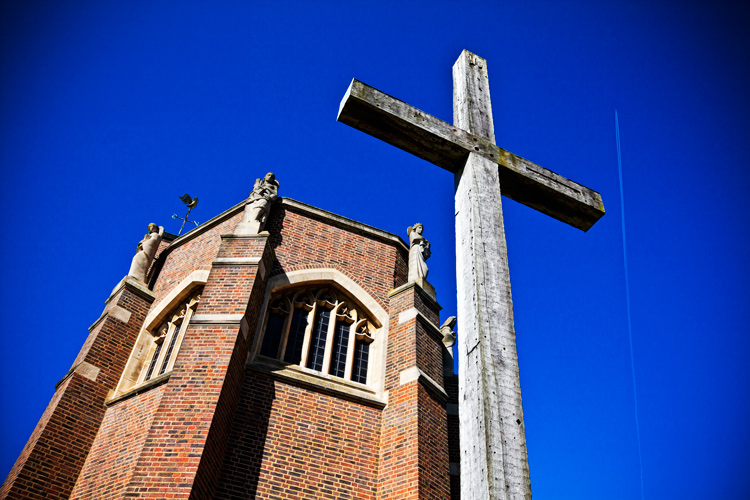
There are countless small and fascinating details in cities. Always be on the lookout for the tiny intricacies, the patterns, and shapes that otherwise go unnoticed.
They won’t all be right in front of you. Keep your eyes moving and your head on a swivel, some of the most rewarding shots are going to be found way above your head or close to the ground.

Whether it’s an advertising billboard, some rugged brickwork, or a set of windows, get in close, fill the frame, and isolate your subject.
This is another time when the quality of the light can make all the difference to the success of a shot. A strong, high contrast light can give interesting areas of highlights and shadow, turning an everyday scene into a beautiful abstract. If you have time, it’s worth revisiting potential subjects at different points throughout the day.

#5. Composition
Moving from the countryside to the urban environment doesn’t mean all the old landscape composition rules go out the window. Much of what applies standing on top of El Capitan in Yosemite Park, is still relevant looking down on New York from the Empire State.
Keep the basics of composition in your mind, things like the rule of thirds, leading lines, and natural frames. Then be prepared to break the rules when necessary.

Always think before you shoot. Look around you and see if taking a different viewpoint would improve your shot. Can you get higher and look down or even lie on the ground and shoot upwards?
Unfortunately, in major cities buildings are often so close together they can restrict your options and movements as a photographer, but make sure you’re at the optimum position for your subject. The difference between a winning shot and a mediocre one can sometimes be measured in the space of just a few feet.

#6. People
One area where urban landscapes differ greatly from the traditional is in the number of people you’re likely to encounter. It can be frustrating when you arrive at your dream location, only to find it swarming with tourists, as well as the locals going about their daily business, all seemingly determined to clutter up your shot. Along with the great light, it’s another good reason to be up and about in the early hours of the day, while everyone else is still tucked up in bed.
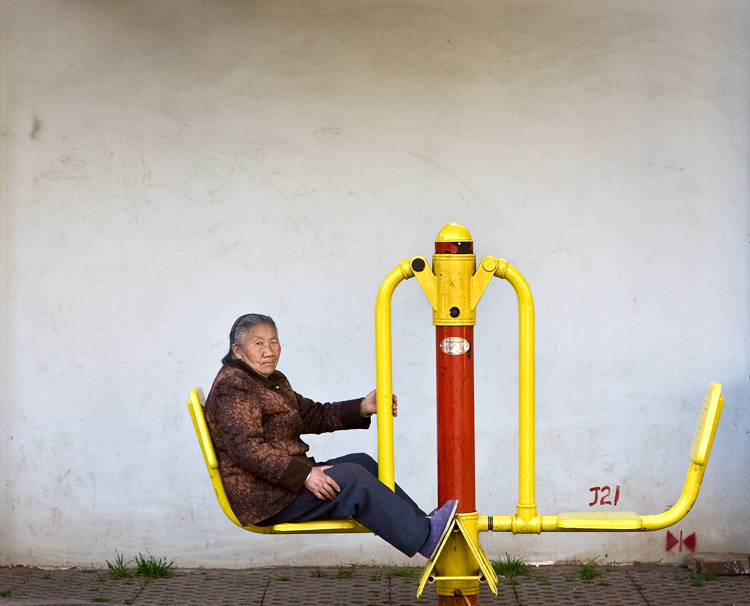
But people make great subjects for candid portraits as you wander the streets. Big cities attract some real characters, and capturing them in their home environment can lead to some winning images.
One thing to remember is to always ask your subject’s permission before you shoot. The vast majority will be more than happy to oblige so long as you’re polite. (Take this from a man who once got a severe and humiliating telling off from a Buddhist monk in Thailand for taking his picture without having the courtesy of asking first. They’re not as chill as you’d think!)

#7. Reflections
Modern cities seem to be more glass than anything else. This is great news for you as a photographer. You can use that beautiful reflective quality in your compositions to create some wonderful, quirky effects.
The major landmarks in every city have been photographed a bazillion times. So, you have to work a little harder and think a little more creatively to come away with shots that are distinctly your own. Shooting a famous and easily recognizable building reflected in the windows of another gives an interesting change of context, especially as it often contrasts the old and the new.

Many big cities are built along the banks of hefty rivers as well, which gives you another opportunity to utilize reflections in your shots. Clear skies offer the best results, preferably at the start or end of the day to give a little color. A dull, overcast day will be reflected in the water, giving it an ugly, muddy quality.

#8. Monochrome
Urban landscapes are very well suited to the simplicity of black and white photography. Taking away the distractions of the vast range of different colors on show in any city and focussing on just the tones and textures, gives a completely new dimension to your shot.

The increased contrast of a monochrome image benefits architecture especially, enhancing the shape of buildings and accentuating their details. Again, the light is all-important. A low sun highlights surfaces and gives areas of rich shadow for added depth.
Try and avoid using the black and white function on your DSLR and shoot RAW if you can. Then use your post-production software for the conversion. It allows you much more control over the final image.
Conclusion
Shooting urban landscapes can be a richly rewarding experience and gives you the opportunity to try out several different disciplines at once.
You have the chance to flex your portraiture and architectural photography muscles, as well as experimenting with close-up abstracts and shooting in black and white. Plus, you get to practice all that while staying firmly in civilization and never more than a few feet from a decent cup of coffee!

Of course, all that added convenience comes at a price. Shooting in cities has its inherent risks and you always need to keep your wits about you. Watch where you stand to shoot and make sure you’re not in any danger from fast-moving traffic or trespassing on anyone’s property.
Also, keep a tight grip on your equipment, especially if you’re shooting at night. Cities have more than their fair share of bad people who’d not think twice about running off with your expensive kit. If you’re nervous, it’s the perfect opportunity to buddy up with another photographer and explore the location together.
Please share your urban landscape photos in the comments below.
googletag.cmd.push(function() {
tablet_slots.push( googletag.defineSlot( “/1005424/_dPSv4_tab-all-article-bottom_(300×250)”, [300, 250], “pb-ad-78623” ).addService( googletag.pubads() ) ); } );
googletag.cmd.push(function() {
mobile_slots.push( googletag.defineSlot( “/1005424/_dPSv4_mob-all-article-bottom_(300×250)”, [300, 250], “pb-ad-78158” ).addService( googletag.pubads() ) ); } );
The post 8 Tips For Doing Stunning Urban Landscape Photography by Andy Callan appeared first on Digital Photography School.

Digital Photography School


You must be logged in to post a comment.