RSS
 

Posts Tagged ‘Landscape’

4 Key Elements to Help You Create Stronger Landscape Photography

08 Aug

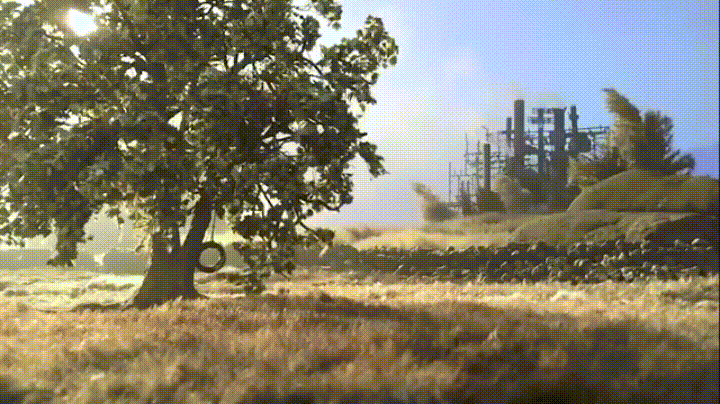
If you’re like me and love great landscape photography, then you’ve probably wondered how the same photographers seem to be able to pull off beautiful shots of sweeping mountain vistas or incredible black and white images of rolling hills and valleys. It’s as if they have some secret formula for “getting lucky” time and time again. Have you ever thought about what goes into making a strong landscape photograph? The techniques, the composition, the timing, the tools?

4 Key Elements to Help You Create Stronger Landscape Photography

The fact is, there is no secret formula for making better photos of landscapes. There’s almost always much more that goes into the task than simply snapping a picture of a pretty place. Most great landscape photos are made in beautiful places but that doesn’t mean that every picture of beautiful scenery is a great landscape. While there are no concrete “rules” for doing solid landscape photography there are a few ways to strengthen your landscape work and make those “awesome shots” happen more frequently.

#1 – Construct Interesting Elements

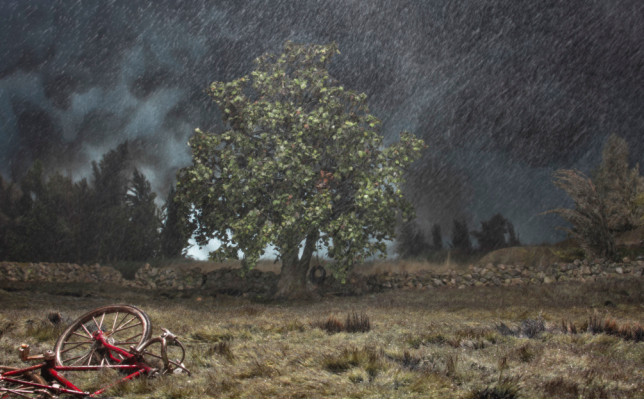
I once had a professor of photography tell me that any photograph could be judged by how much information it contained. It’s easy to say that a successful landscape photo shows the beauty and majesty of a place, but the truth is there is so much more. When setting up for your photo, pay attention to everything that falls within the frame. Look for interesting foreground elements such as trees or rocks, water, even people or animals.

4 Key Elements to Help You Create Stronger Landscape Photography

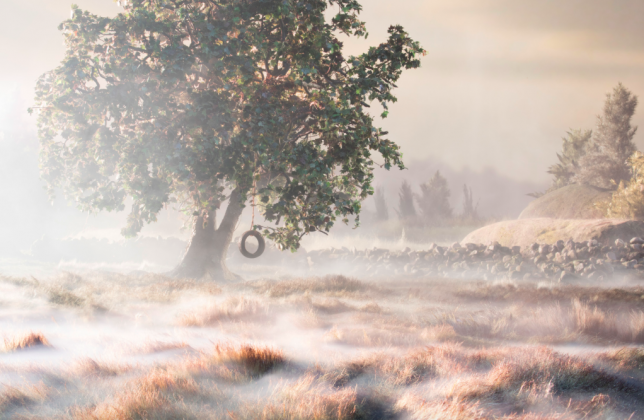
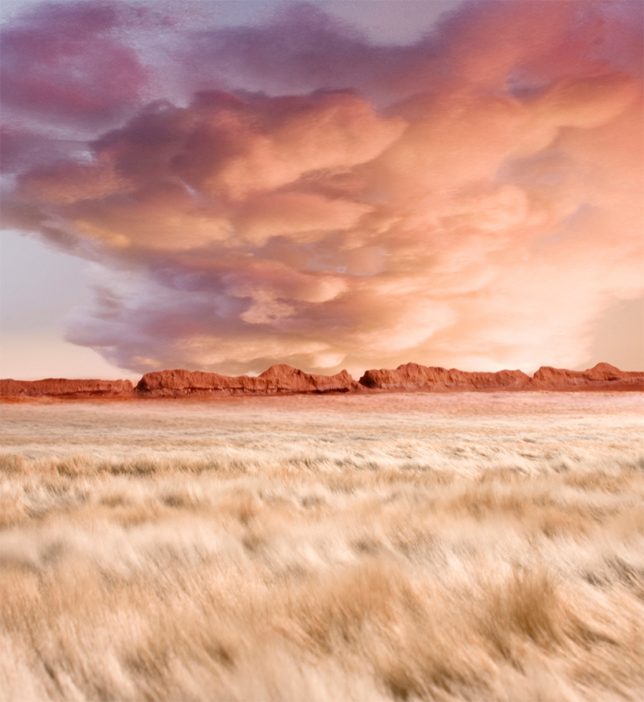
Look for ways to add more information to the photograph. Generally, the more you fill the frame with interesting elements the more interesting and appealing the overall photograph will be. But there is also a flip side to this concept as sometimes less is more. There are times when you must know what to NOT include in order to give a better feel to the photo. Look at this photo from a blustery winter morning.

4 Key Elements to Help You Create Stronger Landscape Photography

The feelings of solitude and isolation are brought about by the use of empty space. More on composing your landscape photos a little later.
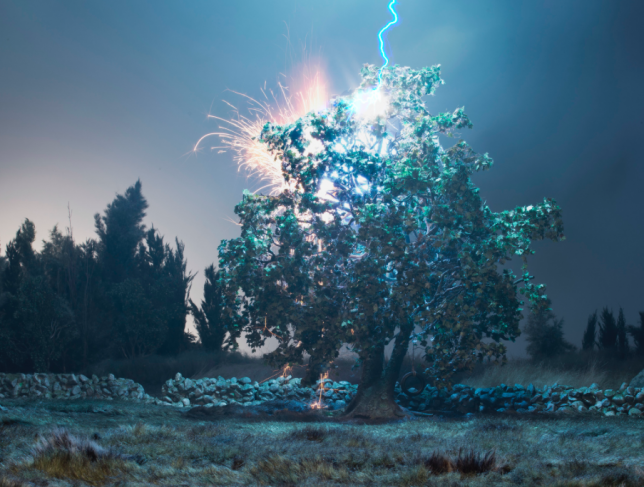
#2 – Lighting

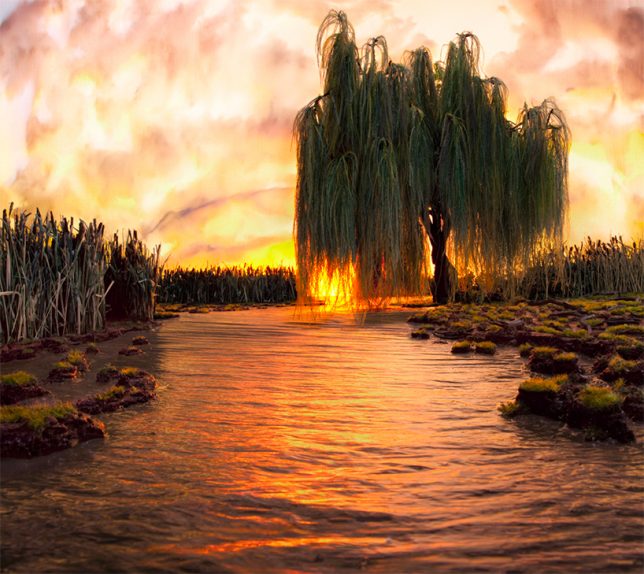
Yes, yes…I’m sure you’ve heard the phrase “chasing the light” when it comes to making good photos. This is especially true when it comes to landscape photography. There’s a reason why photographers love to shoot in the early morning hours (ugh) or in the waning light of the afternoon or late evening.

4 Key Elements to Help You Create Stronger Landscape Photography

It comes down to the quality of light which again, adds more interest to a landscape. When you have beautiful light, the entire landscape is transformed into something different. It becomes less ordinary and more extraordinary.

4 Key Elements to Help You Create Stronger Landscape Photography

As much as it pains me, getting up early and staying out late is virtually a necessity for landscape photographers. The reason being is that some of the most gorgeous golden light comes in the late afternoon as the sun gives way to night. Just as true, the early morning “Blue Hour” as the first glimpses light begin to appear, is another prime time for shooting landscapes.

Even locations that seem somewhat lackluster at midday can take on an entirely new feel in the late or early hours of the day. So be sure to try out different spots at daybreak and sundown. There’s a good reason why we landscape junkies really do chase the light.

#3 – Composition

The very word “composition” describes the nature of how something’s parts are constructed or arranged together. Having all the best ingredients doesn’t help you much if you don’t know how to put them all together into an awesome cake, a beautiful symphony, or in your case…a strong landscape photograph. The way you compose the elements in your landscapes can often make or break the photograph. Again, there are no actual rules to composing your photo but there are some tried and true practices.

4 Key Elements to Help You Create Stronger Landscape Photography

Adjust the horizon so that it isn’t exactly in the middle of the frame and place foreground or background elements off-center to add interest and make stronger images.

4 Key Elements to Help You Create Stronger Landscape Photography

It helps to use imaginary lines such as the Rule of Thirds (again, not exactly a rule) to help compose your image.

4 Key Elements to Help You Create Stronger Landscape Photography

Just as importantly, always remember to shoot your landscapes in accordance with how they “feel”. Composition in landscape photography is about conveying a feeling, not just how the scene looks. Shoot different compositions of the same location until you find one that works best for that particular landscape.

#4 – Gear and Technical Considerations

While a successful landscape photo doesn’t rely on having the latest or greatest gear, there are a few gear and technical aspects that make for better photos. Here are a few tips.

Use a wider lens

Even though many solid landscape photos can be shot at long focal lengths using zoom lenses, generally short focal length (wider angle) lenses work best. Wide angle lenses allow you to include more into the frame of your photo.

4 Key Elements to Help You Create Stronger Landscape Photography

Use smaller apertures

Continuing on from lenses, using a smaller aperture increases the depth of field and brings more elements into focus. Remember, the larger the F-Number the smaller the physical aperture of the lens becomes.

….and wait for it…..

Use a tripod

If you’ve read any of my other articles, you’ll know that when it comes to landscape photography I believe a sturdy tripod is worth its weight in gold. Reducing motion as much as possible is key for obtaining sharper landscape photographs. Using a tripod helps to eliminate as much camera shake as possible. This becomes important because generally the smaller apertures used in landscape photography call for longer shutter speeds which make hand holding the camera less desirable.

Final Thoughts

A successful landscape photo is a careful construction of multiple ingredients. Knowing what to include (or exclude from your photo) and understanding when the best light happens, go a long way to making a better image.

4 Key Elements to Help You Create Stronger Landscape Photography

Just as importantly, knowledge of how to compose the elements in the frame and what techniques or gear will be needed are both essential to “getting lucky” time and time again. Producing stronger landscapes takes patience and a little planning but it is well worth the effort.

The post 4 Key Elements to Help You Create Stronger Landscape Photography by Adam Welch appeared first on Digital Photography School.


Digital Photography School

 
Comments Off on 4 Key Elements to Help You Create Stronger Landscape Photography

Posted in Photography


6 Ideas for More Creative Landscape Photography

26 Jun

In the following article, you will learn how to do creative landscape photography using a variety of different techniques.

The level of technical skill in photography these days is amazing. A quick Google search for any given location will show well-composed photos, taken during the correct lighting conditions, and edited to perfection. The number of people capable of taking these perfectly crafted photos is also increasing, and therein lies the problem. The number of people with similar photos diminishes all the others when placed together. What’s the solution to this? If you still want to take a photo of a particular landscape consider other creative approaches to photographing it.

So what’s the solution to this? If you still want to take a photo of a particular landscape consider using some other creative approaches to photographing it. Read on for six ideas to help you do better and more creative landscape photography.

6 Ideas for More Creative Landscape Photography - long exposure

This photo has used a long exposure to flatten the water. It’s also the same image used for the 360-degree panoramic image below.

#1 – Infrared Photography

Infrared photography is great fun to experiment with and has been around along time. This particular form of photography uses, as the name suggests, infrared light to capture images. Now you can’t see the infrared spectrum with your eyes, but your camera sensor or special infrared film can.

When using a digital camera you will either need to adjust the White Balance in camera or use post-processing to bring out the signature infrared look (note you can also get an old camera body converted especially for capturing infrared images). What is the infrared look? These photos have dark black skies, bright white foliage and often they have still water caused by a long exposure. In order to take this type of photo with a digital camera you will need a filter or a reconditioned camera.

6 Ideas for More Creative Landscape Photography - infrared

Infrared is a lot of fun if you’re prepared to put the time into learning this technique.

#2 – Aerial Photography

One of the best angles in photography is a high angle looking down, this can lead to some great creative landscapes. The advances in drone technology have seen many people take amazing photos from the sky, though the consumer-level drones still don’t produce the highest quality still images. There are a few options if you want to try out aerial photography yourself.

  • Airplanes – Yes get the window seat of your plane, and take photos from the sky. Ensure you have a high shutter speed, remember you’re plane is moving fast so you need a fast shutter speed to get a sharper image.
  • Drones – The consumer drone will get you great angles, and images with good enough quality for online sharing, but not for printing. The professionals use larger drones that allow their dSLR to be attached to them.
  • Hot air balloons – It’s a great experience to take a hot air balloon ride, and the photos can be incredible. Even more extreme is attaching a camera to a weather balloon, and sending it up almost into space!
6 Ideas for More Creative Landscape Photography - aerial photo

A great angle if you can get it is overhead for a creative landscape. This photo was taken from a hot air balloon, but a drone would also get an angle like this.

#3 – Refraction

The concept of refraction to use light bent through a glass object is essentially how your lens puts an image onto your camera sensor. You can create this effect with spherical glass objects, or even ones filled with water. The image inside the refracting object will be upside down, and a vast amount of the scene behind the ball will be captured.

This is an interesting way to capture a creative landscape because the image inside the ball the image has the characteristics of a fisheye lens. Using a lens with a long focal length will compress the scene.

6 Ideas for More Creative Landscape Photography - refraction

This scene of St Paul’s Cathedral was captured inside a crystal ball, using the refraction technique.

#4 – Shoot a 360-Degree Panorama

This creative landscape idea utilizes post-processing to create a tiny planet effect. The effect is similar to the refraction idea, in that you are creating a globe, however, the look is very different.

To create this photo you will need a panoramic landscape image. If you’re a purest, then the panoramic landscape will be created by rotating the camera through 360 degrees. Once you have your panorama it needs to be reformatted into a square image, flipped upside down, and then the polar coordinates filter should be applied in Photoshop. To find this filter go to filter > distort > polar coordinates.

6 Ideas for More Creative Landscape Photography - 360-degree pano

This photo was turned into a tiny planet. It has the feel of a 360-degree panoramic photo.

#5 – Long Exposure

The different types of images that are possible with long exposures will lead to a burst of creative landscape photography. All you need is a tripod, and a camera capable of taking long exposure photos. The effect of long exposure is to make things move. The main subjects are car light trails, water, and cloud movement. Now, of course, astrophotography is also long exposure, but you’ll learn about that next.

  • Car light trails – These are produced by taking photos that are generally five seconds or longer. An overhead angle from a bridge or tall building is often best for shooting car trails, but photos from street level also look nice.
  • Water – Anywhere there is moving water, a long exposure can look nice. When photographing waterfalls the white water becomes like silk, with exposures over two seconds. The sea and its waves can be flattened by using long exposures over 10 seconds.
  • Cloud movement – Clouds moving across the sky make for a dreamy look in your photo, to achieve this you’ll need lots of clouds, with some clear sky. The faster the clouds move the easier it is to capture this movement. A sturdy tripod is important here, clouds move faster on windy days, so you need the camera to be still.
6 Ideas for More Creative Landscape Photography - long exposures

It’s a lot of fun to play creatively with traffic light trails in a photo. The photo of Big Ben in London is a popular one.

#6 – Astrophotography

One of the most popular forms of photography for those interested in landscapes is astrophotography. The latest cameras help you capture starry skies, with better noise performance at high ISO levels. Recent excursions to the deserts of Dubai and the coastline of southern England revealed a phalanx of photographers interested in this kind of photography. The most popular types of astrophotography are capturing the Milky Way, or showing the rotation of stars around the pole.

  • The Milky Way – Positioning the Milky Way in your frame can create a dramatic and creative landscape photo. This is the subject of a whole different article. The basics are to shoot at the constellation of Sagittarius between March and October in the northern hemisphere. Use the largest aperture you have, with exposures generally being 25 seconds long, and an ISO of 6400 or greater.
  • Star trails – The aim here is to point your camera at the north or south pole, and capture the earth’s rotation during a long exposure. The photo can be an ultra long 15-minute exposure or a series of shorter ones. The best method is to take multipl30-secondnd exposures, and then stack them together. StarStax is a good piece of software that will help you create this type of photo.
6 Ideas for More Creative Landscape Photography - Milky Way

Shooting the Milky Way is hard to photograph, so the chance of your photo being more unique is higher if you can do it.

Which creative landscape will you make?

There are many creative landscape photography ideas, which one will you choose to try out? There are other ideas we’d love to hear about as well, how did you make a creative scene your own?

In this article, I stuck strictly to still photos, but experiments with video allow for time-lapse or cinemagraphs as well. Please share your examples of the above styles that you’ve done, and tell us why and how you create your shot.

The post 6 Ideas for More Creative Landscape Photography by Simon Bond appeared first on Digital Photography School.


Digital Photography School

 
Comments Off on 6 Ideas for More Creative Landscape Photography

Posted in Photography


How a Short Versus Long Exposure Will Affect Your Landscape Images

29 May

The shutter speed is probably the factor which has the greatest impact on an image. By adjusting the exposure time by only a few stops, you’re able to completely change the appearance of an image. But what exposure time is best for landscape photography? Should you use a  long exposure or should you work with shorter ones? When will adjusting the shutter speed have the greatest impact?

In this article, I’ll share three case studies where I compare how adjusting the shutter speed has impacted the final images. I don’t believe that either is better than the other (in each case) but it’s important that you’re aware of the differences so it becomes easier to convey the story or emotions you desire.

What is a Long Exposure?

I’ve had many discussions with fellow photographers regarding the exact definition of Long Exposure. At first thought, most consider a long exposure to be an image where the clouds are dragged across the sky or moving water looks like silk or ice. However, this is judging solely based on the visual aspect of the image. Is it not still considered a long exposure if you don’t see its effect? Wouldn’t a 20-second exposure be 20 seconds no matter what?

The definition most of my photography friends have agreed upon is that a long exposure begins when you can’t take a sharp image handheld. Normally, this is at about 1/50th of a second with a wide angle lens.

Using a tripod makes it possible to have a longer exposure.

Case Study #1 – Waterfalls

Waterfalls are often ideal to start experimenting with long exposures. Since the water is moving quickly, you don’t need an extremely long exposure just to capture some motion. In fact, you’ll need a very quick shutter speed to avoid capturing any motion at all.

The choice of shutter speed has an extremely high impact on the image. You might not even need a filter to begin capturing the motion of water in your shots. However, I find waterfalls to be tricky to photograph at times because of this. The different shutter speeds have such a big impact that the entire mood (and story you tell) of your image quickly changes. So, consider what you wish to convey.

If it’s a huge waterfall with a lot of power you might want to use a quick shutter speed to capture its raw power and beauty. While a smaller waterfall might be more appealing when you use a slow shutter speed (long exposure). Experimentation is always the key when working with shutter speeds.

waterfall case study

Rjukandefossen, Norway 1/5th of a second shutter speed.

For the image above, I chose to use a shutter speed slow enough to require the use of a tripod but not so long that the water would become completely blurred. The textures in the water help build the overall atmosphere of the image and it compliments the rawness. By keeping some texture in the water, I’ve also strengthened the composition. When a longer shutter speed was used (see below), many of the lines in the foreground were lost and the flow wasn’t as natural anymore.

long exposure waterfall

Rjukandefossen, Norway 20-second exposure.

When lengthening the exposure time to 20-seconds, the image lost a lot of its raw and natural feel, which was what I wanted to convey. Now, the image has an unnatural appearance and even though it’s still visually pleasing, it’s not as interesting anymore.

A long shutter speed wasn’t ideal since the river was flowing so quickly. Had the water been slower, a 20-second exposure might have done a better job. So, when photographing a waterfall make sure that you keep in mind how quickly the water is flowing, as this will have a great impact on your choice of shutter speed.

Had I used a faster shutter speed than on the first image (for example 1/500th) the image would have a different impact yet again. Such a quick shutter speed would freeze most of the water and remove the sense of motion shown in the first image. Instead, there would have been a lot of texture in the water but no movement to compliment it. That would have resulted in a messy and, again, less appealing image.

Case Study #2 – Seascapes

When working with images that have more than one moving element (for example the sky and the water), you’ve got multiple factors to consider when choosing a shutter speed. Not only will the choice of shutter speed determine how the sky appears but it’s also crucial for the appearance of the water. In fact, since the water is what’s moving the quickest, that is where you’ll see the biggest difference (just as with the waterfalls).

For the image above, I used a shutter speed of 0.6 seconds. In the grand picture of long exposures this is still a relatively short shutter speed, and for some, it doesn’t even qualify as a long exposure. However, despite the shutter speed being only 0.6 seconds, there’s quite a lot of motion in the image. Since the waves were coming in fast the camera was able to register a significant amount of motion within that short time.

Personally, I’m a big fan of exposures between 0.5 seconds to 1.5 seconds when photographing seascapes (especially when using a low perspective like this). The shutter speed is long enough to capture the motion but it’s also fast enough that there’s still a lot of texture in the water. The lines that come as a result of the slow shutter speed do a significant job in improving the composition.

long exposure seascape

In the second image, I increased the exposure time to 30 seconds, allowing the camera to register motion for a longer period of time. As you can see, the texture that was the previous image is lost and the water has completely changed its appearance. Now it looks more like ice, or some sort of solid state.

However, the clouds are also considerably different than in the first seascape. By using a 30-second exposure the camera has also registered motion in the clouds, resulting in a more dynamic sky. When the clouds are dragged across the sky, such as above, you’ve got an extra factor to consider for your composition. In this scenario, the clouds are moving towards the horizon, creating a series of extra lines that help lead your eye through the image. Often this can be a great advantage.

I don’t believe that one is necessarily better than the other but, again, it’s important to understand how the choice of shutter speed (exposure time) will impact the image. When working with a slow shutter speed you’re introduced to several new factors (such as the helpful leading lines in the sky) and being aware of them will make the process of learning long exposure photography easier.

Case Study #3 – Generic Landscape

Once you remove the second element of motion, the choice of shutter speed becomes somewhat less crucial. Still, there will be a big difference between a 30-second exposure and a 1-second exposure if you’ve got some movement in the clouds. But the difference between a 0.5 second and 5-second exposure is less significant for a generic landscape and a seascape or waterfall photo.

It’s not uncommon for me to see someone using an ND Filter when photographing a mountain on a cloudless day. This is very common when first using filters, as you want to use them all the time. However, a 2-minute exposure won’t look any different than a 1/100th of a second exposure when there aren’t any moving elements in the image. After all, an ND filter doesn’t create motion, it registers it.

The image above is a typical example of when a long exposure wouldn’t make a big difference. I used a 1/5th second exposure time for this particular image but had I used a 30-second exposure with filters instead, it still would have looked more or less the same. Simply put, it wouldn’t have been beneficial to use a long exposure on this scene.

It isn’t until you’ve got at least one moving element that the true power of a long exposure photography appears (remember, this can be something as simple as grass moving in the wind). In the image below, you see the same scene but this time with clouds in the sky. The shutter speed I used for this image was 1/15th of a second, which means that I wasn’t able to capture any motion – yet.

short exposure generic landscape

Once clouds had appeared and there was one element of movement in the frame, a long exposure would have an impact on the image. Since the clouds were moving I was able to capture the motion and, again, create a more dynamic image.

For the image above I increased the exposure time to 30-seconds. By increasing it that much you can clearly see how the sky has changed and how the overall mood of the image has changed along with it. Unfortunately, the clouds were moving sideways. Had the clouds moved towards or away from me, the image would have greatly benefited from a long exposure and taken advantage of the leading lines that would have helped to lead the eyes towards the structure. Since the clouds were moving sideways, the extra leading lines in the image aren’t as helpful, even though they look nice.

Summary and Conclusion

After reading this article I hope you have a better understanding of how the shutter speed will affect an image and when increasing or decreasing it will be beneficial. There’s no “correct” way of doing it, and in the end, which image you prefer depends on what you’re looking for in your image. However, as I’ve mentioned multiple times, it’s extremely important that you understand how a longer or shorter shutter speed will impact the image. By understanding this, you’ll be able to save a lot of time in the field and ultimately create better images.

Remember, a slower shutter speed can affect the appearance of an image when there’s more than one moving element within the frame. A slow shutter speed is not going to make a difference when there are no moving elements.

The post How a Short Versus Long Exposure Will Affect Your Landscape Images by Christian Hoiberg appeared first on Digital Photography School.


Digital Photography School

 
Comments Off on How a Short Versus Long Exposure Will Affect Your Landscape Images

Posted in Photography


Moving Miniature: Tiny Landscape Made of Sugar, Spices, Salt & Sand

11 May

[ By SA Rogers in Art & Sculpture & Craft. ]

Nothing about the hazy sunlight, languid motion of a tire swing, branches blowing in the breeze or puffy white steam pouring out of a factory chimney gives you any idea that the scene you’re looking at fits on a tabletop. Not only is this landscape a miniature – it’s made out of ordinary household objects and materials. Artist Matthew Albanese uses salt, sugar, flour, sticks, moss and other easily procured items to craft stunningly realistic tableaus, but for the first time, he’s incorporated movement, sharing a video.

‘The North Jersey Din’ is a moving version of a tree that Albanese has frequently used in a series of images called ‘A Tree in My Backyard.’ The attention to detail that went into this work is pretty incredible. In order for the miniatures to look realistic in the final images, Albanese employs a mix of techniques perfecting the scale, depth of field, white balance and lighting.

“This video is my first attempt at creating a moving miniature. Everything is designed for movement. The tree itself is made from brass tubes soldered together with springs at every joint. The leaves were die punched and machine cut, each threaded one by one. This video was filmed with just an iphone set to slow motion at 240fps. The audio is a set of recordings I made in my backyard capturing the sounds of the typical North Jersey Din.”

On his YouTube channel, Albanese also shared a video that captures four months of work in 33 seconds. ‘Making of a Promised Land’ is a time lapse of stills documenting the construction of another diorama, giving us an idea of just how much work goes into creating a single one of these photos.

Some of the scenes use materials you’d never expect, like faux fur standing in for the fields and sifted tile grout for mountains in ‘After the Storm,’ above. Among the items used in ‘Wildfire’ were cooked sugar, Scotch-Brite pot scrubbers, yellow glitter, clear garbage bags and party bulbs. Click on individual works on his website to see more behind-the-scenes images.

Share on Facebook


[ By SA Rogers in Art & Sculpture & Craft. ]

[ WebUrbanist | Archives | Galleries | Privacy | TOS ]


WebUrbanist

 
Comments Off on Moving Miniature: Tiny Landscape Made of Sugar, Spices, Salt & Sand

Posted in Creativity


3 Useful Accessories for Landscape Photography

09 May

With photography being more popular than ever been before, it’s no surprise that there are also a whole bunch of accessories available on the market. Many of these are completely unnecessary items that you’ll most likely never need. In this article, I’ll introduce you to three accessories for landscape photography that you can manage without BUT will probably be used more than anything else. I wouldn’t be surprised if they end up as your favorite accessories that you can’t imagine photographing without.

L-Bracket

I’ve been using an L-Bracket for so long that I don’t even consider it to be an accessory anymore. For me, it’s become part of my equipment and I honestly don’t remember what my camera looks like without one.

An L-Bracket is a plate that is fastened to your camera body and serves as a connector between the tripod and the camera. The L-bracket is used instead of a regular quick release plate as it’s a much more flexible option. A clamp is placed on the tripod’s head to connect it with the camera.

3 Useful Accessories for Landscape Photography

Advantages of an L-Bracket

Now, you might be asking, “Why is that a better option than the regular plate which comes with the tripod?” Simply put, it eases your workflow.

Let’s say that you’re standing in the middle of a river and photographing a waterfall. You’re taking a horizontal image and you’ve got a good composition. After taking some images you realize that a vertical image will work better for that scene. With a regular plate, you’ll need to adjust your tripod head so the camera is tilted vertically. By doing this you most likely have to set up the composition all over again since you’re camera has now moved several inches to another side.

With an L-bracket, however, you avoid this problem. Simply disconnect the camera and clip it back into place vertically. In this case, the tripod hasn’t been moved which means you still have the same composition, just vertically instead.

Manfrotto L-bracket mounting a camera vertically on the tripod.

It wasn’t until I “lost” the clamp (connection between camera and tripod) in Iceland that I realized how valuable this tool has become in my workflow (I did find it again later at the airport – in my backpack…) Being able to seamlessly switch between a vertical and horizontal format has made this my favorite accessory. It does add some extra weight to your equipment but it will also protect the camera if you should be unlucky and drop it (still, I don’t recommend dropping it!)

Spirit Level

While this is a built-in function in many high-end DSLR cameras, a spirit level is an accessory that I strongly recommend one if you own a camera without the virtual horizon function.

Capturing images with a straight horizon can be difficult without a spirit level, especially when you’re photographing a scene that doesn’t have a defined horizon (in which case the grid view will help a lot). The spirit level is a handy little tool that will make this process much easier.

The spirit level is placed on the hot shoe (where you connect a flash to the camera). Many choose to leave it there at all times to avoid accidentally forgetting it at home. It’s not the most popular tool for those who don’t use a tripod since it’s placed on top of the camera. If you’re using a tripod, however, it can be essential.

Pre-Moistened Wipes

The last accessory I recommend is one that I have in my backpack at all times. In fact, I get worried if I only have one left.

Pre-moistened wipes are a landscape photographer’s best friend out in the field. We all know that creating beautiful images of landscapes often involve being outdoors in less than ideal weather. Either it’s windy, rainy or large waves are spraying you, having a couple pre-moistened wipes nearby will help you keep the lens clean at any time.

zeiss lens wipes - 3 Useful Accessories for Landscape Photography

Dust spots or dirt on the lens are constant battles and when it gets really bad it has the potential to ruin an image. (Unless you’re a post-processing ninja who’s willing to spend hours in Photoshop cleaning it up.)

I tend to always have a couple pre-moistened wipes plus a microfiber cloth in my pocket when I’m shooting out in the field. Most of the time, regular microfiber cloths will work great but in the most challenging conditions, you will want to use wet ones. This is especially true when photographing seascapes and the lens gets a thin layer of salt over it.

Zeiss lens cleaning wipes.

What are your faves?

These are some of the accessories I recommend for landscape photography. What are your favorites?

The post 3 Useful Accessories for Landscape Photography by Christian Hoiberg appeared first on Digital Photography School.


Digital Photography School

 
Comments Off on 3 Useful Accessories for Landscape Photography

Posted in Photography


5 Composition Tips for Landscape Photography

09 May

So what exactly is composition in photography and why is it such a big deal? Composition is the way you intentionally arrange or put together the visual elements in an image, in and around your subject. The goal is to catch the viewer’s interest and keep it wandering around your photo. While some people have an innate ability to “see” and compose great images, it is a skill that can be taught.

Once you have identified your subject, here are a few useful precepts you can use when composing your next great image.

5 Composition Tips for Landscape Photography

1. Simplicity

Now that you have your subject in mind, the first question is how do you showcase it so there is no doubt of your intent? Keeping it simple is a good approach, as clutter can distract or even make it difficult to identify your focus. Most times in landscape photography, you have no control over what is around your subject. Here the use of lighting can reduce clutter, as the brighter areas of your photo will draw the eye in. You can also find an angle that helps you remove any

Most times in landscape photography, you have no control over what is around your subject. Here, the use of lighting can reduce clutter, as the brighter areas of your photo will draw the eye to them. You can also find an angle that helps you remove any strong elements that can detract the focus of the object. Thus use only what you consider necessary components. Good composition is as much about what you leave out as it is what you include.

Good composition is as much about what you leave out as it is what you include.

5 Composition Tips for Landscape Photography

2. Lines

You have no doubt heard the term lead-in lines – which are lines that direct the eye where you want it to go. This is a powerful tool in composition and can add a three-dimensional feel to your image. It does this by creating movement and can take away that static/flat feeling.

Lines can be literal (such as roads, streams, power lines, or fences) or implied (those that link different subjects in the frame). While diagonal lines are considered the strongest, you are not limited to it as experimenting with horizontal, vertical and converging lines can also be a source of inspiration.

5 Composition Tips for Landscape Photography

3. Oddities

If you have more than one subject in your image, choose an arrangement with an odd number of subjects (at least three e.g. three rocks or trees). Similarly, you can frame or surround your main subject with two objects to add visual stimulation. Odd numbers within a frame are said to be more pleasing and comforting to the eye.

5 Composition Tips for Landscape Photography

Side Note: In landscape photography, even numbers in the frame can seem less natural and informal, although an even number of subjects can produce symmetry. This is just something to keep in mind if you are breaking the “rule of odds”.

4. Interest

The easiest way to create interest is by having a foreground element in your shot which adds extra depth and dimension. Following on from the point above, you can feature a subject in the foreground, middle, and background, keeping them harmonious or having subjects that complement each other. Complementary subjects are those that have some association (e.g. they are the same color, similar appearance, or add to your story in some way). On the opposite side of this, you can use juxtaposition to create some tension in your image.

Other ways to add interest can be showing the scale of the scene by including an object or person or even by framing your photo in an interesting way.

5. Rules? What Rules?

Most composition articles start with the rule of thirds. This rule divides the image into thirds horizontally and vertically and suggests that you arrange your subject and other important elements near these division lines or at their intersections. The objective is to be more visually pleasing, as placing your subject in center of the frame stops the eye there and takes away from the movement you are trying to create and use to your advantage.

5 Composition Tips for Landscape Photography

It is a classic rule that is widely used with great results, so it is an excellent place to start as a beginner. However, what if you want to create a perfectly symmetrical image, such as a mountain with its perfect reflection in a lake? What if you have just as much interest in the sky as in the ground? An image like that will clearly not follow the rule of thirds, would it?

When you are out in the real world looking at the scene before you, these rules become more like handy suggestions. You need to allow your subject to influence your composition and not force it to conform to the “rules”. Therefore knowing the rules helps you decide when it is okay to break them, this is a skill you will develop over time.

5 Composition Tips for Landscape Photography

5 Composition Tips for Landscape Photography

Conclusion

Composition is important. To get a sense of how important, think about the impact of what you perceive as a really good or bad image. First, analyze the elements and how they work or do not work together. Identify the subject(s) of the photo and break it down into which compositional “rules” are present or broken. Are there lead-in lines? Is there a point of interest in the foreground or odd numbers present? Remember to move around your scenery and try different angles for your composition and in time you will know which rules to apply or ignore.

Please share any images you have created that use one or more of these tips, in the comments below.

The post 5 Composition Tips for Landscape Photography by Nisha Ramroop appeared first on Digital Photography School.


Digital Photography School

 
Comments Off on 5 Composition Tips for Landscape Photography

Posted in Photography


Wider than wide: A landscape photographer’s thoughts on the Canon 11-24mm

06 May
The Canon EF 11-24mm F4L USM is a super wideangle zoom lens for Canon’s full-frame DSLRs, which can also be adapted for use on Sony Alpha a7 and a9-series full-frame mirrorless cameras.

Even though I’ve been writing for DPReview for over 4 years, I’ve never written any equipment reviews. And why should I? There are far better equipment experts, technical fanatics, pixel-peepers (I mean that in a good way!) and gear enthusiasts out there than me. My fields of expertise are different, and my writing consists mostly of photographic vision, composition, the philosophical aspects of photography and so on. I intend to stick to this line of writing, and for the most part, I’m happy to leave the equipment reviews to the experts.

That said, after shooting with the Canon 11-24mm F4L for a few months, it has proven to be such a game-changer that it has altered how I think about composition. And in a more general sense, it has changed my ability to take control over what is included in an image, and how these elements are arranged.

Goðafoss, Iceland at 13mm. The extra width allowed me to get closer to the edge and get a wider view while keeping all the elements I needed in the image, framing the waterfall, with enough space around them to avoid a crowded feel.

Canon EOS 5D Mark IV, Canon 11-24mm F4L
Nisi Filters 180mm ND + GND
F14, 13sec, ISO100

This will not be your regular gear review. I won’t be discussing sharpness (although trust me that this lens is very sharp), chromatic aberrations or barrel distortion. I will only be talking about composition, which is, in my opinion, the single most important ingredient to a successful photograph. I will present some images and explain what about the 11-24mm made them possible. I’ll also talk a bit about the downsides of this lens and the solutions to the problems it presents. 

So why? Why does a landscape photographer need an 11-24mm? Isn’t it just too darn wide? Is 11mm worth the size and the monstrous weight? Is it worth the hefty price tag? I have to admit that before shooting with it, I was in serious doubt. I was sure I’d leave it in the bag most of the time, taking it only on rare occasions when 16mm wasn’t wide enough. I thought that 16mm would be wide enough for 90% of my images, after all, I’ve been producing satisfactory shots until now – what good could a wider lens be?

I knew that when going wider, background subjects shrink significantly in size, which can hurt the composition. Moreover, in cases where 16mm wasn’t enough, I had a 14mm F2.8 which was excellent for night photography and for shooting in confined spaces. 

It turns out that I was wrong. The extra width proved to be extremely useful, much more than I had imagined. It allowed me to have much more control, to include more sky when I wanted to, to get closer to the foreground, to reveal more detail and create a greater sense of depth and more dramatic imagery. Let’s look at some examples.

An ice cave in Breiðamerkurjökull glacier, Iceland. Getting this composition in one shot with a narrower lens would have been impossible.

Canon EOS 5D Mark IV, Canon 11-24mm F4L
Focus stacked from 3 images at 11mm, F13, 15sec, ISO800.

The ice cave pictured above was magnificent, but it was also very cramped. I couldn’t walk upright in most of the spots I shot, and this stream was very small. The ice-crusted rock in the middle was tiny, and its details were so beautiful, I needed to get close in order to expose their intricacies. On the other hand, I needed to frame the different elements well, and in a balanced way that makes visual sense.

The cave’s ceiling is extremely important, since it’s the only subject of the frame which is part of the glacier, which basically IS the ice cave. It also contains wonderful melting patterns, and black, volcanic earth which gives extra texture and detail. 
On the bottom of the frame, there are two important elements: the ice-crusted rock in the middle of the stream, which is most definitely the centerpiece, but equally importantly the ice crusted banks on the bottom right. These serve to create the frame to the blurred water and to compositionally counterbalance the rock and the left-running stream.

In addition to the compositional aspect, I strongly feel that including all these elements serves to give the viewer a better sense of being in this incredible cave. This might be the strongest advantage of utilizing such a wide angle of view.

Without a super wide lens, I could still have included all of these elements. I could have achieved this in one of several ways.

Firstly, I could have moved back a little. This would indeed allow me to include all the different desired elements in the frame, but going backward would change the perspective significantly, shrinking the most important elements in the process, namely the ice crusted rock and the stream itself. That would hurt the composition a great deal.

Alternatively, I could have shot a panorama, using a tilt/shift lens or by moving the camera and lens. This would make the job much, much harder, since (a) it would require multiple stitching in addition to the already-challenging focus stacking and (b) shooting so close to the stream meant I constantly needed to wipe the lens dry, and the extra shooting time would mean much more wiping, Photoshop work and general headache.

The 11-24mm allowed me to shoot this as close to the rock as I needed to, in order to include all the detail I wanted to show while still framing the shot as I desired, all with only three shots to focus stack. I simply wouldn’t have been able to do that before I bought this lens. 

Let’s see another example from my Arctic trip earlier this year.

The amazing black and white sand patterns of Skagsanden Beach, Lofoten, Arctic Norway.

Canon EOS 5D Mark IV, Canon 11-24mm F4L
Nisi Filters 180mm ND + GND
Stacked from 4 images at 11mm, 0.8 sec, F13, ISO100

Again, this image would’ve been almost impossible without the 11-24mm, which allowed me to get very close and personal with the tree-like sand patterns, while being wide enough to shrink the background and include the whole mountain range in the frame. 

The Lofoten Islands are full of fjords with towering mountains rising out of them. Some mountains are so close to a water body, it’s extremely hard to include the entire thing in the frame without a truly wide lens. This is even more so when trying to include reflections.

Mount Stortinden reflecting in the calm Flakstad Fjord, Lofoten. I was standing about 1 km from this 850m tall mountain. Being so close, I couldn’t have included both the mountain and the reflection with a 16mm. It was easily done, however, with the 11-24mm.

Canon EOS 5D Mark IV, Canon 11-24mm F4L
Nisi Filters 180mm ND + GND
11mm, F11, 0.5 sec, ISO100

Last but not least, the 11-24 is an almost perfect tool for night photography. The maximum aperture of F4 is a limit, but then again, it’s easier having the foreground in focus at F4, plus the monstrous angle of view allows one to expose marginally longer without getting the stars or Northern Lights blurred.

Let’s see an example from an incredible night of Aurora in Lofoten. The super wide angle allowed me to include a huge chunk of the sky, showing the wonderful patterns and lines in addition to the mountains and the moving waves. I could also expose for 8 seconds, which is considered a bit long for this kind of strong Auroral activity. To be honest, the lights blew up a few seconds before I took this shot, and I should’ve exposed for less time, but the amount of blur is not a big issue and the Aurora is still well defined.

Beautiful Aurora in Skagsanden Beach, Lofoten, Arctic Norway.
Canon EOS 5D Mark IV
Canon 11-24mm F4L
11mm, F4, 8sec, ISO1600

Here are a few more examples of Aurora shot with the 11-24mm.

Stacked from 2 images at 11mm, F4, 8sec, ISO3200 Stacked from 2 images at 11mm, F4, 13sec, ISO3200
11mm, F4, 5sec, ISO1600 11mm, F4, 8sec, ISO3200

I hope you’re convinced of this lens’ advantages. What about the downsides?
For me, the greatest disadvantage is the inability to fit regular filters in front of the huge front element. I’m used to popping my 100mm system out of the bag and putting it in front of any lens. Not this one.

The only solution I currently know of which covers the whole width of this monster is the Nisi Filters 180mm system (proper disclosure: Nisi gave me the holder and some filters to try out). These filters are not cheap, but they are well made and have superb optical quality. The problem is that together with the mounting system, they are big and heavy, and don’t allow a photographer to be as spontaneous as with a 100mm system. I still like the system very much and I’ve achieved good images with it. If you’re into using filters with the 11-24, I highly recommend it.

As to the size, weight and price – simply put, it is what it is. If you need this type of lens, or if you can extract any type of value out of it, there is not much choice, is there? You need to weigh the advantages and the disadvantages and make up your own mind. You can also leave the lens at home if it’s not really necessary or if the weight is too much for a specific project (for example, on my recent Patagonia hiking trip, I chose not to lug it around due to the weight, and opted for the lighter 16-35mm). In my opinion, the answer is clear: if you’re an avid landscape photographer, don’t wait – get this lens, you won’t regret it.


Erez Marom is a professional nature photographer, photography guide and traveler based in Israel. You can follow Erez’s work on Instagram, Facebook and 500px, and subscribe to his mailing list for updates.

If you’d like to experience and shoot some of the most fascinating landscapes on earth with Erez as your guide, you’re welcome to take a look at his unique photography workshops around the world:

Land of Ice – Southern Iceland
Winter Paradise – Northern Iceland
Northern Spirits – The Lofoten Islands
Giants of the Andes and Fitz Roy Hiking Annex – Patagonia
Tales of Arctic Nights – Greenland
Saga of the Seas and The Far Reaches Annex – The Faroe Islands
Desert Storm – Namibia

Selected Articles by Erez Marom:

  • Parallelism in Landscape Photography
  • Behind the Shot: Dark Matter
  • Mountain Magic: Shooting in the Lofoten Islands
  • Behind the Shot: Nautilus
  • Behind the Shot: Lost in Space
  • Behind the Shot: Spot the Shark
  • Quick Look: The Art of the Unforeground
  • Whatever it Doesn’t Take
  • Winds of Change: Shooting changing landscapes
  • On the Importance of Naming Images
  • On Causality in Landscape Photography

Articles: Digital Photography Review (dpreview.com)

 
Comments Off on Wider than wide: A landscape photographer’s thoughts on the Canon 11-24mm

Posted in Uncategorized


5 Hacks and Tricks to up your Landscape Photography Game

05 May

Landscape photography is something that most photographers do. You may be a beginner or an advanced landscape photographer, you may have your own style, or you prefer certain subjects, but there’s always room for something more, something different.

This article is meant to show you five ways in which you can experiment with landscape photography. The techniques will force you to think differently about the surrounding landscape and will uncover new potential shots in places or situations where you might not have considered even getting your camera out.

Let’s see what these five landscape photography hacks that will up your game:

#1 – Long exposures in unusual places

When you think about long exposures you may be thinking of water flow, night photography, or everything that is in low light. The thing is, you can do a long exposure on anything that moves or changes over time. If something is still, then there is no point of doing this technique.

Sometimes you’ll need a Neutral Density filter of 6-stop or maybe even 10-stops if you want to do this during the day when the light is bright. In this case, you would need an ND to dim it down. The idea is to seek subjects that are moved by the wind for example; it works better if some elements of are still and some are moving. Maybe leaves or some thinner branches are moving and the thicker tree trunk is still.

5 Hacks and Tricks to up your Landscape Photography Game

5 Hacks and Tricks to up your Landscape Photography Game

Place your camera on the tripod, use the ND filter if necessary, and take the shot. You’ll get a simple, yet powerful image that represents not only a glimpse of time but few seconds. You can also try this with crops blown by the wind.

#2 – Move your camera while shooting

You usually try to stay still when you shoot so that’s why, as a landscape photographer, you use a tripod. But sometimes it’s interesting to bend the rules and see what the unexpected offers. You can try and move the camera while shooting. Move it from up to down or maybe you can rotate it slightly while the shutter is pressed.

This technique will produce more of an impression of what you see and certain movements work better with certain types of subjects; for example, move your camera up and down if you have straight tall trees. It also helps to have an exposure time of about one second.

5 Hacks and Tricks to up your Landscape Photography Game

5 Hacks and Tricks to up your Landscape Photography Game

5 Hacks and Tricks to up your Landscape Photography Game

5 Hacks and Tricks to up your Landscape Photography Game

5 Hacks and Tricks to up your Landscape Photography Game

#3 – Zoom your lens

Another element that usually stays the same while you press the trigger is the focal length. But what would happen if you changed it during the exposure? Of course, it helps a lot if you have longer exposure time so that you’ll have time to actually zoom.

You have two options with this technique. You can just zoom in or out and you get an interesting effect like everything is “running” to the edges of the photo.

5 Hacks and Tricks to up your Landscape Photography Game

Or you can first zoom your lens in all the way and hold the zoom ring. While you press the shutter button keep the zoom ring fixed and rotate the camera so that the lens zooms out. Don’t forget to keep the hand that is holding the zoom ring still; you are actually zooming out by moving the camera. You’ll get a twisted effect that I find it works better on pines or similar trees.

5 Hacks and Tricks to up your Landscape Photography Game

5 Hacks and Tricks to up your Landscape Photography Game

5 Hacks and Tricks to up your Landscape Photography Game

#4 – Use graduated filters in unusual ways

As a landscape photographer, you likely know how to use graduated ND filters to balance the brightness of the sky with the foreground, but you can do so much more with them too.

In the old days, photographers used to dodge and burn certain areas of a photo to lighten or darken those spots. The technique is still used today in post-processing.

But what if you could do this right in the camera using two graduated ND filters to darken the margins of an image. You only need to place the grad ND filters at a 90-degree angle, one facing left and the other facing right. You don’t even need to have the same filters; you can use a 2-stop and a 3-stop, for example. This will create a light beam effect.

5 Hacks and Tricks to up your Landscape Photography Game

#5 – Create Cinemagraphs

Cinemagraphs are the new thing, and they look cool. You may be wondering what is a Cinemagraph? Well, it’s a combination of still photography and video. The result is a video, but because of this combination, I included this idea here. Here’s an example of what they look like:

In short, the technique requires you to record a video, preferably with the camera on a tripod, freeze one of the frames and make it a photo, and then creating a mask that reveals only one element that moves. It looks better if you make the video loop-able but that is not absolutely necessary. The effect plays with your mind because everything is still apart from one element that moves.

Conclusion

I hope you’ll find these ideas interesting and you’ll use them to open new horizons and explore new techniques. I think experimenting plays a big part in photography and landscape photography is no exception.

Share your landscape tricks and tips in the comments below.

The post 5 Hacks and Tricks to up your Landscape Photography Game by Toma Bonciu appeared first on Digital Photography School.


Digital Photography School

 
Comments Off on 5 Hacks and Tricks to up your Landscape Photography Game

Posted in Photography


How to Find the Best Locations for Landscape Photography

28 Apr

Have you ever looked at the work of a good landscape photographer and wondered how they found such beautiful places to shoot? Or would you like to travel to a new place to do landscape photography but are unsure how to find the best locations?

You are not alone. It takes work to find the best locations and most landscape photographers go through this process. The tips in this article will help you.

Landscape photography locations

1. Look at the work of other photographers

The first step to finding great places to take landscape photos is to look at the work of other photographers. There are so many great photographers on 500px, Instagram, and Flickr that it should be relatively easy to find some who have worked in the areas that you have in mind.

Looking at the work of other photographers helps you in two ways:

  1. It helps you find the most iconic, popular, and spectacular places to take photos.
  2. It gives you an idea of the potential of a place for the type of landscape photography you have in mind (for example, perhaps you are looking for somewhere to do long exposure photography, or perhaps you like to work in black and white).

It’s a good idea to look for the work of a local photographer. Locals have a huge advantage over visitors. They know the area better and are familiar with photogenic but relatively unknown locations. They may have lived there for years and built up a substantial body of work. Their portfolios contain photos taken at different times of the year. All these things help build a picture in your mind of the location and its potential for landscape photography.

I went through this process when I traveled to northern Spain last year. Looking at the work of local photographers helped me find locations like this.

Landscape photography locations

2. Go out and explore

Once you’re on location, curiosity is the key to finding interesting things and places to photograph. If you’ve done your research you already know the most iconic and popular locations – they are probably what attracted you in the first place.

But what about other locations? The not so well known ones? You can only find those by exploring. It’s only the desire to see what lies around the next corner, or where a lonely road takes you that allows you to find these places.

I made this landscape photo while walking along footpaths near my parent’s house. This is not a well-known area and you’ll struggle to find other photos taken here. Yet it has a lot of potential and I was able to make photos like this.

Landscape photography locations

3. Make a bucket list of great locations

As you look at other photographer’s work and read about landscape photography on websites like Digital Photography School you are bound to come across interesting places and locations.

My suggestion is that you set up a spreadsheet or word processing file that contains a list of all the places you might like to visit one day. The world’s a big place and there are a lot of photos to look at online. If you don’t make a note when you find something interesting you may forget it and never find it again.

As time goes by you can go back to your list and research the places that seem most interesting to you. For example, let’s say you have the city of Venice on your bucket list. Whenever you find an interesting photo or a good article about photography in Venice, add it to your file. Then, when the time comes that you finally get to go, you’ve already done most of the research required and have a good idea of what you’d like to achieve.

Make your list

Another approach is to write down a list of the places you’d like to visit. Don’t censor the list – they are ideas, not certainties. Then you can research them and make notes as you find out more information. This gives you time to think about how much time you need on location, and how to fit that into your schedule. You can think about time and money and gradually build your plans.

Places on my bucket list include the mountains of Torre del Paines National Park in Patagonia, the Italian Dolomites, and the desert landscapes in the southwestern United States. How about you?

The Picos de Europa in northern Spain, where this photo was taken, were also on my list.

Landscape photography locations

4. Find your personal vision

One of the dangers of looking at the work of other photographers is that it creates a desire to take photos of the same places as other photographers. There’s nothing wrong with capturing photos of iconic locations, and sometimes it’s just an itch that has to be scratched before going on and finding the lesser known places. But the danger is that you forget to look elsewhere for good places to take photos.

Photographer Cole Thompson has an interesting idea he calls photographic abstinence. He never looks at the work of other photographers as he wants to find his own locations and his own way of seeing the landscape. There’s a lot of merit to this idea and it’s something you might like to try for yourself. It’s the opposite approach to the advice given at the beginning of this article, and it may work well for you.

Personalize it

Last year I visited my family in Norfolk, England. Look up the work of local photographers and you’ll find lots of photos of sand dunes, wide beaches, and beach huts – the typical landscape of the local area.

I stayed away from those places and walked around with my camera through the landscapes around the village where my family left. It wasn’t intentional to start, but as I did so I found that I was building a body of work photographing the elements of the landscape that were personal to me. I was ignoring the iconic locations, the ones you see photos of for sale in local galleries, and photographing the landscape in a much more personal and interpretive way.

I ended up taking photos like the one above, and this one.

Landscape photography locations

Wherever you go to take landscape photos, and no matter how well known and iconic some of the locations there are, I encourage you to look for and find your own personal vision.

Conclusion

These ideas are just some of the ways that you can find interesting landscapes to photograph. Do you have any more? I’d love to hear them – please let me know in the comments.


Andrew is the author of the ebook The Black & White Landscape.

The post How to Find the Best Locations for Landscape Photography by Andrew S. Gibson appeared first on Digital Photography School.


Digital Photography School

 
Comments Off on How to Find the Best Locations for Landscape Photography

Posted in Photography


7 Tips for Urban Landscape Photography

22 Apr

When you ask people what is landscape photography they have no trouble defining it. But ask what urban landscape photography is and you will get conflicting answers. People have an idea, but often don’t really understand what it is, or how to go about doing it. One of the first things to do is work out what it is, and then how you can do your own urban landscapes.

7 Tips for Urban Landscape Photography

Urban landscape photograph, taken in the early evening from a rooftop looking back towards the city.

What is urban landscape photography?

Before you can start taking specific urban landscape images it is good if you understand what it is. If urban refers to cities and towns, then it is generally understood that landscapes of these would be defined as that. Any image within those places where humans live, work and play would be considered in that category.

Cities are very popular for this kind of photography. You will find that many of you are already doing urban landscapes, especially when you travel. However, when you ask others what it is you are often told cityscapes. Yes they are, but there is so much more to the genre than that.

Here are seven tips to help you get better urban landscapes and, hopefully, help you to understand what it is as well.

1 – Street photography

Street photography can fall into two categories, one is street portraits, and the other looks more at the scene and what is going on. The first is not what you would typically find in urban landscapes, but the second is.

Look for scenes where people are, groups, or individuals, but place them in their environment so you get a context of where they are and what is happening. You could photograph people shopping and take a look at consumerism. Perhaps go to sporting events and photograph how people carry on at them. There are parks where people may be sitting on their own with no one around. Anywhere that people hang out is going to make for some interesting urban landscape photography.

7 Tips for Urban Landscape Photography

A street scene showing the landscape and what people are doing in it.

2 – From above

There are many ways to photograph above the city now. You can see the tops of the buildings looking straight down to the streets below. You can get amazing views that are unique.

Observation decks allow you to look down onto the city. They aren’t always easy to shoot from, as you sometimes have to take photos through glass or some sort of security mesh.

Another way is a helicopter ride over a city. It is an option that many cities offer now. You can take a 15-minute ride if you want to pay for it. If you are lucky to live somewhere like Melbourne, you can also take early morning balloon rides over the city. You will get some views of the city that are available no other way.

7 Tips for Urban Landscape Photography

A view from above, this was taken from Eureka Deck, an observation deck looking over Melbourne.

3 – Long exposure photography

Without a doubt, there aren’t many types of photography that long exposures don’t suit. You can use it for individual buildings or for groups and streets. It allows you to create some magical scenes.

The most common one that people think of is using Neutral Density filters so you can get very long exposures, anything from 30-seconds to several minutes. They can help create movement with getting blurred clouds, or you can remove people and cars from streets. You can get some interesting effects with the filters. Whether you use it for one building or many, and over water you will get some different images.

7 Tips for Urban Landscape Photography

A long exposure of Melbourne taken across the river.

4 – Night photography and light trails

Night photography is another way. Urban environments are great when the sun goes down. As the lights come on you can get a completely different view. The camera will pick up a lot more than you can see with your eyes. Depending on how bright or dim it is you may be able to take some exposures for a minute to two, even longer.

You can also get great light trails at night. Look for interesting streets that have some great buildings in the background that you can use when capturing the trails.

7 Tips for Urban Landscape Photography

Light trails of cars moving around captured during the night.

5 – Interesting architecture

Every city strives to build interesting buildings. Architects like to show off as much as anyone. No matter where you are, see if you can find the most interesting structures to photograph.

You could figure out why a building was designed for an area; if there is something unique about it. Churches were often built on hills so the congregations were still looking up to them when they weren’t attending.

Look for buildings that are nestled in with others that are very different. Perhaps there is an old building somewhere that is surrounded by new ones. Scenes like that can give your images an interesting story.

7 Tips for Urban Landscape Photography

One of the most distinctive buildings in Melbourne, Flinders Street Station.

6 – Weather and seasons

People often forget how a city or town can look completely different in each season and how the weather can change it as well. If you only go to a place once, you don’t get a lot of choices. But if you live or visit them often then you can get a wide variety of shots when you photograph it at other times and in various conditions.

Throughout the year, the seasons will give you numerous opportunities to get scenes that are unique to that time. Autumn will have the colors, so any trees in the streets or parks can make them colorful. Winter will have people rugged up against the cold and public places are empty. In summer everyone is in lighter clothing and those same spaces are filled with people. Consider what sort of photos you want and then choose the season accordingly.

Rain, hail or shine, well perhaps not hail, but each will give your urban landscape a distinct look. The weather is not something you can control but you can take advantage of it. Photos of cities that are white from the snow can be magical. Rain will make all the surfaces reflective and make it look bigger and shinier. Don’t underestimate how much bad weather can make your photos that bit different.

7 Tips for Urban Landscape Photography

Rain has given Hosier Lane a shiny appearance.

7 – Leading lines

Bridges are beautiful, but they can be used for so much more than traveling. They can be the perfect way to help your viewer enter your image. Leading lines are fantastic for helping your audience know where you want them to look. Though bridges are one type, there are lots of others as well.

Really anything that will lead people into an image will work. Look for roads that enter and leave cities and towns. Using the light trails of cars or other vehicles can be great for the same thing. Don’t just think road and bridges, consider train tracks, a moving bus, anything that will take or point your viewer to the area where you want them to focus.

7 Tips for Urban Landscape Photography

Using the bridge as a leading line to take you into the early morning light in Melbourne.

Taking the tips

You don’t have to do all of these, but using one or a few will help you get good urban landscape photography images. Consider what you are taking and think about the environment around you. Make the most of it and give your images a purpose.

Share your urban landscape photography in the comments below!

The post 7 Tips for Urban Landscape Photography by Leanne Cole appeared first on Digital Photography School.


Digital Photography School

 
Comments Off on 7 Tips for Urban Landscape Photography

Posted in Photography