RSS
 

Posts Tagged ‘improve’

10 Ways to Improve Your Travel Photography

20 Feb

How to improve your travel photography

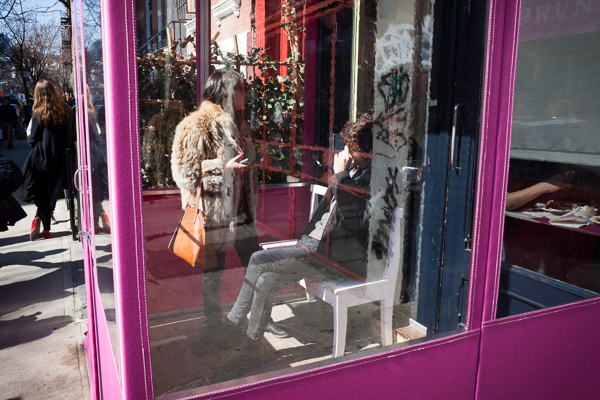
Get the most out of your travel photography and capture the moment with these 10 simple tips. Most of these tips are pretty basic and some of them are useful for traveling in general.

1 – Focus on faces

Sounds obvious I know, but whether it’s wildlife or people, it’s often best to focus your lens on the face of of your most important subject. We are naturally drawn to eyes, so that’s where you’ll usually want to focus.
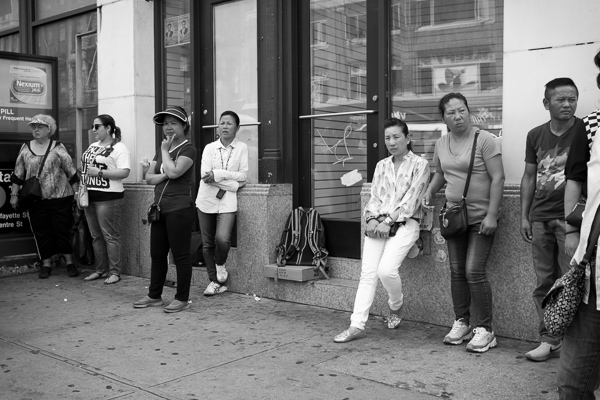
10 Ways to improve your travel photography

2 – Shoot fast

Photographing people in fascinating cultural situations requires a totally different mindset to shooting landscapes.

Forget your tripod, forget low ISO settings and think less about image quality and more about capturing the moment. Be ready, by relying on your autofocus and fast shutter speeds to freeze the action. Handheld is the way to go because you just don’t have the time to be fiddling around with tripods.

In bright sunlight you’ll get away with ISO settings between 400 and 1000 but when the light starts to get low, don’t be afraid to crank that ISO way up into the thousands.

Use wider apertures like f/2.8 to achieve faster shutter speeds and get a pleasing shallow depth of field to accentuate your main subject. Shooting in Aperture Priority mode (AV) lets you quickly dial in the desired aperture while your camera decides on the shutter speed.

If your lens has some kind of vibration reduction be sure to switch that on when going handheld.

Travel Photography tips

3 – Learn the lingo

Take at least a few hours while traveling to learn the basic language skills for your location. Knowing how to say ”Hello, excuse me, please, thank you, sorry, yes, no,” etc., goes a long way even in countries where English is spoken in tourist areas.

Having some basic language skills can make a huge difference to the type of access you’ll get, and the things you’ll get to see. Language opens doors that would otherwise be closed to the average tourist.

4 – Hire a translator or guide

Getting access to people’s everyday lives is often difficult if you don’t know any locals, especially if it’s your first time at a particular location. Consider hiring a guide or translator so that you can communicate with locals on a deeper level than just knowing the basic phrases.

I’ve done this a few times and you sometimes get to make great friends with your guides, who will be happy to introduce you to interesting people and places.

Travel Photography Tips

5 – Smile and make friends

When taking pictures of strangers or communicating with locals, don’t be a dour faced tourist. Smiling is universal and softens what might otherwise be an intimidating approach to people who have little experience with adventurous foreigners.

If you want people to like you, a smile is a good place to start.

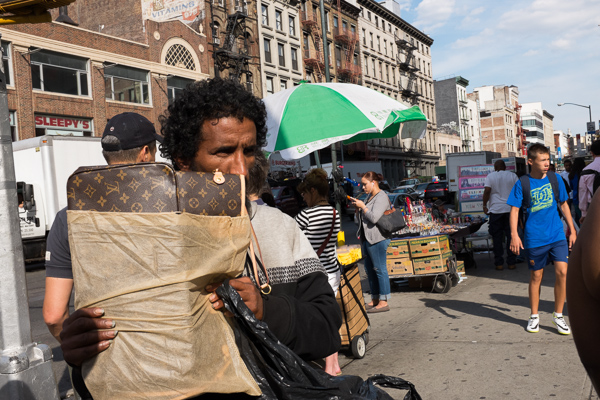
6 – Ask for permission whenever possible

If you’re able to ask a person for permission to take their picture, you should. In many countries there is no legal obligation to do so but it’s just good manners, and some people may have religious reasons why they’d really prefer not to have their picture taken.

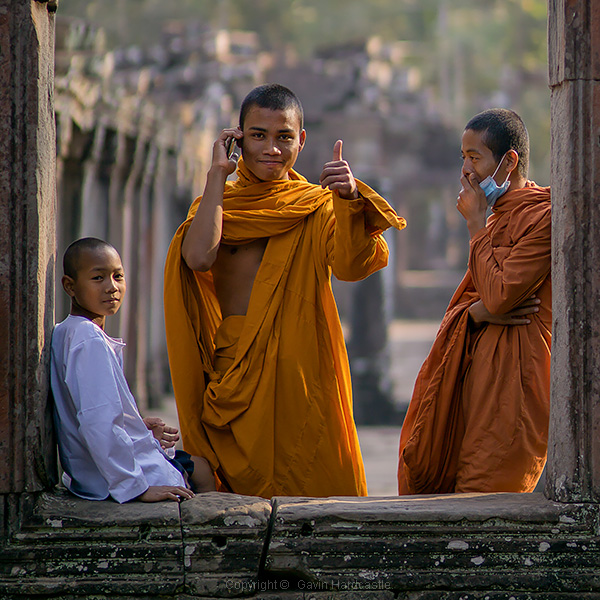
Conversely, don’t interrupt a delicate social situation if there’s a chance it might be socially awkward. This picture I took at the very famous What Pho in Bangkok is a good example. The monks were taking an exam in front of hundreds of tourists under a high pressure situation so I’m hardly going to walk up and interrupt.

Wat Pho Thailand - Travel Photography Tips

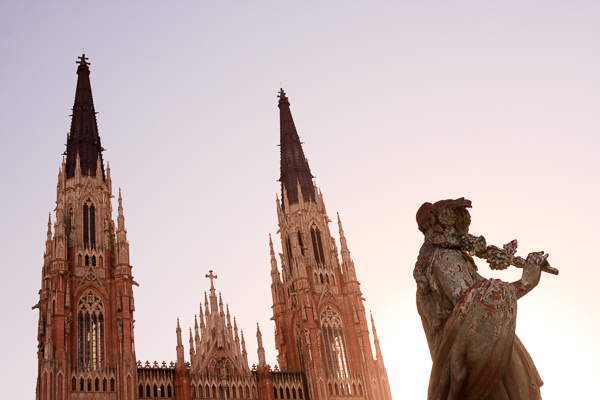
7 – Choose the right lenses

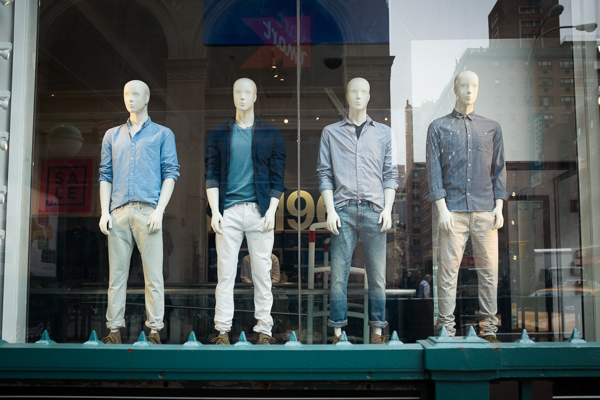
When it comes to capturing atmospheric cultural shots, I’ll choose prime lenses that offer a lovely blurred bokeh effect while keeping my main subject sharp. Typically these will be in the 35mm, 50mm or 85mm, range on a full frame camera. These types of lenses will give you that lovely cinematic look that all-in-one zoom lenses just can’t deliver.

You can achieve a similar look with big telephoto lenses but those are less portable. Smaller primes also make you look more low-key and have great image quality.

Best lenses for travel photography

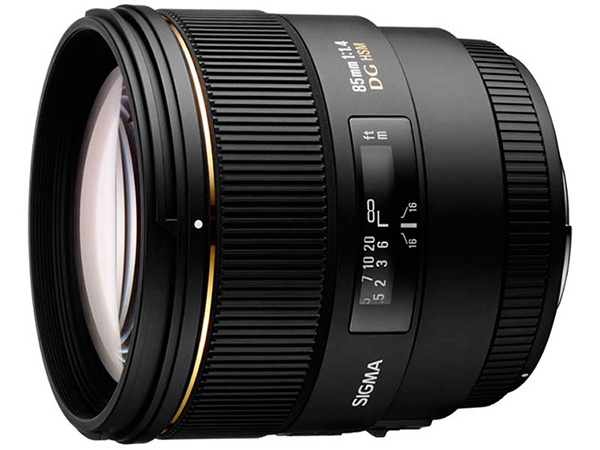
One of my favourite lenses for travel photography is the Sigma 85mm 1.4 prime.

8 – Carry two cameras

This goes back to what I said about shooting fast. With people and animals you often won’t have time to switch lenses, so consider carrying two cameras that have lenses for different purposes. Let’s say a wide angle lens on one camera, and a lovely 85mm prime for portraits on the other. This way you’ll be able to cope with most situations at a fast pace.

If you are going to carry two cameras, try and keep one in a small bag at all times. If you look too much like a paparazzo it might intimidate some people.

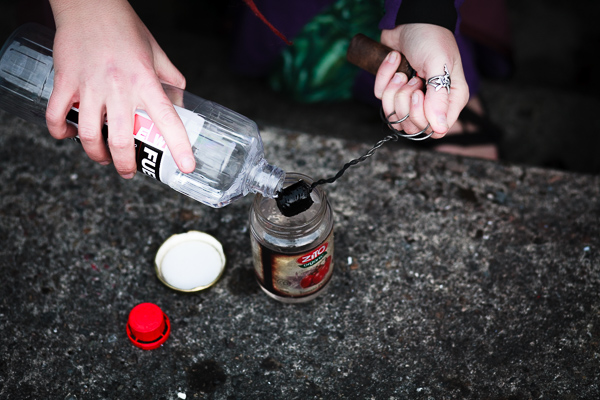
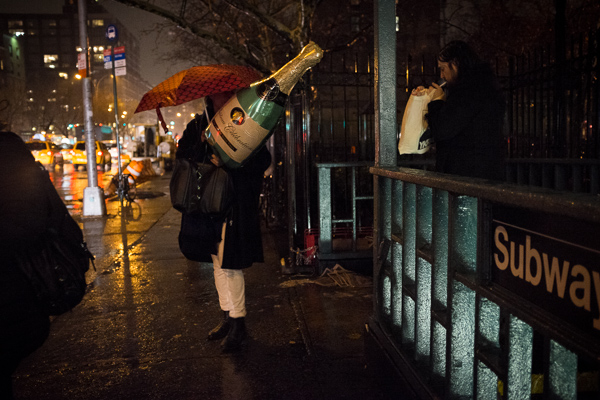
9 – Step out of your comfort zone

I’m not advising you to put yourself in danger. You should always use common sense, but consider doing things you might otherwise find yourself saying NO to. That’s where you’ll find the best photo opportunities.

An example of this would be my recent visit to a mountain cave in Thailand called Phra That Cave in Kanchanaburi Province. The cave has no lights, claustrophobic tunnels and thousands of bats, some of which you’ll have flying right in your face. To me, that’s fun, but to others it’s a living hell.

10 Travel photography tips

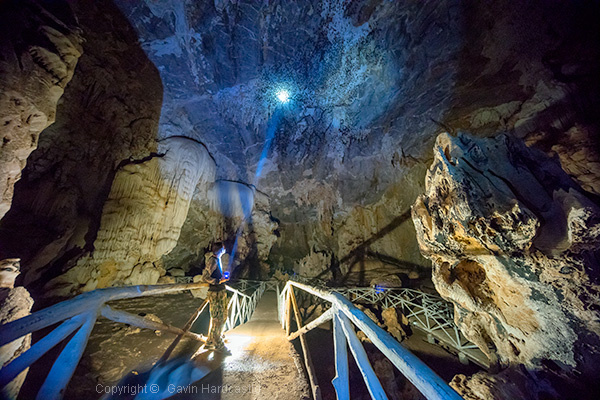
”Bats, you say? Thousand of bats?”

10 – Take responsibility for your ownsafety

Third world countries (and even some first world countries) have a very vague concept of Health and Safety. Modern day westerners are raised in a bubble of relative safety that can sometimes result in us having a misplaced sense of responsibility.

Use common sense when traveling, and don’t assume that those hastily built steps you’re about to climb have been passed by a safety inspector.

Got Your Own Tips?

I’d love to hear your travel photography tips. From always carrying toilet paper to having your lawyer’s phone number on speed dial, please share your hard earned experiences and let’s grow this tip list.

googletag.cmd.push(function() {
tablet_slots.push( googletag.defineSlot( “/1005424/_dPSv4_tab-all-article-bottom_(300×250)”, [300, 250], “pb-ad-78623” ).addService( googletag.pubads() ) ); } );

googletag.cmd.push(function() {
mobile_slots.push( googletag.defineSlot( “/1005424/_dPSv4_mob-all-article-bottom_(300×250)”, [300, 250], “pb-ad-78158” ).addService( googletag.pubads() ) ); } );

The post 10 Ways to Improve Your Travel Photography by Gavin Hardcastle appeared first on Digital Photography School.


Digital Photography School

 
Comments Off on 10 Ways to Improve Your Travel Photography

Posted in Photography


Improve Your Photography in 10 Days with These 10 Tips

18 Feb

For beginners, learning the ins and outs of the fundamentals can often seem daunting. Intermediate photographers might feel confident of their grasp of the photography basics, but find themselves lacking inspiration. Even seasoned photographers might occasionally find themselves stuck in a rut. So we put together a list of tips you can use to get your shutter firing and improve Continue Reading

The post Improve Your Photography in 10 Days with These 10 Tips appeared first on Photodoto.


Photodoto

 
Comments Off on Improve Your Photography in 10 Days with These 10 Tips

Posted in Photography


6 Eye-Catching Photos and How They Can Help You Improve Your Photography

17 Feb

Each photographer has their own way of approaching a scene, choosing which settings on their camera will best reflect their vision, and then crafting the final image. You get to make this series of decisions each time you take a photo, and it’s a highly personal experience.

But you can still learn a lot by going behind the scenes of a photo, and hearing how the photographer made their own decisions. Whether you pick up a new tip for creating an interesting effect, a new way of looking at a scene, or simply the inspiration to go and shoot, it’s both informative, and a lot of fun too.

So here are six of my favourite photos, and details about how they were taken. Get out your notebook, have your camera handy, and let’s go.

1. Waterfall in the Woods

Extremely essential camera skills 1

Vancouver Island, Canada – Settings: 14mm, f/10, 1.6 seconds, ISO 80

This shot is a great example of what happens when you pick a slow shutter speed. Moving water takes on this flowing look and adds a softer feel to the image.

If you want to get this effect, first set your shutter speed to a long value. Here the setting was 1.6 seconds – a value around there is a good place to start. Then you’ll need to adjust the rest of your settings to get a good exposure. This can be tricky sometimes, especially if it’s a really bright scene. A high (small) aperture, and low ISO can really help. But if that’s not enough, you may need to use a neutral density filter.

Then make sure you can keep your camera steady for the entire shot. The ideal would be to use a tripod, but it doesn’t even need to be a big, heavy one. This shot was taken with a point and shoot camera (the Sony RX100III) and the tripod was just a tiny tabletop tripod set up on the rocks.

Finally take the photo, and enjoy a beautiful waterfall image that really grabs your viewers’ attention.

2. The Bee and the Flower

Extremely essential camera skills 2

Edmonton, Canada – Settings: 85mm, f/4.0, 1/3000th, ISO 200

This photo has two elements to pay attention to, the first being the composition. The bee is very small, but you can still easily make it out. That’s thanks to negative space. All of the blue, empty sky is negative space that draws your eye towards the subject. One of the keys to finding negative space in a scene is to move your feet. Walk around, looking to see if you can find an angle that helps simplify your frame by incorporating negative space. Don’t stop there, though. Change your position even further by climbing up high, or, as in this case, lying on the ground. Yep, this photo was taken lying flat on the grass. Don’t be afraid to get messy in the pursuit of a great shot.

The second thing to note about this shot is the shutter speed. There’s a very fast setting chosen here (1/3000th of a second) and that allowed the bee to be in sharp focus, even when it was moving very fast. A slower shutter speed could have led to motion blur of the subject, losing that crisp, sharp detail. When shooting fast moving objects, make sure your shutter speed is set appropriately.

3. The Internet Man

Extremely essential camera skills 3

Jodhpur, India – Settings: 50mm, f/1.6, 1/320th, ISO 400

There’s a great story behind this image. On a trip through India we found ourselves in Jodhpur, known as the Blue City. The walls of many of the houses are painted a vibrant blue, and it made for some incredible images. But this portrait was not taken on a photo walk, but rather after we made our daily visit to the internet shop.

After we finished up on the computer, we got to chatting with the man who owned the shop. He was a wonderful guy, with a great face, so we asked for a portrait. He was happy to oblige, and by standing in the doorway of his shop we got both a beautiful blue background, and catchlights in his eyes from the light coming in the door (catchlights, those white specks in the eyes, are a great way to add life and sparkle to your subjects’ eyes).

One final note on the settings: using a low aperture value can help your subject stand out from the background, especially if you can’t bring them very far forward from the background. In this image f/1.6 was used, which is definitely very low, but it really helped create some background separation.

The best part of the story? After we took his photo (and gave him a copy of the file) he thanked us, and told us that he’d pray that we’d have a son before returning to India. Well, we did have a son. Now we just have to go back, don’t we?

4. Cows in the Field

Extremely essential camera skills 4

The Sacred Valley, Peru – Settings: 200mm, f/7.1, 1/1600th, ISO 800

Learning how to use lens compression to your advantage can make for some really impressive shots. This image is a great example of this technique.

Very simply, when you use a longer focal length (like the 200mm used in this photo) it makes the distance between objects in the frame appear to be less. It makes the background appear closer to the foreground, and in this example it makes the hills appear very close to cows. Essentially, it compresses the space in the image.

Here you can see how it makes the hills really fill the frame and create a strong, patterned background that contrasts nicely with the organic shapes of the cows.

In your own photography you can use a long lens to make clouds appear much larger and closer to your subject, or make your friends look like they’re stepping on top of a building, Godzilla-style. There’s no limit to the creative effects you can achieve when you use compression.

5. Down the Stairs

Extremely essential camera skills 5

Krabi, Thailand – Settings: 17mm, f/5.0, 1/400th, ISO 400

If long lenses make objects appear closer to each other in your frame, what about wide angle lenses?

Here’s a great example. This shot, taken while looking down a few of the 1,272 treacherously steep steps of the Tiger Cave Temple, makes you feel like you may just fall down them, along with the photographer.

The wide angle lens (17mm) helps to create that feeling. The wide angle exaggerates the distance between objects, especially at the edges. Take a look at those hand rails at the edge of the frame. They look very far apart, especially compared to the distance between the hand rails further down the stairs. But this exaggeration at the edges helps to turn the rails into leading lines, drawing your eye down the stairs, and creating that falling feeling.

So if you want to add some drama to an image, or exaggerate perspective, grab a wide angle lens. Place objects near the edges and make use of the stretching it causes.

6. Camel at Sunset

Extremely essential camera skills 6

Jaisalmer, India – Settings: 70mm, f/7.1, 1/400th, ISO 125

Doesn’t a great silhouette image just grab your attention? It’s so different from how we normally see the world that it can add a big impact to your work.

But a silhouette is a prime example of how your camera can easily be fooled by light, and how you, the photographer, need to know how to control it.

In this example your camera might very well try to expose for the camel, or somewhere in between the camel and the sunset, and you’ll wind up with something really bright, or sort of dark, but it probably won’t look like a nice, crisp silhouette.

So what to do? Take control. When aiming for a silhouette you’ll want to expose for the sky, not the subject. Then you can either use exposure compensation to dial in the exposure you’re looking for, or better yet, jump into full manual control and choose your settings to get exactly the exposure and depth of field you want.

Hopefully this peek behind the decisions and settings of these photos gives you a few tips to take some great shots of your own. The more you learn about how all the settings on your camera affect the look and feel of your images, the better decisions you’ll be able to make. Best of all, this stuff doesn’t have to be hard to learn, and you’ll get to use the knowledge to create better images for the rest of your life.

googletag.cmd.push(function() {
tablet_slots.push( googletag.defineSlot( “/1005424/_dPSv4_tab-all-article-bottom_(300×250)”, [300, 250], “pb-ad-78623” ).addService( googletag.pubads() ) ); } );

googletag.cmd.push(function() {
mobile_slots.push( googletag.defineSlot( “/1005424/_dPSv4_mob-all-article-bottom_(300×250)”, [300, 250], “pb-ad-78158” ).addService( googletag.pubads() ) ); } );

The post 6 Eye-Catching Photos and How They Can Help You Improve Your Photography by Lauren Lim appeared first on Digital Photography School.


Digital Photography School

 
Comments Off on 6 Eye-Catching Photos and How They Can Help You Improve Your Photography

Posted in Photography


Shoot for the Light – Improve Your Composition

05 Feb

JB 1134 Edit

JB 2111

Here is one of my most valuable tips. The one I will offer to someone who comes to me, complaining that after 20 years of taking photos they can’t get out of their usual compositions, and want to get into a new level of creativity.

It may sound like something you have heard before. Yes, photography is all about light, and if there is a good light then there is a good photo.

But no, I am talking about something more specific.

JB 2548

Please note that I have always focused my photography, and my articles on travel photography, on people. So when reading this article, please think people photography (which also includes street photography).

In travel photography, most people tend to look for a good subject to photograph. Of course that means that this subject should be “sitting” in an appropriate light, with a good catchy background, something not too distracting. The problem with this approach, is that you might end up taking the same kind of compositions again and again. Framing your subject on the side, rule of thirds, looking into the photo, etc. As much as these are nice photos, you may feel the need to develop your creativity and come up with something different.

JB 1174

JB 2352

What I am telling you, is to completely not focus your attention on your subject. After all, your subject does not matter (unless you happen to meet the new “Afghan girl” of Steve McCurry, or the girl with green eyes of David Lazaar). No, believe me, as someone living in Vietnam: one old lady with a pointy hat looks the same as another old lady with a pointy hat.

Instead of that, try and focus your entire attention on the light around you. Not the beautiful sunset light in the whole sky, but the little spots of golden light right there, on the floor next to you. Yes, can you see them? Well, there is your next photo my friend.

Yes, I hear you already, “What do you mean shooting light?! And what is my subject, what am I telling a story about?”. Well – now your job is to patiently wait for the right subject to walk into that light. But remember? Shoot the light.

JB 6808

IMG 6354

In the same way as we say “fill your frame” in photography. Keep things simple, only include elements which are relevant to the story you are telling. You can fill your frame with that sumptuous golden light you found on the floor. And that is what is going to lead you to a completely new level in composition and creativity. Because you are only shooting that piece of light, you are going to crop your subjects in way you would never have dared before. You are going to break all the rules you have carefully been following until now, and create something new.

IMG 3204

It will surely be beautiful, as your light will be stunning. You may miss a lot of photos, as you have to get used to getting that close to things and people in a light that can be quite full of contrasts and colors. But with time and a bit of practice, things will start to take shape. You will get used to such new ways of composing your image, and your results will become sharper over time. Until you are getting comfortable with this new idea, and start re-creating your templates that will allow you to be fast and efficient and not miss your images.

EJB 1426 IMG 1761

“Heresy!!!” I can already hear. Sorry? Which book are you talking about? Look at the results you are going to achieve with this technique, and tell me if does not make you think in a complete new way, bringing completely new styles of images. If you don’t like it, well go and try something different. But surely you would have learned something out of it.

Last year, while running a photo workshop in Myanmar, I managed to capture this image using this exact technique. I could see the light on the floor, and the beautiful blue color next to it. I also knew that this monastery was quite busy, and if I waited long enough someone would walk into my frame.

EJB 1515

One of my students and I laid down on the floor. I switched from Aperture mode to Manual (making sure I would have the right exposure, as the situation had very strong contrasts). I did compose the photo, exactly the way I wanted to have it, and I waited. Surely, after half a minute, some novices went down the stairs. They did spot us, and feeling a little shy to be photographed, they ran through the corridor, laughing out loud.

Click – Click – Click

I did not expect them to run in the first place so my shutter speed was right enough to freeze my hand shakes, or someone walking. But it gave some blur to the novice’s robe, and I liked the shot even more like that. After all, most new things that were created on our planet are the result of accidents!

Go ahead, give it a try!

EJB 1830 IMG 8352

JB 6091

IMG 6605

IMG 4331

IMG 9911

googletag.cmd.push(function() {
tablet_slots.push( googletag.defineSlot( “/1005424/_dPSv4_tab-all-article-bottom_(300×250)”, [300, 250], “pb-ad-78623” ).addService( googletag.pubads() ) ); } );

googletag.cmd.push(function() {
mobile_slots.push( googletag.defineSlot( “/1005424/_dPSv4_mob-all-article-bottom_(300×250)”, [300, 250], “pb-ad-78158” ).addService( googletag.pubads() ) ); } );

The post Shoot for the Light – Improve Your Composition by Etienne Bossot appeared first on Digital Photography School.


Digital Photography School

 
Comments Off on Shoot for the Light – Improve Your Composition

Posted in Photography


How to Use Triangles to Improve Your Portraits Composition

23 Jan

Do you ever look at a picture and absolutely love it, but you don’t know why? There are a lot of elements that can go into a great shot, but the hardest thing to see/ easiest thing to pick up on are triangles, which are leading lines that frame your subject, drawing your eye deeper into their inner lives. The Continue Reading

The post How to Use Triangles to Improve Your Portraits Composition appeared first on Photodoto.


Photodoto

 
Comments Off on How to Use Triangles to Improve Your Portraits Composition

Posted in Photography


Improve your Images with Photography Projects

14 Nov

Photography project

Have you ever been in a situation where you are stuck for ideas about what to take photos of? I certainly have, and a lot of it comes from being so familiar with my surroundings that it’s hard to see the photographic potential in anything. A newcomer to my local area would probably see it completely differently, and find lots of inspiration.

Given that most of us spend the majority of the year at home, is there an easy way to find inspiration? There is – the secret is to get in the habit of setting yourself photography projects.

Projects are a way of giving yourself something to aim for, and developing a thematically linked body of work. Professionals set themselves projects to learn new skills, make new contacts and give themselves something creative and positive to do in quiet times. But you don’t have to be a pro to benefit. Projects can help you become a better photographer, no matter what your level.

Photography project

Benefits of projects

Here are some of the practical benefits of projects.

Projects help you develop new skills.

For example, the photos illustrating this article were taken as part of a personal project photographing circus performers. The aim of the project, apart from creating an interesting set of portraits, was to improve my portrait taking skills. Setting myself a project with a specific theme allowed me to hone in on a group of interesting people. Circus is a tight-knit social group, so once I’d got started it was easy to meet more performers by asking the ones that I’d photographed if they knew anybody else who would be interested.

Best of all I got to meet and get to know a new group of people. It has been great fun and opened my eyes to a way of life and outlook different to my own. The project has fuelled personal growth as well as helping me become a better photographer.

Photography project

Projects give you something to aim for.

Once you’ve committed to a project, and the idea of taking a series of photos over a period of time, you get to compare your newest work with previous photos. You  will see how your skills and ideas progress over time.

Projects can last for years.

That’s right, there’s no need to work on one project at a time, or to work on a project with a finite time span. There’s no reason why you can’t have several ongoing projects, each with an indefinite time span, that only come to an end when you feel that your time with the project is done.

Projects let you explore a subject in-depth.

One way of taking photos is to visit somewhere for a day or two, taking photos of the scenery and anything else that catches your eye. That might help you take photos of landmarks and other well-known scenes, but it’s not an in-depth exploration of a subject. I’m aware of this because I’ve just returned from a trip exploring New Zealand’s South Island. I spent no more than two days in any location, photographing the most obvious (and sometimes not so obvious) landmarks and scenery. But that’s only a shallow coverage.

Imagine how much more depth you can get if you have time to explore a place on a deeper level. If you live somewhere with beautiful landscapes, you can go beyond the more obvious scenic spots and find photogenic but little known places. Or you could photograph the lives of the people who live and work there.

This isn’t easy to do when you’re visiting a place for a short period, but it’s something that’s much easier when your subject is closer to home. That’s why projects are such a good way of getting more out of your home town, or places nearby within a convenient travel distance.

Photography project

Project ideas

Here are some ideas for projects to get you started:

365 project

This has become a classic – take a photo a day for a year, publishing the best photo from the day or your blog or Flickr photostream. The idea is that the discipline of taking a new photo every day pushes you to explore new subjects and encourages you to take your camera out with you to find things to take photos of. Your photography skills should improve immensely over the year.

10o strangers project

I love this concept (written about on Digital Photography School a few months ago by Matt John Robinson). The idea is to take photos of 100 strangers. Not candid photos taken without their knowledge, but by approaching your potential subject and asking if you can take their photo. Not only will you become a better portrait photographer by doing so, but you will meet some new and interesting people along the way.

Photography project

Night skies project

I’ve been very impressed by the work of Wellington based photographer Mark Gee. He has built a reputation taking photos of the night sky, principally in the southern part of New Zealand’s North Island. This is a great example of a long-term project that anyone who lives outside a heavily built-up urban area can undertake. Not only will you learn a new skill (taking photos at night) but it will encourage you to go out and explore your area and appreciate its natural beauty during the night hours.

Garden flowers project

Mandy Disher is another photographer whose work I admire greatly. She takes photos of flowers and insects, the majority created within her own garden. This is a long term project that anybody with a garden can undertake, and it’s a great example of something you can do close to home.

Photography project

Your turn

Have you ever undertaken a photography project, and do you have ideas for projects other than the ones I’ve mentioned here? Please let us know in the comments. I’m looking forward to reading about what ideas you come up with.


Mastering Photography

Composition and lineMy latest ebook, Mastering Photography: A Beginner’s Guide to Using Digital Cameras introduces you to digital photography and helps you make the most out of your digital cameras. It covers concepts such as lighting and composition as well as the camera settings you need to master to take photos like the ones in this article.

The post Improve your Images with Photography Projects by Andrew S. Gibson appeared first on Digital Photography School.


Digital Photography School

 
Comments Off on Improve your Images with Photography Projects

Posted in Photography


How to Improve Your Photography with Storytelling Images

09 Oct

east_village_gentrification7

How many times have you had this interaction?

“This photo is beautiful!”

“Thanks!”

End of conversation.

There’s nothing wrong with this, of course. Beautiful is a great, great compliment. However, if you’ve ever wanted to have a longer conversation with a viewer about one of your photographs, then creating images with stories behind them, or around your own personal stories, can be a very important approach to try.

My favorite photography tip has always been that you should photograph what you know and what you are most interested in. This passion and knowledge will help form your photographs and improve them. Instead of only sitting back and capturing what is given to you, go out searching for a way to capture something with which you have experience.

There are three types of stories to think about: ambiguous, personal, and documentary

Ambiguous stories

The ambiguous photograph is an image with a story that is unclear. It is a photo that makes you think, where you can imagine multiple stories and arcs based on a single image. This is a very important way to think about your work. If you can create a photo with an evolving story then as it lives on your wall or the wall of a viewer, the photograph will never get old. There will always be mystery and an evolving story based on the viewpoint of the observer. It’s hard to get sick of an image like that.

Bodega Flower Worker, 2012

Here’s an example of an ambiguous image for me. I walk by this flower stand outside of a bodega every day. I’ve always been curious about the lives of the people that work at these places. I know that some of them are immigrants looking to make a tough living in a tough city. On one of my walks home one evening, I noticed this man stopped and stared at the flower with this pained and thoughtful look. I have absolutely no idea what is going on here, but it makes me imagine a very elaborate story around what he is thinking about based on a simple look.

Personal stories

The personal story is to capture something that has happened to you. You can do this through multiple images or try to capture it within a single image. If you have a photo blog this is a great way to spice it up from just a solid stream of photographs with no commentary. When you put it on your wall, the next time someone complements you on how it looks, you can also tell the story behind the image. It’s good to create beautiful images for the sake of beauty, but it can also be fun to include images with stories. There is a place for both on your wall or on your blog.

Here is a recent example taken straight from my own blog to give you some inspiration. It is a single image that brought up a fun memory from my youth.

Canal Street, New York

Canal Street, New York

“Louis Vuitton? Rolex? Rolex?

These are the women on Canal Street in New York who sell fake handbags. I remember my first experience on Canal Street, the home of fake handbags. This must have been freshman or sophomore year in high school. My friend wanted to go to Canal Street to get a fake ID, so four of us took the subway down.

We were walking down the street when someone walked by whispering, ‘Fake IDs, Fake IDs?’ I mean… he picked us out pretty quickly, we must have been perfect targets. So my friend says, ‘Yeah,’ and he takes us into a Chinese restaurant. ‘This is just a front for some illegal operations’ he tells us. I was kind of nervous, but the fact that I was a passive observer with a couple other people made me just sit back and not pay too much attention to what was going on. I already had an ID.  I’ll tell the full story here one day, but making fake IDs is how I got into photography. I downloaded a very early copy of photoshop to alter a photo of an ID and fell in love with it. The rest was history.

The man sat us down at two separate tables with two of us at each table. It was here I probably should have realized something was going on. He clearly did that because the four of us together would have realized something was up.

The two guys who were getting IDs sat at the other table and I overheard the man telling them that he had to go around the back to tell them we were here and to not move or say anything. He was purposely trying to make us nervous about everything.

So he walks out. After a couple minutes we went over to their table. ‘What did he say?’ – ‘Oh, he’s coming back soon. He just had to take our money in first to make sure it’s not counterfeit.’

‘Um… I don’t think he’s coming back.’”

Louis Vuitton, Canal Street

Louis Vuitton, Canal Street

Finally, there is the documentary photograph

You can do this anywhere, but unless you are a professional documentary photographer, it will usually be more practical to create stories where you live and where you are familiar. Capture photographic stories in your community. You can even do this based on a story taken from your own life. The final manifestation of this is creating a full documentary project, but if you’ve never tried anything like this, then start smaller and create single images or small groups of images.

The image at the top of this article, and the following nine, are based on a project that I’ve been working on documenting the gentrification and overall change in my community, the East Village and Lower East Side neighborhoods of New York City. For a somewhat brief version of the story, the neighborhood was once a center of immigrant life in New York, with polish, Ukrainian, Italian, Jewish, Puerto Rican, and people from many other countries around the world. The neighborhood was hit extremely hard during the drug epidemic in New York in the ’80s and it became the place in Manhattan to purchase drugs. People would line up down the block to purchase heroin from drug dealers who often dropped the drugs down in cans. Building owners abandoned their buildings for squatters to take over, and some even burned their buildings down for the insurance money.

Because of all of this, the neighborhood was the cheapest place to live in the city. Musicians, artists, creatives, and many different types of people moving to New York, would go to the East Village because it was cheap and they would be able to pay the rent working a few odd jobs, spending the rest of their time on their art or whatever they wanted. The neighborhood became the birthplace of Punk Rock.

It’s a wonderful neighborhood, the one in which my grandfather and mother grew up, but more recently it has become the trendiest area of the city. Developers have attacked the neighborhood, taking over buildings and illegally strong-arming out rent-controlled and rent-stabilized tenants, many of whom had lived there for 40 or more years. Neighborhood shops, many of which have been around for decades, are disappearing rapidly being replaced by chains. The night is filled with drunk people yelling and peeing on stoops.

The story is much longer than that, but here are just a couple of images from the project that I feel gives a sense of what is happening to the neighborhood.

east_village_gentrification

east_village_gentrification8

east_village_gentrification2

east_village_gentrification9

east_village_gentrification3

east_village_gentrification4

Razed Building, East Village, 2012.

east_village_gentrification6

east_village_gentrification10

So grab a pad and brainstorm some ideas. Share any images you have taken with a good story behind them. Let’s see your stories.

The post How to Improve Your Photography with Storytelling Images by James Maher appeared first on Digital Photography School.


Digital Photography School

 
Comments Off on How to Improve Your Photography with Storytelling Images

Posted in Photography


How to Improve Your Composition Using Juxtaposition and Contrast

09 Oct

Juxtaposition and contrast in composition

Today I’d like to explore two complementary elements juxtaposition and contrast, to help you improve your composition.

Juxtaposition occurs when you place two contrasting subjects side by side. The difference (i.e. the contrast) between the two subjects creates an interesting photo.

A classic example

A great example of this is the Annie Leibovitz portrait (bottom of page linked) of jockey Willie Shoemaker (4’ 11” tall) and basketball player Wilt Chamberlain (7’ 1”). Placing the two men side by side (juxtaposition) emphasizes the difference in their height (contrast). As we’re not used to seeing an extremely short person standing next to a very tall one, the difference in height appeals to our sense of curiosity.

Juxtaposition and contrast in action

Here are some more examples, this time using my own photos, showing how you can use juxtaposition and contrast to improve the composition of your images.

Juxtaposition and contrast in composition

I took this photo in the remote village of Iruya in north-west Argentina. It was late afternoon and I wandered beyond the boundary of the village towards a pass through the mountains. I saw two people walking down a path cut between the rock, one of them leading a donkey.

The juxtaposition here is between the human figures and the mountainside. The contrast is one of scale – the difference in size between the people and the landscape they are passing through.

Juxtaposition and contrast in composition

This photo was also taken in South America, this time in south-west Bolivia. The juxtaposition is between the guanacos in the middle distance and the mountain in the background. The contrast in size gives a sense of distance and scale to the landscape.

This photo is interesting because there is also strong tonal contrast, formed by the light and dark horizontal bands crossing the photo. The effect is emphasized because I used a short telephoto lens (the 55mm end of an 18-55mm kit lens on an APS-C camera), which compressed the landscape and flattened the perspective.

Juxtaposition and contrast in composition

This photo is a simple close-up of a seashell on a beach. The juxtaposition of the white shell against the black sand emphasizes the difference between them. It’s not a coincidence that I chose to convert this photo to black and white. Sometimes, good black and white photography is created simply by juxtaposing a black subject with a white one.

Juxtaposition and contrast in composition

I took this photo at sunset in the Argentinian city of La Plata. The cathedral is one of the largest in the Americas and was only completed in the 1990’s. The juxtaposition here is between the statue in the foreground and the spires of the cathedral. You can’t tell from this photo but the statue is located in a square in front of the cathedral. The two are some distance apart, separated by a road. By finding a position from which I could include both the statue and cathedral together, I created a composition that is more interesting than one containing either the cathedral or the statue alone. There is also a contrast between the gothic architecture of the cathedral and the weathered stonework of the statue that encourages the eye to move between the two.

Juxtaposition and contrast in composition

I photographed this waterfall on the side of Mount Taranaki, a conical volcano on New Zealand’s North Island. I used a tripod to support the camera and a shutter speed of 1/3 second to blur the water.

The juxtaposition here is between the rock and the water. The rocks are still, hard, and have a beautifully textured surface. The water is moving, soft and blurred. This type of contrast is the basis of many long exposure photographs.

Juxtaposition and contrast in composition

Finally, this photo taken in a temple in Shanghai, China, shows a different type of juxtaposition – the power of line. It’s a photo comprised of intersecting lines. The lines created by the incense sticks are perpendicular to the one created by the edge of the burner.

There is another type of contrast too. The line formed by the edge of the burner is much bigger than the sticks of incense. It’s another type of contrast of scale, as seen in some of the earlier photos.

Your turn

Can you think of any other examples of juxtaposition and contrast? Please let us know in the comments, and feel free to add your photos so we can all see what you have done.


Mastering Photography

Composition and line

My latest ebook, Mastering Photography: A Beginner’s Guide to Using Digital Cameras introduces you to digital photography and helps you make the most out of your digital cameras. It covers concepts such as lighting and composition as well as the camera settings you need to master to take photos like the ones in this article.

The post How to Improve Your Composition Using Juxtaposition and Contrast by Andrew S. Gibson appeared first on Digital Photography School.


Digital Photography School

 
Comments Off on How to Improve Your Composition Using Juxtaposition and Contrast

Posted in Photography


7 Tips to Help Improve Your Seascape Photos by Controlling the Waves

18 Sep

When photographing outdoors, you generally take the world as you find it, and you have very little control over the elements. You cannot control the weather. The terrain is a given. You certainly cannot control the skies or the clouds.

But when photographing seascapes there is one thing you can control, and that is the waves. At least, you can control the appearance of the waves. This is a fundamental difference between landscapes and seascapes.

Picture1 Pier

In landscapes you have generally static ground and foreground elements, while in seascapes you are dealing with a fluid substance that is in constant motion. If you just treat a seascape as a landscape, you will get an ordinary photo, but with some attention to the waves you can get extraordinary pictures.

You can actually control the appearance of the waves in order to add just the right mood and interesting effects to your photos. It is actually very simple to do; it’s all about controlling your shutter speed. In general, the slower the shutter speed, the more calm and serene the water will appear, while a very fast shutter speed implies power and action.

In this article, I will walk you through some shutter speed ranges that you might try in your own seascape photography next time you are at the coast. So here are some tips to help you take better seascape photos:

#1 Minimal Gear Needed

To photograph moving water successfully at various speeds, you will not need much in the way of extra gear. Other than a camera, a tripod, and perhaps a remote shutter release, the only necessity is a neutral density filter.

It is best to have a few different strengths of neutral density filters. A 10-stop filter is a must, and from there I recommend adding a 3-stop and a 6-stop filter. In a pinch, remember that polarizing filters typically reduce the amount of light reaching the camera by two stops, so you can use a polarizer as well.

Picture2 AcadiaRocks

#2 Controlling Shutter Speed

Coastal pictures are all about controlling the shutter speed, and you will usually find yourself trying to slow down the shutter speed. If you are shooting in one of the automatic modes, this is a good opportunity for you to step up Manual (M) mode. Just set the shutter speed where you want it, then if you can get the proper exposure by changing the aperture settings, great. But if not, use your neutral density filter to cut down on amount of light entering the camera.

This is also a rare instance where you might consider Shutter Priority (Tv or S) mode. Once you set the shutter speed, the camera will set the aperture for you. Of course, you could also use Aperture Priority (Av) mode and set the aperture with an eye toward where the camera is setting the shutter speed.

When you get to the coast, take a few test shots, Keep an eye on the histogram to make sure your exposure settings work for the mood you are trying to create.

Picture3 SchoodicSunset

#3 Creating Flat Seas with Extremely Long Shutter Speeds (at least 10 seconds)

Most of my favorite seascapes were taken at shutter speeds of 10 seconds or more (sometimes a lot more). Under calm conditions this adds a sense of serenity to the seascape. Under other conditions the slow shutter speed can add some drama to the scene.

Picture4 DavenportCliffs

To accomplish this effect, you are probably going to need to use the 10-stop neutral density filter. If you are set up for a proper exposure before you put the filter on the lens, you will need to add 10 full stops of light to get the proper exposure once the lens is on the camera. If your camera is set up to adjust in 1/3-stop increments, that will mean 30 clicks (of your dial) of additional light.

This filter is so powerful that it leads to some challenges. You are going to need to focus and set your exposure before you put the filter on the camera. Once you put the filter on, you will not be able to see anything or focus. A great process for these long exposures is this article: Step-by-step Guide to Long Exposure Photography

In addition, keep in mind that the exposure will be quite long and the camera will need to be very stable. If you are on sand or other unstable surface, be sure to jam the legs deep into the sand to make it as stable as possible. If you are near the water, let a wave or two touch the tripod’s feet before shooting because the first wave will shift the tripod a little bit.

Picture5 PortlandHeadLight

#4 Ocean Trails: Long shutter speeds (2-8 seconds)

Another great way to capture the sea is with a long shutter speed of at least a few seconds, but not so long as to blur everything out. The advantage of the speed is that it gives the viewer an idea of the rhythm, or currents, of the ocean. This range of shutter speed will often show trails in the ocean and give a general sense of the location of the waves.

Picture6 DavenportSurf

To capture this look, the shutter speed will ordinarily be between two seconds and eight seconds. That also means a neutral density filter, but often not the 10-stop filter. If you have a 3-stop or 6-stop density filter, those usually work best in this situation, depending on the amount of light available.

Picture7 WaveApproaches

#5 Motion and Power: Moderate shutter speeds (1/8 – 1/2 second)

Sometimes you want the viewer to see the actual wave. It still helps to have a little motion to the wave though. This will convey both a sense of motion and give a sense of the power.

To accomplish this, you will typically need to slow the shutter speed down just a little bit. You will find the best shutter speeds for this range are between 1/8th and 1/2 of a second. At these speeds, you can still clearly see the waves, but the slower shutter speed takes the jagged edges off of them.

Picture8 AcadiaWave

While you will still need a tripod at these shutter speeds (they are too slow to hand-hold your camera and get sharp images), you can often get away without using a neutral density filter by stopping down the aperture.

Picture9 DunDochathair

#6 Pure Power: Fast shutter speeds (1/500 and up)

Finally, there are days when the ocean is very active where you will want to stop the motion and really capture the power of the sea. A great way to do that is with a fast shutter speed. Speeds of 1/500 of a second and faster work best.

Picture10 CrashingWave

The good news here is that you will not need to use a neutral density filter. You can also ditch the tripod and just hand-hold your camera. These shots offer maximum flexibility and mobility.

A fun thing to do is try to time the wave at it crashes into a rock or the surf. This means a lot of trial and error, but when you hit one, the results can be spectacular.

#7 Before You Go

Remember that the sea coast is a harsh and unforgiving environment. Salt water and electronics do not mix very well, and just the spray of the ocean can lead to serious camera problems (which, unfortunately, I have experienced firsthand). In addition, the terrain can be slippery and treacherous. If you are not careful, you can also find yourself stranded on some rocks in a rising tide (learned this one the hard way too, I’m afraid).

But if you are careful about what you are doing, there is no better place to be than on the coast at dawn or sunset. So get out there and give it a try, and if you have questions or need additional information just use the comments below.

The post 7 Tips to Help Improve Your Seascape Photos by Controlling the Waves by Jim Hamel appeared first on Digital Photography School.


Digital Photography School

 
Comments Off on 7 Tips to Help Improve Your Seascape Photos by Controlling the Waves

Posted in Photography


8 Quick Composition Tips to Help Improve Your Images

10 Sep
Using different composition techniques can result in more dynamic images

Using different composition techniques can result in more dynamic images

You have likely heard of the Rule of Thirds, in fact it seems as if this is the only rule of composition. To be fair though, the Rule of Thirds is a good go to tool when you are unsure of how to put a scene together compositionally. There are many other techniques that can be used to improve your composition. Techniques like balance, leading lines, symmetry, depth of field, and so on, can all make a big difference to your image.

In many ways a photograph is very similar to a painting. Photographers learned early on that composition is a key component to engage people in an image. Composition literally means to put together, so when you think about composing an image, you need to think about the visual elements that you will put together in your image.

As a photographer, you need to decide when to use certain techniques, and when not to use them. Most compositional techniques are simply guidelines, or frameworks, there are very few hard and fast rules.  What they do offer is a starting point for putting an image together. Perhaps you may look at a scene and not know how to capture it. That is a good time to put some of the techniques into action and work the scene from there. They have been tried and tested by visual artists (painters, photographers and moviemakers) around the world for decades. The only constraint is don’t be dogmatic about applying them. Once you understand how to use the rules, you will then know how to break, and break out of them. By doing this, you will take your photographic creativity to a new level and your images will become that much better.

As always, with anything photographic, you need to experiment and practice. Know your equipment, experiment by shooting different scenes under different lighting conditions. Find what works for you and hone that skill. The art of composition is not a particularly technical art, but it can make an amazing difference to your images.

Good composition can make any subject interesting

Good composition can make any subject interesting

The great thing about composition is that you don’t need specialist equipment. The most important pieces of equipment are your camera and your tripod. I know, I know, we all sigh when we hear about the tripod. Once you see how much easier your photographic life becomes with a tripod, you will not be so reluctant to carry it around. There are also  better options for tripods nowadays (think Gorillapod and other travel-style ones). Remember though, a tripod is a key piece of equipment for successful composition. A tripod will help you to compose your image and keep that composition. Whenever possible, use a tripod to set up your shots, that way you can be sure that there is no movement when you photograph.

A lot of the time, you will be shooting images handheld. That is perfectly fine, and you can apply the compositional techniques to handheld shots. Sometimes you may need to take more than one image and adjust your composition to correct or change it.

Here are eight additional composition tips to help improve your images.

The yellow funicular and the blue house add an element of balance to this scene

The yellow funicular and the blue house add an element of balance to this scene

1. Balance

Often when you place an image on one of the thirds, the rest of the frame may be left without much in the way of anything of interest. This is often referred to as negative space, not because it is bad, it is simply to point out that it is not the centre of interest. In some images, negative space can work well, but in other images there may need to be another object in the frame, or even a colour to balance the centre of interest. Photographers use this compositional tool to do exactly that, balance the centre of interest with another object.

2. Leading Lines

We look at an image in the same way that we read a page of words. In the western world that means we look at an image from left to right. Our eyes are naturally drawn into the image by lines. If you have a road or a river winding through your image, the viewers eye will automatically run along those lines. If your centre of interest is at the end of that river or road, that is a good way to compose the image. Sometimes it is enough to have the river or road meandering through the image as it makes the image interesting to look at.

The lines pull us into, and through the scene. The lines can be straight, diagonal, curving, zigzag, S – Shape and many other types. The important thing is to create as dynamic an entry point to an image if possible.

The numerous lines in this scene direct your eyes down the street

The numerous lines in this scene direct your eyes down the street

3. Symmetry and Patterns

We live in a world that is defined by symmetry and patterns. They are all around us in so many ways. There are natural patterns that are captivating to photograph and there are man-made objects that accentuate balance. It is very gratifying to photograph a perfectly uniform scene. The symmetry brings order to the scene and gives a sense of peace and harmony to your image. Sometimes it is good to break the symmetry, show it in a different way, and by doing so create a sense of tension.

A symmetrical doorway

A symmetrical doorway

4. Viewpoint

Kneel down or lie down to get the eye level of your subject

Kneel or lie down to get to the eye level of your subject

Changing your viewpoint when shooting a subject makes a huge difference to the visual impact. It is natural to shoot everything from your eye level. By doing that you tend to create images that have been seen before. By changing your viewpoint, you immediately give a different perspective on very familiar subjects. If you are taking photos of small children or pets and animals, try and get down to their eye level. This is a view that most adults won’t see very often and will make a big difference in the impact of your image. To change your viewpoint, try a few of these tips:

  • Stand on a chair or ladder to get up higher than your subject
  • Kneel or lie down to get underneath a subject, i.e. for shooting a field of flowers
  • Photograph the subject directly from the top
  • Shoot from a diagonal angle to emphasize shape or texture

The important thing here is to make sure that you change YOUR viewpoint and by doing that, you will breathe new life into a well known subject.

5. Background

A distracting background can completely ruin an image. The human eye will naturally settle on the area of an image that is: the brightest, most colorful, sharpest and has the most contrast. Be aware of what is behind your centre of interest. If there is a pole, a distracting pattern, an awkward colour or some other object, you may need to reconsider your shooting angle. This is not always possible, but sometimes, taking two or three steps to the left or right can make all the difference. Look around for an unobtrusive background, or change your aperture settings to achieve a shallow depth of field and by doing so, soften the background.

Move around your subject until the background is nit distracting to the rest of the image

Move around your subject until the background is not distracting viewers from the subject

6. Depth

Photography is a two-dimensional art form. As a result, you use certain techniques to imply three-dimensionality. One way to do this is to have subject matter in the foreground, middle and background. This creates depth, and the eye will naturally walk through the image. This implies a deep depth of field from a technical point of view, so ensure that you use a smaller aperture (i.e. f/8, f/11 or f/16) making everything in the scene in focus. This technique is particularly important when photographing landscape images.

Sometimes, it is great to have a whole scene in focus

Sometimes, it is great to have a whole scene in focus

7. Framing

The world is full of natural objects that can be used to frame a subject (e.g., archways, tree lined streets, holes, and so on create natural frames). By placing your subject in the middle of these natural frames you will create a strong visual pull towards your centre of interest.

Use natural elements to frame your scene

Use natural elements to frame your scene

8. Get in Tight

Sometimes, closer is better and less distracting.

Sometimes, closer is better and less distracting.

It is often tempting to put more detail into a frame to show more about what was happening, but this can lead to confusion. The important maxim to remember is this: less is more. The art of simplifying an image is not easy, but if done correctly can make an image far more dramatic. When you find that your composition has more than one centre of interest, or seems confusing, try these steps:

  • Get in as close as you can to your subject
  • Simplify the composition
  • Be sure to avoid any distracting colours or objects in the background
  • Use a shallow depth of field

Finally

Composition and the rules around it are flexible. There really is no right or wrong way to compose an image, but there are better ways to do so. Some composition techniques can make a huge difference to an image and take it from being a snapshot to becoming a truly great photo. The important thing is to experiment with these techniques. Combine them wherever possible. Try them out as often as you can on different subject matter, and know when NOT to use them. The important part is to make sure that you master them. Use them when you need to. Find out what works for you and go from there. By doing this, not only will your images improve, so will your ability to see an image in a scene.

This is the most important part of photography and very often what separates an average photographer from a great photographer. The ability to see an image in a scene makes all the difference and these compositional techniques help you to do that.

Don't forget to experiment and break the rules where necessary

Don’t forget to experiment and break the rules where necessary

The post 8 Quick Composition Tips to Help Improve Your Images by Barry J Brady appeared first on Digital Photography School.


Digital Photography School

 
Comments Off on 8 Quick Composition Tips to Help Improve Your Images

Posted in Photography