RSS
 

Posts Tagged ‘Images’

How to Improve Your Photography with Storytelling Images

09 Oct

east_village_gentrification7

How many times have you had this interaction?

“This photo is beautiful!”

“Thanks!”

End of conversation.

There’s nothing wrong with this, of course. Beautiful is a great, great compliment. However, if you’ve ever wanted to have a longer conversation with a viewer about one of your photographs, then creating images with stories behind them, or around your own personal stories, can be a very important approach to try.

My favorite photography tip has always been that you should photograph what you know and what you are most interested in. This passion and knowledge will help form your photographs and improve them. Instead of only sitting back and capturing what is given to you, go out searching for a way to capture something with which you have experience.

There are three types of stories to think about: ambiguous, personal, and documentary

Ambiguous stories

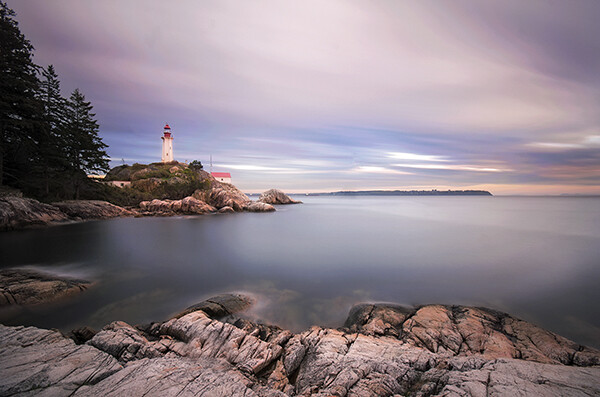
The ambiguous photograph is an image with a story that is unclear. It is a photo that makes you think, where you can imagine multiple stories and arcs based on a single image. This is a very important way to think about your work. If you can create a photo with an evolving story then as it lives on your wall or the wall of a viewer, the photograph will never get old. There will always be mystery and an evolving story based on the viewpoint of the observer. It’s hard to get sick of an image like that.

Bodega Flower Worker, 2012

Here’s an example of an ambiguous image for me. I walk by this flower stand outside of a bodega every day. I’ve always been curious about the lives of the people that work at these places. I know that some of them are immigrants looking to make a tough living in a tough city. On one of my walks home one evening, I noticed this man stopped and stared at the flower with this pained and thoughtful look. I have absolutely no idea what is going on here, but it makes me imagine a very elaborate story around what he is thinking about based on a simple look.

Personal stories

The personal story is to capture something that has happened to you. You can do this through multiple images or try to capture it within a single image. If you have a photo blog this is a great way to spice it up from just a solid stream of photographs with no commentary. When you put it on your wall, the next time someone complements you on how it looks, you can also tell the story behind the image. It’s good to create beautiful images for the sake of beauty, but it can also be fun to include images with stories. There is a place for both on your wall or on your blog.

Here is a recent example taken straight from my own blog to give you some inspiration. It is a single image that brought up a fun memory from my youth.

Canal Street, New York

Canal Street, New York

“Louis Vuitton? Rolex? Rolex?

These are the women on Canal Street in New York who sell fake handbags. I remember my first experience on Canal Street, the home of fake handbags. This must have been freshman or sophomore year in high school. My friend wanted to go to Canal Street to get a fake ID, so four of us took the subway down.

We were walking down the street when someone walked by whispering, ‘Fake IDs, Fake IDs?’ I mean… he picked us out pretty quickly, we must have been perfect targets. So my friend says, ‘Yeah,’ and he takes us into a Chinese restaurant. ‘This is just a front for some illegal operations’ he tells us. I was kind of nervous, but the fact that I was a passive observer with a couple other people made me just sit back and not pay too much attention to what was going on. I already had an ID.  I’ll tell the full story here one day, but making fake IDs is how I got into photography. I downloaded a very early copy of photoshop to alter a photo of an ID and fell in love with it. The rest was history.

The man sat us down at two separate tables with two of us at each table. It was here I probably should have realized something was going on. He clearly did that because the four of us together would have realized something was up.

The two guys who were getting IDs sat at the other table and I overheard the man telling them that he had to go around the back to tell them we were here and to not move or say anything. He was purposely trying to make us nervous about everything.

So he walks out. After a couple minutes we went over to their table. ‘What did he say?’ – ‘Oh, he’s coming back soon. He just had to take our money in first to make sure it’s not counterfeit.’

‘Um… I don’t think he’s coming back.’”

Louis Vuitton, Canal Street

Louis Vuitton, Canal Street

Finally, there is the documentary photograph

You can do this anywhere, but unless you are a professional documentary photographer, it will usually be more practical to create stories where you live and where you are familiar. Capture photographic stories in your community. You can even do this based on a story taken from your own life. The final manifestation of this is creating a full documentary project, but if you’ve never tried anything like this, then start smaller and create single images or small groups of images.

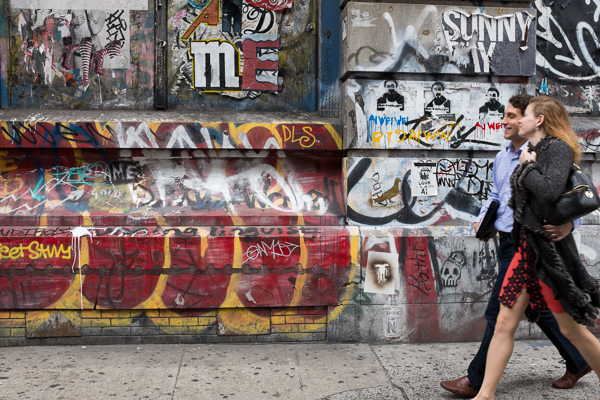
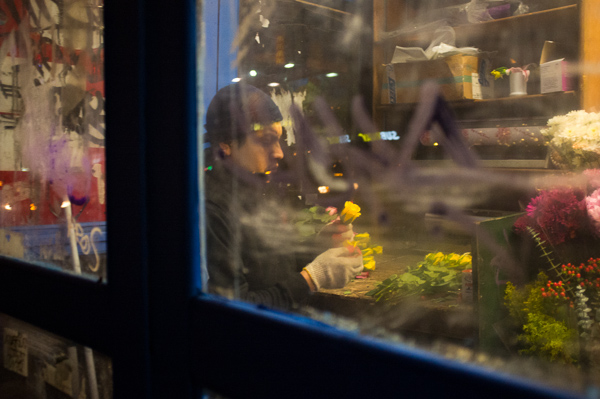
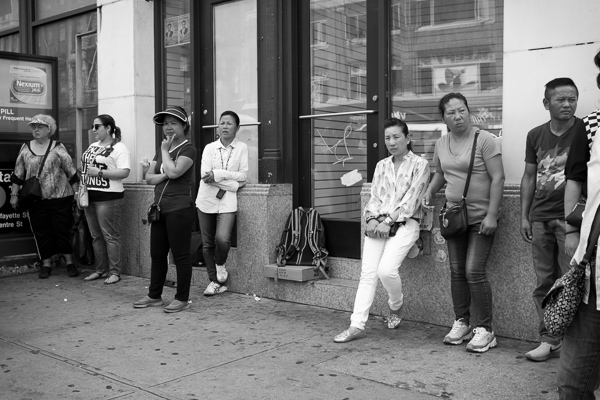
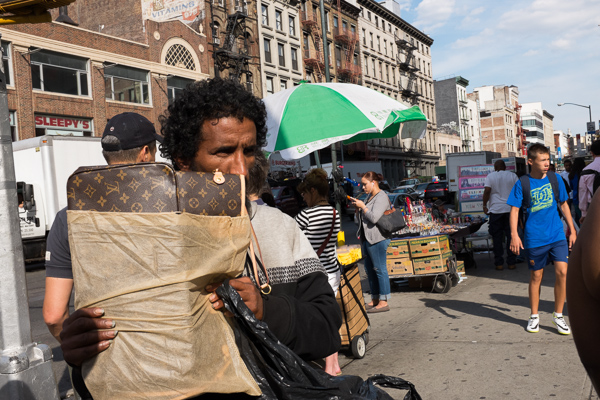
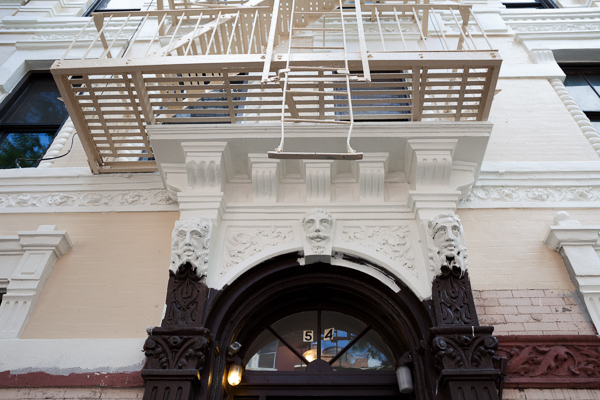
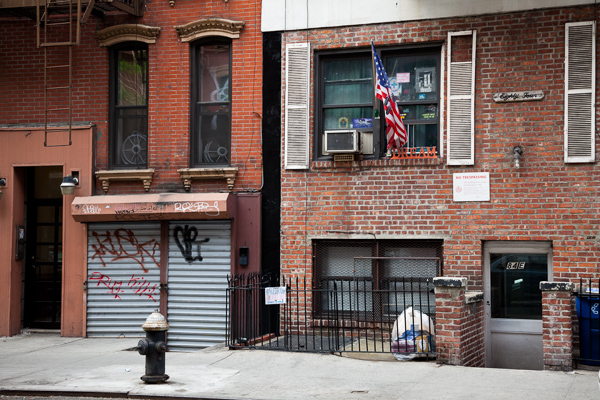
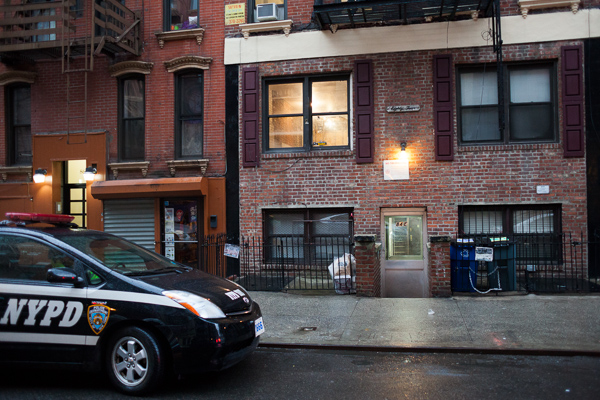
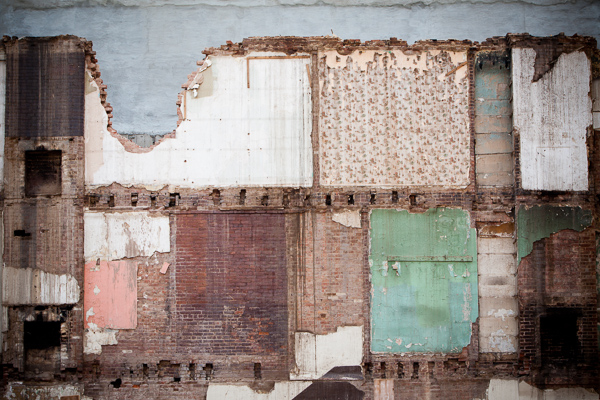
The image at the top of this article, and the following nine, are based on a project that I’ve been working on documenting the gentrification and overall change in my community, the East Village and Lower East Side neighborhoods of New York City. For a somewhat brief version of the story, the neighborhood was once a center of immigrant life in New York, with polish, Ukrainian, Italian, Jewish, Puerto Rican, and people from many other countries around the world. The neighborhood was hit extremely hard during the drug epidemic in New York in the ’80s and it became the place in Manhattan to purchase drugs. People would line up down the block to purchase heroin from drug dealers who often dropped the drugs down in cans. Building owners abandoned their buildings for squatters to take over, and some even burned their buildings down for the insurance money.

Because of all of this, the neighborhood was the cheapest place to live in the city. Musicians, artists, creatives, and many different types of people moving to New York, would go to the East Village because it was cheap and they would be able to pay the rent working a few odd jobs, spending the rest of their time on their art or whatever they wanted. The neighborhood became the birthplace of Punk Rock.

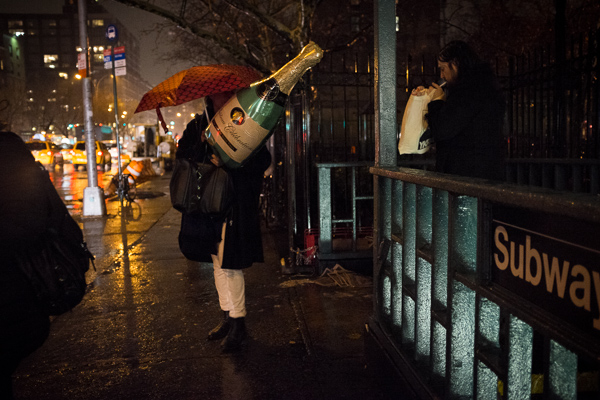
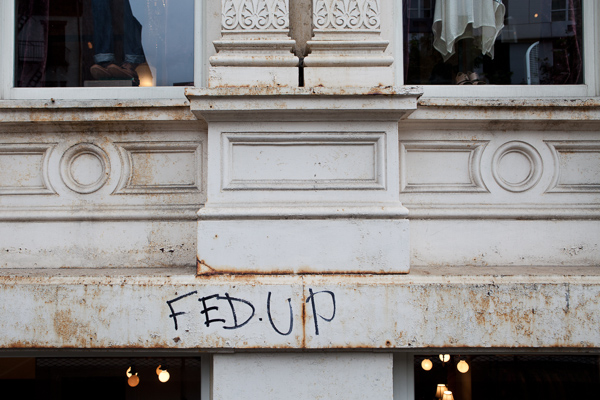
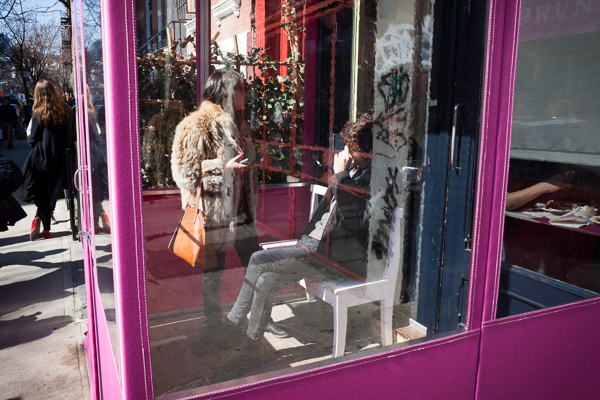
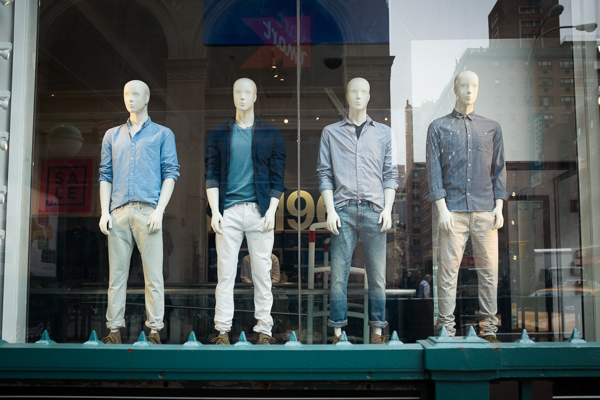
It’s a wonderful neighborhood, the one in which my grandfather and mother grew up, but more recently it has become the trendiest area of the city. Developers have attacked the neighborhood, taking over buildings and illegally strong-arming out rent-controlled and rent-stabilized tenants, many of whom had lived there for 40 or more years. Neighborhood shops, many of which have been around for decades, are disappearing rapidly being replaced by chains. The night is filled with drunk people yelling and peeing on stoops.

The story is much longer than that, but here are just a couple of images from the project that I feel gives a sense of what is happening to the neighborhood.

east_village_gentrification

east_village_gentrification8

east_village_gentrification2

east_village_gentrification9

east_village_gentrification3

east_village_gentrification4

Razed Building, East Village, 2012.

east_village_gentrification6

east_village_gentrification10

So grab a pad and brainstorm some ideas. Share any images you have taken with a good story behind them. Let’s see your stories.

The post How to Improve Your Photography with Storytelling Images by James Maher appeared first on Digital Photography School.


Digital Photography School

 
Comments Off on How to Improve Your Photography with Storytelling Images

Posted in Photography


Aerial Rugs: Images from Above Converted to Carpet Patterns

06 Oct

[ By WebUrbanist in Design & Furniture & Decor. ]

aerial dimensional carpet design

Created by an architect and landscape enthusiast, this limited edition series of custom textiles derives its geometries and colors from aerial views shot around the world.

aerial landcarpet custom series

aerial urban suburban image

Florian Pucher, an Austrian designer now based in Beijing, has long traveled by day to take in as many sights from the sky as possible. Since 2007 he has collaborated with graphic designer Sophia Liu Bo to redraw and abstract images shot from above, turning them into unusual rugs using high-quality New Zealand wool.

aerial carpet close up

aerial carpet urban center

Each LANDCARPET creation is 1 of 88, signed and numbered in the spirit of traditional artistic prints.

aerial carpet with cow

aerial carpet cow scale

The subjects cover the globe, from Europe and the USA to Africa and Asia, urban settings to rural sites.

aerial carpet signed dated

aerial rug design detail

There is a rich variety from one to the next, showcasing an array of lines, curves, organic land forms, urban topographies, and other natural and man-made patterns and features.

aerial carpet city grid

aerial carpet grid pattenr

Each edition takes approximately five weeks to produce, combining real depth and hand-tufted textures.

aerial rug topographic detail

aerial rug colorful topography

The source images range from aerial photographs and satellite images to maps and other views from above. His work as an architect exposes Pucher to all kinds of site maps, master plans and other inspirational materials.

Share on Facebook


[ By WebUrbanist in Design & Furniture & Decor. ]

[ WebUrbanist | Archives | Galleries | Privacy | TOS ]


WebUrbanist

 
Comments Off on Aerial Rugs: Images from Above Converted to Carpet Patterns

Posted in Creativity


How to Watermarking Images With Photoshop and Lightroom

30 Sep

Have you seen the writing on images? You know, the little pictures or words that show the photographer’s name? Those are called watermarks. Photographers often watermark their images so that they are properly credited for their work. Here are a few ways to watermark images with Photoshop and Lightroom.

Watermarks using Photoshop

You can create watermarks in Photoshop several different ways. Here are a few of them.

1. Text layer

The first way is to create a text layer. This is great for simple word watermarks. You can then write your name or your photography business’ name. From there, you can adjust the opacity as you see fit. Try adjusting the blending mode to achieve the look you want. To get the © symbol type; option+g on a Mac, or Alt+0169 on a PC.

MonicaDayDPS-Watermark-01

Normal blending layer with black font at 100% opacity.

MonicaDayDPS-Watermark-03

Normal Blending Mode with an opacity of 63% in black font.

MonicaDayDPS-Watermark-04

Overlay Blending Mode with a black font color at 100% opacity.

2. Logo file

If you have a logo you can place it on your image. You want to make sure your logo has a transparent background. Usually, this will be a PNG file, a GIF or even a vector graphic. If you are unsure, check with your logo designer. Use the place option to put your logo on your image. Again, you can adjust your opacity and blending modes to get the desired effect.

MonicaDayDPS-Watermark-05

PNG file with a transparent background. The checker pattern lets you know that the background is transparent.

MonicaDayDPS-Watermark-06

Place function in the Photoshop CC menu. You then choose the file you’d like to place.

MonicaDayDPS-Watermark-07

Place the file and adjust the size as you wish. (Hold the Shift key down as you resize to maintain the aspect ratio and proportion of your logo)

MonicaDayDPS-Watermark-08

You can again adjust the opacity and blending mode to get your desired look.

2a. Making your logo background transparent if it isn’t already

If you have a logo file that does not have a transparent background then follow these simple steps to create one. First, open your file in Photoshop. Go ahead and unlock this layer (double click it, then hit Enter).

Watermark-01

Watermark-02

Background layer locked

Watermark-03

Layer is now unlocked.

Next, use the magic wand to select the background. If the background is not a solid color then select your logo image and then invert the selection. Now that your background is selected, simply cut. You can do this with cmd+x (Mac) or ctrl+x on a Windows computer.

Watermark-04

Select the background only.

Your image should now have a transparent background. Save this file as a .PNG (JPGs cannot hold transparency) and you’re ready to go.

Watermark-05b

Where you see the grid pattern it’s now transparent.

3. Using the brush tool

For an even easier way to watermark, create a brush. This way you do not have to go through these steps each time you want to watermark your images.

To create the brush with text you’ve written you will need to open a new document in Photoshop. Make sure your document has a transparent background. Type the information you want to have on your watermark. Make sure you have it set up exactly like you want it on your images. Once you have your watermark just as you want it you should go to Image > Trim > Transparent Pixels. Next, Edit-Define Brush Preset. Name your brush and you’re ready to go. The same process can be done with your logo file.

MonicaDayDPS-Watermark-09

These are sample settings that work well in most cases. Make sure your background is set to “Transparent”.

MonicaDayDPS-Watermark-10

Notice that the font is written very large.

MonicaDayDPS-Watermark-11

Make sure you trim your watermark text.

MonicaDayDPS-Watermark-12

MonicaDayDPS-Watermark-13

Your trimmed text should have no space around it.

MonicaDayDPS-Watermark-15

Define your brush in the edit menu.

MonicaDayDPS-Watermark-16

Give your brush a descriptive name.

MonicaDayDPS-Watermark-17

Notice that your brush is now in your brush menu. You can see it at the bottom right in this picture.

You can now use your brush as you would any other brush. The key to having it watermark is to create a layer and select the brush that is your watermark. A simple click will watermark your image. You can adjust the size, opacity, and blending mode as your like.

For more on making a signature brush read: How to make a signature brush in Photoshop

Watermarks using Lightroom

Lightroom has an awesome feature built-in that allows you to watermark your images upon export. In order to use this feature you must first set up your watermark, to do that go to Lightroom>Edit Watermarks.

Screen Shot 2014-09-16 at 5.49.22 PM

You can choose an image or text. There are several different settings that allow you to adjust your watermark like you want. Remember, to get the best results you’ll want to use a PNG file with a transparent background. If you don’t, you’ll have a white box around your logo. You’ll need to save and name your watermark.

For a text watermark simply write your desired information in the white box. You can change the font, color, shadow, and size of your watermark. Watch the image to see your desired effect. Use the Anchor option to adjust placement and the Inset option for further tweaks.

For a text watermark simply write your desired information in the white box. You can change the font, color, shadow, and size of your watermark. Watch the image to see your desired effect. Use the Anchor option to adjust placement and the Inset option for further tweaks.

Screen-Shot-2014-09-16-at-5.02.11-PM2

The font, opacity, size, and location can be altered as you like.

Make sure you use a logo file with a transparent background to avoid this white box. JPEG files do not have transparent backgrounds.

Make sure you use a logo file with a transparent background to avoid this white box. JPEG files cannot have transparent backgrounds.

Now that your watermark is all set up, let’s apply it to your image. Go to Export and Watermarking. There you can choose whatever watermark you have setup. Your image will be exported to the desired location with the watermark chosen.

Screen-Shot-2014-09-16-at-5.06.01-PM2

This image was watermarked in Lightroom with a shadow.

This image was watermarked in Lightroom with a shadow.

Have you got any other methods for adding a watermark to your images? Please share your tips or your results using these methods in the comments below.

The post How to Watermarking Images With Photoshop and Lightroom by Monica Day appeared first on Digital Photography School.


Digital Photography School

 
Comments Off on How to Watermarking Images With Photoshop and Lightroom

Posted in Photography


A 10 Minute Lesson to Photographing Images with More Pizzazz

28 Sep

Photograph-plain-things-with-pizzazz-article-shadow-helping-an-image

Even the most seasoned photographer wants to continue to stretch their creativity. I know I do!

One simple activity you can do in your spare time is to find new ways to photograph everyday, plain things. Yup, the things you see or use every day; no models, no glamorous set-ups, no breathtaking locations. You don’t even need to do this with a fancy DSLR camera or have a significant amount of time. The lesson you learn can be achieved in 10 minutes once a week, using a $ 100 camera or a smart phone.

Your goal is to make something very plain look more interesting through your lens.

Tips:

1. Pay attention to the shadows

If there is a lot of light, then there are probably shadows. Figure out if the shadows are helping the image or hurting it. If the shadows take away from the image, then make a change so that they don’t. The change could be a significant one, like moving your object altogether, or it could be a subtle one, like changing the angle you are shooting.

Annie-Tao-Photography-everyday-hearts-watch-shadow

2. Look for natural patterns and shapes

If you can locate natural patterns in your shot or interesting shapes within the object or everyday scene, then you can shoot it in a way that highlights this.

Annie-Tao-Photography-everyday-hearts-sweater-fringe

3. Know where there is good light

If you can move the object, then place it in the light you want. That could be near a window if you are indoors, or in the shade, if you are outside when the sun is too bright. If you can’t move what you are shooting, then re-position yourself or angle of your camera.

4. Take a close-up shot of one of the key details

You don’t always have to photograph the full object or the entire scene. Figure out what are the key details and consider photographing just that.

5. If it opens, open it – if it moves, move it

Is it a chest? A book? A cookie jar? Photographing it opened will show the content and make the image more dynamic.

Annie-Tao-Photography-everyday-hearts-music-book

Example:  Photographing plain things to create images with more pizzazz

I gave myself 10 minutes to walk around my house and find natural hearts. This lesson was easy and fun. More importantly, it let me see these plain, everyday objects differently (see three images above for more of the hearts I found).

Annie-Tao-Photography-everyday-hearts-scissors

Annie-Tao-Photography-everyday-hearts-leaf-of-green-plant

So, now what?

Doing this activity from time to time can help you discover new ways to photograph people, landscapes, or whatever makes your heart sing. You can give yourself a specific goal, like finding a particular shape, as I did in the example above, or give yourself a general goal of shooting an object with pizzazz in 10 minutes.

Over time, your eyes will be trained to do this on their own, and the results may surprise you.

How this activity translates into lifestyle shoots

Here are a few examples from my recent photoshoots:

Annie-Tao-Photography-photograph-plain-things-with-pizzazz-article-natural-pattern

Photograph-plain-things-with-pizzazz-article-good-light

Photograph-plain-things-with-pizzazz-article-different-perspective

Photograph-plain-things-with-pizzazz-article-shadows-helping-image

Annie-Tao-Photography-Photograph-plain-things-with-pizzazz-article-light-and-shadows

How do YOU stretch your creativity? Share with us in the comments below, so we can all help each other grow.

The post A 10 Minute Lesson to Photographing Images with More Pizzazz by Annie Tao appeared first on Digital Photography School.


Digital Photography School

 
Comments Off on A 10 Minute Lesson to Photographing Images with More Pizzazz

Posted in Photography


Collection of Starry Night Images

27 Sep

Photographing the night sky is challenging and also very rewarding. Doing it well takes patience and skill. In this collection I’ve searched for some outstanding starry night images for you.

Let the star gazing begin!

Photograph A Legend of Starry Night by Shawn Yang on 500px

A Legend of Starry Night by Shawn Yang on 500px

Photograph Home on the Range by Ben Canales on 500px

Home on the Range by Ben Canales on 500px

Photograph Starry night in Santorini by Luca Bettarini on 500px

Starry night in Santorini by Luca Bettarini on 500px

Photograph Black Magic! by Piyush Hatolkar on 500px

Black Magic! by Piyush Hatolkar on 500px

Photograph the road by jonathan sander on 500px

the road by jonathan sander on 500px

Photograph ~ Early morning ~ by Prakash Bajracharya on 500px

~ Early morning ~ by Prakash Bajracharya on 500px

Photograph Medieval Vortex by Javier Martinez Moran on 500px

Medieval Vortex by Javier Martinez Moran on 500px

Photograph Galaxy love by Leung King Lun on 500px

Galaxy love by Leung King Lun on 500px

Photograph The Sky Watcher by Nimrod Genisher on 500px

The Sky Watcher by Nimrod Genisher on 500px

Photograph Starry Night by Vahid Varasteh on 500px

Starry Night by Vahid Varasteh on 500px

Photograph The Path to God by Hammad Iqbal on 500px

The Path to God by Hammad Iqbal on 500px

Photograph Starry Night by Alan Aurmont on 500px

Starry Night by Alan Aurmont on 500px

Photograph Life Struggles by Royce's NightScapes on 500px

Life Struggles by Royce's NightScapes on 500px

Photograph Starry night by Jorge Maia on 500px

Starry night by Jorge Maia on 500px

Photograph Past Life by Ben Canales on 500px

Past Life by Ben Canales on 500px

Photograph Mobius Arch by Sungjin Ahn on 500px

Mobius Arch by Sungjin Ahn on 500px

Photograph Night Train by Aaron J. Groen on 500px

Night Train by Aaron J. Groen on 500px

Photograph Stars over Teton homestead by Royce's NightScapes on 500px

Stars over Teton homestead by Royce's NightScapes on 500px

Photograph Starry lighthouse by Ivan Pedretti  on 500px

Starry lighthouse by Ivan Pedretti on 500px

Photograph Starry road by Ivan Pedretti  on 500px

Starry road by Ivan Pedretti on 500px

Photograph Starry Night over Crater Lake by Rick Parchen on 500px

Starry Night over Crater Lake by Rick Parchen on 500px

Photograph Starfalls by Ben Coffman on 500px

Starfalls by Ben Coffman on 500px

Photograph Stars over Historic Ward Charcoal ovens by Royce's NightScapes on 500px

Stars over Historic Ward Charcoal ovens by Royce's NightScapes on 500px

Photograph In the Still of the Night by Jessica Hendelman on 500px

In the Still of the Night by Jessica Hendelman on 500px

Photograph All That Glitters – Milky Way Above Yosemite Forest by Jim Goldstein on 500px

All That Glitters – Milky Way Above Yosemite Forest by Jim Goldstein on 500px

Photograph Stargazing Through A Window by Jerry Patterson on 500px

Stargazing Through A Window by Jerry Patterson on 500px

Photograph Reflection of the Galaxy | Pfeiffer Beach, California by Ali Erturk on 500px

Reflection of the Galaxy | Pfeiffer Beach, California by Ali Erturk on 500px

Photograph Earth, Air, Fire and Water by Greg Gibbs on 500px

Earth, Air, Fire and Water by Greg Gibbs on 500px

Photograph Andromeda Galaxy by Rogelio Bernal Andreo on 500px

Andromeda Galaxy by Rogelio Bernal Andreo on 500px

The post Collection of Starry Night Images by Darlene Hildebrandt appeared first on Digital Photography School.


Digital Photography School

 
Comments Off on Collection of Starry Night Images

Posted in Photography


How to Avoid and Reduce Noise in Your Images

18 Sep
Reducing noise in your images can make a huge difference to their quality

Reducing noise in your images can make a huge difference to their quality

We have all seen it in our images, that uneven grainy look that makes our images look a little unappealing. In the days of film, noise was called grain and it looked better (even the word grain sounded better) but the digital equivalent of noise can often make a good image look bad. The first question we need to answer is:

What is noise?

Generally speaking, noise is defined as aberrant pixels. That means pixels that are not representing the colour, or the exposure of the scene correctly. The next question is:

When does noise happen?

Noise is introduced into your images when you shoot a long exposure image or shoot at a high ISO setting. Does mean you should never go over ISO 100 or do long exposures? No, there are times that you may need, or even want, to shoot in those conditions. Landscape photographers shoot in low light all the time. The important things to know are; how to avoid getting too much noise in your image and, how to deal with it in your post-production.

Let’s deal with how you can get less noise in your images first.

1. Reduce noise in-camera:

Shoot at lower ISO settings

If your camera is three years old or newer, the ISO functionality will be great. You shouldn’t see too much noise creeping into your images, even up to ISO 1000. However, there might still be some noise at the higher ISO numbers, so be aware of your exposure. Shooting at a lower ISO means you will have less noise in your image. Higher ISO settings tell your camera’s sensor to group pixels together to capture more light. This grouping effect can make your image look gritty and noisy.

So, how do you avoid shooting at a high ISO? If possible, open your aperture to its widest setting i.e. f/2.8. If you are shooting in low light, use a tripod if possible, or you could use a flash. If none of these options give you the correct exposure, then you will need to push the ISO up higher. Also, do some test shots to find out at what level the ISO settings on your camera start to degrade image quality. For many years I shot on a Nikon D80 and I knew that anything above ISO 500 was really difficult to use afterwards. This was because the noise became difficult to remove, even in third party software, and if it was removed, the image looked like a watercolour painting as a result of over processing of the noise. So I got to know the limits of my camera and worked within those constraints.

Shoot in RAW format

I know you may feel daunted by shooting in RAW, but you don’t need to be. RAW is a great way to get the best out of your images, so be sure to use it. You don’t have to shoot RAW all the time, but when you notice that the light is becoming a little too dark, switch over to RAW. The reason is that JPEG images already have compression applied to them. This means that there is already some noise, and what is known as JPEG artefacts, in the image. If you are using a high ISO with JPEG files, the noise can become even worse. Also, in post-production, you have much more flexibility removing noise, and increasing exposure, with a RAW file than a JPEG.

Adobe Photoshop Camera Raw has some powerful noise reduction tools

Adobe Photoshop Camera Raw has some powerful noise reduction tools

Check your exposure

When digital cameras first hit the market, they were really bad at rendering highlights correctly. Many photographers (myself included) would slightly underexpose the images in order to retain detail in the highlights. This meant that the shadow areas were really dark and when you tried to pull them up in Photoshop, the noise would become evident.  This has been largely sorted out now and the new generation of digital sensors does a great job of handling highlights and shadows. As a result, you can expose correctly without fear of having noise in the shadows, or problems in the highlights. In fact, you can now overexpose slightly so that the shadows are a little brighter than normal and then you can pull the highlights down in Photoshop. I have been doing this for a while now and it is amazing how much detail the new sensors can capture in the highlights. Be careful not to overexpose too much, watch that you don’t clip the highlights as the details may then be lost for good.

Be careful when doing long exposures

Long exposures make some of the most dramatic images, but if the exposure is too long, the sensor of the camera can begin to heat up and the pixels will render incorrect colours and exposure. You can still do long exposures, but again, be aware of how you camera handles the long exposure time. Does the image look too grainy? Test it out and experiment to see where your camera begins to struggle. Then make sure that you don’t shoot a long exposure for longer than whatever works on your camera. The key point here is to know the limits of your gear and shoot within those limits. This will ensure great images and easy image editing.

Long exposure images can accentuate noise in a scene

Long exposure images can accentuate noise in a scene

Use in-camera noise reduction

In most cameras there will be a function called High ISO Noise Reduction or Long Exposure Noise Reduction. It’s a good idea to turn this on if you are shooting at a high ISO or doing long exposures. The reason is that after the image has been shot, the camera will analyse the image and look for any pixels that are incorrectly rendered. It will then fix the pixels that are not properly rendered. This takes some time, usually as long as the exposure time. So if you shot an image that was 30 seconds long, the camera will do an analysis and correction that will take up to 30 seconds. This may become impractical if you are doing 10 minute exposures, but it is worth doing on shorter exposures. If you have the time, do it on the very long exposures too, as it can improve the image quality.

Use in camera noise reduction for long exposures and lowlight images

Use in camera noise reduction for long exposures and lowlight images

2. Fixing noise in Lightroom or Photoshop:

Once you have captured your image, you will want to open it up in Lightroom or Photoshop to see how it looks. It is a good idea to zoom your image to 100% to see the actual details of the noise in the image. When you make any adjustments, be sure to zoom in to 100% (1:1 in Lightroom), but also zoom out to see the full image to make sure that the whole thing looks good.

Noise reduction workflow in Lightroom and Photoshop Camera Raw

The controls in Lightroom and Photoshop Camera Raw are pretty much the same, so below is a quick overview of what each slider does and how to use them. In Lightroom you will find the Noise reduction tools in the Develop module and in Camera Raw you will find it as the third tab on right hand side of the screen, it is the Detail tab.

The sliders do the following:

The noise reduction sliders in Photoshop Camera Raw, are identical in Lightroom

The noise reduction sliders in Photoshop Camera Raw, are identical in Lightroom

Luminance

Reduces luminance noise which is noise coming from over or underexposed pixels, this can be quite prevalent in long exposures.

Luminance Detail

Controls the luminance noise threshold. This is good for noisy photos. Higher values preserve more detail but can produce noisier results. Lower values produce cleaner results but also remove some detail.

Luminance Contrast

Controls the luminance contrast; useful for noisy photos. Higher values preserve contrast but can produce noisy blotches or mottling. Lower values produce smoother results but can also have less contrast.

Colour

Reduces color noise. This is often noticed in the underexposed shadow areas of an image.

Colour Detail

Controls the colour noise threshold. Higher values protect thin, detailed color edges but can result in color specking. Lower values remove color speckles but can result in colour bleeding.

Colour Smoothness

This slider controls the smoothness of the colours in the image. This is useful if you still have some unusual colour noise in your image after you have made all your adjustments above. Use this to finish off the noise reduction workflow.

Conclusion

There are no standard settings here that will work for every image. You will need to slide each adjustment around until you find the desired result and see how the changes interact with each other. I tend to slide Luminance and Colour to about 50 and then work from there, I slide each slider up and down, carefully watching how this is affecting the image. Once I am happy with the adjustment, I then move onto the next slider until I am done. I do this while I am zoomed into the image at 100% and after each change, I zoom out to see the effect it is having on the overall image. This may sound a little tedious, but if this is done properly, you will be able to eliminate most of the unsightly noise in just about any image. Practice is also important here, try this on as many images as you can and pretty soon you will be able to predict the effect of each changes.

Do you have any other experiences or tips for noise avoidance and removal? Please share in the comments below.

The post How to Avoid and Reduce Noise in Your Images by Barry J Brady appeared first on Digital Photography School.


Digital Photography School

 
Comments Off on How to Avoid and Reduce Noise in Your Images

Posted in Photography


Riding the waves to smooth water images

15 Sep

Photos that feature milky-smooth flowing water seem to have a Marmite effect on people: they’re either loved or hated. I’m often rather ambivalent towards them, but it doesn’t mean that it isn’t a useful technique to have up your sleeve if you’re faced with a weir or waterfall and you want to capture an image with smooth-looking water that has a sense of flow to it.

Image thanks to Tom at Triggertrap

Image thanks to Tom at Triggertrap

There’s no great secret to shooting a photo that has water flowing through it that looks smooth: it’s done using a long exposure. The slow shutter speed captures the the water as it moves, making it blurred. The blur, in this instance, gives the water a smooth appearance.

Shooting long exposures in daylight hours comes with an inherent problem, however. Over-exposure. Our cameras’ sensors are capable of detecting far more light than we think they are, and even using the lowest possible ISO and smallest available aperture, a long exposure can result in an over-exposed photo when taking during the day. To get around this irritation, you might want to try a neutral density (ND) filter over your lens.

APL0719-1024x681

Image thanks to Tom at Triggertrap

ND filters are grey filters that cut down the amount of light that enters your lens without affecting the colour of your images. They come in different grades, or densities, blocking out between one stop and 12 stops of light. Screw one over your lens and you’ll give yourself a great deal more flexibility when it comes to shooting daytime long exposures.

Then of course you’ll need a tripod. You might want to capture the motion blur of the water, but you’ll want to avoid camera-shake and the rest of the scene getting the wobbles. Even though you’ll be using a very small aperture with an enormous depth-of-field, still think carefully about your framing of the shot and its point-of-focus. Make sure it’s telling a story.

Image thanks to Tom at Triggertrap

Image thanks to Tom at Triggertrap

Obviously you’ll need to have your camera in manual mode to ensure that you can adjust the shutter speed, ISO, and aperture to get the photo that you want. Almost certainly you will need to use the lowest ISO and smallest aperture avalable. When it comes to shutter speed, you might find that you need to venture into bulb mode to get the shutter speed you need. And we recommend that you use a remote shutter release to prevent jolting your camera on its tripod and shifting its focus, too.

Then it’s a case of hitting the cable release and leaving the camera to do its thing.


All images are courtesy of Triggertrap. You can learn more about using remote releases on the awesome Triggertrap How-to site!

This article was originally posted at Riding the waves to smooth water images , on Photocritic.

PLEASE NOTE — The contents of the Photocritic blog is strictly copyrighted, and this feed is for personal, non-commercial use only. The use of this feed on other websites is a copyright infringement, so you should only ever be able to read this text in a feed reader. Digital Fingerprint: d07805f964d211dfdfe227d609f7448f

Photocritic

 
Comments Off on Riding the waves to smooth water images

Posted in Photography


8 Quick Composition Tips to Help Improve Your Images

10 Sep
Using different composition techniques can result in more dynamic images

Using different composition techniques can result in more dynamic images

You have likely heard of the Rule of Thirds, in fact it seems as if this is the only rule of composition. To be fair though, the Rule of Thirds is a good go to tool when you are unsure of how to put a scene together compositionally. There are many other techniques that can be used to improve your composition. Techniques like balance, leading lines, symmetry, depth of field, and so on, can all make a big difference to your image.

In many ways a photograph is very similar to a painting. Photographers learned early on that composition is a key component to engage people in an image. Composition literally means to put together, so when you think about composing an image, you need to think about the visual elements that you will put together in your image.

As a photographer, you need to decide when to use certain techniques, and when not to use them. Most compositional techniques are simply guidelines, or frameworks, there are very few hard and fast rules.  What they do offer is a starting point for putting an image together. Perhaps you may look at a scene and not know how to capture it. That is a good time to put some of the techniques into action and work the scene from there. They have been tried and tested by visual artists (painters, photographers and moviemakers) around the world for decades. The only constraint is don’t be dogmatic about applying them. Once you understand how to use the rules, you will then know how to break, and break out of them. By doing this, you will take your photographic creativity to a new level and your images will become that much better.

As always, with anything photographic, you need to experiment and practice. Know your equipment, experiment by shooting different scenes under different lighting conditions. Find what works for you and hone that skill. The art of composition is not a particularly technical art, but it can make an amazing difference to your images.

Good composition can make any subject interesting

Good composition can make any subject interesting

The great thing about composition is that you don’t need specialist equipment. The most important pieces of equipment are your camera and your tripod. I know, I know, we all sigh when we hear about the tripod. Once you see how much easier your photographic life becomes with a tripod, you will not be so reluctant to carry it around. There are also  better options for tripods nowadays (think Gorillapod and other travel-style ones). Remember though, a tripod is a key piece of equipment for successful composition. A tripod will help you to compose your image and keep that composition. Whenever possible, use a tripod to set up your shots, that way you can be sure that there is no movement when you photograph.

A lot of the time, you will be shooting images handheld. That is perfectly fine, and you can apply the compositional techniques to handheld shots. Sometimes you may need to take more than one image and adjust your composition to correct or change it.

Here are eight additional composition tips to help improve your images.

The yellow funicular and the blue house add an element of balance to this scene

The yellow funicular and the blue house add an element of balance to this scene

1. Balance

Often when you place an image on one of the thirds, the rest of the frame may be left without much in the way of anything of interest. This is often referred to as negative space, not because it is bad, it is simply to point out that it is not the centre of interest. In some images, negative space can work well, but in other images there may need to be another object in the frame, or even a colour to balance the centre of interest. Photographers use this compositional tool to do exactly that, balance the centre of interest with another object.

2. Leading Lines

We look at an image in the same way that we read a page of words. In the western world that means we look at an image from left to right. Our eyes are naturally drawn into the image by lines. If you have a road or a river winding through your image, the viewers eye will automatically run along those lines. If your centre of interest is at the end of that river or road, that is a good way to compose the image. Sometimes it is enough to have the river or road meandering through the image as it makes the image interesting to look at.

The lines pull us into, and through the scene. The lines can be straight, diagonal, curving, zigzag, S – Shape and many other types. The important thing is to create as dynamic an entry point to an image if possible.

The numerous lines in this scene direct your eyes down the street

The numerous lines in this scene direct your eyes down the street

3. Symmetry and Patterns

We live in a world that is defined by symmetry and patterns. They are all around us in so many ways. There are natural patterns that are captivating to photograph and there are man-made objects that accentuate balance. It is very gratifying to photograph a perfectly uniform scene. The symmetry brings order to the scene and gives a sense of peace and harmony to your image. Sometimes it is good to break the symmetry, show it in a different way, and by doing so create a sense of tension.

A symmetrical doorway

A symmetrical doorway

4. Viewpoint

Kneel down or lie down to get the eye level of your subject

Kneel or lie down to get to the eye level of your subject

Changing your viewpoint when shooting a subject makes a huge difference to the visual impact. It is natural to shoot everything from your eye level. By doing that you tend to create images that have been seen before. By changing your viewpoint, you immediately give a different perspective on very familiar subjects. If you are taking photos of small children or pets and animals, try and get down to their eye level. This is a view that most adults won’t see very often and will make a big difference in the impact of your image. To change your viewpoint, try a few of these tips:

  • Stand on a chair or ladder to get up higher than your subject
  • Kneel or lie down to get underneath a subject, i.e. for shooting a field of flowers
  • Photograph the subject directly from the top
  • Shoot from a diagonal angle to emphasize shape or texture

The important thing here is to make sure that you change YOUR viewpoint and by doing that, you will breathe new life into a well known subject.

5. Background

A distracting background can completely ruin an image. The human eye will naturally settle on the area of an image that is: the brightest, most colorful, sharpest and has the most contrast. Be aware of what is behind your centre of interest. If there is a pole, a distracting pattern, an awkward colour or some other object, you may need to reconsider your shooting angle. This is not always possible, but sometimes, taking two or three steps to the left or right can make all the difference. Look around for an unobtrusive background, or change your aperture settings to achieve a shallow depth of field and by doing so, soften the background.

Move around your subject until the background is nit distracting to the rest of the image

Move around your subject until the background is not distracting viewers from the subject

6. Depth

Photography is a two-dimensional art form. As a result, you use certain techniques to imply three-dimensionality. One way to do this is to have subject matter in the foreground, middle and background. This creates depth, and the eye will naturally walk through the image. This implies a deep depth of field from a technical point of view, so ensure that you use a smaller aperture (i.e. f/8, f/11 or f/16) making everything in the scene in focus. This technique is particularly important when photographing landscape images.

Sometimes, it is great to have a whole scene in focus

Sometimes, it is great to have a whole scene in focus

7. Framing

The world is full of natural objects that can be used to frame a subject (e.g., archways, tree lined streets, holes, and so on create natural frames). By placing your subject in the middle of these natural frames you will create a strong visual pull towards your centre of interest.

Use natural elements to frame your scene

Use natural elements to frame your scene

8. Get in Tight

Sometimes, closer is better and less distracting.

Sometimes, closer is better and less distracting.

It is often tempting to put more detail into a frame to show more about what was happening, but this can lead to confusion. The important maxim to remember is this: less is more. The art of simplifying an image is not easy, but if done correctly can make an image far more dramatic. When you find that your composition has more than one centre of interest, or seems confusing, try these steps:

  • Get in as close as you can to your subject
  • Simplify the composition
  • Be sure to avoid any distracting colours or objects in the background
  • Use a shallow depth of field

Finally

Composition and the rules around it are flexible. There really is no right or wrong way to compose an image, but there are better ways to do so. Some composition techniques can make a huge difference to an image and take it from being a snapshot to becoming a truly great photo. The important thing is to experiment with these techniques. Combine them wherever possible. Try them out as often as you can on different subject matter, and know when NOT to use them. The important part is to make sure that you master them. Use them when you need to. Find out what works for you and go from there. By doing this, not only will your images improve, so will your ability to see an image in a scene.

This is the most important part of photography and very often what separates an average photographer from a great photographer. The ability to see an image in a scene makes all the difference and these compositional techniques help you to do that.

Don't forget to experiment and break the rules where necessary

Don’t forget to experiment and break the rules where necessary

The post 8 Quick Composition Tips to Help Improve Your Images by Barry J Brady appeared first on Digital Photography School.


Digital Photography School

 
Comments Off on 8 Quick Composition Tips to Help Improve Your Images

Posted in Photography


Black and White Portraits a Set of Images to Admire

06 Sep

Last week we looked at a collection of stunning black and white landscape photos. This week it’s all about portraits in the same modality.

Photograph So close together by Magda Constantin on 500px

So close together by Magda Constantin on 500px

For me there is something special about a portrait done in black and white, something about it that allows the photographer to exposure the subject’s very soul itself. The simplistic nature of being monochromatic means the focus is on light, shape, tone and emotion more so than with color, in my opinion anyway.

Black and white portraits transport me to a time of the master photographers like Karsh, Hurrell and Newman. If you don’t know those names – I suggest you google them with the word “portrait” and learn from them, as they were truly some of the best in portrait photography, possibly ever.

Without further ado, enjoy this set of black and white portraits, and if you want to learn more about black and white grab a copy of the newest dPS ebook The Essential Guide to Black and White Photography at early bird pricing only until September 13th.

Photograph K. by pkfruen  on 500px

K. by pkfruen on 500px

Photograph Fête de la musique by Jean-Paul Verjus on 500px

Fête de la musique by Jean-Paul Verjus on 500px

Photograph Sister love by Cathy Martineau on 500px

Sister love by Cathy Martineau on 500px

Photograph Rain by pkfruen  on 500px

Rain by pkfruen on 500px

Photograph Soul-division by Anthony De Faria on 500px

Soul-division by Anthony De Faria on 500px

Photograph David Hayman, King Lear by Tommy Ga-Ken Wan on 500px

David Hayman, King Lear by Tommy Ga-Ken Wan on 500px

Photograph FIlm Noir: Chris Botti by Brian Smith on 500px

FIlm Noir: Chris Botti by Brian Smith on 500px

Photograph second wind ,,, by Mete Ba?koçak on 500px

second wind ,,, by Mete Ba?koçak on 500px

Photograph my life... by Leila Raymond on 500px

my life… by Leila Raymond on 500px

Photograph Untitled by Lee Jeffries on 500px

Untitled by Lee Jeffries on 500px

Photograph shootout by David Mar Quinto on 500px

shootout by David Mar Quinto on 500px

Photograph Mans Best Friend by Drew Hopper on 500px

Mans Best Friend by Drew Hopper on 500px

Photograph Serge. by DrakSpirit on 500px

Serge. by DrakSpirit on 500px

Photograph Symmetry of Hate by Daniele Di Egidio on 500px

Symmetry of Hate by Daniele Di Egidio on 500px

Photograph Close-up portrait of a street by Mikhail Levit on 500px

Close-up portrait of a street by Mikhail Levit on 500px

Photograph A portrait of friend in a kitchen setting by Mikhail Levit on 500px

A portrait of friend in a kitchen setting by Mikhail Levit on 500px

Photograph Smoking Hot by Darcy Evans on 500px

Smoking Hot by Darcy Evans on 500px

Photograph Jill by Renee Robyn on 500px

Jill by Renee Robyn on 500px

Photograph Eye & Face by Andi Halil on 500px

Eye & Face by Andi Halil on 500px

Photograph The breath by Claudio L'Estremo Montegriffo on 500px

The breath by Claudio L'Estremo Montegriffo on 500px

Photograph mr thomas by Hegel Jorge on 500px

mr thomas by Hegel Jorge on 500px

Photograph When the soul cries(The true story of a tough life) by Silvia S. on 500px

When the soul cries(The true story of a tough life) by Silvia S. on 500px

Photograph Danka B&W by Gabor Jonas on 500px

Danka B&W by Gabor Jonas on 500px

Photograph Sometimes there are no words... just the moment by J.J. Taylor on 500px

Sometimes there are no words… just the moment by J.J. Taylor on 500px

Photograph thoughts by Danilo Veccia on 500px

thoughts by Danilo Veccia on 500px

Photograph Elusive by Federico  Ratano on 500px

Elusive by Federico Ratano on 500px

Photograph girl's eyes by marylexa on 500px

girl's eyes by marylexa on 500px

Photograph vamos bien by Angelo Tassitano on 500px

vamos bien by Angelo Tassitano on 500px

Photograph Master Monk by Anthony Pond on 500px

Master Monk by Anthony Pond on 500px

Photograph In the Brick Shed by Anthony Pond on 500px

In the Brick Shed by Anthony Pond on 500px

Photograph Three Prayers by Anthony Pond on 500px

Three Prayers by Anthony Pond on 500px

The post Black and White Portraits a Set of Images to Admire by Darlene Hildebrandt appeared first on Digital Photography School.


Digital Photography School

 
Comments Off on Black and White Portraits a Set of Images to Admire

Posted in Photography


Luminosity Masks Versus HDR Software For Creating Natural Looking HDR Images

27 Aug

Jimmy’s Luminosity Masks Tutorials – Art of Digital Blending Course For Photoshop is on sale now at 15% off over at SnapnDeals. Only until September 6th, grab it now!

If you type the term ‘HDR’ into google images you’ll very quickly see why HDR photography has a bad reputation. While we all differ in our tastes, in recent years, those strongly saturated, blurry and noisy HDRs have fallen out of fashion, even amongst HDR photographers.

Pink seascape

Luminosity Masks Versus HDR Software For Creating Natural Looking HDR Images

The goal, among many, is now a clean HDR look. HDR programs are attempting to tidy up their processes to meet the needs of the demanding HDR photographer. However, a large number of photographers are beginning to take the blending process into their own hands, and produced beautifully balanced HDRs using luminosity masks, probably the cleanest alternative to HDR software.

In fact, luminosity masking has become an exciting buzz-term in the world of digital photography, and there’s good reason for that.

If you’re new to luminosity mask exposure blending, you can see a beginner’s tutorial on dPS in my previous article: Exposure Blending Using Luminosity Masks Tutorial

In this article we’ll take a look at the benefits and challenges of luminosity masks versus HDR software.

Benefits of Luminosity Masks

1. Image quality

We’ve all seen over-saturated, noisy, messy, HDR images. One guaranteed way to avoid the poor image quality we normally associate with HDR is to manually blend your exposures in Photoshop using luminosity masks.

When exposure blending with luminosity masks, you’re working only with the RAW files to restore highlights and shadows. You do not affect any other part of the image. In other words, your final blended image will be, more or less, exactly the same image quality as your RAW files.

You do not affect any colour changes, you retain absolute sharpness, you don’t flare up noise (which means you can shoot at a much higher ISO), and you will not exaggerate chromatic aberration.

This is the major reason why so many are turning to luminosity masking to create natural, balanced HDRs.

Chilean sunset

Sunset at Puerto Natales, Chile

2. Complete control over what we blend

Artists of any genre fight for complete control over their ability to express themselves. And so it is in photography. One of the problems with using HDR software is that we have very little control over the blending process.

We rely on an algorithm to choose which areas to blend with which exposures. Then we’re given some sliders to adjust. Although this gives us greater control over the process, it isn’t giving us 100% control.

Through luminosity masking, we begin with a base exposure, and we then decide for ourselves which exposures we wish to use in the blending process, and which areas we wish to adjust, and at what opacity.

The image below is a good example of how you can make very precise changes with luminosity masks.

Hong Kong Light Trails

Hong Kong Light Trails

This image is made up of 11 exposures; six of which were used for the light trails, four were used for exposure blending, and one was used as the base exposure. You can learn how to create light trails like this here: How To Add Dramatic Car Trails To Your Photos In Photoshop

Below you’ll see the RAW file used for the base exposure.

HK Light Trails

Base Exposure

The only highlights I wanted to control in the image were the street lights, and even then I still wanted them to be bright. Through bright lights like this night cityscapes are able to give off a lot of energy and dynamism.

I very gently blended in three darker exposures to gain a little bit of control in those areas, without darkening them too much. If I ran my exposures through an HDR program, all of the highlights in the image would have been affected to some degree, which is exactly what I didn’t want.

For the darker areas, I only wanted to bring back information in one area, the side building to the right, which is noticeably dark. I used an exposure two stops brighter and, with luminosity masks, I easily painted details back into this area.

#3. No more halos and fewer ghosts

Halos simply don’t exist in luminosity mask exposure blending if you’ve done it correctly.

As for ghosts, you will rarely encounter a moving object that is difficult to blend. Since you use a base exposure, which will be done for most of your images, and simply reduce specific highlights and shadows, there shouldn’t be any ghosting.

The only challenge you may have, which is also a challenge when using HDR software, is if you have moving leaves on trees, for example, between exposures. Then the blending process is a little bit trickier.

#4. Become a better photographer

Mesa arch

Mesa Arch, Before and After Exposure Blending With Luminosity Masks

In my early days I was a die hard tone mapper. I’d approach a scene and think, “this would be a cool HDR subject”. I’d fire off some brackets and take them into Photomatix when I got home. I had a predefined routine of what to do, what result I wanted, and how to get there. I had tunnel vision.

When I began exploring luminosity masks, everything changed. I began to read a scene, not as an HDR subject, but in terms of its unique beauty and mood. I started to grasp more fully the use of light in controlling mood, whereas previously I was simply relying on getting the ‘HDR effect’ each time.

Rather than shooting off a set of automatic brackets, for a complex scene I will often bracket manually, changing the aperture, ISO and shutter speed to capture different elements of the scene. Then I’ll blend in each of the elements to hopefully get the best out of that scene.

In the Hong Kong Light Trails image above, the base exposures and brighter exposures, the light trails, and the darker exposures were all shot manually with different settings to achieve different effects.

It is through using luminosity masks, and taking my imagery into my own hands, that I have pushed myself in the field to achieve more.

#5. Combine with other HDR processes

One of the beautiful things about luminosity masks is that you can combine them with other exposure blending methods to complete the blending process. 32-bit processing is becoming an interesting way of blending exposures cleanly, but we are a long way off before the process is good enough and our monitors can handle true 32-bit files.

However, we can overcome the limitations of 32-bit processing by combining it with luminosity mask exposure blending. The tutorial below will show you exactly what I mean. The video is taken directly from the Art of Digital Blending course:

Challenges with Luminosity Masks

HDR software is simpler

Luminosity masks require more patience and a steeper learning curve than HDR software. The concept takes a little bit of time to get used to, and it will certainly challenge you to re-learn a few things.

While HDR software will take all of the leg-work out of it for you, luminosity masks require you to really think about your exposures and deepen your workflow.

Luminosity Masks don’t work on every occasion

Every now and then you’ll come across an image where luminosity masks won’t create a smooth blend between exposures. This happens because there isn’t enough contrast between the areas you wish to blend and the areas you don’t wish to affect.

In which case, using 32-bit processing or HDR software would be a good alternative.

Luminosity masks work in 8-bit mode

Like all live selections in Photoshop, luminosity masks work in 8-bit mode. They don’t affect the bit depth of your image, so if you’re working at 16 bits that won’t change. But there may be a chance of posterization in some cases.

A quote from Photoshop staff on the Adobe forum claims:

“The selection mask is 8 bits, regardless of the document precision. That fact has no affect on the precision of the image.

No, it won’t change the image or cause future posterization — the image data is still the same precision as it always was.”

So while this shouldn’t be an issue, it is something to be aware of.

Hong kong the peak view

Conclusion

HDR images don’t have to be messy, garish and overdone. There are many ways to cleanly blend exposures to create a beautifully natural and balanced HDR. Having luminosity masks in your arsenal, will give your workflow a superb cutting edge, that can quite literally change your imagery over night.

It will require a little bit of extra work on your part, but often the best things in life do.

Jimmy’s Luminosity Masks Tutorials – Art of Digital Blending Course For Photoshop is on sale now at 15% off over at SnapnDeals. Only until September 6th, grab it now!

  • Getting Real with HDR – a Step by Step Tutorial for Realistic Looking HDR
  • Is the Death of HDR Photography Coming?

The post Luminosity Masks Versus HDR Software For Creating Natural Looking HDR Images by Jimmy McIntyre appeared first on Digital Photography School.


Digital Photography School

 
Comments Off on Luminosity Masks Versus HDR Software For Creating Natural Looking HDR Images

Posted in Photography