RSS
 

Posts Tagged ‘Image’

The Ugly Truth About Image Theft: How to Protect Yourself

14 Jan

Back in the Middle Ages, you could have your ears or hands cut off as a punishment for theft. Though in today’s civilized society, lots of things have changed, and we no longer deprive people of the parts of their body. Instead, we, in the worst case, put them to jail, with their ears safe! While theft is an issue Continue Reading

The post The Ugly Truth About Image Theft: How to Protect Yourself appeared first on Photodoto.


Photodoto

 
Comments Off on The Ugly Truth About Image Theft: How to Protect Yourself

Posted in Photography


15 Inspiring Image Collections from 2013

31 Dec

Over this year we’ve seen some amazing images that have inspired us – today we take a look back at:

The most popular image collections in 2013.

  1. How to Take Beautiful Bokeh Christmas Images [With 31 Stunning Examples]

    By Kathy

  2. 13 Fabulous Photos of a Rainy Day
  3. 41 Delicious Flower Photographs

    By rosemary*

  4. 17 Amazing Wide Angle Images

    By justin tippins

  5. 25 Spectacular Light Painting Images

    By Brent Pearson

  6. 27 Beautiful Black and White Portraits

    By wolfgangfoto

  7. 23 Beautiful Dawn Images

    By James Jordan

  8. 12 Stunning Silhouette Shots

    By Thomas Hawk

  9. 61 Amazing Kite Aerial Photography Images

    By Pierre Lesage

  10. 17 Images of Poverty

    By HORIZON

  11. 18 Stunning Self Portraits
  12. 25 Shadow Images to Inspire You

    By zev

  13. 17 beautiful images with shallow depth of field

    By Dustin Diaz

  14. 25 special snow fall images
  15. 21 Impressive Tree Images

    By Trey Ratcliff

The post 15 Inspiring Image Collections from 2013 by Darlene Hildebrandt appeared first on Digital Photography School.


Digital Photography School

 
Comments Off on 15 Inspiring Image Collections from 2013

Posted in Photography


Carnivorous plant image wins Olympus BioScapes competition

22 Dec

2013-1-large-olympus-bisocapes-photos-670x440.jpg

The open ‘mouth’ of a floating humped bladderwort plant (Utricularia gibba) took first prize in Olympus’ microscope image competition. Igor Siwanowicz, a researcher from the Howard Hughes Medical Institute’s Janelia Farm Research Campus in Ashburn, Virginia, took the winning image of the carnivorous plant, beating more than 2,000 entries from 71 countries. See gallery

News: Digital Photography Review (dpreview.com)

 
Comments Off on Carnivorous plant image wins Olympus BioScapes competition

Posted in Uncategorized


Getting to Know Picasa – a Free Image Editor and Browser by Google

20 Dec

Getting to know Picasa

If you’re looking for an image browser and editor that is feature packed and easy to use then Picasa just may be the only bit of software you’ll ever need. It may not have all the advanced features you would expect from some of the more well-known image editors but it is a nice piece of software that punches way above its weight, and what’s more, it’s free and available for both Mac and Windows platforms.

Photo editing picasa 01

Before I get started I will state unequivocally that I have never in the past or present worked, in any capacity, for Google or any of its subsidiaries. Furthermore, I have never received payment of any kind for writing about their products. I wish!

I recently ran a digital photography course in Perth, Western Australia and was asked by my boss to use Picasa as the editing software. I was sceptical at first about what I could achieve with freeware, mainly because I was used to working with the Adobe Creative Suite, and initially protested. But after downloading and trialling Picasa, I was pleasantly surprised to find it’s actually quite a useful and feature-packed piece of software.

So what exactly is Picasa?

According to Google, it’s software that helps you “organize, edit and upload photos”. When you download and install Picasa, the first thing the software will do is trawl through your computer, and attached hard drives, looking for image files such as jpegs, bitmaps, tiffs. In fact Picasa recognizes most image file types, including Photoshop PSD. So what you’ll end up with is a large library of pictures organized chronologically in folders, which is handy for finding that holiday snap you took several years ago. How long this all takes will depend on how many images you have on your computer or hard drive, so be patient and wait until it has finished collating.

Browsing

Once Picasa has catalogued all your pictures you can then start to browse, organize, and edit, as well as having the option of grouping them into Albums. One of the nice things about Picasa is that it’s non-destructive. So edits you make to photos can be undone. Picasa also stores all edits as separate files so your original pictures are left intact. Picasa also scans your hard drive and updates itself whenever you add more pictures so it’s always up to date.

Picasa main screen 01

Picasa’s main browsing interface is simple and easy to navigate

You also have the ability to import photos directly from cameras and portable drives using the import function in the top left hand side of the browser. Simply connect the device to your computer and navigate to the photographs on your device. Once you have all your pictures imported, and in their respective folders, you are ready to start editing.

Picasa import button 02

Use the import function to download from a digital camera or portable hard drive

Editing and effects

To begin editing you simply double click on a picture in the Picasa browser. This activates the editing functions and you can begin making changes to your selected photograph.

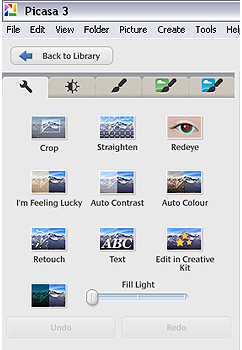
There are five tabs at the top left-hand side of the editing window:

Use the import function to download from a digital camera or portable hard drive

Use the import function to download from a digital camera or portable hard drive

TAB #1 COMMONLY NEEDED FIXES

The tools in this tab gives you control over cropping, straightening, red-eye removal, basic brightness and contrast adjustments. There are some automated features too such as “Auto contrast” and “Im feeling lucky”, which all deliver varied results. The “Edit in Creative Kit” feature has been discontinued but there is the opportunity to edit online inside Google+. There’s also a “Text” tool for adding some titles and information to your selections as well as a “Retouch” tool for fixing blemishes and scratches.

TAB #2 CONTRAST ADJUSTMENTS

The second tab gives you more brightness and contrast options and a greater level of control. It includes sliders to adjust the amount of fill light and shadows in your picture, and you also have the ability to change highlights. There’s a temperature control feature but in reality this simply adds either a blue or sepia tint to the picture which simulates daylight or interior colour temperatures.

TAB #3 FILTERS

The third tab is where Picasa starts to offer some cool features. Here you will find a series of twelve preset filters such as sharpening, film grain and black and white. Most of the filters are adjustable so you can control the amount of each effect applied to a photograph.

TABS #4 and 5 MORE FUN FILTERS

Similarly, tabs four and five continue to offer you even more fun filters to apply to your photographs, with twenty four additional styles.

Picasa effect previews 04

The image filters in Picasa offer a wide range of modern and classic effects

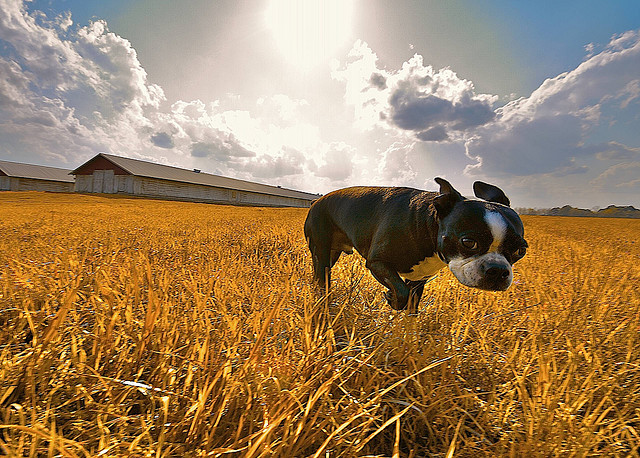
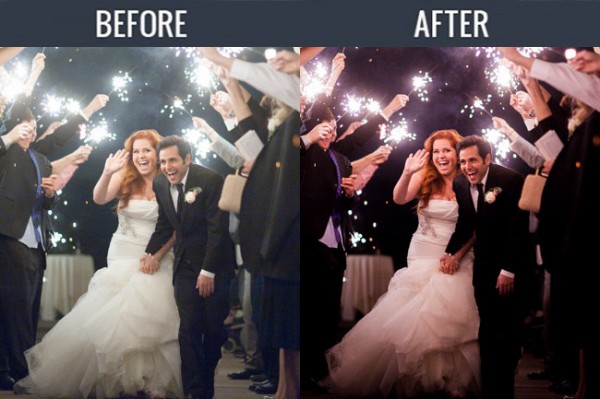
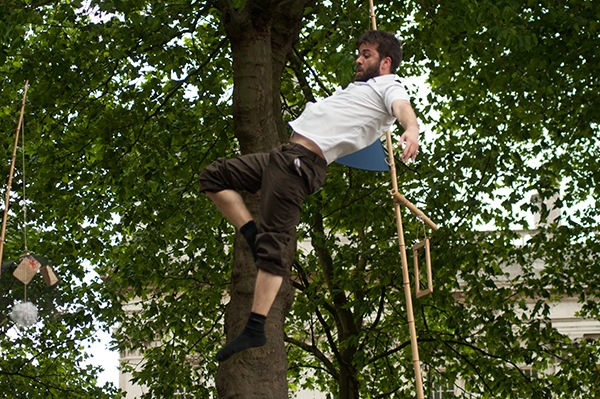
In the picture below I applied the Orton-ish filter and a Vignette to get a softening, yet dynamic effect.

Picasa before and after 05

Video

So, you’ve messed around for a few hours and now have a dozen images you want to show off to friends and family. Well Picasa’s bag of tricks doesn’t stop there. In fact, there’s some very useful output options available should you want to either print, make a video, or simply upload your pictures to the web.

Picasa create video icon 06

Making videos is simple and fun in Picasa. Just click the “Create Video Clip” icon to get started

By selecting a group of pictures in the browser and selecting “Create Video Clip Presentation’ it puts your selected pictures onto a simple video timeline. You can then add titles, and even import a music sound track to go with your pictures. If you’re not happy with the selection order you can shuffle the pictures, and then output the file to one of several video formats, including high definition 1080P.

There’s also the option of making a collage for print, screen or for the web. There are tons of options and it takes very little time to come to grips with how it all works.

Other features

If you think that’s impressive, wait, there’s more! If you have a free Google+ account you can upload and share your pictures right from the Picasa browser, to Picasa’s Web Albums photo sharing site with very little effort. Just make sure you familiarize yourself with the privacy settings before you start uploading and always read the terms and conditions.

On the downside,

On the downside Picasa has limited raw editing features, so if you want to try something more advanced then you will have to look elsewhere. That said there’s enough features in this little program to keep most people happy.

Bottom line on Picasa

Picasa is really a fun and easy program to use and the learning curve isn’t too steep. If you need an application that is primarily for browsing and organizing, then this is a handy program. Although the editing capabilities are basic there are some useful features such as geotagging, keyword tagging, face recognition and a range of exporting options. But if you are a serious photographer that needs a program that can do some heavy lifting then perhaps you’ll need something more robust.

Picasa will certainly appeal to a broad demographic and it is really intended to perform many of the most common photographic tasks. It can also speed up the process of getting your pictures online. While I was reluctant to start using this program I have warmed to it. So if you need a photo organizer and editor that’s quick, easy and – dare I say – fun to use then perhaps give it a go.

Download it:

  • Picasa for Windows
  • Picasa for Mac OSX

The post Getting to Know Picasa – a Free Image Editor and Browser by Google by Mark Sutton appeared first on Digital Photography School.


Digital Photography School

 
Comments Off on Getting to Know Picasa – a Free Image Editor and Browser by Google

Posted in Photography


LG G2 review: First Android with optical image stabilization

15 Nov

lgg2.jpg

The G2 follows the Optimus G/G Pro as LG’s flagship smartphone, with plenty of tech spec to warrant a second look. From its huge 5.2-inch IPS LCD display to its 13MP CMOS sensor with optical image stabilization system, there’s a lot here for mobile photography fanatics. We tested out the smartphone’s camera capabilities as only Dpreview can: check out our in-depth 10-page review on connect.dpreview.com.

News: Digital Photography Review (dpreview.com)

 
Comments Off on LG G2 review: First Android with optical image stabilization

Posted in Uncategorized


Matching the Production Style to the Image – High Energy Means High Contrast

31 Oct

Introduction

The Following is an excerpt from the SLR Lounge Lightroom Preset System v5 and accompanying workshop from the Lightroom Workshop Collection v5.  The Lightroom Preset System is designed to take you from Ordinary to Extraordinary photos in just a few seconds and clicks within Lightroom 4 and Lightroom 5.

Overview

One thing that we like to do within our studio is match the post production style to the overall emotion and story within the image. We feel that doing so leads to a much stronger overall image.

So in scenes that have a lot of energy, we want to emphasize the excitement with a colorful, high contrast production style. For this tutorial, we are using this sparkler exit photo which should be well complimented by the high contrast edit. The SLR Lounge Lightroom Preset System v5 has presets specifically for high contrast portraits which we are going to apply to this photo. Not to worry, we are going to demonstrate all of the settings below.

Here is what our image looks like before and after our presets are applied.

beforeandafter

Lightroom Preset System v5 Mixology

For those who have the Preset System, you can follow the Mixology Recipe below to get to the same results. If you don’t have the Preset System, please read the article or watch the video below to see exactly how this look was achieved.

Develop Mixology
01-10 BASE-SOFT: 14a. Heavy Crush – Skin Desat

Local Adjustment
Radial Filter: 03 Burn (Darken) -0.5 Stop (watch video tutorial for reference)

Written Tutorial

Step 1: Checking the EXIF data

Screen-Shot-2013-08-12-at-3.40.04-PM

The first thing we generally do is take a look at how the image was shot. Doing so, gives us a lot of information on things we need to look out for when post producing. To check the EXIF data press ”i”.  This image was shot with a Nikon D700 at ISO 6400. This is important to keep in mind because Nikon cameras tend to shoot skin tones slightly green, and this high of an ISO might also present a noise issue.

Step 2: Apply Preset

After we adjust Color Temperature and Tint to taste, we apply the “01-10 BASE-SOFT: 14a. Heavy Crush – Skin Desat” preset. This preset adds contrast to the photo and makes adjustments to desaturate skin tones.  The Contrast is being raised and the Shadows and Blacks are being dropped in order to boost overall image contrast. To flatten out the highlights over skin tones, we have dropped the Highlights and Whites.  In the Tone Curve we have a subtle “S” shaped contrast boosting tone curve to add a bit of contrast back specifically where we need it.

Here are the final Basic and Tone Curve Panel settings:

developpanal

We have our standard Sharpening and Noise Reduction adjustments applied to this image. Even though this image was shot at a high ISO,the D700 takes such great photos at ISO 6400 that we don’t have to raise any of the Noise Reduction Luminance beyond what we already have.

In the HSL our Reds and Oranges are slightly dropped in order to desaturate heavy reds and oranges that can appear within skin tones when we are doing a high contrast edit.

developsettings1

Step 3: Add Radial Filter

The last thing we’re going to do is add a Radial Filter to this image. This filter is unique to Lightroom 5, but Lightroom 4 users can get the same effect by adjusting the vignette settings, or by using an Adjustment Brush and painting around the outside of the image.

radialfilter

We’re pairing the Radial Filter with our “03 Burn (Darken) -0.5 Stops” preset to get a nice vignette around our couple. We adjust the Feather to 70 to make the effect more subtle.

radialfiltersettings

Some people may comment that shadow details are being clipped, but that’s okay for this image. Remember, we edited this image to fit the mood and energy, not for it to be technically “color correct.” Making this high energy photo a high contrast one is a stylistic choice, and we love the way it looks. Here’s what our photo looks like before and after our edit.

Before

lightroom-5-tutorial-high-contrast-portrait-0001

After

lightroom-5-tutorial-high-contrast-portrait-0002

Watch the Video Tutorial

If you would like to see exactly how all of the settings and adjustments were applied, please watch the video from the SLRLounge youtube video channel.

Conclusion and Learn More

We hope you all enjoyed this tutorial. If you are interested in learning more or purchasing the SLR Lounge Lightroom Preset System v5 or the newly released Lightroom Workshop Collection v5, please click any of the links in this article.

Post originally from: Digital Photography Tips.

Check out our more Photography Tips at Photography Tips for Beginners, Portrait Photography Tips and Wedding Photography Tips.

Matching the Production Style to the Image – High Energy Means High Contrast

The post Matching the Production Style to the Image – High Energy Means High Contrast by Post Production Pye appeared first on Digital Photography School.


Digital Photography School

 
Comments Off on Matching the Production Style to the Image – High Energy Means High Contrast

Posted in Photography


How I Shot My ‘Mini World’ Image

20 Oct

Over on our Facebook page this week we shared our recent ‘Small World‘ post featuring some of our readers shots of miniature figurines shot in larger scenes. On Facebook one of our readers – Dave Flynn – commented that he used to take these types of photos but now does something different. He shared a link to his Mini Worlds Gallery where he showed his different take on it. It includes this photo!

Mini World: Final Edit

I immediately shot Dave a message asking if he’d write up how he took it. Here’s what he sent in.

My name is Dave Flynn, I’m 45 years old and got into photography 3 years ago when I was made redundant from my career in retail. I’m completely self taught through reading magazines and watching online videos. I don’t have a particular field of interest and have a varied portfolio which can be seen at www.dflynnphotography.com and www.facebook.com/daveflynnphotography

In my bag

  • Nikon D90
  • Nikon 50mm 1.8D prime lens
  • Nikon 18-70mm DX 3.5 wide angle lens
  • Tamron 90mm Macro 2.8
  • Tamron 70-300mm Zoom f/4
  • I also have 2 speedlights and triggers.

For most of my creations I use the 50mm, 90mm and 18-70mm.

I will always try to use natural light where possible and have a roof terrace which is perfect for getting shots of the posed models and backgrounds.

On wet days, I use my bedside table which is next to a large window. I don’t have expensive equipment or studio lights, my editing is all done on my laptop so I am proof that you don’t need every photography related gadget or the latest kit to create amazing images. They key to all photography is the light. It’s the first thing you should think about when creating any image.

Inspiration just comes to me, I might see an item/person/scene and imagine a final image in my head then set out to create it. Photography for me is a great way to share what goes on in my brain and I hope you can get some inspiration from my thoughts.

ONE LUMP OR TWO: How I Shot It

I’d been to a festival in London and got some shots of the various performances. The bearded man in the shot below is jumping on a trampoline for his act. Shot using my 70-300mm at f/5.6 @200mm, ISO 400 with a fast shutter. When I reviewed the images; this one stood out so I tried to think how to use him in a mini world. It was a few days later when I was making coffee and I got the idea. This is how I created it.

GW_-79.jpg

In photoshop I use layer masks to remove the model from the background. There are other methods like using the pen tool or quick selection tool but masks are my preferred method.

There are very good tutorials on youtube about using layer masks in photoshop.

SL.jpg

The scene is set for the background. I used 2 speedlights to balance the light. I think they were both set to 1/128 sec because I had natural light coming in the window too. I used my wide angle lens at 18mm with a shutter speed of 1/160 and an aperture of f/8.

SL-5.jpg

Next it was time to drop a sugar lump into the scene, remember the speedlights are set to freeze any motion in the image. It took a few attempts for me to get this shot to catch sugar cube where I wanted. Exactly the same settings were used.

SL-6.jpg

The same technique was used to catch the splash at just the right moment. This again took a few attempts ( and a lot of cleaning) to get the splash how I wanted.
photo.jpg

The ‘studio’ in my bedroom and the scene setup.

The final edit with some curve and level adjustments in photoshop.

one lump or 2 2nd Edit Final.jpg

Thanks to Dave for sharing this behind the scenes look at his shot. Check out more of his Mini Worlds here.

Post originally from: Digital Photography Tips.

Check out our more Photography Tips at Photography Tips for Beginners, Portrait Photography Tips and Wedding Photography Tips.

How I Shot My ‘Mini World’ Image

The post How I Shot My ‘Mini World’ Image by Darren Rowse appeared first on Digital Photography School.


Digital Photography School

 
Comments Off on How I Shot My ‘Mini World’ Image

Posted in Photography


How to Sharpen Image Edges in Photoshop

18 Oct

How to Sharpen Image Edges in Photoshopopener

If you’re a Lightroom user you’ll know that in Lightroom you can mask the sharpening you apply to an image so it is applied to the edges in the image only. This same feature is not yet available in Photoshop and the sharpening filters there are applied to the entire image rather than just edge detail.

However you can achieve a reasonable approximation of the Lightroom masking feature in Photoshop using the Photoshop Find Edges filter. The benefit of this is you can apply more sharpening to the image than you would do without the masking effect and areas of flat color like skies and skin tones won’t be sharpened. Here’s how to do this.

How to Sharpen Image Edges in Photoshop

Once you have finished processing your image in Photoshop, flatten the image to a single layer or make a single layer of the edited image by adding a new layer at the top of the Layer palette and press Ctrl + Alt + Shift + E (Command + Option + Shift + E on the Mac) to create a flattened version of the image on that layer.

Duplicate the flattened layer twice.

How to Sharpen Image Edges in Photoshop 1

Target the topmost layer – you will create your sharpening mask from this layer. Choose Image > Adjustments > Desaturate to convert it to black and white then choose Filter > Stylize > Find Edges to isolate the edges in the image.

How to Sharpen Image Edges in Photoshop 2

Choose Image > Adjustments > Invert to invert the colors so that what is black is white and vice versa.

Choose Image > Adjustments > Levels and adjust the mask so that it shows white in the areas that you want to sharpen and black in those areas that you do not want to sharpen.

How to Sharpen Image Edges in Photoshop 3

Once you have a good mask, blur its edges slightly by choosing Filter > Blur > Gaussian Blur and apply a 1 or 2 pixel blur to it. When this is done, hide the sharpening mask layer by turning its visibility icon off in the Layer palette.

Now target the second topmost layer in the image and click the Add Layer Mask icon at the foot of the Layer palette.

How to Sharpen Image Edges in Photoshop 4

Click the mask thumbnail on this layer to target it and choose Image > Apply Image to open the Apply Image dialog. From the Layer dropdown list select the layer that contains the hidden sharpening mask, and click Ok.

How to Sharpen Image Edges in Photoshop 5

Click on the image thumbnail on this layer to target it and apply your sharpening to this layer – use Smart Sharpen or Unsharp Mask as desired. When you set the slider values, view the result on the image and not using the preview in the sharpening dialog. The preview in the dialog doesn’t take into account the mask you have applied – the image itself does. Click Ok when you’re done.

How to Sharpen Image Edges in Photoshop 6

To compare the before and after result of sharpening the image with an edge mask, Shift + Click on the mask layer thumbnail to disable it and see the image as it would look sharpened and without the masking effect. Click the mask thumbnail again to enable the mask again. You can discard the hidden mask layer now, if desired as it is no longer needed.

While this sharpening mask takes some effort to create once you’ve done it a few times you will find the process quite straightforward and some of its creation can be automated using Actions.

Post originally from: Digital Photography Tips.

Check out our more Photography Tips at Photography Tips for Beginners, Portrait Photography Tips and Wedding Photography Tips.

How to Sharpen Image Edges in Photoshop

The post How to Sharpen Image Edges in Photoshop by Helen Bradley appeared first on Digital Photography School.


Digital Photography School

 
Comments Off on How to Sharpen Image Edges in Photoshop

Posted in Photography


Samsung announces new 13MP camera unit with optical image stabilization

07 Oct

TS520x0~cms_posts-5978951149-OIS_camera.JPG

Samsung has revealed a brand new 13MP smartphone camera unit with optical image stabilization and improved low light performance. Samsung’s press release doesn’t specifically name any devices that the new camera is slated to appear in, but it’s safe to assume that we’ll see it next year in the Galaxy S5 and Note 4. Click through for more details at connect.dpreview.com.

News: Digital Photography Review (dpreview.com)

 
Comments Off on Samsung announces new 13MP camera unit with optical image stabilization

Posted in Uncategorized


PhotoSmith app for iPad offers image organization, syncs with Lightroom

12 Sep

TC4x3AS520x0~cms_posts-3244247666-1_Photosmith_main-1.PNG

The PhotoSmith app for iPad lets photographers catalog and filter their photos on the move. There are no editing capabilities, but users can add ratings, labels, keywords and other metadata, and group photos into collections. It can export to Facebook, Flickr, Dropbox and iPad Albums, but its party trick is the ability to sync tags and ratings with Lightroom. Read more in our full review on our sister site, connect.dpreview.com.

News: Digital Photography Review (dpreview.com)

 
Comments Off on PhotoSmith app for iPad offers image organization, syncs with Lightroom

Posted in Uncategorized