RSS
 

Posts Tagged ‘Image’

Canon EOS 7D Mark II beta image samples

18 Sep

We got a chance to shoot with a pre-release beta of Canon’s EOS 7D Mark II, so we grabbed it. We have prepared a 23 image gallery from a Canon event running at the Photokina show in Cologne. Although the image quality hasn’t been entirely finalized, this should give some first impressions of what that camera can do. We’ve included a sequence of 10fps shooting. Click through for more details.

Articles: Digital Photography Review (dpreview.com)

 
Comments Off on Canon EOS 7D Mark II beta image samples

Posted in Uncategorized


Directing your Viewer’s Eyes with Lightroom to Make a More Powerful Image

17 Aug

One key to a successful photograph is that it directs the viewer’s attention towards the subject in question. There are many ways that this can be achieved through composition and lightning in the field, but did you know, you can also direct the attention of your viewer’s eyes through post-production?

truck edit-2

You still need an interesting subject for this to work, as directing your viewer’s eyes to a boring location within a frame is still going to result in a boring photograph. For the sake of this tutorial I’ll be using this photograph of an abandoned utility truck, but you could use anything from an interesting tree, to a model, to your pet, and achieve similar results.

First a few basic edits to bring the photo to life

Before we can work on drawing the attention of the viewer this photograph needs a bit of life pumped back into it. Having shot this photograph into the sun, the foreground and front of the truck are going to require some basic recovery techniques. I’ll be using the Basic Tab in Lightroom 5 to recover the detail and add some interest to the shot.

Step One: Highlights and Shadows

direct-viewers-attention-11

Shooting into the sun can be tricky as it often will cause your sky to turn white. Reducing the highlights slider will help to counteract this. It does so by targeting the brightest areas of your photograph without effecting the overall white point of the image. The shadows slider has a similar effect on the darker areas of the image, allowing detail to be brought out in the grill of the truck and along some of the trees.

Step Two: Add contrast with the Blacks and Whites sliders

direct-viewers-attention-10

One of the problems with the highlights and shadow recovery technique above is that it often will reduce the contrast of the image and create a sort of muddled and dull look. To counteract this you can use the whites and blacks sliders to effectively set your white and black points, as well as bring a bit of contrast back into the image. This allows you to have a bit more control over the contrast of your image as opposed to the more global Contrast slider adjustment.

Do this by dragging your White slider to the right until your histogram touches the right edge of the graph. Make sure not to go too far and clip any highlights. Holding down the Alt (Option) key while you drag the slider will show any areas that are clipped – so drag to the right until you see some, then bring it back to the left just until they are no longer visible. Do the same with the Blacks slider by pulling it to the left. The Alt (Option) key works with this one too, but in the case of Blacks you actually do want a little clipping. Having a good black in your image will add that contrast you’re looking for.

Step Three: Even out the exposure

direct-viewers-attention-9

Now that the highlights, shadows, whites and blacks are set –  a quick bump up on the exposure slider will even out the rest of the scene and get us close to something we’re ready to work on.

Step 4 (optional): Saturation and Vibrance

direct-viewers-attention-8

For this particular shot I wanted to add a bit more saturation to the trees and the floor of the forest. It’s going to depend on the shot that you’re working on, and the look that you are trying to achieve, as to whether this step is necessary. But it doesn’t hurt to play around with it before you move on to the next steps.

For more on Lightroom’s Basic Tab read: Master These Five Lightroom Sliders and Your Photos Will Pop

Now to draw the attention of the viewer

While the truck itself is a strong subject, and one that does capture the viewer’s attention on its own, there are a few tools that Lightroom has to offer which will allow for even more attention grabbing goodness.

Cropping for better positioning

direct-viewers-attention-7

The crop tool allows you to have more control over the positioning of your subjects within the frame. In this shot the truck was a bit too centred and there was a little too much dead space in the forest so by cropping in a bit closer the shot becomes a bit more balanced, allowing the viewer’s eyes to stay focused on the truck.

The Graduated Filter tool

direct-viewers-attention-6

By adding a graduated filter to the bottom right of the image more detail can be recovered from the front of the truck without effecting the rest of the exposure. This allows for a more compelling focal point for the viewer to rest their eyes on. When you go about placing graduated filters in your own images be sure to think about how it’s effecting the overall light of the scene and ask yourself if it looks natural.

Getting creative with graduated filters can allow you to have some really interesting results read 4 Fun Tricks to Enhance Your Photos With Lightroom’s Graduated Filter Tool for more creative uses of the graduated filter tool.

The Radial Filter tool

direct-viewers-attention-4

The radial filter allows for a subtle vignette to be added to the image which helps to keep the viewer’s eye within the frame. It also has the added benefit of darkening the sky, without darkening the truck, allowing for deeper blues to come through. After I was happy with this first radial filter I dropped in a second one to increase the brightness and detail of the grill of the truck. To do this the radial filter was inverted and the exposure and clarity sliders were increased.

direct-viewers-attention

Removing distractions

direct-viewers-attention-2

Once you’ve gone through all the work of drawing attention to a particular area of a photograph you’ll want to go through with Lightroom’s clone/healing tool and remove anything that competes for that attention. Adobe has greatly improved this tool in Lightroom 5 allowing you to drag paths, making it possible to remove distracting branches with ease.

The Final Edit

With a few quick adjustments in the basic tab, a simple crop, and a few of Lightroom’s filters –  this utility truck really grabs the attention and is a vast improvement over the original straight out of camera shot. Go try this workflow for yourself and share your own before and after in the comments below!

truck-edit2

Watch this Edit Click for Click

For those who prefer to sit back and watch – here’s  a quick video of the edit above.

The post Directing your Viewer’s Eyes with Lightroom to Make a More Powerful Image by John Davenport appeared first on Digital Photography School.


Digital Photography School

 
Comments Off on Directing your Viewer’s Eyes with Lightroom to Make a More Powerful Image

Posted in Photography


Flickr launches image marketplace initiative

30 Jul

Flickr has announced that it is expanding its photo licensing opportunities for users. Alongside its partnership with Getty Images, Flickr will now allow users to opt in to an ‘image curation’ initiative called Marketplace. Participating members may have their images featured across Yahoo’s network of sites along with other media outlets including the New York Times and the BBC. Read more

Articles: Digital Photography Review (dpreview.com)

 
Comments Off on Flickr launches image marketplace initiative

Posted in Uncategorized


Sony expands image sensor production for mobile devices

25 Jul

Reuters has reported that Sony is planning to invest 35 billion yen (approximately US$ 345 million) to expand its manufacturing capacity of smartphone and tablet image sensors. Sony says the investment will allow for a 13 percent increase in production to 68,000 wafers per month in 2015. Sony leads the market for smartphone imaging sensors, and supplies the sensors for Apple’s iPhones and a large number of Android smartphones. Read more at connect.dpreview.com

Articles: Digital Photography Review (dpreview.com)

 
Comments Off on Sony expands image sensor production for mobile devices

Posted in Uncategorized


The Secret to Capturing the Best Image Quality with Your Digital Camera

16 Jul

Many modern digital cameras boast incredible ISO speeds. Where ISO 400 or 800 was the top speed in the film era, usually accompanied by grain the size of golf balls, today’s digital cameras can give you top ISOs of 6400, 12,800, 25,600 or even higher. Camera makers boast of these high speeds and use this information to increase camera sales.

Photodune 2896107 digital camera xs

Inexperienced photographers will be tempted to jack up the ISO on their new cameras, and keep it there. However, just because the feature is there doesn’t mean you should use it all the time. In fact, the best practice is to keep your camera set at its lowest ISO setting by default so you will capture the best possible image.

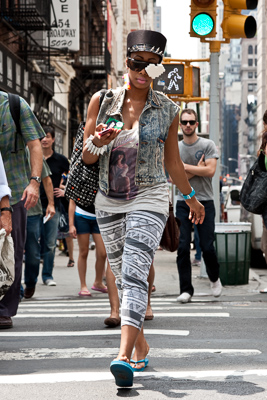
With experience you will learn that higher ISO settings are more appropriate when shooting sports, street photography, photojournalism, and low-light situations where you need to stop action. Low ISO images will be cleaner (no digital noise), have a wider dynamic range (more shadow and highlight details), and produce better color depth (smoother color transitions). This is a better choice for travel, landscape and portrait photography, where good detail and accurate skin tone are important.

Let’s geek out

There are two ways you can understand the effect of low versus high ISO on digital images: by reading lab test results, and by looking at sample images. DxOMark Labs is a great resource for sensor tests. It’s an independent lab that tests most current digital camera sensors and publishes the results on their web site. For sample images, you can make your own. Continue reading to learn more.

Digital noise

Run any number of digital cameras through a battery of image quality tests and you’ll see a clear pattern emerge. At the lowest ISO setting, the signal to noise ratio, expressed in decibels (dB), is highest. That’s good, it indicates the lowest digital noise. As you increase ISO, the dB level decreases. The lower the dB level, the higher the digital noise, which degrades the image.

By lmvphoto

Example: If a Canon EOS 70D has a 41dB result at ISO 100, 30dB at ISO 1600 and around 17dB at its top ISO of 25,600, the image with the higher dB will have less noise than an image with a 17dB measurement.

Note: keep in mind that most images when viewed at the recommended distance will appear clean as low down as 30dB.

Dynamic range

Similarly, the dynamic range of a digital camera is widest at its lowest ISO. Depending on the camera, that range can be anywhere from 9 stops to around 14. Typically, with DSLRs, it is around 11-12 stops. In carefully exposed high-contrast scenes, both highlights and shadows will have more detail at low ISOs than at high speeds. In test result charts, dynamic range starts to decrease in more of a curve than a straight line; typically the first few ISO settings are acceptable, but once you pass ISO 800 or 1600 (depending on the camera) the range becomes more limited.

Dynamic range is acceptable at 10 stops or higher. Below that number shadows and/or highlights will become blocked up, especially in contrasty scenes.

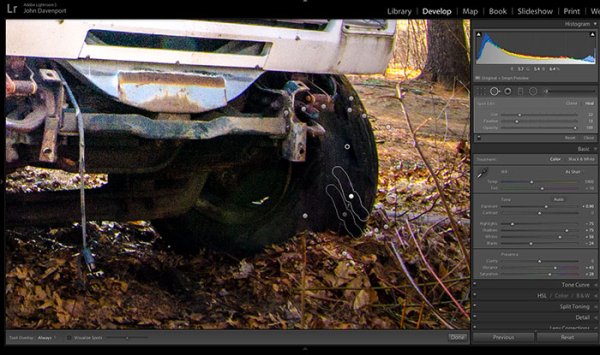
Tip: RAW image capture is best for dynamic range. You can use the shadow and highlight sliders in your RAW image editor to reveal even more details in both the shadows and highlights, effectively stretching your camera’s dynamic range. The better your image’s dynamic range is, the more information you can reveal this way.

Tone and color

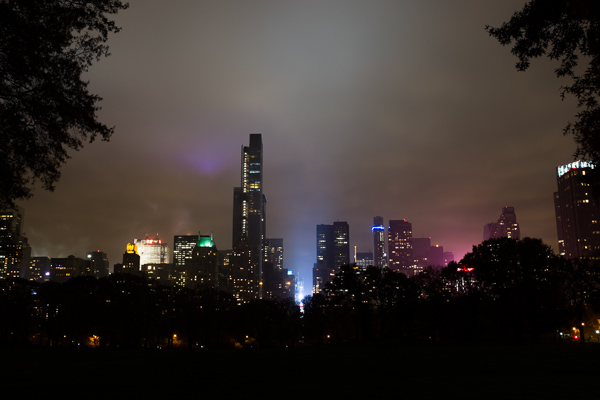
You may have noticed that some images that show the sky or other areas that should have smooth, subtle transitions, instead show subtle strips of color as the shading changes. This is called banding, and that’s what happens when the tonal range is limited. This is usually an artifact from compressing an image too much when preparing it for web use, but it happens in a more subtle form in photos that come straight out of the camera and, as above, this phenomenon is more apparent in high ISO images, but is imperceptible in low ISO photos.

A camera’s ability to capture subtle changes in tone and color (both expressed in bits) is best at its lowest ISO, and decreases steadily throughout the ISO range. Most DSLRs have a 21-24-bit maximum for color sensitivity, and it can degrade to half of that. Tonal range usually peaks at around 8-10 bit.

Testing your camera in the real world

Enough of the geeky stuff, let’s look at some pictures to see how this plays out in the real world. While the images here were shot with a Canon 7D, you can run your own tests:

  • With the camera on Program mode, take a sequence of photos
  • Start with your lowest ISO and work your way up to the highest
  • Mount the camera on a tripod to avoid shake, which is an unwanted additional variable, and turn off the anti-shake feature (Image Stabilization IS on Canon or VR on Nikon)
  • Shoot both landscapes and people pictures so you can see the effects ISO has on each
  • Make prints at your largest print size and see if you notice the distance at a typical viewing distance

Here are two image comparisons at a range of ISO settings.

Portraits show the difference

The effect of changing ISO is most obvious when you photograph people. In this example, the model was photographed on a sunny day while holding a reflector, against a low-key (darker) background. As the ISO setting is raised, the effect on her skin becomes obvious. Camera: Canon 7D with Canon 85mm f/1.8 lens.

ISO100 portrait full 600

ISO 100

ISO100 portrait detail 600

ISO 100

At ISO 100 (above), skin tone is accurate, with good contrast. In the 100% detail shot, there’s good, natural falloff of light, showing a wide range of tonality and good detail in the darker areas. You can especially see this in the eyes.

ISO800 portrait full 600

ISO 800

ISO800 portrait detail 600

ISO 800

At ISO 800 there is a subtle increase in contrast, an indicator that dynamic range has decreased slightly. Noise has not yet become apparent in the detail photo.

ISO1600 portrait full 600

ISO 1600

ISO1600 portrait detail 600

ISO 1600

By ISO 1600 there is a little more contrast, but again, it is a subtle change. However, you can see the noise in the blow-up, and the smooth gradation from light to shadow is starting to become a bit rougher, indicating that the tone has degraded.

ISO3200 portrait full 600

ISO 3200

ISO3200 portrait detail 600

ISO 3200

ISO 3200, at screen resolution it may still be hard to see the change when you compare this image to the one shot at ISO 100, but by ISO 3200 there is a pronounced decrease in highlight and shadow detail, and rougher color and light transitions.

ISO6400 portrait full 600

ISO 6400

ISO6400 portrait detail 600

ISO 6400

By ISO 6400, the Canon 7D’s highest resolution setting, even at screen resolution a difference is visible. If you look in the details of the shirt and hair, you can see that shadows are more blocked up. A quick glance at the 100% detail is all you need to see the graininess and reduced range of color and tone.

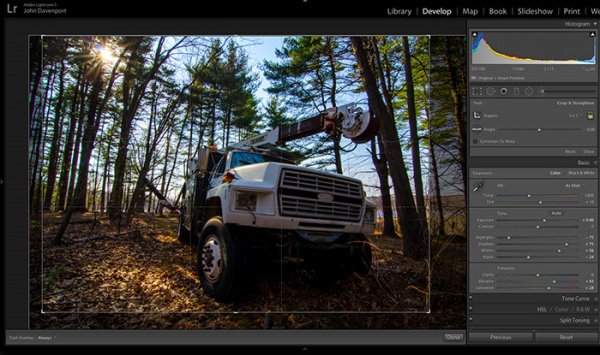
Bonus pointer: The advantage of shooting RAW

ISO100 portrait optimized 600b

Optimized

You can increase an image’s dynamic range by using your RAW image editor’s shadow and highlights sliders, which reveals more information in the highlights, and especially in the shadows. Compare this version of the ISO image with the ones above and notice how much more detail is visible in the shadows, thanks to tweaks done in the RAW image editor.

Landscape subtleties

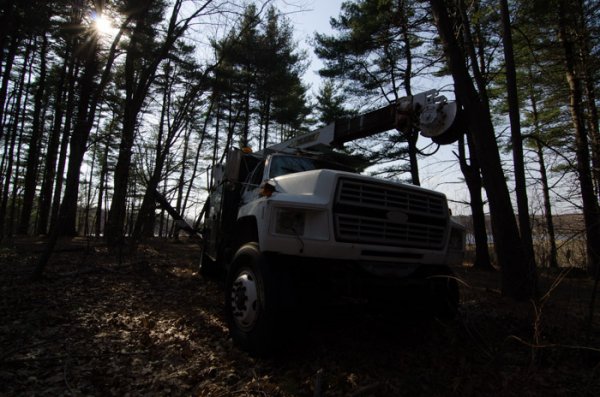
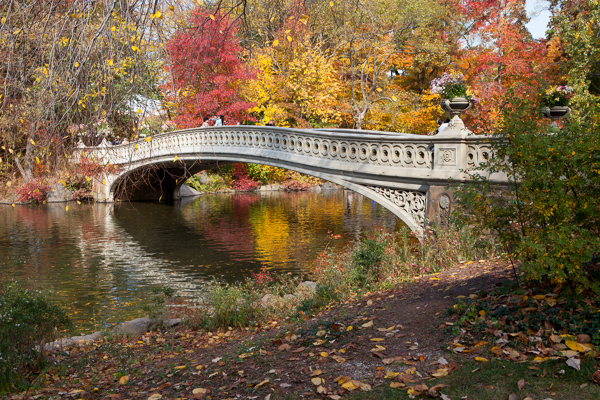
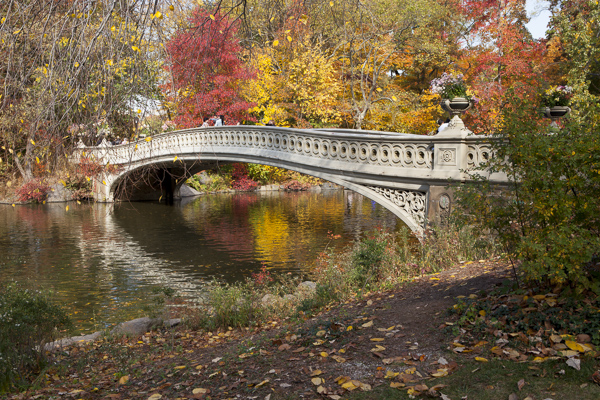
A scenic lookout in western New Jersey, shot in the middle of the day, at ISO 100, 800, and 3200 with a Canon 7D and Canon 24-70mm f/2.8L II USM zoom lens. While the dynamic range, tone and color only show minor differences here, the level of noise deteriorates at the faster speeds. After looking at these examples, you may wonder why anyone in their right mind would want to shoot above ISO 100 on a bright, sunny day. All samples are straight out of the camera.

ISO100 landscape sooc 600

ISO 100

At ISO 100, this is the full scene.

ISO100 landscape detail 600

ISO 100

In this detail of a 100% blow-up of the ISO 100 image, there is no apparent digital noise, as expected.
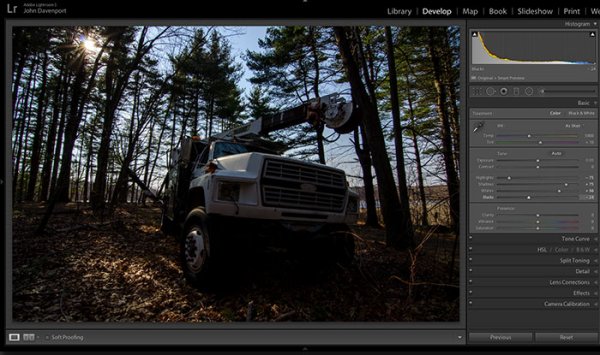
ISO800 landscape sooc 600

ISO 800

ISO800 landscape detail 600

ISO 800

At ISO 800, digital noise has started to become apparent in this 100% blow-up detail.
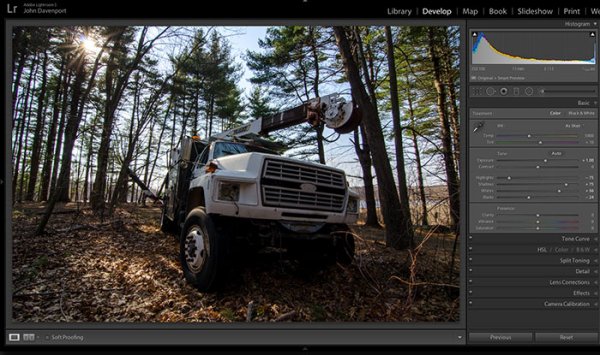
ISO3200 landscape sooc 600

ISO 3200

ISO3200 landscape detail 600

ISO 3200

By ISO 3200, digital noise is obvious, and the overall image quality has deteriorated. The graininess covers up the loss of color quality and tonality somewhat.

ISO100 landscape raw 600

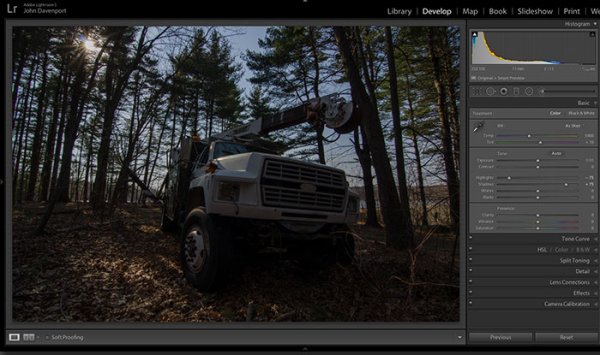
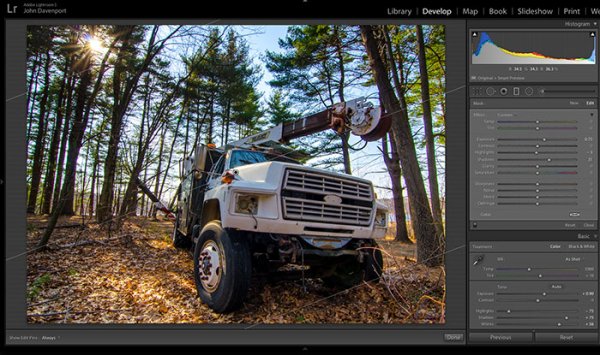
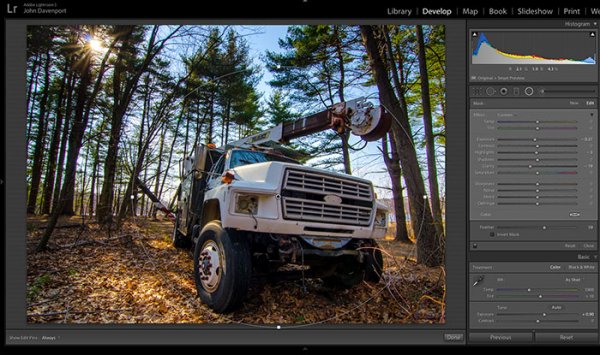
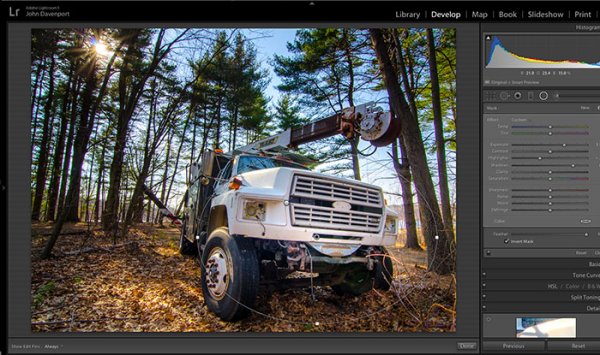
While the samples above are unadulterated JPEGs, what happens if you try to coax more detail out of a shot in RAW? You get more detail in the shadows and highlights. Compare this shot to the original and you’ll see more detail in the sky (highlights) and in the bark and branches of the tree (shadows) on the right.

Bottom line

The bottom line? There may be times when you must pump up your ISO settings, and it’s nice to know that you have that option. But when you are shooting in daylight under normal shooting conditions, you will bring back higher quality images when you shoot at, or near, your camera’s lowest ISO settings.

The post The Secret to Capturing the Best Image Quality with Your Digital Camera by Mason Resnick appeared first on Digital Photography School.


Digital Photography School

 
Comments Off on The Secret to Capturing the Best Image Quality with Your Digital Camera

Posted in Photography


Avoid These 10 Mistakes That Can Ruin Your Image Quality

08 Jul
Central Park South.

Central Park South.

How many times have you captured an amazing image only to view it on your computer, or as a print, and realize that you screwed something up along the way.

Unfortunately, the only way to stop doing a lot of these easy-to-make mistakes is to have an image ruined by them.  Once you screw up an image you’ll quickly learn not to make the same mistake again.

Here are the most frequent ways I see photographers ruining their images. Avoid these 10 mistakes that can ruin your images

1. Leaving Image Stabilization on when using a tripod

Everyone learns this tip too late. Image stabilizers (in your lens) usually make your images sharper by reducing camera shake. However, when your camera is on a tripod and perfectly still, the motor can actually cause shake! I know a few of you are shaking your head right now as I did when I learned this. If you couldn’t figure out why your tripod images weren’t perfectly sharp, this is usually the reason, although a strong wind or touching the tripod or camera while shooting can do this as well.

2. Not using a fast enough shutter speed

Lego Girl, SoHo.

Lego Girl, SoHo.

Unless you are on a tripod, to achieve a sharp shot your shutter speed needs to be at least 1 over your focal length.  So if you are shooting at 50mm your shutter speed needs to be at least 1/50th of a second (and I like to add a little leeway to that to be safe).  If you are on a cropped sensor, remember that a 50mm lens might be the equivalent of an 80mm or 100mm view, so make sure to adjust for that.

For moving subjects, 1/320th of a second is my ideal speed to freeze motion.  For fast moving objects such as cars or sports, I prefer an even faster shutter speed.

Be especially careful when shooting on Aperture Priority mode or in the auto settings, because it is easy for the camera to set the shutter speed to a setting that will introduce blur into your image without you noticing.  For this reason I frequently like to shoot in Shutter Priority mode.

3.  Not focusing exactly on the most important object, especially when shooting with a large aperture

If you are shooting with a small aperture, such as f/8 and above, you will often have leeway, but especially when shooting with a large aperture (like f/2), you need to make sure that the most important element in the image is the sharpest.  If this is not the case, it might not always be noticeable on the monitor, but it will show up when you make a print.

This is especially important when doing portraiture. Missing the sharpness on the eyes often means ruining the image.

Be especially careful when the element you are focusing on is small, because it will be very easy for the camera to focus on the area behind it instead. This is a mistake that is frequently made by newer photographers. In these tricky situations you need to pay attention to whether the autofocus is picking up the small element.

4. Not raising your ISO up higher when needed

In situations where the light is not strong and you need a fast shutter speed and a large aperture, don’t be afraid to raise your ISO. I see too many people afraid to go above ISO 200.  I use ISOs of 800, 1600 and even 3200 a significant amount. Many digital cameras, especially ones made within the last four years, can handle these ISOs.  Yes it will add noise to your photos, but in many cases you will notice that despite the noise, the technical quality of your images will be better. Noise can look very pleasing, especially on the newer digital cameras.

Mobile Office, Midtown.

Mobile Office, Midtown. ISO 3200

5. Moving while you shoot

This is my biggest pet peeve, by far.  I am normally a very calm person, but when I see this it makes me want to grab the photographer and shake them silly.  I see so many people that take photos without breaking their stride.  Stop your motion every time you take a shot, if even for a second!  Keep your hands still!  It’s not difficult.  Respect every image that you take enough to stop and think about it for a second, and your images will ultimately respect you when they turn out well in print.  Sorry, that is the end of my rant for the day.

6. Over-sharpening

Be careful of over-sharpening your photos. I see this happen all too often. Particularly with high resolution cameras with the right settings, your images often will only need a minimal amount of sharpness. If you overdo the sharpness it will actually have the reverse effect, making your image look fake or as if it was blown up to a larger size.

Couple in Snowstorm, Central Park

Couple in Snowstorm, Central Park

7. Resizing your images after you sharpen them

Sharpening should be the last step after you have sized the image to your final print size. If you sharpen your image and then resize them it will negatively affect the quality of your photo.

8. Not using the correct color space: ProPhoto RGB > Adobe RGB > sRGB

You should always keep your digital photo in the largest colorspace possible. While digital printers cannot yet print all of the colors in ProPhoto RGB, and many printing services prefer you to send them your files in Adobe RGB. When processing my RAW images to Tiff files I always convert them to the ProPhoto colorspace because it is the largest. Why not save your files with the most amount of color information possible?  Many cameras will allow you to set this in the settings.

However, did you know the sRGB is the best colorspace to show your images on the web? Yes, when printing your images it is best to keep them in ProPhoto or Adobe RGB, but when rendering them for viewing over the web, convert them to sRGB.

When you convert an image to a different colorspace, always make sure to do it as a copy of the original image. If you convert a ProPhoto image to sRGB and save it, you will not be able to retrieve that color information if you then convert it back to ProPhoto.

Bow Bridge in Fall, sRGB

Bow Bridge in Fall, sRGB.

Bow Bridge in Fall, Adobe RGB

Bow Bridge in Fall, Adobe RGB. A subtle but noticeable difference.

9. Not using exposure compensation (+/-)

When shooting in overly light or dark situations in Aperture Priority or Shutter Priority mode, the light will fool the camera’s sensor.  For instance, if you photograph in a dark alleyway, your camera’s sensor will try to overly brighten the scene, while if you capture an image with a lot of bright sky or white snow, the camera will try to overly darken the scene.

This is where your exposure compensation comes in.  It is a vital tool for any photographer, especially in tricky lighting situations.

10. Not resetting your camera

Take a look at your camera settings at the beginning of the day and frequently throughout a day of shooting. Some of the most common settings to forget to reset are a high ISO from the night before, your exposure compensation, your white balance setting, and checking your autofocus switch.

Final thoughts

A few final notes that must be mentioned.  With digital images, you can always fix many problems later in post-production. However, there is still no substitute for getting the image perfect in camera.  Processing is necessary in some way for every digital image, but the more extreme, the more you can damage the quality of your images.

It is tough to notice the effects of many of these mistakes when viewing the images on the web or on a monitor, but when you zoom in close to the details or make a print, especially a print of a decent size, these effects with be very noticeable.

The post Avoid These 10 Mistakes That Can Ruin Your Image Quality by James Maher appeared first on Digital Photography School.


Digital Photography School

 
Comments Off on Avoid These 10 Mistakes That Can Ruin Your Image Quality

Posted in Photography


Single Image Star Trails – a Powerful Technique to Create Star Trails in Minutes Using Phototoshop

11 Jun

10258929_1466264890276738_7906982947618430010_o

If you are reading this, you must be among those who have a special place in their hearts for stars, galaxies and the wonders of the universe. With recent advancements in camera technology, many photographers have captured the beauty of the night sky in spectacular ways. The truth is that every photographer is fascinated by the glittering stars, and captivating night skies, that have the power to instantly teleport us to a world beyond our wildest imaginations. From a photographic perspective, star trails can add another dimension to an otherwise average shot and that is likely the primary reason for many photographers desire to learn how to capture star trails. If you are struggling to find out and learn about this rewarding effect, get your camera and computer ready. But before that, let me introduce you to star trails.

10373061_1472036406366253_4127720884282225109_o
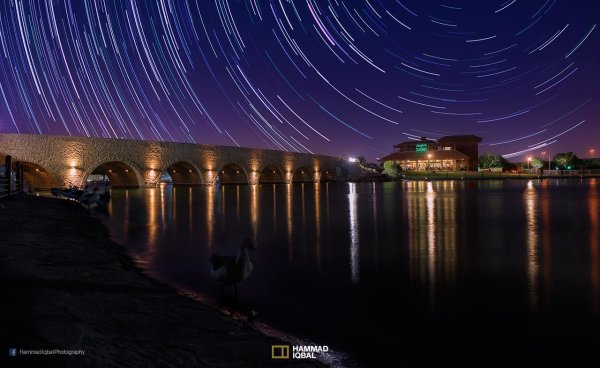
What are Star Trails?

Star trails is a photographic effect that gives an illusion of motion to the stars along a circular or an elliptical path. Technically, stars do not move when we observe them. They are quite stationary very much like our Sun. In reality, the circular motion of the stars we see in star trail images is a result of rotation of the Earth along its axis. For better understanding, please refer to the ‘equatorial grid’ figure under “Understanding Star Trails” section below.

How are Star Trails captured?

Traditionally, star trails are captured by taking multiple shots of the sky in succession over a period of many hours. Modern DSLR cameras also allow you to take a single exposure of an extended length of 30 minutes or more but many photographers prefer to take multiple shots at 30 seconds each and stack them together. Doing it this way eliminates any chances of shaky exposures that can occur due to wind or bumping into the setup while the shutter is open. If you are attempting to make almost a full circle star trails, then the number of shots required to create it can go in hundreds. Later, all those shots are stacked together in Photoshop or a free software such as StarStax to create a single image that shows the circular paths of the stars.

Photographers have been using this method for years with great results. But if you do not have the option to return to the same location again, then the conventional method would feel limited, as it requires you to stay in one spot for hours, thereby limiting your options to take multiple shots and capture a variety of angles on location in one night.

Understanding Star Trails

Equatorial grid

Equatorial grid from observer’s point of view

Imagine that ‘YOU’ are inside a giant sphere (see above diagram). Now, depending on the direction you look at, the effect of the star trails will be as follows:

Facing North: Star trails effect will appear to be circular with some stretching of the circular lines at the far edges of the frame.

Facing East: The trails will appear to be straight in the middle moving diagonally in an upward direction from bottom center to top center. They will also appear to be converging at both top left and bottom right at the far sides of your frame. See image below:

East West Trails Umm ul Aish Kuwait

Umm-ul-Aish, Kuwait – image shows the upward motion of East star trails

Facing West: In this direction, the trails will appear to be the exact opposite of what you see when looking towards the South. Moving downwards and to the right from top to bottom in a diagonal line, they will also appear to be converging at both bottom left and top right at the far edges of your frame.

Facing South: If you are facing South head-on, the star trails will appear to be moving from left to right in an upward curve.

One-shot Star Trails – the Technique

I have been developing a new method to create star trails in Photoshop. Unlike the ‘Star Trails’ Photoshop action that you might already be familiar with, this technique is much more than that. It eliminates all limitations associated with the traditional method of capturing star trails. Unlike the conventional method, this technique only requires a single shot, that’s right, only ONE shot of the night sky to create realistic star trails. Since this technique is a result of a joint effort between me and my friend Mobeen Mazhar, who is a great landscape photographer from Pakistan, we have named it the “HM technique” or “HM star trails”.

When implemented correctly, this technique will open endless possibilities for you in your star trail adventures and is sure to spark new hope among photographers for all levels of expertise. Now, let’s take a look at different types of star trails and how you can use this new technique to create them in Photoshop with just one shot.

Creating North Star Trails

North Star Trails Nanga Parbat

Nanga Parbat-Trashing, Pakistan – North Star trails created with HM technique

This is the most common and simplest type of star trails. Traditionally, it can be achieved by pointing your camera towards North with the focus set to infinity and then taking consecutive long exposure shots (30 seconds) at high ISO settings. Since the North Star remains almost stationary, the final effect is circular with the stars seeming to revolve around a pivot point, which is the North Star. Then at the time of post-processing, all shots are stacked using Photoshop or StarStaX.

The downside to this approach is that it can take as many as 700 shots over a period of five to eight hours to get a full circle trail. Now watch the video below to learn to create North Star trails within minutes using just a single shot of the night sky.

Creating Meteor Shower Trails

Meteor shower AspirePark

Aspire Park, Doha – meteor shower trails created with HM technique

Meteor shower trails is by no means an official name. This is fundamentally a beautiful variation of the North Star trails. Instead of a long continuous streak of light, the trails seem to disappear at the origin which gives it depth and dimension. There is also another variation of the meteor shower trails in which the tip of the trail is thicker, brighter and looks like a blob or droplet.

The underlying technique of the meteor shower trails is the same as shooting the North Star trails. The only difference is in post-processing. The meteor or comet effect is achieved by using the ‘Comet mode’ in StarStaX as shown below.

‘Comet Mode’ feature in StarStax

But regardless, the traditional method still requires that you spend hours on a single spot to take hundreds of consecutive shots. Now watch the video below to see how you can create amazing meteor shower trails in minutes, and once again, all you need is a single shot of the night sky.

Creating Vortex Star Trails

Vortex Aspire Park Doha

Aspire park, Doha – Vortex star trails created with HM technique

This is by far my favorite kind of star trails and is quite complex to achieve. Unlike the previous two types of trails, vortex star trails require special equipment which can be costly and may prevent most photographers from trying it. The vortex effect is achieved by zooming in or out on the lens during the long exposure. It may sound simple at first but the trick is to avoid vibrations as you zoom during the 30-second long exposure. Hence it makes it extremely difficult, if not impossible, to do it with bare hands without shaking the whole setup.

But if you have plenty of free cash to burn, you can get the tools which would include a geared ring that goes on the zoom ring of your lens, a motor and a wireless remote for controlling the motor. The setup is basically what DSLR filmmakers use for focus racking, that is a motorized follow focus system as shown below. The system is very useful if you shoot professional video with your DSLR but for photographers, the cost might not be justifiable.

Electronic follow focus

Wireless electronic follow focus kit v2 by Jag35

Do not worry because the following video will show you how to create vortex star trails in Photoshop. No cash required.

Conclusion

With the help of this powerful new technique, you will be able to maneuver on location, shift your focus towards making a variety of compositions, save countless hours, battery power and thousands of shutter actuations on your DSLR. Would you have thought that a single shot could give you such incredible flexibility in your star trail photography?

Tip: Just make a note of the direction your camera is facing to help you create star trails in relation to the reference direction.

I am sure that this tutorial will add a new skill to your photography arsenal. If you have any questions, post them in the comments below. Thank you.

Technique developed by Hammad Iqbal and Mobeen Mazhar

Mobeen Mazhar is a passionate traveler and has spent more than a decade exploring Pakistan and its natural beauty. Photography gives him a mode to express his love for nature and a medium to document his travel experiences. He is a landscape specialist, regular travelogue writer and travel expert for Pakistan. You can find his photographic work at Facebook, 500px and Flickr.

The post Single Image Star Trails – a Powerful Technique to Create Star Trails in Minutes Using Phototoshop by Hammad Iqbal appeared first on Digital Photography School.


Digital Photography School

 
Comments Off on Single Image Star Trails – a Powerful Technique to Create Star Trails in Minutes Using Phototoshop

Posted in Photography


Levitation Photography 7 Tips for Getting a Great Image

11 Jun

Image1

Levitation images are magical! They draw the viewer in and make them think about what’s not quite right. If you search the internet for levitation photography, you will find amazing examples. However, levitation photography hasn’t become wildly popular yet. I assume it’s because levitation photography looks really difficult. I think most people would be surprised to learn that in its most basic form, it’s just compositing two or more images in editing software.

Like most portrait photographers, I shoot what I’m good at, and mostly stay inside my little portrait box. Recently, I decided I needed to get my creative juices flowing again and get out of my comfort zone. Levitation photography caught my eye. I learned the basics of how to create such images from posts like this: How to Shoot a Mysterious Levitation Photo.

My first levitation experiment was rough, to say the least. I knew the basics of how to accomplish a levitation photograph, but the images turned out mediocre. The best part though, was coming home after the shoot and writing down all the things I had learned to make my levitation images better for the next time. Below, you’ll see the lessons I learned, so you don’t have to learn the hard way.

Preparing for the Shoot

Tip #1 – Gather Your Equipment

In order to create a levitation photograph, you must have: a camera (that has manual focus capabilities), a tripod, a willing model, a strong fan (if your model has medium to long hair), and something to prop your model up (a stool, chair, or ladder). If you have a camera remote, bring that along too.

Tip #2 – Tell Your Model What to Wear

Clothing can make or break a levitation image.

  • Solid color clothing is best. Prints and patterns can make it difficult if you need to clone out certain parts of clothing or liquefy fabric.
  • Tell your model not to wear a jacket or sweater. Anytime the model lays upside-down, or sideways, the garment should be hanging down. But if he/she is laying on a stool, the jacket won’t be able to naturally hang leaving the image looking less realistic.
  • If you’re going for a feminine levitation shot, long dresses, skirts, or extra flowing fabric can help create the look you’re going for.

Tip #3 – Shoot on a Cloudy Day

Sun and harsh shadows have the potential to create a lot of extra work for you in post-production. Editing out the stools and ladders, yet keeping a realistic shadow of your subject can turn into a job for Photoshop experts.

During the Shoot

Tip #4 – Shoot from a Low Angle

You will want to shoot from a low perspective to give the illusion that your subject is high in the air. However, be mindful of how low you are. If you are lower than the prop your model is standing/laying on, the prop will block parts of his/her body. It is safest to shoot in line with the top of the prop your model is on. Having your model situated at the very front of the prop will also lessen the chance of cutting into the body.

Image2

When I erased the garbage can, parts of the model’s body looks like it went missing since it was hiding behind the garbage can.

Tip #5 – Always Photograph the Empty Background

When preparing to photograph the frames that will create your final levitation image, follow these steps.

  1. Set up your shot with your model in the frame.
  2. Plan the angle you are going to shoot from and set up your camera on the tripod.
  3. When your model is in place, choose the focus point on your subject.
  4. Set your camera to manual focus and don’t touch it!
  5. Take the different shots suggested below, in Tip #6, without moving your focus point or your camera.
  6. After you’re sure you’ve captured all the images you need with your model and props, remove EVERYTHING from the scene. Photograph ONLY the empty background. This is the most important image you will take.

Image3

Tip #6 – Take Multiple Shots to Create One Image

The most basic levitation image is a composition of two or more frames. At the bare minimum, you will need at least a shot of the background and one of the model in that background.

Most great levitation images use a few more frames to add interest and make the final image more provoking. Here is a list of some shots you might want to take all without changing the focus and position of the camera:

  1. Model on the prop(s) – the focus of this shot is on what the arms, legs, and body are doing.
  2. Hair and facial expression – the focus of this shot is to capture the models expression and hair moving like it would naturally if the model was really in that position (floating straight up, blowing behind her, etc.). *Hair dryers and small fans are not strong enough to propel hair in specific directions. The longer and heavier the hair, the more powerful the fan needs to be.
  3. Clothing – the focus of this shot is to capture the movement of the clothing (if needed). If your model is being pulled one direction, what direction should the loose fabric be moving?
  4. Additional props – the focus of this shot is to photograph any extra props you want in the picture (if desired).
  5. Empty background – see Tip #5 above to learn more about the importance of this shot.
Image4

Shot 2 is a perfect example of how a strong fan would have made the shot more realistic with her hair blowing behind her instead of being held up by an assistant. We did not need to photograph additional props for this image, therefore, we did not do a “Shot 4″ for this composition.

After the Shoot

Tip #7 – Putting the Images Together

Many levitation photographers use Adobe Lightroom and Photoshop to create their final images. Regardless of your software choice, it is recommended to first color correct the series of shots so they are all the same. Lightroom has a great “sync” feature to make sure the exact same settings are applied to the entire series of images.

Next, open the images in an editing software like Photoshop. Start with the empty background image. Next, add in the main image of your model as a layer with a “Reveal All” mask. Simply use a black paintbrush on the mask to remove the props supporting your model. The end of this article describes each step in more detail. Repeat those steps for each frame you’d like to add. Finally, you can merge your layers and put the finishing touches on your final image. Then voila, you have a gorgeous piece of levitation art.

Image5

1 – Empty background shot is the bottom layer, with the model image above it. 2 – Select the model image and go to “Layers”> “Layer Mask” > “Reveal All”. 3 – Select the paintbrush, make sure it is black. 4 – Simply brush over the props that you don’t want to show in the final image.

Creating levitation images lets your fantasies become “realities”. Don’t let the laws of physics prohibit you from creating true art For more inspiration, search 500px.com for levitation images. You’ll be amazed.

Your Turn

Have you tried creating a levitation photograph? What was your experience? Do you have any additional tips that would help those getting started? Let us know in the comments. Also, feel free to include a link in the comments to your levitation work. We’d love to see what you create!

The post Levitation Photography 7 Tips for Getting a Great Image by Danielle Ness appeared first on Digital Photography School.


Digital Photography School

 
Comments Off on Levitation Photography 7 Tips for Getting a Great Image

Posted in Photography


iStick allows for easy image transfer from iPhone to computer

31 May

istick_thumb.jpg

While most Android and Windows Phone devices act like external drives when connected to a computer with a USB-cable, transferring photos and files to and from an iOS device is a little more tricky. This is where the iStick, a Kickstarter project comes in. iStick is a USB-drive with an integrated Apple Lightning connector, making it compatible with more recent iPhone, iPad and iPod generations. 

News: Digital Photography Review (dpreview.com)

 
Comments Off on iStick allows for easy image transfer from iPhone to computer

Posted in Uncategorized


Tokina officially announces image stabilised 70-200mm F4 telezoom

16 May

70-200-f4-520news.png

Tokina has officially announced its first optically-stabilized lens – the AT-X 70-200mm F4 PRO FX VCM-S telephoto zoom. Designed for use with full frame SLRs, it has a ring-type ultrasonic motor for autofocus, and the voice coil motor-driven IS system promises three stops of stabilization. When used on APS-C / DX format SLRs, the lens will offer a 105-300mm equivalent zoom range. It will initially be available in Nikon mount, and will go on sale in Japan at the end of May for ¥150,000.

News: Digital Photography Review (dpreview.com)

 
Comments Off on Tokina officially announces image stabilised 70-200mm F4 telezoom

Posted in Uncategorized