RSS
 

Posts Tagged ‘Image’

Akiwi semi-automatic tagging site suggests image keywords

10 Nov

Students at HTW Berlin University of Applied Sciences have created a new semi-automatic tagging website called akiwi in cooperation with Fotolia and Pixolution. Users simply upload an image, which is compared to a library of more than 22 million photos, and keywords are suggested based on similar images and input from the user. Read more

Articles: Digital Photography Review (dpreview.com)

 
Comments Off on Akiwi semi-automatic tagging site suggests image keywords

Posted in Uncategorized


Out of sight: Astronomers create 46-gigapixel image of the Milky Way

27 Oct

Researches from German university Ruhr-Universitat Bochum spent half a decade creating the largest astronomical image created to date, a 46-gigapixel image of the Milky Way, which is now available via an interactive online viewer. The image is made up of 46 billion pixels, and the file weighs in at a hefty 194GB. Read more

Articles: Digital Photography Review (dpreview.com)

 
Comments Off on Out of sight: Astronomers create 46-gigapixel image of the Milky Way

Posted in Uncategorized


9 Tips for Adding a Warm Sun Flare to Your Image

21 Oct

Photography, as an art form, is simply the capture of light on either a sensitive physical medium or, in more recent times, an electronic sensor.

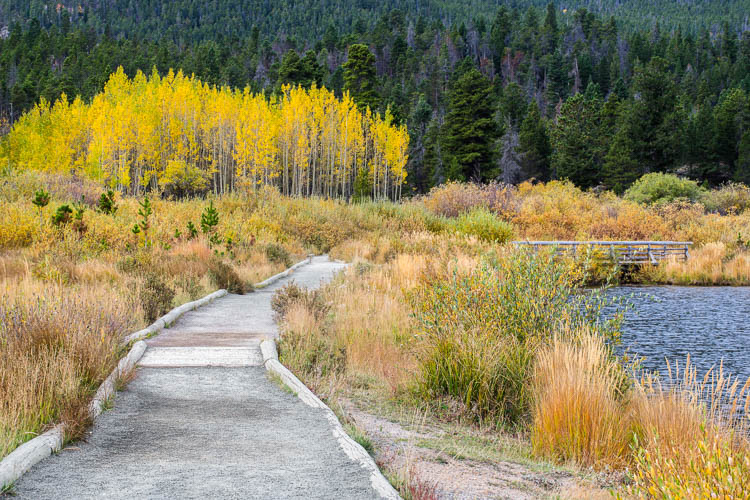
What makes a photograph unique and attractive to the eyes is the distribution of that light. Shadows, highlights, and varying levels of warmth and tone evoke emotion when viewing them, emotionally investing you to the picture you’re viewing.

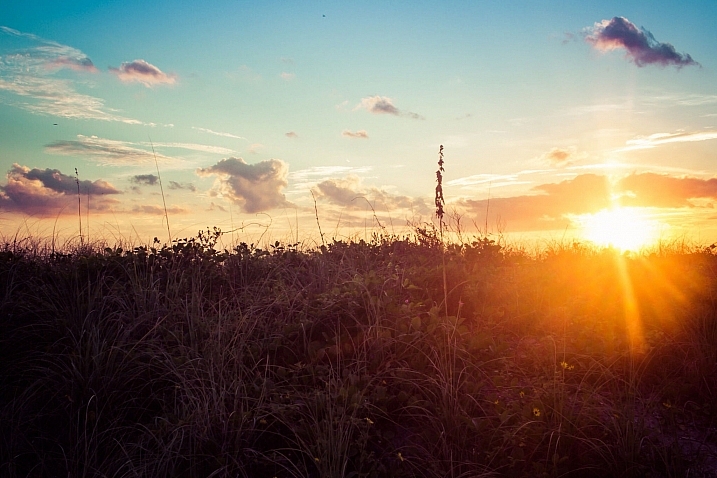
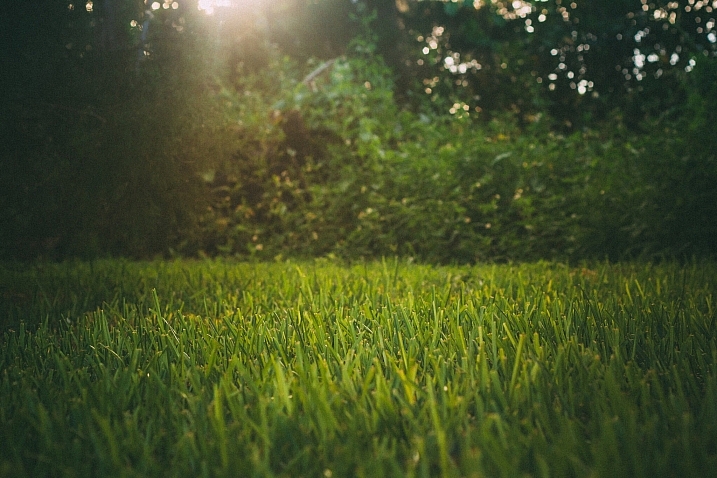
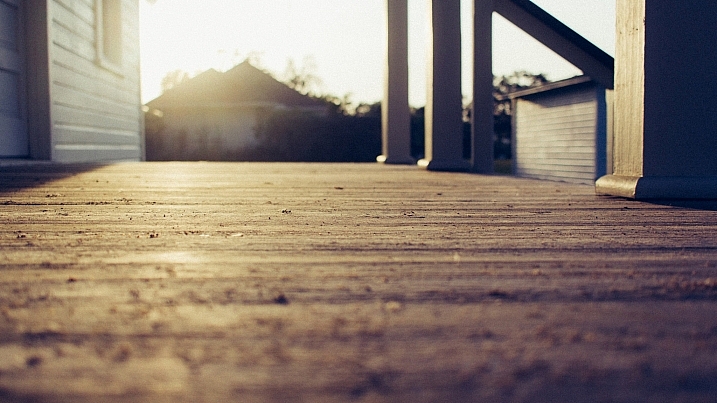
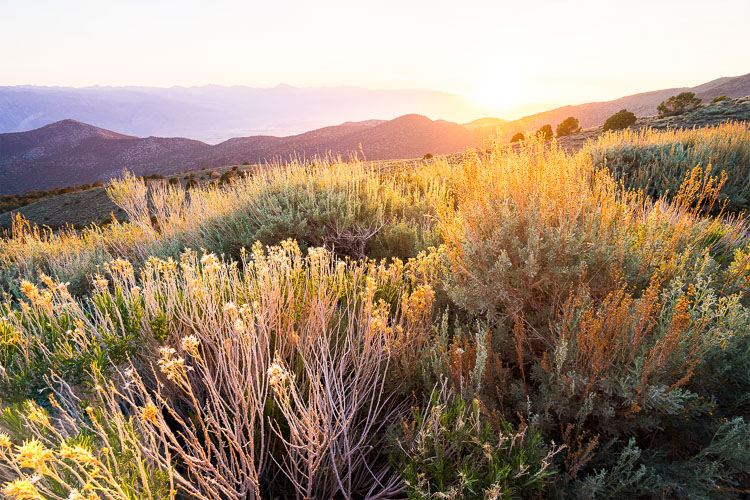
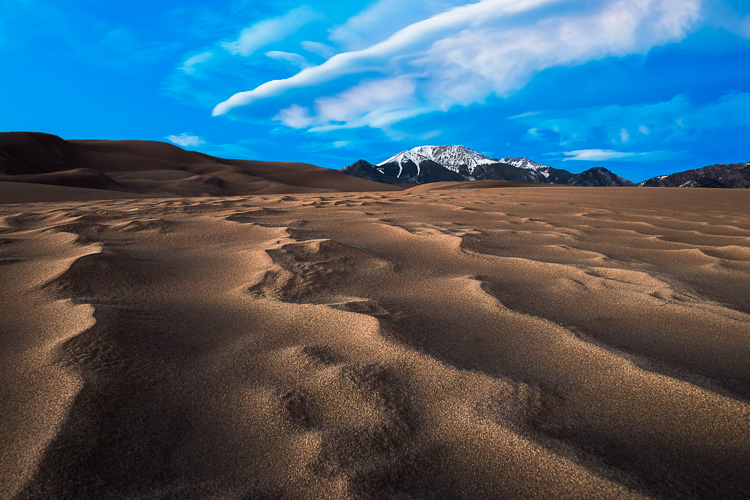
One of the most dramatic instances of light that can occur in a photo is flare, and more specifically, a sun flare. You’ve no doubt seen spectacular images with beams of light radiating through the photo, giving you a wonderful sense of warmth and brilliance.

21474625629_1dd03156ae_k

I remember about three years back, a friend asked me to how to produce the warm flares that were visible in many of my photographs. I tried to explain, but realized I really didn’t know the exact combination of properties that worked. I just knew the sunlight coming through a camera lens at the right angle created a beautiful artifact, and that I was able to achieve it pretty consistently in my beach, landscape, and nature shots taken at sunset.

Over time, I learned the details of what it takes to incorporate this effect, and how to use it to my advantage to get a warm, dreamy feel that amps up the viewer’s connection with the photo. This is what I’d like to share with you, as it’s one of the easiest ways to inject emotion into your photography.

In this article, we’ll cover what flare is, what artistic and aesthetic benefits you can derive from it, and finally, how to produce and use it effectively in your photography.

What is sun flare?

Lens flare, as described in its most basic form, is the result of a bright light source entering the lens and producing artifacts, shapes, and effects in the resulting image.

Technically, lens flare and sun flare are different entities, but for the purpose of this article, we’ll treat them the same. We will be talking about the effect created in-camera by having bright sun as a light source in, or near, the edge of the frame.

21629871846_47b2c9c4fa_b

On many occasions this is an unwanted effect. For this reason a lens hood is often used to prevent flare, when bright light shines on the lens opening from outside the frame. Flare often reduces cleanliness and clarity in a scene that requires it, such as with architectural or commercial photography.

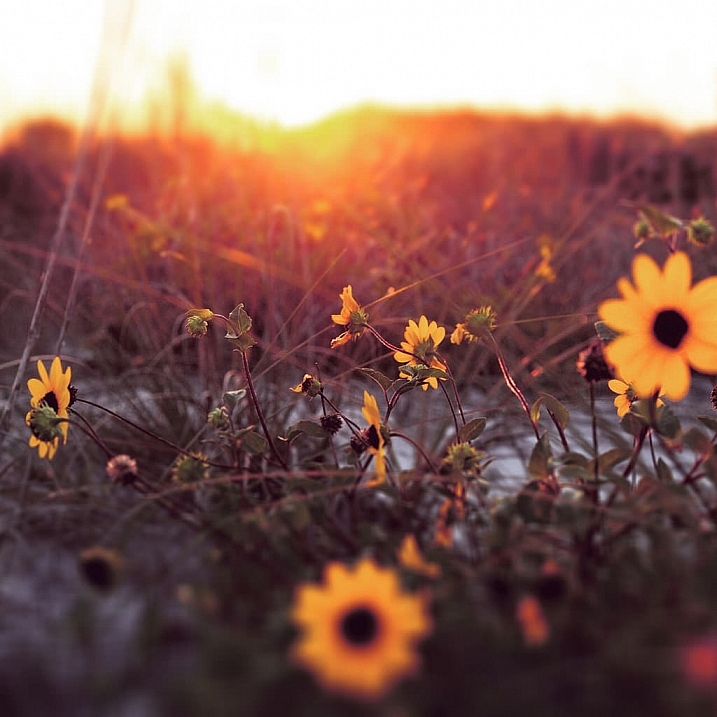
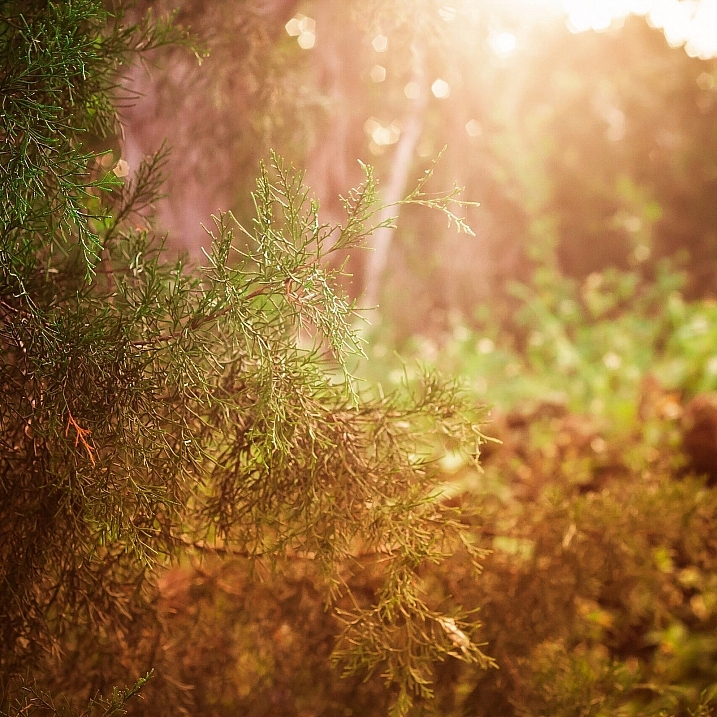
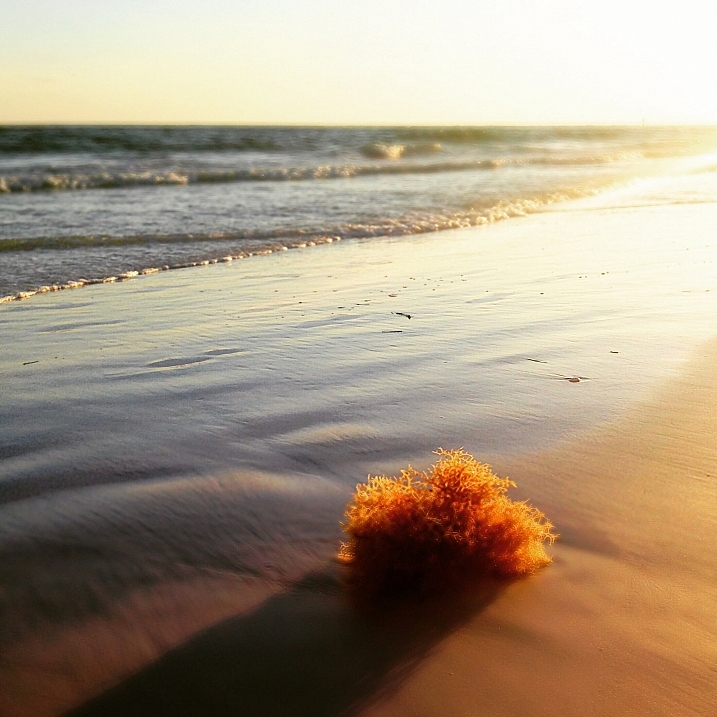
But flaring has a beautiful side as well, as you know. Some of us strive for the warmth and haziness that flared light from the sun can provide. Environmental portraiture is an example of an area that utilizes this effect. So how can we create and use flare to our advantage?

21036819798_41e380f648_h

Creating the flare

1. Don’t try this on a cloudy day

The main requirement to create flare is of course, the sun. If you’re shooting on an overcast day and there isn’t any sun poking through, you won’t be able to create a flare.

2. A low angle is best

Although you can create flare at any time during the day, it’s much easier, and much more dramatic, to shoot the sun when its low on the horizon – in other words, at sunrise or sunset, during the golden hours.

This is because you’ll need the sun in the frame, or just outside the frame, and this will usually coincide with your subject positioning.

21469116409_265a1699e2_k

3. Drop the lens hood and pick your lens

If you’re using a lens hood, remove it. Lens hoods are intended to reduce glare and flare from light sources outside the frame, which is exactly opposite of what you’re looking for in this case..

To amplify the chances of getting a good flare, try using a zoom lens, as opposed to a prime. The additional spaces and mechanical parts inside the zoom give the sunlight more room to bounce around and do its thing.

4. Shoot in Manual Mode

This particular discipline is based on the principle that the slightest change in orientation, composition, or aperture can make a pretty big difference in the end result. Shooting manually will allow you to have finer control over these factors and make things much easier for you.

Shooting with Live View can help even more, as you’ll be able to monitor changes in your scene in real time.

5. Settings: Aperture and more

You can use any aperture you wish when creating flare effects, but the look will differ depending on what setting you choose. At smaller apertures (f/11 and smaller), any visible part of the light source will create more of a starburst effect, while a larger aperture (f/8 and larger) will diffuse and disperse the effect, and you’ll end up with a much smoother distribution of the light.

Shutter speed also affects the final result, as more light streams into the lens when using slower speeds; therefore, you’ll have more of a flaring effect.

20950860109_026cca9525_o

6. Focus first

The large amount of light coming into your sensor will affect the autofocus on your camera if you’re using it. So, focus on your subject first by blocking the sun somehow, whether it be your hand, a reflector or a piece of cardboard. Then, once you’ve focused (and lock it or use back button focus), you can shoot normally knowing you are focused correctly for the given distance.

7. Don’t forget to light your subject

If you’re photographing a portrait, don’t forget the negative effect the flare can have on the proper lighting of the face and body. If you find the subject’s face, or other important areas, are washed out too much from the high light levels, use a reflector or other methods of fill light to compensate, and ensure your subject is well illuminated.

Alright, let’s get to shooting!

8. Method one:  In the frame

There are two primary methods of creating the flare effect. The first is by having the sun actually within the frame of the image. Naturally, just having it centered and completely uncovered will result in a washed out photo. You’ll want to have something to partially block the light, so that a flare can be achieved without washing out the subject of your photo. Trees, a distant treeline or building, and your subject can all provide enough cover to produce the desired effect.

16777527017_5540bf7379_b

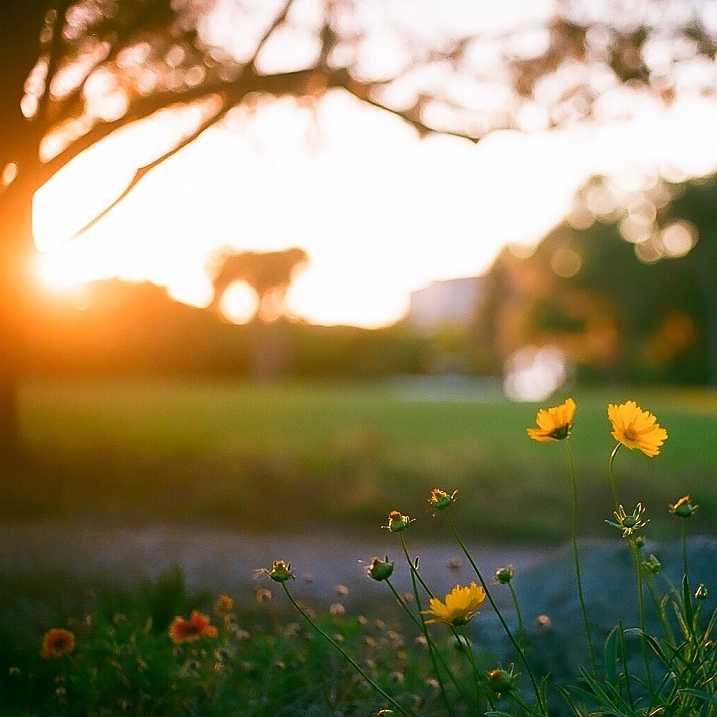
Take care not to capture too much light. Sometimes the resulting flare can be so pronounced that your image is completely washed out. Shoot several frames, and check the amount of flare you’re getting. If it’s too much, compose the sun a little more out of frame (or more hidden) to reduce the effect.

9. Method two: out of the frame

For an even more pronounced and diffused flare, you can compose your image with the sun partially, or completely out of frame. Usually the best results come from having the sun just outside the camera’s view. Experiment with position to find the correct angle and amount of flare necessary for the shot you’re after.

This method produces more a diffused and smooth flare, especially in the early morning and late evening hours, when the sun is very low on the horizon.

16642785747_fd851ca392_k

That’s it! 

Adding a nice looking sun flare to your image really isn’t tough at all. Following a few rules is all you have to do, and like everything else in our wonderful world of photography, the result is always subjective. Add a little, add a lot, all that matters is that you’re happy with the final image! There’s no wrong way to do it.

So get out there and get your flare on! Of course, we’d love to see some examples of what you can do with this effect, let’s see your best shots!

googletag.cmd.push(function() {
tablet_slots.push( googletag.defineSlot( “/1005424/_dPSv4_tab-all-article-bottom_(300×250)”, [300, 250], “pb-ad-78623” ).addService( googletag.pubads() ) ); } );

googletag.cmd.push(function() {
mobile_slots.push( googletag.defineSlot( “/1005424/_dPSv4_mob-all-article-bottom_(300×250)”, [300, 250], “pb-ad-78158” ).addService( googletag.pubads() ) ); } );

The post 9 Tips for Adding a Warm Sun Flare to Your Image by Tim Gilbreath appeared first on Digital Photography School.


Digital Photography School

 
Comments Off on 9 Tips for Adding a Warm Sun Flare to Your Image

Posted in Photography


JPEG Committee contemplates adding DRM to image format

16 Oct

Change may come soon for the web’s most widely adopted image format. Earlier this week at a meeting in Brussels, the JPEG Committee discussed adding a DRM (Digital Rights Management) security feature to the regular JPEG image format. Read more

Articles: Digital Photography Review (dpreview.com)

 
Comments Off on JPEG Committee contemplates adding DRM to image format

Posted in Uncategorized


Sony spins off image sensor division to form its own company

08 Oct

Sony Corporation is to split the part of its business that makes imaging sensors away from the Devices segment that it currently comes under, to form its own company called Sony Semiconductor Solutions Corporation. Sony has said that the degree of autonomy that the new company will enjoy will allow it to react more quickly to changing market forces and will encourage the business to grow more quickly. Read more

Articles: Digital Photography Review (dpreview.com)

 
Comments Off on Sony spins off image sensor division to form its own company

Posted in Uncategorized


Image Size and Resolution Explained for Print and Onscreen

17 Sep

One of the most confusing things for a new photographer is understanding image size, resolution, and printing. I’ll try and explain what these things mean, and how to make the best choices depending on what you want to do with your photos.

Megapixels and photo size

Find information about a photo using File > File Info

As a photographer you will already have confronted the term megapixel when you first purchased your camera. While technically a megapixel is equal to 1,048,576 pixels, in reality, camera manufacturers round this number to 1,000,000 when stating how large an image the camera will capture.

So, my camera, for example, is stated to capture 14.6 megapixel images which is around 14,600,000 pixels per image (14.6 x 1,000,000). This information tells you nothing about the actual pixel dimensions of the image – it only tells you the total number of pixels that comprise the image.

My camera, like most dSLRs, captures images with an aspect ratio of 1.5. So the ratio comparing the number of pixels along the long edge of the image, to the short edge is 3:2. Each full size raw image is 4672 x 3104 pixels in dimension. So, by multiplying the number of pixels along the width by those of the height (4672 x 3104 = 14,501,888) we get the actual number of pixels in the image. You and I might call this 14.5 MP but the camera manufacturer rounds this up and calls it a 14.6 MP camera.

You can check the width and height of an image using your photo editing software. In Photoshop, with the image open, choose File > File Info > Camera Data. The image above shows this information dialogue box.

A pixel itself is a single picture element, and for our purposes it’s the smallest element that your photo can be divided into. A pixel can be only one color, and a photograph is made up of a grid of thousands of pixels, each of varying colors that together make up your image. You can see these pixels if you open a photo inside a photo editing program and zoom in until you see single blocks of color (like below). Each of these is a pixel.

An image of pixels in a photo

Why size is important when printing

When you’re printing an image you may encounter the term ppi or pixels per inch. Most printing services, and indeed your own printer, will require a certain density of pixels in the image (ppi) to be able to render an print that looks good, with smooth color transitions so you can’t see each individual pixel. Typical printing ppi values range from 150 to 300 ppi, although some high-end magazines may require images which are 1200 ppi.

So, for example, if you want to print an image 4 x 6 inches at 300 ppi, then you need a file that has at least 4 x 300 (1200) pixels along its short side and 6 x 300 (1800) pixels on the long side. So, it needs to be at least 1200 x 1800 pixels in size.

To print an 8 x 10 inches at 300 ppi use the same math – multiply the printed image width and height in inches each by 300 pixels. The result is 2,400 x 3,000 pixels, which is the size image you need to print an 8 x 10 at 300 ppi.

When cropping and sizing an image for printing, you’ll need to know what ppi the image should be – your printer manual or the printing service should be able to tell you this. This is a screenshot from the MpixPro.com website showing their Optimal and Minimum image sizes for standard print sizes. Their printer outputs at 250 ppi (but can handle 100 ppi images) – other services may differ – so always check before preparing your images:

Print size required for MpixPro printing

Use the crop or resize feature in your software to size the image to the desired width and height, and the ppi resolution. Here an image cropped to a size of 3000 x 2400 pixels is being adjusted from 72 ppi to 300 ppi in preparation for printing at 300 ppi. There is no resampling required as the image is already the correct dimension and only the resolution requires adjusting.

Adjusting resolution in a photo without resampling it

Photoshop, like other applications, will also crop an image to a fixed size and resolution if you type these value into the tool options bar when you have the Crop tool selected (see below). If your image is smaller than the typed dimensions then the image will be enlarged using the default resampling method as it is cropped. While it isn’t generally advisable to enlarge images – provided the image is already close in size to the desired size, enlarging it a little bit generally won’t cause a noticeable loss of quality.

Crop an image in Photoshop setting size and resolution

Sizing for screen

When it comes to displaying images on the screen you need far less pixels than you do for printing. This is because the density of pixels on the screen is far less than what is required for printing. So, for example a typical monitor is 1920 by 1080 pixels in size so, to fill the monitor you only need an image that is 1920 by 1080 pixels in size. That’s about the same size image you need for a 4 x 6 print at 300 ppi, yet this size image displays perfectly on a 23 inch diagonal monitor.

googletag.cmd.push(function() {
tablet_slots.push( googletag.defineSlot( “/1005424/_dPSv4_tab-all-article-bottom_(300×250)”, [300, 250], “pb-ad-78623” ).addService( googletag.pubads() ) ); } );

googletag.cmd.push(function() {
mobile_slots.push( googletag.defineSlot( “/1005424/_dPSv4_mob-all-article-bottom_(300×250)”, [300, 250], “pb-ad-78158” ).addService( googletag.pubads() ) ); } );

The post Image Size and Resolution Explained for Print and Onscreen by Helen Bradley appeared first on Digital Photography School.


Digital Photography School

 
Comments Off on Image Size and Resolution Explained for Print and Onscreen

Posted in Photography


Pete Ashton’s ‘Sitting In Stagram’ shows image degradation after 90 reposts

19 Aug

What happens when you screen-cap and re-post a photo to Instagram 90 times? Artist Pete Ashton’s ‘Sitting In Stagram’ project shows just that – and it’s not pretty. Read more

Articles: Digital Photography Review (dpreview.com)

 
Comments Off on Pete Ashton’s ‘Sitting In Stagram’ shows image degradation after 90 reposts

Posted in Uncategorized


Qualcomm’s Snapdragon 820 comes with new image signal processor

15 Aug

Qualcomm has announced the latest generation of its top-end chip, the Snapdragon 820, which is expected to start appearing in devices in the first half of 2016. It comes with the brand new Spectra camera ISP (Image Signal Processor), which it claims will make a number of improvements in image quality. Read more

Articles: Digital Photography Review (dpreview.com)

 
Comments Off on Qualcomm’s Snapdragon 820 comes with new image signal processor

Posted in Uncategorized


How To Quickly Focus Stack an Image in Photoshop

04 Aug
Four-image focus stack of sunset in Bishop, California. The foliage in the foreground was just inches away from the camera.

Four-image focus stack of sunset in Bishop, California. The foliage in the foreground was just inches away from the camera.

When you take into account all the different ways to get a tack sharp image, it can be quite overwhelming. I’ve been photographing landscapes as a full time photographer for six years now, and have tested just about every method out there. Focus stacking is just one more option, but it is one of my favorites, if the conditions are right.

Focus stacking is a life saver when you have a foreground subject that is very close to the frame, and a background subject that is equally important to the image. This happens quite a bit in landscape photography when using super wide angle lenses! Some will argue that hyperfocal calculations work in these situations too, and while they certainly can, I personally don’t like hassling with the charts and measurements unless I really have to.

Two image focus stack of Lily Lake near Estes Park, Colorado.

Two image focus stack of Lily Lake near Estes Park, Colorado.

One of the most important things you can do out in the field is to inspect your shots instead of just assuming you nailed it. You’ll find articles all over the place making fun of photographers for chimping, but the ability to zoom in on all the tiny details of your shot is a major advantage over the film days.

When I’m taking pictures of a magnificent sunset, I’m working fast and keeping my head on a swivel. When I take a shot, I’ll quickly review it and zoom in all the way on my main subject. Then, I’ll zoom in on the other parts if they need to be sharp as well (sometimes they don’t). If you have a really close foreground subject and it’s tack sharp, but the mountains in the background are just a bit soft; this is a good time to consider focus stacking.

Two image focus stack at Great Sand Dunes National Park in Colorado. One for the sand that was less than a foot from the lens, and one for the background.

Two image focus stack at Great Sand Dunes National Park in Colorado. One for the sand that was less than a foot from the lens, and one for the background.

The best part about focus stacking is that it’s super easy! Just put your camera on a tripod and set your lens to manual focus. I use live view on the back of my camera to zoom in as close to my subject as possible and turn the focus ring on my lens until I see the subject become tack sharp. Once you’ve gotten that shot, scroll around the image and see what is soft in the background. If the mid-ground is soft, turn your focus ring until it’s sharp and take the same picture with the same settings. Then, dial the focus ring for the background and take another shot. That’s it until post processing!

Stacking the Images Together in Photoshop

Final image from the video. Three image focus stack from Zion National Park.

Final image from the video. Three image focus stack from Zion National Park.

When Focus Stacking Doesn’t Work

In all the images above that had foliage in them, there was virtually no wind at the time I took the shots. The foliage was perfectly still. If the wind is blowing and the leaves are swaying back and forth, focus stacking is going to be a nightmare, and isn’t even worth bothering with in most cases.

It’s also important to note that having the entire image in sharp focus isn’t always the best artistic approach to a scene. Sometimes having your subject sharp and the background soft will do a much better job of drawing the viewer’s eye where you want. It really just depends on the situation.

Conclusion

Focus stacking is just one trick to have in your bag, and this is just one method of doing it. There are also third party programs like Helicon Focus to consider. I personally haven’t used the program but have heard great things about it.

Have anything to add to the article? Let me know in the comments below!

googletag.cmd.push(function() {
tablet_slots.push( googletag.defineSlot( “/1005424/_dPSv4_tab-all-article-bottom_(300×250)”, [300, 250], “pb-ad-78623” ).addService( googletag.pubads() ) ); } );

googletag.cmd.push(function() {
mobile_slots.push( googletag.defineSlot( “/1005424/_dPSv4_mob-all-article-bottom_(300×250)”, [300, 250], “pb-ad-78158” ).addService( googletag.pubads() ) ); } );

The post How To Quickly Focus Stack an Image in Photoshop by James Brandon appeared first on Digital Photography School.


Digital Photography School

 
Comments Off on How To Quickly Focus Stack an Image in Photoshop

Posted in Photography


The Art of Photojournalism: Tell a Story with Your Image

15 Jul

Many people don’t think of photojournalism as being an artistic pursuit. In many ways, it isn’t. Documentary photography is often utilitarian in nature; the photographer’s job is to tell a story plainly, honestly and efficiently. A person might argue that approaching this job with other intentions, such as producing great art, could potentially sully the images. That is, if the Continue Reading

The post The Art of Photojournalism: Tell a Story with Your Image appeared first on Photodoto.


Photodoto

 
Comments Off on The Art of Photojournalism: Tell a Story with Your Image

Posted in Photography