RSS
 

Posts Tagged ‘Image’

ZTE nubia 11 features optical image stabilization and plenty of storage

30 Jun

Chinese manufacturer ZTE has launched its latest flagship-level device, the nubia Z11. Looking at its specifications the new model has the potential to be a serious alternative for mobile photographers for several reasons. On paper, the camera module looks very similar to the one on the recently unveiled OnePlus 3 and comes with a 16MP Sony IMX298 1/2.8″ sensor that offers on-chip phase detection and a pixel size of 1.12 micron. The lens is protected by a sapphire glass element and  comes with a fast F2.0 aperture and an optical image stabilization system. The front camera captures 8MP images on a sensor with a 1.4 micron pixel size. The lens on the front module covers a wide angle view of 80 degrees and features a F2.4 aperture.

Photographers and frequent video shooters will also like the generous on-board memory. The Z11 comes in two versions, either with 4GB of RAM and 64GB of storage, or 6GB of RAM and 128GB of storage. On both models storage can be further expanded via a microSD-slot.

Photos can be viewed and edited on a 5.5-inch Full-HD display that is protected by Gorilla Glass 3, and inside the Android 6.0 OS is powered by Qualcomm’s current top-end chipset Snapdragon 820. A fingerprint reader increases security and the 3,000 mAh battery supports Qualcomm’s Quick Charge 3.0 standard. The high-end components are built into an elegant looking all-metal case with extremely thin display bezels. In China the nubia Z11 will be available from July 6 at approximately $ 375 for the model with 4GB RAM and $ 525 for the higher-end version. No information on availability in other markets is available yet.

Articles: Digital Photography Review (dpreview.com)

 
Comments Off on ZTE nubia 11 features optical image stabilization and plenty of storage

Posted in Uncategorized


‘I instinctively felt I had an extraordinary image’: Ansel Adams on capturing Moonrise over Hernandez

25 Jun

In newly released footage, legendary landscape photographer Ansel Adams recounts capturing one of his most popular images: Moonrise, Hernandez, New Mexico

Adams’ son Michael recently explained in an interview with Marc Silber of Advancing Your Photography how the events unfolded the day the photo was taken. Riding along with his father, he remembers how Ansel caught sight of the moon rising over the landscape and pulled the car over to take the photo. In the clip above, you’ll hear Michael and Ansel Adams himself explain how the image was created, thanks to some quick thinking when a light meter couldn’t be found. The resulting image is, of course, a classic.

Articles: Digital Photography Review (dpreview.com)

 
Comments Off on ‘I instinctively felt I had an extraordinary image’: Ansel Adams on capturing Moonrise over Hernandez

Posted in Uncategorized


Review: Panasonic Lumix DMC-GX85 impresses with image quality, versatility

19 Jun

Key Features

  • 16MP Four Thirds MOS sensor
  • Electromagnetically driven shutter
  • Depth from Defocus AF
  • 2.76M-dot field sequential EVF
  • 1.04M-dot tilting touchscreen display
  • 4K video / photo
  • 5-axis image stabilization with Dual I.S.
  • Bouncable pop-up flash
  • Wi-Fi

The Panasonic Lumix DMC-GX85 is a mid-range interchangeable lens camera sporting a 16MP Four Thirds sensor and 4K video capability. In markets outside of North America the GX85 is sold as the GX80; in Japan it is sold as the GX7 Mark II.

Sliding in directly below the flagship GX8, the GX85 is targeted toward enthusiast photographers and videographers. It doesn’t use the new 20MP Four Thirds chip we saw in the GX8, instead it sticks with the familiar 16MP sensor used on many other Micro Four Thirds cameras. It also does not have the tilting EVF, weather-sealing or microphone input offered by the GX8. 

Still, the GX85 shares many of its big brother’s features like 4K photo mode, Post Focus, Depth from Defocus AF, and Dual I.S.. It also has a redesigned shutter mechanism. Shutter-induced blur (‘shutter shock’) was an issue we encountered on the GX8, which used a motor and spring arrangement in its shutter mechanisms. The new electromagnetic shutter found in the GX85 resolves this problem.

The GX85 also has no anti-aliasing filter, a first for Panasonic cameras. This should lead to better detail retention at the pixel level, but can also lead to moiré. However, Panasonic claims that the new Venus Engine image processor is specially tuned to combat moiré and false color and in use, we’ve found that it does so pretty well.

Like the GX8, the GX85 offers Dual I.S., combining sensor-based image stabilization with lens-based IS. But unlike the GX8, which has 4-axis sensor IS, the GX85 offers 5-axis sensor IS with rotation correction. Another advantage over its big bro: the GX85 can also use Dual IS during 4K video capture, something that the GX8 cannot.

Compared to its peers

  Panasonic GX85 Panasonic GX8 Panasonic GX7 Olympus PEN-F  Sony a6300
Sensor 16.0MP Four Thirds CMOS  20.3MP Four Thirds CMOS 16.0MP Four Thirds CMOS  20.3MP Four Thirds CMOS  24.0MP APS-C CMOS
Anti-aliasing filter  No  Yes Yes  No  Yes
Image stabilization Sensor-shift (5-axis) + Dual I.S.
Sensor-shift (4-axis) + Dual I.S. Sensor-shift (2-axis) Sensor-shift (5-axis) In-lens only
AF system  49-pt CDAF 49-pt CDAF 23-pt CDAF 81-pt CDAF Hybrid AF
(with 425 PDAF points)
Flash x-sync  1/160 sec  1/250 sec   1/320 sec 1/250 sec  1/160 sec
Burst rate
(with C-AF)
 6  fps   6 fps 5 fps 5 fps   11 fps
EVF res/type 2.76M-dot field sequential LCD 2.36M-dot tilting OLED 2.76M-dot tilting field sequential LCD 2.36M-dot fixed OLED 2.36M-dot fixed OLED
EVF magnification  0.7X 0.77x  0.7x 0.62x  0.7x
LCD type/res 3″ tilting touch 1.04M-dot LCD 3″ vari-angle touch
1.04M-dot OLED
3″ tilting touch
1.04M-dot LCD
3″ vari-angle touch
1.04M-dot LCD

3″ tilting
921.6k-Dot  LCD

Built-in flash  Yes  No  Yes No *  Yes
Video 2160/30p @ 100Mbps 2160/30p @ 100Mbps 1080/60p @ 28Mbps 1080/60p @ 77Mbps  2160/30p @ 100Mbps
Mic/headphone sockets No / No Yes / No No / No No / No Yes / No
Weather-sealing No Yes No No  Yes
Battery life  290 shots 330 shots 320 shots 330 shots 400 shots 
Dimensions 122 x 71 x 44 mm 133 x 78 x 63mm 123 x 71 x 55mm 125 x 72 x 37mm 120 x 67 x 49 mm
Weight (CIPA) 426 g 487 g 402 g  427 g 404 g
* External flash included in box 

It’s arguable whether the GX85 should be called the little brother of the GX8 or the true replacement to the GX7. And the different regional naming conventions for the GX85 only add to the confusion. The chart above seems to give support to both ways of looking at it: the GX85 uses the same field sequential EVF as the GX7 (although it doesn’t tilt), and what is presumably the same sensor (sans AA filter). And like the GX7, it lacks weather sealing and microphone/headphone ports but has a pop-up flash.

However, aside from its sensor and EVF, the GX85 also shares a lot of core components and specs with the GX8, such as its 49-point AF system, 4K video capture and 6 fps burst with AF. So whichever way you view the GX85, it certainly stacks up nicely to its Panasonic peers, as well as to the competition.

Part of the family: The GX85 (top) alongside its Lumix stablemates, the GX7 and GX8.

Pricing and availability 

Kitted with the collapsible 12-32mm F3.5-5.6 zoom lens, the GX85/GX80 will run you $ 799/£599/€699. In the UK and Europe it’s available body-only for £509/€599 and with both the 12-32mm F3.5-5.6 and a 35-100mm F4-5.6 for £729/€899.

Articles: Digital Photography Review (dpreview.com)

 
Comments Off on Review: Panasonic Lumix DMC-GX85 impresses with image quality, versatility

Posted in Uncategorized


Review: Panasonic Lumix DMC-GX85 impresses with image quality, versatility

14 Jun

Key Features

  • 16MP Four Thirds MOS sensor
  • Electromagnetically driven shutter
  • Depth from Defocus AF
  • 2.76M-dot field sequential EVF
  • 1.04M-dot tilting touchscreen display
  • 4K video / photo
  • 5-axis image stabilization with Dual I.S.
  • Bouncable pop-up flash
  • Wi-Fi

The Panasonic Lumix DMC-GX85 is a mid-range interchangeable lens camera sporting a 16MP Four Thirds sensor and 4K video capability. In markets outside of North America the GX85 is sold as the GX80; in Japan it is sold as the GX7 Mark II.

Sliding in directly below the flagship GX8, the GX85 is targeted toward enthusiast photographers and videographers. It doesn’t use the new 20MP Four Thirds chip we saw in the GX8, instead it sticks with the familiar 16MP sensor used on many other Micro Four Thirds cameras. It also does not have the tilting EVF, weather-sealing or microphone input offered by the GX8. 

Still, the GX85 shares many of its big brother’s features like 4K photo mode, Post Focus, Depth from Defocus AF, and Dual I.S.. It also has a redesigned shutter mechanism. Shutter-induced blur (‘shutter shock’) was an issue we encountered on the GX8, which used a motor and spring arrangement in its shutter mechanisms. The new electromagnetic shutter found in the GX8 resolves this problem.

The GX85 also has no anti-aliasing filter, a first for Panasonic cameras. This should lead to better detail retention at the pixel level, but can also lead to moiré. However, Panasonic claims that the new Venus Engine image processor is specially tuned to combat moiré and false color and in use, we’ve found that it does so pretty well.

Like the GX8, the GX85 offers Dual I.S., combining sensor-based image stabilization with lens-based IS. But unlike the GX8, which has 4-axis sensor IS, the GX85 offers 5-axis sensor IS with rotation correction. Another advantage over its big bro: the GX85 can also use Dual IS during 4K video capture, something that the GX8 cannot.

Compared to its peers

  Panasonic GX85 Panasonic GX8 Panasonic GX7 Olympus PEN-F  Sony a6300
Sensor 16.0MP Four Thirds CMOS  20.3MP Four Thirds CMOS 16.0MP Four Thirds CMOS  20.3MP Four Thirds CMOS  24.0MP APS-C CMOS
Anti-aliasing filter  No  Yes Yes  No  Yes
Image stabilization Sensor-shift (5-axis) + Dual I.S.
Sensor-shift (4-axis) + Dual I.S. Sensor-shift (2-axis) Sensor-shift (5-axis) In-lens only
AF system  49-pt CDAF 49-pt CDAF 23-pt CDAF 81-pt CDAF Hybrid AF
(with 425 PDAF points)
Flash x-sync  1/160 sec  1/250 sec   1/320 sec 1/250 sec  1/160 sec
Burst rate
(with C-AF)
 6  fps   6 fps 5 fps 5 fps   11 fps
EVF res/type 2.76M-dot field sequential LCD 2.36M-dot tilting OLED 2.76M-dot tilting field sequential LCD 2.36M-dot fixed OLED 2.36M-dot fixed OLED
EVF magnification  0.7X 0.77x  0.7x 1.23x  0.7x
LCD type/res 3″ tilting touch 1.04M-dot LCD 3″ vari-angle touch
1.04M-dot OLED
3″ tilting touch
1.04M-dot LCD
3″ vari-angle touch
1.04M-dot LCD

3″ tilting
921.6k-Dot  LCD

Built-in flash  Yes  No  Yes No *  Yes
Video 2160/30p @ 100MBps 2160/30p @ 100MBps 1080/60p @ 28MBps 1080/60p @ 77Mbps  2160/30p @ 100MBps
Mic/headphone sockets No / No Yes / No No / No No / No Yes / No
Weather-sealing No Yes No No  Yes
Battery life  290 shots 330 shots 320 shots 330 shots 400 shots 
Dimensions 122 x 71 x 44 mm 133 x 78 x 63mm 123 x 71 x 55mm 125 x 72 x 37mm 120 x 67 x 49 mm
Weight (CIPA) 426 g 487 g 402 g  427 g 404 g
* External flash included in box 

It’s arguable whether the GX85 should be called the little brother of the GX8 or the true replacement to the GX7. And the different regional naming conventions for the GX85 only add to the confusion. The chart above seems to give support to both ways of looking at it: the GX85 uses the same field sequential EVF as the GX7 (although it doesn’t tilt), and what is presumably the same sensor (sans AA filter). And like the GX7, it lacks weather sealing and microphone/headphone ports but has a pop-up flash.

However, aside from its sensor and EVF, the GX85 also shares a lot of core components and specs with the GX8, such as its 49-point AF system, 4K video capture and 6 fps burst with AF. So whichever way you view the GX85, it certainly stacks up nicely to its Panasonic peers, as well as to the competition.

Part of the family: The GX85 (top) alongside its Lumix stablemates, the GX7 and GX8.

Pricing and availability 

Kitted with the collapsible 12-32mm F3.5-5.6 zoom lens, the GX85/GX80 will run you $ 799/£599/€699. In the UK and Europe it’s available body-only for £509/€599 and with both the 12-32mm F3.5-5.6 and a 35-100mm F4-5.6 for £729/€899.

Articles: Digital Photography Review (dpreview.com)

 
Comments Off on Review: Panasonic Lumix DMC-GX85 impresses with image quality, versatility

Posted in Uncategorized


Step by Step How to Make a Moody Desaturated Image in Lightroom

12 Jun

Often times we occupy our processing time with thoughts of what can be added to our images in order to make them more impactful; more sharpness, contrast, or color. But, this may not always the best route to take. The old expression “Less is more” can be applied to many aspects of photography, and it is especially true when it comes to dealing with colors.

Example 1

Desaturated images are becoming more and more popular, especially with nature, landscape, and street photographers. As counterintuitive as it might seem, removing some color saturation can be more effective than adding it in some situations. That being said, there is more to making a strong desaturated photograph than simply working with the saturation and vibrance sliders in Lightroom or ACR.

In this article I will walk you through all the steps needed to process a moody, desaturated image in Lightroom. It’s extremely easy, and will help you add a unique look to your images. But first, a little bit of knowledge that you need to understand before we get started processing our photos.

What is Saturation?

It might seem to be one of those “It goes without saying” type of situations, but have you ever really thought about what saturation means, or how it can impact your images? As it relates to photography, saturation is the overall intensity of a color. Technically, saturation can be viewed as how far a color differs from pure white in the color spectrum.

For our purposes, saturation is the depth of colors present within a photograph. How intense the colors are in an image can be controlled globally (affecting the entire photo) in multiple ways such as: the saturation slider, HSL panel, and tone curve. Also, saturation can be controlled selectively, to only certain areas of the image, by using the filter and brush tools. In the end, saturation adjustments apply themselves to all colors no matter their luminance.

Full saturation applied

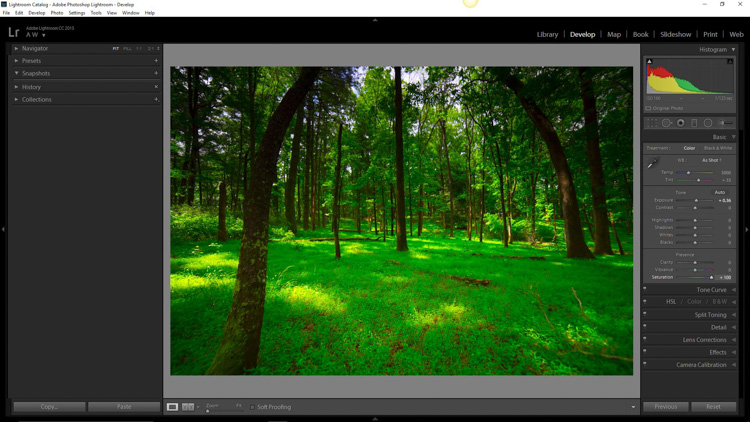
Full +100 saturation applied – notice the histogram here.

What is Vibrance?

Vibrance is a somewhat more interesting concept. This is a term Adobe has used to label something that is very similar to saturation. The difference between saturation and vibrance isn’t always black and white (color humor), but there is a distinction.

The saturation slider controls the intensity of all color tones throughout the image, regardless of their luminance. This means any colors whose brightness falls into the highlights, mid-tones, and shadows are all affected. Vibrance is different, in that it only affects the saturation of colors whose luminance falls into the mid-tone range. It has been referred to as smart saturation, and I tend to agree. Vibrance is very useful for enhancing, or in our case desaturation of the colors within a photo, without being as harsh as the saturation slider.

+100 Vibrance applied - notice the difference between this histogram and the saturation one.

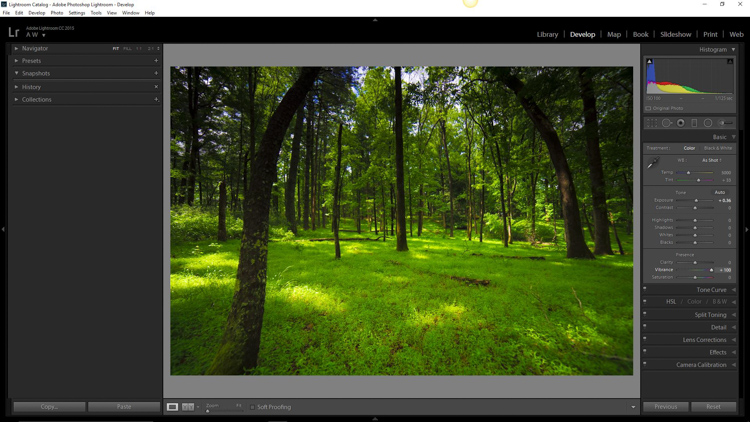
+100 Vibrance applied – notice the difference between this histogram and the saturation one.

When Does Desaturation Work Best?

Bright colors lend themselves to photos when the intent is to bring an upbeat or more cheerful feel to the image. Not to say that all less saturated images have to be melancholy or less cheerful, most times it is quite the opposite. The purpose of desaturated, or muted tones, is not to dampen the spirit of a photo, but rather to enhance the mood. Still, more often than not, photographs that benefit the most from desaturation are those which carry an underlying sense of brooding. Images that work well with desaturation include but are definitely not limited to:

  • Moody portraiture
  • Earthy outdoor photographs
  • Urban landscapes and cityscapes
  • Emphasizing dank weather conditions such as rain, mist, or fog

Now that you’ve been patient and endured the why, we will move onto the how.

How to Desaturate Images Effectively

More often than not, the actual desaturation process is accomplished with the vibrance slider more so than the saturation slider itself. They key is the desaturate the image without making it appear flat and completely colorless. There should almost always points of color which are emphasized. As with most aspects of photography less can actually be more. Don’t take away too much color and be sure to work with the colors that enhance the photo. It should be about harmony.
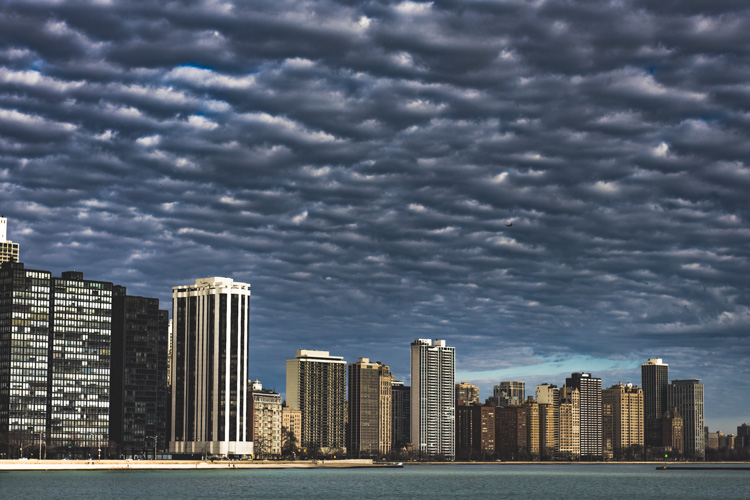
We begin with a RAW file straight from the camera.

RAW Chicago

Here we have the same image after being straightened, and some adjustments in the basic panel of Adobe Lightroom applied. I also used the neutral density filter tool to equalize the exposure of the sky, buildings, and water. Then +45 dehaze was added.

Chicago Basic

Now that we’ve finished with our basic adjustments, the desaturation process can begin. I find it usually works best to save the saturation adjustments for toward the end of the editing process. Please keep in mind that there are an infinite number of directions you can take your saturation effects, so have some fun with this part.

Find the Presence section of the basic Panel in the develop module of Lightroom.

Presence

For this image I took the saturation to -40.

Desat Slider

This brings the entire photo into a considerably desaturated state.

Desaturation Chicago

By itself the desaturation leaves the image a little flat. To counteract this, let’s increase the vibrance to +25.

Vib Slider

Remember that vibrance affects the colors in the mid-tones only. In this case, the blue, orange, and yellow tones are amplified. This makes them stand out more within the image, adding a little more pop.

Increased Vib Chicago

Now, this is where things get interesting. Instead of settling for an image that is merely desaturated, we will now take full control with some advanced options, in order to make the photo stand out.

To do this, we turn to the curves panel. The tone curve is simply a graphic representation of the luminance present within the image. If you’ve ever seen a vintage style photo, most likely some edits have been applied using this technique. What we want to do is to slightly fade the image, in order to add a washed out feel to the scene. Mainly the blacks will be lightened and the highlights enhanced. This forms somewhat of an S-curve and looks something like the following image:

Tone Curve

Which leaves us with a subtly faded effect.

Tone Curve Update

The buildings and the water still look a little drab, so to add a little color intensity we will once more turn to our old friend, the graduated filter tool. This will allow a little more color to be added where it is needed, without affecting the entire image.

Grad Filter Sat

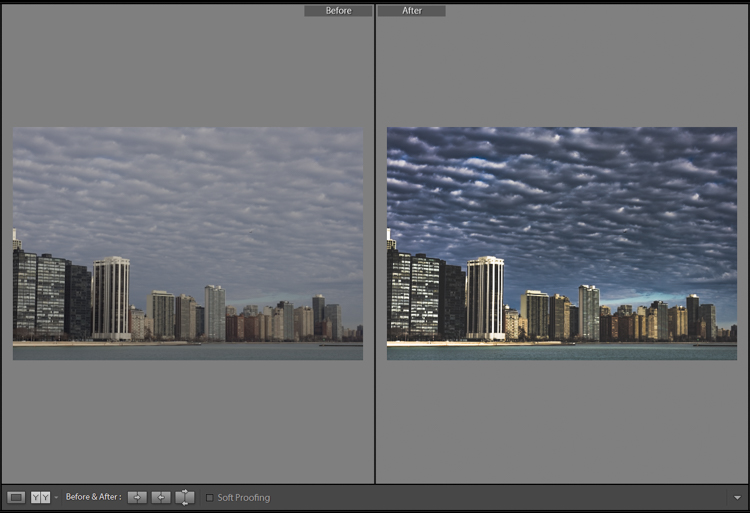
Which leaves us with a photograph much different than the one we began with just a few minutes earlier.

Final Desat Chicago

The difference is quite apparent when compared to the original RAW file.

Before_and_After_Desat_Update

Desaturating a photograph goes much further than merely taking away color. Sure, you can move those sliders to the left and continue on your merry way, but why not go further to the next level, and really make them unique? Remember these key points:

  • Begin with a RAW file in order to give you the most dynamic range possible.
  • Complete all basic adjustments such as exposure, contrast, and clarity first.
  • Don’t go too far with your desaturation.
  • Make use of the tone curve panel to add additional ambiance.
  • Fine-tune your finished product using local adjustments such as graduated filter tool or the adjustment brush.

The important thing to remember is to never underestimate the possibilities for your images. Take the time to experiment with different effects until you discover what you like best. It may be something entirely different that what your expected.

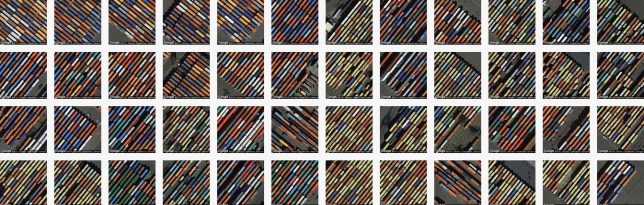
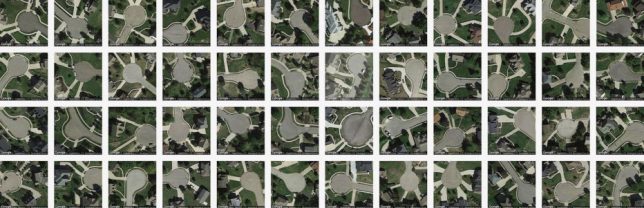
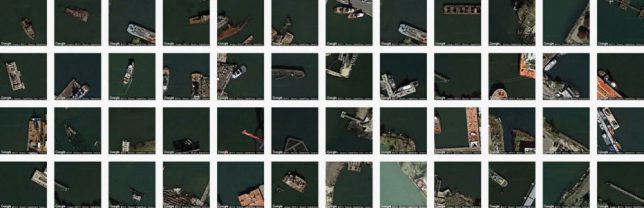
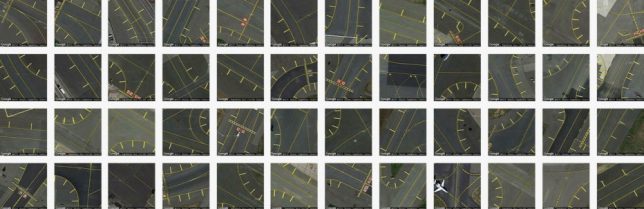
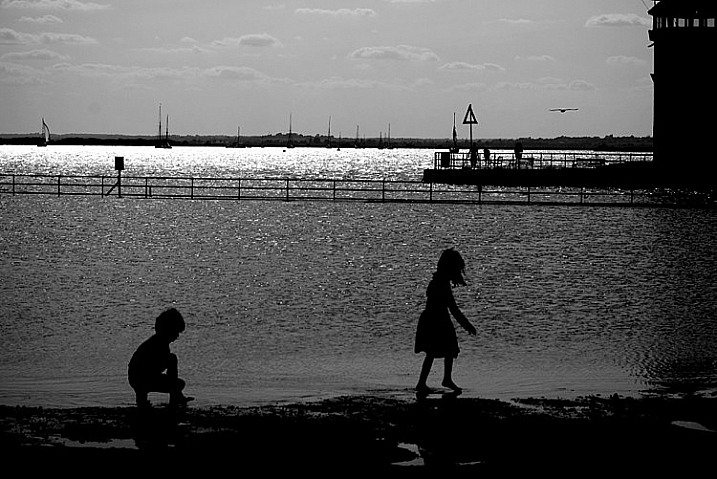
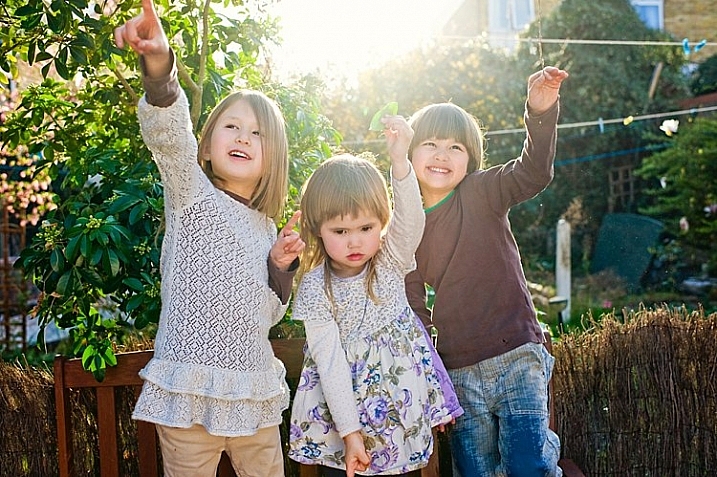
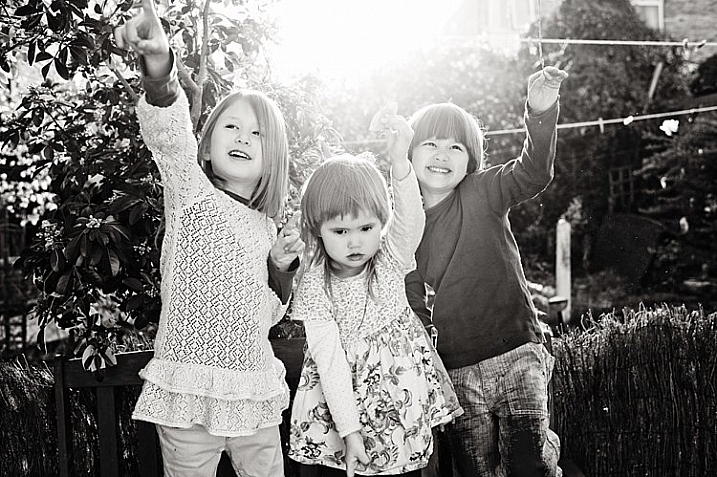
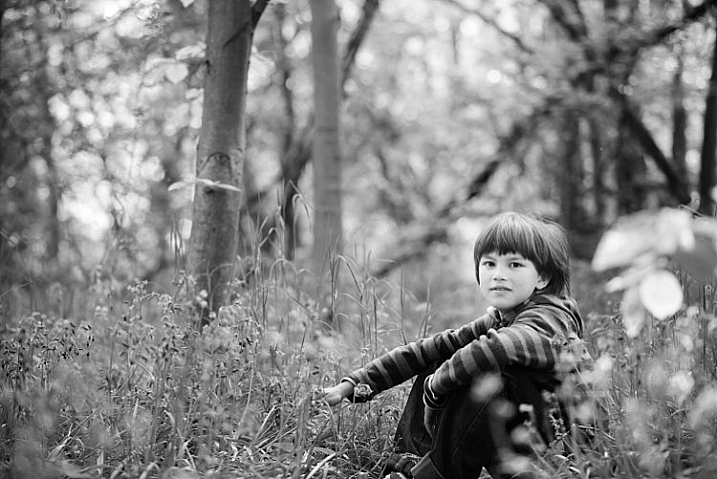
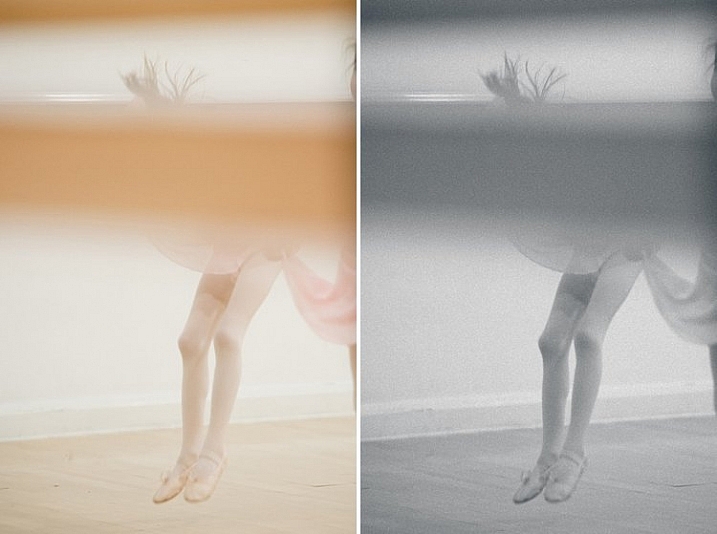
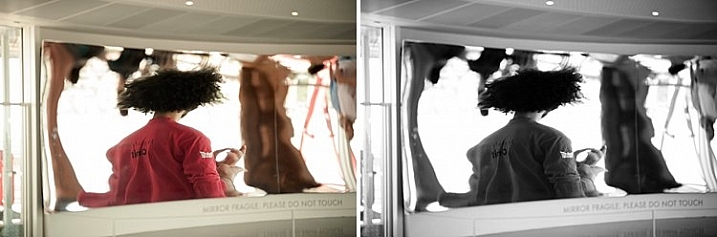
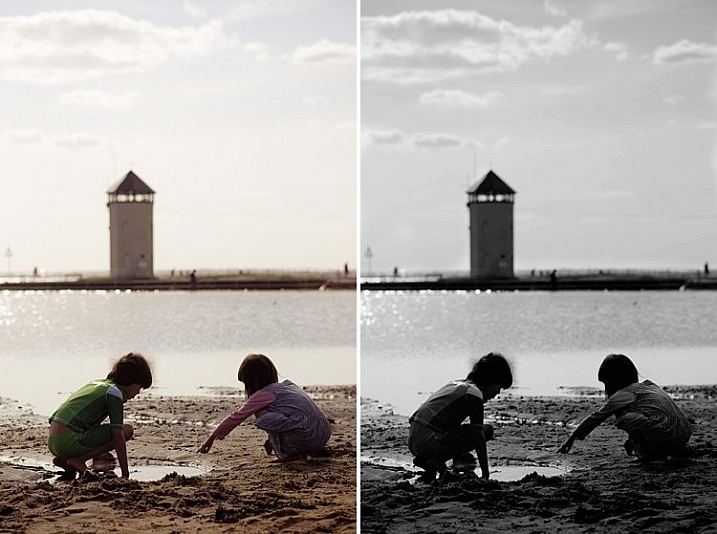
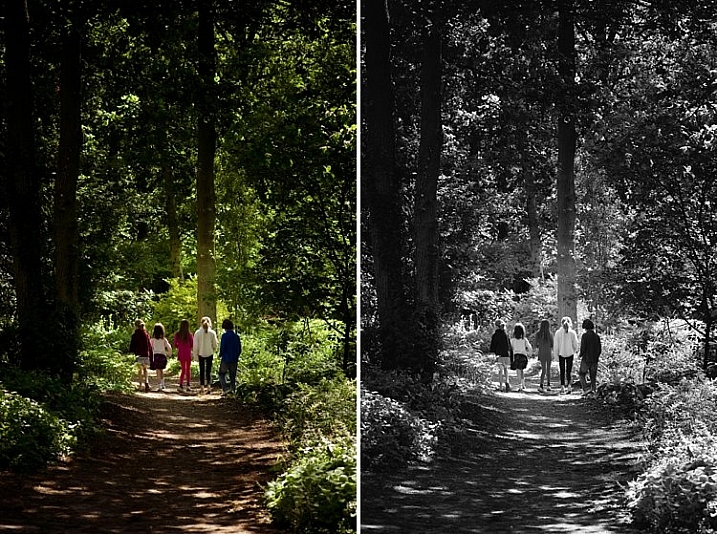
Here are a few more examples of images processed with a desaturated look:

Desat 1

Desat 2

Desat 3

Desat 4

Desat 5

Have you got some photos that you purposely desaturated? Be sure to share them with us in the comments below.


Editor’s Note: Adam also has a Lightroom Preset pack called Desaturated Cinematic that will give you this sort of look. Inspired by motion pictures and tv series, this pack of 25 lightroom presets will achieve great-looking desaturated effects. Perfect to give your images a simulated cinematic look. You can get more info on that by clicking the link.

googletag.cmd.push(function() {
tablet_slots.push( googletag.defineSlot( “/1005424/_dPSv4_tab-all-article-bottom_(300×250)”, [300, 250], “pb-ad-78623” ).addService( googletag.pubads() ) ); } );

googletag.cmd.push(function() {
mobile_slots.push( googletag.defineSlot( “/1005424/_dPSv4_mob-all-article-bottom_(300×250)”, [300, 250], “pb-ad-78158” ).addService( googletag.pubads() ) ); } );

The post Step by Step How to Make a Moody Desaturated Image in Lightroom by Adam Welch appeared first on Digital Photography School.


Digital Photography School

 
Comments Off on Step by Step How to Make a Moody Desaturated Image in Lightroom

Posted in Photography


Explore Mars with 360-degree image shot by NASA Curiosity Rover

11 Jun

Earlier this year, NASA released a 360-degree image from the perspective of the Curiosity Mars Rover. The scene is made up of a combination of multiple exposures taken with the rover’s 2MP ‘Mastcam’ camera, which we wrote about back in 2012.

The resulting image is pretty incredible, and if you have access to a Google Cardboard viewer you can experience it in 3D. So if you’ve got a free few minutes this weekend, why not explore the surface of Mars? 

Articles: Digital Photography Review (dpreview.com)

 
Comments Off on Explore Mars with 360-degree image shot by NASA Curiosity Rover

Posted in Uncategorized


OOWA smartphone lenses use ‘free-form’ tech for improved image quality

09 Jun

DynaOptics, an optical engineering company that has previously looked at bringing zoom lenses to smartphones, has launched a Kickstarter campaign for its OOWA smartphone add-on lenses. 

The lenses, a 2.5x tele-lens with an equivalent focal length of 75mm and a 15mm equivalent super-wide-angle, use DynaOptics’ patented free-form system design methodology which promises improved edge-to-edge sharpness, minimal distortion, no chromatic aberrations and no vignetting, compared to conventional optical designs. This is achieved through a rotationally asymmetric design that optimizes image quality in a rectangular shape (i.e, the shape of an imaging sensor). In contrast, conventional rotationally symmetric lenses optimize image quality in a circle.

Both lenses attach to iPhone 6-series models via an included protective case. The tele-lens has 5 elements, one made from glass and 4 made out of plastic. The wide-angle has three plastic elements and one glass element. 

You can currently secure either lens by pledging $ 65 on the OOWA Kickstarter page, or $ 120 for the kit. If you like the idea behind the lenses but don’t currently own an iPhone you can also help OOWA select the next devices that it will make lenses available for. Samples and comparison shots can be be found on the DynaOptics website.

Press Release:

Palo Alto, CA and Singapore – June 8, 2016 – DynaOptics, an innovator in optics technology, entered the mobile photography market today with OOWA, a suite of iPhone lens attachments powered by free-form lenses. OOWA’s high-quality wide-angle and telephoto lenses, together with protective phone cases, are available for pre-order on Kickstarter now.

“The introduction of OOWA lenses marks a true innovation in the world of optics: for the first time, a free-form lens is incorporated into a camera lens,” said Li Han Chan, DynaOptics CEO and co-founder. “OOWA’s precision-crafted lens attachments are now available for the iPhone 6 series. Our technology empowers these users to see the world from a fresh perspective — with unprecedented clarity — zero chromatic aberration (no color bleeding) and zero vignetting (no dark corners).”

Photographs taken by OOWA can be found on Instagram at #madewithoowa.

OOWA’s suite of products includes:

  • a 2.5X zoom telephoto lens,
  • a 110 degree diagonal field-of-view wide-angle lens, and
  • a phone case that allows for lens attachment with ease and precision while protecting the phone

A Single Lens Kit (telephoto or wide-angle lens) comes with the selected lens and a phone case, a lens cap, and a carrying pouch. The Pro Kit comes with both lenses, two lens caps, two carrying pouches, and a phone case. OOWA’s Kickstarter supporters can purchase lens kits at early-bird prices (Single Lens Kit at $ 65; Pro Kit at $ 120) during the first three days of the campaign. After which, the kits will be offered at regular reward levels of $ 79 and $ 139 respectively.

As mobile phones capture an ever-increasing share of the world’s photos, the pressure is on for cell phone technology to compete with the image quality of DSLR cameras. Market research firm InfoTrends estimates that more than one trillion photos will be taken by mobile phone users in 2017, up from 0.14 trillion in 20101.

OOWA’s products address this insatiable demand for ever-improving image quality and technology in today’s mobile camera world. Visit OOWA’s press page here for more information on OOWA’s free-form technology, product specifications, lab and field image quality results, and a prototype review by a professional photographer. 

OOWA products are available today for pre-order on KICKSTARTER. OOWA lenses are compatible with the iPhone 6, 6S, 6+ and 6S+ (other phone users — watch this space!), and with screen protectors. The products are expected to ship in November 2016.

Articles: Digital Photography Review (dpreview.com)

 
Comments Off on OOWA smartphone lenses use ‘free-form’ tech for improved image quality

Posted in Uncategorized


Terrapattern: Satellite Image Search Engine Matches Similar Places

31 May

terrapattern shipyard

A powerful tool for artists, designers and researchers, Terrapattern lets users seek out similar-looking locations from an aerial perspective, finding connections and patterns between disparate landscapes and built environments.

terrapattern culs de sac

The premise is simple: start with a single place, be it a park or street, stadium or shipyard, then let the tool work its magic. The results are uncanny: colors, textures and shapes tied together by computer vision and clever algorithms. The broader use cases are infinite, but specific ones are possible too, like: a user could look for abandoned ships floating around the island of Manhattan.

terrapattern abandoned ships

The system works by looking at its subjects in layers, looking for identifying features like curves, edges and shadows that indicate height. In a way, its task is similar than some pattern recognition software since it is not called upon to identify the subject, just match it.

terrapattern street grids

“For our purposes,” explain the creators, “‘interesting’ features are anthropogenic or natural phenomena that are not only socially or scientifically meaningful, but also visually distinctive—thus lending themselves ideally to machine recognition. Examples could include things like animal herds, methane blowholes, factories, destroyed homes, or logging roads. Many other patterns await discovery.”

terrapattern buses

The system draws on data from OpenStreetMap, combing through hundreds of thousands of images looking for something like whatever you submitted. Researchers can use tools like this to monitor natural habitats or make archaeological finds, but ordinary people can employ this tool to create art or make inquiries about the cities they live in. Even a quick tour around the engine reveals emergent macro-patterns from individual tiles, some worthy of wall art treatment.

terrapattern golf courses

Terrapattern’s creators are indeed excited for more non-standard and unexpected uses: “Terrapattern is ideal for discovering, locating and labeling typologies that aren’t customarily indicated on maps. These might include ephemeral or temporally-contingent features (such as vehicles or construction sites), or the sorts of banal infrastructure (like fracking wells or smokestacks) that only appear on specialist blueprints, if they appear at all.”


WebUrbanist

 
Comments Off on Terrapattern: Satellite Image Search Engine Matches Similar Places

Posted in Creativity


Sony expects to restart image sensor production by end of month

17 May

Sony, one of the biggest image sensor manufacturers for the photographic industry, has announced its sensor plant in the earthquake-hit Kumamoto region will be ready to begin production again by the end of this month.

The company says it has been able to resume back-end processes like testing sensors and camera modules, and that assembly lines for new units should begin working again any day now. Wafer manufacture, it says, should begin on 21st May, though not all lines will start on that date. 

Damage caused by the earthquake forced the Sony Semiconductor Manufacturing Corporation to halt production at the Kumamoto Technology Center where it produces imaging sensors for digital cameras. According to a report from the Nikkei Asian Review, the damage and lost business caused by the series of earthquakes and aftershocks has cost the Japanese economy $ 4.6 billion. Sony itself says it is still evaluating the cost of the disaster, and it is due to publish forecast figures for the current financial year on 24 May.

For reports on Sony’s recovery process see the company’s investor relations website.


Press release:

Status of Sony Group Business Operations Affected by 2016 Kumamoto Earthquakes
(Fourth Update)

The status of Sony Group business operations affected by the earthquake of April 14, 2016 and subsequent earthquakes in the Kumamoto region, as of today, is as follows:

Operations at Sony Semiconductor Manufacturing Corporation’s Kumamoto Technology Center (located in Kikuchi Gun, Kumamoto Prefecture), which is the primary manufacturing site of image sensors for digital cameras and security cameras as well as micro-display devices, had been suspended due to the impact of the earthquakes. However, as of May 9, 2016, testing operations, which are one of the back-end processes carried out on the upper layer of the building, have resumed and other back-end processes, such as assembly, are also expected to restart sequentially beginning May 17, 2016.

Wafer processing operations located on the lower layer of the building are expected to restart sequentially beginning May 21, 2016.

Although there was a delay in the supply of components to Sony from certain third-party suppliers that also have manufacturing facilities in the Kumamoto region, inventory adjustments have been made and a timeframe for regaining supply levels is now in place, so no material impact is anticipated on Sony’s business operations.

Based on the above, the effect of the Kumamoto earthquakes on business operations within the Mobile Communications, Game & Network Services and Home Entertainment & Sound segments is not anticipated to have a material impact on Sony’s consolidated results.

On the other hand, regarding the Devices and Imaging Products & Solutions segments, the impact on Sony’s consolidated results due to the effect of the earthquakes, including from opportunity losses, as well as expenses for recovery and reinforcement work, continues to be evaluated. Sony is scheduled to announce on May 24, 2016 its consolidated results forecast for the fiscal year ending March 31, 2017, as well as its forecasts for the Mobile Communications, Game & Network Services, Imaging Products & Solutions, Home Entertainment & Sound and Devices segments for the fiscal year ending March 31, 2017.

Articles: Digital Photography Review (dpreview.com)

 
Comments Off on Sony expects to restart image sensor production by end of month

Posted in Uncategorized


5 Reasons Why Converting to Black and White May Improve Your Image

09 May

Photography styles are always down to personal taste, in my opinion. I respect that; people have different preferences, and in the same vein photographers can’t please everybody. This also applies to black and white photos, which will be the focus of this article. I have clients who absolutely do not like black and white images, and clients who want a full set of black and white conversions. Personally I give my clients at least 95% color photos and the rest are in black and white.

reasons-to-convert-to-black-white-tips-photography

But why convert to black and white? Is it ever necessary? When do I convert color images to black and white? Here are five reasons why I do black and white conversions on selected photos.

#1 When the background is colorful and distracting

When there are too many colorful things cluttering in the background and taking the focus away from the subject, if they are not intended to be there, they are more likely to be a distraction rather than an enhancement to the image. It may also be that you have no control over the location and cannot move things away to de-clutter. In the photo below, my intention was to shoot backlit, and this was the only possible spot in a small patio. Light was my priority, and I had no control over the neighbor’s garden. This was a personal snap of my kids and I was not going to spend ages photoshopping the clutter away. Black and white was the way to go.

reasons-to-convert-to-black-white-tips-photography

reasons-to-convert-to-black-white-tips-photography

#2 When colors in the photo or the subject’s clothing do not enhance the image

Sometimes you just have to go with the flow. When you have children, you choose your battles. This photo was taken during a family walk looking at the bluebells. It was hard enough getting the kids out of the house in good time, let alone fighting over which outfits they want to wear. Clearly my son’s outfit does not remotely fit in with the tone of this image. Another hooray for black and white.

If clients turn up during a photoshoot with outfits that are too bold or distracting, then you have the option of offering them a choice of color or black and white. Explain your reasons why you felt it was necessary to convert it, and show them the difference it makes on the impact of the image.

reasons-to-convert-to-black-white-tips-photography

reasons-to-convert-to-black-white-tips-photography

#3 For artistic purposes like exaggerating contrasts and silhouettes

There are no rules in photography when it comes to creative style. It’s all down to your personal taste and vision. Artistic license is a great thing. You can photograph with motion blur and activity blur in mind, or add grain for more creative effect or a film look. Converting to black and white is just one more creative tool at your disposal.

reasons-to-convert-to-black-white-tips-photography

reasons-to-convert-to-black-white-tips-photography

#4 When black and white has more impact than color

Sometimes a scene just looks blah. It’s muddy and the colors seems non-committal; they are neither here nor there, not standing out, nor serving a purpose. Trust your gut. When I see “muddy” I run to black and white. An example would be a photoshoot in a living room with cream walls, a cream settee, and the subjects are also wearing cream. You can bring out more contrast in a black and white image.

At the other end of the spectrum, if the subject are wearing clashing colors that are too much, then converting to black and white turns the colors into varying values of gray, thus giving more cohesion to the overall look of the image.

In this snapshot of my kids below, I blew out the sky and wanted to bring some of the faint clouds back in. Apart from the muddy colors, it was easier to recover the blown out sky which would have looked very gray in a color image anyway.

reasons-to-convert-to-black-white-tips-photography

reasons-to-convert-to-black-white-tips-photography

#5 When the image is too noisy in color

Sometimes there are moments when your camera is not set correctly, and yet you see something you just have to capture in a split second, without having the chance to change your settings. The result would predictably be an underexposed image with unacceptable noise levels, or an overexposed image with plenty of highlights clipped. But the moment was priceless nonetheless. Black and white lessens the impact of the imperfection and makes the photo acceptable.

Perhaps this is because we are used to seeing grain in old black and white photos, and accepting the nostalgia associated with such a photo could forgive such an error in today’s digital image. However, beware of making this as an excuse. It should be a last resort to save a photo that is priceless, but never as part of your normal workflow.

reasons-to-convert-to-black-white-tips-photography

The kids in the photo above were never still, always running in different directions. I looked back and suddenly saw them walking in a row down a shaded path. I took a few successive shots knowing full well it would be underexposed based on the settings of my previous shots. I anticipated they would suddenly disperse, which they did in a few seconds, so I fired away. From the shots I took within seconds of this happening, I chose the one where they had just walked through a sunlit part of the path. There was still visible noise even after editing, but it becomes a non-issue in black and white.

How about you? Do you like black and white images? What reasons do you convert to black and white? Please share your thoughts in the comments below.

googletag.cmd.push(function() {
tablet_slots.push( googletag.defineSlot( “/1005424/_dPSv4_tab-all-article-bottom_(300×250)”, [300, 250], “pb-ad-78623” ).addService( googletag.pubads() ) ); } );

googletag.cmd.push(function() {
mobile_slots.push( googletag.defineSlot( “/1005424/_dPSv4_mob-all-article-bottom_(300×250)”, [300, 250], “pb-ad-78158” ).addService( googletag.pubads() ) ); } );

The post 5 Reasons Why Converting to Black and White May Improve Your Image by Lily Sawyer appeared first on Digital Photography School.


Digital Photography School

 
Comments Off on 5 Reasons Why Converting to Black and White May Improve Your Image

Posted in Photography