RSS
 

Posts Tagged ‘Help’

How Slow Photography Can Help You Improve Your Images

06 Apr

So often we are caught up in hectic schedules and checking completed items off our to-do lists that we don’t make time to truly enjoy our photographic experience. I believe slow photography can be a fabulously enjoyable, and even therapeutic experience, especially when you give yourself time to indulge.

Woman making giant soap bubbles in a park. - How Slow Photography Can Help You Improve Your Images

When you have a camera in hand you can set your mind and emotions free from the troubles of the day and step into another world, one of inspiration and creative expression. But you must be mindful and make time for yourself to achieve this.

Man with his tricycle taxi in Chiang Mai, Thailand - How Slow Photography Can Help You Improve Your Images

Being Patient

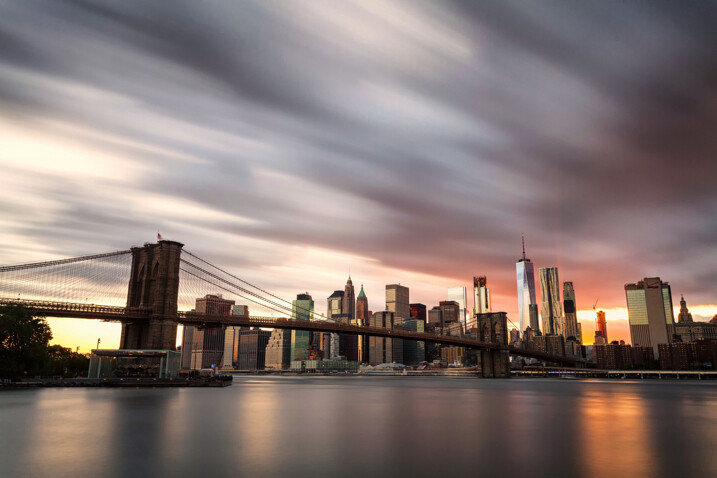
Patience is a virtue and should not be exclusive to bird and wildlife photographers. Maybe these genres require somewhat more patience, but street photography, sports, landscape and most other kinds of photography require you to slow down and take time to obtain the best possible images from most situations.

Some of the very best street photography is not brought about by spontaneity alone, but by careful planning, anticipation and patience. Finding a great location on the streets is one thing, but often you’ll have to wait for the best light and the most interesting action to present itself in your chosen location to capture the most impressive photographs.

Street with activity in Muang Mai Market, Chiang Mai, Thailand. - How Slow Photography Can Help You Improve Your Images

Even the best sports photographers take time with their photography. The time they invest may be in studying the game more or getting to know the players and coaches of the teams they photograph the most.

Doing this will give them the knowledge and relationships which will enable them ultimately to capture more dynamic pictures in the spur of the moment. They will more easily anticipate the flow of the game than someone who’s inexperienced and knows little or nothing of the character of the team.
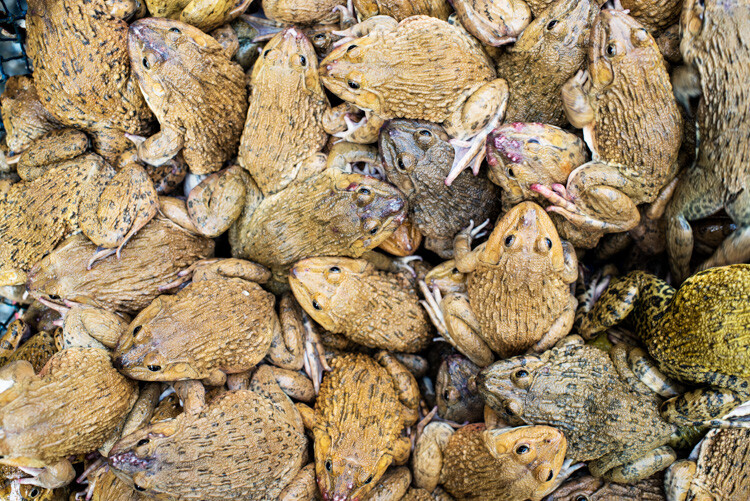
Thai man working as a porter at the fresh market in Chiang Mai - How Slow Photography Can Help You Improve Your Images

Observe

Taking time to observe the environment in which you are photographing will help include more sense of feeling into your photos. Rather than rushing in to get some photos as soon as you arrive at your location, leave your camera in its bag or case and just observe what’s there and what’s happening.

Use your other senses too, not just your eyes. Listen, feel, smell and even taste (when it’s appropriate) to become more aware of the environment where you want to take photos.

Lots of frogs - Slow Down and Take Your Time – Don’t Rush Your Photography

Give yourself space to slow down, to take a step back and observe what’s going around you. You will often discover interesting and photogenic subjects that you may not notice if you move in too quickly and start taking photos immediately.

Incorporate Photography into Your Schedule

Take your camera with you wherever you go. To work, school or university, when you exercise, when you go shopping, and when you walk the dog. By doing so you will learn to see your regular environment in different ways.

Thai woman outdoors - Slow Down and Take Your Time – Don’t Rush Your Photography

Making time to use your camera each day is one of the best ways to improve your skill and technique and to develop your own unique style. Giving yourself time within the regular context of your day might seem hard or a little strange at first. But as you commit yourself to doing this you can begin to find ways you hadn’t thought of to make interesting photos.

Think outside the box as you go about your regular routine. Make the ordinary things in your life look extraordinary in pictures.

Thai woman selling mangos at the fresh market in Chiang Mai - Slow Down and Take Your Time – Don’t Rush Your Photography

Revisit Locations and Subjects

Visiting the same locations multiple times and photographing the same subjects more than once is often worth taking the time to do. If you go someplace just once you will never really know if you’ve gotten the best photos possible.

Reviewing the images from your first or subsequent visits to a location will help you build a more critical eye. Then when you return to that place and subject you will have a more experienced perspective than at first go around.

Female butcher are a Chiang Mai market - Slow Down and Take Your Time – Don’t Rush Your Photography

By making time to do this you will most likely enjoy the experience more and produce better photographs.

Be careful to opt for places you really enjoy and feel good about as this will help compel you to return and seek to make better photographs than you have done previously.

Kayaw girl blowing bubbles in Chiang Mai, Thailand.

In Conclusion

By allowing yourself time to slow down and enjoy using your camera you will begin to see a progressive improvement in the quality of your images. Continuing to delve into techniques you’ve not previously mastered and experimenting with new subjects will help maintain a freshness in your pictures and you will enjoy your photography time even more.

Maybe we can make slow photography the next popular craze!

The post How Slow Photography Can Help You Improve Your Images appeared first on Digital Photography School.


Digital Photography School

 
Comments Off on How Slow Photography Can Help You Improve Your Images

Posted in Photography


5 Tips To Help You Enjoy Your First Digital Camera

29 Mar

It’s easy to use a modern digital camera to take generic looking snapshots. Getting beyond what’s easy requires a little, or a lot, of commitment, (depending on how creative you desire to become.)

Reflection of a tricycle taxi rider in his bike mirror in Chiang Mai, Thailand. - 5 Tips To Help You Enjoy Your First Digital Camera

Dedicating a little time each day to learning how to use your new camera will enable you to be truly creative in your photography. Without a good understanding of the basics of photography and how to control your camera, and regular practice with it, you will most likely continue to produce bland photos and become disheartened.

Let me encourage you by offering you five tips to help you really enjoy your first digital camera.

Thai woman and child share a fun moment with a DSLR camera in Chiang Mai, Thailand - 5 Tips To Help You Enjoy Your First Digital Camera

1. Use YouTube and Google

Use YouTube and Google, rather than your camera’s manual, to learn the basic controls. Camera manuals are notoriously difficult to make sense of so finding alternative sources of information that provide you with a foundational understanding of your specific camera can be more beneficial for you.

Searching online for your camera model along with the word “settings” will often return you results which are easier to follow than the manual that came with your camera. Find a good website or video channel where you can comfortably follow the presenter. This will help you gain the knowledge you need in order to control your camera well.

back of a DSLR camera showing the image of the Iron Bridge in Chiang Mai, Thailand, on the monitor - 5 Tips To Help You Enjoy Your First Digital Camera

2. Take a Course or Workshop

Going beyond the very basics will require a little more study. Once you are a little more familiar with your camera and its essential controls, joining a workshop, night class, or enrolling in an online course can help take you to the next level of photographic skill and creativity.

Books and websites are helpful as well, but I find people interested in photography are often visual and tactile learners. Many people who join our photography workshops in-person or study with our online courses give us wonderful feedback that they have learned more with our help during a workshop or course than they have through self-study with books or other mostly text-based learning.

Man with two cameras teaches photography - first digital camera

Before you enroll in a course it’s important to discover the content and style being taught. Make sure you are comfortable with whoever is teaching and ensure that they have sufficient knowledge and experience to convey what you want to learn.

There’s an abundance of photography courses available at various prices and levels of quality. Starting with a general course and then progressing on to more in-depth topics will build your photography experience in a positive manner.

people Learning photography - 5 Tips To Help You Enjoy Your First Digital Camera

3. Use Your Camera Every Day

One of the easiest and certainly most beneficial ways to grow as a photographer is to use your camera every day.

Even if you can only manage 10 or 15 minutes a day, if you are diligent and practice for a year, you will see a vast improvement in your photographs within 12 months.

To master any creative art form requires regular practice. Musicians, actors, painters etc., all must put in regular hours of dedicated practice to become successful. If you want to develop your skill level and produce truly creative photographs you must do the same.

Tricycle Taxi Rider in Chiang Mai, Thailand - 5 Tips To Help You Enjoy Your First Digital Camera

Taking my advice in tips one and two above will help you somewhat, but if you practice regularly and take photos every day you will certainly make the most of the study you have engaged in.

4. Go Easy On Yourself

Go easy on yourself. It’s very common for creatively oriented people to be too critical of their initial efforts. Learning to step back and taking a somewhat objective view of your photos as a beginner is a healthy practice.

Looking down at a Tricycle Taxi Rider in Chiang Mai, Thailand, With a Thai flag - 5 Tips To Help You Enjoy Your First Digital Camera

Don’t compare your photos to those of really experienced photographers, but instead compare them to photos you have made previously.

If you are following my first three tips and compare photos you are currently making to ones you’ve made previously, you will begin to see a development in your technical skills, creative expression, and style.

Tricycle Taxis at Night near Warorot Market in Chiang Mai, Thailand.

5. Make a Habit of Photographing Something You Love

Start with something you love. By photographing a subject you are interested in, familiar with, and even passionate about, you are more likely to be encouraged by the results. Make sure to choose a subject which is easy for you and you can make a regular habit of shooting.

For example, if you love dogs but don’t own one, making regular dog photos may not be practical. If you love gardening and frequently have time to spend tending your garden, take your camera with you when you do so. This would be an ideal type of subject for you to start with.

Find something that you love and that’s easy and it may turn into a lifetime photographic project.

Detail of decoration on a tricycle taxi in Chiang Mai, Thailand.

I’ve always photographed bikes and love the Samlors in Thailand.

In Conclusion

Modern cameras are designed to be easy to use and return good results in most situations. However, I know many people who have invested in a good digital camera only to become somewhat frustrated because they are not achieving the results they had hoped for.

Taking time to learn your camera settings, study, practice, think positively and objectively about your photos, and having an on-going project to work on will help you grow as a photographer and develop your own unique style.

Tricycle Taxi in Chiang Mai, Thailand.

The post 5 Tips To Help You Enjoy Your First Digital Camera appeared first on Digital Photography School.


Digital Photography School

 
Comments Off on 5 Tips To Help You Enjoy Your First Digital Camera

Posted in Photography


Focus Challenges and How Live View Can Help You Get Razor-Sharp Images

16 Mar

There’s no feeling quite like the dread that sets in when you are reviewing your photos from the day and you notice that some of those stellar images you snapped are soft and out of focus. For photographers who like to shoot with a wide aperture, sometimes hitting your focus is like walking on a tightrope – and missing by just a tiny little bit can seriously ruin your day.

An image showing accurate focus with a wide aperture - Focus Challenges and How Live View Can Help You Get Razor-Sharp Images

The watch is the focal point of this shot, and some careful technique helped ensure that it stayed tack sharp.

Editing can do a lot to save a picture; you can make areas of it brighter or darker, you can modify colors and add your own distinctive style – but there’s no way to completely fix a shot where the focus simply missed.

Fortunately, when shooting in controlled situations, there’s a useful trick for making sure each and every shot is in razor-sharp focus.

Why are some of my shots out of focus?

In a perfect world, cameras would adjust correctly to the lighting and dynamics of every shot and deliver focus with pinpoint precision. Unfortunately, reality gets in the way.

There are a few reasons why your shots sometimes come out a bit soft, meaning that the camera has decided to focus a bit too far in front or behind the target you were actually aiming for.

Lack of contrast

Cameras determine focus based on contrast. When you try to focus on an object that doesn’t have much contrast, say a smooth white wall, for example, there isn’t contrast for the camera to lock onto. Sometimes the camera will hunt for a focus point, shifting back and forth for a few seconds, and then give up. Sometimes the camera focus will latch onto a different part of the picture, putting your true subject out of focus.

An image of a Christmas Tree ornament where the autofocus grabbed onto the wrong spot in the image - Focus Challenges and How Live View Can Help You Get Razor-Sharp Images

This shot was supposed to be focused on the red ornament, but finer details in the background and the flicker of lights grabbed the attention of the camera’s autofocus instead.

An image of a Christmas tree ornament with accurate focus - Focus Challenges and How Live View Can Help You Get Razor-Sharp Images

After flipping over to manual focus and choosing the focus point more deliberately, the final shot looks a whole lot better!

This can also be a problem in low light conditions. Once again, the camera doesn’t have any strong contrasts to grab onto and can miss its target.

Bad focus caused by user error

As much as we hate to admit it, user error can cause some missed focus problems too. If you lock your focus on a target, then either move the camera or wait too long and allow the target to move significantly from where it once was, the resulting shot isn’t going to be razor-sharp.

Another common problem for shooters using autofocus is when the focus locks on an unintended part of the image, leaving the main subject blurry. One good way to counter this is to choose a more specific focus mode, such as single point focus.

A chess board image with accurate focus managed using Live View - Focus Challenges and How Live View Can Help You Get Razor-Sharp Images

The focus of this shot is tight on the King, emphasizing the piece’s importance in the game.

A chess board image with missed focus - Focus Challenges and How Live View Can Help You Get Razor-Sharp Images

Here the autofocus grabbed a different part of the frame, leaving this picture without a clear subject or purpose.

Slow shutter speed

Some blur that looks like missed focus could also be the result of using a shutter speed that is too slow. The resulting movement in the camera from pressing down the shutter button can blur out the fine details in your shot.

If your shot isn’t turning out right, take time to consider whether it might be because of one of these common problems before you throw your camera at the wall in frustration.

So how can Live View help me with focus?

Live View is a mode where you can see through your lens using the LCD screen on the back of your camera. It can be used to pinpoint your focus in situations when your subject isn’t moving and your camera is on a tripod.

The advantage of using the camera’s LCD screen is that you get a 100% accurate look at how the picture is going to turn out once you press the shutter button.

Using Live View on a camera for accurate focus - Focus Challenges and How Live View Can Help You Get Razor-Sharp Images

The camera is set up in Live View mode, ready for precision focusing.

Live view set to magnify the image five times

In Live View mode, you can focus up to 5 times magnification.

Live view set to magnify the image ten times - Focus Challenges and How Live View Can Help You Get Razor-Sharp Images

Some cameras can even zoom to 10 times magnification, helping guarantee that the focus is precise, even at f/1.8.

This technique is mostly useful at wider apertures when your camera’s autofocus may miss its target, even with using single point focus. When shooting at a wide aperture of f/4 or lower, the margin for error is very slim. With an extremely narrow depth of field, missing your focus by even a couple of centimeters could make those crucial details in your shot looks soft.

If you are taking a landscape photograph and are using a narrow aperture (such as f/16) to keep as much detail in focus, there is a lot more room for error.

What about using the single point focus mode?

For precision focusing, the single point focus mode goes a long way.

This is a mode where you can choose just one point for the camera to automatically focus with, rather than allowing the camera to consider the entire scene.

A good opportunity for using single point focus - Focus Challenges and How Live View Can Help You Get Razor-Sharp Images

Single point mode was a good choice here in order to make sure the focus was accurate on the orange insect.

When you need to nail a tough shot on a moving subject, single point focus is definitely the way to go. For stationary subjects, however, shooting in manual focus mode and using Live View to ensure your focus is tack sharp removes any potential for trouble. Even single point focus can have issues with accuracy in dark or low contrast situations.

Read more here: 6 Ways to Use Live View to Get Sharper Image and here 4 Tips for Using for Live View to Get Sharper and More Creative Images.

Less misses, more keepers

Discovering what subjects you like to photograph and chasing unique moments with a camera is a thrill. And practicing your focusing technique and using tricks like Live View focusing can help you make sure you come home with more and more keepers after every shoot!

The post Focus Challenges and How Live View Can Help You Get Razor-Sharp Images by Frank Myrland appeared first on Digital Photography School.


Digital Photography School

 
Comments Off on Focus Challenges and How Live View Can Help You Get Razor-Sharp Images

Posted in Photography


7 Tips to Help You Capture the Perfect Landscape Photo

08 Mar

Landscape photography is one of the most popular genres of photography and it’s easy to understand why. After all, every single person at some point in their life has probably looked at a landscape photograph of an epic scene with dramatic clouds and beautiful light and just thought, “Wow!” But as easy as it may seem, capturing stunning landscape images isn’t straightforward. Here are seven tips to help you capture the perfect landscape photo.

How to Capture the Perfect Landscape Photo

1. Find Your Perfect Spot

The starting point for any great landscape photo is your location. This, of course, means you have to start planning a shoot in advance to ensure you don’t waste time looking for it once you are on location. The first thing you need to do is decide what you are actually going to photograph. Is it a beautiful valley from lookout point? Or is it a historic castle perched on top of a cliff?

This might come from your research into the area you are visiting or it might be a place someone has told you about. It could even be somewhere that you have already been to, but now want to photograph.

Once you have an idea of where and what you are looking to photograph, you then need to look at the relevant maps to make sure that what you are planning to photograph is accessible. Then you need to delve in deeper and ensure that your view of that beautiful valley isn’t going to be obstructed by a big hill in front of you – this means using maps that show elevations. On top of all of this you also need to factor in the direction of the light and how that will affect your view.

Ideally you want to end up with an exact spot of where you would like to photograph and which direction you are intending to look. The good news is that in today’s digital world there are tons of options to help you find out this information from the likes of Google maps, and apps like Photographer’s Ephemeris or PhotoPills.

How to Capture the Perfect Landscape Photo

2. Light is Everything

Any sort of outdoor photography relies heavily on the light that is available. For landscape photography, light is even more vital. The most amazing scene in front of you will look uninspiring and mundane under a blanket of white cloud. If you want to capture the perfect landscape photo, then you need to ensure that you are working with the best light possible.

It’s no secret that most landscape photographers would recommend photographing in the early morning and late afternoon/evening. This is when you will get a low golden soft light from the sun that produces long shadows but that doesn’t mean you can’t photograph at any other time.

You just need to ensure that you understand and have planned for the light you intend to use. For example, it may be that you want to capture a particular side of a cliff. It may be that the only time it is lit by the sun at that time of year is late morning. The most important thing is understanding and trying to organize your shoot for the best time that you possibly can.

How to Capture the Perfect Landscape Photo

3. Compose Your Shot Perfectly

One of the best things about landscape photography is that you often have plenty of time to prepare and compose your shot. That big mountain in front of you isn’t suddenly going to move like an animal does in wildlife photography. As long as you have planned your shoot well and have arrived at your location early, you should have enough time to really fine-tune your composition.

The first thing I always do whenever I get to a location for a landscape shot is just to sit down and look around for 10-15 minutes, I recommend you try it. Not only does this help you evaluate the scene and think about the best composition, but it also helps you lower your heart rate (if you have had a long walk). It allows you to get over that initial awe that you often feel when you see an amazing landscape before you.

When you feel you are ready, compose the shot and take a few test photos while you wait for the perfect light. Think about the scene in front of you. Should you show more of the foreground? If so, is there a point of interest to capture the viewer’s eyes? Or are there interesting mountains or sky, in which case you need to show more of the background? As I said earlier, keep taking test photos and recomposing your shot until you feel that you have the perfect composition and then wait for the perfect light.

Clearly, on the odd occasion, you might have to work fast. For example, if you have a small break in a storm that allows the rays of the sun to get through, but the majority of the time if you have planned your shoot well, you should not be in a hurry.

How to Capture the Perfect Landscape Photo

4. Use a Tripod

For landscape photography a tripod is essential. If you want to capture the best possible photo, in the best possible light, you will have to use a tripod. The alternative usually means having to raise your ISO, which in turn means excessive noise in your photos that can affect the overall image sharpness.

But the other advantage of using a tripod is that it can give you more options for your photography. For example, you can use slower shutter speeds to capture movements of clouds or water or give you a more elevated or lower point of view.

Yes, they are a hassle to carry (you may want to invest in a good camera bag that you can strap your tripod to), but they are simply essential for landscape shots.

How to Capture the Perfect Landscape Photo

5. Use Graduated ND filter

Often the other most widely used accessory for landscape photography is graduated filters. One of the big challenges of landscape photography, especially in low light conditions is the difference in the light areas (the sky) and your dark areas (the foreground). For example, as it gets nearer to sunset, the sun drops lower on the horizon. This might mean that mountains obstruct it.

You then have a situation where your sky is really bright as obviously it is still being lit by the sun, but your foreground is dark because the light from the sun is obstructed by the mountains. So, if you expose for the sky (light areas or highlights) then your foreground will be too dark and if you expose for the dark areas (shadows) your sky will be blown out ( completely white with no detail).

To compensate for this difference in exposure settings needed, you can either use a technique called “exposure stacking”. That means taking multiple shots at different exposure levels and then merging them into one photo in post-processing (using layer blending or HDR techniques).

Or, most landscape photographers prefer to capture photos as correctly as possible at the time of taking the photo. In this situation, the only way to do this is by using a graduated neutral density filter, which balances out the difference in the brightness between the top and bottom of the photo.

How to Capture the Perfect Landscape Photo

6. Experiment With Shutter Speed

As mentioned earlier, one of the great things about landscape photography is that you often have time to take a few different shots. Even during the short time when it’s sunset or sunrise, you will have plenty of time to experiment with different settings and even a few different compositions. So don’t be afraid to really push your settings to extremes.

For example, set a really slow shutter speed of 30 seconds and if there is some wind you will see some amazing cloud movement streaks in the sky. Or if you are by the coast set a fast shutter speed to capture the waves crashing into the rocks. Play around with the settings until you have something that looks amazing and captures the scene perfectly.

How to Capture the Perfect Landscape Photo

7. Post-Production

Usually, the final step in any good landscape photo is some post-processing. This always seems to be a contentious issue as some photographers prefer to keep post-processing to a minimum and some like to really boost the image. Whatever your preference and way of working are, it comes down to personal opinion. But there are a few things that you should look at as a minimum.

For example, making sure your images are straight, clear of dust spots, and correcting the white balance should be a must. You may also want to tweak the crop of the photo if it needs it. Beyond that, ensuring a good contrast and boosting the saturation will help your landscape image jump out.

Generally speaking, every photo will benefit from some level of post-production. Some will need more and some less.

How to Capture the Perfect Landscape Photo

Conclusion

Landscape photography is an incredibly rewarding genre of photography. A great landscape shot often has the power to really capture the viewer’s attention which is why it’s no surprise that it’s also one of the most popular branches of photography.

The post 7 Tips to Help You Capture the Perfect Landscape Photo by Kav Dadfar appeared first on Digital Photography School.


Digital Photography School

 
Comments Off on 7 Tips to Help You Capture the Perfect Landscape Photo

Posted in Photography


DPRSplit will help pull more dynamic range from Canon 5D Mark IV Dual Pixel Raw files

14 Feb

RawDigger and FastRawViewer have released the beta version of an application called DPRSplit, designed for Canon 5D Mark IV owners. With DPRSplit, photographers can input a CR2 file from a Canon 5D Mark IV and then extract a second image from it, one with an exposure value that is about one stop lower than the original CR2 image.

This utility works only if the camera’s Dual Pixel Raw mode was enabled when the shots were taken.

Canon explains how this technology works on its website:

The Dual Pixel sensor’s pixels have a dual photodiode construction. This sensor design means the sensor can receive an A and B signals from the subject and to detect any phase differences between the two signals, allowing them to attain focus as part of the Dual Pixel AF system … During Dual Pixel RAW shooting, a single RAW file saves two images into the file. One image consists of the A+B combined image data and the other only the A image data.

Photographers benefit from this technology by using Canon’s Digital Photo Professional software, which enables users to make “microadjustments” to focus, bokeh shift, and reduce ghosting. However, the software doesn’t enable users to extract both images from the CR2 file separately—that’s where DPRSplit comes in.

With this utility, photographers get access to that second frame, which has half the light of the composite image. This means that, in essence, the camera is automatically capturing two shots, bracketed by about 1EV.

Extracted images are saved as DNG files for editing with any software that supports the format, so you can blend the images back together and get about +1EV more usable dynamic range. And since the exposures are captured simultaneously, you don’t have to worry about motion blur in your image. The only potential “issue” is a minor parallax error between the two frames.

DPRSplit beta 0.8 is free to download for Windows 7 or higher and Mac OS X 10.6 through macOS 10.13. As with any beta software, it is possible users will encounter bugs, but if you’re a 5D Mark IV user and you already shoot in Dual Pixel Raw, this one might be worth a shot.

Articles: Digital Photography Review (dpreview.com)

 
Comments Off on DPRSplit will help pull more dynamic range from Canon 5D Mark IV Dual Pixel Raw files

Posted in Uncategorized


Simplifying Manual Mode to Help You Take Control of Your Images

05 Feb

As the owner of a DSLR camera, you may have heard the pros encouraging you to graduate to Manual Mode or M on your camera’s dial. While there are different schools of thought on which mode to use, Manual Mode allows you the greatest control over your settings.

Simplifying Manual Mode to Help You Take Control of Your Images

So why are so many people still daunted by it and how do you take next step to start working with Manual Mode? In this article, I’ll try to simplify it for you so you can understand how to use it and take better images.

Simplifying Manual Mode to Help You Take Control of Your Images

Why Manual Mode?

If you use the other modes, the camera helps you figure out some or all of the settings. For example, if you choose Aperture Priority mode, the camera works out the shutter speed and vice versa if you choose Shutter Priority. So if it already does all this, why bother with manual?

Sometimes these automated or semi-automated settings are not always in line with your vision. They may even be incorrect or tricked by unique lighting situations. This is where you take back control by using Manual Mode. You tell the camera how you want your output and your photos to look.

Simplifying Manual Mode to Help You Take Control of Your Images

Understanding the Big Three

As stated before, with Manual Mode you have control over “everything”- but what exactly does this mean? Well simply put, there are three variables that determine the exposure of your photograph and Manual Mode puts you in control all of them. These variables are the aperture, shutter speed, and ISO, which together make up what is known as the Exposure Triangle. The balance of these three points of the exposure triangle is what Manual Mode is all about.

Aperture

Also known as f-number or f-stop, aperture refers to the size of the hole in your lens that lets in light. With a larger aperture (smaller f-number like f/2.8), more light hits your camera sensor. The reverse is also true (a larger f-number like f/16 lets in less light).

NOTE: It is often confusing for beginners because the smaller the number, the larger the hole. Just remember that the aperture is a ratio or fraction so f/2 is like 1/2 and f/20 is like 1/22. So remember that one half of anything is larger than 1/20th. 

Your control of aperture determines the depth of field in your photo – or how much of your image is sharp. A wider aperture (like f/2.8) results in a shallow depth of field. This means that only a part of your image is sharp, leaving the rest blurred or out of focus. Portraits are a good scenario to use wider apertures.

Simplifying Manual Mode to Help You Take Control of Your Images

Here a shallow depth of field has been combined with a fast shutter speed to get this shot.

If you want most of your image to be sharp, use a smaller aperture. Smaller apertures (higher f-numbers like f/16) are commonly used when shooting outdoor or landscape scenery.

Shutter Speed

Shutter speed refers to the length of time that the shutter inside your camera is opened and light is allowed to hit the sensor. So to double the amount of light, you can double the length of your exposure.

If you want to freeze motion, use faster shutter speeds to limit the amount of time that light hits the sensor. Conversely, if you want to blur motion in your scene, use slower shutter speeds (or long exposure photography).

Simplifying Manual Mode to Help You Take Control of Your Images

Taking control of your shutter speed can change your usual day shots. Here a long exposure was used to add a motion blur to the moving water.

ISO

To keep the definition of ISO simple, it is the way your camera controls its sensitivity to light. Increasing your ISO value allows you to shoot in lower light conditions without a tripod. Note that higher ISO values add digital noise to your image which affects image quality. Fortunately, most cameras now handle digital noise better that those of times gone by, so experiment with it as it can be quite useful.

Simplifying Manual Mode to Help You Take Control of Your Images

Higher ISO values can add noise (grain) to your image but it is sometimes necessary to do this.

How to use Manual Mode

Now that you are familiar with what Manual Mode controls, how do you start working with it? Well, after you decide what you want to shoot, pick one the points of the exposure triangle as your starting point.

To shoot a landscape, for example, decide how much you want in sharp focus. Let’s say you choose an aperture of f/16. After your aperture is set, turn your shutter speed dial until the exposure is balanced. You can use the camera marker on your exposure chart as a guide. Theoretically, you have just balanced your aperture and shutter speed.

Start with your ISO at 100 and take a shot. Is your photo too bright or too dark? Based on the results, adjust your settings and retry. When working with the exposure triangle, most times when you adjust one setting, you usually have to adjust one of the other two (in the opposite direction) to get a balanced result and a proper exposure.

Simplifying Manual Mode to Help You Take Control of Your Images

Conclusion

Manual Mode may seem daunting, but as you learn more about controlling light, it becomes easier with time. While nothing is wrong with using the other available modes of your camera, the ability to control the final output of your vision is a great skill to develop.

If you have any tips or tricks that worked for you when you were learning Manual Mode, please share with us in the comments below.

The post Simplifying Manual Mode to Help You Take Control of Your Images by Nisha Ramroop appeared first on Digital Photography School.


Digital Photography School

 
Comments Off on Simplifying Manual Mode to Help You Take Control of Your Images

Posted in Photography


4 Great Pieces of Camera Equipment to Help You Get Creative

08 Jan

A great way to broaden your horizons in photography is to try out something new. In some cases, that will be a different technique, and in others, this will be using new gear. In this article, you will see four different kinds of camera equipment to help you get creative.

The obvious new gear for you as a photographer is a new lens. But there are other options though, and these will be explored in this article. Of course, it’s not the best idea to get new equipment until you have thoroughly mastered what you already own. But there comes a time when further growth needs some investment. Luckily there are options for all budgets, and there are so many items to explore.

4 Great Pieces of Camera Equipment to Help You Get Creative

The tripod is my number one pick for camera equipment to get creative.

1 – Is the tripod the best camera equipment to get creative?

What the best purchase you’ll ever make as a photographer? If you were to say a tripod you’d not be far off, as bang for your buck this is the best value piece of equipment you can buy. Once you have learned to properly master the various techniques that a tripod opens up for you, it will be a permanent fixture in your bag.

With such an important item it’s worth spending a little more money to get good quality one, and it’s still great value for the creativity this will then offer. So what kind of photographic opportunities does having a tripod open up?

4 Great Pieces of Camera Equipment to Help You Get Creative

For this photo, I used an ND1000 filter, which allowed long enough exposure to capture motion in the sky.

  • Self-portrait – If you want professional level portraits, ditch the selfie stick and use a tripod. This will allow you to join group photos with your friends. Setting the camera on a tripod, and using the camera’s self-timer will allow you to put yourself in the frame.
  • Bracketing your photos – This means setting your camera up to take three or more photos in rapid fire. These photos will usually be one exposure value apart, so typically -1, 0 and +1 EV. This will allow you to experiment with HDR photography or the more advanced skill of digital blending.
  • Long exposure – Any kind of long exposure needs a good quality tripod. There are so many options available to you once you are exposing for one second or longer. Long exposure is the subject of multiple articles, examples of the types of photographs you can take are; Infrared, Astro-photography, light painting and long exposures of moving water.
  • A light stand – A tripod can double as a light stand when using strobes. Using off-camera flash is great for portrait photography, so this is yet another use for a tripod.

2 – Light up your world

4 Great Pieces of Camera Equipment to Help You Get Creative

A strobe combined with a radio trigger is a great creative tool.

As photography is the art of using light to create images, so the strobe is a very good piece of camera equipment to help you be creative. Take care to make sure the strobe is compatible with your camera, the wrong brand can fry the electronics in your camera.

If you are wishing for the best value you can look at the second-hand market, as getting more than one strobe will give you many more options. The title here is lighting gear, as a strobe on its own won’t give you maximum creativity. The purchase of radio triggers and receivers, for doing off-camera flash is also a great idea.

4 Great Pieces of Camera Equipment to Help You Get Creative

The use of color gels in this photo adds more interest to this portrait.

Tips for using flash

  • Enhance those details – Use a strobe (speedlight) to light a surface such as bank notes, or a brick wall. With the light coming in from the side you will get a lot more texture and detail in your photo.
  • Throw shadows – Use your strobe to throw scary shadows, for the night is dark and full of terrors! Alternatively, you could make a heart shape from a ring, by placing it on a book.
  • See the world in color – The addition of color gels to the front of your flash can make for some nice creative photography. How about experimenting with complementary (opposite) colors? This can work nicely for portrait photos, or you can use the gels to color a background wall.
  • Studio level photos – This is an entire genre and whether you’re interested in portrait photos, or still life photography you could do a lot worse than checking out the strobist.

Do you want something to go with your lighting gear that’s travel size? The Rogue Flashbender is a great off-camera lighting accessory that works both as a soft-box, and as a snoot.

3 – Get that creative filter on

4 Great Pieces of Camera Equipment to Help You Get Creative

There are so many filters to choose from, and they are among the most affordable pieces of camera gear.

Prior to Instagram adding a filter to your photo meant adding something to the front of your lens.  This is really camera gear to get creative with. Let’s take a look at some of the most important lens filters you can use in photography.

  • Circular Polarizing Filter – This is often referred to as a CPL. This has the effect of polarizing the light, so only light from one direction enters the camera. This can be used to either enhance reflections or eliminate them from reflective surfaces such as water. The CPL will also give color images more punch, and on cloudy days you can adjust the filter by rotating it and see the clouds pop out of the frame.
  • Neutral Density Filters – As above, these are commonly referred to in shorthand as ND filters. They have the effect of reducing the amount of light coming into the camera. This is useful when you wish to use a large aperture on a bright sunny day. The filters come in gradients, typically ND2, ND4, and ND8. ND2 is the weakest of these filters. At the more extreme end of the scale are filters like the ND110, or even the ND1000 (10-stops). These more extreme filters are used by landscape photographers for daytime long exposures.
  • Graduated filters – The most common of these are the graduated ND filters, used by landscape photographers to balance the light across the frame. The next most common in this category are sunset filters, that color half the sky in a specific color such as orange or red.
  • The best of the rest – Black and white film photographers will often use red, orange, or yellow filters to enhance the contrast in their scene. Another popular type of filter is the starburst, that makes light sources appear like stars.
4 Great Pieces of Camera Equipment to Help You Get Creative

Infrared photography can be great fun to experiment with.

4 – Specialist camera equipment

In addition to the above, there is some very good niche specific camera equipment to get creative with. These will allow you to take outstanding images, with the effect produced in camera.

  • The Pixelstick – This is a great tool for light painting that will take your photos to a different level. This allows you to fully control the light that’s emitted, and even program in your own patterns. The cheaper variant is to use a glow stick, or fairy lights attached to a stick. The ability to fully program the light source though makes the pixelstick a creative beast.
  • A glass ball – A personal favorite of mine is the glass ball. This can be used for refraction photography and could be referred to as an external lens optic that you carry around with you. If you think of this as a lens, it’s, without a doubt, the cheapest lens you’ll ever buy. Those that want to learn more can read my previous article on this, or perhaps follow the links in my bio below.
  • The dripkit – Have you ever tried your hand and water drop photography? If you haven’t you really should, it’s a ton of fun. The next level up here is the dripkit, which allows you to control every aspect of these types of photo. With the dripkit, you can now create some out of this world splash photography. Truly this is a camera equipment accessory to get creative.
4 Great Pieces of Camera Equipment to Help You Get Creative

This photo of Boston was taken through a glass ball.

Which gear is most interesting to you?

There are so many choices when it comes to camera equipment to help you get creative. The choice of gear you use is down to personal taste.

Here at dPS, we would love to hear your experiences. Have you tried any of the above pieces of equipment? Is there any other gear you’ve used that’s not mentioned here, something that really took your photography in a new direction? Let’s hear from you whether you’ve already tried any of these, or if you are thinking about taking the plunge.

This photo was taken in a single frame. The strobe was used to throw a self-portrait shadow on the wall. The tripod was used as this is a long exposure, also freeing me up to both light paint, and be in the frame. Finally, the light painting was produced using a pixelstick.

The post 4 Great Pieces of Camera Equipment to Help You Get Creative by Simon Bond appeared first on Digital Photography School.


Digital Photography School

 
Comments Off on 4 Great Pieces of Camera Equipment to Help You Get Creative

Posted in Photography


9 of the Best Apps to Help You Do Awesome Mobile Phone Photography

05 Nov

They say the best camera is the one that you have with you. Even though I love my digital SLR, quite frequently, I shoot with my smartphone. This is why mobile phone photography is so popular.

There is a collection of stunning oak trees near where I live. Each time I go there, the trees look different based on the weather and time of year. Did I need an expensive $ 5,000 camera to get these pictures? No, because I know some tricks for shooting with my smartphone.

9 of the Best Apps to Help You Do Awesome Phone Photography

For these types of images, it doesn’t matter what type of camera you have. If you’ve got a camera, the inspiration, and the time, you can create some great images with your smartphone. Great images come from a good eye and a basic knowledge of composition and light. If you practice with these elements, you can take awesome pictures with any device even if it’s a phone camera. In this article, I will give you some of my favorite apps that will inspire you to have some fun with the camera that is always with you.

Is the era of the compact camera coming to a close?

9 of the Best Apps to Help You Do Awesome Mobile Phone Photography

Either people shoot with their smartphones or they use an advanced digital SLR.  There’s not much in between. Why is this happening?

For the general public, smartphones have more capacity and are easier to use than the current lower-end point and shoot cameras on the market. People are getting better results with less effort. When someone asks for a recommendation on a camera and they only have a couple hundred dollars to spend, I usually recommend that they use their cellphone.

As a photography educator, I find my iPhone to be easier to use and more consistent across multiple models. Some Android models work differently and don’t have the same capabilities as other phones. Some apps don’t work on all Androids, so please take that into account when trying out the apps mentioned in this article.

Smartphone-workshop 9 of the Best Apps to Help You Do Awesome Mobile Phone Photography

The current compact cameras are more menu-driven than most people can handle. And if their photography skills are not up to snuff, it is hard to get past the automatic modes on those cameras. I have had clients in my classes with these lower-end compact cameras where the manual modes do not work at all. These little gadgets are almost as complicated as the advanced digital SLRs, but without the quality results. The only things that are of benefit are their size and price point, but even then it means a smaller lens, a smaller sensor and diminished results.

Smartphone photography

I discovered smartphone photography after attending a professional photographic trade show. I took a little seminar on an app called Hipstamatic for iPhone and I was hooked. I was no longer a photo snob! All of a sudden, I realized I could create stunning photos in moments that would take hours in Photoshop.

Over the next year or so, I shot thousands of pictures on my smartphone and I got really familiar with the ins and outs of this type of photography.

San Simeon Hipstamatic - 9 of the Best Apps to Help You Do Awesome Mobile Phone Photography

I also realized this was the future of social media and photography for the general public. You could create little masterpieces that were appreciated online. They were not high resolution and the use of these images was limited, but that works just fine for most people. As a photographer, you don’t want to post images that can be stolen and easily used somewhere else, so the smartphone low-resolution image size is perfect.

I knew then there was a huge future in this art form for the general public. I continued to research new apps, reading everything I could and staying updated. Here are some of my favorite apps for mobile phone photography.

Shooting apps

Camera+Camera+ for IOS

This app allows you to control separate focus and exposure points, one of the secrets to good mobile phone photography. You can also use additional features such as selective focus, exposure compensation, and exposure lock. I use Camera+ on every picture I take.

Unfortunately, Camera+ is not available for Android.

Big Sur-iPhone  9 of the Best Apps to Help You Do Awesome Mobile Phone Photography

ProshotProShot – for IOS and Android

This app has all of the auto, program and manual modes that Camera+ has and is available for both IOS and Android (as well as Windows phones). With ProShot you have full manual control over exposure, ISO, and shutter speed. The most important aspect here is the ability to separate focus and exposure like you can with the Camera+ app.

My go-to editing app

Snapseed

Snapseed

This app is a must for both IOS and Android users! Snapseed is a go-to app for processing photos. It has such an easy interface, that you can make it part of your normal workflow and literally do your editing in seconds when taking a shot with your mobile phone. There are so many options in this app, but my favorite is the selective contrast and exposure settings. It allows you to go into the image and change exposure, contrast, and saturation in specific parts of your picture. Other settings such as grunge, HDR and Retroux let you create a variety of special effects.

Snapseed is available for both iPhone and Android.

Graphic Apps

wordswagWordswag – for IOS and Android

Are you looking for a simple text app where you can create text overlay or a watermark? Wordswag will help you create professional looking graphics like this in just seconds!

wordswag 9 of the Best Apps to Help You Do Awesome Mobile Phone Photography

Retro Apps

HipstamaticHipstamatic –  for IOS
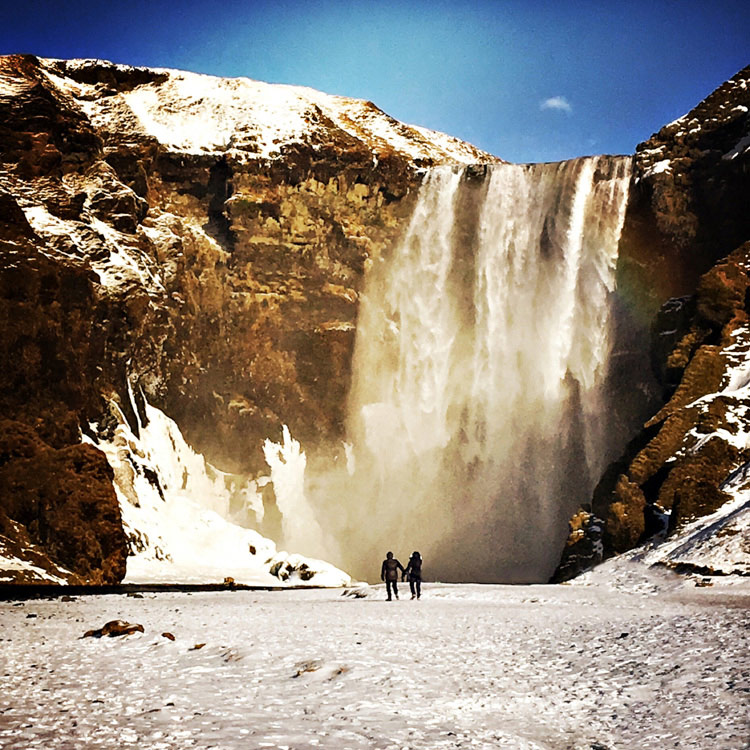
This app allows you to select “film” and “lenses” in the “classic mode” before you shoot to create the perfect effect. Hipstamatic also added a modern interface with the ability to change your “lenses” and “filters” after you have taken the shot. Find one combination you like to create your own shooting style.

Hipstamatic - 9 of the Best Apps to Help You Do Awesome Mobile Phone Photography

Retro Camera – for Android

Retro

With Retro Camera you can take Hipstamatic-style images with five cameras, five sets of vintage vignetting, film scratch and cross-processing options.

Creative art apps

 Prisma – for IOS and Android

Prisma

Here’s a fun app that will turn your images into works of art in seconds. Lots of different options to create in this app. Each option in Prisma is preset and instant with very little custom editing needed.

9 of the Best Apps to Help You Do Awesome Mobile Phone Photography

Diana

 Diana – for IOS and Android

This app is an easy way to create double-exposure images in seconds. You can create images by selecting specific photos to combine, or you can randomly let Diana select for you. It works better if you have a vision in mind before working with this app, but sometimes a random selection works as well!

Diana app - 9 of the Best Apps to Help You Do Awesome Mobile Phone Photography

Waterlogue – for IOS and Windows 10 devices

Waterlogue

Create beautiful watercolor style images with Waterlogue. Select from a number of different styles to create your own masterpiece!

waterlogue

Conclusion

The beautiful thing about photography with the smartphone is that it expands your creativity and can even help with your Digital SLR photography. You can use more than one app to create even more customized effects. Take each image through a series of apps before getting the final look you want. You never know where you’re going to end up, and you might just like that.

What are your favorite Smartphone apps? Has it changed the way you shoot with your Digital SLR? Which of these apps is going to become a regular part of your smartphone photography workflow?

The post 9 of the Best Apps to Help You Do Awesome Mobile Phone Photography by Holly Higbee-Jansen appeared first on Digital Photography School.


Digital Photography School

 
Comments Off on 9 of the Best Apps to Help You Do Awesome Mobile Phone Photography

Posted in Photography


6 Tips To Help You Shoot In Low Light Without a Tripod

31 Oct

Most photographers will tell you that a tripod is invaluable and is usually the favorite accessory that they carry with them. While a tripod remains an essential piece of equipment, especially for low light photography, it is also usually the one piece of camera equipment that draws the most amount of attention.

In some scenarios and places, you won’t be allowed to use a tripod so you have to find other ways of utilizing your camera to take the photo you want. Here are six tips to help you capture photos in low light without a tripod.

6 Tips To Help You Shoot In Low Light Without a Tripod

#1 – Raise the ISO

The first option that most people will turn to is to raise the ISO setting in the camera. Principally, the ISO is the sensitivity of the camera’s sensor to light. The higher the ISO the more “sensitive” the sensor becomes to light which in turn means you can capture more detail in low light conditions. In simple terms, the darker your scene is, the higher you need your ISO. But before you start whacking your ISO up to 25,600, beware that raising the ISO also has a detrimental effect on the image.

The higher your ISO setting, the more noise you’ll see in your photo. Too much noise and your photo will begin to start looking soft. The key to being able to use ISO effectively is to balance it with other elements such as shutter speed and depth of field to be able to capture the shot you want.

Always aim to have your ISO as low as possible. Also, make sure you test your camera at different ISO settings before you use it for an actual photograph you intend to take.

Taken at ISO 4000. It was the only way that I was able to capture a photo in this dark tunnel.

#2 – Use Mirror Lock-Up and Live View Mode

Have you ever taken a photo with a tripod, with good depth of field, at a slow shutter speed only to see the final photo on your computer is slightly blurred? This is one question that has often baffled novice photographers but there is a simple solution.

When you press the button to take a photo, the mirror inside the camera flips up out of the way. This mechanical process can mean that there is a slight movement in the camera, which in turn causes a small shake, hence the blurred photo. To get around this problem, you can set your camera to Live View mode (when you get a live picture on the display of your camera) which essentially flips the mirror up permanently (until you switch off Live View mode) and means that when you take the photo you don’t get the movement the camera. Some cameras also allow you to “lock the mirror” without using the live view mode (so using your viewfinder).

This issue would be the same when photographing without a tripod in low light conditions. So in this scenario, set your camera to Live View mode/mirror lock-up to avoid that small, unwanted camera shake.

6 Tips To Help You Shoot In Low Light Without a Tripod

#3 – Use High-Speed Burst Mode

One of the great innovations of modern DSLR cameras is how much faster you can now take photos in burst mode. Using a high-speed burst mode is a really good trick to capturing decent photos in low light. But this only works when your shutter speed is just below the threshold of you shooting handheld.

For example, if you can hold your camera steady enough to take a sharp photo at 1/60th, you may be able to get away with using high-speed burst mode and using 1/45th or even 1/30th of a second. This is because with high-speed burst mode you have less time in between photos for the camera to move and often you’ll find one or two photos sharp enough for use in the middle of the burst.

Just remember to use high-speed burst as some cameras also offer low-speed burst option and aim for a good number of photos. You’ll also be well advised to try out this trick a few times to find out what your threshold is before you use it in a real-life situation.

6 Tips To Help You Shoot In Low Light Without a Tripod

#4 – Find a Ledge or Wall

Often your best bet for capturing photos in low light is to find a ledge or wall that you can rest your camera on. Not only does this mean you can have your settings at pretty much exactly what you would with a tripod, but you can also often find interesting camera angles which are different to traditional photos you’d see taken with a tripod.

One thing to be aware of is that you may need to raise your lens up slightly. Otherwise, you may see the ledge/wall in the foreground of your photo. You can use anything you can find or have with you to slightly tilt the lens upward.

6 Tips To Help You Shoot In Low Light Without a Tripod

I found a small ledge in this old church that I was able to rest the camera on to take this photo.

#5 – Use Your Bag

Over time you’ll begin to pick up tricks and techniques that you will use in your photography. One of the most useful that I have found has been to simply use my backpack. Put it on the floor and put your camera on top and you have a quick tripod without all the attention that a tripod brings.

This trick has been really useful in buildings and places where tripods are not allowed like museums or galleries. You can put your bag on benches and even rest it on a branch of a tree (as I did once).

6 Tips To Help You Shoot In Low Light Without a Tripod

#6 – Train Yourself

Like anything else photography is something that you can improve your skills. This is also true of actually being able to hold the camera steady. So start by practicing your stance and make sure that you are holding the camera as securely and comfortably as you can.

Work on your composure and try to teach yourself to relax when you are going to take the photo. By practicing over and over again you may find that you actually can hold the camera at slightly slower speeds than you were able to before.

6 Tips To Help You Shoot In Low Light Without a Tripod

Conclusion

There’s no question that if you want to capture the best possible photos at the best quality in low light conditions, then a tripod will give you the best results. But in situations when that might not be possible, using the tips and tricks above might help you capture the shots you need.

Anything else? What tricks do you use to capture photos in low light conditions without a tripod?

The post 6 Tips To Help You Shoot In Low Light Without a Tripod by Kav Dadfar appeared first on Digital Photography School.


Digital Photography School

 
Comments Off on 6 Tips To Help You Shoot In Low Light Without a Tripod

Posted in Photography


 7 Photography Exercises To Help You Be a Better Photographer

23 Oct

Photography is like most other professions or hobbies in that you will improve and get better with training. But, like other skills, you need to try and set yourself a structure and actively try and improve the areas that you may not be good at. Sure, like anything else, there are those that are naturally skilled at seeing a scene and pre-visualising a shot, but the following photography exercises will help anyone become a better photographer.

 7 Photography Exercises That Will Help Make You a Better Photographer

#1 – Use a Film Camera

Like most photographers who grew up in the 90s, my first introduction to photography was at college and university using film. I spent hours in the darkroom developing the photos I had taken. Whilst, like most, I love the romantic notion of shooting with film, the reality is that digital photography offers so much more freedom.

However, the one downside of digital photography is that it also allows you to snap away without really having to worry about the number of photos taken. Not like using film where literary every photo taken cost a few cents.

But also, without the ability to review the photo instantly on the back of your camera, it meant that you had to trust your instincts and ability for capturing a great photo. All of this combined to ensure that you really had to think before taking a photo – thus meaning you had to be better at seeing something and capturing it.

 7 Photography Exercises That Will Help Make You a Better Photographer

If you have been photographing for a while and want to take your skills to the next level, get or rent a film camera and spend a while using it. You may find yourself pleasantly surprised when you go back to your DSLR camera.

2 – Set Yourself a Limit of Six Photos

Another way that you can train yourself to make every shot count is by setting yourself a limit on a photo session. Say you are planning on photographing a local market, set yourself a limit of six shots for the day only. So if you reach six you’ll need to delete one before taking any more.

The reason for this is that you will have to become really analytical about your photos. Setting yourself a small shot list can help ensure you capture six photos with variety that capture the whole experience rather than just a small element.

 7 Photography Exercises That Will Help Make You a Better Photographer

As an example, if you were photographing a market you could set out your six shots as such:

  • A great portrait of a market vendor.
  • An environmental portrait (i.e. when a vendor is making/cooking something or making a sale).
  • A close up of the produce on sale.
  • Wide-angle shot of the venue.
  • Other people at the market (i.e. tourists enjoying their day out, a performer, etc.).
  • Something unique about the market (i.e. it could be a unique plaque or sign, or a famous old stall).

You would then work through your shot list and aim to capture the best photo that you can for each one and in theory replacing each shot you have taken with something better. You will then end up with six fantastic photos from a shoot rather than 300 mediocre ones. Do this enough times and you’ll notice that your “great” photos from a shoot will begin to rise.

Do this enough times and you’ll notice that your number of “great” photos from a shoot will begin to rise.

 7 Photography Exercises That Will Help Make You a Better Photographer

3 – Photograph What is Least Uncomfortable

Every photographer has something that they are the least comfortable with photographing. For you, it might be something technical like photographing in low light conditions. For others, it might be capturing landscapes or a fear of photographing people.

Whatever you are least comfortable with, you should aim to improve that. Not necessarily because it is something you will use in your branch of photography, but because it will teach you new skills that will become useful in your genre of photography.

For example, you may be a wedding photographer and decide that you are going to improve your sports photography. That genre requires you to work fast as the action moves quickly, so learning skills that can help you do that will no doubt come in useful at weddings.

Trying a new aspect of photography will also give you a glimpse into something different and you never know, you may end up loving it.

 7 Photography Exercises That Will Help Make You a Better Photographer

4 – Work With a Managed Stock Agency

New photographers often ask me what I would recommend they do when starting out in travel photography. I always respond that I think they should get a portfolio together and approach a managed stock agency. The key word in the previous sentence is “managed”. So what is a managed stock agency? Fundamentally there are two types of stock photo agencies. There are ones that you simply upload photos and as long as they pass technical quality checks (i.e. there are no chromatic aberrations, they are sharp, no nudity, etc.) they will be accepted regardless of composition or subject.

Then there are managed stock photo agencies where not only do your photos go through the same rigorous quality checks, but someone at the agency also edits them. This means someone might look through the 100 photos that you have submitted and choose 20 to go up for sale on their site. They obviously choose photos that they feel will sell and this is a really good way to gauge how sellable your photos are and also if you are improving over time.

 7 Photography Exercises That Will Help Make You a Better Photographer

For example, for your first few submissions, you may find that the agency accepts an average of 10 photos but by your 20th submission that average might be getting to 30 or 40. This shows that you are improving.

5 – Shoot in Difficult Conditions

The general rule of photography is that you photograph certain subjects at certain times to be able to capture the best photos. For example, landscape shots will be shot during the golden hour, portraits on overcast days, food outdoors in the shade, and so on. While there is a reason for these rules and wherever possible you should aim to follow them as you will capture great photos, sometimes breaking them will give you far more dramatic photos.

But photographing in harsh conditions like midday for outdoor photography, low light conditions or backlit for portraits, will also mean you have to think outside the traditional photography box and work out how you can tackle the difficult conditions. Not only will this help you gain valuable skills but it may also come in handy when you are on a real shoot and encounter these conditions.

 7 Photography Exercises That Will Help Make You a Better Photographer

6 – Work on a Brief

Another great exercise to improve your photography is to work on a brief. You can either set yourself a brief or you can ask someone you know to set you one, but treat it as a real-life brief that you might get from a client. Get the person setting the brief to give you as much detail as possible and when you have taken the photos, present them to him as if he is the client.

Get their feedback and if you need to shoot things again, do so. The great thing about working on a brief is that you have a very specific remit of what is needed and as such you will find yourself being much more focused. If you work with a stock photo agency then you can always ask them for a brief as they will often have specific photo needs that they will be more than happy to share.

 7 Photography Exercises That Will Help Make You a Better Photographer

7 – Don’t do any Post-Production

I have lost count of the number of times I have heard someone say, “I’ll fix that in post-production”. The purpose of post-production should be to enhance your photos rather than create them. You should always aim to get as much right when you are taking the photo rather than trying to fix it in post-production later.

By setting yourself a photography exercise that you won’t use any post-production you will have to try and get the photo right at the time of shooting. So if there’s a rubbish bin (garbage can) in your frame you’ll need to try and find a way to crop it out. Or if the light isn’t great you’ll need to wait until it is.

By removing the safety blanket of post-production you will find yourself getting better at taking photos.

 7 Photography Exercises That Will Help Make You a Better Photographer

Conclusion and Time for Action

The exercises above are not the only options. As you progress through your photography journey whether that is a profession or a hobby you will come up with your own photography exercises that you can do. The key is to constantly look to improve and never stop learning.

Have you got any other good photography exercises? Please share them below.

The post  7 Photography Exercises To Help You Be a Better Photographer by Kav Dadfar appeared first on Digital Photography School.


Digital Photography School

 
Comments Off on  7 Photography Exercises To Help You Be a Better Photographer

Posted in Photography