Halloween. You know it for its pumpkins, ghosts, spooks, the color orange, annoying trick-or-treaters, costumes, masks and, of course, a plethora of candy to make your tummy hurt like crazy. You know it less for Halloween photography, but it turns out that this celebration is a wonderful opportunity for specialized photography. The absolute, best aspect of Halloween is the sheer Continue Reading
The post The Ultimate Guide to Halloween Photography appeared first on Photodoto.
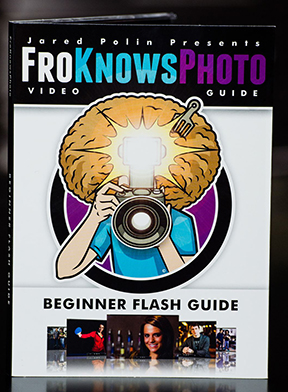
It’s a little past 4:00 a.m. and I just finished watching all three hours of the just-released Fro Knows Photo Beginner Flash Guide. A lot of photography-related books and videos come across my desk, and my favorites are always those that have something to offer not only the beginner, but the advanced photographer as well. This is absolutely one of them. In this follow-up video to his Fro Knows Photo Beginner Guide, Jared Polin (the aforementioned Fro) leads you on an off-camera flash adventure, taking you from hopelessly intimidated to supremely confident in a style all his own. Not bad for a three-hour tour. With expert assistance from friend and professional photographer Adam Lerner, viewers have a front-row seat to everything from breaking down the contents of an affordable-but-effective light kit, to a behind-the-scenes look at six professional-grade photo shoots, all lit with a single speedlight and a convertible umbrella.
The Beginner Flash Guide starts literally from the ground up, planting a light stand firmly on the floor and explaining not only the contents of the light kit, but how those five or six pieces all work together to achieve professional-quality lighting without breaking the bank. Jared launched FroKnowsPhoto.com in 2010– a brand and a website that quickly became synonymous with making advanced photography techniques accessible not only to professional photographers, but also to beginners, hobbyists, and enthusiasts. The Beginner Flash Guide maintains and elevates that educational philosophy, taking what can be the confusing language and landscape of photographic lighting, and essentially handing the viewer a dictionary and a road map.
Among the nuts and bolts laid out are: The Lighting Kit Explained, Four Ways to Trigger Your Flash, Flash-to-Subject Distance, How Shutter Speed Affects Ambient Light, Understanding Flash Zoom, and Quality of Light. Plus, thirteen “Quick Tips” interspersed throughout the lessons cover some minor and some not-so-minor details on topics ranging from which rechargeable batteries you should use (lithium) to how best to interact with your subject. Word to the wise– make sure you take notes– they’ll make retaining and applying the information to your own photography much easier. An additional, non-video element is the included Flash Photography Field Guide– a six-page PDF designed to be printed and tucked away in your camera bag for quick, easy reference. The field guide does a great job of summarizing the basics covered in the videos, as well as offering suggestions for overcoming some real-world lighting challenges.
Not everyone is lucky enough to have a mentor or someone to show them the ropes when they are first trying to learn this stuff. The BFG can and will fill that void. But even if you already have a firm grasp of off-camera flash principles– or just need a refresher– the lessons in this video guide can enhance and build upon what you already know.There will always be trial and error when it comes to learning and experimenting with photographic lighting. The Beginner Flash Guide, though, can help you minimize the error.
Get your copy of the Fro Knows Photo Beginner Flash Guide here.
Post originally from: Digital Photography Tips.
Check out our more Photography Tips at Photography Tips for Beginners, Portrait Photography Tips and Wedding Photography Tips.
Fro Knows Photo Beginner Flash Guide – Review
The post Fro Knows Photo Beginner Flash Guide – Review by Jeff Guyer appeared first on Digital Photography School.
If so, we’ve just released a great pet photography guide on our
sister site snapnguides.com you’ll definitely want to check out.
It is called Sanpn Paws and it’s all about creating adorable photos of your furry little friends.
As an Early Bird special… it’s just $ 7 for a limited time!
Pet photography presents the photographer with a load of wonderful opportunities and some real challenges.
On the one hand pets are not self-conscious and can be really playful – but on the other hand they are not always known for taking direction well and can take a lot of patience to work with.
This mini-guide will equip you to work through the challenges and create some beautiful images.
It will teach you to:
pose your pets to show them off at their best
position yourself and leverage backgrounds
choosing locations
use the right camera and gear
shoot moving subjects
make the most of light – both indoor and outdoor with natural and artificial light
get your pets attention
Snapn Paws is designed to be a quick read that gets straight to the point and present you with actionable information that you can apply straight away.
While it’s focused on photographing cats and dogs, there’s no
reason you can’t apply what you’ll learn to other pets as well.
About the Author
Snapn Paws is written and beautifully illustrated by Erin McNulty. Erin’s twin passions of photography and animals made her the perfect author for this eBook and makes her a wonderful pet photographer (it is her business).
Erin has been featured in in numerous magazines, newspapers and TV-shows for her pet photography and you may have even seen some of them on the packaging of pet food in your supermarkets.
She’s a great teacher and her images in the book will give you loads of inspiration.
Grab Your Copy Today and Save 33%
As an early bird special you can grab your copy of Snapn Paws today for just $ 7.
Get yours here today and start taking beautiful shots of your cats and dogs.
Post originally from: Digital Photography Tips.
Check out our more Photography Tips at Photography Tips for Beginners, Portrait Photography Tips and Wedding Photography Tips.
Your Essential Guide to Photographing Cats and Dogs: Snapn Paws
The post Your Essential Guide to Photographing Cats and Dogs: Snapn Paws by Darren Rowse appeared first on Digital Photography School.
Our friend Margo (dancin’ on the right there) has a real gift for making gifs.
She can crank out a masterful gif, in a jiff.
Margo has made some jolly good gifs for the Photojojo Shop (and points beyond).
So, we grabbed our most giferiffic questions, and sat her down to gab gifs.
We’ve gathered her answers in The Ultimate Gif Guide. Read it to find how she makes gorgeous gifs, how you can too and just how to pronounce “gif” in the first place.
Read The Ultimate Gif Guide, Then Go Forth And Gif
Q: How do you plan out your gifs?
A: I start off by thinking about what I want to happen. How the gif should start and end, and what will happen in between? Do I need an extra set of hands or any other tools?
I keep a few items in my studio- glue dots, tape, fishing line, just in case I need to keep wiggly objects in place or make other objects levitate.
I try to keep it simple, but fun. Cuz gifs are fun. 🙂
Q: How’d’ya take photos that’ll work well as a gif?
A: The key here is consistency. I’ve learned my lesson trying to put together a crazy hodge podge of images (that just doesn’t work).
Now when I’m making a gif, I try to make sure my lighting, focus, and camera placement will stay the same. If I accidentally move the camera, I’ll start over from the beginning. Sometimes it’s a pain, but it makes it easier in the long run.
If you’re going for a stop-action gif, tripods are your best friends. Seriously. Unless you have rock-steady hands, which I don’t.
Working in the studio makes it easy. I know my lights, background, and focus will be spot on. Working outdoors, and with models, gets trickier. I try to find a nice shady spot to shoot in, and ask my model to stay as still as possible… which is also harder than it seems.
In any case, try to minimize the variables! Keep the camera on my tripod if you can, and shoot wider than you normally would, so that you can crop in and have room to line things up during post-production.
Q: Got any pro tips for shooting a stop motion gif?
A: How you take your photos totally depends on how smooth you want the action to be.
If you want it to be real smooth, like video smooth, just move the objects a tiny bit at a time. This means more photos, and more editing, but smoother transitions between frames.
If you like the choppy look, you can make larger movements and take less photos.
Q: How do you turn your photos into a gif, on a compy?
A: This part can be as simple or complex as you want it to be, and also depends on how consistently you shot the images.
1. Open the images you want to use in Photoshop, and resize them to a smaller resolution. *Don’t crop or make major edits at this point.* Simply resize.
Since gifs end up being pretty small for the web, and my camera takes really large file size photos, I do this first. It just makes it easier on me and the computer. For the web, the resolution only needs to be 72dpi, so start there.
2. Copy each image onto a new document, pasting them in layers one at a time. With each new layer, lower the opacity so that you can see the image layer beneath it. Use “free transform” to move, resize, and line up the layers.
3. Once you have all the layers in place, crop and edit. By making adjustment layers to the entire document, you make sure to keep the consistency you started with (and don’t have to remember the exact adjustments from image to image).
Bonus Step. SAVE YOUR FILE every few changes. The WORST is when you’ve spent forever editing something, then your computer freezes. It’s made me want to cry.
4. Once it’s all edited, I use the “Create Frame Animation” feature of Photoshop CS6 (free trial here). It creates a frame from each layer. Then set the speed and save it for the web.
This site has a great step by step for making gifs, if you’ve never tried it before.
Q: How do you turn your photos into a gif, on a phone?
A: There are a few apps specifically for gifs.
Gifboom lets you upload from your camera roll, from the web, from a video or from another gif, which means you can make anything you want. You can also add music to it right in the app.
Cinemagram is really great for creating gifs in real time, especially ones where you also want to involve an optical illusion, like your body walking away with out your head.
You can also take still photos on your phone, then using iMovie make a stop action movie. Save that, upload it to Instagram and bam! Watch out world.
Q: What’s the best way to share your new gif?
A: Tumblr is a great way to share gifs, as long as they meet their specs (see below). Be like these guys and make an entire tumblr just for your amazing gifs!
You can make a real-time gif using Vine (just tap your finger quickly as you record).
Or if you want to add it to Instagram, just export your gif in photoshop as a movie. Then send the file to your phone.
Q: Posting to Tumblr can be a pain. What’s the secret?
A: Tumblr is one of the best places for gifs but they have to be a certain size to upload and play correctly. They need to be under 1mb and no more than 500px wide.
Best way to achieve that – First, check your image size. Make sure the resolution is 72dpi, and the width is 500 px or less.
Another way to reduce file size is to reduce the number of colors the gif is using when you are “saving for web.” Instead of 256 colors, try 128 or even 64. Sometimes that makes the gif look strange, but sometimes it looks alright and that does the trick!
If it’s still too big, you may simply have too many frames. Try reducing the number of frames in your gif. Less frames means choppier transitions, but might be the only way to get that gif onto Tumblr.
Q: Once and for all, is it pronounced “gif” or “gif”?
A: Oh man. Such a debatable issue!
I believe the g is actually silent. So I just call them “ifs.”
Related posts:
Ask Photojojo: Photojojo’s Photo Pros Answer All Your Questions! Have you ever wondered what Photojojo’s deepest dreams and desires…
This Guide to Birth Photography was written by Lori Peterson
Few things in this world are as joyous as welcoming a new baby. Seeing such a tiny and perfect little human being stirs emotions in everyone. It’s no wonder that there has been a significant rise in the number of photographers offering their services not only for pregnancy and newborn images, but for photographing the birth itself as a way to complete the story of that particular moment in time.
A Guide to Birth Photography
1. You are on Call
If you are interested in birth photography you will want to make sure that you have the time to set aside for it. Births can be short or they can be very long. There is no set time for them (not even with a cesarean because a doctor’s schedule can change if there is an emergency!). Make sure you have arranged for child care for your own children and that you can clear anything off your schedule if the need arises.
2. You Cannot Set the Scene
Nurses, doctors, techs, interns are all walking in and out of the room. You cannot ask them to stay out so you can set up the perfect shot. You have to just go with it and work within the space you have and around the people in the room.
3. No Flash Photography
Mom-to-be is working hard. Flash is a distraction. Enough said.
4. It’s not the time to Learn about Medicine or ask a lot of Questions
Asking questions about procedures, medications, or input of your opinions on childbirth or what they are doing is not necessary or needed. You are there to document, not to quiz medical professionals.
5. If at all possible, arrange to meet the Doctor before the actual Birth
Meeting the doctor ahead of time can give you an opportunity to talk to them and find out if they have any particular rules for photographing or recording labor and birth.
It also gives you a chance to talk to them about what happens if your client has a cesarean. Some doctors will arrange it with the anesthesiologist to get the photographer back into the OR in non-emergency cases. (In an emergency, you will not be allowed back there.). In most cases the anesthesiologist has the final say because you would be in their area to shoot. Don’t take it personally if they say no to a photographer in the OR. They are looking out for your client.
6. Have a back up plan in the event of a cesarean and you can’t go into the OR.
This means making sure you know where the nursery is and where your client will be brought to after delivery. The doctor will fill you in during your meeting about their standard protocol, but make sure you know where everything is once you are there.
7. Be Prepared for the Unexpected with Birth Photography
Babies pay no attention to your time frame, the doctor’s time frame, or anyone else’s. They come when they want to. Be ready for a short labor and be even more prepared for a long one. Make sure you have battery supply for your camera and your phone and extra memory cards. Make sure you have money for vending machines.
It’s better to have all of that and not need it as it is to not be prepared and find yourself on hour 13 and needing something to snack on and your camera battery has only 10% charge left!
8. Make sure that your Images are telling the Story of that Day
Flowers, balloons, visitors….they all help tell the story. Capture the moments that you think that they will want to remember. Even take a photo of the dry erase board where their nurse writes her name and their room number. They will want to remember their nurse’s name. If there is a shift change, take a new photo of it.
Record it until the baby is born. They may have a favorite nurse and you will help them remember her name. Some parents send thank you cards to the staff and it’s nice when they can include the names of the people who took care of them.
9. Remember that this Day is NOT about You
Don’t try to chat with everyone and make the focus of the day you. It’s easy to get consumed in the activity and not even realize that you have taken focus from the real star of the day….the mom-to-be. Let her know that you are there documenting everything she wants you to. That makes her job a little easier and allows her to focus.
10. Convert the images to black and white, but give them the color versions as well.
Give them color versions, but also black and white. The reason is very simple.
Some people do not like medical stuff. Some people can’t stand the sight or even the idea of blood, or even the vernix (that cheesy type substance that covers newborns).
When they put together their scrapbook for the birth, they might want black and white. Don’t let them be the ones to convert the images. Take control of the edits and make sure they have the images in black and white. They might use all the color ones, but give them the option. Make sure you capture the little details of the baby like toes and ears when you take the photographs as well.
Those are always loved and appreciated by the parents.
Birth photography is unlike portrait photography. You may not get everything perfect. People may walk into the shot. Someone may turn on a light or turn off a light. Things happen. The scene can move quickly.
Make sure you are prepared with camera in hand and make sure to expect the random things that may happen. Document the moments and learn from your experience. The next birth will be easier and you will gradually learn to adapt and easily navigate your way through the whole birthing process and tell better stories each time. Your clients will love you for it and you will grow as a photographer, an artist, and as a person with each moment you help bring to life.
Lori Peterson is an award winning photographer based out of the St. Louis Metro Area. Her dynamic work ranges from creative portraits to very unique fine art photography. Lori’s work can be seen at www.loripetersonphotography.com and also on her blog at www.loripetersonphotographyblog.com. You can follow her on Facebook at https://www.facebook.com/LoriPetersonPhotography.
Post originally from: Digital Photography Tips.
Check out our more Photography Tips at Photography Tips for Beginners, Portrait Photography Tips and Wedding Photography Tips.
A Guide to Birth Photography
The post A Guide to Birth Photography by Guest Contributor appeared first on Digital Photography School.
If you’re looking for a compact digital camera, you have a lot of choices. Although the past couple of years has seen a serious erosion of the entry-level, sub-$ 100 class thanks to the emergence of powerful smartphones, improvements in technology have meant that if you’ve got a couple of hundred dollars or more to spend, you can get yourself a very capable camera. In this guide, we examine the major classes of compact cameras, and discuss their relative strengths in order to help you make an informed buying decision. Click through for a link.
To a photographer, the mood of the sun means everything. Natural light is temperamental — fluxing, fading, and shifting to an invisible rhythm. Working at the mercy of the elements means photographers often find themselves stuck in unsuitable situations, especially when it comes to lighting. Seasoned photographers Lindsay Adler and Erik Valind have developed a bag of tricks to get Continue Reading
The post The All-Knowing Guide to Purposefully Placing Highlights appeared first on Photodoto.
Our fascination with the stars has lasted for eons. So it is no surprise that so many photographers rotate their lens into a vertical postion to capture these natural wonders! But as many of you may have already found out, photographing stars can be a little tricky, as many factors come into play, and certainly the most irritating is that, Continue Reading
The post The Zen Guide to Photographing Stars Like the True Master You Are! appeared first on Photodoto.
Landscape photography is a lot like fishing: There are good days and there are bad days…sometimes the weather isn’t on your side…. Other times it is…. You can wait around for hours and come away with nothing, or sometimes you end up with too much to carry! One thing is definitely certain: The better prepared your kit is prior to Continue Reading
The post The Intrepid Landscape Photographer’s Guide to Bag Packing appeared first on Photodoto.
A guest contribution by Misho Baranovic, co-developer of the Perspective Correct app and author of the iPhone Photography DPS eBook .
I’ve read a lot of perspective correction articles over the past few days and my head is spinning from the technical explanations, illustrations and equations. In this article, I’m going to keep it simple and talk about the role that perspective plays in photography.
What is Perspective?
Perspective is one of the many ways that the human eye can judge depth within a scene. Perspective is something that we can see with one eye (monocular) rather than two (binocular). It refers to the angle and location of parallel lines within a scene. The eye registers depth when parallel lines start moving towards each other (converging). An example would be standing on a straight road, looking down the road, and noticing how the road narrows as it gets further away from you.
In art and photography, Linear Perspective refers to the way lines are drawn and captured to show an objects perceived size within space. In short, how we translate real world depth into a flat picture. Linear Perspective is made up of two basic concepts, the horizon line and vanishing point. The horizon line represents the viewing angle of the observer. Vanishing points are the point (on a horizon line) where parallel lines meet (converge). For example, the point where the two sides of the straight road meet (as shown below).
One of the key visual cues in Linear Perspective is that vertical lines and edges remain vertical in the scene. The only time you would have vertical lines coming together is if you are trying to show a triangular or pyramid shape within the scene, like the angle of a building’s roof or the shape of the Eiffel Tower.
Since the start of photography, camera and lens makers have focused on replicating the visual cues of Linear Perspective in order to make photos look as ‘true to life’ as possible. Nearly all modern lenses are rectilinear – they capture straight lines in a scene as straight lines in a photograph. Whether wide angle or zoom, DSLR or iPhone, lenses are designed to keep lines straight, which helps the eye judge depth within a two dimensional scene. The fisheye is the most popular non rectilinear lens as straight lines are shown as curved from the extreme field of view.
Perspective Distortion
For this article I’m going to focus on only one form of photographic perspective distortion – perspective convergence or keystoning. This form of distortion is very common across architectural, street and travel photography. It’s most often seen when tall buildings ‘fall’ or ‘lean’ within a picture. This distortion has become so common that most people have stopped noticing it within their pictures or just think it has something to do with the focal length of their lens. For example, you can see the extent of the vertical convergence below when the verticals are outlined in white.
For a number of photographers, vertical convergence and distortion are unpleasant and unwanted because they don’t conform to Linear Perspective cues where vertical lines remain vertical. This makes the scene look different to how we think it should look. While this distortion can be used creatively, corrected photos often look ‘right’ to the viewer (see below).
Why does Distortion Happen?
It’s actually pretty simple. As mentioned, modern lenses are designed to show straight lines. However, this only works when we the camera is pointed straight at (in line) with the object that is being photographed. This is because the distance between the camera and object remains the same. As soon as the camera is titled then the distance changes. Let me explain, if I’m trying to capture a tall building straight on with my camera I can only get the bottom section – vertical lines are straight but I’m missing the rest of the building. Now if I angle the camera higher I can get the whole building into the frame but now the vertical lines (sides of the building) are converging. Why? It’s because the top of the building is now further away from the lens than the bottom – just like the road receding into the distance.
So how do you take a photograph of a tall building without this happening? There are a few ways. The most obvious is by changing your viewpoint. You need to get higher to shoot more of the building front on, with the mid-point being the best place to capture the maximum amount of the structure. You could shoot out the window of a neighbouring building, or if there is nothing around you could spend some money on a crane!
This photo was taken from the third floor of a neighbouring block. You can see that all the verticals in the photo are straight.
If you can’t physically get higher then you can change your viewpoint in two other ways. One is with the help of shift lenses the other is through perspective correction software.
Shift Lenses
The ability to shift the position of the lens has been around since the beginning of photography. The original view cameras (created in the 1840s) used a bellows system which let photographers change the position (shift) the lens in relation to the film. The shifting mechanism acted like a mini elevator, moving the photographer’s viewpoint higher and lower. Historically, shifting in order to correct perspective convergence was seen as an important part of the capture process, just like focus, shutter speed and aperture. Shifting was possible because the lens captured a much larger (circular) field of view than the film. The same way that modern shift lenses work. Modern shift lenses are commonly used by architecture photographers to limit vertical convergence on large buildings. However, these lenses can only be used on DSLR or medium format cameras and can also be very expensive (upwards of $ 1,000).
Here you can see the mechanical shift mechanism on an SLR lens – Photos by Bengt-Re
Software Correction
In recent years, digital technology has been able to replicate this shifting process, artificially changing the photographer’s viewpoint. Software like Photoshop, Lightroom or Gimp reworks the pixels in an image in order to straighten vertical lines in turn reducing distortion. Most of these programs allow you force the image back into a ‘correct’ position through either sliders or by selecting and dragging a corner. One of the downsides of the software is that significant adjustments require resampling of the image, often reducing sharpness in parts of the photograph.
Camera Distortion Correction with Photoshop Elements 11
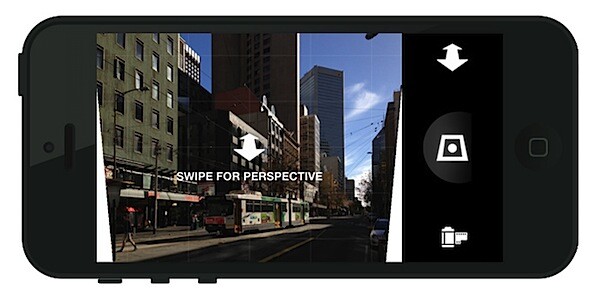
For photographers that either shoot or edit photos on their mobile phones, the Perspective Correct app for iPhone uses the touch interface to adjust both vertical and horizontal convergence within an image. For example, an up/down swipe on the screen represents the same movement as the shift mechanism on a lens.
While it’s easy to overlook, small perspective adjustments can often be the difference between good and great urban and architectural photographs.
…………………………………….
Perspective Correct is the first app to offer live perspective adjustment of your photos and is available for download from the Apple App Store for US $ 1.99
Post originally from: Digital Photography Tips.
Check out our more Photography Tips at Photography Tips for Beginners, Portrait Photography Tips and Wedding Photography Tips.
Why are my Buildings Falling Over? A Short Guide to Perspective Distortion and Correction in Photography
 If so, we’ve just released a great pet photography guide on our
 A: I start off by thinking about what I want to happen. How the gif should start and end, and what will happen in between? Do I need an extra set of hands or any other tools?
  A: The key here is consistency. I’ve learned my lesson trying to put together a crazy hodge podge of images (that just doesn’t work).


 A: Tumblr is one of the best places for gifs but they have to be a certain size to upload and play correctly. They need to be under 1mb and no more than 500px wide.


You must be logged in to post a comment.