RSS
 

Posts Tagged ‘Guide’

The Winner of $1000 from our Essential Guide to Black and White Photography eBook Competition is….

23 Sep

NewImageRecently we launched our Essential Guide to Black and White Photography. As part of the launch we put everyone who purchased a copy into the draw to win $ 1000 in camera gear.

The winner of this competition is…. Yves Wepadjuie!

Congratulations Yves – we’ve just emailed you with details of how we’ll get you your prize and can’t wait to see what you buy!

Thanks everyone else for picking up a copy of the Essential Guide to Black and White Photography – the eBook has received some amazing feedback and we appreciate you supporting dPS with your purchase – the sale of our eBooks is how we are able to keep producing 14 free tutorials each week here on the blog!

Our Next eBook is Just Around the Corner

For those looking forward to our next eBook – you don’t have to wait too long! We’ve got another exciting one for you very soon from our best selling author – Gina Milicia!

The post The Winner of $ 1000 from our Essential Guide to Black and White Photography eBook Competition is…. by Darren Rowse appeared first on Digital Photography School.


Digital Photography School

 
Comments Off on The Winner of $1000 from our Essential Guide to Black and White Photography eBook Competition is….

Posted in Photography


How to Photograph Teenagers: a Kick-ass Guide

23 Sep

Whether it’s for a magazine beauty and fashion spread, senior pictures, or my daughters and their friends just dressing up and having fun, teenagers are up for absolutely anything, which makes them my favorite subjects to photograph. Stand fully dressed under a freezing cold waterfall while hanging ten off a surfboard and holding a drooling English Bulldog? “Sure!” Go to Continue Reading

The post How to Photograph Teenagers: a Kick-ass Guide appeared first on Photodoto.


Photodoto

 
Comments Off on How to Photograph Teenagers: a Kick-ass Guide

Posted in Photography


Beginner’s Guide to Tripods

17 Sep

The lowly tripod – the unsung hero behind so many fantastic shots – finally gets its day in the spotlight here on dPS.

Do you want to photograph the stars? You’ll need a tripod. Want to get silky smooth waterfall photos? Yep tripod again. Need to photograph an HDR to extend the dynamic range of your scene? Oh yes, tripod required there too.

Basically, if you want to do anything more than point and shoot, you’ll need to bring your three legged friend along with you.

beginners-tripods

I’ve decided to write this article in a way that assumes you’re just starting out with your journey in photography. So for those of you who have spent some time getting to know your tripod and how to use it, please feel free to add your own advice to the comments section below.

Buying the right tripod

A tripod allows you to frame a shot exactly how you want, and keep it there indefinitely. This allows you to take long exposures, use heavy lenses without straining your arms, or compose the same scene with different subjects in order to photograph it later. All tripods are essentially the same – three legs meeting at a center-point that supports your camera. However, all tripods are not created equal.

Buying the right tripod can be a challenge, one that can easily cause you to give up, head to your local big box store, and by the first $ 30 dollar option you see on the shelf. This is not the best idea, especially since you’ve spent good money on that camera body and lens you’re trying to support. Would you trust a $ 30 plastic tripod to hold your camera steady for a shot like this? I know I wouldn’t.

sturdy-tripod-must

In general you want a tripod that’s strong enough to support your camera, light enough to carry with you wherever you go and affordable enough to not break your budget. Here’s some simple pointers to help get you started:

  1. Know what you need: For working in the studio weight and a compact height won’t be so important, but for landscape and travel you’ll want something light enough to hike with, and compact enough to fit in your luggage.
  2. Aluminum or carbon fibre: If you’re on a tight budget, or won’t be doing many rigorous activities with your tripod, then aluminum will be your go-to as it’s more affordable, but still offers great support. Carbon fibre will set you back a bit more than its aluminum counterpart, but it offers a huge benefit in terms of strength to weight ratio, so it’s ideal for the landscape photographer – especially those intending on more rigorous travels.
  3. Tripod heads: I’ve always been a fan of ball heads and honestly haven’t used anything else. They are often less expensive then the more feature packed options, and are smaller, lighter, and allow you to frame your shot quickly and easily.

Got any more buying tips? Share them below!

Using a tripod

In this video I share some basic tips on how to set up a tripod in various situations to get the best shots every time. I’ll talk a bit more about various setups below the video as well.

Low angle perspective

Many tripods offer the ability to get very low to the ground, which is a great way to change the perspective of a scene to create interest. If this is the sort of thing that you’re looking to do, make sure when you’re comparing tripod options that you pay attention to the minimum height specifications.

low-angle-perspective

When height is needed

When you’re looking to add height to the tripod remember to keep a few things in mind. As I mentioned in the video above, always extend your legs from the widest segment first, as these will offer more support than the smaller legs and always use your center column as a last resort. Finally, something I didn’t mention in the video but that’s also very important, is that weighing down your tripod can really help quite a bit when you’re out shooting on a windy day. You can either carry a sandbag with you, or simply use your camera bag if you’ve got a couple of heavy lenses or bodies inside.

When you’re on a tricky landscape

Finally, using a tripod on a tricky landscape like a hillside or staircase is something that takes a bit of planning. Each leg of the tripod will likely have to be extended to a different length, and positioned at a different angle, but the goal is to have your center column (and thus your center of gravity) aligned evenly between the three legs, and perfect straight up and down. This will give you the most support, and allow you the most freedom to frame your shot.

Throw it all out the window

Of course there are times when you just have to throw everything mentioned here out the window ,and do what you have to do to get the shot. As an example I’ll show you a shot I made earlier this year at Trap Falls, framing the waterfall inside of a Y-shaped tree.

trap-falls-framed

The tree is on a hill, and the base of the Y was a bit too high for my tripod fully extended, which meant that I needed to use every bit of the tripod to its full potential.

As you can see in the behind the scenes photograph below, the center column is extended well beyond what I’d consider an ideal situation. I wouldn’t necessarily call this setup stable, but it did allow me to get the shot I wanted. So like everything in photography, just because there are rules that you should follow whenever you can, if there’s a shot you can’t get by following them, but think you can get it safely by bending the rules a bit, then by all means go for it.

20140411-125515

Note: This is not a mysterious two legged tripod – the third leg is hidden behind the front leg due to the perspective of the shot.

The post Beginner’s Guide to Tripods by John Davenport appeared first on Digital Photography School.


Digital Photography School

 
Comments Off on Beginner’s Guide to Tripods

Posted in Photography


Down and Dirty Guide to Milky Way Photography

16 Sep
Another World | Mono Lake, California

Milky Way Over Mono Lake | James Brandon

Seeing the Milky Way with your own eyes is a life-changing, mind-blowing experience. It will put your place within the universe in to perspective and remind you just how small and insignificant we all are. The sad part is that most people have never seen it. Over half of our planet’s population lives in cities where seeing the Milky Way is all but impossible.

Even when people get out of the city and have a good view of the stars, they usually don’t focus on them long enough to find the Milky Way. It’s something that you either stumble onto by accident, or something that you have to plan ahead of time. Here’s a few quick tips for getting the Milky Way in your viewfinder and exposing it properly – your guide to Milky Way photography.

Research, Research, Research

Benjamin Franklin said so brilliantly that, “By failing to prepare, you are preparing to fail”. And it was Antoine de Saint-Exupéry that said, “A goal without a plan is just a wish”. So it goes with Milky Way photography. Sure, you can make a point to go out at night and see what you can find, but chances are you will be wasting your time.

saint-john-milky-way-2

The Milky Way by Hemispheres

The Milky Way is only visible in your respective hemisphere during certain months of the year. If you’re in the northern hemisphere your best time to photograph the Milky Way is in the summer, with July being the peak month. Unfortunately, the summer months aren’t typically the best times for clear skies because of the heat and the clouds from all the storm systems. Summer nights are also short, therefore limiting access further to the night sky. Folks in the southern hemisphere have it better, with the winter months being the best time.

Don’t Forget the Moon!

The moon can make or break your Milky Way shots. This is why planning is so important! Don’t make the mistake of finding a perfect subject, waiting for the Milky Way to line up, and then discovering that the moon is right in the middle of the celestial center. Having the moon obstructing the view of the Milky Way will, quite simply, ruin your shot.

There are two ways the moon can help your shot. One is by its total (or nearly total) absence in the sky. The other is by having the moon behind you, with the Milky Way in front of you (thereby providing a light source for your foreground).

The Best Astro App EVER

photo

Oh no! The moon is in the way!

All you need to do to plan a perfect night of Milky Way photography is a beautifully designed app called StarWalk 2 (sorry Android users, you’re simply out of luck here. I have an Android phone and I absolutely hate that I don’t have access to this). Luckily I have an iPad and it works beautifully on there.

StarWalk lets you interactively view the night sky from either your position, or any other position on earth, at whatever time of day you choose. As you change the time of day, the entire sky will magically begin to revolve around your position, revealing or concealing the Milky Way, the constellations and the moon.

So let’s say you decide to photograph Delicate Arch in Arches National Park. You discover through research that from beneath the arch looking toward it you will be facing east. All you really need to do now is choose a location in that general area, make the app point east and then scroll through the hours in the day to find when the Milky Way will rise above the horizon.

One of the jaw-dropping cool features of this app is that you can actually use it in the field with an image overlay. You can hold your iPad or iPhone out and the app will turn the camera on and look at what you’re seeing. It will then overlay the night sky onto your image so you can see what that view will look like at a certain time of day or night! How cool is that!?

The Milky Way Over Delicate Arch | James Brandon

The Milky Way Over Delicate Arch | James Brandon

Having a Dark Sky is Crucial

While it’s not impossible to photograph the Milky Way in light polluted areas, it’s certainly not ideal. I live in the heard of the Dallas – Fort Worth metroplex and to really get a great view of the Milky Way I have to drive about three to four hours west. A great resource for locating extremely dark skies is the International Dark-Sky Association. They’ve got a list of locations that host some of the darkest skies in the world. Planning a trip to any of these places during the right time of the year will give you some of the clearest views of the Milky Way you will find anywhere. Trust me, you haven’t lived until you’ve stood beneath a Milky Way so bright that it lights the landscape in front of you. It’s truly a spiritual thing to witness.

Camera Settings

Photographing the Milky Way is quite different from any other subject you will attempt to capture. Like I said before, it really is a magical experience. Seeing the Milky Way with your own eyes is one thing, but wait until you see it appear on your camera’s LCD screen! You will quite possibly, literally jump for joy the first time you see it.

ISO is the first thing we’ll cover. In short, it needs to be set as high as possible while still maintaining a useable image quality. While this doesn’t mean that you need a pro level SLR, having one that performs exceedingly well in low light will certainly help. If your camera can produce quality images at ISO 1600 or even ISO 3200 you are going to be in great shape. If ISO 6400 or ISO 12800 is still workable, then you are going to knock it out of the park. Having your ISO set high means that your cameras sensor will be as sensitive as possible so that the maximum amount of light can be collected (which is very important at night).

Milky Way Over Monument Valley | James Brandon

Milky Way Over Monument Valley | James Brandon

Next, select a shutter speed. Anywhere between 20-30 seconds is ideal. If you can get away with super high ISO levels, then go with 20 seconds. If you’re around ISO 1600-3200 then you may want to stick with 30 seconds. The only downside to 30 seconds is that you will have just the slightest hint of trails in your stars from the rotation of the earth. Not really a big deal though.

Finally, you need to set your aperture to be wide open, or very close to it. This is where having a lens that can open up to f/2.8, or larger, is really helpful.

All of these settings combined have one goal – to bring as much light as possible back to the cameras sensor.

Other Gear to Consider

The Milky Way At Tunnel View In Yosemite

The Milky Way At Tunnel View In Yosemite

A good and sturdy tripod is worth its weight in gold. That is almost a literal statement if you go with something like a Really Right Stuff tripod, hehe. I got mine about a year ago (after saving up for quite a while) and will never consider another one. Having a good tripod means that your camera will be steady throughout the entire long exposure. If your tripod is cheap and made from plastic, or just a very flimsy aluminum or carbon fiber tripod, you will definitely have a hard time with long exposures. If your tripod has a hook underneath the center column, be sure to utilize it by hanging your camera bag there to weigh the whole thing down!

You’ll also want to set either a two second timer or use a cable release (remote trigger). Both of these methods get your hands off the camera for the entire duration of the exposure. If you try and press the shutter button down for a 30 second exposure, you will not be happy with the results.

Conclusion

The Milky Way is one of the most challenging and rewarding things you can get out and photograph. Doing it well requires planning and more planning. Don’t leave anything to chance. If you have more tips to add, questions or thoughts about the article, let me know in the comments below.

The post Down and Dirty Guide to Milky Way Photography by James Brandon appeared first on Digital Photography School.


Digital Photography School

 
Comments Off on Down and Dirty Guide to Milky Way Photography

Posted in Photography


Beginner’s guide: shooting high-key at home

08 Sep

High-key lighting is a classic look for portraits or product photography that minimizes shadows and produces a bright, vibrant look. Although typically shot in the studio with lots of high-powered lights, it’s possible to produce a similar look at home using some fairly basic kit. In this article we’ll talk you through a simple backyard setup and some easy post-processing that will serve as a great introduction to high-key portraiture. Learn more

Articles: Digital Photography Review (dpreview.com)

 
Comments Off on Beginner’s guide: shooting high-key at home

Posted in Uncategorized


Interview: Oded Wagenstein – Author of Snapn Travel Guide and dPS Writer

01 Sep

Oded Wagenstein interview

Oded Wagenstein is a travel photographer and writer. He’s built a reputation taking intimate portraits from around the world and is a regular contributor to National Geographic Traveler magazine (Hebrew edition).

Regular readers will be familiar with Oded’s wonderful photography and articles. We’re interviewing him here at dPS because we have just published his new ebook about travel photography.

Oded Wagenstein interview
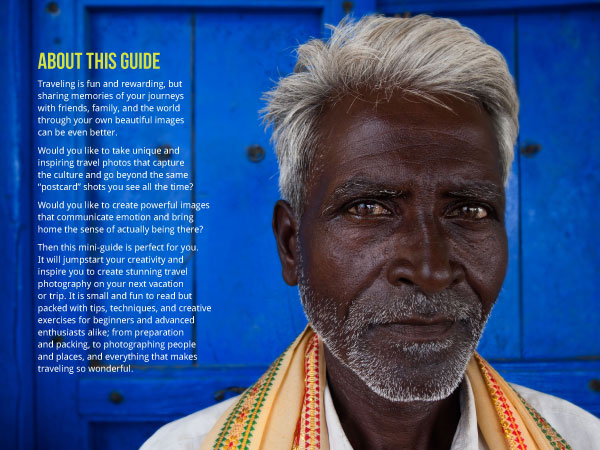
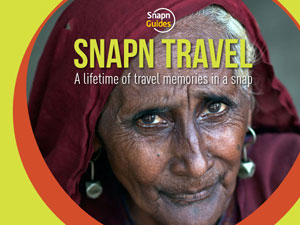
It’s called Snapn Travel – A lifetime of travel memories in a snap, and it’s available from our sister site Snapn Guides. It’s a fantastic ebook that will help any photographer who is planning a trip to another country to take better photos while they are there.

In Snapn Travel Oded writes about the importance of creating images that tell stories. He explores the process that he undertakes on any travel assignment, from initial research to working in the field, to come away with powerful and evocative images. We’ll delve a little deeper into some of those topics in this interview.

The Interview

In your ebook you start by saying that travel photography is all about portraying the stories and emotions we find during our journeys. Can you elaborate on those ideas? How does one go from taking snapshots of places you see on your travels to taking photos that make full use of emotion and story?

Oded: Travel photography is almost as old as photography itself. Magazines and commercial photo publishers used to send travel photographers like Francis Bedford and James Ricalton to “exotic” places in the east to bring back some of that “oriental flavor” that everyone in the west was so badly after in the nineteenth century. Even until recently, if you visited a remote tribe in Africa and got an image of someone with a bone through his nose, you got yourself a “worthy” image.

But those days are over! We live in an era of digital photography, where cameras are so common, that even this tribe might have its own smartphone camera. Today, it is really hard to create fresh images that the world hasn’t yet seen. So, from my point of view, today, an image alone is not enough, as you must be able to tell a visual story. Don’t show me India, I know how India looks, tell me how traveling in India felt for you. If you want to sum up my philosophy: shoot what you feel and make your viewer feel the same.

Oded Wagenstein interview

A lot of your photos are portraits. How do you find willing subjects for your portraits when travelling?

Oded: Portrait photography is a “give and take” relationship, not “take and take”. I try to make it as fun as possible for the person I photograph. If he wants to tell me a story, I listen, and always do my best to send the photo to him. I make the process a conversation, and not a photo shoot. This lets my subject forget about the camera.

One of the most important skills I learned is to ask a person a question, shoot while he’s answering, and while I’m thinking about the next question. This makes everything natural and “flow”. Portrait photography is so much more than controlling aperture and shutter speed.

Oded Wagenstein interview

How do you overcome obstacles such as language differences or suspicion of foreigners?

Oded: I always travel with a fixer, who is a local that can serve as a guide and translator.

How do you become involved with the people that you meet? How do you come across as a traveller who is genuinely interested in people rather than a tourist who perhaps sees the local people as little more than subject for photos?

Oded: First, as obvious as it may sound, I am really interested in them. The image for me is just a byproduct: a nice byproduct, but not the goal. I am an image maker because the camera helps me “see” the world in a better way. It lets me start a conversation with a stranger, and maybe have a cup of tea with them. The camera is my bridge to the world and besides being interested in the person’s story, I always try to get inside the story and not watch it from outside. For example, once I was invited to a local Tajik wedding. I took a few pictures but then put the camera down and got on the dance floor. The next time I took out my camera, the pictures were much better.

Oded Wagenstein interview

Can you talk us through the differences between working on an official magazine shoot and going to a location purely under your own initiative?

Oded: I treat both scenarios exactly the same way. In both, the responsibility to come back with the best results is all on the photographer’s shoulders and no one can tell you exactly what to shoot and where to go. The magazine can help you with ideas or hiring a fixer (local guide), but you are your own boss, for better and for worst.

I do my visual research and learn about the culture (history, food, music, religion, etc.). On the ground, I hire a fixer and do my best to come back with the best images, even if it takes me long days, hard walks, and enduring extreme weather.

In my travel photography workshops, I always refer my students to the “client”. From my point of view, we all, professional and amateurs alike, have clients. Our clients are our viewers and friends, and I treat my Facebook viewers and my magazine editor with the same amount of effort and professionalism.

Oded Wagenstein interview

I like this piece of advice: “Discover things not commonly photographed and your stories will always be two steps ahead of the crowd.” Can you explain this in a little more depth? How do you find the things that are not commonly photographed?

Oded: You don’t have to travel far, or trek for miles, to find those places. You just need to think outside the box. For example, I did a story not long ago on Bollywood. India is so complex and rich, but I think that we always see the same things about the country: poor people in really colorful clothes. So I wanted to show a different side of India: rich and glamorous.

My students struggle to find interesting things to photograph in their own towns. And I tell them that one’s ordinary breakfast or road to work is another’s “exotic” country.

Oded Wagenstein interview

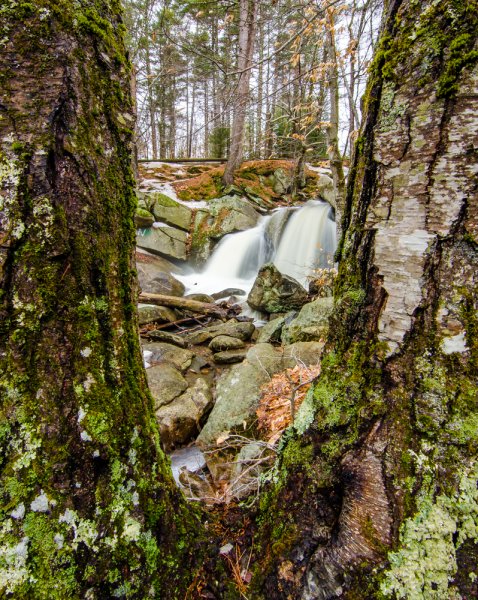
Last year I spent a week in the north of New Zealand’s South Island. I took some landscape photos but I wasn’t really happy with the results. It made me realixe just how hard landscape photography can be – you’re relying on the weather and light to do its part, and in many ways as a photographer, your hands are tied. You have to work with the landscape as it is, and (digital manipulation aside) there is nothing you can do to change it. Bearing in mind there isn’t much happening in a cultural sense in this part of the world, what advice would you give me if I was to go back to the same place and try again? How can I move from taking uninspiring landscape photos to finding and telling an interesting story?

Oded: This is a good question. Here you have two approaches:

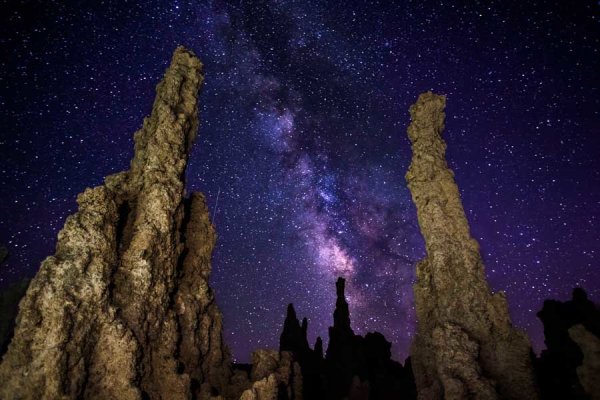
The passive approach, or coming at the right time. Just come in the right season, the right day, at the right time. Say a cloudy winter day with golden rays of sunrise.

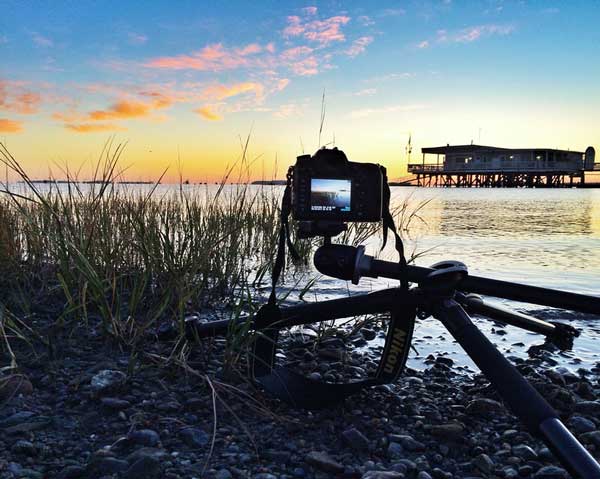
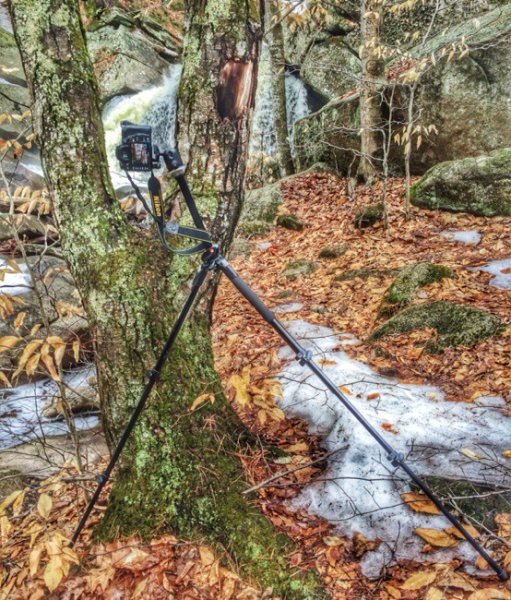
The active approach, or creating the right time. Good lighting is always needed, but bring a tripod, a good looking hat, a backpack, and capture yourself enjoying the view. You will see how the image becomes better because you added a “main hero” to the image and because people love watching other people. Don’t avoid people in your landscape photography, that’s my advice.

Oded Wagenstein interview

Traveling to a distant and exotic location is one thing, but given that most people can only spend a short time of the year doing this, what about the idea of travel photography in your own back yard?

Oded: Buy the Lonely Planet guide (or any other guide book) on your own country and travel by it. Take a silly tourist’s hat and view some postcards. See your own back yard as a tourist. Think of places you have special access to – maybe there is an interesting story or a person in your family (I have a few), maybe your job is not ordinary, and maybe your mother just cooked a local dish that I, as a foreigner, would love to see.

Do you have any questions for Oded about travel photography? Please let us know in the comments. And don’t forget to check out Snapn Travel – A lifetime of travel memories in a snap.

The post Interview: Oded Wagenstein – Author of Snapn Travel Guide and dPS Writer by Andrew S. Gibson appeared first on Digital Photography School.


Digital Photography School

 
Comments Off on Interview: Oded Wagenstein – Author of Snapn Travel Guide and dPS Writer

Posted in Photography


GoPro launches new Field Guide tutorial series

29 Aug

GoPro’s in-house production team travel the globe with some of the world’s best athletes and produce videos like the Hero 3+ launch, with over 16 million views on YouTube. This week GoPro and its production team released a new tutorial series called the GoPro Field Guide, a set of videos designed to delve a little deeper into some of the more complex functions of their action camera lineup. Read more

Articles: Digital Photography Review (dpreview.com)

 
Comments Off on GoPro launches new Field Guide tutorial series

Posted in Uncategorized


Getting Started Guide to Macro or Close-Up Photography

22 Aug
Close up photos of flowers can make for interesting colours and shapes

Close-up photos of flowers can make for interesting colours and shapes

There is something magical about seeing a subject up close and personal. This opens up a whole new world of options for you as a photographer. Close-up photography, or macro photography, can be a very rewarding form of photographic expression. The great thing about it is that you can do this from your basement at home, if necessary. Of course you can, and should, go outdoors too and setup shots in a forest or at the sea, but you can also setup shots of everyday subjects and shoot them up close.

Think of an old watch, a flower or even some food items that could be shot on your kitchen table. The shapes, textures and colours come to life in the world of macro photography, but it can be tricky and fidgety. Sometimes beginners are put off by this aspect and assume they need specialist skills to make close-up images. This is not necessarily true. Like any other aspect of photography, you need to understand how your camera works, and work within the limits of the equipment you have. Do you NEED to have a macro lens? In short, no. There are a few other cheaper options that you can experiment with before investing in a macro lens. Let’s take a look at how you can get going in close-up photography. This is really an introduction article, and I will be putting together some more detailed articles on the various aspects of macro photography, but first, let’s start with the basics.

Sometimes overexposing or underexposing can add to the image

Sometimes overexposing or underexposing can add to the image

1. Get as close as you can

This sounds obvious, but try it. Set your camera up on a tripod, choose a subject (anything will do really) and get your camera up close to the subject. Switch your camera to Manual focus. You can try autofocus, but generally you will be able to focus a little closer on manual focus. If you are using manual focus, the tripod will be important. There is nothing worse than trying to get your subject in focus when you are off balance, or you keep moving, so use the tripod. Once you have your subject in clear focus, look at the composition, just as you would with any other image. Use the various composition guidelines to put your image together and take the shot.

This is just the beginning, you will find that you will make minor adjustments and shoot another shot and so on. I find that when I do close-up or macro photography I get lost in this small world of intimate details. When you look through the viewfinder, try and visualize it as a small world or a small landscape scene. Pretty soon you will find that you will be totally swept up in it and that is the fun part.

Getting in close will help to isolate the subject and throw the background out of focus

Getting in close will help to isolate the subject and throw the background out of focus

2. Do I need a macro lens?

To do some great close-up shots, you won’t need a macro lens. You can use almost any lens to make close-up images. Bear in mind that each lens has a minimum focusing distance. This can range from a few centimetres (1-3″) to half a meter (20″) depending on the lens. Telephoto lenses will have a longer minimum focusing distance, while medium range lenses (24-70mm) will have a closer focusing distance. The difference between macro lenses and non-macro lenses is that a macro lens has a much shorter focusing distance (30cm/1 foot or closer) in most cases.

Also, a macro lens has a magnification ratio of 1:1. What that means is that the lens can reproduce the subject onto the sensor at it’s actual life size. So if your subject is 20mm in size and it is captured as 20mm on the sensor, that means it has a 1 :1 ratio.  Some lenses can only reproduce a 1:2, or 1:3, ratio which means that the subject will be half the size or less, on the sensor, relative to the size of the subject. I would suggest that you try close-up photography with the range of lenses you have. See which one works best. Prime lenses are usually a good place to start as they have great clarity and sharpness. I used my 50mm f/1.8 for a long time before I invested in a macro lens. Once you feel that you are limited by your lenses or that you think macro photography is a genre you want to expand on, only then consider buying a macro lens.

This image was shot with an old 70-300mm lens at F4

This image was shot with an old 70-300mm lens at f/4

3. What can I photograph?

The beauty of close-up photography is that – when one properly, a shot of a cup of coffee can be fascinating.  Suddenly the pattern in the latte cream looks amazing, the bubbles and cup shape become very intriguing. We very rarely look at everyday subjects up close and when we do, they can be really interesting. The same is true for flowers, an aged piece of wood, electronic goods, even a knife and fork, just about anything can become a subject for macro photography.

Some of the more challenging subjects are those that move. Subjects like insects, flowers, leaves, grasses and any other subject that is outdoors. For these, you will need more patience and better timing. Photographing a close up of a flower on a windy day will be really tough. If you want to do macro photography outdoors, maybe start off doing it on a windless day or in a sheltered area. Alternatively, you could go and buy some cut flowers and set them up in a vase, setup the shot and take a few images. The controlled environment of the flowers in a vase will make things much easier. Insects are even more challenging. They sit still for very short periods and move very quickly.

The name of the game to get good insect macro shots, is to be patient. To get some honeybee images in the past, I have set up my camera on a flower and attached my cable release. I then manually focused the lens to the flower and simply waited until a bee or another insect was in the right place and snapped off a few shots. Generally one in ten shots were usable and I was pretty happy with that, but they take time and patience.

Be patient and set up your shot beforehand when shooting insects

Be patient and setup your shot beforehand when photographing insects

4. Where to from here?

I found that I really enjoyed close-up photography. Once I got into it, I spent many hours trying to get some unusual images of flowers or insects. You may find this too. Get your tripod, cable release, choice of lens and set up a scene either indoors or outdoors. Get in a close as you can and start working with the scene. Change your depth of field until you are happy with what is in focus and what is out of focus. If you are using a macro lens, be careful about shooting with a very shallow depth of field. F/2.8 will mean that a VERY thin sliver of your scene is in focus, and that can be difficult to work with at first. Start at f/8 and work from there.

Experiment with different exposures, sometimes a slightly overexposed macro scene can look good, so play around with that. Above all, have some fun. Use it as an exercise in learning more about photography, and try and get some dynamic images too! In a future article, I will go into more details about settings and exposure modes. In the mean time, start shooting some close up images and let’s see how things look.

A close up of a poppy flower, the details are what is mesmerising!

A close-up of a poppy flower, the details are what is mesmerising!

For more information on macro or close-up photography check out these dPS article:

  • Equipment for Macro Photography – Video Tips
  • 6 Tips for Near-Macro Photography with a Telephoto Lens
  • How to Focus-Stack Macro Images using Photoshop
  • The Wonderful World of Macro Lenses: Close-Up Photography Lesson #4
  • Reverse Lens Macro: Close Up Photography Lesson #3
  • Extension Tubes: Close Up Photography Lesson #2
  • Getting Up Close with Close-Up Lenses

The post Getting Started Guide to Macro or Close-Up Photography by Barry J Brady appeared first on Digital Photography School.


Digital Photography School

 
Comments Off on Getting Started Guide to Macro or Close-Up Photography

Posted in Photography


New Photographer’s Guide to Blue Hour

14 Aug

Among the many tips and tricks new photographers get with regards to lighting, the time of day is an essential concept, which for getting some shots of landscapes and some dynamic shots of natural light and artificial light, is the time at dusk or dawn. This time is just before the appearance of the sun or just after it, when the light is soft enough to emphasize most of the dark of the scene, and yet not so dark that it necessitates the use of additional light source. This is a guide to Blue Hour, that natural time frame which is so poplar among photographers.

Blue hour 03

What is Blue Hour?

Blue Hour can be defined as the period of the day when the colour of the sky ranges from blue to dark blue, followed by black sky or vice versa depending upon the time of day it is being considered (i.e. for sunrise or sunset). It is termed as BLUE HOUR based on the consideration that the blue hue in the sky lasts for about an hour. In reality it lasts between 30 to 40 minutes approximately. Its duration also depends upon the geographical location and the season.

Rule of Thumb for Blue Hour times

The rule of thumb for Blue Hour is when exactly it starts and ends:

  • Sunrise: during this part of the day the Blue Hour starts around 30 minutes prior to sunrise. The peak of it can be 10 minutes before the sunrise. During sunrise, the blue hour diminishes very fast towards the sun rising on the horizon.
  • Sunset: during the sunset the Blue Hour roughly starts 10 to 15 minutes after the sun has set. I personally prefer to capture Blue Hour during the sunset as it gives me added time to setup my equipment, or change my location before the actual Blue Hour starts.
  • There are websites available where one can find out the approximate blue hour duration at any location so that you can plan your trip accordingly.
  • If the sky is overcast then the duration of Blue Hour will shorten and in some instances the clouds can be too dense soas to wash out the complete Blue Hour.

What to capture during Blue Hour

Blue hour 04

Blue Hour is best to capture cityscapes, landscapes and scenic beaches. The shots require long exposure or slow shutter speed thus making it difficult for taking pictures of people or moving bodies, as a slight movement can make the picture blurry but yet the light is optimum to bring out the vibrance of the landscapes.

Why to capture Blue Hour pictures

#1 Creativity in capturing motion

Since, Blue Hour photography requires long exposures or fairly slow shutter speed, depending upon the scenario the long exposure can be creatively used to capture motion. The best part about Blue Hour is to capture light trails of vehicles while also capturing cityscapes, and if it is partially cloudy then the movements of the clouds can be used to create a drag effect. When capturing scenic beaches the movement of water appears to be dreamy. All of these effects add to the dynamics of the photograph.

#2 Easy control of parameters in dim light

I personally find capturing shots during Blue Hour fairly easy and interesting as compared to bright light conditions. With the availability of the right gear (e.g. tripod, remote trigger or shutter release) it’s easy to control various parameters to compose your shots. In comparison to this during a bright sunny day there are chances of getting overexposed images or burnt spots if there is no proper control of the light source with regards to the subject. However, every photography technique has its own pros and cons.

Blue hour 05

List of Equipment for Blue Hour

The following are the essentials which can be considered as a must for Blue Hour photography:

  • DLSR – a must for taking any pictures. The better the DSLR, the better will be the noise performance for long exposures.
  • A rigid tripod – this as a must and the reason being long exposure/slow shutter speed during blue hour. So handheld shots maximize the chances of blurry images.
  • A cable or wireless remote shutter release – this is also one of the essential items which can help you in avoiding camera shake. An alternative to this is self-timer mode but at times you may need to use Bulb (exposures longer than 30 seconds) mode to capture the surroundings (for multiple layer blending) when shooting Blue Hour.
  • A handy flash light – to look around the surrounding areas when setting up your tripod in case the place is a bit dark.
  • A stop watch – this is now available in most of mobile phones, and comes very handy when you need to monitor the duration of shutter release in case your DSLR or remote doesn’t do that.
  • A wide angle zoom lens or lens suitable for composition – not a must but a wide angle zoom lens will help you in composing your frame properly as you can zoom in and out depending upon what you need to see in your picture.
  • Lens cleaning cloth and blower – this is one of the essentials to keep the lens clean in case of fingerprints or dirt. Although this isn’t specifically a Blue hour essential, it is a photography essential nevertheless.
  • Miscellaneous bits – these things can be handy and will make your photography comfortable. If you are setting up your camera around grass then a bug repellent will be useful and also if the weather is hot don’t forget to carry a small towel to wipe off the sweat rather than dripping onto your DSLR or lens.

Blue hour 02

How to capture Blue Hour

Step one: Setting up your equipment

The first and foremost is to setup your camera on a tripod, on firm ground, to avoid any camera shake. Place the tripod on the ground and give a firm press against it, to make sure it is set in position. Place your camera on the tripod and make sure it is properly locked on. Take a look from the viewfinder and compose your frame, and also make sure that the camera is properly aligned using a bubble level or electronic level (if available in your camera). Do make sure that you are not directly under a source of bright light, which can make lens flare.

Connect the remote to the DSLR if it’s a wired one, or keep a wireless remote ready to be used. Looking into the viewfinder, try and use the autofocus to lock focus on any of the bright objects in your frame. Once the focus has been locked put the focusing switch on your lens to Manual Focus in order to avoid any re-focusing and lost focus.

Try capturing picture in RAW format, rather than JPEG, as it gives us more flexibility and details when post-processing the image. Double check that your focus is covering the complete frame properly by taking a couple of test shots. I always try and make sure that I am there well before Blue Hour so that I can take my sweet time to setup my equipment and be ready to take pictures.

Blue hour 01

Step two: Taking multiple exposures

Once your equipment has been setup, and the lens has been focused properly, set the aperture between f/8 and f/16 to make sure you have a good depth of field. My personal preference is that I keep a balance of ISO and shutter speed to control the noise in the picture. The preferred setting for ISO is between 100-200, and the rest I leave to the shutter speed which ranges from five seconds to over a minute, depending upon the foreground details or any light show I need to capture. I prefer shooting in full manual mode so that I can control all the parameters.

If you have set a frame of the shot which contains trees and grass, try and capture couple of exposure in well lit condition so that you may use those during the post-processing. This will also give you an idea of what shutter speed you will need to capture the sky.

Keep taking shots at different intervals during the Blue Hour in order to use the best exposure during the post-processing of the image. If your composition contains any light shows or any other architecture which has a lot of light, you can adjust the shutter speed to suit, and prevent it from being overexposed. At the same time you should keep reviewing your shots to make sure they are correctly exposed for post-processing.

Post-processing of exposures

This can be a separate article on “Multiple Layer Blending in Adobe Photoshop” but I will give a brief description about it here.

I use Adobe Photoshop for multiple layer blending of my photographs of Blue Hour. If the picture is a RAW file format then you can change the basic parameters like Exposure, Clarity, Vibrance, Temperature, etc., when you open the file. Once you have done that, the actual image opens up in Adobe Photoshop. Select and open multiple images on the basis of exposure of sky, foreground, etc. Select one image that has the best Blue Hour exposure and create a blank “New Layer” to copy the other image which has good exposure of the foreground.

Layer blending

Arrange the different layers as per the priority of coverage in the example image the layer having a major section of the sky to be set as top layer followed by the foreground layer. Use the Erase tool to remove the underexposed areas from the top layer to reveal the correctly exposed layer for the foreground (you can also use a layer mask). Adjust the parameters like Selective Colour, Shadow/Highlights, Contrast, etc., of every layer to have an even colour effect. Merge these layers to form a single layer upon completion and you have got your final image ready.

I personally don’t merge the layers which gives me the flexibility to alter any of the layers if required in future.

Feel free to drop your suggestions and comments, if you have any, as I am always eager to learn more and more.

The post New Photographer’s Guide to Blue Hour by Ausaaf Ahmad appeared first on Digital Photography School.


Digital Photography School

 
Comments Off on New Photographer’s Guide to Blue Hour

Posted in Photography


The Essential Guide to Black and White Photography

14 Aug

There has been a real buzz of excitement around dPS headquarters this past week because today we’re launching a new eBook that we’re really proud of – The Essential Guide to Black and White Photography – an eBook that will walk you through everything you need to know to take beautiful black and white images!

Blackandwhitephotographycover

My first love with photography was with black and white photography. It was in a high school. The class that I remember sitting in a darkroom with two friends, watching images appear in front of me on paper, sitting in a chemical bath.

At first they were faint grey outlines of the image, but as the chemicals did their work, tone, shade and contrast were added to the image until it had fully appeared.

While our family photos were all shot in colour from the time I was born, as a teenager I would spend hours gazing into those first black and white images that I’d shot and developed. I’m not exactly sure what it was about them but there was a timeless, classic and magical quality to them that I still love today.

It turns out that many of us here at dPS have similar memories and love for the black and white image, and so when we started to talk about putting together this new eBook on the topic we did so with real anticipation and energy.

We looked around for a photographer to author this guide 12 months ago and came across the work of David Nightingale. David not only shoots beautiful images but he’s the creator of one of the most successful courses on the topic so we knew we’d found our dream author and set out to convince him to partner on the project.

Thankfully he agreed and after many months of preparation today we’re excited to announce The Essential Guide to Black and White Photography is available for you to purchase with a very special Early Bird Offer.

The eBook walks you through everything from learning to ‘see’ and take beautiful black and white images, to advice on gear right through to processing your images to perfection.

NewImage

Early Bird Special

NewImageWhen you purchase The Essential Guide To Black And White Photography you’ll also receive a free copy of 10 Recipes for Amazing Black And White Photography.

This bonus eBook contains all the ingredients you’ll need for shots such as an Ansel Adams Landscape right through to vintage images and classic black and white portraits.

These recipes helps you take the amazing teaching in the essential guide, and put it into action in a variety of situations – it’s the perfect companion!

Normally this would cost you $ 9.99 USD, with our new essential guide it’s FREE – but for a limited time only.

Grab Your Copy Today

These two eBooks are yours today to download for just $ 19.99 USD.

They have straight forward explanations and tricks for all skill levels. Anyone wanting to take better black and white photos will get something out of this book.

Pick up yours here today.

The post The Essential Guide to Black and White Photography by Darren Rowse appeared first on Digital Photography School.


Digital Photography School

 
Comments Off on The Essential Guide to Black and White Photography

Posted in Photography