RSS
 

Posts Tagged ‘Guide’

A Guide to Photographing Dance Performances in a Theatre

09 Apr

DSC4090

One of the biggest challenges as photographer is shooting inside a theatre, simply because the only thing that you can control is the camera. You may be faced with very dim lighting conditions, dancers moving around at great speed, different lighting settings during the show, no use of flash, and your movement in the theatre during the show may be limited.

I am writing this guide based on an assignment you have with the organizer, as photographer of the event. Some of the points might not be relevant or accessible for you if you are attending a performance as a member of the public.

IMG 7011

Preparation for the shoot

Know the ground

A protocol for all professional photographers is to understand the grounds and what to expect. This can be done through an early visit (if allowed), or a search online for other’s work in the same location, to understand the layout and surroundings.

Request to attend a rehearsal prior to the performance (usual this is done free of charge) if possible, but to me this is mandatory if the opportunity exist. This not only gives you a chance to enter the theatre but also to understand what is to be performed and its sequence. You can then be better prepared to know the photos you will wish to take, and at which location you’ll need to be so you’ll be ready for the shot. Take this opportunity to talk to the organizer on which seats you will be allocated or which seat you prefer. I will cover location of seat for shooting in the technique part later.

IMG 4792 1

Settings: f/2.8, 1/125th, ISO 1600

Choosing your seat (if you have a choice)

I am very particular in my location of shoot as it reflect the quality if work I will produce from the assignment.
Most theatres can accommodate hundreds, to thousands of spectators at various elevations. My personal recommendation is to locate yourself on the ground level, a few rows behind the front, right in the middle. Below are some explanations of some problem you may encounter at different locations.

Up in the balcony

Cons: Too far from the stage, shooting angle not directly perpendicular to the dancers.

First row seats

Cons: Too near to the stage.

Side Seat

Cons: shooting angle not directly perpendicular to the dancers, too many distractions in photos (sometimes you can see dancers at the side before entry to the stage.

IMG 4399 1

Ideal seat

On the ground level, a few rows behind the front, right in the middle is the ideal seat. Personally if I can only sit at one location throughout the show, I will prefer this seat as it provide me a comfortable direction to the stage and most of my shots will be facing the dancers.

Type of Equipment needed

With the above, you can know decide what equipment you need for the shoot.

Flash Gun

As most performances prohibit use of flash during show, you can omit having one on your camera during the performance but do still carry one with you (I use it for group photo at the end of the show). The use of LED light is good as well for after the show shots.

Camera

In such challenging conditions, a camera with capability to handle high ISO settings without producing too much noise is preferred. I usually have my Canon 5D Mark II, and also my Sony 7R for such assignments.

IMG 6849 IMG 4669 1

Lenses

The most important piece of equipment you need after understanding the grounds and location is the right lens. A zoom lens is mandatory for me to enable me to reach out to the stage and get close-ups of the dancers. Lenses with large apertures are preferred in such low light conditions. I will touch on that more at the later section on why. I usually have my 70-200mm f/2.8 on my Canon, and the 16-35mm f/2.8 on my Sony 7R for wide-angle shooting.

Tripod/Monopod

This is a interesting topic as most theatres prohibit you from setting up a tripod, subject to organizer approval. If you are given a seat for shooting, a tripod will be difficult to manage with limited legroom space. I always use a monopod for such assignments in order to conserve energy.

IMG 6252

Camera settings: f/2.8, 1/30th, ISO 1000

IMG 4454 1

Camera settings: f/3.2, 1/500th, ISO 2500

Know your gear inside out

I am often on site photographing events and someone will come and ask for help as they can’t tune back to certain setting or something is not functioning correctly on their camera.

Shooting in a theatre is like sports photography. If you missed a moment it will be gone, and you will not have a second chance. Always be ready, and anticipate what is coming up. Study your camera inside out for all the functions that you wish to use and manipulate during the shoot. Know all the commonly used functions like setting ISO, aperture, shutter speed, etc. I usually use AV (Aperture priority) and control the ISO if I need more shutter speed.
On ISO, every camera has its own capability to handle ISO and minimize noise. Know the limit of your camera, like my 5D MarkII, I will not push it to more than 5000 ISO.

IMG 4470 1

Camera settings: f/2.8, 1/200th, ISO 800

Techniques to adopt

Basic technique for shooting such scenes is to select the right ISO for the shot with the right shutter speed, depending on the movement speed of the dancer. Things moves very fast in a performance and you have to make your camera adapt to what is happening on the stage, so you capture what you need.

A common trick I use something is to pre-focus on an stationary object on the stage prior to the dancers coming into position. This only works if you attend the rehearsal and know the staging of the show.

Lastly always shoot RAW for such events so that back at your desk the white balance can still be adjusted. Color balance can be off due to some lighting differences during the show.

IMG 4908

Camera settings: f/4, 1/250th, ISO 1600

IMG 4594 1

Camera settings: f/2.8, 1/320th, ISO 1600

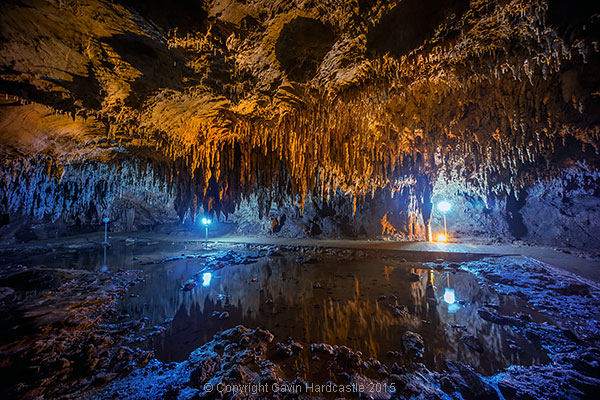
Photos taken during Enana Production and Academy performances.

googletag.cmd.push(function() {
tablet_slots.push( googletag.defineSlot( “/1005424/_dPSv4_tab-all-article-bottom_(300×250)”, [300, 250], “pb-ad-78623” ).addService( googletag.pubads() ) ); } );

googletag.cmd.push(function() {
mobile_slots.push( googletag.defineSlot( “/1005424/_dPSv4_mob-all-article-bottom_(300×250)”, [300, 250], “pb-ad-78158” ).addService( googletag.pubads() ) ); } );

The post A Guide to Photographing Dance Performances in a Theatre by Ray Toh appeared first on Digital Photography School.


Digital Photography School

 
Comments Off on A Guide to Photographing Dance Performances in a Theatre

Posted in Photography


Venus Optics offers hotshoe Macro Twin Flash KX-800 with guide number of 190ft/58m

09 Apr

Chinese flash manufacturer Venus Optics has launched a double headed macro flash unit, claiming that it has the highest guide number in the world for such a device. The Kuangren Macro Twin Flash KX-800 uses a pair of flash heads on extending flexible arms that can be positioned in front of the lens for extreme close-up work. Another arm houses an LED light to help with focusing. Read more

Articles: Digital Photography Review (dpreview.com)

 
Comments Off on Venus Optics offers hotshoe Macro Twin Flash KX-800 with guide number of 190ft/58m

Posted in Uncategorized


The Quick Guide To Corporate Photography

27 Mar

Businesses as well as individual business professionals have a wide range of photography needs that may need to be filled over time, and as a professional photographer, you have the opportunity to profit when you make an effort to fill these needs. There are essentially two types of corporate photography that you can focus on, and you may choose to Continue Reading

The post The Quick Guide To Corporate Photography appeared first on Photodoto.


Photodoto

 
Comments Off on The Quick Guide To Corporate Photography

Posted in Photography


The Ultimate Guide on How To Photograph Special Events

25 Mar

Weddings, birthday parties, anniversary dinners, christenings, product launches, retirement parties – these are special occasions and people always want professionally taken photographs to remember them by. This means that if you can perfect your technique and build a good portfolio of event images, you will always be in demand! The Do’s and Don’ts of Special Event Photography The important thing Continue Reading

The post The Ultimate Guide on How To Photograph Special Events appeared first on Photodoto.


Photodoto

 
Comments Off on The Ultimate Guide on How To Photograph Special Events

Posted in Photography


A Beginners Guide to Light Modifiers

25 Mar

Regardless of the light source you use (daylight, continuous or flash) it’s really easy to use light modifiers or shapers to train the light in any direction you want.

light-modifers

***A quick note about costs

Every kind of light modifier will have a top of the line version and a really cheap version. The main difference between the options is that the cheaper ones won’t be as durable. This becomes important when you’re using them every single day.

When you’re learning how to use them however, I recommend choosing cheap versions. You’ll figure out how they work and save yourself a lot of money.

I rarely work without some sort of diffusion because using naked flash spreads the light around too much. The result is hard shadows that I personally think look really unflattering.

Nobody is ever going to tell you, “Wow I love the way your hard lighting has captured and enhanced every single pore, line and blemish on my skin. I actually look ten years older. Thanks!”

There are, of course, many really cool uses for hard lighting and some photographers can make it look brilliant. I’m just not one of them. I like to control the light and only illuminate certain areas of my shot.

There are a couple of factors I consider before deciding what kind of light modifier to use:

1. What kind of lighting am I trying to replicate?

Fill Flash Light Styles HARD

As a general rule of thumb if you are in hard light conditions like full sun, then opt for a light modifier that creates hard light like a gridspot, beauty dish, fresnel lens or naked flash.

Fill Flash Light Styles Soft

If the light is soft like early morning, twilight, open shade, or overcast then chose a light modifier that produces soft light such as: a scrim, umbrella or softbox.

2. What kind of mood I’m in

What are the best light modifiers to recreate soft light?

The Umbrella

An umbrella creates a quality of light that is soft and abundant, and very forgiving. They are great to use if you want to light a large area with flat even lighting. Because umbrellas are quite easy to use, and relatively cheap, they are great as your first light modifier.

On the downside, umbrellas will over-light your shot spreading lots of light around. Lots of light. Everywhere. Like a hose with its spray nozzle set to “everywhere”.

UMBRELLA_bounce

Bounce umbrella throws light everywhere

Just like I consider eating Nutella straight out of the jar a sometimes food, you should consider using umbrellas as an only use in case of emergency style of lighting. If I overuse either, things tend to get a bit ugly.

Types of umbrella light shapers

  • Silver/gold reflective umbrella: These babies throw light everywhere. They are great for lighting large groups of people. The silver umbrella will give you a slightly cooler light, while the gold umbrella creates warmer light. Both produce a slightly harder light than the white reflective umbrella.
  • White reflective umbrella: This umbrella creates a soft light with slightly less spread and contrast than the silver or gold reflective umbrellas. Because the style of light created allows people to move around a lot and in a constantly even source of lighting, they are great to use when you are shooting groups and couples under pressure, like for an event.
  • White Shoot through umbrella: These are perfect as your first light modifier as they diffuse and spread light quite evenly.
Shoot Through_UMBRELLA

White shoot through umbrella

When my children were young, I taught them how to ride bikes using training wheels. The wheels boosted their confidence more than anything else. After a while, I took the wheels off and they rode on two wheels as if they’d been doing it all their lives.

Training wheels

I think using flash with umbrellas is the same. Use them as a learning tool until you get your balance, then move on to a better bike.

A final note on umbrellas

They are perfect for indoor lighting but become tricky, actually downright dangerous, to use outside. I’ve had countless (expensive) lights blown over using umbrellas! If you must use them then please make sure you have somebody holding them, or sand bags to keep them in place.

Scrim, baby

Scrim

After you’ve ditched your umbrella training wheels, the next step is to work with a scrim panel which is a square or rectangular frame with a fabric diffusion material covering it. Of all the light modifiers, a scrim is probably the most versatile and a must have in your kit.

Shapers scrim
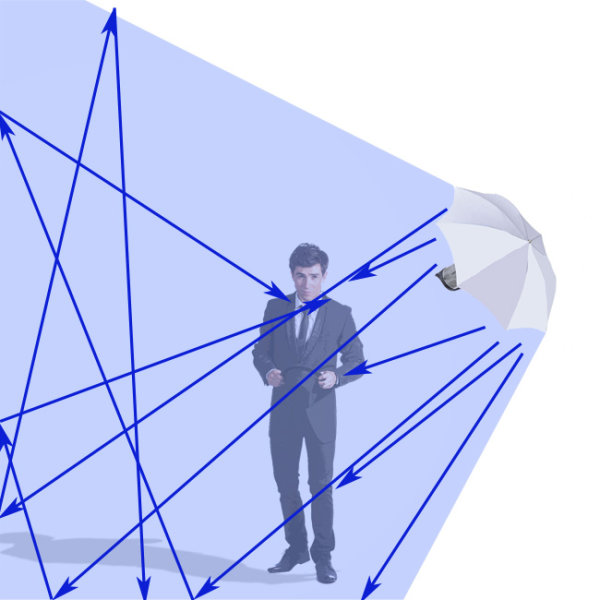
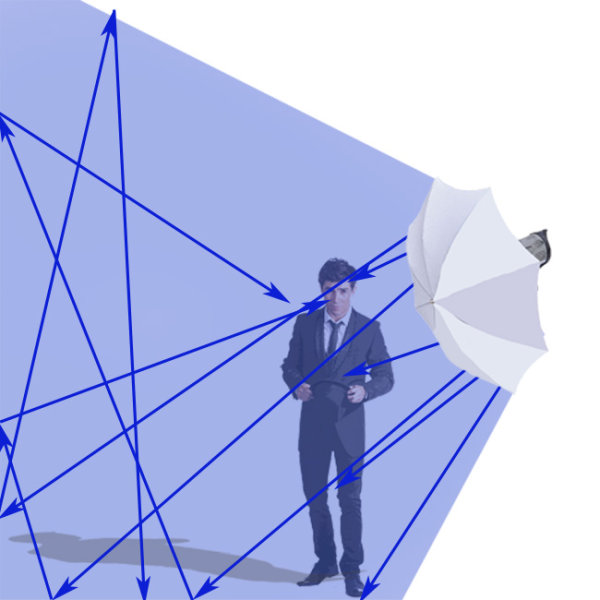
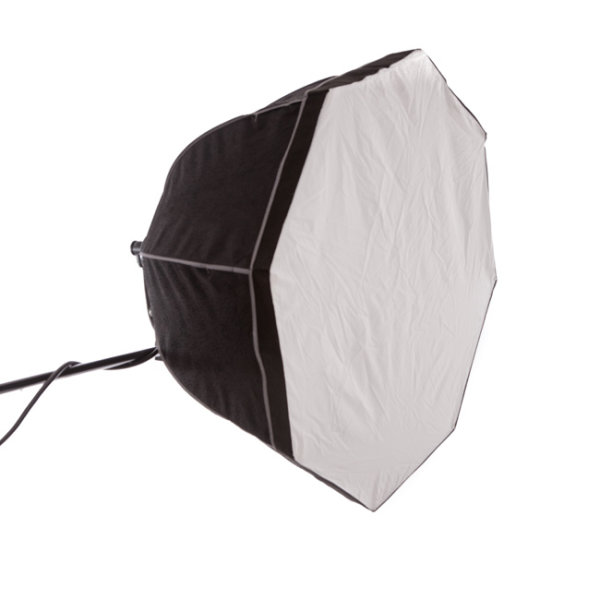
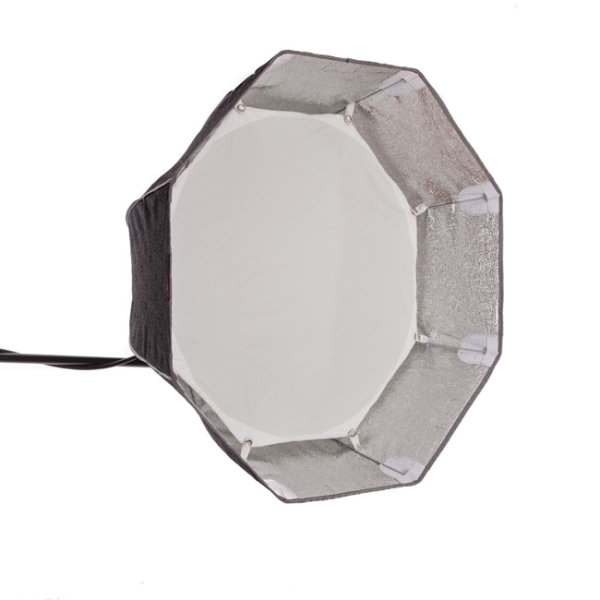
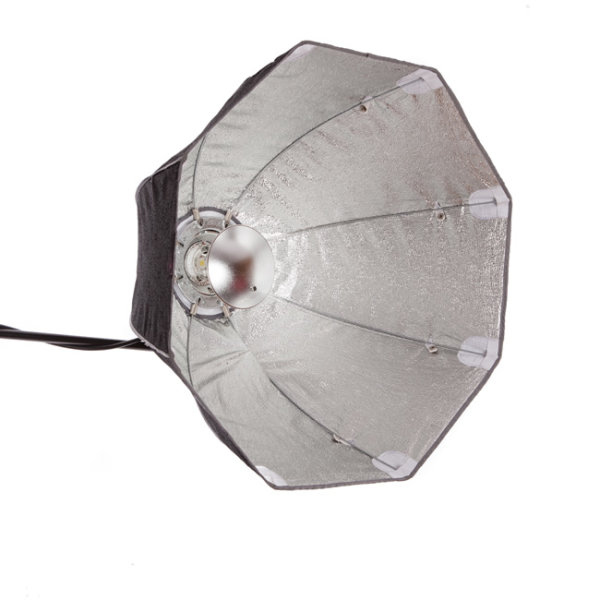
This is a really cool way to create large areas of soft diffused light, as if you were shooting next to a large window, or have light clouds over the sun.

Remember: The larger the light source, the softer the light.

This is a piece of equipment that you can easily make yourself. I used a DYI one for my first 10 years as a photographer and they are great for diffusing flash, continuous light, and sunshine.

Using a softbox

softbox

Small softbox 580EX+Lumiquest+stand 1

This image of race-car driver, Glauco Junior Solleri, was taken using a speedlight and small Lumiquest Pro softbox. This is a low-cost and versatile modifier that creates a beautiful soft light source that you can easily control. In this instance I only wanted to light Glauco’s face and let the background go to black, If I had used an umbrella (and spray light everywhere) the entire background would also be lit, killing my moody vibe.

If I could only pick one light modifier to take to a deserted island, it would have to be the softbox. Small, medium, or large – this little puppy is my go to light source for 80% of my shoots.

Why? The quality of light is soft, flattering and malleable. Changing the angle and proximity of the softbox to the sitter easily changes the hardness of light, and direction of shadow.

It’s one of the light modifiers that, I feel, recreates the effect of soft daylight through a window. I think what I like most about this light modifier is that it’s subtle. Highlights gently merge to shadows. I think I love this light modifier more than Nutella – there I said it.

Different softboxes

I use a few different kinds of softboxes depending on where and what I’m shooting.

If it’s a studio shoot I love using my Chimira Medium softbox with white reflective interior. The white interior creates a softer light and this particular softbox has an extra layer of diffusion on the inside, adding even more softness to the light.

Some photographers remove this interior panel because they like having more contrast of the harder light (because it’s not as diffused as much), but I prefer less contrast. You can also increase the spread and contrast of your light by using silver or gold interior panels.

Shooting using beauty lights

The beauty dish I have is quite a cheap brand, which goes to show you don’t need to shell out a lot of money for every piece of equipment. I like mine because it works with my speedlight, my Elinchrom monolight, and battery flashes.

Beauty-2

I like that kind of versatility in equipment because it means I have more options on the day of the shoot, and less to carry around!

The beauty dish differs from other light modifiers because it gives you a distinct circular, soft-contrast light, which is perfect for lighting faces and defining bone structure such as cheek bones and chin lines. They also create a circular catch light in your model’s eyes, which makes the reflection seem quite natural.

You can see why these modifiers are popular with fashion/beauty and celebrity photographers.

The downside of using beauty dishes is that the fall-off, from light to dark, is very rapid so you’ll often get shadows under your model’s chin and nose. You can compensate for the shadows by adding a fill board, like a white reflector, to reflect light up, onto your subject’s face.

Why would you use this over other modifiers?

A beauty dish gives you a certain look. It will just light a small area and flatten out your model’s features. It makes people look great but you need to light your model in quite a specific way, lighting them from above, to really pull it off.

Using a grid spot

Gridspot Gridspot 2

A portrait shoot I did with Australian actor Scott McGregor shows lighting without gridspot (left) and with gridspot (right).grid

The gridspot is a bit of kit you can use in conjunction with a speedlight, monolight, or battery operated flash. The width of the grid and the size of the holes will affect the width of the light beam hitting your subject. This is a hard focused light. I love to use grid spots in the same way I use beauty lights.

Why would you use this over other modifiers?

I like using grid spots because they create a similar light to beauty dishes. The light is a bit harder but they’re perfect for single portraits because you can pop a bit of light onto someone’s face and shoulders without impacting the background mood.

They are also perfect to use outside as they won’t get blown about.

Gridspot typesjpg

BeautyDish+Grid 1

Beauty dish with a gridspot

Fresnel light (lens)

Fresnel

The Fresnel light modifier gives a soft, crisp and very distinct look to my portraits. In this portrait of Australian actor Robbie Magasiva, I’ve placed the Fresnel light slightly to camera right to create a shadow, which I’ve softened by using an umbrella (Sprays soft light everywhere) to increase the amount of daylight fill.

Fresnel 2

A Fresnel is a light modifier that can be focused. They were first used in lighthouses, then the technology was developed to include continuous lighting for movies and television.

The style of lighting is soft and crisp, reminiscent of 1940s portrait lighting. This style of lighting has become really popular lately, particularly with fashion and editorial photographers. The downside of this type of lighting is you need to hock a kidney to afford one.

Octabox

Beauty dish Octa

Here are two different ways to use the Rotalux deep octabox. The image on the left of actor Firass Dirani is shot using a deep octabox as a beauty dish. The light source is hard and drops off rapidly under his chin to give a hard and contrasty light source, which not only defines and sculpts his features it also gives the image an edgy look.

The image on the right of actor Harley Bonner is shot using the same Rotalux deep octabox as I used with Firass but this time I’ve added the interior and exterior bevel giving a much softer light which blends in with the muted light and low key feel I was going for.

An octabox is what you’d get if a softbox and umbrella got married and had babies. An octabox has soft light, just like its mama the softbox, but spreads its light around more just like his daddy the umbrella.

They are fantastic for lighting large groups evenly. The other advantage some people like is they give round catch lights.

I don’t own an Octabox because I’m not a huge fan but do have a Rotalux deep octabox, which is what you get if a softbox married a beauty dish and made babies. This, as far as I’m concerned is a match made in heaven for lighting single portraits.

Octabox

Octobox with the front panel in.

octabox-interior-baffle

Octobox with interior baffle exposed.

octa_as_beauty_dish

Octobox as a beauty dish.

Mixing modifiers

Combolights

Model credit: Fat Tony and Co., image courtesy Nine Network Australia.

I often mix my lighting modifiers to make my images more interesting. In this television promotional shot I did for Fat Tony and Co., I used a medium deep octabox as my main light and a gridspot as a hair light. I also added an umbrella for fill light to camera left because the deep octabox alone was too moody and I wanted more detail in the shadows.

Do you have a favorite light modifier or do you like working with naked flash? Do you have examples of your favorite images? Please share them in the comments below. I’d love to see them and hear your thoughts.

googletag.cmd.push(function() {
tablet_slots.push( googletag.defineSlot( “/1005424/_dPSv4_tab-all-article-bottom_(300×250)”, [300, 250], “pb-ad-78623” ).addService( googletag.pubads() ) ); } );

googletag.cmd.push(function() {
mobile_slots.push( googletag.defineSlot( “/1005424/_dPSv4_mob-all-article-bottom_(300×250)”, [300, 250], “pb-ad-78158” ).addService( googletag.pubads() ) ); } );

The post A Beginners Guide to Light Modifiers by Gina Milicia appeared first on Digital Photography School.


Digital Photography School

 
Comments Off on A Beginners Guide to Light Modifiers

Posted in Photography


Beginner’s Guide to Light Painting

13 Mar
Mill Falls in Logan, Ohio. Main source of light for this scene was the street lights on the bridge over the river. The bridge was light painted with a high power spot light and some light was also add to the rocks in the foreground. Exposure was 69 seconds. Aperture was set at f/14 to maximize the star burst on the street lights. This image won the auther Bruce Wunderlich a photographers choice award in the 2014 Shoot the Hills photo contest.

Mill Falls in Logan, Ohio. The main source of light for this scene was the street lights on the bridge over the river. The bridge was light painted with a high-powered spotlight. Light was also add to the rocks in the foreground. Exposure was 69 seconds. Aperture was set at f/14 to maximize the starburst on the street lights. This image won me a Photographers Choice award in the 2014 Shoot the Hills photo contest.

What is light painting?

Light painting is an imaging technique that uses a moving light source to add light to an under-illuminated subject while taking a long-exposure photograph. A scene or object can be brought to life by painting with a beam of light!

You, the photographer, becomes an artist, and instead of just capturing an image as presented, with light painting you create the image that the camera is capturing. Light painting may take lots of patience and practice to perfect, but the results can be very rewarding. But let’s not make this sound too complicated – light painting is a lot like any low light photography, except in this scenario we are putting an outside light source in motion to enhance an image. Let’s take a look at some of the basics for light painting photography.

School_house_in_snow

Schoolhouse in the snow – 170 second exposure, f/8, ISO 100. Notice the light coming from inside the school house, added from the outside by shining a flash light through windows on the back side of the building.


Tools

  • Camera – Any digital camera capable of manual settings (Bulb).
  • Tripod – One of the most important tools to produce light paintings is a sturdy tripod. In most cases your shutter is going to be open for several minutes and it is very important that your camera does not move during the exposure.
  • Shutter release – Either use a cable release or a remote shutter release to begin your exposure. If you don’t have either of these, use your camera’s timer function to initiate the shot. To light paint, it is very important that you never touch your camera or tripod to prevent vibrations during the exposure.
  • Stop watch – A stop watch or some other way of timing your exposures is helpful, since most of these exposures are going to require your camera set to Bulb.
  • Light source – Many different types of lights can be used to do light painting. These light sources are your brushes and may include: flashlights, torch lights, lasers, glow sticks, flash or strobes, cell phones, or even candles. Just about anything that can produce light can be used as a brush to do light painting. Different light sources will produce different colors of light. For example, a LED light source will produce a cooler (blue) colored light, while a halogen source will produce a much warmer (orange) colored light.
  • Color gels –  Color gels can be used over your lights to alter the tint of your light and add color to your painting.
Exposure time 30 seconds at f/8

Exposure time 30 seconds at f/8

Camera Settings

  • Mode – Use the Manual mode setting, which allows you to set your shutter speed and aperture.
  • Image quality – Set your image quality to RAW, which allows you to capture as much information about your image as possible. (This is not a necessity if you are uncomfortable with shooting RAW, but is a recommendation.)
  • White Balance –  If you are wanting to balance your lighting to the light source, choose either the Incandescent or Tungsten setting. However, sometimes experimenting with other white balance settings can produce some interesting light effects. Daylight white balance is a good starting point if you want to use the color tones of your light sources. Auto White Balance is not recommended.
  • ISO – Set to a low ISO, such as 100.
  • F-stop or aperture – Stop down to f/8 or f/10, which allows you to get more depth of field and enables you to use a longer shutter speed.
  • Shutter speed – Set shutter speed to Bulb, so your actual shutter speed will be determined by the amount of ambient light in the scene.
  • LCD brightness – Lower the brightness of your LCD preview, because the normal setting is too bright at night and will make your image look bright when it is really under-exposed.
  • Histogram – Use your histogram to help check your exposure. If the histogram charts heavily over to the left, your image is going to be mostly dark.
  • Blinkies – Turn on your blinkies (highlight warning) to help you determine if your highlights are exposed properly. It is perfectly acceptable for your brightest highlights to have the blinkies if the rest of your image is properly exposed.
  • Image Stabilization – Set to Off. With your camera on a tripod, having image stabilization turned on can actually fool your camera or lens and cause blurring in your image.
  • Long exposure noise reduction – Recommended setting is Off. This setting can be set to On, but will cause your exposures to double while the camera takes a second black exposure to help remove noise. If your camera is set to a low ISO, the noise level will be low enough in most cases to make this setting unnecessary. Still, it is a good idea to check your noise level before you start, and some older cameras may require this setting to be On to get usable noise levels.
Still_life

This vase was back lit with a candle and the flowers were painted with a small pen light. 30 second exposure, f/16 ISO 100.


Begin with ambient light

The first step before beginning any light painting is to determine the ambient light in your scene. Determining base exposures can be time consuming when you are experimenting with exposures that could be three to four minutes long. Here is a little trick that can help expedite this process.

  1. Set your ISO to six stops higher than the ISO you plan to use. Example, if you are planning to shoot at ISO 100, set your ISO to 6400.
  2. With your camera set at ISO 6400, experiment to find out how many seconds you will need to expose the ambient light of your scene. Every second of exposure at ISO 6400 is equal to one minute at ISO 100.
  3. So now set your ISO back to 100 and prepare to begin your exposure in minutes instead of seconds. Many cameras lowest ISO is 200 so 6 stops higher would be 12800, and if you cameras lowest ISO is 50, six stops higher would be 3200.
30 second exposure at ISO 800. In this image the ISO was increased to shorten the exposure to 30 second any exposure longer then that would cause a noticeable blur on the stars. Light Painting was applied from the front of the subject without letting the light shine directly back at the camera.

30 second exposure at ISO 800. In this image the ISO was increased to shorten the exposure to 30 second because any exposure longer then that would cause a noticeable blur on the stars. Light painting was applied from the front of the subject without letting the light shine directly back at the camera.

Focusing

Focusing your camera is an important step and in the dark it can sometimes be difficult to achieve. The simplest way to get your focus is to shine a light source to a spot in your scene that you have determined must be in focus. Using autofocus, place your focus point on the light and make sure your camera is focused on that point. Now change your camera from autofocus to manual and your focus will not change. But remember, if you move the camera you must turn your autofocus back and refocus. Back button focusing is another great way to achieve focus for light painting.

The Exposure

At this point, you have determined your exposure time and have your camera focused on your subject. It’s time to begin your exposure and start painting. Most cameras will allow you to set exposures of up to 30 seconds. For exposures over 30 seconds, set your shutter speed to Bulb. Use your cable release or remote to trigger your shutter open. Your shutter will remain open until you press the release again. Use your stop watch, or the timer on your phone, to time the exposure length.

1971 VW bus

This vintage 1971 bus was painted using one LED flash light on the outside, with a second light used inside to light up the interior of the bus. White balance was set to Daylight, which cause the LED light to produce the cool blue cast around the bus.

Painting techniques

  • Paint from the sides – Don’t just stand behind your camera and wave your light around over your image. Painting flat surfaces from the side will allow you to bring out the textures of the surface.
  • Use lots of different angles – for instance, when painting the ground hold the beam low and pan the light over the ground. This will keep the ground from appearing flat and bring out all the details of the surface. Also, by adding light from many angles your resulting image will have an interesting three dimensional effect.
  • Don’t stand between the camera and your light source or you will show up as a silhouetted ghost in your image.
  • Wear dark non-reflecting clothing and keep moving. Again, you do not want to appear as a ghost in your image!
  • Don’t shine the light source back at the camera, or else you will create a bright spot in the image.
  • Use a flash light with a red filter when you need to check your camera to make adjustments. The red light will keep you from ruining your night vision.
  • Different surfaces are going to react to light differently. Wood surfaces may require more light than shiny surfaces such as metal or glass, as rougher surfaces absorb more light than smooth surfaces.
  • Keep your light moving. Move the beam in slow strokes to add light and make faster strokes in areas where less light is needed.
  • Paint in up-and-down or side-to-side strokes, just like one paints with real paint.
  •  You are more than likely not going to get the shot you want on the first try, and it may take multiple attempts to get an image that you are satisfied with. For this reason, try to keep track of how much light you add to each surface. Develop a plan so that you can make adjustments to each exposure until you get the image you have visualized.
Howard Ignatius

30 second exposure at f/5.6, ISO 1250 (to get the stars to show up). By Howard Ignatius

Be Creative

These are a few basic tips to help you get started with light painting. There is so much more you can do with this medium. Be creative and fearless about trying new things. Once you start to get the hang of light painting, there is no limit to the images you can create with your camera in the dark and a few creative light sources. Do you have any additional tricks or tips for light painting to share?

googletag.cmd.push(function() {
tablet_slots.push( googletag.defineSlot( “/1005424/_dPSv4_tab-all-article-bottom_(300×250)”, [300, 250], “pb-ad-78623” ).addService( googletag.pubads() ) ); } );

googletag.cmd.push(function() {
mobile_slots.push( googletag.defineSlot( “/1005424/_dPSv4_mob-all-article-bottom_(300×250)”, [300, 250], “pb-ad-78158” ).addService( googletag.pubads() ) ); } );

The post Beginner’s Guide to Light Painting by Bruce Wunderlich appeared first on Digital Photography School.


Digital Photography School

 
Comments Off on Beginner’s Guide to Light Painting

Posted in Photography


Posing Guide: How to Pose Groups without Losing Your Mind

09 Mar

The other day I had mom bring her daughter in for fine art dance pictures. “Oh, just snap away while she’s doing her competition routine… she doesn’t like to be interrupted,“ the mom said as the daughter grand jeted halfway off my roll paper half in the storage room, facing completely away from me. Shooting that would be crazy, right? Continue Reading

The post Posing Guide: How to Pose Groups without Losing Your Mind appeared first on Photodoto.


Photodoto

 
Comments Off on Posing Guide: How to Pose Groups without Losing Your Mind

Posted in Photography


The Ultimate Guide to Buying a Tripod

03 Mar

You need a tripod for long exposures

Picture the scene – Bangkok airport and I’m settling into seat 16H on my short Thai Airways flight to Siem Reap, Cambodia. The lovely hostess hands me a hot, scented towel as I shout ”Bollocks” while slapping myself firmly on the forehead.

She gives me a justified look of disdain while I apologize for my outburst and then start begging her to contact Lost & Found as soon as possible. You see, I’d stupidly left my gorgeous carbon fibre, ball head tripod, in one of those plastic trays into which all airports now force you to empty your worldly goods before being forced through the X-Ray machine.

I’d somehow managed to wander through Bangkok airport, grab a snack, check my email and then board the plane without even realizing I’d lost one of my most essential pieces of equipment. I blame it on the terror filled drive through downtown Bangkok the night before while trying to find our hotel, it was a late night.

I realize I will never see that beloved tripod again.

Night Photography requires a sturdy tripod

So I touch down in Siem Reap, Cambodia and the first thing I do is go shopping for a tripod. Siem Reap has seen some major development over the years but it’s still a galactic black hole when it comes to tripod shopping.

The best I could find was a $ 45 Yunteng tripod with a plastic video panning tripod head that has one of those long handles that poke you in the eye every time you try to look through the viewfinder.

It was like going back in time to the very first tripod I’d ever bought. The next four days of shooting were an exercise in rage management as it took me five times longer to set up my shots. If it hadn’t been for my ever present tuk-tuk driver and his calming influence, I would have bent that tripod over my knee and tossed it under the wheels of a bus for good measure.

No wonder so many beginner photographers quit at the tripod using stage.

A good tripod makes ALL the difference

When buying a tripod, if you go for an El Cheapo one, two things will happen:

  1. You’ll spend so much time messing around getting your camera in position that by the time you’re ready to take the shot, you’ve already lost the will to live.
  2. You’ll realize that the $ 45 you spent could have gone towards a proper tripod that you now know you’ll have to buy anyway.

I realize that for total beginners, spending around $ 400 on a tripod seems like a major financial commitment but I’ve seen so many of my workshop students struggle in frustration with shoddy tripods that it breaks my heart. When I lend them one of mine, it’s like a ray of sunshine for them. At that point they realize their cheap tripod is now junk.

Long exposure - Why You Need a Good Tripod

Speed is important

You might think that if you’re using a tripod to hold your camera in place, that means you’ve got plenty of time to frame your shot. Sometimes that’s true but more often than not, the scene changes quickly, especially when you’re dealing with nature. Weather and wildlife won’t wait for you to get your tripod set up.

Things to consider when buying a tripod and tripod head

1 – How fast do the legs telescope?

I can’t stand those rubber twist leg locks that you have to loosen and then tighten. I much prefer quick release grips that flick open and quickly drop those tripod legs. Securing the extended legs requires a quick push of the thumb and you’re done. If your tripod has four telescopic extenders with threaded grips you’ll still be setting up your shot while I’m at the next shooting location.

Tripod Comparison

2 – How fast does the ball head adjust?

Once your tripod is in place and secure, it’s time to position your camera. For me, the best ball heads are those that only require one lever to loosen and tighten. That means that with just two turns of the lever I can position my camera in exactly the right position.

It’s also important to get a ball head that allows you to quickly switch between landscape and portrait aspect. A lot of cheapo tripods have those flippable mounts that you have to loosen first then tighten once in place. These are usually abysmal as you struggle to get just the right position and then the flimsy flippable part wobbles from the impact of just your breathing.

Ball Head Tripod

Manfrotto 496RC2 ball head


3 – Easy quick release

The thing that infuriated me the most with my temporary $ 45 Yunteng tripod was the quick release clip which mounts the camera on to the tripod head. I longed for my well oiled Manfrotto head with its trusty quick release clip.

Mounting the camera on the tripod head should be quick and easy. When shopping for a tripod, get the store clerk to demonstrate and then try it out yourself multiple times until you feel if it’s right for you. Some of the smoothest looking quick release plates I’ve seen are made by Really Right Stuff.

Really Right Stuff Quick Release Plates

4 – How heavy should my tripod be?

This is a personal choice based on your exact needs, and how much you can carry. There’s always a trade-off between portability and sturdiness. Heavier tripods will laugh in the face of a strong wind, while super lightweight carbon fibre tripods will vibrate. You can always attach a rock filled bag to the central stem of your tripod to give it more stability in high winds.

5 – How big should my tripod be?

Again, this depends on your travel plans. Since my recent loss at Bangkok airport, I’m now considering buying a smaller tripod that will actually fit into my camera bag. A smaller tripod won’t be anywhere near as sturdy, but for the Siem Reap shoot it’s not as if I had to face high winds and extreme weather, so smaller would have been okay.

Very tall photographers will most likely have to shop for tripods that cater to their height. Sure, you can always extend your tripod’s central column, but that’s always a last resort as you’ll find it induces major wobble from just your hand contact with the camera.

6 – How much should I spend?

Here’s another important thing to consider. If like me, you’re a bit of a Gormclops, don’t buy the best that you can afford. I abuse my tripods by shooting in the ocean, rivers, deserts and mountains. If I’m lucky, I’ll get two years out of a tripod (assuming I don’t leave it in the airport) so it just doesn’t make sense for me to spend big money when I can get a very capable tripod for under $ 400, that already comes with a good ball head.

7 – Do I need a bubble level?Camera Bubble Level

Although not essential, it’s nice to have an accurate bubble level on the tripod stand itself, and one on the tripod head. If you’re lucky enough to have a digital level inside your camera (like my Sony A7R) you probably won’t use a bubble level much. If you have neither, you can always attach a bubble level to your cameras hot shoe attachment as pictured here (see photo right).

Why do I even need a tripod?

If you want tack sharp images (see my article on how to get super sharp landscape images) with the best possible image quality, accept that a tripod will become a part of your anatomy. For long exposures, a tripod is essential. If you shoot weddings, portraits, action and events, a tripod may just get in your way.

Which brands should I buy?

I’m not going to recommend one brand over another. I advise that you try out as many tripods and heads as you can. It’s fine to read reviews but you need to get hands on to decide which tripod and head combination works best for your needs. A specialist camera store should have a much wider choice of consumer and pro level tripods to choose from.

Enough Yunteng Bashing

Cheap Yunteng Tripod
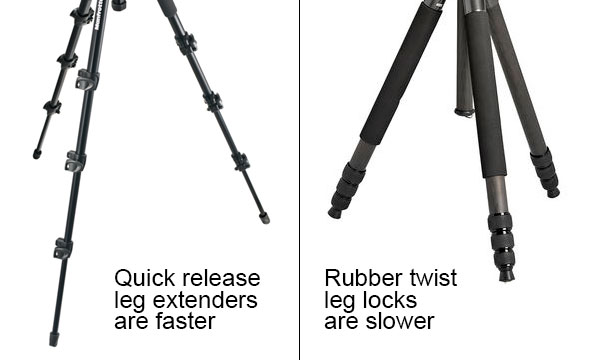
To be fair to Yunteng, I got the sturdiest tripod I believe it’s possible to find for a measly $ 45. It didn’t fall apart, was light, and in all honesty the tripod head was made for video, not stills. I got exactly what I paid for. I’ll keep it in my studio as a demonstration tool for showing people the difference between a $ 45 tripod and a $ 400 tripod.

What features do you look for in a tripod? Do you have any horror stories or recommendations for our readers?

googletag.cmd.push(function() {
tablet_slots.push( googletag.defineSlot( “/1005424/_dPSv4_tab-all-article-bottom_(300×250)”, [300, 250], “pb-ad-78623” ).addService( googletag.pubads() ) ); } );

googletag.cmd.push(function() {
mobile_slots.push( googletag.defineSlot( “/1005424/_dPSv4_mob-all-article-bottom_(300×250)”, [300, 250], “pb-ad-78158” ).addService( googletag.pubads() ) ); } );

The post The Ultimate Guide to Buying a Tripod by Gavin Hardcastle appeared first on Digital Photography School.


Digital Photography School

 
Comments Off on The Ultimate Guide to Buying a Tripod

Posted in Photography


Gear Guide: The Ultimate Authority on What to Put in Camera Bag

27 Feb

I remember my first time in a Real Professional Camera Store, Samy’s Camera, in Los Angeles. I had money to burn in my pocket so that I could buy the right equipment to be a Professional Photographer, but instead of being a kid in a candy store, I was a vegetarian in a hunting store. Nothing looked familiar. There were Continue Reading

The post Gear Guide: The Ultimate Authority on What to Put in Camera Bag appeared first on Photodoto.


Photodoto

 
Comments Off on Gear Guide: The Ultimate Authority on What to Put in Camera Bag

Posted in Photography


A Beginner’s Guide to Mirrorless Cameras

13 Feb

Micro four-thirds cameras, otherwise known as mirrorless cameras, have been around for a little while now. And during the time they’ve been on the market, the companies that make them have been steadily improving on these pint-sized wonders. Many professional photographers in different fields are beginning to make the switch to mirrorless cameras, opting for something smaller than bulky DSLRs. Continue Reading

The post A Beginner’s Guide to Mirrorless Cameras appeared first on Photodoto.


Photodoto

 
Comments Off on A Beginner’s Guide to Mirrorless Cameras

Posted in Photography