RSS
 

Posts Tagged ‘Guide’

A Beginner’s Guide to Choosing the Right Post-Production Software

12 Jan

When it comes to choosing your first piece of post-production software you may find yourself spinning in circles. There’s so much to choose from, and the whole idea of learning to do something new can be intimidating. This article will cover a number of the most well known software options available, and hopefully lead you towards the right decision for you.

Adobe Photoshop CC

Over the years no one has truly been able to displace Adobe’s dominance of the photography software market. Both Lightroom and Photoshop are hugely popular pieces of software and regarded as the go to platforms for professionals. Let’s break down both Lightroom and Photoshop individually to see what makes them so popular.

Adobe Lightroom

LR

Lightroom is the most popular tool available for post-processing your images. It can be used as an all-in-one solution for post-processing, image storage, and printing. Due to this all-in-one nature, Lightroom becomes a convenient and powerful option for both new photographers and pros alike.

One of the biggest differentiating factors of Lightroom verses other post-production tools is that it is widely supported by third party developers. What this means is that you can find a number of plugins for Lightroom that will allow you to extend your workflow beyond the core program. You’ll also be able to find a number of Lightroom presets, which can help you speed up your workflow by saving time for tedious edits. On top of that, sites like Smugmug and Zenfolio allow you to hook right into Lightroom, enabling you to share your photographs directly from your Lightroom catalog to your website.

Finally, due to the popularity of Lightroom, there is no shortage of support for you on the web. If you have a question about something related to processing an image with Lightroom look no further than YouTube or the many eBooks written on a number of different aspects of Lightroom’s features (including Loving Landscapes, a dPS ebook about processing your landscape images in Lightroom).

This whole package of features, extendibility, and resources, is why I’d suggest Lightroom as the first program for any new photographer looking to get into post-production. Not only are you getting a very capable program for editing and organizing your images, but you have the ability to extend the core features as your skills develop. You also have an endless supply of help from the many tutorials written on the platform over the years.

Adobe Photoshop

PS

Lightroom may be the best place to start as a new photographer, but Photoshop is a close second. The only reason I place Photoshop second on this list is due to its complexity. You still get the same great community of professional photographers, which enables you to learn more quickly, and you’ll still find a wealth of Photoshop Actions to help you speed up your workflow, but the learning curve for Photoshop is quite a bit more challenging than that of Lightroom, making it harder to recommend to a total beginner.

Adobe’s Creative Cloud platform is a subscription based model, which gives you access to both Photoshop and Lightroom for $ 10/month. The reason to pay the premium for Adobe’s products, over the ones I’ll list below, is not because they will perform better edits, but rather because of the way they integrate with other pieces of software, and the availability of tutorials on the web.

Open Source Options

If you’re not ready to invest money into your post-production workflow just yet, then these open source platforms are where I’d direct your attention.

GIMP

wilber_painterGIMP is the most well known Photoshop alternative out there. It has been around for years, works on both PC and Mac, and will provide you with many of the same tools that Photoshop offers. Being open source it doesn’t have the polish that Photoshop does, and won’t offer nearly as many third party options or tutorials. However, as a budget friendly way of processing your images, this is by far the best way to go.

Darktable

darktableDarktable is what I’d recommend if you’re looking for a RAW developer to substitute for Lightroom. Like GIMP, this is an open source option, which offers a number of features that will give you complete control of your images, and truly does compete with Lightroom in that area. Again where it’ll fall flat is that you’ll have less extendibility, and not as many resources to help you along the way. Note: Darktable does not work on Windows.

Other Tools

When it comes to post-production there are a number of what I’d call, supplemental tools available. These tools are designed to work in conjunction with Photoshop and/or Lightroom, and help you further refine your style as a photographer.

TopazLabs

logo_smallThe TopazLabs line of products includes 17 different pieces of software, each one specifically designed for its own unique purpose. These tools are designed to help you enhance and speed up your post-production workflow, but not necessarily replace Photoshop or Lightroom, although some of Topaz’s programs, like Impression and Texture Effects, do offer some standalone functionality that will let you create very different types of images.

Nik Softwarenik-logo

Like TopazLabs, Google’s Nik collection is a set of tools that will help you enhance and speed up your workflow. There aren’t as many different tools, and Google has a recent track record of killing off products that weren’t working for them without warning. But, the Nik collection is powerful, and will give you some great functionality beyond just Lightroom’s basic toolset.
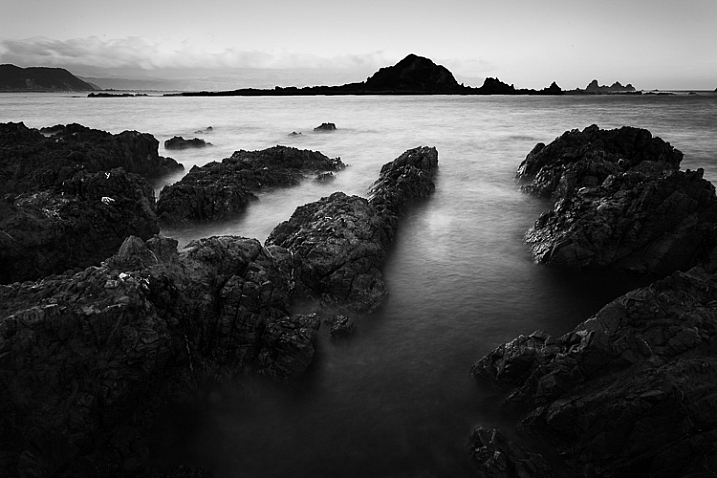
Photomatix

photomatixPhotomatix has been the leader of the HDR post-production world for quite some time. Their product continues to produce some of the best controlled tone mapped images, and would be a great addition to your set of tools if you wanted to get deep into HDR photography.

Aurora HDR

aurorahdrAs an alternative to Photomatix, Aurora HDR is a newly released product from Macphun, in partnership with Trey Ratcliff. At the moment Aurora HDR is only for Mac and is an early stage product, so there’s bound to be some growing pains. That said, with backing from Trey Ratcliff, who’s made his name on HDR photography, this product could eventually get to where it wants to be – which is an all-in-one HDR tool, that doesn’t require Lightroom or Photoshop to produce images.

Not a beginner? What else would you recommend?

If your favorite piece of software didn’t make this list let us know why you like it, and why you’d recommend it over the others in the comments below.

googletag.cmd.push(function() {
tablet_slots.push( googletag.defineSlot( “/1005424/_dPSv4_tab-all-article-bottom_(300×250)”, [300, 250], “pb-ad-78623” ).addService( googletag.pubads() ) ); } );

googletag.cmd.push(function() {
mobile_slots.push( googletag.defineSlot( “/1005424/_dPSv4_mob-all-article-bottom_(300×250)”, [300, 250], “pb-ad-78158” ).addService( googletag.pubads() ) ); } );

The post A Beginner’s Guide to Choosing the Right Post-Production Software by John Davenport appeared first on Digital Photography School.


Digital Photography School

 
Comments Off on A Beginner’s Guide to Choosing the Right Post-Production Software

Posted in Photography


A Beginner’s Guide to Doing Black and White Photography

12 Jan

If you’ve never tried black and white photography before, you may be wondering what the appeal is. After all, isn’t it a little like black and white television or silent movies – an anachronism in our modern, high-tech age?

Black and white photography

The answer is no, definitely not. In the photography world, black and white is considered an art form. Some would even say only the best photographers work in monochrome. It’s a medium with a rich history, (look at the work of Ansel Adams, Edward Weston or Henri Cartier-Bresson for examples) and a bright future.

Just as importantly, working in black and white can help you become a better photographer. How? It’s all to do with composition.

Colour is very powerful, and tends to dominate the photo so much that it’s difficult to see other elements like tonal contrast, texture, shape, form and quality of light. Experienced photographers instinctively see these things, regardless of whether they work predominantly in colour or black and white. But if you’re just starting out, you may need some assistance to do so, and working in black and white photography will help you.

Black and white photography

Black and white emphasizes the textures of the rocks and sea in this landscape photo.

Naturally, there are certain subjects that tend to work better than others in black and white; two in particular are landscapes and portraits. If this is your first time shooting in black and white, then these are great subjects to try out.

Black and white photography

Black and white portraits emphasize expression and quality of light.

Black and white on your camera

Before digital photography the only way to work in black and white was to use black and white film. Thankfully, now it’s much easier to work in black and white, just by switching your camera to Monochrome Mode (check your camera’s manual if you are unsure how to do so, look for Picture Styles settings).

Cameras with electronic viewfinders automatically display the image in black and white, helping you see how the image will look, before you press the shutter. If you have a digital SLR you will get the same effect in Live View. This may be useful if you are working with your camera on a tripod (for instance, taking a landscape photo).

Usually at this point I advise you to use the Raw format. In the long run it’s easier than using JPEG, and gives you better image quality. But I appreciate that if you’re new to photography you may still be working exclusively in JPEG. The rest of this article works on this basis.

Working in Monochrome Mode

Once in monochrome mode you will see some extra options. They help you set your camera up to produce the best results. Again, check your manual if you are not sure where to find them.

Colour filters

The colour filter settings are left over from the days of film photography. Photographers would buy coloured filters, and use them to alter the tones in black and white photos. For example, if your scene includes a blue sky, then using a yellow filter will make the sky a little darker, an orange filter makes it even darker, and a red filter darker still.

Black and white photography

This scene works quite well in black and white, but it’s not nearly as dramatic as it could be.

Black and white photography

Applying the Red filter setting makes the blue sky go much darker, creating a much more dramatic version of the same scene.

There is also a place for green filters, which can bring out more detail in green subjects like leafy forests. Those four coloured filters (red, orange, yellow and green) have made their way onto most digital cameras as black and white settings.

Contrast

If you take a photo in flat light (for example, a portrait of somebody standing in the shade) the photo may look flat (two dimensional). So, you need to compensate by increasing the contrast. You can either do this in Photoshop or Lightroom after the photo has been taken, or you can do it in-camera with the contrast setting.

Black and white photography

The model was standing in the shade when I took this photo. The light lacks contrast, and the black and white photo is flat.

Black and white photography

Increasing contrast creates a much stronger image.

Cropping and the square format

Most modern cameras let you change the aspect ratio. The reasons why you might want to do that are a little complex, but the main one is that it lets you shoot in the square format, something you may already be used to if you use an app like Instagram on your smartphone. If your camera has an electronic viewfinder, it will display a square image for you, making composition much easier.

Black and white photography

Cropping to the square format emphasizes the shapes of the three pots.

Toning

Finally, you may have the option to tone your images. To be honest, unless your camera lets you apply toning affects subtly, I wouldn’t bother with these, as the effect is usually too strong.

Have fun!

Black and white is a beautiful medium to work in, one which you will appreciate the more you practice. In the meantime – have fun and enjoy yourself. You are following a path trodden by some of the most famous names in photography. And of course, if you have any questions about working in black and white, please let us know in the comments.


Masterlng Lightroom: Book Three – Black & White by Andrew S Gibson

Mastering Lightroom: Book Three – Black & White

My ebook Mastering Lightroom: Book Three – Black & White goes into the topic of black and white in depth. It explains everything you need to know to make dramatic and beautiful monochrome conversions in Lightroom, including how to use the most popular black and white plug-ins. Click the link to visit my website and learn more.

googletag.cmd.push(function() {
tablet_slots.push( googletag.defineSlot( “/1005424/_dPSv4_tab-all-article-bottom_(300×250)”, [300, 250], “pb-ad-78623” ).addService( googletag.pubads() ) ); } );

googletag.cmd.push(function() {
mobile_slots.push( googletag.defineSlot( “/1005424/_dPSv4_mob-all-article-bottom_(300×250)”, [300, 250], “pb-ad-78158” ).addService( googletag.pubads() ) ); } );

The post A Beginner’s Guide to Doing Black and White Photography by Andrew S. Gibson appeared first on Digital Photography School.


Digital Photography School

 
Comments Off on A Beginner’s Guide to Doing Black and White Photography

Posted in Photography


PaintShop Pro launches faster brush tools, in-app guide and tutorials with version X8.1

05 Jan

Software provider Corel has updated its PaintShop Pro X8 image manipulation program to include more help and guidance to enable users to find their way around the tools and features of the application. A new welcome screen has been added to version X8.1 that offers links to tutorials and inspirational features, as well as to partner paid-for content from the online training site Udemy. The idea is to help photographers get more from the program by making it clear what tools are available and how they should be used. 

The application features links to on-line training company Udemy

The update also brings what Corel describes as ‘performance enhancements’ across the application, but especially faster brush speeds. The company claims nine brushes, including Paintbrush, dodge/burn and clone, are now on average twice as fast, while the Wet Paint brush is four times faster than it was previously. There are also over 100 additional enhancements that the company has made based on feedback from its user community. 

On the download page of the Corel website there is a list of ten issues that the new version addresses, including color problems with Raw files from the Nikon D810. 

Issues addressed

  • Burn Brush: Fixed edge result (previously showed darker result along brush edges)
  • Color Replacer: No color bleed when using the Round brush to fill shapes
  • Text wrapping: Left and Center alignment results fixed. Stability improved when saving layered text wrapping files to a .pspimage format compatible with legacy versions of PaintShop Pro.
  • Nikon D810: Fixed raw image color issue
  • Resize dialog box: Now retains settings last used for Based on One Side
  • Magic Move in scripts: Fixed reported issues related to accurate rendering of script commands
  • Material Properties palette: Improved stability when adding custom swatches
  • Organizer palette: Restored drag-and-drop functionality between the palette and the workspace
  • Script selection: Fixed script selection issue in the Batch Process dialog box
  • Adjust workspace: Restored ability to set Save As option once per session (dialog box does not open for each photo edited)

The update is free to download and install for current users of PaintShop Pro X8 and X8 Ultimate. Suggested retail pricing (SRP) for PaintShop Pro X8 is $ 79.99 (USD/CAN) / EUR 69.99 / £59.99 / $ 99.95 AUD. Qualifying registered users can purchase for the upgrade price of $ 59.99 (USD/CAN) / EUR 49.99 / £44.99 / $ 69.95 AUD. 

SRP for PaintShop Pro X8 Ultimate is $ 99.99 (USD/CAN) / EUR 89.99 / £79.99/ $ 129.95 AUD. Qualifying registered users can purchase for the upgrade price of $ 79.99 (USD/CAN) / EUR 69.99 / £64.99 / $ 89.95 AUD.

For more information visit the PaintShop Pro website. 


Press release: 

Free PaintShop Pro X8 Update Adds In-App Learning With New Ways to Access Complementary Tools & Content, Plus Increased Performance

X8.1 brings dramatic brush acceleration and performance enhancements app-wide

Today, Corel announced the latest update to its photo-editing and graphic design software, PaintShop® Pro X8.1. This release introduces the Welcome Guide, an all-new in-app learning tool that makes it easier than ever to access helpful tips and tricks. Users will also find new ways to discover content to enrich the PaintShop Pro experience, plus significant performance enhancements app-wide, including major improvements to brush speeds. The X8.1 update is available now and is free to all registered users of PaintShop Pro X8. 

New Welcome Guide & Add-on Content 

Continuing PaintShop Pro’s drive to make photo editing and graphic design more accessible, the new Welcome Guide makes getting started quick and easy. Fire up X8.1 and you are presented with a dedicated window linking to several tutorials and new project ideas. 

Users can now discover additional brushes, plug-ins, complementary programs, and plenty more to extend PaintShop Pro’s already strong photo and design toolkit, with new tools and content to be added on an ongoing basis. The new features in X8.1 come as part of Corel’s commitment to deliver continuous updates and improvements to PaintShop Pro without requiring a subscription. 

“A lot of people get intimidated when using a full-fledged photo-editor, often because they don’t know where to start,” says Greg Wood, Senior Product Director for Photo at Corel. “We want everyone to feel comfortable when they open PaintShop Pro, even if it’s their first time. The new Welcome Guide provides users with video and training content to help them explore PaintShop Pro’s many features, as well as direct access to a brand new learning series from our friends at Udemy.” 

Faster Brushes & Performance Enhancements 

PaintShop Pro X8.1 also delivers major performance improvements, including dramatically accelerated brush speeds when working with larger images. Nine brushes, including the Paintbrush, Dodge/Burn, Clone and others have seen an average improvement of 2x faster than before, with the Paintbrush’s Wet Paint look getting a boost of up to 4x faster! 

Building on PaintShop Pro’s performance, this latest update also includes more than 100 enhancements based on feedback from the PaintShop Pro user community. For more details on the latest improvements to PaintShop Pro X8, please visit our updates page for additional info. 

Articles: Digital Photography Review (dpreview.com)

 
Comments Off on PaintShop Pro launches faster brush tools, in-app guide and tutorials with version X8.1

Posted in Uncategorized


Your Last Holiday Guide and Special FREE Gift From Us!

14 Dec
GG4

It’s our *sniff* last gift guide of the season and we’ve saved the very best for last. A game-changing camera for your phone, our incredible Iris lens set and all the best selling gifts of the year. We’re also throwing a sweet enamel pin into every cart today only! So if you’ve waited until now to get all your shopping done, you clearly made the right choice.

(…)
Read the rest of Your Last Holiday Guide and Special FREE Gift From Us! (0 words)


© Erin for Photojojo, 2015. |
Permalink |
No comment |
Add to
del.icio.us

Post tags:


Photojojo

 
Comments Off on Your Last Holiday Guide and Special FREE Gift From Us!

Posted in Equipment


Your Guide to Creating Unique Conceptual Photography

06 Dec

What is conceptual photography? Have you heard about it, but not been able to work out what it is? Who are the artists doing it? How can you do it? If you have asked yourself any of these questions, then read on and see if they can be answered for you.

Conceptual photography is a type of fine art photography. Like the latter, everyone you ask will give you a different definition. It is an art form that has been around for as long as people have been making art. It seems to be something that people have only started talking about in the last 10 years or so.

leanne-cole-conceptual-photography-046

The Tower of the Manchester Unity Building where the brief was to make it look like Batman lived there. So the sky was replaced and a lot of processing was done.

What is Conceptual Photography?

When I tell people about work that is conceptual the first thing many ask is, “What is it?”

Conceptual photography is often very imaginative. It seems unreal. Often reality in the photos is distorted, and what you know as normal, is completely changed. Then there are also some people who are doing things that aren’t as imaginative. They are changing some things, or exaggerating reality to a lesser degree.

Conceptual photography is about work that starts with a concept or an idea. In many instances, photography normally starts with an image or a place. You go out somewhere that you think will be interesting and take photos. Once you get home you put the photos on your computer, and for a lot of people, that is all besides some basic post-processing. There is nothing wrong with working that way, but conceptual photography starts out differently.

In conceptual photography you start with an idea, or the concept, of what you want to do. At this stage you start working out what you want your final image to be about. You are working in the dark so to speak, as you won’t know the final result until you have processed it.

leanne-cole-conceptual-photography-045

A popular place in an artist retreat, but you can’t take photos with models. So this image was composited from the original, and one of the girl taken at a different time and place.

Artists working conceptually

Other artists (who aren’t photographers) often work this way. Sculptors have an idea of what they want to sculpt, but it isn’t until it is completed that they know if it will be any good. Many painters work the same way, especially abstract artists. The way they work can be fluid, but they have an idea of what they are trying to achieve. Again, it isn’t until the painting is finished, that the artist can judge whether it was successful.

There is no reason why photographers cannot work the same way. Many photographers do, and if you like that kind of work, you can as well.

It is about using your imagination, and seeing what you can envision. If you search Conceptual Photography in Google Images you will find many examples. There are some inspirational photos there as well. They are often clever, and usually highly processed. That does not mean you have to be really good at photo processing, but you do need to have a good imagination.

Adobe Photoshop used to say, “If you can dream it you can create it with the software”. I don’t know how true that is, but you can do a lot in Photoshop, and if you can imagine it, then you should try to create it.

leanne-cole-conceptual-photography-043

Another composite of a popular walking bridge in the city and some sheep. The sheep were placed on the bridge in Photoshop.

It’s all about imagination

That is a big part of this type of photography. It is about imagination and ideas, planning and getting what you need to create the image, and finally the creation of the image.

Most conceptual work you see is created around portraits. There are many photographers in the world who specialize in fine art portraiture. They would also be considered conceptual artists. You can’t take a person out and simply take their portrait, you need to plan the whole session. Long before you have your model, you need to have an idea of what you want to do; what costumes you may need, and where you want to take the photos. That is how it starts.

leanne-cole-conceptual-photography-044

Trying for a Wuthering Heights look. A hill was found on a windy day and the model put into a costume. The cloak was made to look larger as it blew in the wind.

Not all conceptual work is portraiture though. There are many photographers working in landscape or architecture who are creating their own realities.

You might want to put your cat on top of a large building, so it looks like King Kong. You may have seen images where there is a house floating in the air, or someone is put inside a glass jar. These all started with the artist thinking about “what if”.

Some specific conceptual photographic artists

There are some incredible conceptual photographers and artists who are working now.

Rick Amor is an Australian painter. He often paints his environment around him, but not as we see it. He visits places and takes lots of photos. When he gets back to his studio, he goes through those photos to work out which ones he can paint. He will take a little from one image, and something from another, to create a new scene or a new reality. They aren’t straight copies, and he often distorts the sizes and views as well. A statue that is normally six feet tall might appear to be 30 feet tall in one his paintings.

Brooke Shaden is a fine art photographer whose work also fits into the category of conceptual art. She does portrait style images, but they are all more than a portrait of a person sitting in front of the camera. Before she starts, she plans what she wants first. She works out: what the colour scheme will be, what props she will need, if any, and then the location. The model is also important, and has to be someone that will fit the mood of the image she wants to create. Finally, she finishes the image by using Photoshop to give it her unique look.

Canadian Photographer Renee Robyn is also a conceptual artist. She does a lot of fantasy or ethereal images. Again, they would be images that start with an idea or concept. If you look at her website, you can see the before and after photos which makes it is clear that she works with a plan in mind. The models are photographed in a way so that they can then be put into other scenes on the computer.

leanne-cole-conceptual-photography-048

The Woodland Bride – Started with the idea of a bride dressed in rags in the forest. The bouquet of sticks came later.

Another artist that is gaining popularity for his incredible conceptual images, is Erik Johansson. He has an amazing ability to turn the world around him upside down. He manages to turn the ordinary into something extraordinary, to make you see the world in a new way. His imagination is amazing. The ideas he comes up really show how talented he is.

All these artists work differently. You may identify with one of them. You may want to find your own conceptual artists that work in a way that you admire, who you can gain inspiration from. It is important to find other photographers that give you motivation, to work and try new things. You shouldn’t copy them, except to learn, but look at the work and see if you can find your own style.

How can you do conceptual photography?

You need to start thinking conceptually. If you want to create images like the ones mentioned and shown here, then you need to start using your imagination. Think about how you can twist the world around you, or finding some interesting things you can do with it.

Think about how you are going to achieve the final result that you are after. Do you have to take specific photos for it? You need to make sure when you are taking the photos that everything will work together. It should look like it really is possible.

For most images you have to know how to composite. How to take something from one scene, then place it into another. As you put everything together, you start to see whether or not it has worked.

leanne-cole-conceptual-photography-047

Flinders Street in Melbourne Flooded. A process done on the computer to make a place look like water is everywhere.

Working conceptually

Making conceptual images can be a rewarding way of working. It can help you stand out from many other photographers. It is not easy to do, and patience and time are often needed to learn it. However, if you have the drive, then a whole new world could be there for you.

Are you interested in learning more about how to do conceptual photography? What would you like to learn? Have you done any or have any favorite conceptual photographers you’d like to share? Please do so in the comments below.

googletag.cmd.push(function() {
tablet_slots.push( googletag.defineSlot( “/1005424/_dPSv4_tab-all-article-bottom_(300×250)”, [300, 250], “pb-ad-78623” ).addService( googletag.pubads() ) ); } );

googletag.cmd.push(function() {
mobile_slots.push( googletag.defineSlot( “/1005424/_dPSv4_mob-all-article-bottom_(300×250)”, [300, 250], “pb-ad-78158” ).addService( googletag.pubads() ) ); } );

The post Your Guide to Creating Unique Conceptual Photography by Leanne Cole appeared first on Digital Photography School.


Digital Photography School

 
Comments Off on Your Guide to Creating Unique Conceptual Photography

Posted in Photography


Introducing the PDN & Rangefinder 2015 Gift Guide – with DPReview editor’s picks

25 Nov

Our friends over at Photo District News and Rangefinder Magazine have just published their first ever holiday gift guide, with contributions from Rolling Stone, Tiny Atlas Quarterly, TIME and our very own editor, Barney Britton. Click through to read the full guide!

Articles: Digital Photography Review (dpreview.com)

 
Comments Off on Introducing the PDN & Rangefinder 2015 Gift Guide – with DPReview editor’s picks

Posted in Uncategorized


Photographer’s Guide to Using Graphic Tablets for Lightroom Editing

24 Nov

There are several gadgets we can use to improve our performance in Adobe Lightroom, if our intent is to post-produce images quickly and neatly with professional results. However, there is no better tool for a talented photographer than a good graphic tablet. Read on to learn how a graphic tablet can be used with Adobe Lightroom and how it can Continue Reading

The post Photographer’s Guide to Using Graphic Tablets for Lightroom Editing appeared first on Photodoto.


Photodoto

 
Comments Off on Photographer’s Guide to Using Graphic Tablets for Lightroom Editing

Posted in Photography


Feast Your Eyes on Our Festive Gift Guide

23 Nov
GG1

This week we’re thankful for a feast of new photo goodies in our shop. Tools like an SLR lens mount for your phone and an illuminating phone case. There’s even tassels, decals, and temp tattoos. Gobble them up quick, in plenty of time for the holidays!

(…)
Read the rest of Feast Your Eyes on Our Festive Gift Guide (0 words)


© Erin for Photojojo, 2015. |
Permalink |
No comment |
Add to
del.icio.us

Post tags:


Photojojo

 
Comments Off on Feast Your Eyes on Our Festive Gift Guide

Posted in Equipment


Beginner’s Guide to Photographing Horses

22 Nov


Equine-photography-3b

There are two main aspects to consider when beginning to attempt any variety equine photography, the photographic side (technical and creative) and the dealing with horses side (sometimes unpredictable and dangerous).

Lets start with the animal side, in this beginner’s guide to photographing horses.

Equine-photography-4

I am not a horse person, but I have photographed a lot of them, and have spent a fair bit of time around them, their owners, and trainers, who have all taught me a lot.

Horses have distinct personalities which can range from extremes such as: a tendency gallop across a paddock to attack you on one end of the scale, to willing to defend you at their own expense at the other end. Their main instinct is flight, and they can be easily spooked by just about anything – including cameras.

There is a whole horse language involving their ears, leg stance, and head movement. The horse owners I have worked with prefer certain positioning of these things in photographs. For example, they really don’t like images where the horses ears are pinned back, which means the horse is not very happy. I would suggest spending some time googling horse body language before you set out on your first equine photo session – not only to know all the best positions, but to also know if a horse is about to attempt to do you some serious damage.

Equine-photography-1

Ears forward but relaxed means the horse is happy, where as ears like the other guy in the above image, can mean the horse is confused.

Never stand behind a horse. Never catch a horse by surprise. Make sure horse knows where you are, they don’t like people jumping out from behind bushes, or sudden movements. Never run up to a horse. One owner trainer tells me that even wearing bright colors can startle some horses.

Horses and cameras

Unless you know that a horse is very used to flash, using one could endanger you, the horse, or the handler/rider. I would avoid it at all costs. The sight and any sound of your camera can be enough to startle them, even just the slap of the mirror.

I recommend having a chat with owner or handler about the horse’s personality – is he flighty, bite-y? Loves to kick? Hates photographers? Has never seen a camera? Know all that before you go in camera blazing.

Equine-photography-10

If the horse is calm enough, have the handler introduce you. Let the horse approach you, sniff the camera, and move slowly, talk softly and calmly, and if it’s all okay to do so, give it a pat. If you’re unsure how the horse will react to camera sounds (or use silent mode if your camera has it), organize with handler to do a few test shots while the horse is calm, and you are all in safe positions, should the horse start bucking and kicking.

Pretty much all my horse photographs have been taken with a standard 18-55mm kit lens. That’s all we had at the local newspaper to photograph every kind of event, equestrian or otherwise. Regardless of what style of equine photography you are attempting, I would recommend a zoom lens so you can get in close on detail, without getting too close to the horse.

The photography

You’ll want a fairly fast shutter speed, even for portraits – those ears move fast. I’d recommend a minimum of 1/250th  for general photography, faster if the horse is moving at high speed. Generally you want good horse shapes where you can see all four legs, and the animal has its ears forward.

Equine-photography-12

Race horse trainer Ritchie Butler on Tom.

Events

When photographing equine events, like show jumping, you aren’t necessarily that close to the horse, but the same rules apply. Make sure you find a safe spot where the horse can see you from a distance, and don’t keep moving about. Remember not to move towards the horse and rider, and do not use flash. Check with any officials before you start.

An image that involves horse and rider in mid-jump, with all legs off the ground and front legs tucked under, is generally preferred by riders and owners. You’ll need a fairly fast shutter speed, somewhere around 1/650th – 1/800th is a good place to start. Set your camera to continuous release (burst) mode, and press the shutter just as the horse lifts off.

Equine-photography-7b

Photographs mid-leap, all feet off the ground and front legs tucked in, are preferred by show jumpers.

The races

When photographing horse racing I’d recommend the fastest shutter speed the light will allow, and again using continuous release mode. At some smaller race meets, it’s possible to get permission to get fairly close to finish line. For the shot below I asked officials if there was a safe position I could stand near the finish line, as well as capture horse and winners in the ring. They were happy to oblige once I told them I don’t use flash, and am aware that horses are very easily spooked.

Equine-photography-8

You don’t need super zooms or high-end gear to get a winning post shot, just access to a good position on the track.

The races is a good time to try your hand at some panning shots. Panning helps to capture the sense of movement and speed, by moving your camera along with your subject, creating a blur of motion in the background.  It can be a bit tricky at first, but here is a great article to help get you started with this technique.

Equine-photography-9

Panning to create a sense of movement.

Equine-photography-6

Portraits

Horse people generally not only love their animals, but are also obsessed with them, and have a strong connection to them. Aim to capture the love between horse and person.

The tender moments when horse and rider have forgotten about you and your camera, often happen at the beginning or end of your photo session, while getting the horse organized.

Details

Horses are great for detail shots. Owners often have favorite parts of their horse, like the star on a forehead or other markings, or the way the horse’s mane sweeps. A zoom lens would be handy for this, unless you, the horse, and your camera, get on well enough to get up close and personal.

Equine-photography-11

I didn’t need a zoom to get a close detail of this horse. This is Monty, I used to feed and blanket him twice a day for a several months, so we are old pals. His only concern about my camera was whether or not it was edible.

Take your time

Spend as much time as you can with both horse and owner. Take a whole day if you can. Slow down enough to notice opportunities like interesting backgrounds or light. Ask questions about the horse’s favorite things to do. A horse might get really happy after being taken out for the day, and like to jump around in the paddock afterwards, where you can grab some interesting images. The photo below was taken after horses were exercised on the beach. Once the saddle was removed, they threw themselves in the sand and rolled around delightedly.

Equine-photography-5

It’s a lovely thing to see and photograph happy horses.

Horses are wonderful to photograph, sometimes challenging, and with a wide scope of photographic styles and skills involved.  I highly recommend giving it a go. Just stay safe, be respectful of the horses, get creative, and have fun.

Equine-photography-2

Are you a horse person? I’d love to hear any more tips from you if know these creatures well, or have experience photographing them. We’d also love to see more horse photography from you, so post away in the comments below.

Giddy up!

googletag.cmd.push(function() {
tablet_slots.push( googletag.defineSlot( “/1005424/_dPSv4_tab-all-article-bottom_(300×250)”, [300, 250], “pb-ad-78623” ).addService( googletag.pubads() ) ); } );

googletag.cmd.push(function() {
mobile_slots.push( googletag.defineSlot( “/1005424/_dPSv4_mob-all-article-bottom_(300×250)”, [300, 250], “pb-ad-78158” ).addService( googletag.pubads() ) ); } );

The post Beginner’s Guide to Photographing Horses by Lea Hawkins appeared first on Digital Photography School.


Digital Photography School

 
Comments Off on Beginner’s Guide to Photographing Horses

Posted in Photography


How to Photograph the Holidays: Download your Free Guide Today

17 Nov

With the end of 2015 and the holiday period approaching, we know that many dPS readers find themselves with cameras in hand more than any other time of year.

The holidays come with so many wonderful photographic opportunities – and we don’t want you to miss a single one!

So we have a special gift for dPS newsletter subscribers…

A free dPS mini-guide – How to Photograph the Holidays!

Cover w flyouts

This 15-page downloadable PDF guide is filled with 12 practical tips and a fantastic printable checklist. It’s all about helping you discover how to capture the magic of the holidays and create memorable images that you’ll cherish for years to come.

A special thanks to our friends Lauren and Rob at Photography Concentrate for creating this download.

It’s completely free for all our subscribers as a thank you for being a valued part of our community.

To receive it, you can subscribe to our newsletter here. You’ll receive an email shortly after asking you to confirm your subscription, and on doing that, you’ll be taken to a page where you can download the guide and printable checklist.

We hope you find this little gift as useful as we do and that it helps you capture the joy and fun of the holidays.

googletag.cmd.push(function() {
tablet_slots.push( googletag.defineSlot( “/1005424/_dPSv4_tab-all-article-bottom_(300×250)”, [300, 250], “pb-ad-78623” ).addService( googletag.pubads() ) ); } );

googletag.cmd.push(function() {
mobile_slots.push( googletag.defineSlot( “/1005424/_dPSv4_mob-all-article-bottom_(300×250)”, [300, 250], “pb-ad-78158” ).addService( googletag.pubads() ) ); } );

The post How to Photograph the Holidays: Download your Free Guide Today by Darren Rowse appeared first on Digital Photography School.


Digital Photography School

 
Comments Off on How to Photograph the Holidays: Download your Free Guide Today

Posted in Photography