RSS
 

Posts Tagged ‘Getting’

3 Tips For Getting Ahead In The Photography Industry

06 Sep

Photography Industry Leaders Share Their Top 3 Tips For Getting Ahead In The IndustryTop 3 Tips For Getting Ahead In The Photography Industry

Hey there FashionPhotographyBlog.com readers. Our friends from the Dots return to join us on our site to share great tips they have uncovered from their recent masterclass in London, UK. The Dots is a community of creative professionals, designed to connect creatives with collaborators, companies and commercial opportunities. They are just as passionate about collectively building a stronger, more profitable and diverse creative sector as we are and we are very excited to have them featured here again.


For those of you who may not know, The Dots hosted a Photography Portfolio Masterclass at the incredible Spring Studios to give talented emerging Photographers the chance to have their work reviewed by some of the UK’s most prominent Picture Editors and Photographic Agents.


With such a wealth of experience in the room, The Dots team took the opportunity to ask a few questions on how to get ahead in the hugely competitive Photography industry. Here’s what the industry representatives had to say:


Getting Ahead In The Industry – 3 Top Tips


  1. Be original


Photography industry leaders are primarily on the hunt for originality and a unique perspective because, “in the end if you’re presenting a book that looks like someone else, you better be a cheaper version of them, because there’s no reason to hire you just to be a copycat” (Robin Derrick, Executive Creative Director, Spring Studios).


Matt Davey (Co-Founder & Director, Probation London) told us that he looks for “ originality – an ability to express ideas in their work and create something other than just a pretty picture.”


  1. Have a ‘Can-Do’ attitude


Never underestimate the importance of having an upbeat and ‘go-getting’ character. If someone thinks you’re going to respond to a difficult brief with enthusiasm, they’re more likely going to want to work with you.


Dalia Nassimi (Deputy Picture Editor, WIRED) told us “If they have that easy going, very can-do personality and are up for a bit of an adventure you get real magic.”


Similarly, the main thing Jamie Klingler (Publishing Manager, Shortlist/Stylist Magazine) looks for in a photographer is “someone that will do anything and that are part of my team on the day. These are the people who I wanna work with again and again and I wanna have a drink with, and who I’ll hire a million times over.”


  1. Be personable


You’re going to have to work with lots of people throughout a shoot and if you’re unpleasant to be around, chances are noone is going to want to work with you again. “You need to be personable, you need to get on with people, you need to be able to chat and work around an idea.” (Steve Peck, Picture Editor, WIRED Magazine).


It may not seem that important, but as Nicola Kavanagh (Editor in Chief, Glass Magazine) points out, if it’s a toss up between two photographers, “and they both have a really strong portfolio, I’m gonna go with the one that’s easier to get along with, because everyone likes a nice, easy life!”


So it seems that being nice really can help you finish first, hurrah!


To find out  more about The Dots’ next Photography Portfolio Masterclasses here: https://the-dots.co.uk/about/portfolio-masterclasses


You can also check out The Dots’ Vimeo channel for video interviews, tips & highlights from the Photography Portfolio Masterclass here:  https://vimeo.com/album/3444505


Finally, if you have any tips for getting ahead in the industry that you want to share, that hasn’t been mentioned in this post, feel free to share them in the comment section below. 


Fashion Photography Blog

 
Comments Off on 3 Tips For Getting Ahead In The Photography Industry

Posted in Uncategorized


Tips for Getting Proper Exposure for Night Photography

24 Jun
Proper Exposure at Night - Millenium Bridge example

Exposure settings for this shot: Shutter speed of 4 seconds; aperture at f/5.6; ISO 400.

Night photography can be much more rewarding than photography during the day. Because everything looks different at night, you don’t need to go somewhere exotic to get great pictures. Bridges, attractions, and buildings are usually brightly lit at night, and places that might seem rather pedestrian during the day – can make stellar photography subjects at night. Further, you can take your time when photographing at night, more so than during the day. There are generally less people out, and you don’t have to worry about the light changing.

The main challenge when photographing at night is getting a proper exposure. During the day, you can just walk around and hand hold your camera without worrying about camera shake. In addition, because of the amount of available light during the day, you don’t need to worry about shooting at a high ISO and the resulting digital noise. At night, however, hand holding is generally not an option and digital noise can be a major problem.

The principles of exposure work the same way at night as during the day – you will just need a lot more time to allow light into your camera. It goes without saying that you will need a tripod to stabilize your camera, and a remote shutter release to keep from moving anything during the exposure. But with these changes made, you can get out and explore the night with your camera. When you do, here are some tips to keep in mind to help you maximize the experience.

Proper Exposure at Night - ouvre example

Exposure settings for this shot: Shutter speed of 4 seconds; aperture at f/11; ISO 400.

# 1.  Work in Manual Mode

The first tip is to make sure you are shooting in Manual mode. In Manual mode, you will set the shutter speed, aperture, and ISO. This puts you in complete control over you camera.

When shooting at night, your camera will be on a tripod and you will be working slowly. There is no need to use any automatic mode because of the speed provided. Further, there might be a little trial and error with the exposure settings (the camera can be easily fooled by the great differences in bright and dark areas of the picture) and you want to make sure you have plenty of control over this process. Manual mode gives you that control.

#2.  Make sure you are comfortable with Bulb Mode

Manual mode only works for exposures up to 30 seconds. If you need a shutter speed that is longer than 30 seconds, the only option for getting a proper exposure is Bulb mode. Therefore, while you should generally shoot in Manual mode, you should also be comfortable with Bulb.

In Bulb mode, the shutter stays open as long as you hold the shutter button down. When you press the button, the shutter opens. When you release the button, the shutter closes. To avoid introducing any shake or movement into the exposure, using a remote shutter release is imperative when using this mode.

With Bulb mode you can make your exposure several minutes long. If your remote shutter release does not have a timer built-in to it, make sure you keep another timer handy (your phone may have one). If your remote does not have a timer, make sure it has a locking feature so you do not have to hold it the entire time.

Proper Exposure at Night - Pigeon Point example

Exposure settings for this shot: Shutter speed of 6 seconds; aperture at f/5.6; ISO 1600.

#3.  Shoot in Raw

When shooting at night, it is particularly important to make sure you are shooting in Raw format. The Raw files coming out of most cameras are 14 bit files, whereas JPEGS are only 8 bit files. The more bits, the higher the range of available colors and the smoother the transitions between them.

The reason shooting in Raw is even more important at night, is that most of the colors that a camera can capture are at the top (bright) end of the scale. The range of available colors at the low (dark) end of the scale is extremely limited. At night, your pictures will almost always include a large dark portion. A JPEG file, with its reduced color options, you will likely introduce banding in your pictures.

#4.  Bring a flashlight

Knowing your camera controls really well pays dividends at night. You can make changes to the settings without being able to see everything. Nevertheless, a small flashlight is tremendously useful. Keep one handy to make sure you can see everything on your camera and tripod. It occasionally comes in handy for lighting areas of your picture as well.

Proper Exposure at Night - Brooklyn Bridge

Exposure settings for this shot: Shutter speed of 10 seconds; aperture at f/9.0; ISO 200.

#5.  Choose proper settings

Proper settings will always depend on the situation. Nevertheless, there are some ways you should bias your settings when shooting at night. Here are a few:

  • Aperture: Open up your aperture more at night than you would during the day (i.e., use a lower f/number). Most night photographs tend to be of shots on a narrower plane than shots during the day. Further, the background and sky will be black anyway and you will not need as large a depth of field. The larger aperture also has the benefit of letting more light into the camera.
  • ISO: Keep your ISO setting as low as you can. Night photography always means there will be dark areas in your pictures, and these dark areas inevitably lead to digital noise. Raising the ISO will compound the problem.
  • Shutter speed: Whereas shutter speed might be the first exposure setting you worry about during the day, it should generally be the last one you think about at night. Since you will be shooting from a tripod, you can let the shutter stay open as long as you need. If you have traffic (streaking lights), a fountain, or running water in your picture, the longer shutter speed will actually benefit your pictures anyway. The only exception is high winds, or other instability impacting your rig.

One other setting to check is the Long Exposure Noise Reduction, which will be in your camera’s menu. If you enable this option, the camera will make two exposures, one normal and one with the shutter closed, which the camera will use as a comparison to filter out noise from the normal picture. Photos taken with this option enabled will take twice as long to expose, but will be less noisy.

#6.  Meter for the highlights

Determining the proper exposure level can be tricky at night. Each metering mode presents its own challenges. If you use evaluative metering, the camera is likely to be confused. If you use spot or partial metering, the meter will jump around depending upon whether you are aimed at a bright light or the dark background.

One answer to this problem is to use spot metering and to expose for the highlights. Set your meter between +1 and +2 as you meter on the highlights. The +1 -2 setting will keep your highlights looking bright, but at the same time, will keep the highlights within the dynamic range of the camera. Do not worry as much about the dark portions of the picture. If the dark areas happen to turn black, well, it is nighttime after all, and there is supposed to be some black. Take a test shot and adjust as necessary.

Proper Exposure at Night - Dallas example

Exposure settings for this shot: Shutter speed of 5 seconds; aperture at f/16; ISO 400.

#7.  Take a test shot at a high ISO

Speaking of test shots, you should make liberal use of them when shooting at night. However, you don’t want to sit around for 30 seconds, a minute, or even longer, waiting to see if the test shot is going to work out. The best way to get a test, without wasting a lot of time doing so, is to take tone at a much higher ISO than you would ordinarily use.

For example, let’s say you think the proper exposure settings for a given shot are: 30 seconds at f/5.6 with an ISO of 400. Rather than taking that shot and waiting around 30 seconds for the exposure, crank up the ISO and speed up the shutter speed by the same number of stops. The exposure level will be the same, but it will take a lot less time to expose the test picture. In this case, I would raise the ISO by four stops to ISO 6400 (raising it one stop to moves it to ISO 800, one stops increases it to ISO 1600, three stops to ISO 3200, and four stops gets you to ISO 6400). That allows you to reduce your shutter speed by four stops to only 2 seconds (reducing the shutter speed by one stop shortens it to 15 seconds, two stops shortens it to 8 seconds, three stops to 4 seconds, and four stops gets the shutter speed down to 2 seconds).

When you are satisfied with your exposure, just decrease the ISO and increase (lengthen) the shutter speed by an equal amount to get back to the final settings.

#8. Bracket your photos

Night photography is one area where you will want to bracket your photos. Blending and HDR can work wonders at night, but even if you are against such processing, bracket your photos anyway. Think of it as exposure insurance.

Proper Exposure at Night - San Antonio Riverwalk example

Exposure settings for this shot: Shutter speed of 30 seconds; aperture at f/11; ISO 200.

#9.  Verify the exposure with the Histogram

After you have taken your exposures, check them on the LCD on the back of your camera. The picture on the LCD will show you if the exposure is close to correct, but it is better to also check the histogram to make sure the exposure is within the dynamic range of your camera. Remember to keep the highlights on the right side of the histogram, but avoid a spike on the far right. If the dark areas spike on the left side the histogram, that is okay since parts of your picture are supposed to be black. In general, however, keep as much of the image as possible within the range of the histogram, but err on the side of keeping the highlights from blowing out.

Exposing at Night

If you are not totally comfortable with exposure, then doing some night photography will get you there in a hurry. You will have your camera on a tripod in unchanging light, so you can take as much time as you need to think through the exposure, and get it right. You’ll be forced to take into account the highlights and shadows when you meter, then study them on your histogram. Taking test shots, and making adjustments, will help you see the interrelationships between the exposure controls.

When you follow these steps, you are likely to get some great shots. Every city lights up its major attractions, bridges, and museums – often in colorful ways. A scene that might be boring during the day could be a great photo at night. Often, because of the effects of the lights, you’ll actually be surprised at what you end up with. Taking your time and applying these tips to nail the exposure will help you maximize the experience.

googletag.cmd.push(function() {
tablet_slots.push( googletag.defineSlot( “/1005424/_dPSv4_tab-all-article-bottom_(300×250)”, [300, 250], “pb-ad-78623” ).addService( googletag.pubads() ) ); } );

googletag.cmd.push(function() {
mobile_slots.push( googletag.defineSlot( “/1005424/_dPSv4_mob-all-article-bottom_(300×250)”, [300, 250], “pb-ad-78158” ).addService( googletag.pubads() ) ); } );

The post Tips for Getting Proper Exposure for Night Photography by Jim Hamel appeared first on Digital Photography School.


Digital Photography School

 
Comments Off on Tips for Getting Proper Exposure for Night Photography

Posted in Photography


Getting Organized: My Experience Using Google+ Photos

10 Jun

Some time ago, I wrote a post covering different options for organizing and storing your photos. I did this as a first step toward getting my own photographic catalog in order. I decided to pull the trigger, so to speak, and give it a go. I decided to start out with Google+ Photo. I’m already pretty invested in the Google Continue Reading

The post Getting Organized: My Experience Using Google+ Photos appeared first on Photodoto.


Photodoto

 
Comments Off on Getting Organized: My Experience Using Google+ Photos

Posted in Photography


Quick Tips for Getting Into Stock Photography

01 Jun

Getting accepted as a stock photographer can be a difficult and frustrating process. Especially when your best photos get rejected by photo reviewers. After helping many photographers trying to become accepted as Shutterstock contributors, I have discovered how the process can instead become a fun and educational experience.

Stockphoto1

Why become a stock photographer?

Stockphoto3

Earning money on your digital photography work is a great way to earn an extra income. But it is often not the main motivation for why many people try to become contributors. Being accepted, and being able to call yourself a stock photographer, means something. Similar to how many people develop their skills so they one day can become a professional in their field, being able to call yourself a stock photographer will for many mean more than saying you’re a professional photographer.

When someone presents themselves as a professional photographer, people tend to have different views of what that means. Some associate a professional photographer with someone that makes high quality photos. Others may think of the person they hired to photograph their wedding. Or perhaps someone that has their photos sold in a gallery. Some may think a professional photographer is only someone that has a diploma, or someone that works full-time and earns their main income from their photography.

Being able to say you’re a stock photographer says something about the level you have reached. Why? Because the stock photography industry is well known for its high quality requirements.

Furthermore, the best part of being a stock photographer is knowing your work is being purchased, appreciated, and used all around the world. With modern tools like Google image Search, you can back trace and find were and how your most popular photos are being used.

Stockphoto4

Are you qualified?

If you know how to make a manual exposure, get the focusing correct and have a good eye for correct white balance, you’re most likely qualified to become a stock photographer.

Expect to get rejected

It might take a few attempts. But once you’re accepted, as many existing stock photographers can testify, it made them an even better photographer. A rejection of your initial submission might feel like a disappointment at first. But take advantage of the feedback and suggestions provided. Your initial submission will most likely be more strictly evaluated than the general submissions you’ll make in the future after getting accepted.

Stockphoto7

Find the motivation to learn

Try to see your first submission as a homework assignment for reading the stock agency’s submission guidelines. Like any course or workshop, your first homework assignment is not expected to be flawless. There will most likely be room for improvement. With this attitude, learning about stock photography can be an educational, fun, and even motivating experience.

The first batch of photos is the hardest

For example, when signing up to one of the most popular stock photography sites like Shutterstock, you are asked to submit 10 samples of your best work. Seven of these must pass the strict inspection of their reviewers. But if rejected, you’re provided with great feedback to help you improve your photography.

Stockphoto5

It gets easier after getting accepted

As any existing stock photographer can testify, your initial batch of submitted work is much more strictly evaluated than the general submissions you will make in the future after getting accepted.

You’re closer to getting accepted than you might think

A submission that is not approved is often not completely rejected either. Many rejected photos can have only one minor issue that can sometimes even be fixed with a little editing. Even though it may feel like your entire batch of submitted work was rejected, you might only be a few adjustments away from getting accepted.

Stockphoto2

Try again. Many existing stock photographers did.

Many existing stock photographers did not get accepted on their first attempt. For every initial submission that is not approved, take good use of the feedback that is required. See it as a free portfolio review from experts in the field. Be inquisitive, study the material and try again!

googletag.cmd.push(function() {
tablet_slots.push( googletag.defineSlot( “/1005424/_dPSv4_tab-all-article-bottom_(300×250)”, [300, 250], “pb-ad-78623” ).addService( googletag.pubads() ) ); } );

googletag.cmd.push(function() {
mobile_slots.push( googletag.defineSlot( “/1005424/_dPSv4_mob-all-article-bottom_(300×250)”, [300, 250], “pb-ad-78158” ).addService( googletag.pubads() ) ); } );

The post Quick Tips for Getting Into Stock Photography by Kjell Leknes appeared first on Digital Photography School.


Digital Photography School

 
Comments Off on Quick Tips for Getting Into Stock Photography

Posted in Photography


Getting Started with Abstract Macro Photography

26 May

Editor’s Note: This is part a series on macro photography this week. Look for a new one each day. The next newsletter will have them all if you miss any!

Lines and light can emphasise your subject

Lines and light can emphasize your subject

Macro photography truly is a unique genre of photography. In most of the other types of photography (landscape, portrait, sport, etc.) you want to get the context of your scene in the image. In macro photography, you can literally focus in on what’s important and remove any distractions by simply getting closer. One of the best things about macro photography is that you can do it anywhere, all you need is something to photograph. In my previous article: Getting Started Guide to Macro or Close-Up Photography, I went into some details about what you will need to get started in macro photography. Take a look at that article to be sure that you understand more about the genre of macro photography.

In this article we are going to be looking at getting great abstract images using macro photography.

Look for shape and colour

Look for shape and colour

What is abstract macro photography?

Abstract photography in general is about representing a subject in a non-literal way. The focus of abstract photography is more about colour, shape, and texture as opposed to the literal representation of the subject. Abstract macro photography, takes this to the next level by enabling you to get even closer to your subject, and therefore also able to be more abstract in a sense.

The same guidelines around composition apply, you can use the rule of thirds, curves, and lines to draw the viewer into the image. The difference is, the subject may not be immediately recognizable, your centre of interest might be a colour or a curve of a flower. So for abstract macro photography, you will need to think a little differently.

Abstract close up of a lily

Abstract close up of a lily

What will I need?

You will need a macro lens if you want to get in really close. You can use a prime lens like a 50mm, or even an 85mm lens, but for this type of work, a macro lens will work best. The reason is that you want be able to get in close enough to remove all distractions; in other words, you want to fill the frame with your subject. With a macro lens, you can do this. Most macro lenses have the ability to focus on subjects that are really close to the lens. The prime lenses can focus on subjects that are reasonably close, but you may not be able to get in close enough to remove the background.

You will also need to use a tripod. The close focusing ability of the macro lens means that it is very easy for your subject to become out of focus with the slightest movement. Ideally, you will want to have you camera set up with your macro lens mounted, then get that in as close as possible to your subject. Next, you will want to set your aperture to f/8, or higher, and then click onto manual focus to get your subject good and sharp in the frame.

Frayed rope abstract

Frayed rope abstract

What can I photograph?

For abstract macro photography, I find that organic items work best. By organic I mean flowers, wood, fruit, vegetables, and so on. That does not mean you can’t photograph an abstract macro image of a computer keyboard or a coffee cup, but sometimes, these well known shapes are difficult to transform into abstract images. If you are going to photograph a product like a computer or another manufactured product, try shooting it from a different angle or get in very close so that any telltale signs of what it is, will be lost. Ultimately, you can photograph anything that you think will work, but start out with some easy subjects first,  then move on to the trickier ones.

Buds about to bloom

Buds about to bloom

Try this…

Set up your subject and get your camera in position. Look through the viewfinder and start working on your composition. Try some of these pointers to get started and work from there:

  • Work on building your composition – are there any curves, lines, shapes ,or colours that you want to emphasize?
  • Use manual focus to bring even a small part of your image into sharp focus, this will be your centre of interest.
  • Make sure your centre of interest is obvious. In other words it should be in focus, it can be a different colour to the rest of the frame, or it can even be a well defined line or shape in the image
  • Check the exposure to make sure that you are exposing your scene correctly.
  • You can even overexpose slightly. In abstract macro photography, some slight overexposure is okay, as long as it does not distract from the rest of the image
  • Capture the shot
  • Try shooting the same image from a different angle and maybe even a different centre of interest.
  • Take as many images as possible, from different angles, with different focal points.
  • Choose the best three images and edit them in your chosen image editing software.

This is a great indoor project, but you can try this outside too. Shooting macro images outside can be more challenging as the subject may be affected by changes in lighting. If it is a flower or a plant, there may be a slight breeze which can move the flower as you are trying to photograph it. The most important thing is to try this type of photography if you can. It will cause you to think creatively and to look for different things in your image setup. Give it a try and load up your results below – let’s see what you get.

Abstract of a lily leaf

Abstract of a lily leaf


macro-coverWant to learn more about macro photography? Check out Ed Versosky’s Introduction to Close-Up & Macro Photography ebook – just $ 10 (over 30% off) this week with coupon code: DPS. You will need to enter the code to apply the discount.

googletag.cmd.push(function() {
tablet_slots.push( googletag.defineSlot( “/1005424/_dPSv4_tab-all-article-bottom_(300×250)”, [300, 250], “pb-ad-78623” ).addService( googletag.pubads() ) ); } );

googletag.cmd.push(function() {
mobile_slots.push( googletag.defineSlot( “/1005424/_dPSv4_mob-all-article-bottom_(300×250)”, [300, 250], “pb-ad-78158” ).addService( googletag.pubads() ) ); } );

The post Getting Started with Abstract Macro Photography by Barry J Brady appeared first on Digital Photography School.


Digital Photography School

 
Comments Off on Getting Started with Abstract Macro Photography

Posted in Photography


3 Tips for Getting Great Skin Tones Using Adobe Camera Raw

10 Apr

Skin tones can be one of the more difficult aspects of a photograph to master. Getting pleasing skin tones will make your image appear more eye-catching and attractive. If you know the right steps to take, skin can be pretty simple to master. Using these three simple tricks, using only Adobe Camera Raw (ACR), your skin tones will appear more balanced and pleasing to the eye.

Before3 1

After3 1

Note: working in Lightroom you can do the this as well, because the sliders and options are the same!

White Balance

When trying to get great looking skin tones, the first thing you should pay attention to is the white balance. Correct white balance will set the stage for great skin tones. If the white balance is too cool, your skin will appear gray or bluish. On the other hand, if the white balance is too warm, the skin will look yellow or orange. Neither of these options are very pleasing to the eye, and make the skin more difficult to work with later on.

To see if your white balance is accurate, use the white balance targeted adjustment tool. It looks like an eye-dropper and is located at the top of the screen. It is the third tool over from the left. Click on the dropper, then click on an area of your photo that is white. The whites of the eyes are a good place to start. This should give you a good indication of where the white balance should be set. If your image still appears too warm or cool to your taste, use the temperature slider located to the right of your screen, it is the first one. Adjust this by sliding it to the right or left until your get a pleasing white balance. You may have to adjust Tint as well.

Whitebalance1

Exposure

Next, make sure your exposure is correct. Take a look at the histogram located in the upper right hand corner of the screen. Ideally, you want it to look like a smooth bell curve, with the high point of the curve right in the middle. Check to make sure that the curve does not go too far to the left or the right. This may indicate that your photo is over or underexposed, causing your skin tones to either be gray and dark, or too bright and blown-out in some spots.

Exposure 2

If your curve does fall too far to one side, use the exposure slider to fix it. Located three sliders down on the right hand side of your screen, move it either left or right. Watch your histogram. When the majority of the curve is in the middle, you’ve got it! In some photos, there will be parts of your image that are very bright or dark, and cause your histogram to spike on parts of the curve. This happens often when you have a bright sky in the background. If this is the case, your curve will be off the chart on the right edge of the histogram. In an image like this, you would look at where the majority of your curve lies and ignore the parts of the curve that are out of range.

For more information see: How to Read and Use Histograms

Luminance

Finally, to give your skin tones just a little more brightness you will want to locate the luminance sliders (look for the HSL panel, the L stands for Luminance). You will see a horizontal strip of buttons directly under the histogram on the right panel. The fourth one to the left is HSL/Grayscale, click on that button. After selecting that option, three tabs will appear. Click on the Luminance tab. Choose the orange slider, which is two down, and move it to the right. You will notice that this affects mainly the skin in your photo and leaves the other areas of the image untouched. The more you move it to the right, the brighter the skin will appear. Keep moving the orange slider back and forth until the skin is the brightness you prefer.

Luminance 2

Before1 1

After1 1

Once you have adjusted your RAW image using these three steps, you can open it up in Photoshop to do any fine tuning or adjustments on the remainder of your photo. Your skin tones, however, should already look great and need little, if any additional work.

Before2 1

After2 1

Do you have any other tips for making great looking skin tones using ACR? Please share them in the comments below.

googletag.cmd.push(function() {
tablet_slots.push( googletag.defineSlot( “/1005424/_dPSv4_tab-all-article-bottom_(300×250)”, [300, 250], “pb-ad-78623” ).addService( googletag.pubads() ) ); } );

googletag.cmd.push(function() {
mobile_slots.push( googletag.defineSlot( “/1005424/_dPSv4_mob-all-article-bottom_(300×250)”, [300, 250], “pb-ad-78158” ).addService( googletag.pubads() ) ); } );

The post 3 Tips for Getting Great Skin Tones Using Adobe Camera Raw by Emily Supiot appeared first on Digital Photography School.


Digital Photography School

 
Comments Off on 3 Tips for Getting Great Skin Tones Using Adobe Camera Raw

Posted in Photography


Who’s Getting in Line for the New Canon EOS 5DS or 5DS-R Cameras?

22 Feb

It’s that time again. Canon has announced their newest in the 5D line-up – the 5DS and the 5DS R. At a whopping 50.6 megapixels and starting prices rumoured around $ 3699 and $ 3899 respectively – are you taking the plunge?

People were all gaga over the EOS 7D MarkII and headed out in droves to pre-order one for themselves. I know several people personally who picked one up – either as an upgrade or as a backup to their full frame body.

So the question is – who is this camera designed for? Clearly it’s for the professional photographer who needs maximum sharpness and detail. Have a look at this video from Canon to see if it’s for you:

The main difference he mentions between the two new models is the removal of the anti-aliasing filter from the 5DS R. That means even more sharpness.

There are also many similarities to the 5D MarkIII that users of that camera will find familiar such as: body design and layout of controls, same 61-point focusing system, and it even uses the same battery pack which is refreshing. Yay for once you don’t need yet another battery and charger!

For an outside opinion on the new cameras, see what Matt Granger had to say in this video:

So I ask you these questions:

  1. How many megapixels is too many? Opening the RAW file as 16-bit gives you approximately a 288mg file.
  2. What is the advantage of these cameras over a large sensor medium format camera?
  3. If you buy this camera will you likely need a computer upgrade to handle the processing power needed for such large files? Never mind massive amounts of more memory cards.
  4. Are you interested in this or is it way out of your league? Is it a wish list item for “one day”?

Canon-EOS-5DS
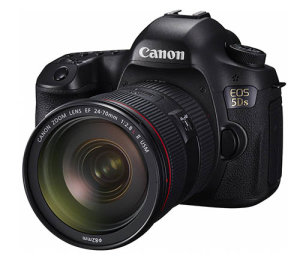
Tell me in the comments below. I personally own the 5D MarkIII and am NOT considering getting one for myself. Perhaps if I were doing commercial studio product work still I might – but then I’d likely already have a medium format like many of my commercial photographer friends.

Let’s talk, is this for you?

googletag.cmd.push(function() {
tablet_slots.push( googletag.defineSlot( “/1005424/_dPSv4_tab-all-article-bottom_(300×250)”, [300, 250], “pb-ad-78623” ).addService( googletag.pubads() ) ); } );

googletag.cmd.push(function() {
mobile_slots.push( googletag.defineSlot( “/1005424/_dPSv4_mob-all-article-bottom_(300×250)”, [300, 250], “pb-ad-78158” ).addService( googletag.pubads() ) ); } );

The post Who’s Getting in Line for the New Canon EOS 5DS or 5DS-R Cameras? by Darlene Hildebrandt appeared first on Digital Photography School.


Digital Photography School

 
Comments Off on Who’s Getting in Line for the New Canon EOS 5DS or 5DS-R Cameras?

Posted in Photography


Getting Started with Off-Camera Flash

10 Feb

Does the thought of attempting off-camera flash sound intimidating? If so, you’re not alone! Many photographers gravitate toward natural light or simple flash setups when tackling photo projects, but the truth is that mastering off-camera flash is one way to really make your work stand out from the rest. Best of all, it isn’t as complicated as it might seem. For this demonstration, forget about strobes, soft boxes, beauty dishes, umbrellas, and all of those gadgets. We’re going very basic with a simple speedlight – no light modifiers needed!

Basic off camera flash product photography

Basic Off-Camera Flash Equipment

To get started with off-camera flash, you need a lighting source. Arguably the most portable and convenient flash is a speedlight. When choosing a speedlight, be sure to consider features such as an articulating head that allows you to angle the direction of your flash, and connection ports for external battery packs and pc sync cables. Most flashes require four AA batteries to function and the power of the flash can suck up batteries really quickly; ports to external battery packs offer options to keep the flash powered longer and reduce recycling times. The pc sync port is also important as many trigger options will require this to connect your camera to the flash. Be sure that your flash includes these aforementioned ports. My Canon 430 EXII backup flash, while cheaper and smaller than the 580 EXII, fails in this sense since it lacks the battery port AND pc sync port.

Next, you need a way to sync the flash with the camera. The easiest way to do this is by using an inexpensive sync cord, although depending on your flash and camera models, you may need to purchase adapters such as the universal translator. Another more expensive, yet arguably more convenient option, is to use wireless flash transceivers. PocketWizard is probably the most well known in this department. One transceiver connects to your camera via the hot shoe mount and another connects to your speedlights via the pc sync port. These triggers are very dependable and durable, but they are pricey, costing as much as $ 149 each for the newest PocketWizard Plus III models.

For those on a budget, there are many cheaper, and just as high quality, transceivers out there. While I’ve been using PocketWizards for a couple of years, I recently invested in four Yongnuo RF-603 II wireless transceivers. Costing just $ 31 for two triggers, they connect to both the camera AND the speedlight via the hot shoe mount; this makes it much easier to sync flashes without the pc sync port, such as the cheaper 430 EXII. As an added bonus, the Yongnuo transceivers can also double as remote triggers by activating the shutter on your camera. If you’re on a budget or just getting started with flash, the Yongnuo transceivers are a great low-cost investment.

The final piece of gear that you should have is a light stand to support your speedlight. Light stands are lightweight and pretty cheap, but you’ll want to make sure that they include an adapter to hold your flash.

Off-Camera Flash in Action

The following demonstration uses the basic tools mentioned above – a Canon 6D, 580 EXII flash, two PocketWizard Plus III transceivers, and a light stand with a swivel umbrella adapter. The photography subject is a wooden sculpture procured during a vacation in Mexico, sitting on a bamboo mat, with a colorful quilt as a background. The bare flash with no modifier is situated camera left, and there is some natural window light coming from camera right.

Off Camera Flash setup

With the camera set at 1/160 for shutter speed, f/2.8 aperture and ISO 250, the natural light shot as seen below isn’t half bad, but the left side of the product is a bit shadowed.

Basic off camera flash product photography

Enter the speedlight! If you aren’t familiar with a speedlight, all of the buttons and controls on the back can look intimidating, but the first button to be familiar with (besides the “on” switch) is the “Mode” button. This is what you hit to get from ETTL (automatic) to M (Manual) to Multi (for firing repeated flashes during a single long exposure). Leaving the flash on ETTL is fine when the flash is connected to your camera’s hot shoe mount, but it can produce disastrous, blown-out photos when the flash is moved off-camera. I won’t waste a photo showing you the result, but the resulting image is completely blown out and unsalvageable.

In order to adjust the off-camera flash’s output to better sync with your camera settings, it’s time to switch the flash onto Manual mode. Simply press the Mode button until M shows up on the flash LCD. Then, start playing around with the flash’s output. On the bottom portion of the flash, press the middle button that reads SEL/SET that is surrounded by the Select Dial. Numbered fractions will appear blinking in the LCD. Turn the Select Dial clockwise to change the numbers, going from 1/1 down as far as 1/128. The result below is shot at the same camera settings, but the off-camera flash firing at camera left at 1/16 power. The resulting image below is still blown out, but not nearly as bad as when the flash fires on ETTL mode.

Basic off camera flash product photography

Flash power set at 1/16


To continue balancing out the overpowering flash, dial the power down to 1/64. The result is much more balanced.

Basic off camera flash product photography

Flash power set at 1/64


Take the flash power down even lower to 1/128, and the photo subject is a bit more shadowy, adding more edge to it and really separating it from the background.

Basic off camera flash product photography

Flash power set to 1/128


This is just the start to experimenting with off-camera flash; many other variables such as camera settings, modifiers, and multiple light sources can produce similar and superior effects. However, the first thing to realize is how dramatic effects can be by just playing around with a single speedlight flash and its the manual settings.

googletag.cmd.push(function() {
tablet_slots.push( googletag.defineSlot( “/1005424/_dPSv4_tab-all-article-bottom_(300×250)”, [300, 250], “pb-ad-78623” ).addService( googletag.pubads() ) ); } );

googletag.cmd.push(function() {
mobile_slots.push( googletag.defineSlot( “/1005424/_dPSv4_mob-all-article-bottom_(300×250)”, [300, 250], “pb-ad-78158” ).addService( googletag.pubads() ) ); } );

The post Getting Started with Off-Camera Flash by Suzi Pratt appeared first on Digital Photography School.


Digital Photography School

 
Comments Off on Getting Started with Off-Camera Flash

Posted in Photography


Landscape Photography Tips & Tricks: Getting the Big Picture

04 Feb

Of all the different types of photography, capturing images of landscapes is one of the most popular.   The compulsion to capture breathtaking images of sweeping vistas, crystal shorelines and towering mountains comes on especially strong whenever people travel to new places. You’ve probably noticed this whenever some of your friends go on vacations. Their Facebook walls become flooded with Continue Reading

The post Landscape Photography Tips & Tricks: Getting the Big Picture appeared first on Photodoto.


Photodoto

 
Comments Off on Landscape Photography Tips & Tricks: Getting the Big Picture

Posted in Photography


5 Tips for Getting Fresh Ideas for Macro Photography

28 Jan

Are you seeking some inspiration for getting creative with some new macro photographs? Perhaps you’ve grown tired of taking close-ups of typical macro subjects like flowers and insects. Help is on the way.

There is a whole world of macro photography available to you that doesn’t involve the typical subject matter so often associated with close-up photography. There are some amazing images of insects and flowers to enjoy on the web, but what about going in a different direction?

Photo 1 macro photography ideas

Here are some ideas to get your creative juices flowing, to challenge your imagination, and direct you to doing more interesting macro photography:

1. Pick a location

This is a good technique to use when the weather outside isn’t the best for macro work. Your kitchen is the easiest place to start generating ideas. I usually grab a notebook, or a tablet and a pen, and start brainstorming by opening drawers and cabinets and writing ideas down.

You have appliances, silverware, glasses, cooking utensils, and plates to start with. Add food and liquids to your list and you’ve got a great big inventory to work with. Coffee beans, cherry tomatoes, and peanuts work well because of their size and variety in surface and color (see photo above).

A few years back, I gave myself a photo assignment to create some new macro images using bathroom subjects. I don’t consider myself an expert macro photographer, but I did have a good time with the challenge of making a few non-typical macro photos. Cottons swabs, a suction-cup shampoo bottle holder, and a razor became the subjects from the bathroom.

Photo 2 macro photography ideas

Other locations could be an office, a workshop, or yes, perhaps even the bedroom. You could also leave your house and take a trip into town, visit a junkyard, or go to a local thrift store.

2. Come up with a theme

Rather than limit yourself to a single location, take a theme approach. What if you picked texture as a theme to develop? Take a second right now to jot down anything you can think of that has texture. Take a deep breath, relax, clothes your eyes, and let your mind go.

Use a mind map like the one pictured below. This is just a brainstorming method to generate creative possibilities. Here are just four random examples. These can lead to other tangent ideas so write down all of your thoughts and you can edit your lists later.

Photo 3 macro photography ideas mind map

3. Take a workshop

There are plenty of courses online you can take, or find a live workshop nearby. Not only will you be exposed to the close-up photos from the instructor, but you’ll surely have an opportunity to interact with other budding macro shooters.

You could ask them what their most unusual macro subject has been. They may have ideas that never would have occurred to you.

I started a practice of attending a minimum of at least two workshops or seminars yearly, and it has been a great way for me to recharge my creativity.

4. View macro photography portfolios

One of the most powerful idea tools I use is Google. Try using a variety of keyword searches with “macro” and “close-up”. Search specific categories and those search results will lead you to other themes and ideas.

You can go to big photo gallery web sites that have search boxes to explore literally millions of macro images. Do a variety of macro searches, based on subject, lighting, or location at web sites like 500pixels, SmugMug, or Flickr, just to mention a few.

5. Play with the lighting

Challenge yourself to come up with a few completely different ways to light one of your subjects. We know photography is a form of painting with light. Try to significantly change the appearance of your subject by dramatically changing the way you light it.

Change the direction, the size of your light source, and the shadow to highlight ratio in a variety of ways to get new results. This may lead to the discovery of different ways to reveal specific characteristics of your subject like texture, color or compositional lines.

The red pepper photo below was lit with a single speedlight, bounced off of a small white piece of cardboard, above and behind the subject.

Photo 4 macro red pepper speedlite

Idea generating tips

The best time for creative thinking is when your mind is fresh and rested. Many personal development books and various brain studies make the point that there are specific peak performance conditions that you can implement to boost your creativity and effectiveness.

For many, certain environments or activities can work. A few minutes of focused and relaxed breathing, time during or after exercise, a walk in the woods, or even brainstorming while in the shower can bring forth great ideas.

Other avenues you can explore can be taking your macro photographs with different lenses or manipulating them afterward with software. The photo below is of a plastic model turbine engine.

Photo 5 macro photography ideas software

I liked all of the details revealed in the close-up, but the original photo had remnants of a yellowish glue from its assembly. I used Nik Silver Efex Pro 2’s Low Key filter to convert it to a black and white image.

In addition to these five ways of getting creative ideas for macro photography, there is a wealth of information available to you for creativity, imagination, and brainstorming techniques in general which you can apply to your photography.

Some of the books by Michael Michalko, Amy Wallace, and Austin Kleon are worthwhile reading if you are looking to apply creativity to your photography or any another aspect of your life.

Have a blast and share any comments or images you have below.

googletag.cmd.push(function() {
tablet_slots.push( googletag.defineSlot( “/1005424/_dPSv4_tab-all-article-bottom_(300×250)”, [300, 250], “pb-ad-78623” ).addService( googletag.pubads() ) ); } );

googletag.cmd.push(function() {
mobile_slots.push( googletag.defineSlot( “/1005424/_dPSv4_mob-all-article-bottom_(300×250)”, [300, 250], “pb-ad-78158” ).addService( googletag.pubads() ) ); } );

The post 5 Tips for Getting Fresh Ideas for Macro Photography by Bruce Lovelace appeared first on Digital Photography School.


Digital Photography School

 
Comments Off on 5 Tips for Getting Fresh Ideas for Macro Photography

Posted in Photography