An important element of photography is getting sharp, crisp images. You may be struggling with focus, especially if you are fairly new to DSLR photography. It is extremely frustrating to go out shooting, assuming you’ve got nice clear, sharp images, only to get home to find out they aren’t quite as sharp, or even in focus, as you had hoped.
There are several things you can do to improve your chances of getting sharper images. Here are a few to get you started, if you have other tips please share them in the comments below.
Five steps for achieving sharp images
#1 Pick the focus point manually
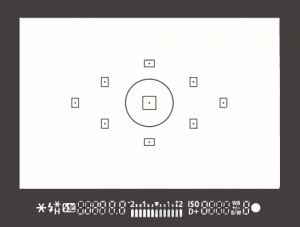 On most SLRs, and some of the mirrorless or four thirds cameras, there is an option of selecting what point it uses to focus. Meaning, when you look through the camera and see some flashing dots or squares (or something similar to the image on the right), those are your focus zones or spots. Make sure it is NOT set for the camera selecting which of those spots are targeted for focusing. When the camera chooses where to focus it can often pick the wrong thing. If you have a subject that is behind something in the foreground the camera will usually pick the closest object, which is not your intention, and you’ll end up with the wrong thing in focus.
Find the setting that allows you to adjust which target focus zone the camera uses to focus. Depending on the camera make and model, that can usually be adjusted with a dial or joy stick on the back of the camera, while you are looking through the view finder. This frees you to choose the most appropriate zone or spot for your subject or scene.
#2 Select the right focus mode
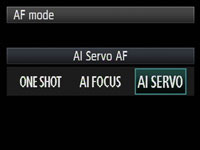 Most cameras have a few different types of focus modes. On Canon you’ll see them as Single (One Shot), AI (stands for Artificial Intelligence) Focus and AI Servo. On Nikon the modes are AF-S, AF-C and AF-A. Choose the one that bests fits for the subject you’re photographing.
Single (or AF-S) means that the camera will focus and lock on a single object and will not refocus until you release your finger from the shutter button. AI Servo (AF-C) is for continuous focusing when you have a moving subject. In this mode when you depress the shutter button half way, the camera will continue to focus on the subject as it moves away or towards you. It does not lock focus until you press the button down fully and take the photo. In AI Focus (AF-C) the camera will choose between the previous two based on whether the subject is moving or not.
#3 Set your minimum shutter speed accordingly
 There is much debate about this subject in terms of how slow is too slow for hand holding your camera. Some instructors will say 1/60th of a second, I tend to use another rule of thumb which is 1 over the focal length of your lens. So if you are shooting with a 200mm lens, then 1/200 is how fast you need to be shooting to get rid of blur caused by camera shake. The longer lens you select, the more amplified any movement will become. If you are shooting with a cropped sensor camera, remember that 200mm is now acting like a 350mm so that changes your minimum shutter speed to 1/400. If you use a lens that has image stabilization then you can often stretch it a little bit more, say one or two stops, depending on how steady your hands are. You also want to make sure you are holding your camera in the most stable position with your left hand UNDER the body and lens (sort of cupping it) and both elbows in tight to your body. Then, hold your breath and shoot!
#4 Make use of back button focusing
Another much debated topic is whether or not to use the back button focusing option now available on most DSLRs. I’m not here to get into that debate, if you want to know more about it you can read 3 Reasons Why You Should Switch to Back Button Focus by James Brandon. The basic idea is that instead of using your shutter button to focus, you separate the focus function to a button on the back of the camera, that you press with your thumb.

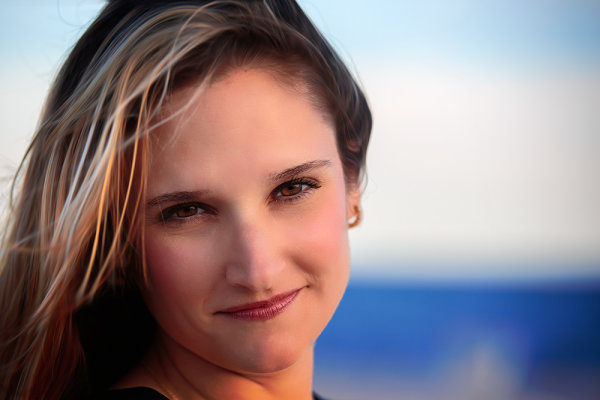
Taken using back-button focus
I use it for many things including; portraits where I want the subjects off centre and don’t want to do “focus, lock, recompose” for every frame, any time I want to focus on a moving target (you have a better chance of getting it sharp this way than with the shutter button focus), for HDR photography when I’m bracketing and don’t want the focus to shift accidentally between shots, for night photography when I focus with the assistance of a flashlight and don’t want it to move afterwards (other option is switch to manual focus every time but it’s too easy to forget to focus at all then).
It does take a little getting use to, but after a friend of mine that shoots sports for the local newspaper showed me how to use it properly I never looked back. So when she says it’s better for action focus on critical, fast moving subjects, I listen cause she knows what she’s talking about!
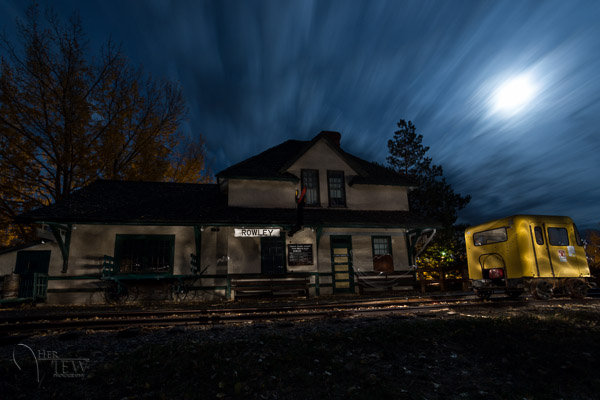
#5 Use a tripod and remote trigger or release
Tri-pod = three legs. Three is better than two right? In some the case of photography – yes! The tripod is your friend.
I think you know what they are and what they’re for, but not many photographers own one or use it. Placing your camera on a tripod will help you get sharper images, if you’re doing it right. Get a good sturdy one, don’t cheap out on a $ 49 tripod on sale at the big box store and put your $ 2000 SLR on it. Do you put cheap tires on your high end sports car – I think not! A flimsy tripod won’t do you any good if it can’t hold the weight of your camera and is constantly slipping or loosening. Worse case scenario has your whole rig crashing to the ground, not good. Invest in a good one, do some research, make sure it is made for still photos not video, and it can hold the weight of your camera. A lightweight one made of carbon fibre is a good option, but expect to pay more for that option.
In addition to a tripod I also suggest getting a remove trigger or shutter release. They come in a few varieties including ones that attach directly to the camera, wireless ones, and even fancy programmable ones for doing timed exposures and auto exposure brackets. Like anything, the more fancy shmancy features you want, the more $ $ $ you will pay. But do get one, because it allows you to fire the camera without touching it, thus reducing any possible vibrations during the exposure. I also tell my students to turn of the IS (or VR) on their lens once the camera is on tripod. This is because the IS/VR runs a little motor inside the lens that vibrates it to help compensate for camera shake. On tripod you do NOT want your lens vibrating, even a tiny bit. The camera manufacturers would like us to believe that their cameras are smart enough to know when that’s happened and turn off the IS automatically. Maybe they are. Maybe they aren’t. I like to take no chances, so I just turn it off.
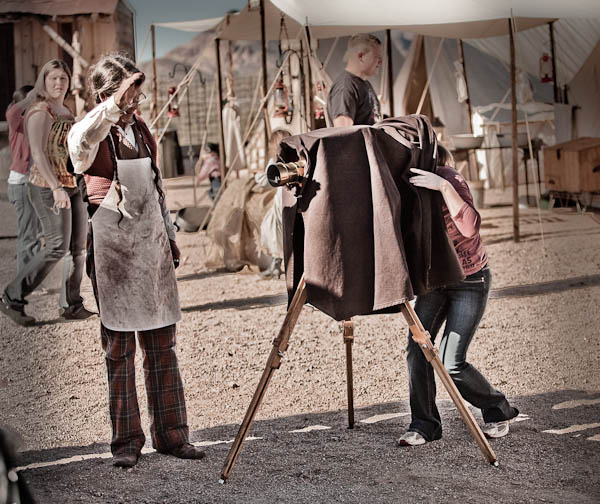
Me playing with a view camera at a mock western town in AZ. The guy posing as the photographer let me have a look through it, for old times sake.
When I started photography school (technical college) the first camera they allowed us to use was a 4×5″ view camera. If you’ve ever seen one you’ll know it’s not possible to use it without a tripod. In hindsight, some 25 years later, I think those photo school instructors were actually pretty smart! At the time I just thought they wanted us to suffer hauling all this heavy gear around. By putting the camera on a tripod you will instantly slow down and put more time into setting up your shot. With the advent of digital and the popularity of SLRs and now even micro four thirds and mirror-less cameras, it’s become so easy to just grab the camera and fire off a few images. So besides the obvious benefit of stabilizing your camera so you can shoot at slower shutter speeds then we discussed in #3 above (if you want to do night photography it’s essential), using a tripod also forces you to put a little more time and effort into it. I find when that happens it often results in a better image aesthetically as well as technically.
Well this was a longer tip than I expected to write, whew! To sum up, if you are having trouble with blurry images, try these tips out for yourself. I’m pretty sure you’ll have a bit more success.
So give it a go, and let me know how it’s working for you!
Post originally from: Digital Photography Tips.
Check out our more Photography Tips at Photography Tips for Beginners, Portrait Photography Tips and Wedding Photography Tips.
5 Tips to for Getting Sharper Images

Digital Photography School


 Over time, you’ll discover that there are certain presets that you use quite often. Feel free to create a new folder in your presets catalog and the drag your favorites into that one. A few of my favorites are Day At The Zoo and Bright and Sunny from my “Family Lifestyle” set, B&W Film Grain and B&W High Contrast from my “Monochrome” set, Sweet Pea Vintage in my “Nostalgia Film” set and Rome in my “Travel” set.


 Find a good spot by getting there early and checking out the parade route. This seems like a no-brainer, but the lighting can be tricky especially if you’re in a spot where the floats and people are half in the sun, and half in the shade. So select a spot where you can either get them all in the shade (and have a shady background too), or all in the sun. Don’t be afraid to move if you find the location you selected isn’t working, for whatever reason. Maybe the lighting is bad, or the background is too busy or too bright. Then see tip #2 below!


 You may have heard that once you get a DSLR you need to learn to shoot in manual and only ever use that mode. That if you are using the Aperture or Shutter Priority you’re cheating and if you want to be more like a pro you have to shoot in Manual only, all the time. To that I say “horse pucky”! (if you’re old enough to remember M.A.S.H. you’ll get that reference).
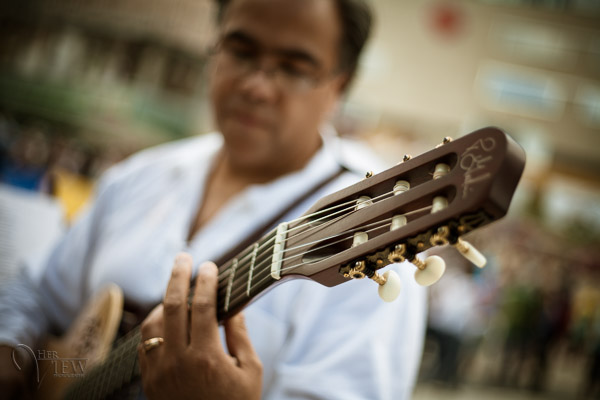


You must be logged in to post a comment.