RSS
 

Posts Tagged ‘gear’

Manfrotto launches Off Road camera gear

20 Jan

Manfrotto has introduced a new lineup of backpacks in its Off Road collection designed for outdoor photographers. The backpacks allow for both personal items and camera gear to be toted around, including the new walking sticks and tripods the company has also launched. Read more

Articles: Digital Photography Review (dpreview.com)

 
Comments Off on Manfrotto launches Off Road camera gear

Posted in Uncategorized


How to Create Dark Moody Low-Key Portraits with Minimal Gear

14 Jan

To paraphrase Samuel L. Jackson in Jackie Brown, “Grids: when you absolutely, positively got to kill every lumen in the room, accept no substitutes.” Do you have a room or environment that you want to appear black? You don’t even need a black backdrop or the dark cover of night to create a dark, dramatic scene. All you need is a flash, a grid and enough space to allow your subject to be at least 5-10 feet away from any walls. As long as you can keep your strobe light from falling on the ground, background or other objects in the scene, only the subject will be illuminated.

1

The scene: If you want to black out your environment to create dark moody low-key images, look for shaded areas with enough space to allow at least 5-10 feet between your subject and the background. The darker the background wall is, the better.

2

The raw file: If you look closely, you will see that there is a bit of background detail, which can be easily eliminated in Lightroom.

It was a particularly windy day that I photographed ballerina Kristie Latham. Since I didn’t have an assistant, and sandbags were too heavy to lug around by myself (I was already pulling my case and carrying two light stands), I would have to shoot without light modifiers. Note, if I had added an umbrella to the light stand without it being sandbagged or held by an assistant, it would have blown over onto a nearby car within five seconds. Though an un-modified flash on a light stand can still be blown over by the wind, it’s much less likely to happen. That said, I still made sure that it wasn’t too close to any nearby cars.

I wanted to highlight her form and the details of her outfit – specifically the tutu – so even though the light was going to be hard without modifiers, it would actually work out to my advantage. I began by setting up the main light. I placed it high – about 8 feet – in order to create dramatic, directional light. After taking a test shot, I saw that the light fell off below her tutu, since it came out about a foot from her body, causing her legs to go into shadow. To remedy this, I added a second light, placing it on the ground, aimed slightly up, to avoid lighting the ground. The second light worked at illuminating the lower half of her body (image above). By zooming the flashes in to a medium setting of 70mm, it allowed just enough light spread to cover her, while not spilling on too much of the environment around her. While a bit of background detail can be seen in the raw file, it can easily be removed in Lightroom in post-production.

3

The final shot: Kristie is now completely isolated in the void. Poetic.

In a slightly different environment, I was doing a shoot with model Dani Dikeman, in a basement. She was in black body paint, wearing all black above the waist. I wanted the whole scene to appear black, save for the highlights on Dani and the textures of her outfit. It was a conceptual portrait shoot, this portion being the Hell portion of a Heaven/Hell-themed shoot. (The as-yet-to-be-shot Heaven scenario will, fittingly, be all white.)

4
The setup: This scenario took place in a basement.

I met Dani at the makeup artist’s house, about an hour after they got started on the makeup, in order to give them a head start on the lengthy application. I knew that the basement was going to be an optimal shooting space because it was not only windowless, but wide open and barren. I quickly set up the sole flash, see above, and then waited while they put the finishing touches on the makeup and hair.

5
The raw file: Though a bit of Dani’s unpainted abdomen and sweatpants are visible in the shot, a quick Lightroom adjustment would have the image ready to go.

The shoot actually went rather quickly (15 minutes), which is ironic since the makeup application took two hours. Though the basement wasn’t especially large, by using a grid on my light to contain light from spilling on the nearby walls, the environment read pretty close to black in the raw files, as seen above. Although Dani’s unpainted abdomen and sweatpants visible in the shot, this wasn’t too big of an issue. Because the light falloff was so dramatic from her bust to her torso, a quick adjustment in Lightroom, lowering the exposure and it went easily to black.

6
The final shot. All black everything.

Have you done all dark or low key images before? Have any other tips or comments to share?

googletag.cmd.push(function() {
tablet_slots.push( googletag.defineSlot( “/1005424/_dPSv4_tab-all-article-bottom_(300×250)”, [300, 250], “pb-ad-78623” ).addService( googletag.pubads() ) ); } );

googletag.cmd.push(function() {
mobile_slots.push( googletag.defineSlot( “/1005424/_dPSv4_mob-all-article-bottom_(300×250)”, [300, 250], “pb-ad-78158” ).addService( googletag.pubads() ) ); } );

The post How to Create Dark Moody Low-Key Portraits with Minimal Gear by Nick Fancher appeared first on Digital Photography School.


Digital Photography School

 
Comments Off on How to Create Dark Moody Low-Key Portraits with Minimal Gear

Posted in Photography


Gear Envy: Five Things to Consider Before Buying Your First Camera

07 Jan

GearEnvy 1

1. The Ol’ Gear versus Photographer Chestnut

What’s the best camera and lens you can buy when you’re starting out?

  • Anything by Nikon
  • Anything by Canon
  • Nikon and Canon are overrated; Pentax is what all the cool kids are using
  • Do the best you can with what you can afford right now

A photographer went to a socialite party in New York. As he entered the front door, the host said “I love your pictures – they’re wonderful; you must have a fantastic camera.” He said nothing until dinner was finished, then: “That was a wonderful dinner; you must have a terrific stove.” – Sam Haskins

Believing a great camera will make you a great photographer is like thinking Roger Federer’s tennis racquet will make you a world champion tennis player. Um, it won’t – I’ve tried. I’ve also worn the same jeans as Gisele Bundchen and they didn’t make me a supermodel. Cooking with Wolfgang Puck’s saucepans didn’t make me a master chef either.

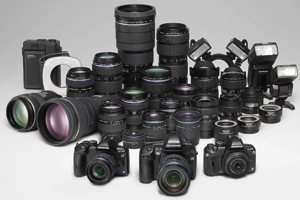
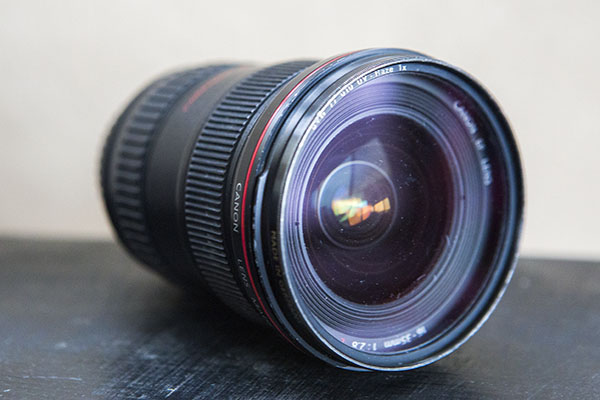
Great gear won’t make you a great photographer. Great lenses, however, can improve the sharpness of your images, and great lights and accessories can improve their quality. But all of that can be undone with poorly executed or sloppily composed images.

Just because something’s technically perfect doesn’t necessarily make it great or even good. A good photo should inspire an emotional reaction, and no camera or lens available today can achieve that for you.

I’m blown away daily by evocative photos on Instagram, 500px, and Flickr. Eighty percent or more of these images are taken with smart phones or entry-level cameras with kit lenses. When I share my images online, I get just as big a response from images taken with my iPhone as I do from images taken with pro gear. Because of the Internet, there’s never been a greater time in history to have your work seen and loved, or to inspire a reaction.

The best first camera you can buy is the one you can afford right now.

2. What are you shooting?

GearEnvy 2

Next, you should ask yourself what your your gear is for? Where will you use it and how often?

  1. I only take my camera to church on Sundays.
  2. I’m going to document my trek to the summit of Mount Everest, rodeo rides and my next Tough Mudder event.
  3. I photograph sixty weddings a year.
  4. I’m still learning, but I love to take photographs every opportunity I get.

Are you planning on taking your camera to rugged subzero locations? Will you be shooting thousands of images a day or only taking photos on special occasions? This is the first question to consider before purchasing any new gear – what will you use it for?

If your answer is #2 or similar, you may want to consider a heavy duty pro body that’s built to take rough and tumble handling and extreme weather conditions; a cheaper lightweight camera may not withstand the wear and tear or hold up to the elements.

If you plan on taking thousands of frames daily or weekly, it may be more cost effective to invest in a mid-range camera that’s built to shoot more frames. The shutter on a cheap camera usually rolls over and dies after about 100,000 frames, so spending a few hundred extra may give you more longevity.

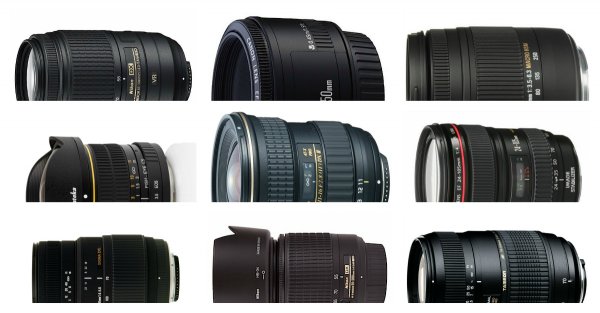
The subject matter you’ll be shooting will also influence your choice of lens. For example, if you’re planning on shooting a lot of portraits and head shots, many fashion and portrait photographers use long fixed focal lenses or zoom lenses. If you’ll be doing a lot of weddings, professionals stock their kits with wide and long lenses and lenses that are somewhere in-between. If you’ll be shooting a lot of scenery, landscape photographers get more use out of wider lenses. And lastly, if you plan on shooting a lot of food or products, you may want to consider adding a macro lens to your kit.

3. Brand loyalty. Which brand should you buy and why?

With cameras there’s no definitive answer to this question. Nikon appears to have a slight edge over all the other SLR brands, but there are advantages and disadvantages to each.

I spent the first 15 years of my career shooting with Nikon because both my brother and my first mentor used them. I loved my Nikon and never dreamt of swapping over. I initially invested in secondhand bodies and prime lenses and after I had saved enough coin to buy new, I stayed loyal to Nikon. Later when I switched over to digital, I continued my Nikon love affair.

The decision to convert to Canon was made for me by the lack of decent Nikon upgrades on the market in 2004-2005 and by the fact that Canon’s 1DS MKII blew anything Nikon made that year out of the water. I switched to Canon and invested in two new camera bodies, new lenses, speedlights and accessories.

Fast forward 10 years and you could argue that Nikon now makes better bodies than Canon, and that Canon makes slightly better lenses. For better or worse, I’ve made a commitment to Canon, and I’m sticking to that – for now. I still suffer the occasional bout of gear envy, but hey, I’m only human.

My advice is to test out each camera on offer in your price range. You’ll find that some cameras are more comfortable to use than others. Also factor in the warranty, general after-sales service, and how easy it is to have the brand you’re looking at serviced or repaired in your area. Another good indication of quality is the camera’s resale value. If your potential camera is flooding the low-end of the secondhand market, it may be a good indication you’re about to buy a lemon. Finally, check out camera reviews and look up discussions about the model you want to buy on forums. The photography community is incredibly thorough and generous with information.

4. Holy crop! Does size matter?

GearEnvy 3

I bought my first digital Nikon 13 years ago and paid $ 17,000 AUD (approx. $ 14,000 USD) just for the body. It took 256 MB memory cards and produced raw image files that were around 6 MB. I used that camera to shoot hundreds of covers, poster shots, magazine spreads and advertising campaigns, and nobody ever questioned the file size.

Today my iPhone takes 8 MB photos. So, does that mean my iPhone camera is better? Umm – no. It’s not the quantity of the megapixels that count; it’s the quality of the megapixels and the size of the sensor. Cramming lots of megapixels onto a tiny sensor decreases image quality, making grainier looking files.

So how big are the sensors in the various cameras on the market today? A camera phone sensor is the size of a tic tac, a compact camera sensor is the size of an M&M, an entry-level SLR sensor is the size of postage stamp, and a pro level camera sensor is the size of a 35mm film frame.

So how many megapixels are enough and what’s the best size sensor for you? Well again, the answer comes down to what the output is going to be.

If you plan on shooting images that are going to end up on billboards or really large wall prints, then a full frame sensor that produces raw image files that are larger than 20 MB is ideal. An entry-level camera can produce large enough files to create billboard size images; they just won’t look anywhere near as good.

If you plan on printing midsize images — A4 (8.5×11″) or smaller — then an entry-level to mid-range camera will achieve really good results.

Finally, if you’re mostly going to share your images online, you can get away with a smart phone or compact camera, but any of the above will do the job, as well.

5. Physical size and weight

GearEnvy 4

Does this camera make my bum look big?

This factor is often overlooked until you get home and pull your new camera out of the box and use it a few times. You may think you want the biggest, heaviest camera and the longest lens, but four hours into an eight-hour mountain hike, you may change your mind.

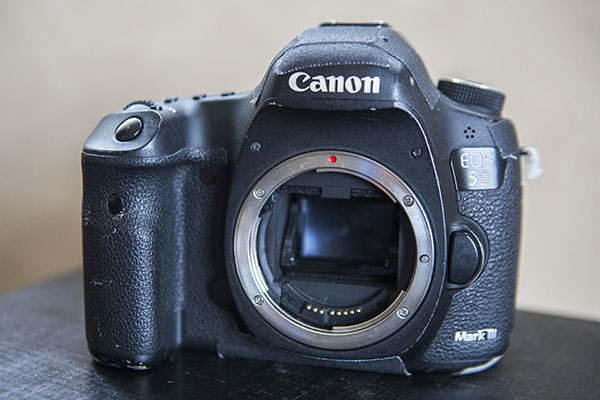
I currently use two different bodies: the 1DS MKIII and the 5D MKIII. My 1DSIII weighs twice as much as my 5D and produces better quality images, but I’m prepared to take a hit in quality when I’m travelling because I know I’ll shoot more if I’m carrying a lighter camera. Having to schlepp a heavy camera around makes me think twice about bringing it out in the first place.

A good camera should feel comfortable and be like a natural extension of your body. Test out how easy it is to change settings with one hand; believe me, this will get frustrating if it’s a difficult process.

Have I missed anything you feel is worth considering? Do you have anything to add to the discussion or have any questions? I’d love to hear from you.

googletag.cmd.push(function() {
tablet_slots.push( googletag.defineSlot( “/1005424/_dPSv4_tab-all-article-bottom_(300×250)”, [300, 250], “pb-ad-78623” ).addService( googletag.pubads() ) ); } );

googletag.cmd.push(function() {
mobile_slots.push( googletag.defineSlot( “/1005424/_dPSv4_mob-all-article-bottom_(300×250)”, [300, 250], “pb-ad-78158” ).addService( googletag.pubads() ) ); } );

The post Gear Envy: Five Things to Consider Before Buying Your First Camera by Gina Milicia appeared first on Digital Photography School.


Digital Photography School

 
Comments Off on Gear Envy: Five Things to Consider Before Buying Your First Camera

Posted in Photography


Most Popular Gear Articles of 2014

28 Dec

win-camera-gear.png

Photographers love our stuff, let’s admit it. We geek out on gadgets and gizmos. We want the latest and greatest thing, lens, camera. We can’t always afford what we want but it’s fun to browse. Here are some of the top gear related posts on dPS over the last 12 months:

Cameras

  • 10 Reasons Why a Pro is Using a Mirrorless Camera for Personal and Paid Jobs
  • How to Clean Your Camera Sensor in 3 Easy Steps
  • The Secret to Capturing the Best Image Quality with Your Digital Camera
  • Updating your Camera’s Firmware – What is it and Why it’s Important
  • Review Comparison of the Canon EOS 70D vs Canon 700D / Rebel T5i
  • Review: Comparison Canon 5D MarkIII vs the Canon 6D
  • Sony A6000 Mirrorless Camera Review and Example Images

Lenses

popular lenses

  • Old Glass: How to Use Old Film Lenses with New DSLR Cameras
  • The Only Three Lenses You Need for Travel Photography
  • Why Prime Lenses are Better Than Zooms
  • 5 Easy Steps to Choose the Perfect Prime Lens for You
  • No Telephoto Lens No Problem – Tips on Shooting for the Crop
  • Ready to Upgrade Your Kit Lens? Tips for Which Lens to Invest in Next
  • How to Choose the Perfect Portrait Lens
  • A Concise Guide to Choosing a New Lens
  • Lens Review Tamron SP 150-600mm f/5-6.3 Di VC USD
  • Creating Swirly Bokeh with the Helios 44-2 lens
  • Writer’s Favorite Lens – the Tamron 18-270mm
  • Writer’s Favorite Lens – the 50mm f/1.4 Lens

Other

  • Phottix Mitros+ Review – the Best Flash System You Have Never Heard of
  • Light Blaster [ For Special Effects Lighting ] a Review
  • Bounce Flash Secrets – Bouncing Your Way to Better Photography
  • 5 Ways to Create Better Images Without Buying More Gear
  • Two Videos on How to Take Care of Your Camera Gear
  • How to Buy Used Camera Gear
  • My Portrait Gear Essentials
  • Essential Gear for the Landscape Photographer

googletag.cmd.push(function() {
tablet_slots.push( googletag.defineSlot( “/1005424/_dPSv4_tab-all-article-bottom_(300×250)”, [300, 250], “pb-ad-78623” ).addService( googletag.pubads() ) ); } );

googletag.cmd.push(function() {
mobile_slots.push( googletag.defineSlot( “/1005424/_dPSv4_mob-all-article-bottom_(300×250)”, [300, 250], “pb-ad-78158” ).addService( googletag.pubads() ) ); } );

The post Most Popular Gear Articles of 2014 by Darlene Hildebrandt appeared first on Digital Photography School.


Digital Photography School

 
Comments Off on Most Popular Gear Articles of 2014

Posted in Photography


ShareGrid offers peer-to-peer gear rental

12 Dec

Renting gear from professional camera rental services has served as a vital resource for many photographers borrowing expensive or niche equipment for a shoot. Now, a new challenger has arrived, and the Los Angeles startup aims to create a peer-to-peer alternative to online rental services – enter, ShareGrid. Read more

Articles: Digital Photography Review (dpreview.com)

 
Comments Off on ShareGrid offers peer-to-peer gear rental

Posted in Uncategorized


Review: The Filter Hive from Mindshift Gear

30 Nov
Filter Nest by Mindshift Gear review

The Filter Hive, made by Mindshift Gear. The fabric exterior is coated with a water resistant coating to help protect your filters in bad weather.

If you are a landscape photographer it’s quite possible you own several filters that you use regularly. These may include a polarizing filter, three or four stop neutral density filters, graduated neutral density filters (you might have two or three of these) and, if you practice long exposure photography, a 10 stop neutral density filter such as the LEE Filters Big Stopper.

Filters can be difficult to deal with. I’ve tried several solutions, like using a messenger style bag (so I can just reach down by my side and take out the filters I need) and a small waist pack to store them. The problem is that filters come in cases that need to be taken out of the bag, then opened, all without dropping the filter. It becomes even trickier when trying to change one filter for another.

The bottom line – filters are essential for landscape photography, but handling them is a pain in the backside.

Filter Hive

That’s why I was so glad to come across the Filter Hive from Mindshift Gear. Essentially it’s a padded, charcoal coloured case with a removable insert that you use for storing your filters.

The Filter Hive is an extremely well thought out product. There are six slots for storing large rectangular filters (such as those made by LEE filters) and another six for storing smaller circular filters. The large slots are colour coded, making it easy for you to find the filter you are looking for. All the slots have a soft lining that is designed not to scratch glass or plastic, so your filters are safe.

Filter Nest by Mindshift Gear review

A peek inside the Filter Hive shows the larger colour coded slots at the back (ideal for large rectangular filters) and smaller slots at the front. You can also see the soft lining that helps protect your filters from scratches.

The insert is removable and comes with a dust flap to help protect your filters from dirt. The case has a zippered pocket on the front, as does the insert. On the back of the case is a loop so you can attach the case to your belt or to the side belt of Mindshift Gear’s Rotation 180 Panorama Rotating Backpack. There’s also a grab handle with a release buckle that you can use to hang the Filter Hive on the side of your tripod while taking photos.

Filter Nest by Mindshift Gear review

The insert containing the lined and padded slots for filters is removeable.

Filter Nest by Mindshift Gear review

The rear of the Filter Hive shows the belt loop (secured by velcro) and the buckle strap for attaching it to a tripod.

So, how does the Filter Hive perform in practise? The answer is brilliantly. I can store all my filters, removed from their cases, plus stepping rings in the Filter Hive. It’s easy to find and remove the filter that I need, and when I’m changing filters I can remove one from the lens and place it directly into the Filter Hive. It’s like the third hand that I’ve always felt I needed when changing filters up to now, and greatly reduces the chance that I will accidentally drop one.

The Filter Hive hanging from my tripod.

The Filter Hive hanging from my tripod.

Another benefit of the Filter Hive is that there is plenty of space to include a sachet of silica gel, helping to ensure that the filters inside stay free of fungi during the colder, damper, months. There’s also room for lens cleaning accessories like micro-fibre cloths and lens tissues.

Learn more

You can learn more about the Filter Hive, and it’s smaller brother the Filter Nest, from Mindshift Gear’s website by clicking on the links. They are also available from retailers such as BH Photo & Video, Adorama and Amazon.

This YouTube video will also give you a good idea of how the Filter Hive works.

Editor’s disclaimer: this product was donated to the author by MindShiftGear. dPS has not received any compensation and the author’s review is unbiased.

The post Review: The Filter Hive from Mindshift Gear by Andrew S. Gibson appeared first on Digital Photography School.


Digital Photography School

 
Comments Off on Review: The Filter Hive from Mindshift Gear

Posted in Photography


How to Buy Used Camera Gear

22 Nov

Even though the prices of digital photography equipment continue to fall significantly, it can be a tough to dole out a thousand plus dollars on a brand new camera or lens. On the positive side, camera gear (especially lenses) retains its value really well. As a result, there’s almost always a surplus of used camera bodies, lenses, and accessories. Before you take the plunge and buy used gear, be sure to understand that used equipment can be a bit tricky to assess in terms of quality and price. As a photographer who shamelessly has about 50% used gear in her collection, here are some methods I run through when contemplating a used camera purchase.

How to buy used photography gear

Price check used items on reputable online sources

By now, just about every online camera retailer has a used section on their website. Availability of items is obviously variable, but a simple item check can pull up estimates for the current standard used prices of the items you want. Be sure to note the quality rating and commentary of each item, and see how it matches up to your expectations. Often, used items that are priced too low have some sort of cosmetic or mechanical problem, so if you think you’re getting an amazing deal, get suspicious. Another reason to be suspicious of outrageously low prices is that they might be grey market items, which essentially come with no factory warranties. The best way to check if it’s a grey market item is to find the serial number and reference it in the camera maker’s database.

The advantage to buying used gear online is that often the gear has been checked out and issued a rating by the retailer. There may also be some flexibility in terms of exchanges and returns in case you aren’t happy with your purchase. Be sure to double check and make sure you know who the seller is, especially on Amazon, which allows private sales to be made.

  • Amazon Used Camera Section
  • Keh.com
  • B&H Used Camera Section
  • Adorama Used Camera Section

Used lens 03

Check out the local classified ads

Scan local communities boards or publications, or see what’s listed in your local Craigslist directory. The advantage to buying used gear in-person is the ability to test the gear out before you buy it. Nervous about meeting a stranger for a business transaction? Choose a meeting place at a super public space like a mall or cafe. Also, I’ve found that many Craigslist sellers of camera gear in my area tend to be other professionals, and thus their names and corresponding web portfolios can be easily researched online prior to meeting in person. If you do opt for an in-person transaction, be clear on how to assess used camera gear yourself.

How to Determine Used Lens Quality

Used lens 02

Lenses are relatively straightforward to assess in terms of quality. First, investigate the lens thoroughly and watch out for common problems such as fungus, dust, and scratches. Shine a light through the lens, and any imperfections should be visible. Note that some problems such as dust and small scratches will likely just be cosmetic damage and should not affect overall image quality. However, any signs of fungus on the lens is a deal breaker as it is incredibly difficult and costly to remove.

Second, do a mechanical test of the lens to see how it performs. It’s best to have your regular DSLR with you to see how it fits. Make sure the aperture blades on the ring are clean and can move freely, and try out both the zoom and focus rings. Depending on the lens model, it’s not uncommon for the rings to offer some resistance, but be sure sure they both operate relatively smoothly. Finally, check out the autofocus operation on the lens and make sure it is smooth.

How to Determine Used Camera Body Quality

Used camera 04
Used camera bodies can be a bit trickier to assess. While it’s perfectly normal for bodies to have physical signs of wear and tear, use your initial visual impressions of the camera as your first judgement. If the camera appears badly worn and used, it’s likely not looking any better on the inside. However, the most telling part of the camera body’s lifespan is the shutter, which is very expensive to replace. Sometimes people will sell their cameras when the shutter is about to die, meaning the new owner will have to drop a lot of extra money soon after to replace it. How to check shutter counts, as well as how many shutter counts are acceptable for a used body, depend on the camera make and model. Google searches and forums should offer some resources.

Autofocus is another aspect of the camera body that should be tested. Using a reliable lens that you bring with you, test out the camera and see how both single and continuous autofocus performs. While you’re at it, also examine the lens mount on the camera and make sure the lens mounts securely.

Whether you’re an amateur or a professional, it’s completely acceptable to purchase used camera gear. Just be sure to do your research and have a thorough understanding of the product you are considering buying. Always use reputable sources, and remember that if the deal seems to good to be true, it probably is!

The post How to Buy Used Camera Gear by Suzi Pratt appeared first on Digital Photography School.


Digital Photography School

 
Comments Off on How to Buy Used Camera Gear

Posted in Photography


LensRentals’ new Keeper program lets you buy rental gear

04 Oct

U.S.-based LensRentals has announced an expansion to its photo equipment rental service that allows photographers to purchase the gear they’ve borrowed. This gives renters a try-before-you-buy option and lets those who have become enamored with their rental equipment keep it forever. Learn more

Articles: Digital Photography Review (dpreview.com)

 
Comments Off on LensRentals’ new Keeper program lets you buy rental gear

Posted in Uncategorized


Education: Gear for Your Brain

02 Sep
Your brain is gear. Keep it in tune by providing it regular doses of education. A well-written and info-packed photo technique book is a screaming bargain in the long run. You’re essentially renting someone’s brain.

I have dedicated an entire bookshelf page to my very favorite lighting (and other photo) books for your consideration. All are well-considered and are, I believe, the very best examples in their genre.
__________

But beyond that I would suggest you consider the occasional workshop. Nothing beats a hands-on, small class with a solid pro who knows things you would like to know. It is a super growth experience, and something you really owe yourself if you are passionate about learning to be a better photographer.

At this point severe time constraints limit my ability to teach. But in the past I have taught many workshops and worked with many organizations. Having worked as an instructor for Gulf Photo Plus (held late winter in Dubai) and Santa Fe Workshops (held year-round in New Mexico and elsewhere). I can strongly vouch for both of these organizations. I have seen first-hand how students grow in leaps and bounds in the span of a week, all while making great new friends and having the experience of a lifetime.

If you have ever toyed with the idea, you should definitely ask around, do your research and then take the plunge.
__________

That’s it, For Now

That’s my two cents worth on gear. You may have other choices or priorities, but that is the best I can offer you with 25+ years’ experience behind it.

If you want to chime in on your own, feel free to do so on Twitter via the hashtag #StrobistGear. If is it important that I see it, include an @Strobist in there somewhere and I will.


Strobist

 
Comments Off on Education: Gear for Your Brain

Posted in Photography


Top 7 Gear Picks 2014 to Try This Summer

18 Jul

Summer is a great time to get outdoors and shoot amazing photos. The weather is sublime, the plants are all blooming and it’s just an all around great time of year. The last thing you want to do is lug around your hunky DSLR. This list of sleek and compact image makers will provide you with all of the best Continue Reading

The post Top 7 Gear Picks 2014 to Try This Summer appeared first on Photodoto.


Photodoto

 
Comments Off on Top 7 Gear Picks 2014 to Try This Summer

Posted in Photography