RSS
 

Posts Tagged ‘from’

South Platte River from Wildcat to Evans by SUP

16 Mar
March 14, 2015. 16 miles stand up paddling (SUP) trip from Wildcat on St Vrain Creek on the South Platte River to Evans Rob Bean. Beautiful, warm weather. Numereous bald eagles, turkeys and other birds, one turtle, and surprisingly a lot of people with children playing on the river.

River flow: St Vrain Cr at mouth 230 cfs, South Platte River at Fort Lupton ~350cfs. Water level on the South Platte was lower than during my last trip. Some of rocks near Wildcat Mound visible in my aerial photos were exposed. I used a short fin on my Badfish SUP and paddled without special problems, but Rob was forced to remove his regular fin in the last miles of paddling..

We finished our trip at highway 85 bridge at Evans about 1 mile upstream from the closed Riverside Park. I was describing this place in my previous posts: comfortable parking (limited to ~10 cars) at the end of frontage road, a pretty good river access under the bridge, but the place has a lot of “urban” character (graffiti, garbage, beer bottles).

Rob’s pictures from this paddling on facebook.

Access to the river from the county road 19.5 looks more or less the same as before flooding. River flow ~200cfs. I started paddling trips here with flow as low as 90cfs.

Wildcat – March 8, 2015. Access to the river from the county road 19.5 looks more or less the same as before flooding. River flow ~200cfs.

paddling South Platte River by SUP

Rob is paddling on St Vrain Creek just above confluence with South Platte River

paddling South Platte River by SUP

The first diversion dam above highway 60 bridge.

paddling South Platte River by SUP

Railroad trestle below highway 60 bridge.

paddling South Platte River by SUP

Portaging the 2nd dam. Water was low enough to just go over the dam.

paddling South Platte River by SUP

Landing at Evans under highway 85 bridge.

Related posts:
Exploring the Upper North Platte River in Colorado by SUP
Paddling SUP on South Platte River from Kersey to Kuner
South Platte River below Denver – GPS/photo river guide


paddling with a camera

 
Comments Off on South Platte River from Wildcat to Evans by SUP

Posted in Photography


Compliment Shower: Kind Words Rain Down from Giant Spigot

10 Mar

[ By Steph in Art & Installation & Sound. ]

compliment shower 1

Would reading a message like “You could make a lemon laugh” make you feel good enough about yourself to spread kindness to others? That’s the idea behind the world’s biggest compliment shower, a massive spigot installed in Antwerp’s Central Station in honor of International Compliments Day 2015.

compliment shower 3

compliment shower 4

Dreamed up by creative agency FRIENDSHIP and commissioned by fashion retailer e5, the installation features what looks like the most absurdly oversized shower head in existence looming over commuters as they pass through the station. A sign simply says, ‘Pull for compliment.’

compliment shower 6

compliment shower 7

Anyone who does so (not minding the fine print, which reads ‘Smile, you’re on camera,’) instantly gets hundreds of complimentary phrases rained upon them and everyone watching. The little blue waterdrop-shaped papers bear messages like “You look like a million bucks today.”

Share on Facebook


[ By Steph in Art & Installation & Sound. ]

[ WebUrbanist | Archives | Galleries | Privacy | TOS ]


WebUrbanist

 
Comments Off on Compliment Shower: Kind Words Rain Down from Giant Spigot

Posted in Creativity


Paddling SUP on South Platte River from Kersey to Kuner

10 Mar
March 8, 2015. A short, 7 mile, stand up paddling (SUP) trip on the South Platte River from Kersey to Kuner with Rob Bean and a company of goose, deer, and bald eagles. It was easy paddling with a good flow of 1100 cfs and beautiful warm weather. After, paddling I did some river scouting around Evans Riverside Park and further upstream.

Rob’s pictures from this paddling on facebook.

paddling SUP on South Platte River

Launching our paddleboards below Kersey bridge next to water gauge station

paddling SUP on South Platte River

I paddled my Badfish SUP with a short fin and never touched the bottom. Rob paddled with a regular fin and had to step out of his board once or twice, but I believe it would be possible to avoid any shallows with a more careful navigation.

paddling SUP on South Platte River

Finishing our run at Kuner on left shore above the bridge

paddling SUP on South Platte River

A typical bridge river access on the South Platte.

A part of Riverside Park at Evans reopened in September 2014 with entry from 42nd Street.  There is access to a small lake, but no access to the river.

A part of Riverside Park at Evans reopened in September 2014 with entry from 42nd Street. There is access to a small lake, but no access to the river.

Evans river access

A bike trail going under hwy 85 bridge at Evans. Off road parking at the end of frontage road. The river access is not bad for the South Platte standards (no fences), but the under bridge scenery is pretty ugly.

Bike trail destroyed by South Platte River flooding

And, the bike trail ends just below the bridge. This is how probably the river shore looks further downstream at Riverside Park after the 2013 flooding.

St Vrain Creek above  confluence with the South Platte River.

Let’s move 16 miles upstream: St Vrain Creek at Wildcat about 1 mile before the confluence with the South Platte.

Access to the river from the county road 19.5 looks more or less the same as before flooding. River flow ~200cfs. I started paddling trips here with flow as low as 90cfs.

Access to the river from the county road 19.5 (no fences) looks more or less the same as before flooding. River flow ~200cfs. I have started paddling trips here with flow as low as 90cfs.

Related posts:
Opening 2015 Paddling Season on the South Platte River
Scouting and Paddling the South Platte River after 2013 Flooding
South Platte River below Denver – GPS/photo river guide


paddling with a camera

 
Comments Off on Paddling SUP on South Platte River from Kersey to Kuner

Posted in Photography


World Press Photo revokes prize from Giovanni Troilo

06 Mar

Following an investigation into Contemporary Issues winner Giovanni Troilo’s photo story ‘La Ville Noir – The Dark Heart of Europe,’ World Press Photo has stripped the photographer of his prize. The organization found Troilo to be in violation of contest rules – specifically, a photo he submitted that he alleged to have been taken in the Belgian city at the heart of the project turns out to have been taken in Sint-Jans-Molenbeek, Brussels. Read more

Articles: Digital Photography Review (dpreview.com)

 
Comments Off on World Press Photo revokes prize from Giovanni Troilo

Posted in Uncategorized


As Triggertrap pulls plug on Ada kickstarter, CEO Haje Jan Kamps responds to comments from unhappy backers

04 Mar

Despite a successful round of funding through Kickstarter, Triggertrap has run into difficulties developing its Ada prototype and has announced that it will not be continuing with the project. As of November last year the company had raised nearly £300,000 in crowdfunding for its latest innovation, Ada – a high-speed shutter and flash trigger. Triggertrap CEO Haje Jan Kamps spoke with us about the response he’s heard from disappointed project backers. Read more

Articles: Digital Photography Review (dpreview.com)

 
Comments Off on As Triggertrap pulls plug on Ada kickstarter, CEO Haje Jan Kamps responds to comments from unhappy backers

Posted in Uncategorized


Win One of FOUR Online Photography Courses from New York Institute of Photography

04 Mar

Over the past few years here at dPS, we have run some of our most popular competitions with a very valued partner – the New York Institute of Photography – to give away to dPS readers handpicked photography courses.

Due to popular demand, NYIP and dPS bring you yet another opportunity to win one of these valuable courses!

NYIP logo440x232black In Post Top and Bottom

For this competition, NYIP is giving away FOUR prizes

Each will be won by a different dPS reader. Here’s what you could win:

  • Wedding Photography Course – $ 999 Value
  • Portrait Photography Course – $ 999 Value
  • Travel Photography Course – $ 999 Value
  • Photojournalism Course – $ 999 Value

These are NYIP’s newest courses. They will teach you everything you need to know to take your skills to the next level in each category. These courses are all online. As a student you get access to videos and lesson materials prepared by experts in each field. You can access the course materials on any device, from anywhere in the world, and learn at your own pace.

NYIP Graphic In Post

How to Win

To win this competition you’ll need to:

  • Visit each of the above four course information pages and choose which of the courses suits your needs best. Choose one that you’d like to win.
  • Leave a comment below and tell us which one you’d like to win and WHY you’d like to participate in the course. Please note: there is a limit of ONE entry per person.
  • Do this in the next 10 days and after March 13th, the team at NYIP will choose the best four answers – one for each course – and we will announce the winners in the following days.

The deadline to enter is March 13th, Midnight PDT (GMT-7). Comments left after the deadline will not be considered.

By best – we’re looking to see if you have an understanding of what the course offers and how it suits your needs, so you’ll need to check out the course pages to put yourself in the best position to win.

There’s no need to write essay length comments to win, but we’re looking to hear what you like about the course and how it would help your development as a photographer.

This competition is open to everyone around the world, no matter where you live, but there is only one entry per person.

To enter, simply leave your comment below.

Don’t forget to share this post with your friends and like NYIP on Facebook for special offers and announcements on all NYIP Courses

NYIP logo440x232black  In Post Top and Bottom

Learn more about NYIP’s online photography courses.

Disclaimer: NYIP is a paid partner of dPS.

googletag.cmd.push(function() {
tablet_slots.push( googletag.defineSlot( “/1005424/_dPSv4_tab-all-article-bottom_(300×250)”, [300, 250], “pb-ad-78623” ).addService( googletag.pubads() ) ); } );

googletag.cmd.push(function() {
mobile_slots.push( googletag.defineSlot( “/1005424/_dPSv4_mob-all-article-bottom_(300×250)”, [300, 250], “pb-ad-78158” ).addService( googletag.pubads() ) ); } );

The post Win One of FOUR Online Photography Courses from New York Institute of Photography by Darlene Hildebrandt appeared first on Digital Photography School.


Digital Photography School

 
Comments Off on Win One of FOUR Online Photography Courses from New York Institute of Photography

Posted in Photography


The Best Way to Delete Photos From Your Memory Card

01 Mar

When it comes to photography, we spend most of our time thinking about taking photos – lighting, composition, exposure, and posing. Then, once the photo is taken, we may start to think about post-processing, gently nudging the photo along until it becomes exactly what we’ve pictured in our mind’s eye. Once that’s accomplished, we do it all over again.

MeredithClark6.jpg

Back in high school and college, I shot film. I can vividly remember running out of film, and sometimes having to wait weeks until I was able to buy more. Our public high school relied heavily on donations of film, and sometimes when there wasn’t any left, our teacher would have us walk around campus with our pointer fingers and thumbs shaped into a rectangle, pretending to take photographs. Now that digital cameras are on the scene and we’re using memory cards in lieu of film, with the capability to erase images and write over them again, the number of photographs that we can take in any given week or month is nearly endless.

You may have noticed that I said, “nearly” endless, and that’s because memory cards do have a lifespan, and will not last indefinitely. That said, there are a few things that we can do to maximize the lifespan of our memory cards, including making sure that we are deleting our photos off the memory card in the most efficient manner possible. This isn’t something that’s talked about all that often, but when it comes down to it, it is really simple:

Less Desirable Ways to Delete

Deleting each photo individually through the camera by using the “Delete” or Trashcan Button

Del3

Deleting all photos through the camera by using the “Delete All” option

Del2

Plugging the camera into the computer, and dragging photos into the computer’s recycle bin and/or allowing your import software to delete the files from the card once they’re uploaded.

Del1

Most Desirable Way to Delete

Using your camera’s Format function

Del4

In the end, all of the  above methods work toward the same end, in that they remove the images from your card. However, the first three ways to delete are actually more taxing to the memory card than using the card’s Format function. I’ve heard it explained like this:

Let’s pretend for a moment that your memory card has a shelf-life of 1,000 uses. Let’s say that you go out and take 500 photos, that’s 500 uses on your memory card. You then upload the photos to your computer, and then individually delete each photo using the delete button on your camera. Deleting each photo individually counts as another 500 uses on your card. So in all, you’ve just spent 1,000 uses of your memory card, leaving you with no uses left on that card.

Now, let’s pretend that you’ve uploaded your 500 photos, but instead of deleting them with your delete button, you use your camera’s Format function. Formatting works in a different way than deleting, and only deletes the directory files rather than the images themselves. This then allows the images to be overwritten the next time you take a picture. Because of this, formatting only counts as ONE use of your memory card, regardless of how many photos you’re deleting. So, in the scenario above, you’d have used only 501 of your memory card’s uses, as opposed to 1,000 with deleting manually. Certainly,  memory cards available today will be able to handle far more than 1,000 uses, but the illustration still rings true – formatting your card causes less wear and tear on your memory card than other ways of deleting images.

Additionally, because formatting only deletes the directory file instead of the images themselves, images on a card that has been formatted are typically much easier to recover (if needed) than those that are deleted manually, assuming that you did not overwrite them by taking more photos. Not a bad trick to have up your sleeve in case of emergencies, am I right?

I’d also like to add that I have personally seen a difference in both buffering time of the card, and also a decrease in the amount of corrupted images/cards that I’ve come across since I’ve been formatting cards rather than deleting in some other way. I’m not sure whether there’s an actual scientific basis there, but it definitely seems related in my book, and it is now pretty rare that I delete even a single image in any way other than formatting.

So, how often should you format? Some people like to wait until their card is totally full, and then format. Personally, I like to format my card before each new photo session. It just makes sense to me to start fresh each time, and be able to upload everything on the card to one location. This is really a matter of personal preference as far as I’m concerned. The one hard and fast suggestion that I do have when it comes to formatting cards is simply to be sure to format the card in whichever camera body you plan to use it in next.

How do you typically delete images, and why?

googletag.cmd.push(function() {
tablet_slots.push( googletag.defineSlot( “/1005424/_dPSv4_tab-all-article-bottom_(300×250)”, [300, 250], “pb-ad-78623” ).addService( googletag.pubads() ) ); } );

googletag.cmd.push(function() {
mobile_slots.push( googletag.defineSlot( “/1005424/_dPSv4_mob-all-article-bottom_(300×250)”, [300, 250], “pb-ad-78158” ).addService( googletag.pubads() ) ); } );

The post The Best Way to Delete Photos From Your Memory Card by Meredith Clark appeared first on Digital Photography School.


Digital Photography School

 
Comments Off on The Best Way to Delete Photos From Your Memory Card

Posted in Photography


Historic prints from the beginning of photography to go on auction in London

24 Feb

William Henry Fox Talbot prints from as early as 1844 are part of a collection of over 200 photographs that are due to go to auction in London next month. All of the pictures in the sale come from a single private collection which includes a many well-known and important works, and many of the prints were made at the time the original pictures were taken. See gallery

Articles: Digital Photography Review (dpreview.com)

 
Comments Off on Historic prints from the beginning of photography to go on auction in London

Posted in Uncategorized


New samples from the Sigma 24mm F1.4 DG HSM Art lens

20 Feb

We were recently lucky enough to visit Sigma’s factory in Aizu, Japan, where Sigma allowed us to shoot with a pre-production sample of the recently-announced 24mm F1.4 DG HSM Art lens. The wintry landscape of the Fukushima prefecture was a nice contrast to the CP+ convention center where we last gathered some samples with this lens, and our recent samples are more representative of lens performance on a native mount body (Canon 6D). Have a look

Articles: Digital Photography Review (dpreview.com)

 
Comments Off on New samples from the Sigma 24mm F1.4 DG HSM Art lens

Posted in Uncategorized


Lessons from the Masters: Robert Capa and Jerry Uelsmann

19 Feb

Before you or I ever picked up a camera, our photographic forefathers( and mothers) were out shooting, learning, and blazing new trails for us to follow. I’ve always taken great comfort in that fact. Knowing that we are part of a long line of picture takers and image makers should lend us a sense of pride. Through sheer will and determination they worked through hard times, failure, and sometimes controversy in order to give us an incredible head start for becoming better photographers.

Ironically, many of these giants of photography, like most other people of great influence, did not start out to be such at the beginning of their careers. Many simply needed a job, others needed an outlet for their artistic inclinations, and still others…well, they had failed in what they initially wanted to become.

In this edition of what I’ve come to lovingly call, The Master’s Series, we will look at two great photographers who didn’t come by their fame easily. You will learn from their hard earned wisdom some tips, that can help you to improve your own photography.

Robert Capa

Capa by Gerda Taro

Capa by Gerda Taro

Robert Capa, who was actually born into this world under the name Endre Friedmann, was a Hungarian photographer and photojournalist. His passion was to give war photography to the masses in an up-close and personal way that had never been seen before. He was born in the October of 1913 and met his untimely end on May 25, 1954. In those 41 years Capa shot photographs in the heat of battle during five wars. His work virtually defined the image we have of World War II including the invasion of Normandy from the front lines of Omaha Beach.

In 1947, Capa was part of a group of photographers who came together in Paris to form Magnum Photos. Among the members of the group where such greats as Henri Cartier-Bresson, George Rodger, David “Chim” Seymour, and William Vandivert. Magnum would become the first worldwide agency for freelance photographers and photojournalists.

Lessons you can learn from Robert Capa

Position yourself for the shot

Increase your chances of making better photos by putting yourself into a position to make them. When I say “better position” I mean this both figuratively as well as literally. Capa was famous for saying, “If your pictures aren’t good enough, you’re not close enough.” Capa was renowned for being fearless and would get right up in the action to make his photographs. Truly, as a general guideline, moving in close to your subject can improve not only the quality of an image but also increase its visual impact with the viewer.

That being said, putting yourself in the position to produce better work also means that you should know what photograph you are trying to capture. Come prepared to make the photograph, i.e. the right lens, tripod, permissions, etc. Lastly, be sure you know what needs to be done in order to make an exposure to the best of your potential.

Promote yourself creatively

Thumbs Up

Why did Andre Friedmann stop being Andre Friedmann and become Robert Capa? The answer is simply better marketing. If you’re of the exceptionally linguistic sort, you may have noticed that Capa is the Hungarian word for shark. When Capa was a boy, that was the nickname given to him by his friends. You see, Capa wasn’t getting very much attention under his given name, so a new persona was invented as front for his work. This new persona was that of famed but wholly fictional American photographer Robert Capa, who was supposedly touring Europe at the time. Clients loved it. Soon work was pouring in and Capa was on his way to becoming a photographic legend.

This doesn’t mean that you have to stop being you in order to be more successful as a photographer. It just means that sometimes you need to bring out a little creativity when you’re selling yourself as an artist. In a way, work to manufacture your own identity as an photographer. Cultivate your own style. Be sure to show only your best work. Tell the story of the photo instead of just showing it. Be charismatic and welcoming with your clients and don’t be afraid to speak favorably (not boastfully) of yourself and your work.

Don’t always obsess over technical perfection

Camera Display

This can be a very difficult task to master. It’s easy to get caught up in getting your aperture just right or making sure there’s not too much grain with that ISO. When it comes to photojournalistic imagery such as street photography, the emotions and mood of a scene or subject should command your primary attention. In the amount of time it might take to tweak that focus, the moment may pass by. The important thing is to teach yourself that a good exposure of a great moment, will almost always trump a great exposure of a mediocre scene.

Street Musician

This shot could have been focused better, but I might have missed the look of concentration.

Mentor those who want to learn

Books

This is a biggie, and perhaps one of the most important things you can learn from Robert Capa to help yourself grow as a photographer. Capa recognized that photography would never advance if there were no new photographers coming along to take the place of himself and his colleagues when their time had passed. So he directed a good bit of his time to networking with, and teaching, other photographers the craft.

When you mentor or otherwise give of yourself to help a new photographer better themselves, you are perhaps unknowingly having an enormous impact on the art of photography. An appreciation for the passing on of photographic principles and techniques is possibly the single greatest contribution a photographer can make to the world.

Jerry Uelsmann

Uelsmann

Image courtesy of Indiana University

To say this next photographer is an interesting individual is both accurate, and at the same time a resoundingly inadequate description. Born on June 11, 1934 in Detroit, Jerry Uelsmann is one of those great artists who flies just beneath the radar of the mainstream, but whose work is truly one-of-a-kind and inspiring. Like many, his rise in the photography world was slow and painstaking. He discovered photography as a teenager. By his own admission he believed that through making photos he was able to live outside of himself and reside in a world of his own creation.

He would eventually go on to obtain degrees from multiple colleges, and ultimately found himself teaching photography at the University of Florida in the early 1960’s. His career was kickstarted in 1967 when he landed a solo photography exhibition at the The Museum of Modern Art in New York City.

Jerry began his work about thirty years prior to the advent of photo editing software such as Photoshop. He rose to fame through his production of highly surreal and manipulated black and white photographs. He did everything in the darkroom – using may different negatives with up to twelve enlargers, that he then literally “layered” on top of one another to create his finished product. Many of his images combine elements of the natural world as well as humanistic representations and man-made objects.

Lessons you can learn from Jerry Uelsmann

Don’t be afraid to post-visualize

If you’re just starting out in photography then you likely have heard some key phrases mentioned over and over again. One of the most important is that of pre-visualization. Teachers and writers (myself included) love to verbalize or write poetic analogies about what it means to “see” an image before the shutter is released. What is meant by this is that you can teach yourself to mentally compose, frame, and process a photograph before it is ever made. Making photographs becomes so much more satisfying once you have managed to develop this difficult, yet essential photographic skill.

The flip-side of that coin is something that seldom gets talked about, but is nonetheless interesting and thought provoking. What we’re talking about here is the act of post-visualization. THis can be thought of as the exact opposite of pre-visualizing a photograph but it’s not exactly that easy. Uelsmann is literally the original master of this process. He photographed distinct objects and scenes, with the express intention of later making a finished work that blends together elements of each. Essentially, he saw the completed photograph after he already had produced a series of otherwise unrelated images.

Try out post-visualization for yourself. Go through some of your old images and see if the passing of time helps you look at them in a new way. Look for different crops that might make the image stronger. See if an image might work well in black and white and experiment with the shadows. Tweak the white balance and completely change the mood of a photo. That’s really all post-visualization is; looking at something that already exists and seeing what else it could become.

Waterfall

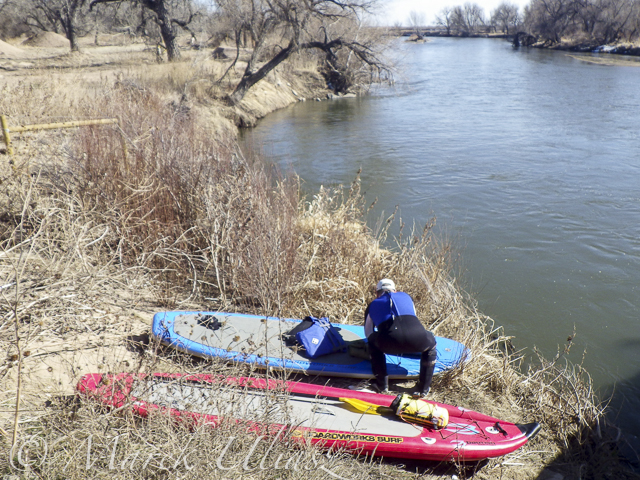
An image I made over four years ago.

Reworked Waterfall

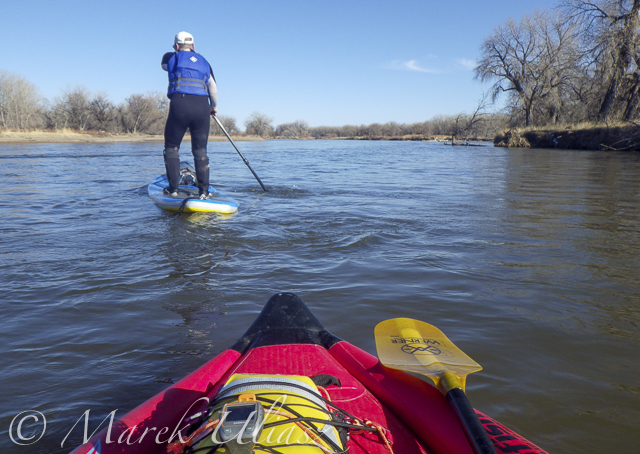
Here we see it in a completely different way after some recent creative processing.

Fulfill your vision

Stay true to your vision. That is the key phrase that you should take away from this point. Uelsmann produced images that were hard to understand by some. They weren’t readily accepted, and the techniques he used where viewed by some as nothing but trickery. Still, he produced the images that he wanted regardless of what manipulation he had to do in the darkroom.

Do whatever you need to do. Be it post-processing, filters, funky borders, weird color selection – anything. It might not be to everyone’s liking, but thats the beauty of photography. Do whatever it takes to achieve the image that you set out to make.

You will fail, but you’re not a failure.

Failure

Jerry Uelsmann is a classic case of someone who refused to give up. He kept trying despite his initial difficulties in school, and the poor acceptance of his early work. Instead of shutting the doors of his darkroom for good he decided to keep going. Making images that moved him was his goal and he didn’t let life’s friction stop him.

The very nature of his work which was at first off-putting began to be what people came to love. So if you’re stuck on a project, you have trouble with a client, or even if your camera seems to be unlearnable, just remember to keep going. Nothing worth doing was ever easy.

googletag.cmd.push(function() {
tablet_slots.push( googletag.defineSlot( “/1005424/_dPSv4_tab-all-article-bottom_(300×250)”, [300, 250], “pb-ad-78623” ).addService( googletag.pubads() ) ); } );

googletag.cmd.push(function() {
mobile_slots.push( googletag.defineSlot( “/1005424/_dPSv4_mob-all-article-bottom_(300×250)”, [300, 250], “pb-ad-78158” ).addService( googletag.pubads() ) ); } );

The post Lessons from the Masters: Robert Capa and Jerry Uelsmann by Adam Welch appeared first on Digital Photography School.


Digital Photography School

 
Comments Off on Lessons from the Masters: Robert Capa and Jerry Uelsmann

Posted in Photography