Take a look at this photo and remember what your initial thoughts are:
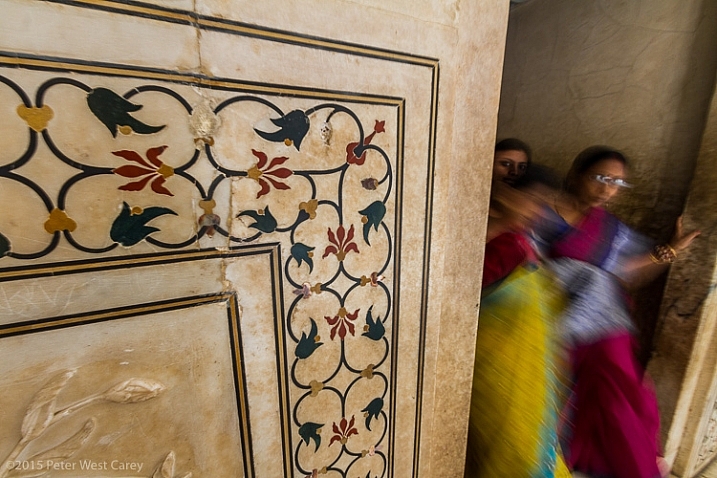
Inlaid marble detail inside Taj Mahal, Agra, India, Asia
Where was the first place you looked in the photo? What about the second?
Some of the more interesting photos (and artwork in general) moves your view around the image, and often brings you back for more.
When you take a photo, you know what you’re looking at and what is most important, but this doesn’t always come through in your picture, unless you make a concerted effort to help the viewer see the same thing. Luckily, as a photographer you have more than a few tricks to lead your viewers in your photos.
Leading Lines
The first technique is to simply point the way. As humans, we like lines that go somewhere and we tend to follow them. A trail, a road, repeating patterns; they are all fodder for the technique of leading lines.
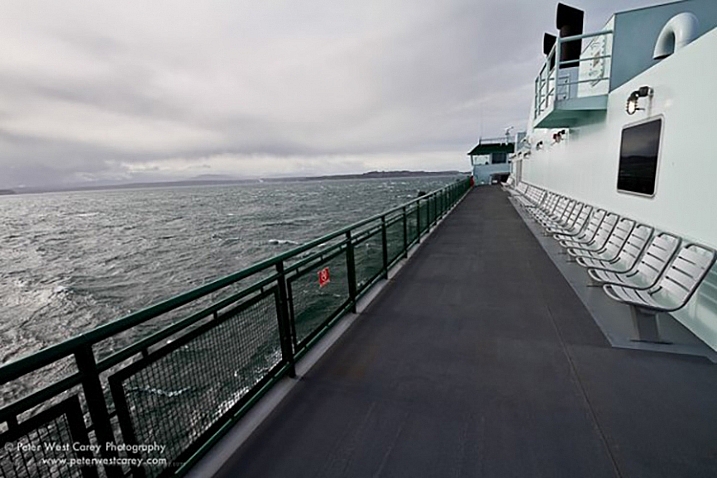
Crossing to the Olympic Peninsula, Washington, USA
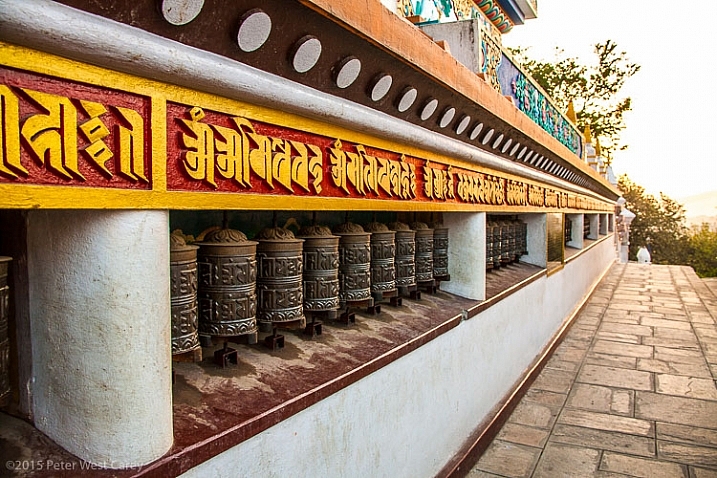
Prayer wheel wall, Kathmandu, Nepal
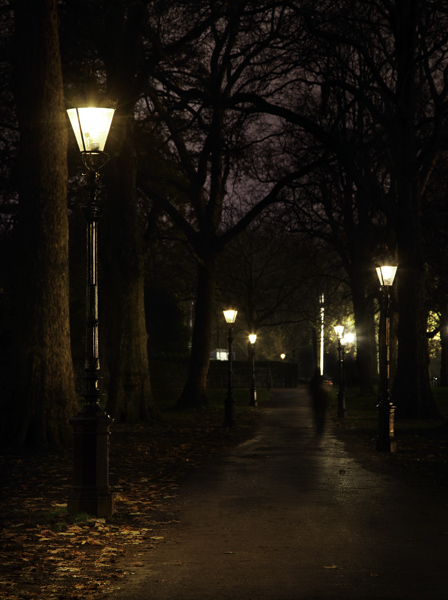
Leading lines, when stretched far, can also give your image greater depth by taking viewers into your scene. The lines need not be straight. They can be as meandering as a forest path.
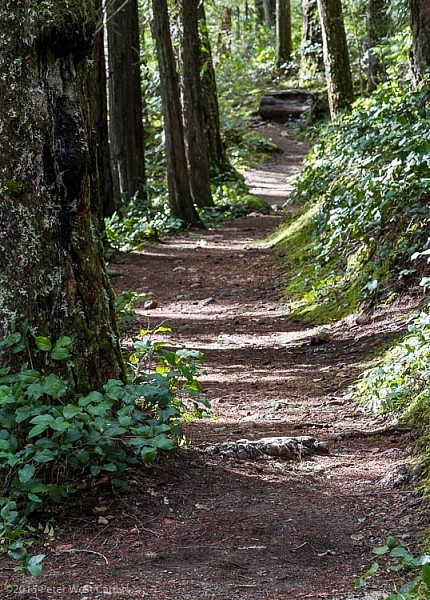
Meandering path, Cascade Mountains, USA
Non-traditionally, I consider a repeating pattern, moving in a particular direction, to be a form of leading line. Such as with this line of bridge braces.
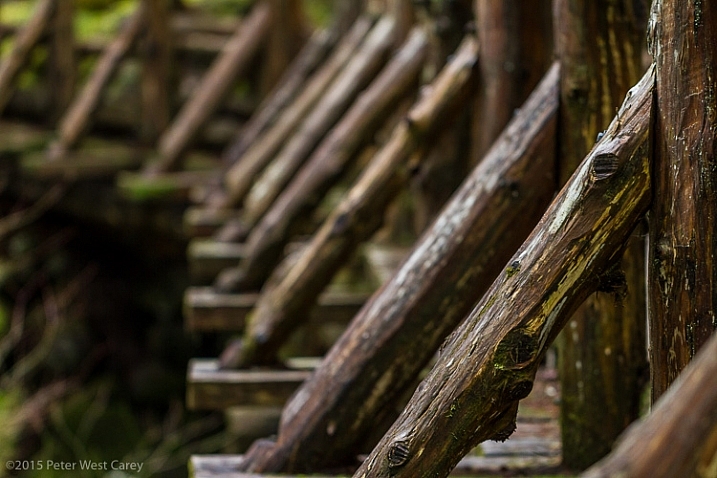
Wooden bridge in Olympic National Park, Washington, USA
Selective Focus
Selective focus seems so simple, but can be tricky if you haven’t mastered the use of aperture in your photography. Selective focus is also useful when you have a subject far on the edge of your photo. By habit we tend to look at the middle of a scene first and it’s quite easy to use selective focus to move your viewers to the edge, and the main subject.
Sunrise on South Sister Mountain, Oregon, USA
It’s also another way to help your viewers ignore the distractions in the scene and find the main subject.
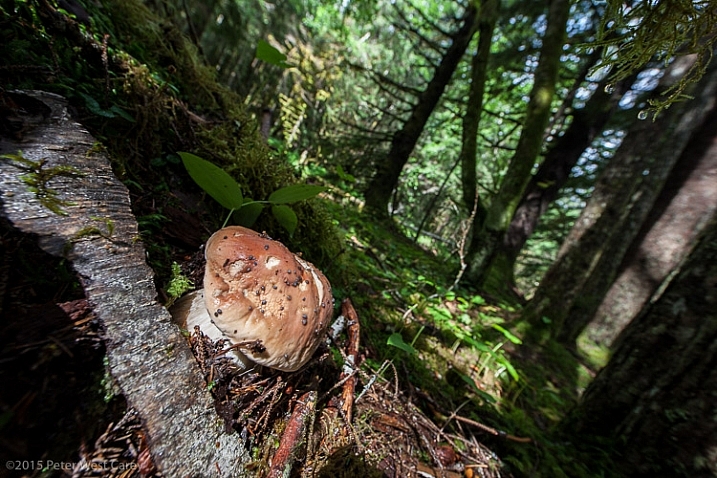
Alaska Rainforest Floor, Glacier Bay National Park, Alaska, USA
There is a great article here: How to Use Leading Lines for Better Compositions by Anne McKinnell, that expands on this topic.
Colors
We’ve all seen this technique that became quite popular many years ago.
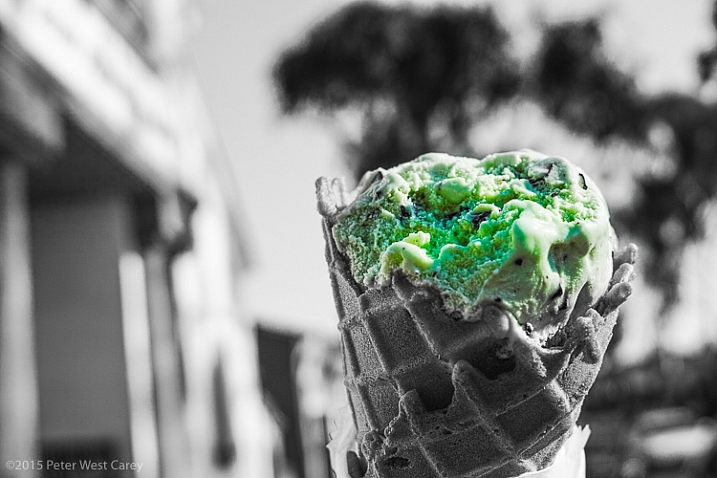
Chocolate chip mint ice cream cone, Balboa Island, California, USA, North America
You might have just cringed or you might have liked the technique, but there is no doubting where you looked in the photo.
But color need not be a single instance amongst black and white. Simply having a splash of color in a fairly monotone scene helps move the viewer to your main subject.
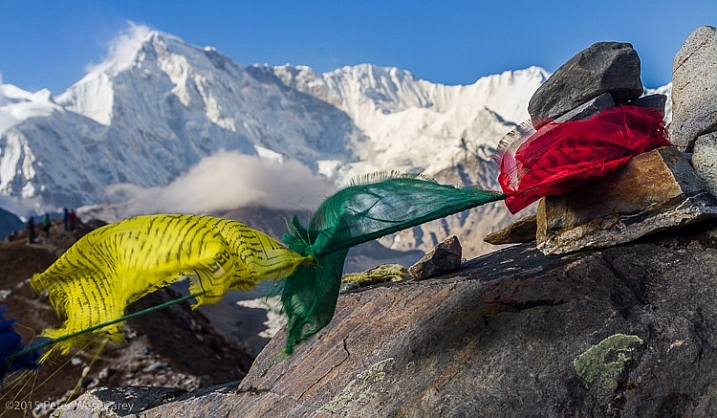
Prayer flags and Cho Oyu, Gokyo, Nepal, Asia
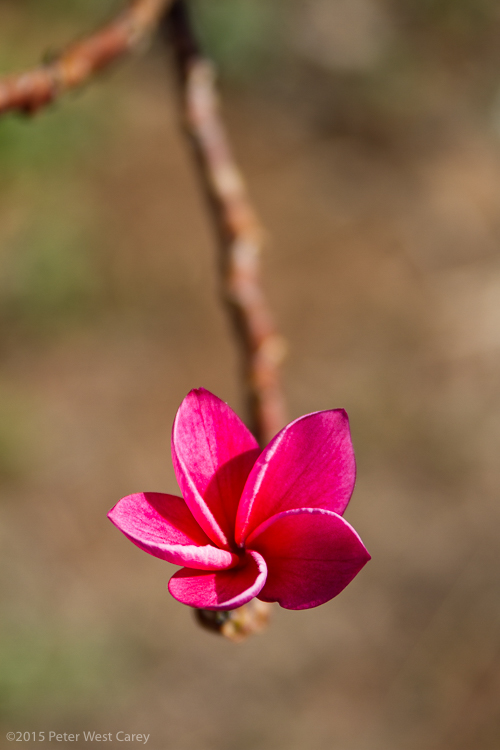
Plumeria flowers, outdoors
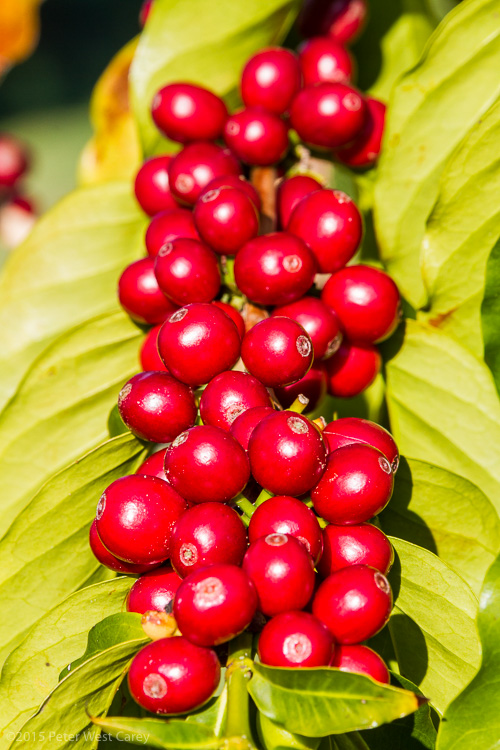
Coffee cherries sit ripe for picking In Hawaii, USA
Contrast
Something or someone going against the grain also brings focus and attention to that point.

Buddhist monks, Jakar, Bhutan
It can also be a contrast in colors or patterns.
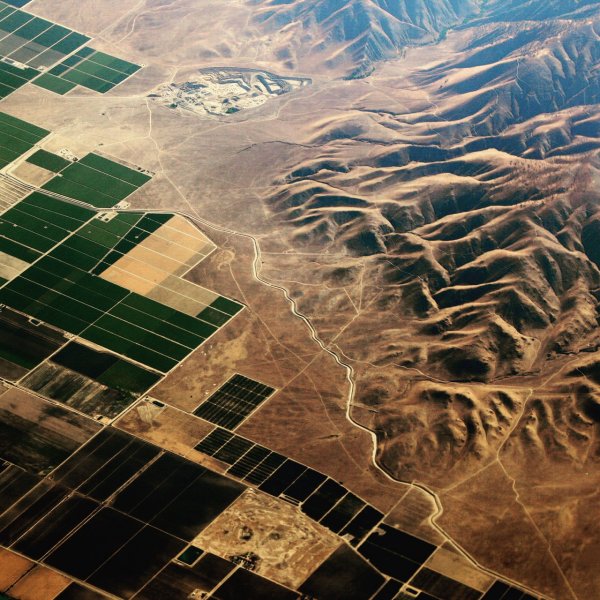
High above California’s Central Valley, USA
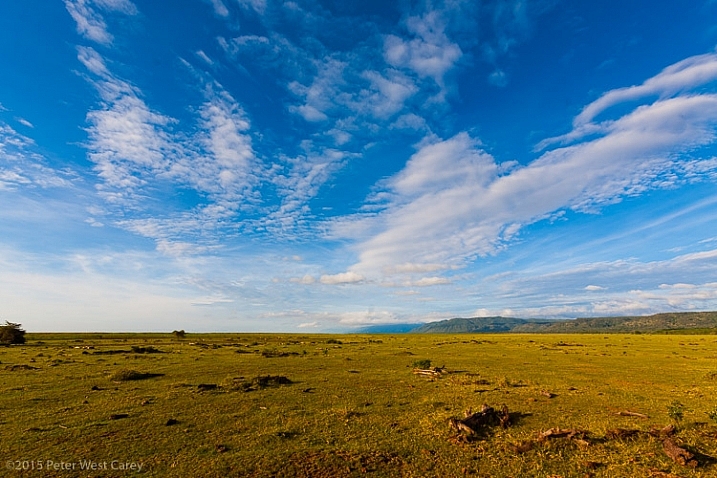
The wide open spaces of Serengeti National Park beckon, Tanzania, Africa
Or it can be a juxtaposition that is the contrast; old and new, youth and elders, fast and slow, etc…

Old:New; Slow:Fast, Natural:Man-made – Dublin, Ireland
Eyes
Eyes are an easy way to draw focus. So easy, it almost seems like cheating. We naturally connect with eyes, be they human or animal. We can look around a scene and find eyes faster than most objects.
Use that to your advantage!
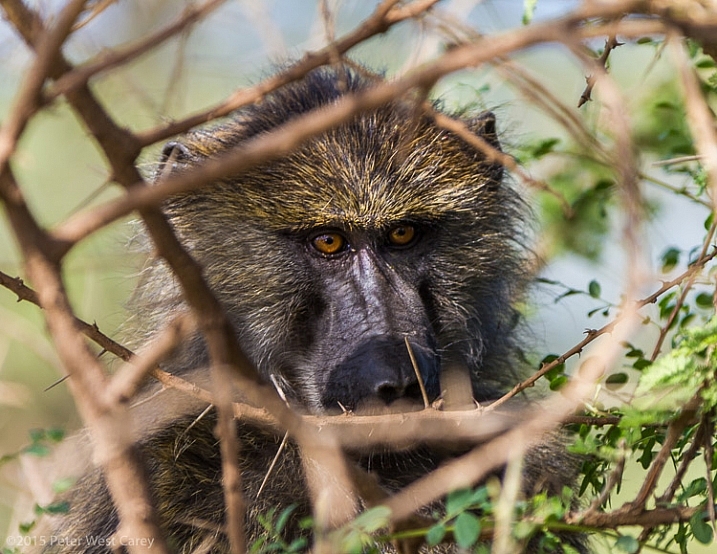
A baboon in the thicket, Serengeti National Park, Tanzania
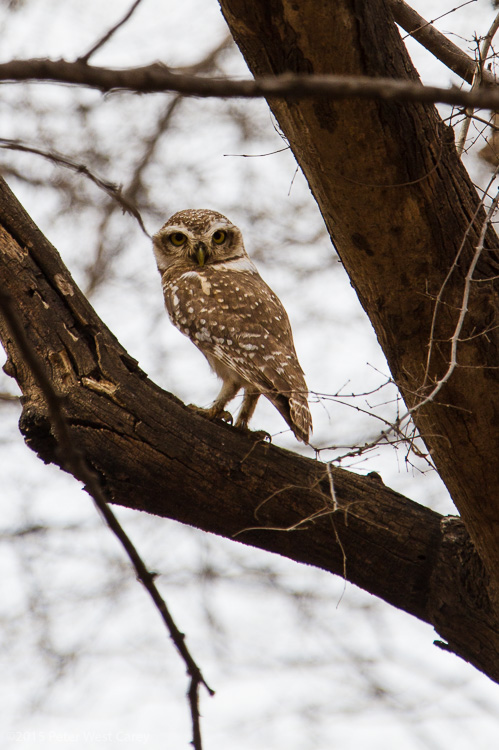
Pygmy owl, Ranthambhore National Park, India
Eyes can also be used to point a way. I have often stated that we don’t like eyes looking off the edge of the photo because we want to know what the person is looking at. But eyes looking toward the middle of an image invite exploration.
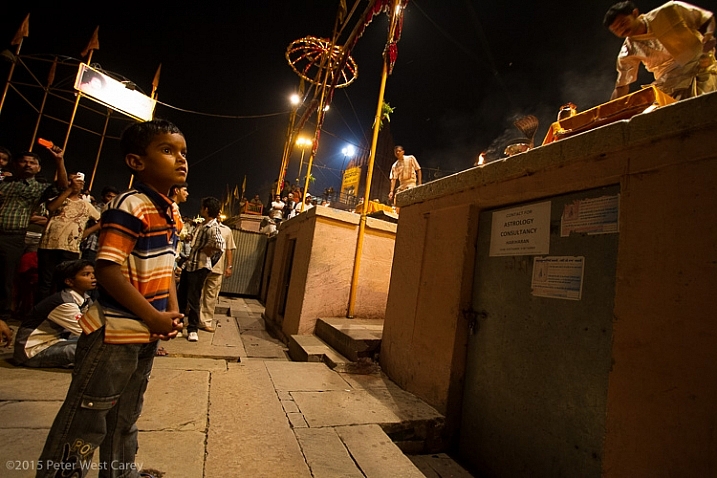
Child watching Ganga Arti Celebration, Varanasi, India
Frozen Action
Panning blur is a simple technique to freeze action on your subject, while letting the rest of the image blur. This is a type of selective focus, when we get right down to it, but used in a unique way.
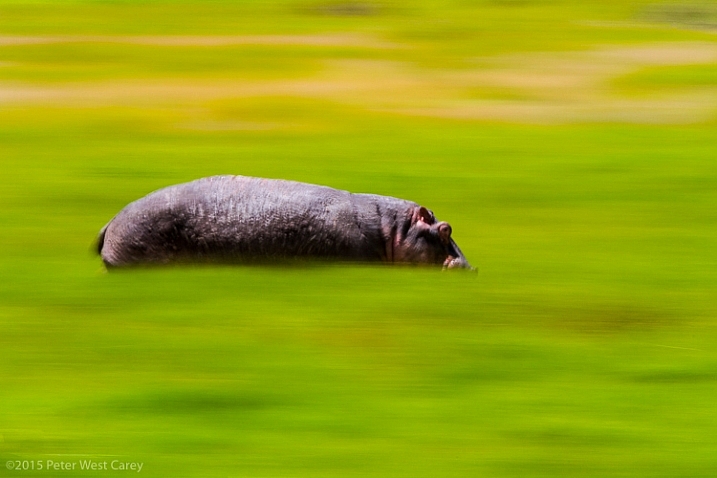
Hippos are amazingly fast animals, deceptively so. I had heard about this before heading to Africa in 2010, but once I witnessed just how fast they can run, and how mean they can be, I made sure my daughter and I were always close to, or in, a vehicle larger than a hippo when they were around. Ngorongoro Conservation Area, Tanzania.
The technique not only leads viewers directly to the main subject as it is the only thing in focus, but also has them looking back where the subject came from, and asking why is there movement.
For more on this technique, check out: Mastering Panning – Photographing Moving Subjects.
It can also be used when inside a moving object to emphasize speed, while also giving focus to the stationary objects of interest.
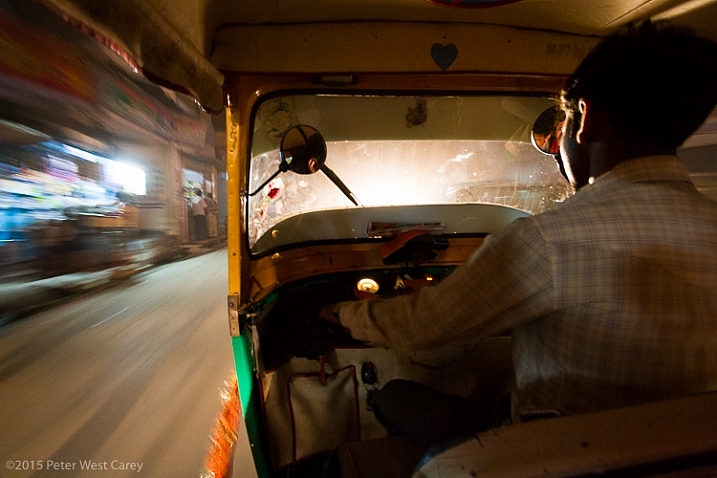
Speeding through the night streets of Varanasi, India
Going Into Your Photo
Arches, doorways, tunnels…these are all things that naturally make us want to go “into” a photo. We want to progress from the outside in. Craft your images by having more than one layer, in a three dimensional sense.
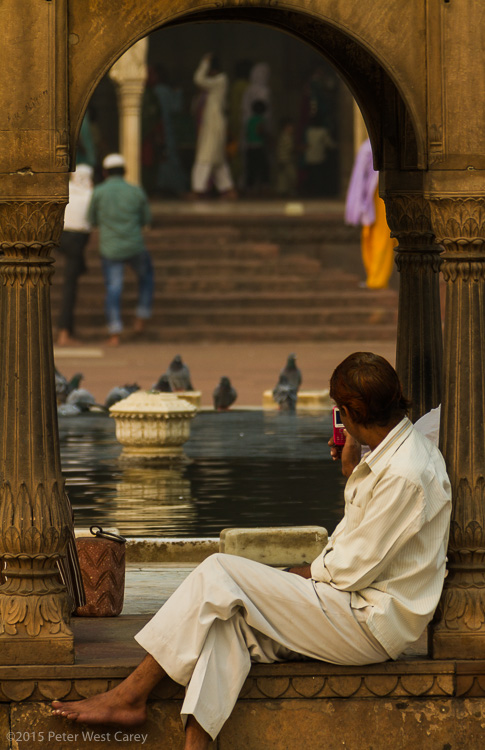
Taking photos at Masjid-i Jah?n-Num?, Delhi, India
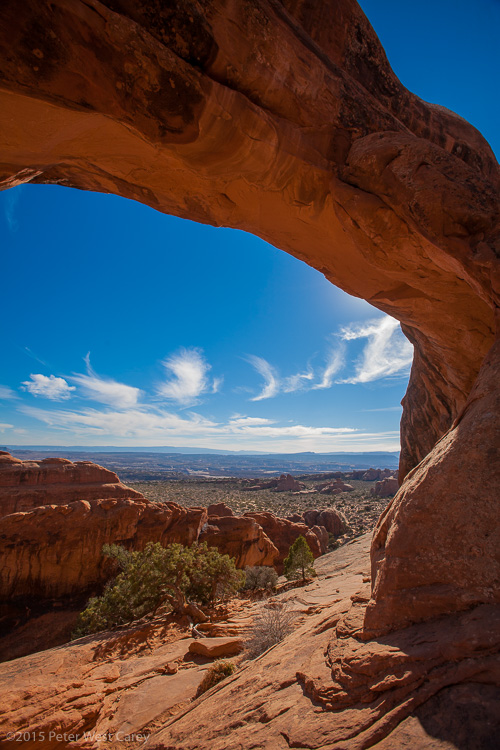
Arches National Park, Utah, USA
Conclusion
Postcard shots are certainly a fine use of a digital camera. They capture a whole scene and make things static. But if you want to move your viewers around your images and have them coming back for more, think about how you are composing your photos.
googletag.cmd.push(function() {
tablet_slots.push( googletag.defineSlot( “/1005424/_dPSv4_tab-all-article-bottom_(300×250)”, [300, 250], “pb-ad-78623” ).addService( googletag.pubads() ) ); } );
googletag.cmd.push(function() {
mobile_slots.push( googletag.defineSlot( “/1005424/_dPSv4_mob-all-article-bottom_(300×250)”, [300, 250], “pb-ad-78158” ).addService( googletag.pubads() ) ); } );
The post How To Lead Your Viewer’s Focus to the Subject by Peter West Carey appeared first on Digital Photography School.


You must be logged in to post a comment.