RSS
 

Posts Tagged ‘Flash’

QA: How to Shoot Events Without TTL Flash

11 Aug

Technology is great. But it can also make us its slave.

For instance, TTL flash is pretty good at solving lighting problems on the run. (See, McNally? I'm open-minded…) But those problems existed long before we had TTL flash—or TTL exposure metering, for that matter.

And yet, we solved them on a regular basis. Even without feedback on the backs of our cameras. Or autofocus. While walking five miles to school barefoot in the snow. Uphill. Both ways.

Read more »
Strobist

 
Comments Off on QA: How to Shoot Events Without TTL Flash

Posted in Photography


LxMeter transforms your smartphone into a light and flash meter

05 Aug

The LxMeter from Italian manufacturer Optivelox has introduced an accessory that turns your smartphone into a light meter. It’s similar to the Lumu light meter, but provides flash meter functionality and is capable of working with Android devices via a dedicated app. Read more

Articles: Digital Photography Review (dpreview.com)

 
Comments Off on LxMeter transforms your smartphone into a light and flash meter

Posted in Uncategorized


Beginners Guide to Using TTL Off-Camera Flash

05 Aug

So you want to use off-camera flash. But why? Your camera has that hot shoe there for a reason, right?

There are two things that you may not realize:

  1. That many DSLR-speedlight combos are capable of wireless off-camera flash using through-the-lens (TTL) metering without any additional equipment
  2. That using off-camera flash can take your photography to an entirely new level both in quality and creative potential.

Many references to off-camera flash talk about sync cords and wireless transmitters, when in fact, many DSLRs with a built-in pop-up flash have the ability to wirelessly control a speedlight. Likewise, many hot shoe mounted speedlights are fitted with an optical receiver to be wirelessly triggered.

Image of pop up flash and speedlight optical receiver

Look, no wires! On camera pop-up flashes are often capable of optically triggering speedlights.

The least painful way to cross the proverbial bridge into the realm of wireless off-camera flash – often referred to as a remote or slave flash – is by utilizing your camera’s ability to act as a remote trigger for a flash combined with TTL metering.

Most Nikon cameras from the D70, and flashes from the SB-R200 and up; and Canon cameras from the 600D (T3i) and flashes from the Speedlite 90EX and up offer these features, but check the manufacturer’s website to be sure what setups will work. There are also a wide selection of other brands of flash, often less expensive, that offer similar features.

A TTL-equipped flash is manufacturer specific. The TTL feature of a Nikon dedicated flash will only work with Nikon, however, it could possibly still be used in manual mode.

In a nutshell, TTL is the way that the camera sets the exposure and flash intensity automatically by firing a nearly imperceptible pre-flash, taking an exposure reading, and adjusting settings accordingly. Nikon calls it i-TTL and Canon has dubbed it e-TTL but it’s basically the same deal.

For wireless off-camera flash functionality, the built-in flash on your camera is set to send an optical signal to your flash which triggers it.

Photo taken with a hot shoe mounted flash

This photo was taken simply with a hot shoe mounted flash set to TTL metering and the camera set to aperture priority. Shot at 200mm, f/5.6 at 1/60th of a second with the flash pointed at a low white ceiling. Nice soft, even lighting.

Photo taken with off camera wireless flash

Exact same settings as the photo above except the flash was setup off-camera in remote mode, with TTL metering. It was placed at 45-degree from the subject and aimed towards the food. Voila! Directional, moody lighting.

First time users of this method will think they just discovered sorcery. Partly because it’s such a cool trick and partly because it is easy to achieve awesome results right away. Manually controlling an off-camera flash isn’t the end of the world but it requires more thought and consideration to balance the flash and camera settings to achieve desired results.

If you have a camera and a hot-shoe-mounted flash unit that are capable and you haven’t taken advantage of it yet, this is the point where you should start getting excited.

Setup for Nikon Equipment

Camera Settings (menu locations may vary depending on camera model)

  1. Open the Custom Settings Menu
  2. Scroll down and select menu “e” – Bracketing/flash
  3. Choose e3 on the list – Flash cntrl for built-in flash
  4. Choose the last selection on this list – Commander mode
  5. The first line item is Built-in flash, scroll right to highlight the Mode column. If you haven’t messed around with this it will probably be set to TTL.
  6. Scroll down until it reads – –. This means that the camera’s built-in flash will only trigger the off-camera flash and won’t add any additional light to your exposure.
  7. No need to change it but note what channel is selected as your flash will need to be set to the corresponding channel.
  8. Press OK.
  9. Pop open the built-in flash.

Flash Settings (varies depending on flash model)

Photo showing SB-600 remote flash setting

Users of Nikon speedlight models SB-600 and SB-800 are looking for this symbol indicating the flash is ready to be wirelessly triggered. The SB-800 selection is also marked Remote.

On some Nikon flashes you are looking for a curved arrow symbol that signifies it is set to be controlled wirelessly. On some models like the SB-600 and SB-800 this is accessed in the Custom Settings menu while the SB-700, SB-900 and SB-910 have a dedicated switch to set the flash to Remote.

Setup for Canon Cameras

Camera Settings (may vary depending on camera model)

  1. Press the Q button to open the menu.
  2. Cycle through until you reach the Built-in flash func. menu setting identified by a flash symbol. Press the Set button to select.
  3. Choose the middle menu item called Easy wireless flash shooting. This setting can also be found in the first page of the shooting menu under Flash control.
  4. No need to change it but note what channel it is set to as your flash will need to be set to the corresponding channel.
  5. Pop open the built-in flash

Flash Settings (varies depending on flash model)

On Canon a flash you need to set it to slave mode. Some Speedlite models have a dedicated switch for this setting, and others require you to hold down the zoom button to switch it on.

The system is an optical one, meaning that the receiver on the speedlight needs to “see” the signal from the on camera flash. A direct line of sight is recommended but I have found that you can often hide the speedlight slightly behind a wall or other object, and it will still receive the signal.

Other than the signal being interrupted by physical objects, it can also be finicky in bright daylight, and the range is limited compared to radio frequency triggers.

Food photo with off camera flash

Simply getting the flash off of the hot shoe and a couple of feet to the side casts more visible shadows and gives the photo more dimension.

Editor’s Note: If you have a system other than Canon or Nikon consult your camera and flash manuals for the settings. We apologize if you feel left out, but we are not able to cover every brand and combination in the scope of one article. 

Notwithstanding the limitations of the system, it’s an ideal introduction to off-camera flash with minimal investment of time or money – especially if you have the equipment already.

These are the very basics. Both Nikon and Canon systems are very flexible, and expandable, with the ability to adjust flash intensity from the camera, add additional flashes in groups, and in some cases, trigger other flashes from a master flash adding more versatility and utility.

After you get the system working its magic and have officially entered the  realm of off-camera flash, there are innumerable adjustments to make both on the flash and camera to gain more control, and fine tune your lighting to create the photo you see in your mind.

A Few Quick Tips

  • Very bright ambient light and flashing lights can interfere with the optical triggering
  • For best results, point the receiver window on the flash (usually covered with red plastic) toward the camera and rotate the flash head if necessary
  • If the background is too dark, try decreasing (slowing) shutter speed and/or increasing the ISO

If you want your subject and background to have more even lighting, take a look at Dragging the Shutter: Balancing Fill Flash with Ambient Light

For more technical information about flash placement, have a read of Working with Off Camera Flash and TTL.

Just starting out with off-camera flash? Let’s hear about your experience and see your results in the comments below.

googletag.cmd.push(function() {
tablet_slots.push( googletag.defineSlot( “/1005424/_dPSv4_tab-all-article-bottom_(300×250)”, [300, 250], “pb-ad-78623” ).addService( googletag.pubads() ) ); } );

googletag.cmd.push(function() {
mobile_slots.push( googletag.defineSlot( “/1005424/_dPSv4_mob-all-article-bottom_(300×250)”, [300, 250], “pb-ad-78158” ).addService( googletag.pubads() ) ); } );

The post Beginners Guide to Using TTL Off-Camera Flash by Jeremie Schatz appeared first on Digital Photography School.


Digital Photography School

 
Comments Off on Beginners Guide to Using TTL Off-Camera Flash

Posted in Photography


How to Trigger an Off-Camera Flash with the Pop-up Flash

21 Jul

If you have ever wanted to explore off-camera flash but don’t know where to start, I have some good news. Many consumer-grade cameras such as the Canon Rebel series and the Nikon D3000 and D5000 models have a fantastic feature that might be just what you are looking for.

One challenge with off-camera flash is that you need a way to fire them at precisely the right moment. That usually means outfitting them with tiny little remote controls called triggers, that are tied into a transmitter unit affixed to the flash hot-shoe on your camera. When you want your off-camera flashes to activate, the transmitter sends a radio signal to them, and they go off at precisely the right time to give you the photo you want. Some triggers are inexpensive, while other, more customizable one,s will set you back hundreds of dollars. But, if you own one of the cheaper Canon or Nikon bodies, you already have a handy trigger built right in to your camera; the pop-up flash.

trigger-off-camera-flash-popup-flash

Your built-in flash can probably do a lot more than you might think.

Several manufacturers have this feature built-in to their cameras, but since Canon and Nikon are the most popular, those are what I’m going to focus on in this article. Both types of cameras require you to change a few menu settings that may seem a bit confusing at first, but get easier with practice.

Setup for Nikon cameras

On a Nikon camera the first thing you will need to do is set your internal flash to Commander mode. This means it will still fire a burst of light when you take a picture, as a way of communicating with your external flashes. You will see this when you take a picture, but don’t worry, this brief burst is not bright enough to have much of an impact on your photo. This quick flash instead serves as a signal to your external speedlights that they need to fire. To do this, press your camera’s Menu button, then choose Custom Setting Menu (Bracketing/Flash) and the “Flash control for built-in flash” option.

trigger-off-camera-flash-nikon-menu-flash

Select the “Flash control for built-in flash” option

The default value for the “Flash Control” option is “TTL,” which means that your built-in flash functions exactly how you normally expect, and has no control or interaction with any off-camera flashes. Change this value to “Commander mode” which will then allow you to use it to trigger external speedlights.

trigger-off-camera-flash-nikon-menu-commander

Next, select “Commander mode” – press the right button to get to the next menu below

The final menu looks a bit complicated, but you only need to change a few settings in order to get everything set up initially. Change the Built-in flash option to display two dashes (–) and leave the rest of the values as shown below; Group A TTL, Group B TTL, and Channel 1.

trigger-off-camera-flash-nikon-menu-commander-control

Change “Built-in flash” to “–” and you’re all set.

You can do more complicated operations involving multiple flashes or even groups of flashes, but for a basic off-camera trigger setup not much else is required.

Setup for Canon cameras

If you have a Canon camera, the process is similar but involves a few different menus. Go to your main camera settings menu and choose Flash Control. Then select Built-in flash settings and choose the EasyWireless option. Make sure your channel is set to 1, and you’re ready to go. If you have a higher-end camera like a 60D you won’t see EasyWireless, so leave Flash mode as E-TTL II and change Wireless function to an image of two flashes with a colon between them. As with the Nikon settings there are other options you can change to customize how your external flashes behave, but this is enough to just get you started.

trigger-off-camera-flash-canon-menu-flash

On Canon cameras, start by choosing the Flash control menu.

trigger-off-camera-flash-canon-menu-flash-control

Next choose Built-in flash func. setting

trigger-off-camera-flash-canon-menu-flash-settings

Set Flash mode to E-TTL II, and then set Wireless func. to the icons displayed above. Alternatively, you can select EasyWireless if that appears as an option.

Testing your setup

Now that your camera is set up, all you need to do is put your flash in Remote (Nikon) or Slave (Canon) mode and make sure there is an unobstructed line of sight between the receiver on the speedlight, and the flash on your camera. Some speedlights allow you to twist the base so it faces a different direction than the flash itself which is useful if you want to get a little more creative with your lighting angles.

Before you get too far into all this you should be aware of two caveats: Canon cameras can only control Canon flashes, and same with Nikon cameras and Nikon flashes. Also, most third-party flashes such as those made by companies like Yongnuo are not compatible with the on-camera remote trigger setup described here. To use those you will need to purchase a remote flash trigger, but since the flashes themselves are cheaper than their first-party counterparts you should have a bit of money leftover to buy a trigger setup.

trigger-off-camera-flash-nikon-sb700

Makesure your external flash is set to “Remote” (Nikon) or “Slave” (Canon). It should also be in the same Channel and Group as your camera, but if you have never changed these then the default values should work fine.

As you get more experience with off-camera lighting you might find yourself wanting to expand your horizons with diffusers, colored gels, additional flashes, and more. But if you just want to get some basic experience with this technique, learning to use your built-in flash as a remote trigger is a fantastic way to get started.

Have you tried using this method before? What has your experience been like, and what are some of your favorite off-camera flash tips? Leave your thoughts in the comments below.

googletag.cmd.push(function() {
tablet_slots.push( googletag.defineSlot( “/1005424/_dPSv4_tab-all-article-bottom_(300×250)”, [300, 250], “pb-ad-78623” ).addService( googletag.pubads() ) ); } );

googletag.cmd.push(function() {
mobile_slots.push( googletag.defineSlot( “/1005424/_dPSv4_mob-all-article-bottom_(300×250)”, [300, 250], “pb-ad-78158” ).addService( googletag.pubads() ) ); } );

The post How to Trigger an Off-Camera Flash with the Pop-up Flash by Simon Ringsmuth appeared first on Digital Photography School.


Digital Photography School

 
Comments Off on How to Trigger an Off-Camera Flash with the Pop-up Flash

Posted in Photography


3 Steps to Professional Looking Headshots Using One Flash

20 Jul

Ideally, every time we take photos of someone, there is a studio full of equipment at our disposal or wonderful sunlight that is perfectly diffused. This, however, is not reality. Usually, the sun is either too faint or too harsh. We don’t always have access to a studio, let alone one full of lighting gear that we can use. Sometimes, we also just don’t have the time to learn a new technique, rent more gear, or find the perfect location. Other times, the subject has very limited availability and locations. Still, we smile through the limitations and do our best to provide professional images every single time.

Do you feel prepared to compensate for these different light conditions that you may be forced to work with, though?

OneFlash-example4

Natural light is always wonderful for any type of portrait, including headshots. Bouncing that natural light around with reflectors or just finding a bright shaded spot all work well. If you have a flash at your disposal, though, you can create even, or dramatic lighting to accommodate headshot needs.

The following three tips will help you create headshots using only one flash to compensate for less-then-perfect lighting conditions:

1. Diffuse, diffuse, diffuse!

When using a flash, the last thing you usually want is for it to LOOK like you used a flash. To do this, you need to find ways to make the light disperse more, reducing any harsh look that it will otherwise produce. There are several ways to do this, and each on their own will help. Combining techniques works best, though.

  • Bounce it – If there’s a wall somewhere to your side, a ceiling within a couple of feet from you, or if you have a reflector of any kind, bounce it. Aim the flash towards the reflector so that it fills in shadows to compensate for any uneven lighting conditions.
  • Aim the flash behind you to help disperse the light –  This may sound counterintuitive, but aiming the flash BEHIND you helps to disperse the light quite a bit. It provides a front light on your subject, but much softer than would otherwise be if the flash were pointed directly at them.
  • Use a diffuser on the flash – Whether it’s a plastic cover, a fabric mini-softbox, a bendable reflector that attaches, or a homemade version of any of the above – a diffuser directly on your flash will instantly soften the light and allow you more versatile light on your subject.
  • Set zoom on flash to the widest setting possible – your flash can be set to adjust to match the angle of view of the focal length lens you are using. However, this can be manually adjusted regardless of the lens you are using. When the flash is set to 70mm, for example, the light will be more narrow and direct than when it is set to 24mm. While this alone doesn’t make a drastic difference, it is another tool to add for further light diffusion.
Left - No flash. Right - Single flash, on-camera, turned to right of subject for fill light.

Left – No flash. Right – Single flash, on-camera, turned to the right of the subject for fill light.

In the before and after photos above, the left image shows the result using only natural light from the window. It’s beautiful light, but not always what you want.

The right photo shows same location, same position, with a single flash used to fill in the shadows. The flash is on-camera and has a flash dome diffuser on it. It’s angled to left of photographer (right of subject) so that it will bounce off walls and ceiling, and manually set at 1/8th power.

2. Use remote triggers

If you have access to remote triggers, play with using the light to add drama or emotion. This alone will give you a studio look and can be done just about anywhere. Be sure that this type of look is appropriate for your subject’s needs, especially since it tends to have a very strong look. For example, the owner of a flower shop may want something that is more natural-looking and shows the outdoors or her shop, while the owner of a tech start-up may like the strong look of dramatic lighting. While each situation is different, a few options for flash placement are:

  • Directly behind client
  • At 45 degrees behind or in front of subject
  • Directly to side of subject
Left - No flash. Right - manual mode, underexposed several stops, single flash towards right of subject.

Left – No flash. Right – manual mode, natural light underexposed several stops, single flash towards right of subject.

The before and after photos above show how to use a single flash to create some dramatic headshots in any indoor situation. The left photo is properly exposing for the space, using natural light only. The photo on the right is manually controlled to greatly underexpose the natural light (so that the background disappears as much as possible), and then a single flash is placed towards right of subject to give concentrated and dramatic light.

3. Manual flash mode

While it is best to always use your flash on manual mode in order to have full control over the lighting, this is an often overlooked method. Manual mode on your flash will allow you to adjust the strength for any situation. Shooting indoors and bouncing the flash? Start your flash strength at 1/8 of full power and adjust from there. Shooting in full sun? Start at 1/2 strength and adjust down as needed. Need a soft bit of shadow to be filled while indoors? Set your flash strength to 1/16 and adjust from there. Note that you will get to know good starting points for different situations, but adjustments are always needed since every situation is unique.

OneFlash-example6

Left is using no flash, outdoors. Right photo is same position and location, using single flash on camera at 1/4th power.

The before and after photos above show you can use a single flash to compensate for shadows in daylight. The left photo shows direct daylight and no flash. The photo on the right is at the same time, same position, same sun condition, but with a single flash at 1/4 power to help fill shadows.

Regardless of what tools you have access to for each photo shoot, a big part of your job as photographers is to be able to adjust to any situation. While having lots of gear at your disposal is handy, it is not always necessary. Oftentimes, the gear you have on hand can do the job you need it to do; all it takes is some thinking outside of the box.

Do you have ways that you create beautiful headshot or portrait lighting on-the-fly? Please share in the comments below.

googletag.cmd.push(function() {
tablet_slots.push( googletag.defineSlot( “/1005424/_dPSv4_tab-all-article-bottom_(300×250)”, [300, 250], “pb-ad-78623” ).addService( googletag.pubads() ) ); } );

googletag.cmd.push(function() {
mobile_slots.push( googletag.defineSlot( “/1005424/_dPSv4_mob-all-article-bottom_(300×250)”, [300, 250], “pb-ad-78158” ).addService( googletag.pubads() ) ); } );

The post 3 Steps to Professional Looking Headshots Using One Flash by Natalia Robert appeared first on Digital Photography School.


Digital Photography School

 
Comments Off on 3 Steps to Professional Looking Headshots Using One Flash

Posted in Photography


How to Get Started with Off-Camera Flash Photography – Start With One!

16 Jul

I was prompted to write this article in the hope of answering the many questions I get asked about flash photography: “I find flash photography very confusing…What do all those numbers mean at the back of the flash…What does TTL mean…What does flash-sync mean?”

This article isn’t about explaining all the technical ins and outs of flash photography, far from it. Instead, I hope to show you how to get started using off-camera flash, by using ONE flash essentially. Okay, you will need a few other items but I’ll get to that shortly.

Emmet-on-car-bonnet-with-flash

Emmet sitting on the hood of a car. Background created using one speed light attached to the steering wheel inside the car.

I like using speedlights because of their portability. When I use these small flashes, particularly outdoors, I am able to scope and think more on my feet. I am physically moving about and placing the flash, that’s on a light stand, in different positions relative to my subject or object. This allows me to visualise the type of shot I want to achieve. For the purpose of this article, I will use the same gear for all the techniques.

Camera Settings

In order to keep things simple, and not get bogged down in too much technicality, your camera settings can only use ONE aperture setting and ONE shutter speed. The flash can only use ONE power level. Flash level is stated in fractions of full power, such as on my flash: 1/128. 1/64, 1/32, 1/16, 1/8, 1/4, 1/2, up to full power, or 1/1. The camera and the flash are going to be set to manual mode.

When shooting outside, the ambient exposure, which is the available light (sun) is controlled by the shutter speed (and technically the aperture too). Just remember that the ambient light isn’t fixed (like in a studio setup with continuous lighting) so it’s constantly changing.

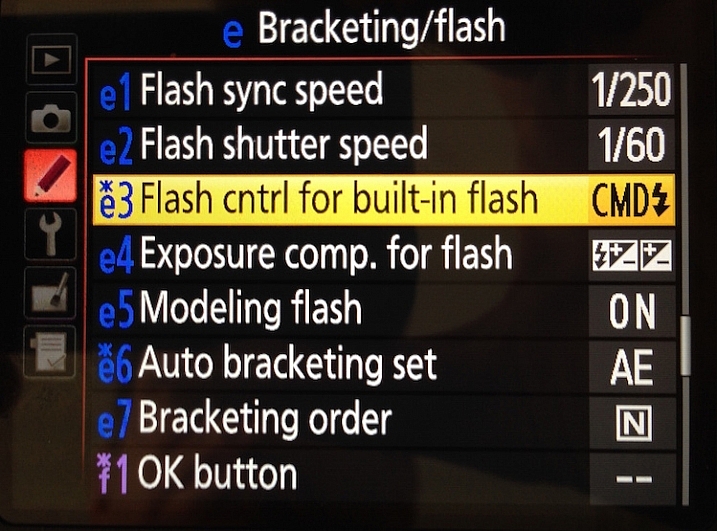
The flash, being instantaneous, is controlled by the aperture. I’m going to ignore ISO here. Well, I’m not quite ignoring ISO but I’m going to leave it at 100 for quality. Set your flash sync-speed to its maximum, usually 1/200th or 1/250th depending on the camera you are using (check in the manual for your camera if you aren’t sure). This will allow you to use the widest possible aperture.

Exposure

You will need to have a good understanding of exposure and how to change aperture, shutter speeds and ISO settings. See Darren Rowse’s article, Learning about Exposure – The Exposure Triangle for a refresher. Bear in mind that this article isn’t aimed at photographers who are new to photography but photographer’s who are new to off-camera flash.

What gear will you need?

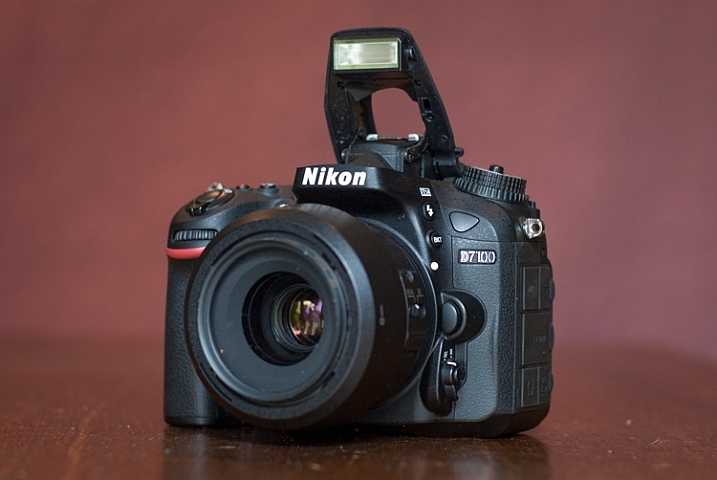
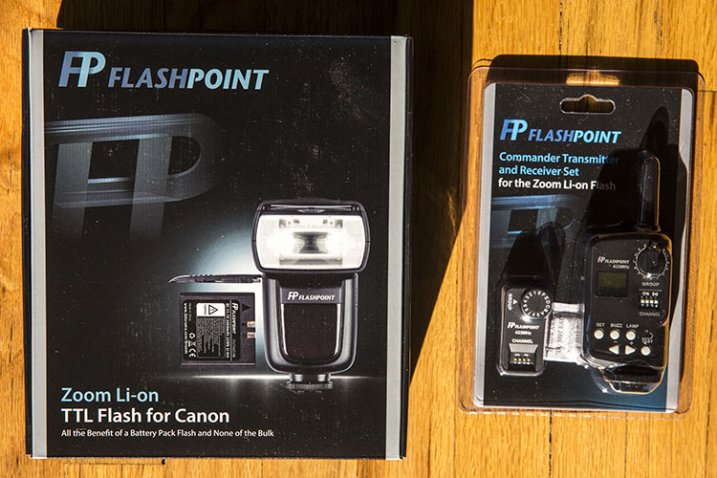
  • A camera and a lens: For the following shots, I used a Nikon D750 with a 24 – 120mm f/4 lens.
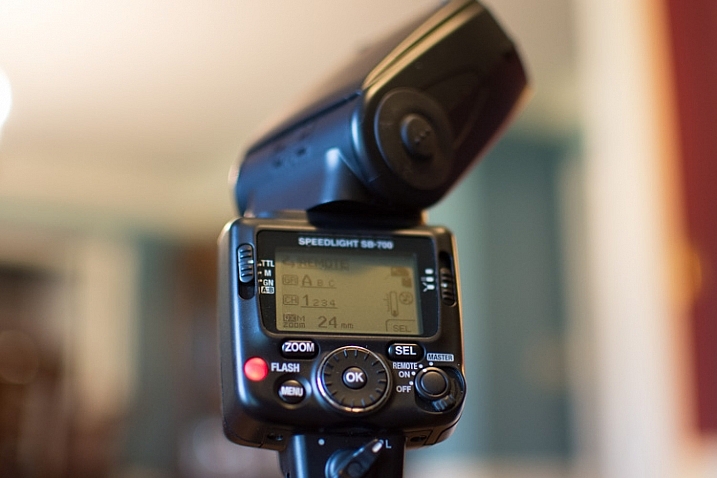
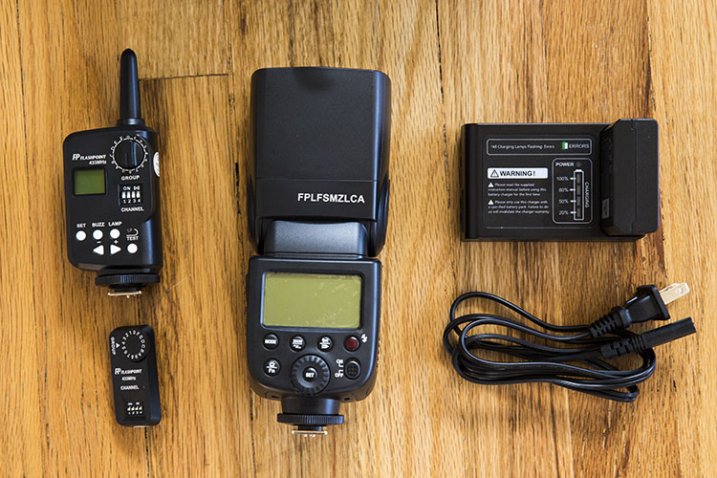
  • A stand-alone flash unit that can be adjusted manually.
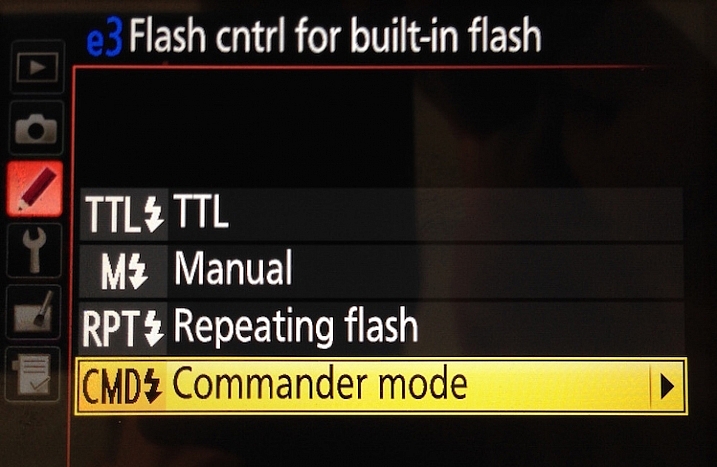
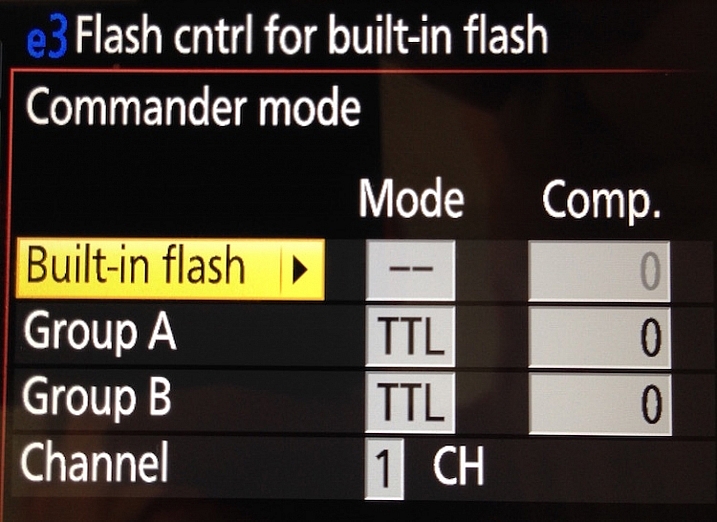
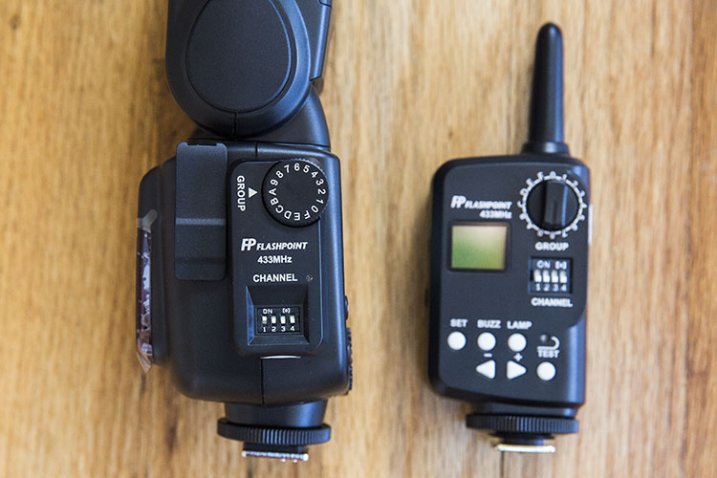
  • Wireless flash triggers: Nikon has the CLS system, which can fire an external flash remotely.
  • A light stand: I also used a Joby Gorilla tripod as a light stand.
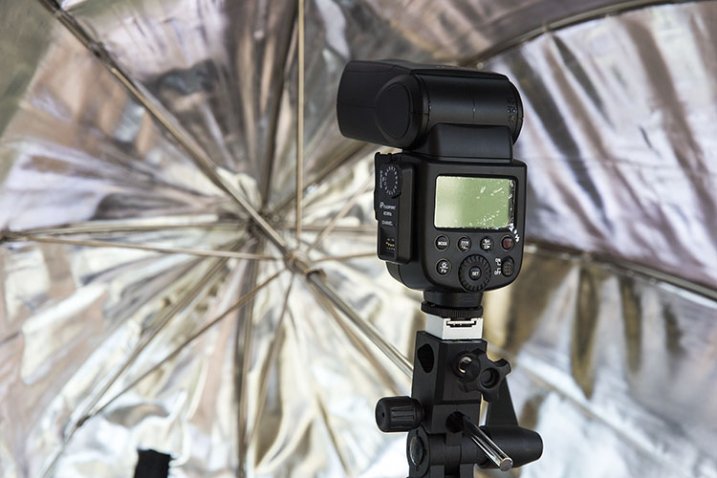
  • A diffuser, or light modifer of your choice: I used a white shoot through umbrella.

Low-light conditions

Amy-no-flash

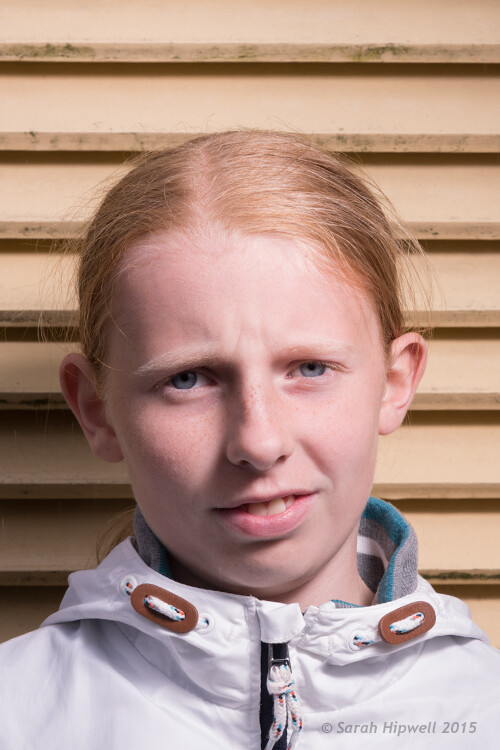
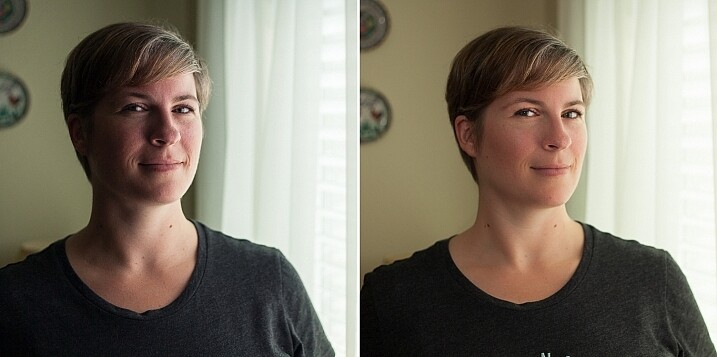
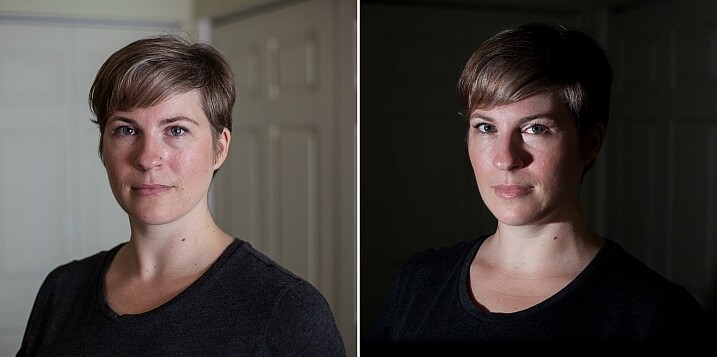
My daughter taken in low-light.

I literally grabbed my daughter and went outside our house to take the following shots. The first shot, as you can see, was taken with no flash. This was about 5:20pm in the evening.

Amy-with-flash-no-diffuser

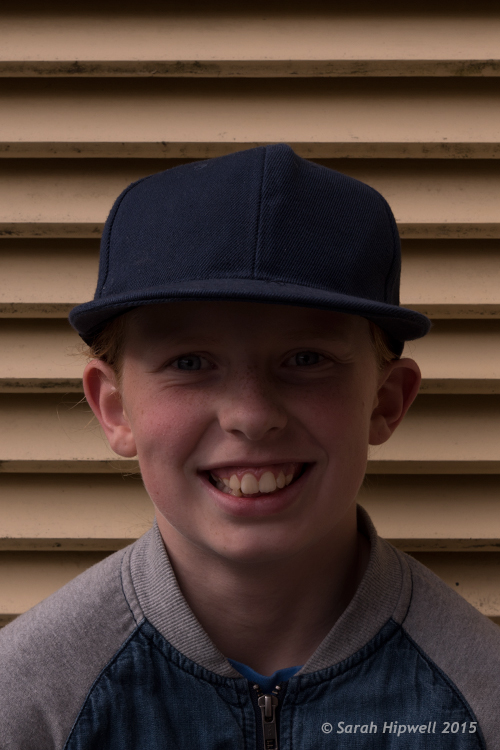
The flash is on a light stand, 2-3 feet away on the subject’s left side. The angle is about 35 degrees set to flash level 1/8 power.

For the second shot, I set my flash to 1/8th power, which is where I generally start. I had the flash on a lightstand 2-3 feet away to the left of my model, roughly at 35 degrees angle, with no diffuser on the flash. As you can see, the shadows are too harsh. I wanted to take another shot and move the light stand further back. Unfortunately, the weather changed and it started to rain!

Amy-with-flash-umbrella

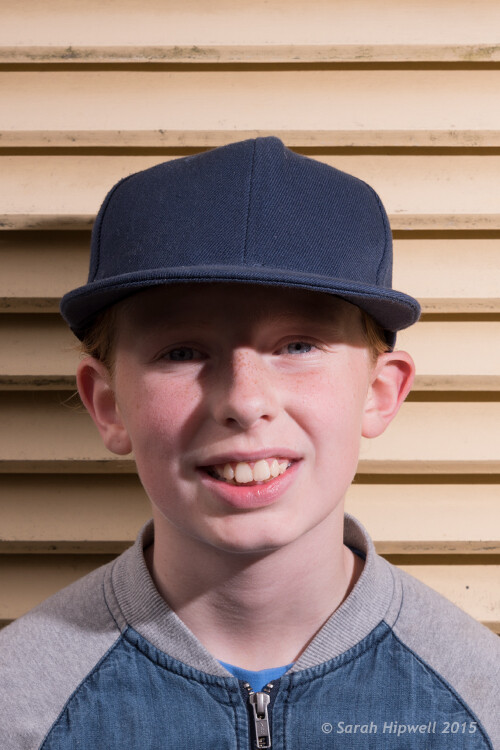
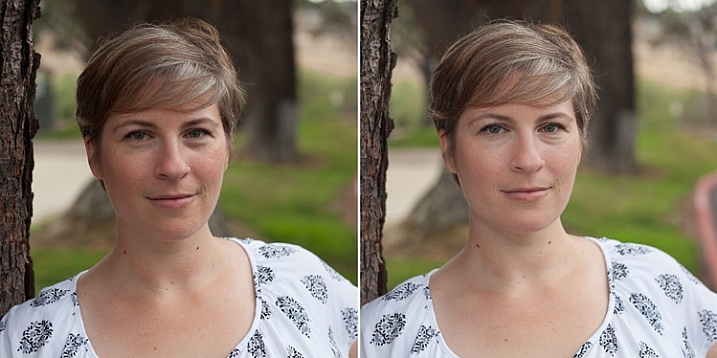
I added a shoot-through white umbrella to the flash. Umbrellas are a great modifier to create a much softer light.

This shot was taken the following day, same time and setup. But I added a white shoot-through umbrella on to the flash, to illustrate how effective this modifier is. Umbrellas are so inexpensive, and work really well to create a soft light. You can see that the shadows have become softer but they are still too strong (dark). However, my daughter’s patience ran out and no amount of bribes would make her stay for more shots!

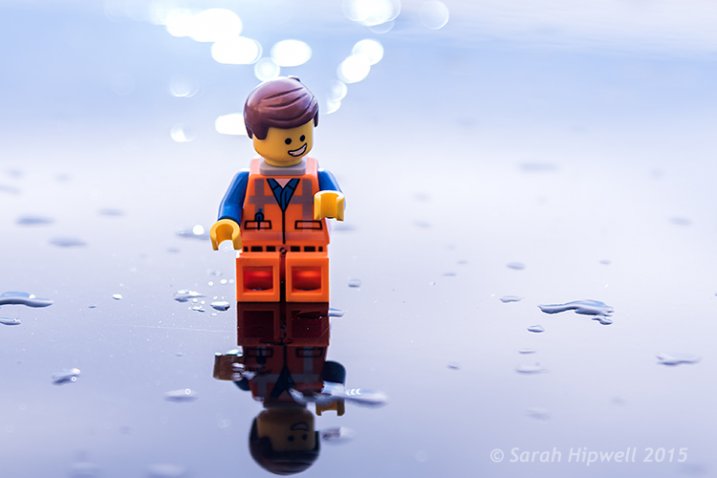
So I took the advantage of the rain and the low light conditions. Instead of a real model, I improvised with Emmet and put him on top of the hood of the car. I attached my flash to the steering wheel inside of the car with a Joby Gorilla tripod. That way, I wasn’t concerned if it started to rain while I was shooting. I had the flash power set to ¼, as I knew the hood of the car would provide a nice bounce. I had never tried this before so it was an experiment for fun; I was happy with the end result.

Emmet-on-car-bonnet-no-flash

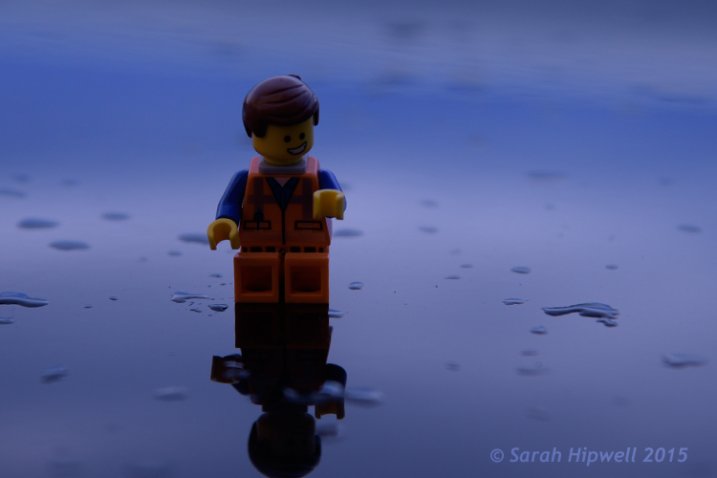
Emmet on the hood of a car – no flash fired in this shot.

Emmet-on-car-flash-on-wheel

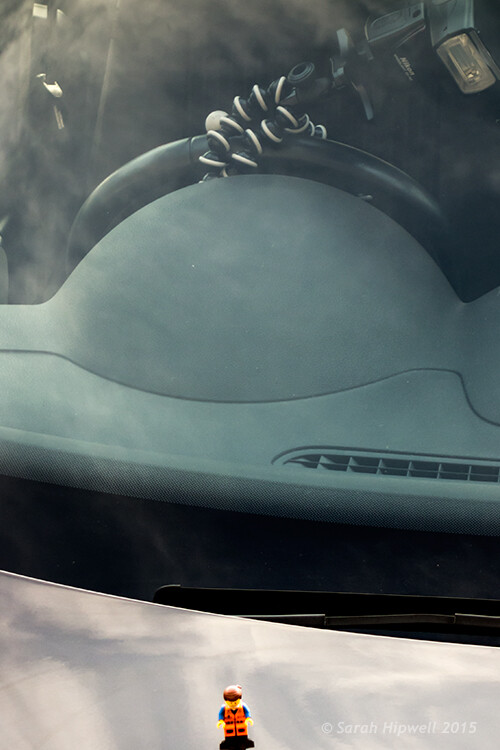
Flash attached to the steering wheel on the inside of the car.

Title-Emmet-on-car-bonnet-with-flash

Overcast dull days

When days are overcast and dull, it is a good opportunity to get out and start using off-camera flash. The light is even and it acts like a big diffuser. This helps you to concentrate on balancing the ambient light with the flash.

Wilson-overcast-day-no-flash

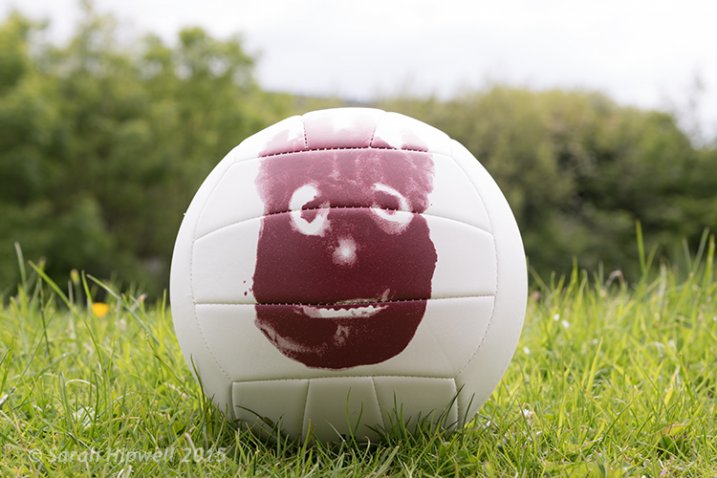
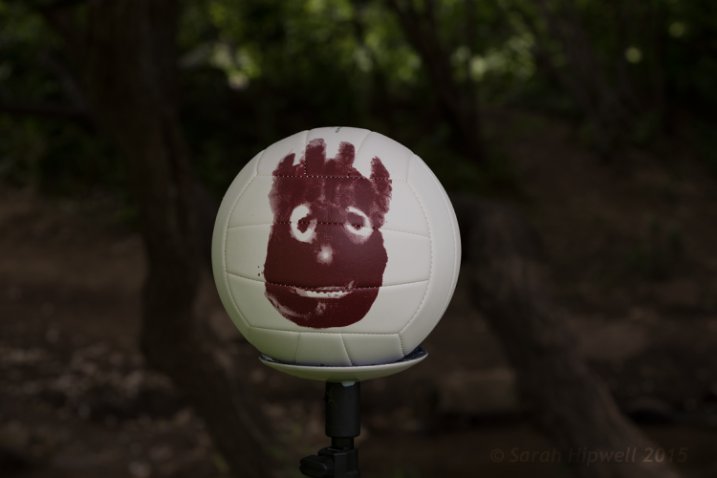
Wilson shot on an overcast, dull day – background overexposed, sky detail is lost. No flash fired.

I placed the flash (on a Joby tripod) to the left of Wilson, roughly 4-5 feet away with an opaque plastic diffuser on. I wanted the light from the flash to be directed at the same level as Wilson. By adjusting the shutter speed, I was able to expose the background better. I had the flash set to 1/8th power, I wanted just enough fill light from the flash to give Wilson more depth.

Wilson-overcast-day-with-flash

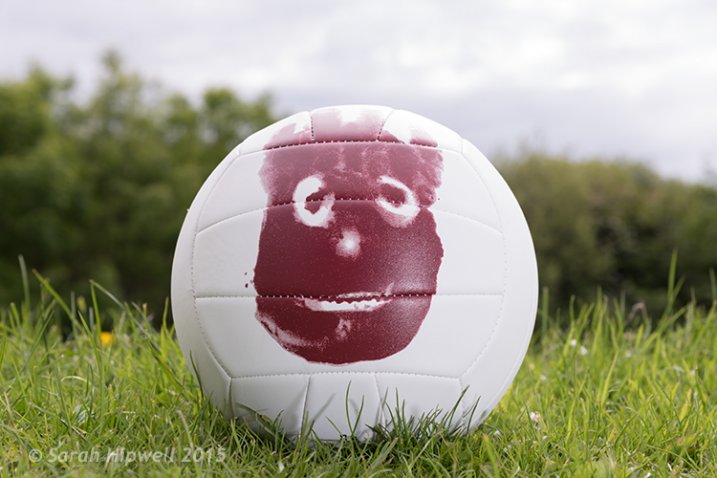
I increased the aperture to bring back some detail in the sky. The flash acted as a nice fill-in or balance against the ambient light.

I moved to a different location but it was the same overcast conditions. This time, I wanted to change the direction of the flash and create a different shot. So I put the flash, still attached to the Joby Gorilla tripod, high up on a branch of a tree.

flash-in-tree

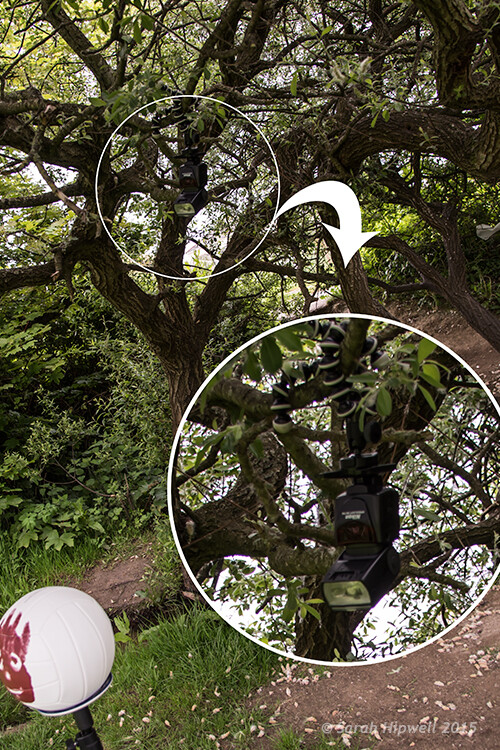
I still had my flash attached to the Joby Gorilla tripod from the previous shot. I then hung it upside-down and wrapped it around the branch of a tree.

Wilson-sun-dapple-no-flash

Wilson set against a backdrop of a woodland. No flash fired.

I wanted to appear as if the sun was shining down through the trees on Willson. By placing the flash high above, and behind Wilson, I was able to achieve this effect. I had the flash power set to ½ and took off the plastic opaque diffuser. I had to take a few shots before I was happy with this one. That’s the fun in this type of shooting, you are experimenting and learning as you go.

Wilson-sun-dapple-with-flash

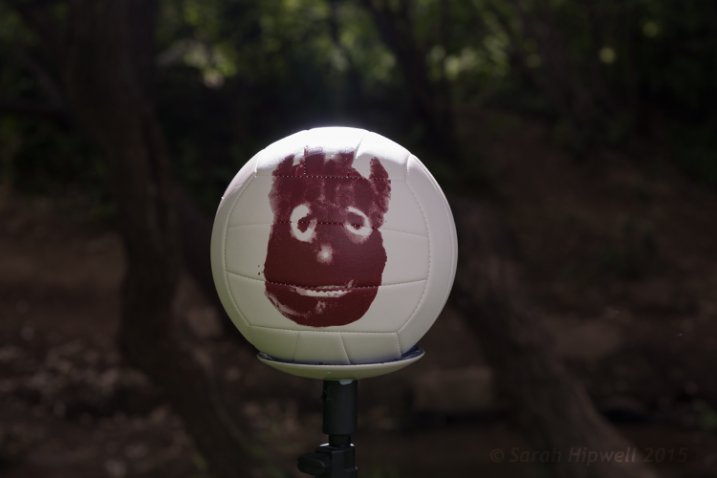
By hanging the flash high up in the tree, it created a sun-dapple effect on Wilson.

Bright Sunny Days

I love the sun. Especially when there are blue skies and only a tiny whisper of a white cloud. However, in photography terms, this light is too harsh. In the middle of the day, the sun shines directly overhead and usually casts strong shadows on your subject (usually the face). If you face your subject looking into the sun to eliminate these strong shadows, your subject has to squint from the glare of the sun! So, by placing your subject with the sun behind them, your camera metering exposes the background correctly and your subject is too dark. Hence, you meter your subject for a correct exposure and then your background is overexposed.

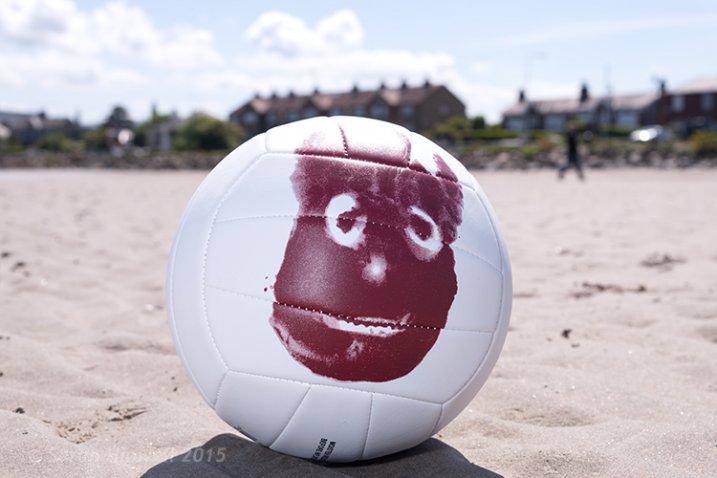
This is where your external flash comes in handy. I brought Wilson to the beach. The day was sunny and it was late afternoon. I placed Wilson on the sand with the sun behind him.

Wilson-on-beach-no-flash

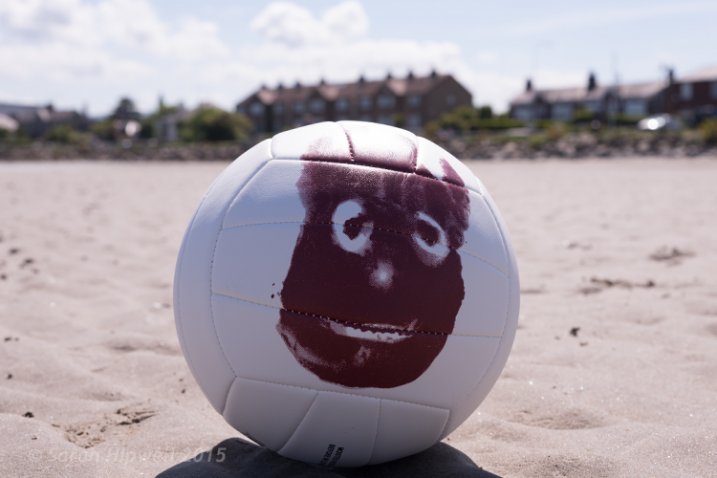
Wilson at the beach with the sun high and slightly behind him. No flash fired.

The flash was placed to the right of Wilson about four feet away. I had the diffusion plastic dome on the flash.

I didn’t achieve the shot I wanted when I reviewed my photos later on the computer. I noticed a slight hotspot on Wilson which is always a dead giveaway that you have used a flash. I wanted a nice balance between the ambient and the fill-in light from the flash. In hindsight, I should have experimented more by taking shots with the flash moved back or changed the direction slightly. As the day was very bright, I had set the flash power to ½, so I could have dialled it down! A good tip here, would be to take notes of your setup, so that you have a benchmark for similar future setups.

Wilson-on-beach-with-flash

Flash was to the right of Wilson, four feet away with a transparent dome diffuser on. Flash power set to 1/4.

Wilson-on-beach-rushes-no-flash

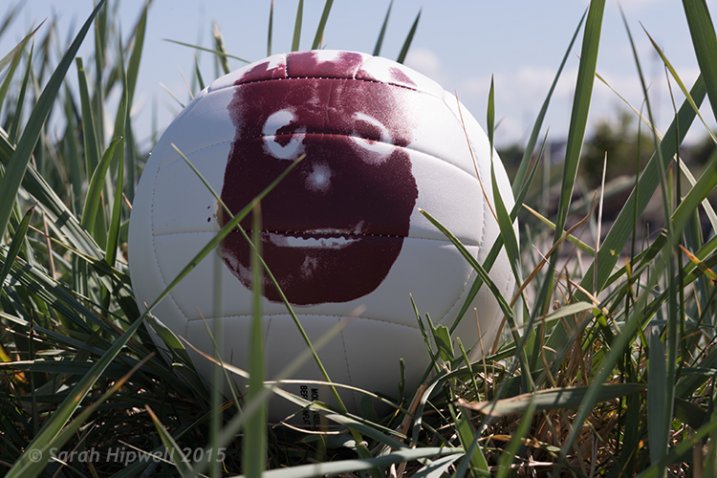
Another shot of Wilson on the beach. No flash fired.

Wilson-on-beach-rushes-with-flash

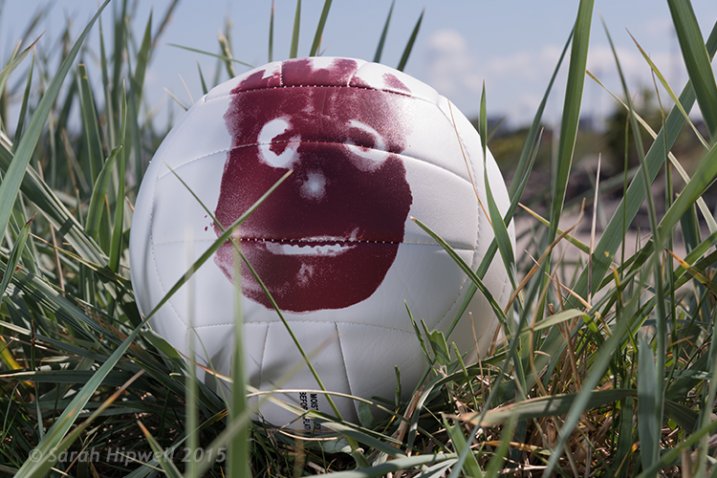
I placed the flash to the right of Wilson and the flash had to fire through the grass.

Tips:

  • Experiment with the distance of your flash relative to your subject as well as the direction.
  • If you are using an umbrella, get lots of sand bags to weigh the stand down firmly, or preferably get somebody to hold it. This is especially important on a breezy, or windy day. The light stand will take off like a kite with the umbrella attached. This happened to me. The umbrella broke but thankfully my speedlight suffered no damage. After all, umbrellas are way cheaper to replace than flashes.
  • Start with a low power level on your flash, such as 1/16 or 1/8th.
  • Put the flash sync-speed to the maximum to give you more latitude with your aperture.
  • Keep practicing before you’re ready to move on.

Conclusion

I hope that I’ve convinced you that off-camera isn’t as daunting as it may seem. However, it isn’t a one-click effect. It does take a bit of mastering. Don’t be afraid of not getting it right first time. If you can’t get a willing subject or model, go get yourself a Wilson! I chose a ball as it’s round and is a good substitute for a face. (Plus you don’t need to bribe a ball).

Do you use off-camera flash? Have any other tips for beginners? If so please share in the comments below.

googletag.cmd.push(function() {
tablet_slots.push( googletag.defineSlot( “/1005424/_dPSv4_tab-all-article-bottom_(300×250)”, [300, 250], “pb-ad-78623” ).addService( googletag.pubads() ) ); } );

googletag.cmd.push(function() {
mobile_slots.push( googletag.defineSlot( “/1005424/_dPSv4_mob-all-article-bottom_(300×250)”, [300, 250], “pb-ad-78158” ).addService( googletag.pubads() ) ); } );

The post How to Get Started with Off-Camera Flash Photography – Start With One! by Sarah Hipwell appeared first on Digital Photography School.


Digital Photography School

 
Comments Off on How to Get Started with Off-Camera Flash Photography – Start With One!

Posted in Photography


Adding an Off-Camera Flash to Create a Winning Image

07 Jul

Star_gazers

This image, titled “Star Gazers”, won Grand Prizes at the 2015 Shoot the Hills photo competition. Held in the Hocking Hills region near Logan, Ohio, this competition takes place the 3rd weekend every April. 160 photographers from several states participated this year.

I initially came up with the idea for this shot over a year earlier, but my first attempt at the image failed miserably. (see below)

DSC_3387

What mistakes did I make?

If I would have checked the histogram I would have seen that all of the image was extremely under-exposed with all the data pushed up against the left side of the histogram.

If I had checked the histogram I would have noticed that the image was extremely under-exposed with all the data pushed up against the left side of the histogram.

  1. The image was under-exposed, because I failed to check the histogram. In the dark the image looked great on the LCD on the back of the camera!
  2. With the long exposure (30 seconds) there was no way for the subjects in the image to remain still enough to avoid blurring.

The Solutions

  1. The solution for the exposure was simple. First I turned down the brightness of the camera’s LCD screen. Then I used the histogram to determine my exposure.
  2. The length of exposure time was the main problem I had with this first attempt at capturing the image I had planned. It is nearly impossible for a live model to stand still for 30 seconds to prevent blurring. An off-camera flash was added behind the models to create the rim lighting in order to freeze their movement. Adding this flash was the major difference-maker from my earlier attempt of this image.

Other Factors to Consider

Sometimes it takes some trial and error to achieve the results you are looking for in an image. Improvisation may be required when unforeseen issues change shooting conditions. Many factors need to fall together for it to be possible to create an image such as this one. After waiting until 2 a.m. for the clouds to clear, it was finally time to capture the image I had pre-visualized nearly a year earlier.  Because the cloud cover remained near the horizon, it became necessary to change the angle of view to capture the higher, clearer sky. This adjustment also made it necessary to change the focal length from the 18mm I had planned to 50mm. One of the rules of the Shoot the Hills photo competition is that all images must be submitted straight out of the camera, so getting everything right in the camera is a must. Here are some additional factors required to capture such an image:

The Weather

  • Clear starry night – Probably the single most important factor to create this image is a clear starry night.
  • Dark sky – Find a dark sky, away from the lights of the city. There are dark sky maps on the internet.
  • Moonless night (or after the moon has set) – The light from the moon will fade out (overpower) many of the dimmer stars.

The Exposure

Histogram for the final winning. Notice how the histogram stretches back almost into the mid-tones, with a little info clear back into the highlights which is the stars and the rim lighting.

Histogram for the final winning shot. Notice how the histogram stretches back almost into the mid-tones, with a little info clear back into the highlights, which represent the stars and rim lighting.

I wanted to keep the shutter speed at 30 seconds for two reasons. First, that is the longest shutter speed most cameras allow without having to set them to bulb, and manually doing a timed exposure. Secondly, I didn’t want the stars to become extremely blurry. Using the histogram, I determined my exposure with my focal length at 50mm to be;  aperture at f/5 and ISO set to 2000, which I had predetermined was the highest ISO I could use, and still be able to minimize the amount of digital noise. As mentioned earlier, do not rely on the camera’s LED screen to determine exposure. In fact, in the dark the LED screen will look really bright when the image is actually extremely underexposed. To remedy this problem, turn the brightness down on you LED screen, if this setting is available. But always use the histogram to get the best exposure setting. If the histogram is all pushed over to the left side, the image is going to be underexposed.

Remote Triggers

Since I was also one of the subjects in the images, I used one remote to begin the exposure, and another to trigger the flash.

White Balance

After experimenting with several preset white balances I decided to set a custom white balance of 2560 Kelvin, to give the image a cool blue colored sky.

Focusing

Focusing a camera in the dark is one of the most challenging parts of creating a night shot under the stars. Here are some tips to set focus for night images:

  • Pre-focus before it gets dark. This is the easiest way to focus for a night shot, and after the focus is set, turn off the auto-focus so it doesn’t change.
  • Shine a bright flash light on the subject to allow the camera to focus, and as in the method above, after attaining focus, turn off the auto-focus.
  • Use live view to focus manually on a light.
  • Use back button focusing to preset focus

For this image I used back button focusing, and a flash light to set my focus.

The Logistics

The setup for this shot was at the top of a steep hill which came to a point. With the subjects at the very top, the camera was placed on a tripod below, and aimed upward at the subjects and the starry sky in the background. The off-camera flash was placed on a tripod on the other side of the hill and aimed upward at the subjects. The flash and tripod had to be placed low enough on other side of the hill, so that the actual flash did not show in the image.

layout

Conclusion

Henry Ford once said that “Failure is the opportunity to begin again more intelligently.”  When an image idea fails, take a look at what went wrong and then look for solutions to improve the image, return to the scenario and try it again. From my first unsuccessful attempt to capture star-gazers, the need to freeze the subjects and prevent the blurring, led me to try the off-camera flash technique. The back-lighting and a year’s experience made all the difference between a failed shot and a winner!

googletag.cmd.push(function() {
tablet_slots.push( googletag.defineSlot( “/1005424/_dPSv4_tab-all-article-bottom_(300×250)”, [300, 250], “pb-ad-78623” ).addService( googletag.pubads() ) ); } );

googletag.cmd.push(function() {
mobile_slots.push( googletag.defineSlot( “/1005424/_dPSv4_mob-all-article-bottom_(300×250)”, [300, 250], “pb-ad-78158” ).addService( googletag.pubads() ) ); } );

The post Adding an Off-Camera Flash to Create a Winning Image by Bruce Wunderlich appeared first on Digital Photography School.


Digital Photography School

 
Comments Off on Adding an Off-Camera Flash to Create a Winning Image

Posted in Photography


Nifty Fifty Flash Sale!

30 Jun

Today only, we’re throwing a Flash Sale with five products at 50% off and YOU choose which five! We trust your opinion.

VOTE for your faves from now until 12PM EST

Winners go on sale from 12PM-2PM EST.

Nifty, eh?

Cast your vote as many times as you want and enlist your friends to vote … maybe even bribe them into voting for your favorite.

Get your vote on!


© Erin for Photojojo, 2015. |
Permalink |
No comment |
Add to
del.icio.us

Post tags:


Photojojo

 
Comments Off on Nifty Fifty Flash Sale!

Posted in Equipment


Tric is a wireless flash trigger for the iPhone

09 Jun

The LED flash units in smartphones are usually poor performers compared to the Xenon flashes in dedicated cameras or even external flashguns. If you feel your iPhone photography has been held back by your Apple device’s underpowered LED light, Tric’s new Kickstarter project might just be what you’ve been waiting for. The team behind Tric is looking to fund the final development and mass production of a wireless trigger unit for the iPhone. Read more

Articles: Digital Photography Review (dpreview.com)

 
Comments Off on Tric is a wireless flash trigger for the iPhone

Posted in Uncategorized


Review: Flashpoint Zoom Li-on Flash

10 May

01 Packaging

Raise your hand if this sounds familiar: you’ve fallen in love with Speedlight flash photography, but you gripe at having to lug around lots of odds and ends for your remote triggers, not to mention boxes of backup AA batteries. Isn’t it time for flashes to catch up with DSLRs and be powered by rechargeable batteries, and have more discrete wireless triggers? It turns out that these features DO exist, but not with Speedlights made by major camera manufacturers.

Announced by Adorama earlier this year, the Flashpoint Zoom Li-on TTL Flash is a new and affordable system that has the key feature of being powered by a rechargeable Lithium Ion Polymer battery. This battery promises to power your flash longer than any other hot shoe mount Speedlight on the market, and it does so while keeping the flash unit at a relatively compact size. When paired with the Flashpoint Commander Transmitter and Receiver set, you have an intuitive, compact way of using the flash off-camera. Sound appealing? Read on for more specs and details.

What’s in the Boxes

02 In the Box

To be clear, the flash unit and the commander (transmitter and receiver) are two separate items that are sold separately. You don’t need to have the Commander set to use the flash unit on its own.

The Zoom Li-on unit, made specific for either Canon or Nikon, arrives in a nicely packaged box containing:

  • (1) Flashpoint Zoom Li-On TTL flash unit
  • (1) Lithium Ion Polymer battery pack
  • (1) Battery charger with cable
  • (1) Protective case for flash with a mini-stand unit

The Flashpoint Commander set arrives with a rather large transmitter (it’s about the size of a Pocket Wizard), and a much smaller receiver (about the size of a thumb drive). The transmitter runs on a pair of AA batteries.

Best Flash Feature: The Battery

Boasting more power than any AA battery, the lithium ion battery is the standout feature of the Zoom Li-on unit. It packs 11.1 volts and 200mAh, and a fully charged battery delivers up to 350 full power shots, with a recycle time of less than 1.5 seconds. You’ll need 2.5 hours to fully charge the battery, but it will function just fine on partial charges. On the unit’s display, there is also a battery icon in the upper right corner that will indicate how much power your battery has left. For longer shoots, it’s recommended that you purchase an extra backup battery, since the flash unit can’t be powered by any other means.

04 Charging

Other Flash Features: Comparable to Most Major Speedlights

Besides the rechargeable battery, the Zoom Li-on flash has all of the other functionality present in other Speedlights today. These features include standard TTL mode, Manual mode, Exposure Compensation, Front and Rear Curtain Sync, Laser Autofocus Assist, High-Speed Sync, group control, and Slave and Master optics, to name a few. This flash also has complete IR TTL control connectivity with Canon and Nikon flashes, meaning you don’t necessarily need to convert your entire Speedlight system. Other triggering modes for the flash include hotshoe, radio controller, 2.5mm sync port, and optical slave.

The flash head has a built-in wide angle diffuser and white bounce card. It also rotates 180 degrees in any direction and tilts over 90 degrees. It can also automatically or manually zoom from 24-105mm. Basically, if you’re familiar with the Nikon SB-900 or Canon 580EXII, the Zoom Li-on flash is similar in size and layout of its controls. Thanks to my familiarity with Canon Speedlites, I was able to unbox the unit and set it up intuitively without referring to the included instruction manual.

Flashpoint Commander Set: All About Convenience

The accompanying Flashpoint Commander set enters a crowded market full of all kinds of remote trigger options, but their main advantages are, an affordable price point and lots of power, packed into relatively small units. Using this set, you can view and change your flash output and trigger your flash remotely from 150+ feet away. There are also 16 channels and 16 groups of control so that you can handle multiple units of remote lighting. The newest version of the transmitter also comes with a 3.5mm sync port, allowing for a direct cable connection to the PC socket of your camera.

03 Details

The transmitter is slightly larger than a single Pocket Wizard Plus III and it sits nicely in your camera’s hot shoe mount. Unlike most other trigger systems, the receiver looks nothing like the transmitter, consisting of a flat unit that simply plugs into the side of the Zoom Li-on flash. After syncing channels and groups via manual switches on the transmitter and receiver, that’s all you need to do to set it up.

Two complaints: you’ll need slim fingernails or a tool to hit the switches on the channel sections of both units, and the group dials are a little too easy to turn, opening up room for possible syncing mistakes. On the whole, this Commander set is impressively compact and easy to set up, although you’ll want to keep an extra eye out for the tiny receiver as it seems very easy to misplace.

05 Umbrella

Flashpoint Zoom Li-On Flash and Commander Set in Practice

To test out the flash unit, I worked put it through three separate scenarios: table top food photography, on-the-fly event photography, and a posed portrait session.

For the food photography session below, the Zoom Li-On flash was paired with the transmitter and receiver and handheld to camera left. Shot in manual mode with no diffuser, the outcome was a soft, natural light that I’d expect from any speedlight.

07 Example Food

The on-the-fly event photography scenario was a quick red carpet photo op with Laila Ali. Fired in ETTL mode on-camera, the Zoom Li-on’s smooth rotating head feature plus fast recycle time came in extremely handy, and I was able to pull off the desired shots without turning to my Canon 580EXII, which I had mounted to a second body just in case.

06 Example Laila

Finally, the portrait session combined the Zoom Li-on flash, acting as the master, and a Canon 580EXII flash off-camera as the slave. Both flash units synced seamlessly, and thanks to similar control layouts, it was easy to figure out that the master/slave function on both units activates the same way (holding down the Zoom button).

08 Example KA

Overall, I declare the Zoom Li-on Flash a winner and a new staple to my camera bag thanks to its power, reliability, and the cost (and weight) savings of not having to haul tons of spare AA batteries. Are you inclined to give this flash a shot?

You can find the Flashpoint Zoom Li-on Flash at Adorama or on Amazon.com.

googletag.cmd.push(function() {
tablet_slots.push( googletag.defineSlot( “/1005424/_dPSv4_tab-all-article-bottom_(300×250)”, [300, 250], “pb-ad-78623” ).addService( googletag.pubads() ) ); } );

googletag.cmd.push(function() {
mobile_slots.push( googletag.defineSlot( “/1005424/_dPSv4_mob-all-article-bottom_(300×250)”, [300, 250], “pb-ad-78158” ).addService( googletag.pubads() ) ); } );

The post Review: Flashpoint Zoom Li-on Flash by Suzi Pratt appeared first on Digital Photography School.


Digital Photography School

 
Comments Off on Review: Flashpoint Zoom Li-on Flash

Posted in Photography