Cactus Image recently launched a new version of their radio trigger for speedlights and strobes, the Cactus V6II. In this review, I’ll go over the features of this trigger, how to use it, and do some example photo shoots to test it.
Features of the Cactus V6II Wireless Flash Transceiver
This is a 16 channel system with 4 groups. That means 16 systems can run concurrently, and each photographer could have four sets of flashes of which they can control the power (and zoom for the RF-60/TTL Flashes). It runs off two AA batteries, mini-USB 2.0, or a 5v DC input. Like most modern flash triggers, it runs at 2.4Ghz, which helps it work reliably up to 100 meters. It supports High-Speed Sync up to 1/8000 sec (if your camera goes that high).
The mini-USB port also allows you to update the firmware on the device, giving it a certain amount of future proofing. The main difference between the V6 and the V6II is that the latter allows you to use High-Speed Sync across a range of cameras and flashes, including that of the Fuji X series (which lacks the ability normally). The V6II HSS is based on the use of camera and flash profiles. This allows both Cactus and the photographer to make profiles for flashes they may not already have in the system.
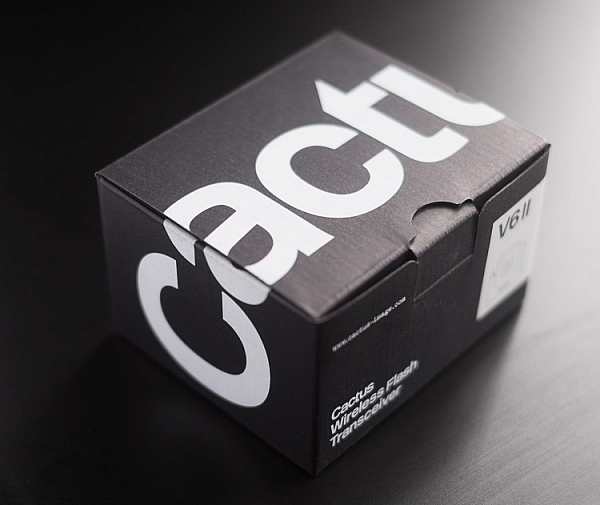
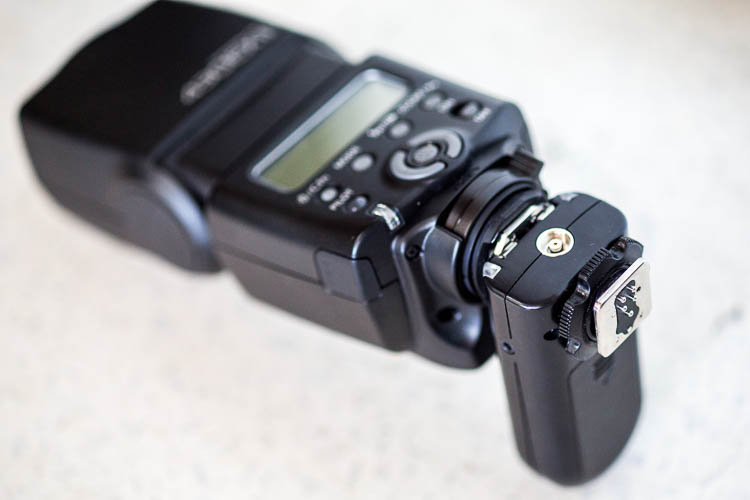
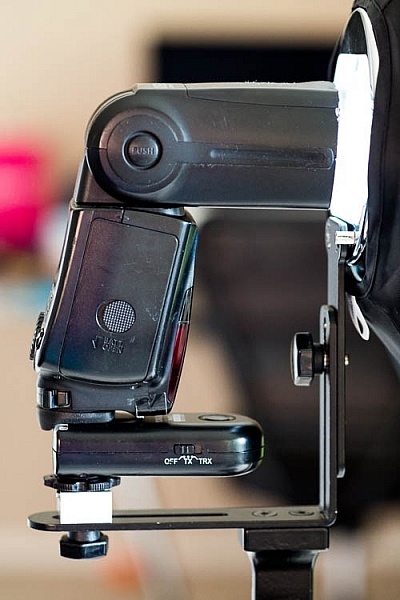
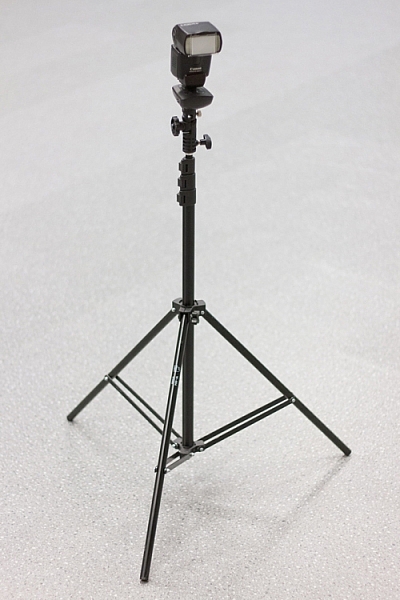
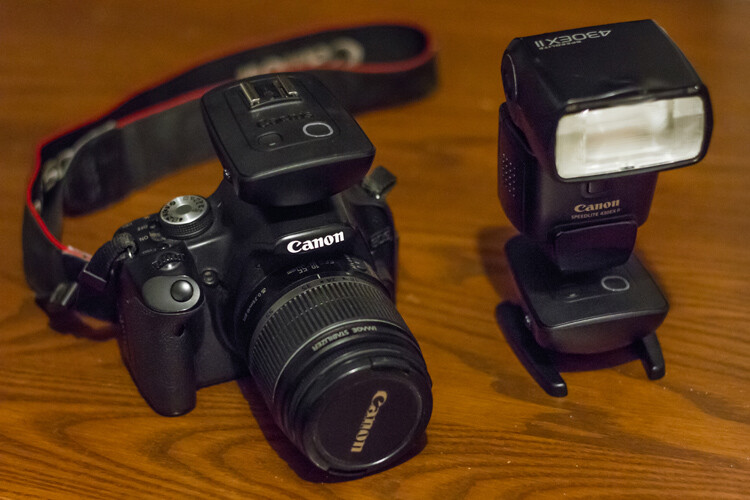
The Cactus V6II transceiver box.
This means there’s practically universal support for any flash you may have. The exception is flashes that have a high sync voltage. The units are cross compatible between systems, so you can use Pentax cameras with Olympus flashes, etc.
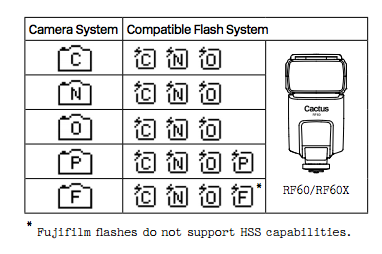
Camera and flash compatibility list for the v6II
There are two High-Speed Sync modes; Normal and Power. Normal High-Speed Sync works up to 1/8000th of a second and uses a pulsing flash fire. Power Sync uses the full power flash as a normal fire, but allows you to exceed the normal sync-speed of the camera.
Getting started with the Cactus V6II
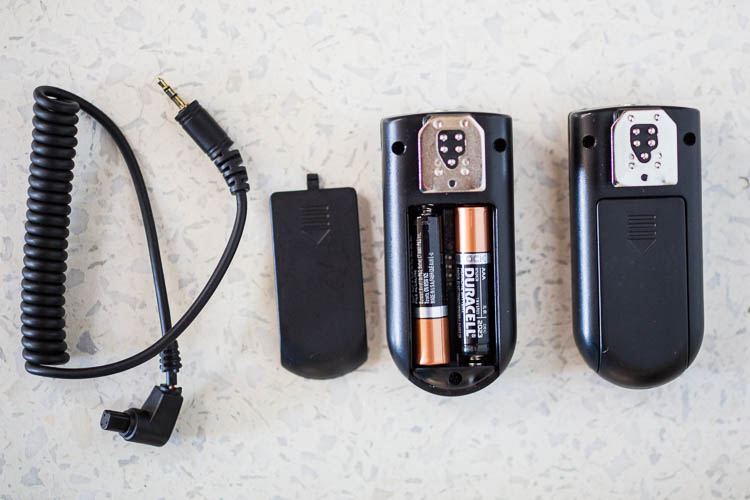
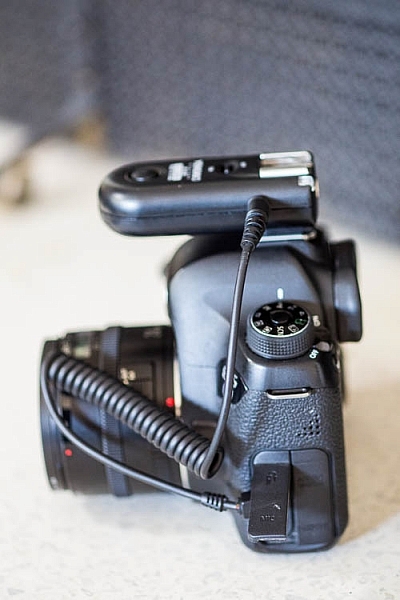
The trigger comes in a nicely designed box, containing the user manual, the trigger, and a hotshoe foot. Unlike other hotshoe feet, this one doesn’t have a screw thread for a lighting stand. It’s not an issue as I wasn’t expecting one anyway. The unit can be configured as either a transmitter or a receiver by selecting Tx or Rx from the power switch.
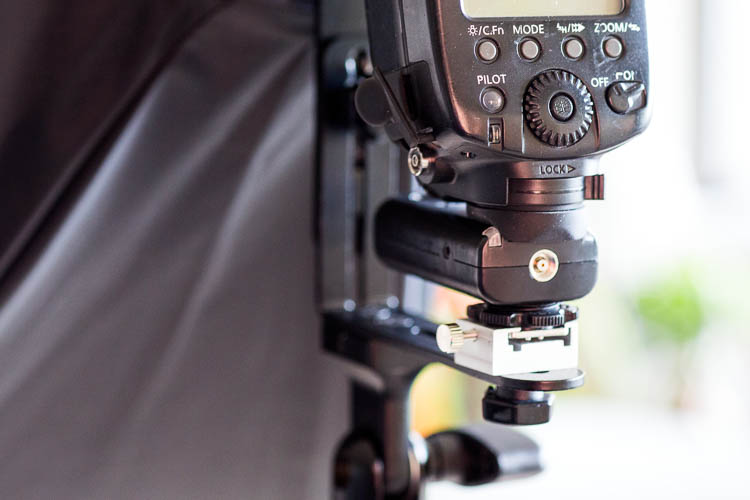
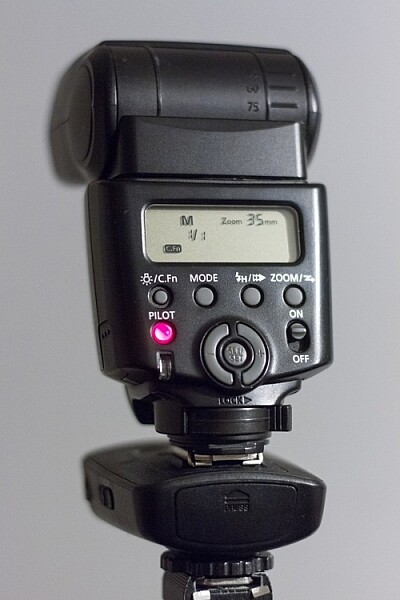
When it is on-camera as a transmitter, you have the four groups visible on the camera left-hand side. Marked A, B, C and D, pressing one toggles it on and off. This way you can select a specific group of flashes to change settings on. This works especially great with Cactus’ own flash, the RF60. Using the dial on the back you can change the power of the flashes on the group, or by pressing in the dial, swap to the lens zoom setting and change that instead.
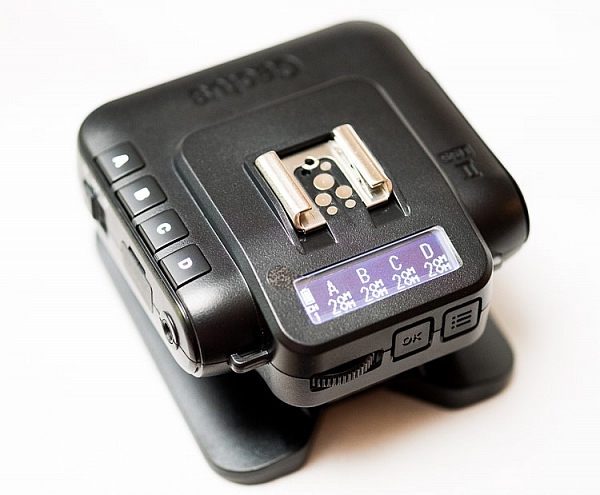
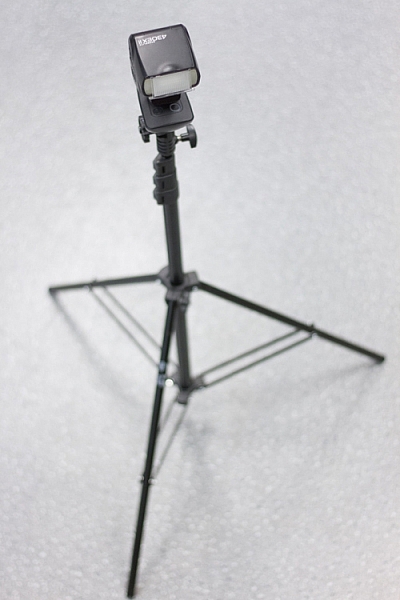
The unboxed Cactus V6II
On the right hand side at the front is the test button. You can press it to test that the signal is going to either the RF60, or to another V6II set to receiver mode. One other useful feature is that there’s a hotshoe on the trigger, where you can add your existing trigger system, or another flash. Using your current triggers will allow the High-Speed Sync signal to pass through the V6II and into your flash system.
Setting up
My main portable system is based around Godox v850 flashes (more precisely, the Neweer versions rebranded as the TT850 – it’s the same flash). I also have the more powerful AD360, which responds to the same trigger (the older FT-16), so I find it a really useful system. All of the flashes are High-Speed Sync capable and have profiles in the trigger. I don’t actually use the built-in profiles for High-Speed Sync with Fuji cameras.
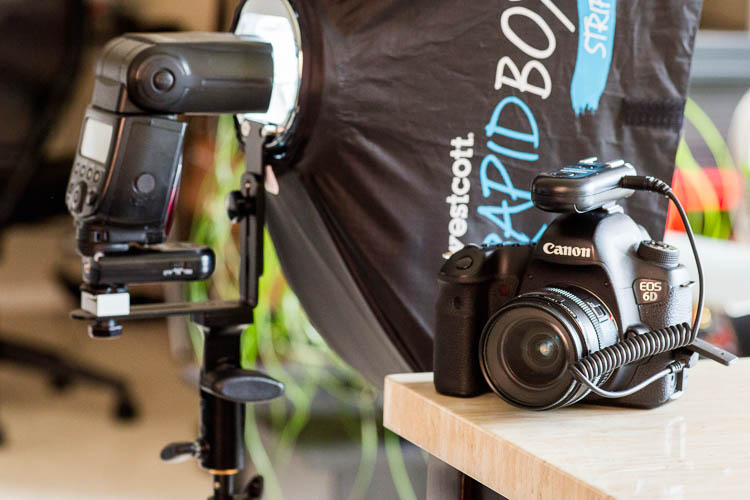
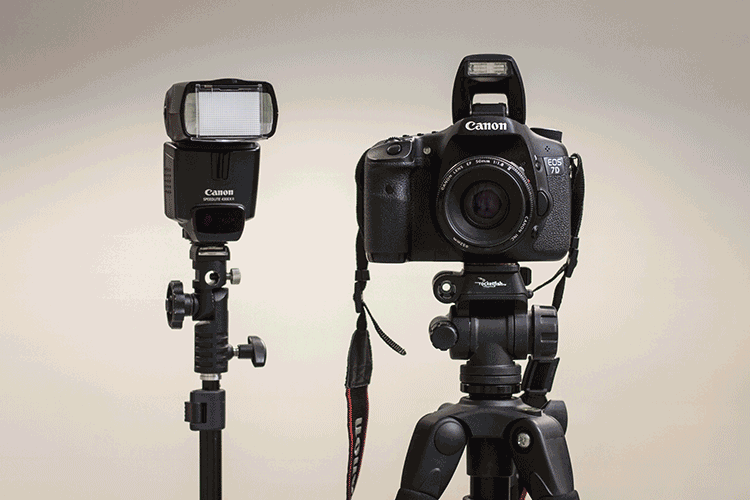
The Gear Setup for HSS
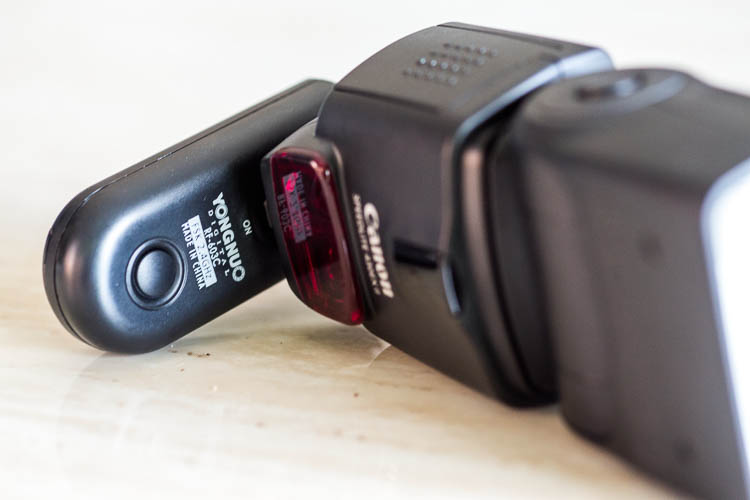
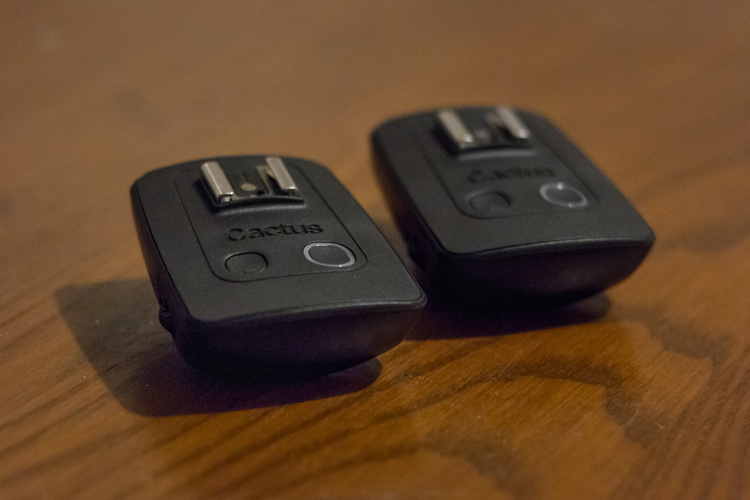
Using the older triggers, I set up the flash as normal. Once it’s all working I take the trigger off the camera and put the Cactus V6II on instead (switched to Tx mode). Next I put the old (FT-16) transmitter on top of the hotshoe on the V6II. Finally I set the flash to HSS mode by pressing a two button combination on the back. Each system has its own way of turning on HSS. Yes, this does mean you only need one Cactus V6II trigger with this system to get HSS working.
To get started, press the Menu button on the back right of the V6II unit. Turn the dial to Camera and Flash Setup. Set Camera to Auto, then set Flash to the brand that you use. Next use the Auto Profile for your Flash. For Fuji, you have an additional step, where you make the trigger learn the HSS response of the flash. For the AD360, I set the Flash to Nikon and the Profile to Auto (Nikon).
The Beta Test
So I set it all up, and with my trusty Godox 120cm Octabox on the Ad360, I sweet-talked my son into posing on his bike. That’s roughly three minutes of attention span before boredom hits. I’ve included some behind the scenes shots as well. The exposure was 1/4000th, f/2.8, ISO 200 with a 35mm f/1.4 lens. Even the nearby trees are out of focus. I absolutely love the bokeh in my first shoot with the trigger.

Test Shoot #1
Testing means dragging out a range of people to shoot with. It also means working around their schedule. So this next shoot happened a little later than I would’ve liked, but I still got some good shots.
Once the trigger is set up, your main issue is dealing with power. Normally with manual flash, only the aperture has an effect on the apparent power of the flash. Below sync-speed, you can change the shutter speed to your heart’s content, and it won’t affect the flash. Not so with High-Speed Sync. Any change of shutter speed changes the flash power. The faster the shutter speed, the more flash power you need. It’s a new experience if you’ve gotten used to normal manual flash. Each stop increase in shutter speed requires about a stop of increase in the flash power.
Here’s the first setup and the resulting image.

Behind the scenes shot showing the Godox AD360 flash with Godox 120cm Octabox. Taken by Ola.

The shot with HSS. The background is beautifully out of focus. ISO 200, f/1.8, 1/4000th, 35mm on Fuji X-T10.
I still managed to blow out the sun slightly, but the flash was at full power, so I couldn’t change the aperture to compensate. The octabox was just out of frame too. Normally, I shoot vertical portraits but for articles, horizontal looks better, so I just recovered this highlights in Lightroom.
Test Shoot #2
For the second shoot, I had more time, better planning, and less wind! Due to the model’s availability, it was later than I’d have like, but still had enough light to get shots using HSS (out of want rather than need!).
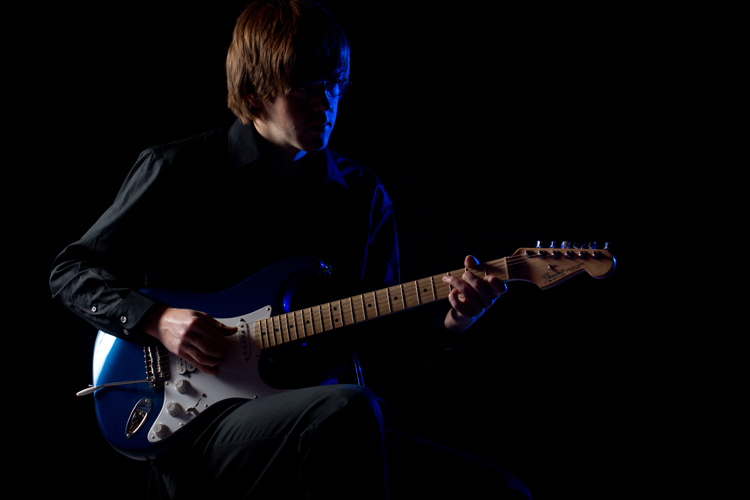
Here I’ve used my typical short lit Godox Octa setup for this using the Fujifilm X-T10 with a 35mm f/1.4 lens. I wanted to create tension and go for a cinematic feel to the image. The grass at the bottom is well out of focus and gives a slightly ethereal feel to the shot. The black clothes and the model peering out of frame seem to reference things in the past as if a loved one has passed.

ISO 200, f/1.4, 1/1600
For the second shot, I wanted to bring in an additional element – a back light. I could’ve used one of the 850’s, but instead, I opted for the Cactus RF-60 flash. This has the receiver built-in and communicates directly with the Cactus V6II receiver. I set this to Group B and zoomed the flash to 105mm to allow it to throw the light further. Once in HSS mode, it triggered every time along with the AD360. I also went for the 50-140mm lens to get further back and compress the background more.

ISO 200, f/2.8, 1/500th. Shot with the 50-140mm f/2.8 lens.
Here’s how the gear looked behind the scenes:

Headshot variation
For the final look, I went for a headshot, so the Octa was moved to give her a soft loop light. I got the model to hold a reflector (in this case a California Sunbounce silver-white mini, using the silver side for contrast). It’s very similar to the last setup with the Cactus RF-60 acting as a kicker.

ISO 200, f/2.8, 1/500th.
Here’s the setup shot:

By swapping the side the Octa is on, so the kicker and the key are on the same side, you get a very different look for only a few minutes work.

Cross Platform Test: Fuji Camera – Canon Flashes
Using a second Cactus V6II trigger, I added a Canon 580EXII Speedlite to the setup to use with the Fuji camera. In this case, I set the flash up as Canon with an Auto Canon Flash Profile. Again with the flash set to HSS, I went through the learning process for HSS, and the flash worked perfectly with the Fujifilm in HSS mode. The 580EXII was set to ETTL, and I could control both the flash power and the flash from the V6II transceiver on the camera.
I still have my Canon 5D MarkIII (not for much longer), so I did a quick test with that as a system check. Again I used the Canon 580EXII Speedlite on ETTL, set to HSS. Because both transceivers were set to Auto, switching the units off and back on began a new detection cycle, successfully recognizing both flash and camera as Canon. After one or two test fires, it all worked perfectly. No pretty models for this demo, but something close to my heart instead.
Shooting the Fuji X-T2 using a Canon 5D MarkIII. The Canon 580EXII flash was set up off-camera, with the trigger set to auto-detect the camera, and the receiver set to auto-detect the flash. Set to ETTL mode, both the power and zoom of the flash can be controlled from the trigger. The flash was bounced into the ceiling. ISO 200, 1/500th, f/1.8.
Firmware Updates for the V6II
Another feature of this trigger is you can update the firmware as new features and profiles are added. During my testing period, two firmware updates became available. I also had the chance to test a beta version of the new Fuji X-T2, another testament to Cactus’ support for their product. For the public updates, I simply downloaded the updater app, ran it, and followed the instructions.
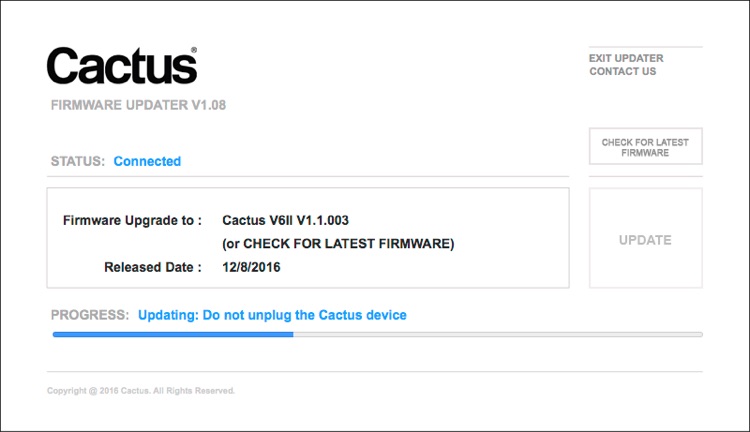
Cactus Firmware Updater
Pros of the Cactus V6II Triggers
- Gives you High-Speed Sync ability across a range of camera systems and flashes.
- Firmware upgradeable.
- Works directly with the Cactus RF-60 flash.
- Good range of channels and groups.
- Power Sync allows additional sync speed options for non-HSS flashes.
- Can work with only one transmitter and your existing triggers.
Cons of the Cactus V6II Triggers
- Clunky – the shape isn’t as elegant as many others with a hotshoe passthrough.
- One of the units I had suffered from a really tight battery clip. It’s more an annoyance than a real con as the batteries last a really long time. The clip on the other unit was perfect.
- For Fuji users, there’s more work to get it going. For everyone else, no problem.
Verdict
I’m delighted with the Cactus V6II wireless flash trigger. It really works.
During the short time I’ve had the trigger, I’ve used it on a few magazine shoots, as well as the fun shoots I did to test it. It’s been great. Their support has been fabulous, and there’s a lot of information on their community page.
Would I recommend these triggers? Absolutely. They bring a new dimension to shooting portraits outdoors that can change your style completely.
googletag.cmd.push(function() {
tablet_slots.push( googletag.defineSlot( “/1005424/_dPSv4_tab-all-article-bottom_(300×250)”, [300, 250], “pb-ad-78623” ).addService( googletag.pubads() ) ); } );
googletag.cmd.push(function() {
mobile_slots.push( googletag.defineSlot( “/1005424/_dPSv4_mob-all-article-bottom_(300×250)”, [300, 250], “pb-ad-78158” ).addService( googletag.pubads() ) ); } );
The post Overview and Test of the New Cactus V6II Wireless Flash Trigger for High-Speed Sync by Sean McCormack appeared first on Digital Photography School.


You must be logged in to post a comment.