RSS
 

Posts Tagged ‘faster’

Tiffen adds more filters, looks and faster processing with version 4 of its Dfx software

14 Apr

Tiffen has announced an updated version of its Dfx photo and video editing software that adds new filters, historic process simulations and extra tools, as well as wider compatibility with movie editing programs. Tiffen Dfx produces effects like those created by the company’s optical glass filters, with the latest version 4 adding 12 extra ‘filters’ to the menu system, including the company’s new Pearlescent and Satin diffusers. Read more

Articles: Digital Photography Review (dpreview.com)

 
Comments Off on Tiffen adds more filters, looks and faster processing with version 4 of its Dfx software

Posted in Uncategorized


Three Tips for Being Ready to Shoot Faster so you Never Miss a Shot

11 Jul

We’ve all heard one of the cornerstones of making better photographs is to slow down; be deliberate and take your time. This is very true. In no way am I advocating not being purposeful in your shooting. However, sometimes there are situations when the difference between getting a good image, instead of a blurred and washed out frame, is separated by only a few precious seconds. This is especially true when it comes to working in action filled situations like sports or street photography, but it can also be just as easy to miss moments in nature and landscape photography if you go into situations ill prepared.

Here are three tips that can improve your reaction time and make you more ready to obtain quality images for processing when you find yourself in those “shoot from the hip” scenarios.

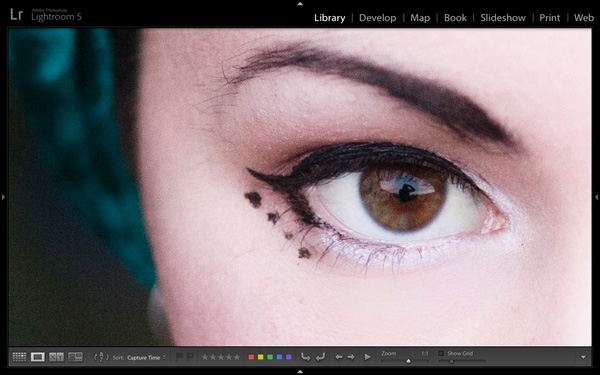
Being Ready to Shoot Faster – Never Miss a Shot

Be Self Aware

Knowbeforeyougo

“Know thyself.” No, Socrates wasn’t a photographer (though I’m sure he would have been awesome). In this case, the saying of “know thyself” means becoming aware of your surroundings more so than having a deep introspective understanding of your own self, although that’s a good thing to have, usually. We exercise this on a daily basis, albeit almost unconsciously. You notice a stain on your shirt, or you see the little boy chasing a ball towards the street, or you see a dark alley that’s just a little too dark to walk down alone. You can incorporate this same inherent awareness into your photography to make you a faster shooter.

Here’s an example: Let’s say you find yourself taking an afternoon to work on your street photography. When you first begin your expedition, it’s very bright outside. You are probably still able to shoot at a reasonably fast shutter speed and low ISO. As the evening starts giving way to night, there is of course less available light. So, a good idea would be to begin thinking about bumping up your ISO so that you can maintain the same exposure settings. Or alternatively, slowing down your shutter speed or increasing the size of your aperture (remember, low F-number means a bigger opening and more light into the lens such as f/2.8). Keep in mind however, that a higher ISO will introduce more noise into your final image, but it will have less of an overall impact than changing the shutter and aperture settings.

In photography, your surroundings are in a state of constant flux. So, to be a good photographer, you must be aware of the changes in your surroundings and mould yourself the best you can in order to produce consistent and quality work. This means learning to understand what is happening around you, whether it be: changing lighting conditions, approaching weather, wind, the presence or absence of people and objects, – the list goes on indefinitely. Anticipate what is going to happen next and make adjustments now, to save time later.

Shoot Comfortably

This would seem to go without saying, but you still see many photographers looking down right uncomfortable or awkward while they’re out shooting. Sadly, the majority of the pain is self-inflicted. To shoot faster and to be ready for the shot when the time is right, your camera must be available for use at a moments notice without restricting your movement or causing discomfort. One of the best ways to make this happen is to have your camera suspended from a quality camera strap. Camera straps, like most things, can become a very personal item for new and seasoned photographers alike. Don’t buy a strap because its got pretty flowers embroidered on it or because its made from the latest space age whatever-foam. Do a quick search for “camera strap” here on dPS and you will find a large number of reviews and write-ups of great camera straps. But don’t stop there. Shop around, read reviews, ask your photographer friends and sift camera forums. Being able to comfortably retrieve your camera quickly is key to not missing great images.

Have a budget? Most of us do, even more of us can’t afford to spend thousands on the latest lens or camera body that we dream of owning. Luckily, the majority of the accessory market is crammed with makers competing to sell you their wares. It’s easier than ever to strike a balance between what you need and what you can afford. If you can, have more than one camera strap in your kit so you can choose what fits best for a particular outing.

Badstrap

Prepare Beforehand

This is the big one, yet many people don’t seem to understand that preparation is golden. A close cousin to situational awareness, research and preparation prior to any photo work should become second nature and will pay huge dividends. It will also make you a faster shooter and help to prioritize your workflow, not to mention make you appear more competent as a photographer.

Preparedness

Know what you’re walking into beforehand and prepare accordingly. Are you going on a hike? Find out what wildlife and plants are native to the area and pack your bag with long lenses so you can get close to your subjects from a distance. Travelling abroad? Be sure to read up on the local attitudes towards photography before you start snapping away to avoid any awkward confrontations or worse. Of course, the most unpopular, but useful, aspect of being well prepared is practice, practice, pactice. Practice, and then practice some more. Want faster and more smoother lens changes? Practice at home, so you lose less time in the field and have fewer fumbles. Practice finding your camera adjustment buttons without looking. This will save you loads of time and frustration when you find yourself shooting at night. If you haven’t figured it out by now, the key word here is practice. Practice everything and you will be amazed at how much easier quicker most things suddenly become.

Do you have any other tips for shooting faster and being ready? Please share them in the comments below.

The post Three Tips for Being Ready to Shoot Faster so you Never Miss a Shot by Adam Welch appeared first on Digital Photography School.


Digital Photography School

 
Comments Off on Three Tips for Being Ready to Shoot Faster so you Never Miss a Shot

Posted in Photography


Faster glass: Sony RX100 III First Impressions Review

16 May

RX100-III_Right-1200.png

Few compact cameras have garnered as much attention as the Sony Cyber-shot RX100 and RX100 II. Sony had managed to squeeze a much bigger sensor into cameras only a little larger than the Canon S-series enthusiast compacts. The RX100 III continues the tradition by adding a wider, faster 24-70mm F1.8-2.8 lens and a built-in, pop-up EVF. Along with a 20MP 1″-type sensor, does the RX100 III remain the ultimate compact for enthusiasts? Learn more in our First Impressions Review

News: Digital Photography Review (dpreview.com)

 
Comments Off on Faster glass: Sony RX100 III First Impressions Review

Posted in Uncategorized


Smaller, faster … better? Canon G1 X Mark II review

08 May

gx1_ii.jpg

The Canon PowerShot G1 X Mark II is an ambitious product that addresses some of the shortcomings of its predecessor by adding a 24-120mm F2.0-3.9 lens, faster AF system, tilting LCD, and 5.2 fps continuous shooting. Its 1.5″-type CMOS sensor also allows for image quality that should rival consumer or midrange interchangeable lens cameras. But do these improvements make the G1 X Mark II the large-sensor compact for enthusiasts? Read full review

News: Digital Photography Review (dpreview.com)

 
Comments Off on Smaller, faster … better? Canon G1 X Mark II review

Posted in Uncategorized


Nikon 1 V3 offers improved AF system and faster continuous shooting

13 Mar

V3_10_30_PD_front.png

Nikon has announced the Nikon 1 V3, the latest addition to the company’s mirrorless lineup. The V3 sports a new 18.4MP 1″-type CMOS sensor that lacks an AA filter, but has on-chip phase detection that covers nearly 100% of the frame. The V3 can now shoot at 20 fps with continuous AF, and 60 fps with single AF. Other features include twin dial control, a tilting 3-inch touchscreen LCD, manual exposure control, 1080/60p video, and built-in Wi-Fi. Something that’s disappeared since the V2 is an electronic viewfinder, which is now an optional extra (depending on region). Read more about the V3.

News: Digital Photography Review (dpreview.com)

 
Comments Off on Nikon 1 V3 offers improved AF system and faster continuous shooting

Posted in Uncategorized


Canon PowerShot G1 X Mark II adds faster lens and AF to big-sensor body

12 Feb

HR_G1X_MARKII_BLACK_3Q_CL.png

Canon has announced the long-awaited follow-up to its PowerShot G1 X large-sensor compact: the G1 X Mark II. The G1 X II improves upon its predecessor in many ways. It’s smaller, features a faster 24-120mm equivalent F2.0-3.9 lens (with closer focusing distances), a 31-point AF system, dual lens rings, a touchscreen LCD that can tilt upward by 180°, and Wi-Fi with NFC. One added trick is that the G1 X II can shoot at 3:2 or 4:3 with the same field-of-view. The catch? No more optical viewfinder (though an EVF is optional). It will be available in April for $ 799.

News: Digital Photography Review (dpreview.com)

 
Comments Off on Canon PowerShot G1 X Mark II adds faster lens and AF to big-sensor body

Posted in Uncategorized


Make Lightroom Faster by Using DNG

03 Oct

Using DNG in Lightroom

A question about Lightroom that often arises is how to make it run faster. On my computer the biggest bottleneck comes when I’m looking at images in the Library module’s Loupe view or in the Develop module. Even images for which Lightroom has created 1:1 previews can take a few seconds to render properly. This may not sound much, but it’s annoying when flicking through images trying to decide which ones to process. It’s even more frustrating when zooming in 100% to check details which are important to me, such as that the eyes are in focus in portraits (above).

Luckily, there’s a relatively easy fix – and it doesn’t involve upgrading your computer or adding RAM (although those things may help). You can put it into action without spending money, and you should see a benefit regardless of how low- or high-spec your computer is.

Fast Load Data

The key is to convert your Raw files to the DNG format. You may not like the sound of it (I’ll explore some of the pros and cons later on the article) but it really does help. Why? It’s all to do with something called Fast Load Data – a partially processed preview of the image that enables Lightroom to render previews faster than it can from a non-DNG Raw file or a DNG file without Fast Load Data.

The net result of converting your Raw files to DNG and including Fast Load Data is that it enables Lightroom to rapidly display previews of your images. That means less time waiting and less frustration for you.

Converting to DNG

Using DNG in Lightroom

The best time to convert your Raw files to DNG is when you import them from your camera’s memory card. To ensure you get the full benefit of using DNG, make sure you go to the File Handling tab in Preferences and tick the Embed Fast Load Data box (above). Do this before you convert any Raw files to DNG, otherwise you will miss out on the speed increase that DNG can give you.

These are the key steps to follow during the import:

Using DNG in Lightroom

  • Select the Copy as DNG option in the Import window (above). This tells Lightroom to copy the Raw files from the memory card to the specified folder on your hard drive, converting them to DNG as it does so.

Using DNG in Lightroom

  • Set Build Previews to 1:1 in the File Handling panel (above).

Using DNG in Lightroom

  • After the import, go to the Catalog panel and select Previous Import. Then go to Library > Validate DNG files. Lightroom checks the files you have just imported and converted to DNG to ensure they are not corrupted. Any corrupted files are placed in a Temporary Collection that appears in the Catalog panel. I’ve yet to see a corrupted DNG file, so I don’t think it happens often.

Other pros and cons of DNG

If you read around on the topic of DNG you will find that opinion varies widely as to whether it is good idea to convert your Raw files to the format.

Note that some Leica and Hasselblad cameras use the DNG format already – so if you are lucky enough to own one of those then the discussion is irrelevant. There’s also at least one Pentax camera that gives you the option of using either DNG or Pentax’s own Raw format (.PEF). If you own one, selecting DNG saves you having to do it at the import stage (if you choose to use DNG).

Bear in mind that camera generated DNG files don’t contain Fast Load Data – only DNG files created by Adobe software do so.

First, the case against using DNG:

  • It takes longer to convert your Raw files to DNG than it does to simply copy them. This is true – but as long as you’re happy to go away and do something else while your computer gets on with it, it won’t be much trouble. I often leave mine running overnight, especially if I have a lot of images to import and convert.
  • Not all applications open DNG. If you ever use, or think you may use, your camera maker’s proprietary Raw conversion software (such as Canon’s Digital Photo Professional) you should probably stick with your camera’s native Raw format, as the majority of these programs don’t recognise DNG. Check the documentation if you are unsure.

Using DNG in Lightroom

Using DNG purely to increase Lightroom’s speed is little use if you don’t use 1:1 previews. By default Lightroom discards 1:1 previews after 30 days (you can change that under the File Handling tab in Catalog settings), so even if you tell Lightroom to create 1:1 previews when you import your images, they will eventually be deleted by Lightroom. Not sure if an image has a 1:1 preview? Just select the image (or images) and go to Library > Previews > Build 1:1 Previews (above). Lightroom will build 1:1 previews for any selected images that don’t currently have them.

Now, some other benefits of DNG:

  • DNG files are smaller than other Raw formats. Converting your Raw files to DNG upon import reduces the amount of space they take up on your hard drive by up to 20 percent. That could be useful, especially for high volume shooters.
  • You may own a new camera with Raw files that aren’t recognised by your version of Lightroom or Adobe Camera Raw (ACR) if you are using Photoshop (not all readers will have upgraded to the latest versions). In this situation you can use Adobe’s free DNG Converter application to convert them to DNG. Adobe usually updates the DNG Converter to work with files from new cameras before Lightroom and ACR.
  • Embedded file verification. A DNG file contains a checksum that enables Lightroom to check if the original source data is corrupted. DNG is the only Raw file format that does so. It means that you can check your images after you have converted them to DNG to make sure there are no issues with corruption.

Mastering Lightroom Book One: The Library Module

Using DNG in Lightroom

My latest ebook Mastering Lightroom Book One: The Library Module is a complete guide to using Lightroom’s Library module to import, organise and search your photo files. You’ll learn how to tame your growing photo collection using Collections and Collection Sets, and how to save time so you can spend more time in the Develop module processing your photos.

Post originally from: Digital Photography Tips.

Check out our more Photography Tips at Photography Tips for Beginners, Portrait Photography Tips and Wedding Photography Tips.

Make Lightroom Faster by Using DNG


Digital Photography School

 
Comments Off on Make Lightroom Faster by Using DNG

Posted in Photography


How to Make Your Photo Experience on the Web Better and Faster

07 Jun

As a fan of the new Flickr redesign, I’ve been particularly impressed with how fast so many images load — an impressive feat given the new image rich, justified, mosaic view, with infinite scroll. Seeing more images, faster, invites more engagement and makes the site a more compelling place to visit. I think Flickr engineers have done a lot of optimizing behind the scenes and are continuing to tweak the site in new ways to make it even faster.

There are some users in the Flickr Help Forum, however, who moan about the newer version of Flickr being slow for them. While it makes some sense to me that a more image intensive design would impact speed, as fast as the new Flickr is for me, (on both my own account and other test accounts), I think there is more to it than just that.

In a new image intensive internet, companies can’t always design and optimize for the lowest common denominator. At some point engineers and designers must just let the Internet Explore 6.0 crowd go. If they haven’t upgraded by now, it now becomes their problem not yours.

Staying on top of the most current technology can help optimize your internet experience. Some of these things that I’m doing are free and some cost money. I do understand that not everybody has the money to just go out and buy a new computer and am not suggesting that it’s your responsibility to do all of these things. These are just some ideas that might help you make your internet experience better and faster.

1. Upgrade your computer. My rule is that I upgrade my primary computer (a MacBook Pro) every three years. As a heavy computer user (and as someone who makes money from my photography and must consider time as a resource in that), this is a no brainer. If it’s been over three years, and you can afford it, consider buying a new machine. Get a Mac. ;)

2. Upgrade your computer’s operating system. I’m currently running the latest version of Apple’s OS Mountain Lion, Mac OS 10.8.3 10.8.4. Make sure you are using whatever is the most current OS for your machine.

3. Consider your internet connection. Are you getting the fastest possible speeds? Years ago when I was on DSL, it was announced that they were putting U-verse fiber into the neighborhood. I was the first guy to jump on that and make sure I got it. Survey each of the internet service providers in your neighborhood and find out what their upload/download speeds are. Don’t stop there though. Also make sure you are on the fastest plan that they offer. The U-verse plan that I have is their Max Turbo and provides 24 Mbps download speeds. Consider the value of your time and make sure you are on the fastest plan possible from your ISP.

4. FREE! Make sure you are running the latest version of Google’s Chrome browser. Once you finally get rid of IE, Safari or Firefox, you will learn to love Chrome — it’s faster and better.

5. FREE! Change your DNS settings to Google’s public DNS, 8.8.8.8 or 8.8.4.4 A lot of people don’t know about this trick, but it will dramatically speed up your internet. Google gives you instructions on how to do this here.

6. If you use your computer remotely a lot (like I do) in places where you don’t always have good, fast, wifi, consider getting a Sprint 4G card. Heavy computer internet surfing takes a lot more bandwidth than cell phones. Using your cell phone to tether to your computer probably works if you just need an occasional log in (I use FoxFi for this on my Android phone which is free) — but this data counts towards your bandwidth limits. Sprint is the only current wireless provider that I’m aware of that offers truly unlimited, unthrottled mobile bandwidth in the U.S. Their 4G service, is a bit more expensive, but is generally speaking very reliable and very fast.


Thomas Hawk Digital Connection

 
Comments Off on How to Make Your Photo Experience on the Web Better and Faster

Posted in Photography


Aptina creates faster 14MP 1″ sensor capable of 80 fps and 4K video

18 Apr

Logo.png

Sensor maker Aptina has announced a 14MP 1″-type sensor for use in mirrorless and video cameras. The AR1411HS enters the range alongside the existing 10MP model and offers even faster shooting capabilities. The 14MP chip can shoot full-resolution images at up to 80 fps and can shoot either 4K or Quad HD (allowing high quality 4:2:2 color) at up to 60 fps. The company suggests the 1″ format (actually 13.2 x 8.8mm) offers an effective balance of image quality, price and capabilities to make a sensible middle ground between the tiny 1/2.3″ sensors in most compacts and the APS-C sensors used in many mirrorless models and DSLRs. 

News: Digital Photography Review (dpreview.com)

 
Comments Off on Aptina creates faster 14MP 1″ sensor capable of 80 fps and 4K video

Posted in Uncategorized


Retouch images faster with new Content-Aware Patch

14 Jan

Bringing imaging magic to Adobe® Photoshop® CS6 software, the acclaimed Content-Aware family of tools lets you retouch or recompose images with astonishing ease, control, and speed. One of the newest of these intelligent editing tools, Content-Aware Patch, was just introduced in Photoshop CS6.

What is Content-Aware Patch?

Content-Aware Patch is designed for times when you want to remove unwanted content from a photo and then replace it with a precise and seamless patch. The tool automatically creates the patch for you, but only after you’ve shown it exactly which area of your image you’d like it to sample from.

And it uses Content-Aware technology to blend the patch into the surrounding area.

Patching challenges

The Content-Aware Fill option introduced in Photoshop CS5 is a great choice when you want to remove unwanted content from an image. Once you’ve deleted your selected content, it can analyze the surrounding pixels and then fill the space with content that matches those pixels. In some cases, though, Content-Aware Fill doesn’t return the desired results. For example, it can fill the space with poorly matched content if the area surrounding the deleted content lacks consistency or a discernible pattern.
How does Content-Aware Patch solve the problem?

Content-Aware Patch gives you superior results by letting you determine the area it will sample from to create your patch. For example, if you want to remove an object from a tight row of similar objects, you can tell Content-Aware Patch to sample from a nearby background area to create a precise and natural-looking patch.

Retouch with greater precision

Content-Aware Patch gives you a fast and easy way to perfect your images. Simply delete the content you don’t want, direct the tool to the patch material you think will work best, and then watch as it uses Content-Aware technology to magically create a stunning result.

Any suggestions, ideas? Feel free to comment on this article!

Back to Top

BlogPhoto

 
Comments Off on Retouch images faster with new Content-Aware Patch

Posted in Equipment