RSS
 

Posts Tagged ‘faster’

How Playing With Manual Mode Can Help You Learn Exposure Faster

21 Sep

I have a disclaimer before I even begin this article. I shoot much more often in Shutter or Aperture Priority than I do in Manual mode. I save Manual mode specifically for studio shooting, for some tripod work where I have a lot of time to get the settings perfect, or for situations where the lighting is very consistent.

Subways in Motion, New York

Learn Manual Mode to better understand exposure

However, I think it is immensely important for you to try to periodically shoot in Manual early on, especially if you’re just learning. Take a look at your camera. How many buttons does it have on it? New cameras these days can have 20 or more buttons on them all doing different things, but in reality, there are only three settings that make the photograph: the ISO, the Shutter speed, and the Aperture.

Central Park, New York

Before you even go out, turn your camera to Manual mode and figure out the fastest and most comfortable way to change each of these settings. You’re going to do a lot of that in Manual.

Understanding shutter speed

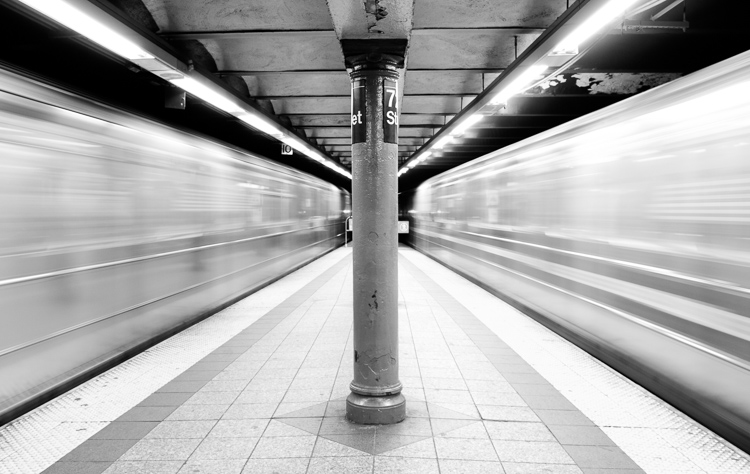
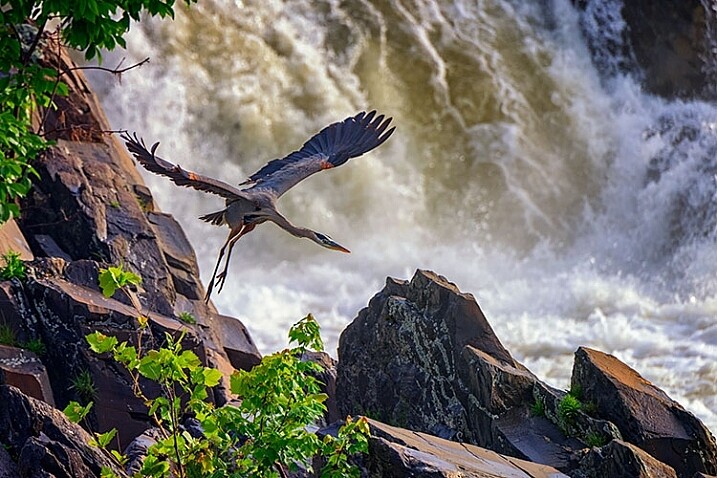
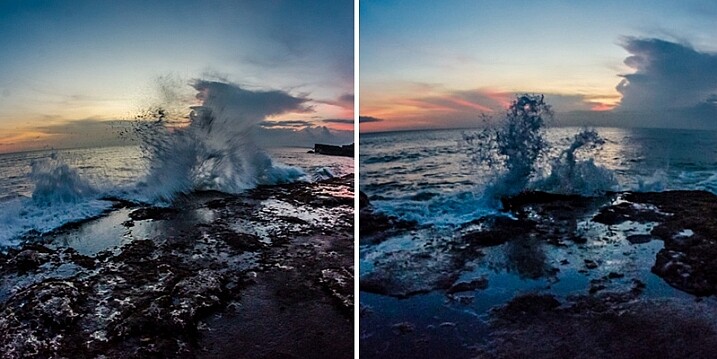
The next step is to understand a couple of important points. The shutter speed always needs to be at least one over your focal length to offset handheld camera shake. So if you are at 50mm (on a full-frame camera), then your shutter speed needs to be 1/50th of a second. To freeze the motion of moving subjects such as people, I like a shutter speed of around 1/250th or 1/320th of a second, but you can get away with a little slower than that. You will need a faster shutter speed to freeze faster moving subjects like cars, etc.

Understanding aperture

For your aperture, the lower the number (such as f/2.8), the less depth of field and more bokeh there will be. This is counterintuitively called a large aperture because the size of the aperture hole in the lens is actually larger. This will also let in a lot of light due to the size of the hole. A small aperture (such as f/11 or f/16) will create a much larger depth of field, but the tradeoff is that it will let in less light.

Waiting in Grand Central Terminal, New York

Understanding ISO

The ISO is the sensitivity of your camera’s sensor to light. The higher the number, the more noise that an image will have, but the more sensitive to light it will be. Newer cameras can make beautiful photos up to ISO 3200 or even 6400, but older or entry level cameras can have a lower limit of around ISO 1600 (test your camera to find your comfort zone with its upper ISO limits).

If you want a lot of bokeh in your image, and you set your lens to f/2.8, that means the camera will be letting in so much light that you will usually want a low ISO. However, if you are shooting street photography, fast moving subjects, you want a shutter speed of 1/250th or faster, and/or a smaller aperture such as f/11 – unless you are in bright sunlight, you will often have to raise your ISO to be able to let in enough light to use those settings. In general, if it’s darker out, then your ISO will often have to go up unless you are on a tripod.

Now play with them

Those are the main considerations that you need to learn; now just walk out the door and mess around with your settings. Screwing around with the settings in Manual is the fastest way to start to learn them well. Start off with your aperture. How much depth of field do you want in the image? Once you pick that, then take a guess at the shutter speed and ISO and see how it looks. View the back of the screen, look at the histogram, and zoom in on the details.

If an image is too dark, then slow the shutter speed, raise the ISO, or use a larger aperture. If the main subject is too blurry, then speed up the shutter speed.

Couple in Sheep Meadow, New York

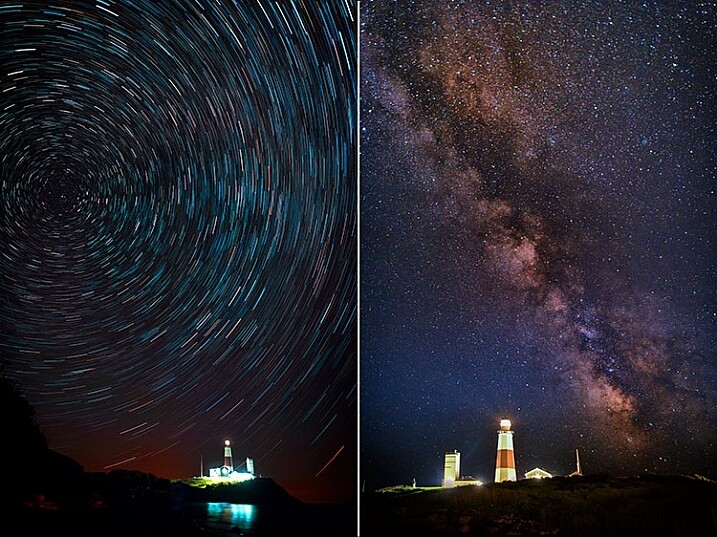
Try different lighting scenarios

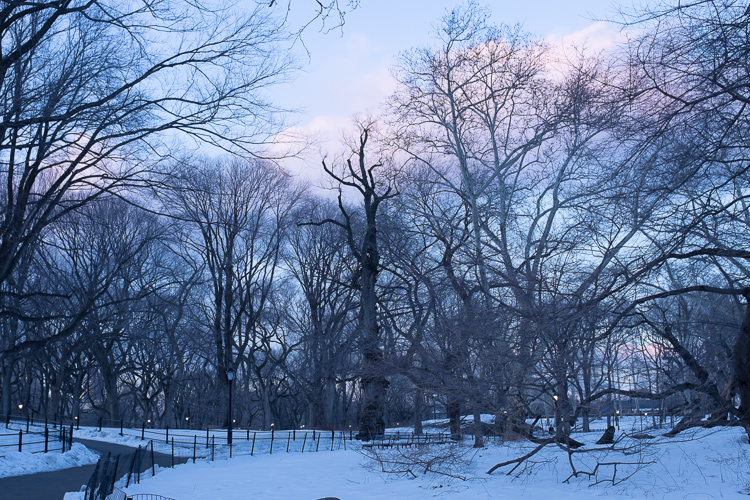
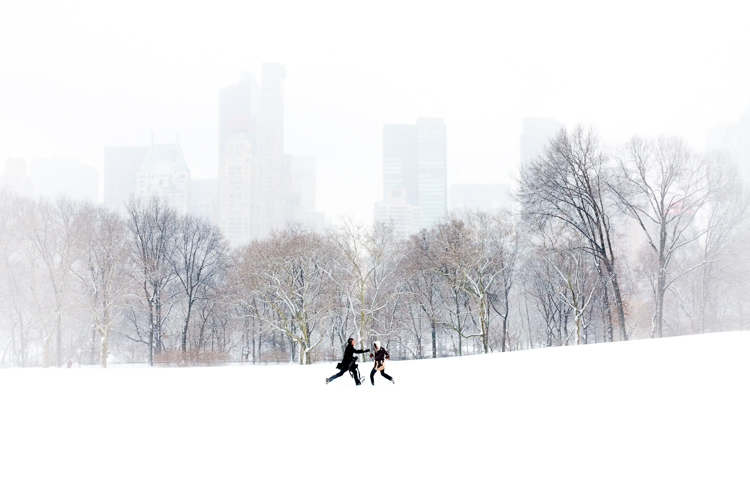
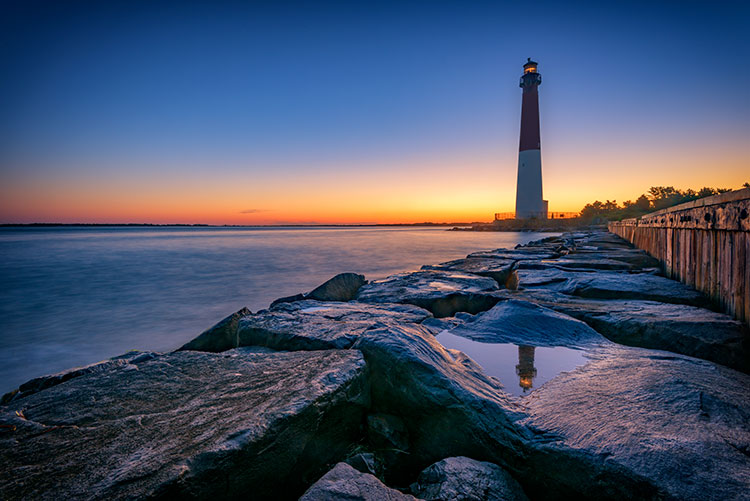
Explore different lighting situations. Paying attention to lighting is the first thing that you should do before you take a photograph. How strong is the light? Where is the sun or artificial light in relation to what you are shooting? The strength of the light will be the number one factor in helping you figure out your settings. From there, you can figure out the depth of field that you want and if you need to freeze the motion of your subjects or not.

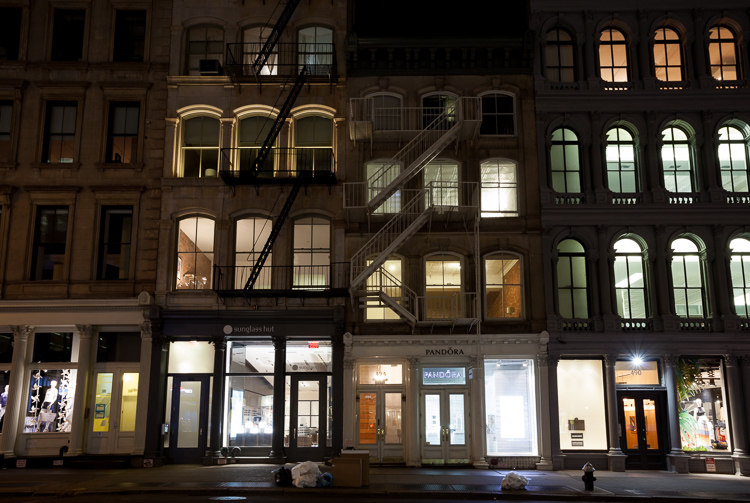
Get comfortable walking from one lighting situation to another. If you walk from the sun into the shade, what will you need to change to expose the scene correctly? Pay attention to scenes with both bright highlights and darker shadows. With these scenes you need to figure out which is most important to expose correctly. If the shady area is more important, then let in more light. If the highlights are the most important, then darken the scene so they are correctly exposed and the shadows are closer to black. If you are in sunlight, learn how your settings will change if you are shooting into the sun versus shooting away from it.

Smokestack and Graffiti, New York

Go out in the morning, in the middle of a sunny day, at dusk, or in light rain. Learn how your settings change in each of these lighting situations.

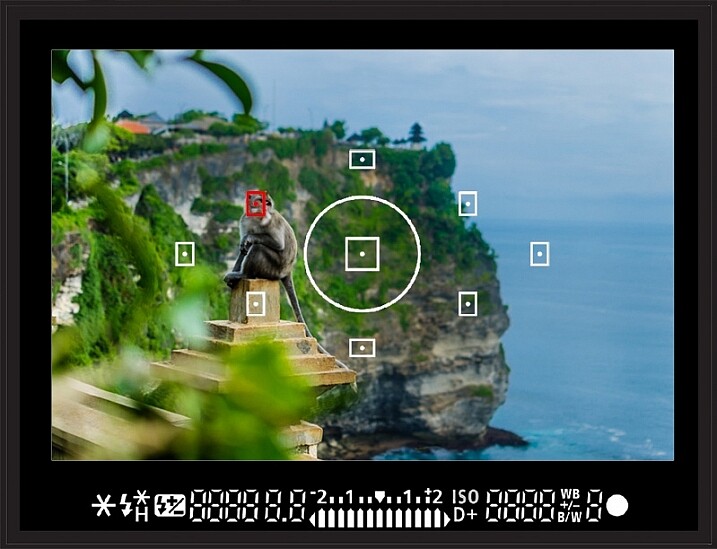
Most digital cameras will show you the light meter reading for what they believe will correctly expose your image. For instance, if you choose the three settings, the light meter might show you that it thinks you are underexposed by one stop (look in your viewfinder for a + 0 – scale, press the shutter button part-way down to activate it). Keep an eye on this because it can help you, but also try to not pay too much attention to it. The point of Manual shooting is to learn the numbers yourself without relying on the camera. You can rely more on the camera later.

Conclusion and practice

The only way to learn these things is to experiment and do them. Shooting in Manual at first will make you screw up much more than in Shutter or Aperture Priority, but a handful of dedicated days of doing this will have you understanding the settings in a much more intuitive way. Then if you decide to shoot in Shutter or Aperture Priority, you will have a strong understanding of how to use those modes to the best of their ability.

SoHo at Night

googletag.cmd.push(function() {
tablet_slots.push( googletag.defineSlot( “/1005424/_dPSv4_tab-all-article-bottom_(300×250)”, [300, 250], “pb-ad-78623” ).addService( googletag.pubads() ) ); } );

googletag.cmd.push(function() {
mobile_slots.push( googletag.defineSlot( “/1005424/_dPSv4_mob-all-article-bottom_(300×250)”, [300, 250], “pb-ad-78158” ).addService( googletag.pubads() ) ); } );

The post How Playing With Manual Mode Can Help You Learn Exposure Faster by James Maher appeared first on Digital Photography School.


Digital Photography School

 
Comments Off on How Playing With Manual Mode Can Help You Learn Exposure Faster

Posted in Photography


Faster flagship: Hands-on with the Fujifilm X-T2

07 Jul

Faster flagship: Hands-on with Fujifilm X-T2

When the X-Pro2 was announced earlier this year, it seemed only a matter of time before Fujifilm unveiled a replacement to its ‘other’ flagship, the X-T1. The just-announced X-T2 boasts the company’s newest 24MP sensor, an AF joystick and a significant speed boost.

Faster flagship: Hands-on with Fujifilm X-T2

Externally, the X-T2 looks virtually identical to the older X-T1, which is no bad thing. Fujifilm got a lot right in the X-T1, and its replacement doesn’t change the basic recipe. The new camera is about 70g heavier, but side-by-side, you’d be hard pushed to tell it apart from its predecessor.

Faster flagship: Hands-on with Fujifilm X-T2

The traditional Fujifilm top-plate, with its array of dials. From left: ISO > Shutter speed > exposure compensation.

One of the very few ergonomic differences between the X-T2 and its predecessor is the omission of a movie recording button from the upper-right of the top plate. This is made up for (sort of) by the addition of a movie recording position on the main exposure mode dial, but we’re not sure why Fujifilm would remove this button completely. 

Since we’re looking at the hot shoe, it’s worth mentioning that the camera can sync with flashes at 1/250 sec. The overall shutter speed range on the X-T2 is 30 – 1/8000 sec with the mechanical shutter, with a top speed of 1/32000 when you switch to the e-Shutter.

Faster flagship: Hands-on with Fujifilm X-T2

Keen eyes will spot the new movie recording position on the mode dial (upper left in this image). The X-T2 offers by far the most advanced movie recording specification of any Fujifilm camera, including 4K (3840 x 2160) video, which to be honest, was a major surprise when we first saw the camera’s spec sheet.

Traditionally a major weak point of Fujifilm’s X-series it seems like the company is really stepping up its efforts when it comes to video.

The X-T2’s electronic viewfinder appears to be unchanged from the excellent 2.36 million-dot, 0.5″ OLED found in the original X-T1, which is absolutely fine by us. 

Faster flagship: Hands-on with Fujifilm X-T2

A predictable – but very welcome – addition to the X-T2 is a dedicated AF joystick (shown here just beneath the ‘Q’ button). Inherited from the X-Pro2, this joystick makes placing the AF point extremely fast and easy – something that could definitely not be said of previous X-series cameras (and many mirrorless cameras in general). 

A less obvious change to the X-T2’s rear controls is a slightly longer travel and more positive tactile response from the buttons surrounding ‘Menu/OK’. These controls on the X-T1 were disconcertingly mushy. On the X-T2, when you push a button, you know it.

Speaking of autofocus, the Hybrid AF system on the X-T2 has 325 points in total, 169 of which are phase-detect. Fujifilm says that the data readout speed has been doubled compared to previous (undisclosed) models and that all focus points are sensitive to -3EV.

Faster flagship: Hands-on with Fujifilm X-T2

Speaking of tactile feedback, we were really hoping that the X-T2 would feature a touchscreen, like its baby brother the X70. No such luck. But at least it’s partially articulating – unlike the X-Pro2’s LCD. 

Faster flagship: Hands-on with Fujifilm X-T2

As well as tilting straight out, the rear screen can also be folded out to 45 degrees….

Faster flagship: Hands-on with Fujifilm X-T2

…and hinged sideways!

Faster flagship: Hands-on with Fujifilm X-T2

The major benefit of this kind of articulation is that it makes waist-level shooting easy even in the vertical orientation. 

Faster flagship: Hands-on with Fujifilm X-T2

Twin card slots can be found under a sprung door located on the X-T2’s grip. A rubber gasket seals the slots against dust and moisture incursion. 

Faster flagship: Hands-on with Fujifilm X-T2

The X-T2’s NP-W126S battery can be found nestled inside the grip, accessible from a door on the base of the camera. According to Fujifilm, a single battery should be expected to last for approximately 340 images. Not great, but typical for a mirrorless interchangeable lens camera.

You can’t quite see in this shot, but one deceptively major change in the X-T2 compared to its predecessor is that the tripod socket on the camera’s base has been centered to the lens axis, meaning that on most tripods, you won’t need to unscrew the camera from the tripod plate before you can access the battery compartment – a point of occasional frustration with the X-T1. 

Faster flagship: Hands-on with Fujifilm X-T2

If you need greater endurance (or you just have big hands) you might be interested in the optional VPB-XT2 grip. This grip takes two additional batteries, making three in total, extending the camera’s total battery life to more than 1000 shots.

There’s a ‘boost mode’ on the camera which uses the grip, increasing burst shooting from 8 to 11 fps (with the mechanical shutter), reducing shutter lag and blackout times and permitting up to 30 minutes of 4K video capture. Do note that if you want continuous autofocus, you’ll need to drop the frame rate down to 5 fps.

Faster flagship: Hands-on with Fujifilm X-T2

The two additional batteries slot into a neat little tray which fits into the grip like so. Here you can also see a plug that accepts a 9V power adapter, so the grip can be charged separate from the camera.

Faster flagship: Hands-on with Fujifilm X-T2

Any self-respecting battery grip offers duplicated vertical controls, and the VPB-XT2 is no different. Here you can see the duplicated shutter button, rear control dial (there’s another one on the front) and secondary AF positioning joystick. 

Faster flagship: Hands-on with Fujifilm X-T2

The X-T2 ships with a dedicated compact flashgun, the EF-X8. This can be used to command a group of external flashguns wirelessly – always a welcome feature on high-end cameras.

A new high-end flash – the EF-X500 – will also be available when the X-T2 launches. It has a guide number of 50m at ISO 100, supports high speed sync, includes a video lamp and covers a range of 24-105mm (or down to 20mm with the included wide panel). It’ll be priced at $ 449 when it ships in September.

Faster flagship: Hands-on with Fujifilm X-T2

The Fujifilm X-T2 will retail for $ 1599 body-only or with an 18-55mm F2.8-4.0 lens for $ 1899, and will be available in September. We’re headed to New York soon to interview senior Fujifilm executives – what should we ask them? Let us know in the comments. 

Articles: Digital Photography Review (dpreview.com)

 
Comments Off on Faster flagship: Hands-on with the Fujifilm X-T2

Posted in Uncategorized


3 Ways to Simplify and Learn Photography Faster

30 Jun

It’s not always easy to be a photographer, seeing all of the great photo opportunities around us, and wanting to capture them all. Recently, I was working with a student of mine, and she wanted to know how to handle changing settings quickly from one situation to another.  Her example was trying to go from photographing landscapes, to trying to focus on a bird or other wildlife that may quickly enter the scene. While some seasoned photographers may be ready for a situation such as this, it’s certainly not easy, and for someone just learning, I would argue that it shouldn’t be attempted at all.

24-120mm. Shot at 120mm, 1/160, f/4, ISO 1400. Knowing how the lens behaves at both ends of the zoom, I knew I could use this lens for wide angle shots in close, but zoom in as the flower girl was coming down the aisle and still get an interesting shot.

24-120mm, shot at 120mm, 1/160, f/4, ISO 1400. Knowing how the lens behaves at both ends of the zoom, I knew I could use this lens for wide angle shots in close, but zoom in as the flower girl was coming down the aisle and still get an interesting shot.

While many of the camera manufacturers want to make photography sound easy (anyone remember “So advanced, it’s simple”?), the fact is, photography is a craft, that despite the advances in technology, takes some time to master. Different photographic situations call for different settings, different lenses, or even a completely different approach to the subject matter. If you’re a hobbyist with only one camera, it can be impossible to be ready for all of the possibilities as they happen.

So here are three ways to keep it simple while you’re learning photography, and stop the overwhelm.

#1 – Focus on one subject at a time

I’m a strong advocate for keeping things simple. First off, if you’re planning to photograph landscapes, wildlife, or portraits, stick with that one goal.  It is easy to get distracted by other subjects that come along. Those opportunities can seem like gold when they pop up, and they can be, but if you’re already set up to shoot a landscape photo at ISO 100, f/16 aperture, and 1/20th shutter speed, quickly switching to settings suitable for capturing a bird in flight is not an easy process. It will likely end in you being frustrated, capturing photos that don’t quite meet your expectations, or worse, don’t come out at all.

Even now, 20-plus years after beginning my photography career, I try not to do too much at once with a camera. I focus on what my goal was when I first decided to pick up the camera and head out. If I’m planning on photographing a landscape at sunset, that’s what I do. The only time I will try to be ready for two separate subjects, is when I have two cameras. For instance, if I’m photographing a landscape, but there are waterfowl nearby and I want to be ready for that, I have a second camera set up with a telephoto lens, so I can grab it and try and get the shot. Even this requires me to at least temporarily put my initial subject, the landscape, aside for a bit.

Wildlife image taken using a fast shutter speed and a telephoto lens.

This shot of the blue heron was taken with a 400mm lens, using continuous AF, and 1/1250 shutter speed.

The image of the waterfall (below), and the image of the great blue heron (above), were both taken at the same location.  However, for the shot of the waterfall, I needed to use a neutral density filter to slow down the exposure. There is no way I’d have been able to remove the filter, and be ready to photograph the heron, even if both shots could have been captured with the same lens. Not only would my shutter speed have needed to be drastically faster to stop the flight of the heron, I would also have needed to use continuous AF to capture its flight sharply, while I always use one-shot AF when photographing landscapes.

Knowing there may be wildlife nearby, I mounted a Nikon 80-400mm lens on one camera (on a strap on my shoulder), while I had a second camera with a shorter lens, set up on a tripod to capture the waterfalls. If I only had one camera, I would have needed to choose between one subject or the other, and then move on. Rare is the occasion when you can jump so quickly from one subject to a completely different one using only one camera.

Landscape image using a slow shutter speed and wide angle lens.

This shot was taken with a 16mm lens, using one-shot AF, and a 0.6 second shutter speed.

If you’re working with only one camera, don’t try to do too much.  Pick one subject and work that until you feel you’ve accomplished what you wanted, then move on to another subject. Yes, it’s difficult to be set up to catch a sunset and watch a beautiful snowy egret land nearby and start fishing, leaving you itching to try and catch it, but chances are it will fly away again while you’re still fiddling with your settings. Meanwhile, the sun is still setting, the color is fading, and you’ve likely missed a shot or two there as well.

#2 – Use only one lens

Back when I took my first photo course in college, my professor was adamant that each student use only a 50mm lens. I didn’t understand why at the time, but I do now. It’s important to understand how your lenses behave, so you’ll know which one is right for the job. As photographers, many of us become gear collectors, always wanting another lens, to allow us to photograph the way we saw another photographer do it. But before you start collecting lenses, it’s important to recognize what each lens can do for you, and to truly understand that, you’ve got to use each lens extensively.

Wide angle lenses expand perspective.

Using a wide angle lens, I was able to emphasize the ice in the foreground, while pushing the bridge to the background at the top center of the frame.

I currently have seven camera lenses in my kit right now. At any given time, there may be four or five in my camera bag when I’m out photographing, depending on what my planned subject is, or what contingencies I want to be ready for. But, as usually happens, it’s rare that most of those lenses will see the outside of my bag once I get where I’m going. While each situation is different, I often find that one lens will usually handle what I want to do when I get to a location. So unless it’s one of those rare times when a situation calls for both a telephoto and a wide angle look, usually only one of those lenses gets mounted on the camera. While in the above example I broke this rule and used two cameras with two different lenses, that is not usually the norm for me.

When you pull your camera out of the bag next time and select lens to use, stick with that one lens. Really get to know it. If it’s a zoom, shoot at only one end of it. The next time you use it, use the other end. Learn how to make that lens really sing. Find out what it’s really good for, and what it’s not good at. Do this with every lens you own, if you own more than one. When it comes time to purchase new glass, you’ll have a much better understanding of where your kit comes up short, and what you need to buy. In addition, you’ll also be building on my first point, focusing on one subject. Too often, new photographers miss opportunities because they are busy changing lenses because they think they need one over another. If changing lenses is not an option, you won’t waste time with it, and can focus on making great photos with whichever lens you find on your camera.

Telephoto lenses compress perspective.

Telephoto lenses compress perspective. Want to make the sun or moon look really big in relation to a building or structure? Back away from your subject a bit and use a telephoto lens to compress the perspective and distort the size relationship.

In the two images shown above, the same bridge can be found in both, and both shots were taken from roughly the same spot. One was taken with a 16mm lens, and the other, with a telephoto lens at 290mm. Wide angle lenses expand perspective, emphasizing the foreground and pushing background objects back, while telephoto lenses minimize foreground and tend to flatten perspective. Using only one focal length will also help you to compose more effective images. Zooms can at times make you lazy. Zooming from a wide angle to a telephoto lens changes the image profoundly, and it’s important to understand what effect that can have on your image.

Telephoto lenses compress perspective, while wide angle lenses enhance it, and each perspective communicates something different to the viewer. There are reasons to use both wide and telephoto lenses, but only working with them extensively will help you recognize the situations where each is most effective.

#3 – Don’t accessorize

For the lighthouse image- Shot at 16mm, f/16, 15 seconds, ISO 64. I simplified my composition down to two elements, the reflection in the foreground, and the lighthouse in the background. Knowing the lighthouse would be there regardless of where I stood or how I zoomed, I focused on getting the reflection right, and letting the rest of the composition fall into place.

Shot at 16mm, f/16, 15 seconds, ISO 64. I simplified my composition down to two elements, the reflection in the foreground, and the lighthouse in the background. Knowing the lighthouse would be there regardless of where I stood or how I zoomed, I focused on getting the reflection right, and letting the rest of the composition fall into place.

One of the great things about digital photography, and today’s technology, is the many cool new tools available to help with your picture-taking endeavors. It’s great to be able to connect to a camera from your smartphone, and do things such as time lapse or long exposures, but often times, these accessories are one more thing that can go wrong, or distract you from actually taking photos.

There are only three accessories that I use regularly. One is a time controller that plugs into my camera directly, second is a tripod, and finally, a set of neutral density and graduated neutral density filters, used to help control exposure. I didn’t even begin using the filters until a few years ago, more than 15 years into my photography career. Both images below used nothing more than a remote shutter release. In the case of the Milky Way image, on the right, I set my camera to manual for a 15 second exposure and used the remote release as I would the shutter button, simply to avoid touching the camera. For the image on the left of the star trails, while that becomes a bit more complicated in processing, in reality, it’s just a lot of 30-second exposures. I simply set my camera to continuous drive, and locked the shutter button on the remote down. Simple.

Minimize accessories

Even for images such as these, the only accessory I used was a time controller, with only the shutter button locked down.

It’s important, when learning photography, to focus on the basics – aperture, shutter speed, and ISO, and understand how they affect your images. It’s too easy to get caught up in all the bells and whistles and how cool they are, and forget that the end result is what matters. In my mind, if the accessory isn’t contributing in a way that affects the final image, then I don’t need to use it. I’m not saying that accessories are bad, or even unnecessary, but if you aren’t sure how to achieve a proper exposure yet, put off purchasing that shiny new toy, and really learn your camera.

I would even advise you to stay away from the special modes on your camera, such as HDR, or star trails mode (I do that manually in post-production), or multiple exposure mode. Yes, they can look cool, and do great things, but again, understanding the basics of exposure is paramount. If you don’t understand basic exposure, using the bells and whistles won’t help you make music.

I find that simplifying the process as much as possible helps me come away with the best images possible. What do you do to help simplify your photographic process?

googletag.cmd.push(function() {
tablet_slots.push( googletag.defineSlot( “/1005424/_dPSv4_tab-all-article-bottom_(300×250)”, [300, 250], “pb-ad-78623” ).addService( googletag.pubads() ) ); } );

googletag.cmd.push(function() {
mobile_slots.push( googletag.defineSlot( “/1005424/_dPSv4_mob-all-article-bottom_(300×250)”, [300, 250], “pb-ad-78158” ).addService( googletag.pubads() ) ); } );

The post 3 Ways to Simplify and Learn Photography Faster by Rick Berk appeared first on Digital Photography School.


Digital Photography School

 
Comments Off on 3 Ways to Simplify and Learn Photography Faster

Posted in Photography


Fujifilm launches Instax SP-2 with faster printing speeds

28 Jun

Fujifilm has announced a new and improved version of its Instax printer. The SP-2 follows on the SP-1 and comes with improved Wi-Fi connectivity and faster printing speeds, producing a print in 10 seconds rather than the previously required 16 seconds. Fujifilm says the SP-2 is also quieter than its predecessor. It prints a card-sized format at a 800 x 600 resolution and 320 dpi and uses 256 levels per color. The battery is charged via a microUSB port and the printer supports JPEG and PNG files. 

Fujifilm has also improved the accompanying SHARE app which is available for iOS and Android devices and now comes with custom filters as well as collage and split templates. It also allows for image transfer from social networks and the overlay of geographic and climate information onto your printed image. 

The Fujifilm SP-2 printer comes in Silver or Gold body colors and will start shipping in mid-July. The printer is priced at $ 200 and the Instax Mini film that is used as printing media will set you back $ 20 per pack of 20 sheets. More information is available on the Fujifilm website.

Articles: Digital Photography Review (dpreview.com)

 
Comments Off on Fujifilm launches Instax SP-2 with faster printing speeds

Posted in Uncategorized


Sigma claims new firmware makes 150-600mm F5-6.3 AF up to 50% faster

15 Mar

Lens manufacturer Sigma has announced new firmware for its 150-600mm F5-6.3 DG OS HSM | Sports and Contemporary lenses, saying that it makes the autofocusing system up to 50% faster. The firmware applies to lenses fitted for Canon EOS and Nikon F cameras, and can be installed via the company’s USB dock and the Optimization Pro software program.

The company says that in normal conditions the improved HSM algorithm boosts the AF speed of the lenses by between 20% and 50%. The Optimization Pro software needed to install the firmware can be downloaded from the Sigma website.

Press release:


SIGMA 150-600mm F5-6.3 DG OS HSM | Sports / Contemporary
Firmware update for Canon and Nikon mount

We would like to announce the availability of a new firmware update for the SIGMA 150-600mm F5-6.3 DG OS HSM | Sports in Canon and Nikon mount, and the SIGMA 150-600mm F5-6.3 DG OS HSM | Contemporary in Canon and Nikon mount. This firmware update can be installed using SIGMA Optimization Pro, the dedicated software for the SIGMA USB DOCK.

Benefit of this firmware update
The latest firmware update improves the AF algorithm of 150-600mm F5-6.3 DG OS HSM lenses and further enhances AF speed by optimizing HSM (Hyper Sonic Motor) drive control. Depending on shooting conditions, it is expected to increase autofocus speed by approximately 20%, to a maximum of 50%, during normal shooting as well as when using “Speed Priority” set through SIGMA Optimization Pro.

For customers who own the SIGMA USB DOCK and applicable products listed below, please update the firmware using SIGMA Optimization Pro. Please ensure SIGMA Optimization Pro is updated to Version 1.2 before updating the lens firmware.

For customers who do not own a SIGMA USB DOCK, please contact Sigma Imaging (UK) Ltd for details about updating the firmware free of charge.

SIGMA Optimization Pro Download page
http://www.sigma-global.com/download/en

We appreciate your continued support for our company and products.

Articles: Digital Photography Review (dpreview.com)

 
Comments Off on Sigma claims new firmware makes 150-600mm F5-6.3 AF up to 50% faster

Posted in Uncategorized


Canon PowerShot G7 X Mark II boasts faster performance and improved ergonomics

19 Feb

$ (document).ready(function() { SampleGalleryV2({“containerId”:”embeddedSampleGallery_3326063429″,”galleryId”:”3326063429″,”isEmbeddedWidget”:true,”standalone”:false,”selectedImageIndex”:0,”startInCommentsView”:false,”isMobile”:false}) });

Canon has introduced the PowerShot G7 X Mark II with a new DIGIC 7 processor, bringing much-needed improvements to camera performance. Maintaining its predecessor’s 20.1MP 1″-type CMOS sensor and 24-100mm equiv. F1.8-2.8 lens, the G7 X II brings some updates to the camera’s exterior as well, with a re-designed grip, bottom-hinged 3″ 1.04M-dot LCD and a front control dial that can switch between clicking or smooth-turning operation.

The new processor allows for face registration and better subject detection in scenes of low saturation or similar colors. In addition, it dramatically speeds up camera performance, with Canon claiming continuous 8 fps Raw shooting. Battery life is also 25% better than the original G7 X, with a CIPA-rated number of 265 shots per charge.

Full 1080/60p HD video is offered, as in its predecessor, along with Wi-Fi and NFC. The G7 X II provides Picture Style processing modes borrowed from the EOS DSLR line, and time-lapse movie mode is included.

The Canon PowerShot G7 X Mark II will be offered for $ 699 with availability in May.

Press release:

TAKE THAT CAMERA TO GO!  CANON U.S.A LAUNCHES COMPACT POWERSHOT G7 X MARK II AND POWERSHOT SX720 HS DIGITAL CAMERAS

Newest Canon PowerShot Digital Cameras Offer Outstanding Quality in Convenient Compact Size 

MELVILLE, N.Y., February 17, 2016 – Ideal for both advanced amateur and pro photographers looking for a convenient, high performance compact camera with the ability to connect to compatible digital devices, Canon U.S.A. Inc., a leader in digital imaging solutions, proudly introduces the compact PowerShot G7 X Mark II1 and lightweight PowerShot SX720 HS digital cameras.

Canon’s new PowerShot G7 X Mark II digital camera pairs a 1.0-inch, 20.1 Megapixel* CMOS sensor with Canon’s new DIGIC 7 Image Processor to help reduce noise and deliver outstanding image quality, even in low light shooting situations. The PowerShot SX720HS digital camera boasts a new 40x Optical Zoom lens (equivalent to 24-960mm), providing outstanding performance, reach and resolution for everyday use and when shooting memorable family events, while easily slipping into a pocket or purse.

“In today’s world, compact cameras must work well with other devices and still offer superb quality. The PowerShot G7 X Mark II and PowerShot SX720 HS cameras both provide outstanding image quality with amazing optical zoom lenses and they easily connect with compatible phones, tablets and other smart devices so great images can be shared and enjoyed” stated Yuichi Ishizuka, president and COO, Canon U.S.A., Inc.  

Sleek and Sophisticated 
The first Canon camera to feature Canon’s new high-speed DIGIC 7 Image Processor, the PowerShot G7 X Mark II digital camera is a model of compact sophistication and speed with a high-quality sleek body and optimum comfort grip. Building on the success of Canon’s PowerShot G7 X digital camera, the PowerShot G7 X Mark II digital camera features a fast startup and improved RAW continuous shooting speed of up to eight frames per second (fps) with short intervals between shots. Additional features include: 

  • Bright f/1.8 (W) – f/2.8 (T), 4.2x (24–100mm equivalent) optical zoom lens with Canon’s Intelligent Image Stabilizer (IS) and a 9-blade iris diaphragm;
  • Multi-angle 3.0-inch capacitive touch panel LCD with a screen resolution of 1.04 million dots and tilt options of 180° up and 45° down;
  • Ability to capture 1080p Full HD video in MP4 format with stereo sound;
  • Built-in Wi-Fi®** and Near Field Communications (NFC™)*** capability with a dedicated Wi-Fi button for easy sharing and transferring of images and videos;
  • Picture Style function that offers superb command of in-camera color, contrast, and sharpness;
  • In-camera RAW conversion, making it possible to preview customized image processing modifications on the camera, without the use of a computer;
  • Convenient control ring lever that enables users to quickly switch between stepped and continuous ring movement; 
  • Time-Lapse Movie feature to help capture images at preset intervals and combine them to create a short movie clip;
  • Panning feature that allows the camera to lock onto the main subject using Canon’s Intelligent IS technology to automatically adjust the shutter speed for beautiful background blur.

The Canon PowerShot G7 X Mark II digital camera is currently scheduled to be available in May 2016 for an estimated retail price of $ 699.992.

Powerful Zoom Delivers Virtually Shake-Free Images
The Canon PowerShot SX720 HS digital camera is equipped with a new powerful zoom lens and is the ideal choice for amateur photographers looking to take a step up from a smartphone or entry-level digital camera to a lightweight, compact camera. The PowerShot SX720 HS digital camera’s new 40x Optical Zoom lens (24-960mm equivalent focal length range) uses one Hi-UD, three UD and three aspheric lens elements to help achieve high image quality and high magnification, while also utilizing Canon’s Intelligent Imaging Stabilizing (IS) technology for greater optical performance. 

As the successor to Canon’s PowerShot SX710 HS digital compact camera, the PowerShot SX720 HS digital camera features increases its zoom range while maintaining compact size for maximum convenience. Additional features include:

  • A dedicated Wi-Fi® button for easy sharing and transferring of images and videos utilizing the camera’s built-in WiFi and NFCtechnology;
  • 20.3 Megapixel* CMOS sensor with Canon’s DIGIC 6 Image Processor to help deliver outstanding image quality, even in low light;
  • 1080p/60 Full HD video capture with stereo sound;
  • 3.0-inch LCD (approx. 922,000 dots) to allow for easy viewing, even from a wide angle;
  • Zoom Framing Assist that allows the lens to automatically zoom in or out while the camera follows subject movement  and helps keep it in focus;
  • Story Highlight feature that enables the camera to automatically compile images and videos3 from a certain day or event into a mini-highlight reel with music and effects;
  • Creative Shot mode that uses composition, color and lighting from an original image to create artistic images.
  • Canon’s PowerShot SX720 HS digital camera is currently scheduled to be available in March 2016 for an estimated retail price of $ 379.992.  

1 This device has not been authorized as required by the rules of the Federal Communications Commission. This device is not, and may not be offered for sale or lease, or sold or leased, until authorization is obtained.

2 Availability, pricing and specifications are subject to change without notice.  Actual prices are set by individual dealers and may vary.

3 Videos must be shot in Hybrid Auto or Short Clip.

* Image processing may cause a decrease in the number of pixels.

** Compatible with iOS® versions 7.1/8.4/9.0, AndroidTM smartphone and tablet versions  4.0/4.1/4.2/4.3/4.4/5.0/5.1.  Data charges may apply with the download of the free Canon Camera Connect app. This app helps enable you to upload images to social media services. Please note that image files may contain personally identifiable information that may implicate privacy laws. Canon disclaims and has no responsibility for your use of such images. Canon does not obtain, collect or use such images or any information included in such images through this app.

*** Compatible with Android smartphone and tablet versions 4.0/4.1/4.2/4.3/4.4/5.0/5.1.

PowerShot G7 X Mark II specifications

Price
MSRP $ 699
Body type
Body type Compact
Sensor
Max resolution 5472 x 3648
Other resolutions 5472 x 3080, 4864 x 3648, 4320 x 2880, 4320 x 2432, 3840 x 2880, 2304 x 1536, 2048 x 1536, 1920 x 1080, 720 x 480, 720 x 408, 640 x 480
Image ratio w:h 4:3, 3:2, 16:9
Effective pixels 20 megapixels
Sensor photo detectors 21 megapixels
Sensor size 1″ (13.2 x 8.8 mm)
Sensor type BSI-CMOS
Processor DIGIC 7
Color space sRGB
Color filter array Primary color filter
Image
ISO Auto, 125-12800 (expandable to 25600)
Boosted ISO (maximum) 25600
White balance presets 8
Custom white balance Yes
Image stabilization Optical
Uncompressed format RAW
JPEG quality levels Super fine, fine
File format
  • JPEG (EXIF v2.3)
  • Raw (Canon CR2, 12-bit)
Optics & Focus
Focal length (equiv.) 24–100 mm
Optical zoom 4.2×
Maximum aperture F1.8 – F2.8
Autofocus
  • Contrast Detect (sensor)
  • Multi-area
  • Center
  • Selective single-point
  • Tracking
  • Single
  • Continuous
  • Touch
  • Face Detection
  • Live View
Autofocus assist lamp Yes
Digital zoom Yes (4x)
Manual focus Yes
Normal focus range 5 cm (1.97)
Macro focus range 5 cm (1.97)
Number of focus points 31
Screen / viewfinder
Articulated LCD Tilting
Screen size 3
Screen dots 1,040,000
Touch screen Yes
Screen type TFT LCD
Live view Yes
Viewfinder type None
Photography features
Minimum shutter speed 15 sec
Maximum shutter speed 1/2000 sec
Exposure modes
  • Program
  • Shutter priority
  • Aperture priority
  • Manual
  • Custom
Scene modes
  • Self Portrait
  • Portrait
  • Panning
  • Star Portrait
  • Star Nightscape
  • Star Trails
  • Star Time-Lapse Movie
  • Handheld Night Scene
  • High Dynamic Range
  • Underwater
  • Fireworks
Built-in flash Yes
Flash range 7.00 m
External flash No
Flash modes Auto, on, slow synchro, off
Continuous drive 8.0 fps
Self-timer Yes (2 0r 10 secs, custom)
Metering modes
  • Multi
  • Center-weighted
  • Spot
Exposure compensation ±3 (at 1/3 EV steps)
AE Bracketing ±3 (3 frames at 1/3 EV steps)
Videography features
Resolutions 1920 x 1080 (60p, 30p, 24p), 1280 x 720 (30p), 640 x 480 (30p)
Format MPEG-4, H.264
Videography notes Also has time-lapse (normal and star), miniature effect, and digest modes
Microphone Stereo
Speaker Mono
Storage
Storage types SD/SDHC/SDXC (UHS-I compatible)
Connectivity
USB USB 2.0 (480 Mbit/sec)
HDMI Yes (micro-HDMI)
Microphone port No
Headphone port No
Wireless Built-In
Wireless notes 802.11b/g/n with NFC
Remote control Yes (via smartphone)
Physical
Environmentally sealed No
Battery Battery Pack
Battery description NB-13L lithium-ion battery and charger
Battery Life (CIPA) 265
Weight (inc. batteries) 319 g (0.70 lb / 11.25 oz)
Dimensions 106 x 61 x 42 mm (4.17 x 2.4 x 1.65)
Other features
Orientation sensor Yes
Timelapse recording Yes
GPS None

Articles: Digital Photography Review (dpreview.com)

 
Comments Off on Canon PowerShot G7 X Mark II boasts faster performance and improved ergonomics

Posted in Uncategorized


PaintShop Pro launches faster brush tools, in-app guide and tutorials with version X8.1

05 Jan

Software provider Corel has updated its PaintShop Pro X8 image manipulation program to include more help and guidance to enable users to find their way around the tools and features of the application. A new welcome screen has been added to version X8.1 that offers links to tutorials and inspirational features, as well as to partner paid-for content from the online training site Udemy. The idea is to help photographers get more from the program by making it clear what tools are available and how they should be used. 

The application features links to on-line training company Udemy

The update also brings what Corel describes as ‘performance enhancements’ across the application, but especially faster brush speeds. The company claims nine brushes, including Paintbrush, dodge/burn and clone, are now on average twice as fast, while the Wet Paint brush is four times faster than it was previously. There are also over 100 additional enhancements that the company has made based on feedback from its user community. 

On the download page of the Corel website there is a list of ten issues that the new version addresses, including color problems with Raw files from the Nikon D810. 

Issues addressed

  • Burn Brush: Fixed edge result (previously showed darker result along brush edges)
  • Color Replacer: No color bleed when using the Round brush to fill shapes
  • Text wrapping: Left and Center alignment results fixed. Stability improved when saving layered text wrapping files to a .pspimage format compatible with legacy versions of PaintShop Pro.
  • Nikon D810: Fixed raw image color issue
  • Resize dialog box: Now retains settings last used for Based on One Side
  • Magic Move in scripts: Fixed reported issues related to accurate rendering of script commands
  • Material Properties palette: Improved stability when adding custom swatches
  • Organizer palette: Restored drag-and-drop functionality between the palette and the workspace
  • Script selection: Fixed script selection issue in the Batch Process dialog box
  • Adjust workspace: Restored ability to set Save As option once per session (dialog box does not open for each photo edited)

The update is free to download and install for current users of PaintShop Pro X8 and X8 Ultimate. Suggested retail pricing (SRP) for PaintShop Pro X8 is $ 79.99 (USD/CAN) / EUR 69.99 / £59.99 / $ 99.95 AUD. Qualifying registered users can purchase for the upgrade price of $ 59.99 (USD/CAN) / EUR 49.99 / £44.99 / $ 69.95 AUD. 

SRP for PaintShop Pro X8 Ultimate is $ 99.99 (USD/CAN) / EUR 89.99 / £79.99/ $ 129.95 AUD. Qualifying registered users can purchase for the upgrade price of $ 79.99 (USD/CAN) / EUR 69.99 / £64.99 / $ 89.95 AUD.

For more information visit the PaintShop Pro website. 


Press release: 

Free PaintShop Pro X8 Update Adds In-App Learning With New Ways to Access Complementary Tools & Content, Plus Increased Performance

X8.1 brings dramatic brush acceleration and performance enhancements app-wide

Today, Corel announced the latest update to its photo-editing and graphic design software, PaintShop® Pro X8.1. This release introduces the Welcome Guide, an all-new in-app learning tool that makes it easier than ever to access helpful tips and tricks. Users will also find new ways to discover content to enrich the PaintShop Pro experience, plus significant performance enhancements app-wide, including major improvements to brush speeds. The X8.1 update is available now and is free to all registered users of PaintShop Pro X8. 

New Welcome Guide & Add-on Content 

Continuing PaintShop Pro’s drive to make photo editing and graphic design more accessible, the new Welcome Guide makes getting started quick and easy. Fire up X8.1 and you are presented with a dedicated window linking to several tutorials and new project ideas. 

Users can now discover additional brushes, plug-ins, complementary programs, and plenty more to extend PaintShop Pro’s already strong photo and design toolkit, with new tools and content to be added on an ongoing basis. The new features in X8.1 come as part of Corel’s commitment to deliver continuous updates and improvements to PaintShop Pro without requiring a subscription. 

“A lot of people get intimidated when using a full-fledged photo-editor, often because they don’t know where to start,” says Greg Wood, Senior Product Director for Photo at Corel. “We want everyone to feel comfortable when they open PaintShop Pro, even if it’s their first time. The new Welcome Guide provides users with video and training content to help them explore PaintShop Pro’s many features, as well as direct access to a brand new learning series from our friends at Udemy.” 

Faster Brushes & Performance Enhancements 

PaintShop Pro X8.1 also delivers major performance improvements, including dramatically accelerated brush speeds when working with larger images. Nine brushes, including the Paintbrush, Dodge/Burn, Clone and others have seen an average improvement of 2x faster than before, with the Paintbrush’s Wet Paint look getting a boost of up to 4x faster! 

Building on PaintShop Pro’s performance, this latest update also includes more than 100 enhancements based on feedback from the PaintShop Pro user community. For more details on the latest improvements to PaintShop Pro X8, please visit our updates page for additional info. 

Articles: Digital Photography Review (dpreview.com)

 
Comments Off on PaintShop Pro launches faster brush tools, in-app guide and tutorials with version X8.1

Posted in Uncategorized


Sony a7 II gains faster focus for adapted lenses and uncompressed Raw

04 Nov

Sony’s a7 II will receive a firmware update that will boost its AF performance with adapted lenses as well as adding support for uncompressed Raw. The update adds a menu option that pushes the camera to either use phase detection (for speed) or contrast detection (for accuracy) when using non-native lenses. Read more

Articles: Digital Photography Review (dpreview.com)

 
Comments Off on Sony a7 II gains faster focus for adapted lenses and uncompressed Raw

Posted in Uncategorized


6 Phrases to Help you Learn Photography Faster

13 Sep

5 simple photography tricks for accurate shots

Learning all the ins and outs of photography is a never ending challenge. For some, the technical side of photography seems more difficult to understand. Others feel they are challenged by the creative side of understanding composition and light. When learning any new skill, the understanding of fundamentals is always most important. The complexity of settings, along with endless creative options is what makes photography so challenging. That’s where these six sayings come in. These simple phrases will bring you back to the basics, helping you to create quality images quickly, allowing for more time to experiment creatively.

1. ISO: Set it first – change it last

Set it and forget it until you have to remember.

Many people get confused by the purpose of ISO, and how to use it when controlling light. Unlike the other two big settings (aperture and shutter speed) when used properly, ISO gives your photograph the ability to be more sensitive to the available light. When you are setting your ISO, remember to choose a setting based on the amount of available light you happen to have in your scene. Don’t set it because the shot you took before was too dark and you want to brighten the exposure.

ISO - Set if first. Change it last.

ISO 2500, f/1.8 at 1/125th of a second

Every time you enter a scene, before you take a shot, ask yourself, what kind of light is there?

Here are some starting ISO settings, adjust as necessary for your scene:

  • Bright sunny day: ISO 100-200
  • Shade/clouds: ISO 400-800
  • Indoors: ISO 800-1600
  • Little/no light: ISO 1600 and up

Don’t forget the negative side of ISO. Most camera models go above 1600 ISO now. However, if you choose 1600, or higher, you will most probably see noise (digital grain) in your image. There are many post-production techniques to remove noise, but it’s always best to capture your best shot in the camera. Consider this when choosing a higher ISO in dimly lit areas.

2. Set an intention

Both shutter speed and aperture measure and control how much light the camera takes in. But they each also have a creative aspect that must be considered when choosing your settings. Knowing their distinct qualities, and creating an intention when you shoot, are two extremely important fundamentals of photography.

Set an Intention

ISO 200, f/4.0 at 1/5000th

Ask yourself, “What is my purpose?” Why are you taking that photo? Be clear on what you want to capture. Give yourself a moment to set an intention or two, then keep it in mind the whole time. Once you have figured out your main purpose, you can use that to choose which setting you will set first. As aperture affects the depth of field and shutter speed affects movement, which aspect is more important for creating the image you want?

Let’s take a look at two more awesome phrases to easily remember the different purposes of aperture and shutter speed.

3. Shutter speed: fast freezes – slow shows

Shutter speed is all about capturing (or not capturing) motion. When you want to show movement in the photograph, use a slower shutter speed. If a subject is moving and you want to freeze that movement, use a higher (faster) shutter speed. The faster the subject is moving, the higher your shutter speed must be to freeze them/it.

Quick Tip: Do not hand hold and shoot below 1/60th of a second. You are a vibrating creature, you are always moving. At about 1/60th of a second, the camera might capture the movement (called camera shake) you create just by pressing the shutter button.

Shutter Speed

Image #1 (left): ISO 1000, f9.0, 1/20th
Image #2 (right): ISO 1000, f/4.0, 1/125th

Here are some starting points to freeze moving subjects. Start here and adjust as necessary:

  • Moving cars: 1/4000th of a second or faster
  • People running: 1/1000th or faster
  • Kids playing: 1/500th or above
  • Person sitting still: 1/100th or faster
  • Still object: 1/60th or faster
  • Night scene: (tripod) 1/60th or slower

4. Aperture: High number = more in focus. Low number = less in focus

This setting is all about depth of field, the distance between the front and back of a focal plane. The focal plane is determined by the spot where you tell your camera to focus. The higher the f-number, the larger the distance of that plane. This means, more depth of the scene is within the focal plane, thus it is in sharper focus. The opposite is also true. The lower the f-number, the smaller the distance between the front and the back of the focal plane and less is in focus.

If you want everything in the photo to be fully in focus you will need to choose a higher f-number. If you want to create a shallow depth of field bringing only one part into focus, you will use a smaller f-number.

Aperture Photography Trick

Image #1 (left): ISO 160, f/11.0, 1/400th
Image #2 (right): ISO 160, f/1.8, 1/4000th

Here are some aperture starting points, same as before, adjust as necessary:

  • Close-ups or detail shots: f/2.8 or lower (larger)
  • Portraits: (one person) f/1.8 – f/5.6
  • Groups: (2 or more) f/5.6 – f/8.0
  • Local scene: (less distance) f/8.0 – f/11
  • Landscape: (more distance) f/11 – f/22

5. Frame your finder

Witness your scene through your viewfinder, as you allow your eye to examine every inch of what you can see through the lens. Look from top left, across and down to the right. What is in each corner? Notice the edges of the frame. When examining everything you see, slightly move your camera around as you prepare for finding the best version (framing) of this shot. This will give you a greater sense of what you do, or do not want to be in the shot. You will notice if you have cut something off, or added something into the shot you do not want.

When you make a habit of always re-framing your viewfinder as you are shooting, you will gain a greater sense of awareness, allowing for more shots from other vantage points you hadn’t considered before. Even more importantly, as you practice this, every shot you take will be closer to what you want to capture in the first shot you take.

Frame your finder

See what is in every inch of your frame before snapping the shutter!

6. Count your clicks

Once you have your desired exposure based on the purpose of what you are capturing, you can choose to change your purpose (capture a different effect) by going up or down the range of either aperture or shutter Speed. To make sure you keep a proper exposure like you had before (assuming you are shooting in Manual Mode), just count your clicks. If you click six times in one direction on shutter speed (because now you want to show motion), you will need to click six times in the other direction for aperture to keep a proper exposure.

For example: When photographing a birthday party, you may go from focusing on close-ups and details, to kids running around, to capturing a sunset. In this case, the first intention is creating a shallow depth of field to capture a non-moving object. Set your aperture to a low f-number. Using your meter, now set your shutter speed for correct exposure and snap away. ISO will already be set because that’s the first trick to remember.

Now it is time to capture the kids running around. You will  switch focus from aperture to shutter Speed. To make sure you freeze their movement (no one likes a photo of a blurry kid), you will change your shutter speed to 1/1000th of second.

Photography tricks

But wait! Before you start moving the dial, remember to count how many clicks you are going. If you clicked down four times to get to 1/1000th of a second, then you will click UP four times using your aperture dial. Now your exposure will be the same, but you quickly changed your settings to creatively capture something entirely different. Note: if you are using Aperture or Shutter Priority modes the camera will do this adjustment for you automatically.

There you have it

The best thing you can do now is turn these tricks into habits by jotting down these simple phrases and stuffing them in your camera bag. Next time you are ready to shoot, read over them once or twice before you begin. As you practice using these tricks in order to become more accurate and efficient behind the lens you will create more stunning eye-catching photographs of any subject you choose to capture.

Do you have any other cool phrases that you say to yourself when you are shooting? If you know any other great tricks that are easy to remember and simple to understand, let us know in the comments section below. Together, it will be fun to build a compilation of great photography learning quotes!

googletag.cmd.push(function() {
tablet_slots.push( googletag.defineSlot( “/1005424/_dPSv4_tab-all-article-bottom_(300×250)”, [300, 250], “pb-ad-78623” ).addService( googletag.pubads() ) ); } );

googletag.cmd.push(function() {
mobile_slots.push( googletag.defineSlot( “/1005424/_dPSv4_mob-all-article-bottom_(300×250)”, [300, 250], “pb-ad-78158” ).addService( googletag.pubads() ) ); } );

The post 6 Phrases to Help you Learn Photography Faster by Danielle Werner appeared first on Digital Photography School.


Digital Photography School

 
Comments Off on 6 Phrases to Help you Learn Photography Faster

Posted in Photography


Intel and Micron create 3D XPoint: a smaller, faster, more secure memory technology

29 Jul

Chip makers Micron and Intel have announced a new form of computer memory that promises faster, more reliable storage than current technologies, in a smaller space and at similar prices. The technology could reduce the distinction between memory and storage within computers and provide a faster, more stable way of storing large Raw and video files. Read more

Articles: Digital Photography Review (dpreview.com)

 
Comments Off on Intel and Micron create 3D XPoint: a smaller, faster, more secure memory technology

Posted in Uncategorized