RSS
 

Posts Tagged ‘Exposure’

How to Create a Double Exposure Effect Using Photoshop

21 Jun

What is a double exposure effect?

In days of yore, back when DSLR cameras were SLR, a roll of film was inserted in the back of your camera to give you 24 or 36 exposures. A double exposure was created in-camera by taking two different photos on the same frame of film.

How to Create a Double Exposure Effect Using Photoshop

The Double Exposure Effect created in Adobe Photoshop using Blend Modes, Layer Masks and of course two or more images.

When I did shoot with an SLR camera, I managed to achieve this effect more by accident than intent. In order to take another shot, you had to manually wind onto the next exposure!

With the onset of digital, this technique is very easy to replicate in Adobe Photoshop. If you don’t have Photoshop, get GIMP, it’s free to download and use. If you do a search on YouTube, there are plenty of tutorials on making double exposure effects to choose from. The more popular tutorials seem to use images of a portrait and a landscape.

However, you can use any images you want as this is quite a stylistic technique.

The ingredients

In essence, all you need are two images.

One of these images will have to be cut out using a layer mask so that the other image can be clipped to it.
Then it’s a case of using the blending modes, reducing the opacity, and other color effects to produce the desired result. Depending on what images that you use, experiment with the different blending options to see which effect you like the best.

The technique – step-by-step

In this article, I will show you a step-by-step tutorial on how to create your very own double exposure effect using Photoshop. The hardest part will be selecting the two images that you want for the composition.

Select your images

For my first image, I’ll be using this photo of the Hook Lighthouse. I took this shot a couple of years ago while on holidays along the hook peninsula in Wexford, Ireland.

How to Create a Double Exposure Effect Using Photoshop

Hook Lighthouse on the Hook Peninsula in Wexford in South of Ireland.

However, I didn’t get to snap any seagulls. This is exactly what I wanted for my second image, a close up side shot of a seagull.

I found one on Pixabay. If you don’t have images ready to hand. You can go to sites such as Pixabay or Unsplash. These two sites alone have excellent quality images to choose from and you can download any image for free (note: please read the usage terms for the Creative Commons license and be sure to follow them).

How to Create a Double Exposure Effect Using Photoshop seagull

Seagull image from Pixabay.com

Cut out the subject from the background

So, first I needed to make a selection of the seagull. The Quick Selection Tool did a good job and I finished it off by using the Refine Mask. I was able to save this out on its own layer with a layer mask.

How to Create a Double Exposure Effect Using Photoshop

Using the Quick Selection Tool and Refine Mask in Photoshop to isolate the subject from the background.

I decided to add a blue background in keeping with the nautical theme but also the seagull is predominately white, so he stands out more.

How to Create a Double Exposure Effect Using Photoshop background

I added a blue background after I isolated the seagull from the original background.

Add the second image and adjust the Layer Blend Mode

I brought the lighthouse image in as a Smart Object above the seagull layer and resized it. Next, I dragged the seagull layer mask to the lighthouse layer (which copies and applies it to the second layer) and changed the Blend Mode to Vivid Light. Finally, I then reduced the opacity to 68%.

How to Create a Double Exposure Effect Using Photoshop

I used the Blend Mode – Vivid Light which produced some funky colors on the beak of the seagull. But I liked the effect it created on the lighthouse image in comparison to the other Blend Mode options.

How to Create a Double Exposure Effect Using Photoshop

The Layers Panel in Photoshop and how the double effect in Photoshop is achieved.

Adjustments

At this stage, the colors on the seagull went a little too funky, especially around the eye and its beak.

So, I added a Hue & Saturation Adjustment Layer, checked the colorize tick box, and dragged the Hue slider to 183 and increased the Saturation to 10.

I added a Hue & Saturation Adjustment Layer to get rid of the funky colors that the Vivid Light Blend Mode created around the beak of the seagull.

The lighthouse rocks were still a little too sharp, but I didn’t want to reduce the opacity of the overall image any further. So I duplicated the seagull layer and dragged it to the top of the layer stack. I chose a big soft brush and I dabbed a couple of times on the layer mask around the rocks and the lighthouse to give it more of an opaque/ghostly look.

Final image

A GIF animation illustrating the different stages in creating a double exposure effect.

I had hoped to put a video together to accompany this article. But honestly, Adobe Creative Cloud have done a great job with a video on their YouTube channel, in illustrating this technique in under 45 seconds!

Now it’s your turn, let’s see what you can do. Why not give this technique a go? Please post your questions, comments and results in the section below.

Disclaimer: the author was not sponsored by Adobe, Pixabay or Unsplash. Words and opinions are those of the author only.

The post How to Create a Double Exposure Effect Using Photoshop by Sarah Hipwell appeared first on Digital Photography School.


Digital Photography School

 
Comments Off on How to Create a Double Exposure Effect Using Photoshop

Posted in Photography


Video tutorial: how to make a double exposure in Photoshop

17 Jun

Youtube user Eye Stocker makes a lot of useful Photoshop tutorials and we found this one in particular to be valuable. Even if you are not well-versed in the program, this double exposure tutorial is easy enough for anyone to follow along. And for those already comfortable with PS, it’s still full of useful tips and advice.

After all, one of the beautiful things about this Adobe staple is there are a near infinite number of ways too accomplish a task. And it’s always nice to watch someone else achieve an outcome in a completely different way than you might.

To get started, all you will need to make a cool double exposure is two images that pair well, a copy of Photoshop and a desire to learn. There’s also written steps, which some might find easier to follow.

Articles: Digital Photography Review (dpreview.com)

 
Comments Off on Video tutorial: how to make a double exposure in Photoshop

Posted in Uncategorized


Manual Mode or Exposure Compensation – Which is Best?

01 Jun

As you may know, cameras often get exposure wrong. The question is, what do you do when you realize that the exposure settings suggested by your camera are not right?

You have two options. One is to switch to Manual mode and set the ISO, aperture, and shutter speed yourself. The other is to use exposure compensation (and Aperture or Shutter Priority mode).

The best solution depends on the situation in which you find yourself, plus the configuration of your camera’s dials. For example, with a Canon EOS digital SLR it’s easy to apply exposure compensation by moving the Quick control dial on the back of the camera. It’s so simple you don’t need to take your eye away from the viewfinder.

Exposure compensation versus manual mode

The Quick control dial on the EOS 77D.

On my Fujifilm X-T1, the exposure compensation dial is on top of the camera. It’s harder to get at and nearly impossible to adjust without taking your eye away from the viewfinder. But the aperture ring on the lens makes it easy to go to Manual mode and adjust exposure by changing the aperture. An optional live histogram in the viewfinder helps you see if exposure is accurate before pressing the shutter (an advantage of some mirrorless cameras).

Exposure compensation versus manual mode

The exposure compensation dial on the Fujifilm X-T1 is much harder to reach.

These are good examples of how hardware can push you in one direction or another. My Canon SLRs pushed me towards exposure compensation, and my Fujifilm X-T1 pushes me towards using Manual mode.

Using Manual mode

Let’s look at Manual mode first. In Manual, you set the ISO, aperture, and shutter speed yourself. There are certain situations when using Manual mode (as opposed to Programmed Auto, Aperture Priority or Shutter Priority with exposure compensation) is beneficial. Let’s look at a few.

1. Shoot in Manual when the light level is constant

If the ambient light level is steady, you don’t need to change the exposure settings once you have decided which ones to use. Automatic exposure modes are influenced by the reflectivity of the subject and the exposure reading can change even if the light levels don’t.

That makes Manual mode ideal for this kind of situation. Once you’ve set the exposure you don’t need to change it. I like to use Manual mode when making portraits in natural light. Once I’ve set the exposure I’m free to concentrate on directing the model.

Exposure compensation versus manual mode

2. Shoot in Manual when you’re photographing landscapes and using a tripod

In this situation, you have plenty of time to assess exposure. Manual mode is ideal because you can set a low ISO (for image quality), a small aperture (for depth of field) and change the shutter speed to suit the light levels. It’s also easy to make adjustments to allow for any polarizing, neutral density or graduated neutral density filters you may be using.

If you’re shooting landscapes at dusk, while the light is fading, Manual mode also works well. After you take a photo, just check the histogram. As it moves to the left, which it will as the light fades, dial in a slower shutter speed to compensate.

Exposure compensation vs. manual mode

3. Use Manual Mode when you’re using manual flash

If you’re using a flash set to manual the output from the flash is the same every time. In that situation, it’s best to adjust the camera settings manually so the exposure is consistent from frame to frame.

To create the portrait below, I worked with both the camera and flash set to manual. Setting your flash to manual only works when the flash to subject distance doesn’t change.

Exposure compensation vs. manual mode

4. Use Manual mode for long exposure photography

If you’re doing long exposure landscape photography and your shutter speed (exposure time) is longer than 30 seconds then you need to use Bulb mode. This is another form of Manual mode. Except that rather than telling the camera what shutter speed you want it to use, you do so by using the camera’s bulb setting and a remote release.

I used Bulb mode to make this landscape photo with a shutter speed (exposure time) of 82 seconds.

Exposure compensation vs. manual mode

Using Exposure Compensation

The alternative to Manual mode is to set your camera to an automatic exposure mode and use exposure compensation to override the camera’s settings.

The three best automatic exposure modes to use are Aperture Priority, Shutter Priority or Programmed auto. Other exposure modes, such as Landscape and Portrait, don’t give you enough control. On some cameras (such as Canon EOS) you can’t adjust exposure compensation when using one of these modes.

These are some of the situations where exposure compensation may be better than Manual mode.

1. Use Exposure Compensation for street and travel photography

If you are taking photos of people in the street the required exposures can vary wildly. One moment you may take a photo of something in the sun, the next you may photograph something in the shade. The sun may also be going in and out between the clouds.

In this situation, you want to concentrate on finding interesting things to photograph and creating a good composition. If you have to stop and think about exposure, then you may miss the shot. Automatic exposure modes help greatly.

Exposure compensation vs. manual mode

2. Use Exposure Compensation when you are using on-camera flash in an automatic mode (TTL)

If you have the on-camera flash set to an automatic mode, then the camera needs to be set to evaluative or matrix metering, the camera’s most advanced metering mode, to take full advantage of that. The camera and flash work together to calculate the correct exposure.

Setting your flash to automatic (TTL or E-TTL) works best when the subject to flash distance is constantly changing. Using automatic means your camera can adjust the output of the flash as it needs to.

3. Use Exposure Compensation when shooting sports or wildlife

This is another situation where the light level is likely to change frequently and you need to concentrate on tracking the action and capturing important moments. You don’t want to be thinking about exposure when trying to capture the peak of the action in sports or photographing fast-moving wildlife. Let your camera do the work, and use exposure compensation if you have to.

Conclusion

Everybody works differently, so the points in this article should be taken as suggestions only. The more experienced you become as a photographer the more you will learn to judge whether you should use Manual mode or Exposure Compensation to take control of your exposure.

It may make it easier to think of it in terms of time. If you have more time to think about your camera settings, then use Manual mode. If you have less thinking time and need to be ready to react quickly to capture the action, then use an automatic exposure mode and Exposure Compensation.

Do you prefer to use Manual mode or an automatic exposure mode with exposure compensation? Please let me know in the comments below,


Want to learn how to get perfect exposure on your digital camera? Then check out my new ebook Mastering Exposure and say goodbye to all your exposure problems!

The post Manual Mode or Exposure Compensation – Which is Best? by Andrew S. Gibson appeared first on Digital Photography School.


Digital Photography School

 
Comments Off on Manual Mode or Exposure Compensation – Which is Best?

Posted in Photography


How a Short Versus Long Exposure Will Affect Your Landscape Images

29 May

The shutter speed is probably the factor which has the greatest impact on an image. By adjusting the exposure time by only a few stops, you’re able to completely change the appearance of an image. But what exposure time is best for landscape photography? Should you use a  long exposure or should you work with shorter ones? When will adjusting the shutter speed have the greatest impact?

In this article, I’ll share three case studies where I compare how adjusting the shutter speed has impacted the final images. I don’t believe that either is better than the other (in each case) but it’s important that you’re aware of the differences so it becomes easier to convey the story or emotions you desire.

What is a Long Exposure?

I’ve had many discussions with fellow photographers regarding the exact definition of Long Exposure. At first thought, most consider a long exposure to be an image where the clouds are dragged across the sky or moving water looks like silk or ice. However, this is judging solely based on the visual aspect of the image. Is it not still considered a long exposure if you don’t see its effect? Wouldn’t a 20-second exposure be 20 seconds no matter what?

The definition most of my photography friends have agreed upon is that a long exposure begins when you can’t take a sharp image handheld. Normally, this is at about 1/50th of a second with a wide angle lens.

Using a tripod makes it possible to have a longer exposure.

Case Study #1 – Waterfalls

Waterfalls are often ideal to start experimenting with long exposures. Since the water is moving quickly, you don’t need an extremely long exposure just to capture some motion. In fact, you’ll need a very quick shutter speed to avoid capturing any motion at all.

The choice of shutter speed has an extremely high impact on the image. You might not even need a filter to begin capturing the motion of water in your shots. However, I find waterfalls to be tricky to photograph at times because of this. The different shutter speeds have such a big impact that the entire mood (and story you tell) of your image quickly changes. So, consider what you wish to convey.

If it’s a huge waterfall with a lot of power you might want to use a quick shutter speed to capture its raw power and beauty. While a smaller waterfall might be more appealing when you use a slow shutter speed (long exposure). Experimentation is always the key when working with shutter speeds.

waterfall case study

Rjukandefossen, Norway 1/5th of a second shutter speed.

For the image above, I chose to use a shutter speed slow enough to require the use of a tripod but not so long that the water would become completely blurred. The textures in the water help build the overall atmosphere of the image and it compliments the rawness. By keeping some texture in the water, I’ve also strengthened the composition. When a longer shutter speed was used (see below), many of the lines in the foreground were lost and the flow wasn’t as natural anymore.

long exposure waterfall

Rjukandefossen, Norway 20-second exposure.

When lengthening the exposure time to 20-seconds, the image lost a lot of its raw and natural feel, which was what I wanted to convey. Now, the image has an unnatural appearance and even though it’s still visually pleasing, it’s not as interesting anymore.

A long shutter speed wasn’t ideal since the river was flowing so quickly. Had the water been slower, a 20-second exposure might have done a better job. So, when photographing a waterfall make sure that you keep in mind how quickly the water is flowing, as this will have a great impact on your choice of shutter speed.

Had I used a faster shutter speed than on the first image (for example 1/500th) the image would have a different impact yet again. Such a quick shutter speed would freeze most of the water and remove the sense of motion shown in the first image. Instead, there would have been a lot of texture in the water but no movement to compliment it. That would have resulted in a messy and, again, less appealing image.

Case Study #2 – Seascapes

When working with images that have more than one moving element (for example the sky and the water), you’ve got multiple factors to consider when choosing a shutter speed. Not only will the choice of shutter speed determine how the sky appears but it’s also crucial for the appearance of the water. In fact, since the water is what’s moving the quickest, that is where you’ll see the biggest difference (just as with the waterfalls).

For the image above, I used a shutter speed of 0.6 seconds. In the grand picture of long exposures this is still a relatively short shutter speed, and for some, it doesn’t even qualify as a long exposure. However, despite the shutter speed being only 0.6 seconds, there’s quite a lot of motion in the image. Since the waves were coming in fast the camera was able to register a significant amount of motion within that short time.

Personally, I’m a big fan of exposures between 0.5 seconds to 1.5 seconds when photographing seascapes (especially when using a low perspective like this). The shutter speed is long enough to capture the motion but it’s also fast enough that there’s still a lot of texture in the water. The lines that come as a result of the slow shutter speed do a significant job in improving the composition.

long exposure seascape

In the second image, I increased the exposure time to 30 seconds, allowing the camera to register motion for a longer period of time. As you can see, the texture that was the previous image is lost and the water has completely changed its appearance. Now it looks more like ice, or some sort of solid state.

However, the clouds are also considerably different than in the first seascape. By using a 30-second exposure the camera has also registered motion in the clouds, resulting in a more dynamic sky. When the clouds are dragged across the sky, such as above, you’ve got an extra factor to consider for your composition. In this scenario, the clouds are moving towards the horizon, creating a series of extra lines that help lead your eye through the image. Often this can be a great advantage.

I don’t believe that one is necessarily better than the other but, again, it’s important to understand how the choice of shutter speed (exposure time) will impact the image. When working with a slow shutter speed you’re introduced to several new factors (such as the helpful leading lines in the sky) and being aware of them will make the process of learning long exposure photography easier.

Case Study #3 – Generic Landscape

Once you remove the second element of motion, the choice of shutter speed becomes somewhat less crucial. Still, there will be a big difference between a 30-second exposure and a 1-second exposure if you’ve got some movement in the clouds. But the difference between a 0.5 second and 5-second exposure is less significant for a generic landscape and a seascape or waterfall photo.

It’s not uncommon for me to see someone using an ND Filter when photographing a mountain on a cloudless day. This is very common when first using filters, as you want to use them all the time. However, a 2-minute exposure won’t look any different than a 1/100th of a second exposure when there aren’t any moving elements in the image. After all, an ND filter doesn’t create motion, it registers it.

The image above is a typical example of when a long exposure wouldn’t make a big difference. I used a 1/5th second exposure time for this particular image but had I used a 30-second exposure with filters instead, it still would have looked more or less the same. Simply put, it wouldn’t have been beneficial to use a long exposure on this scene.

It isn’t until you’ve got at least one moving element that the true power of a long exposure photography appears (remember, this can be something as simple as grass moving in the wind). In the image below, you see the same scene but this time with clouds in the sky. The shutter speed I used for this image was 1/15th of a second, which means that I wasn’t able to capture any motion – yet.

short exposure generic landscape

Once clouds had appeared and there was one element of movement in the frame, a long exposure would have an impact on the image. Since the clouds were moving I was able to capture the motion and, again, create a more dynamic image.

For the image above I increased the exposure time to 30-seconds. By increasing it that much you can clearly see how the sky has changed and how the overall mood of the image has changed along with it. Unfortunately, the clouds were moving sideways. Had the clouds moved towards or away from me, the image would have greatly benefited from a long exposure and taken advantage of the leading lines that would have helped to lead the eyes towards the structure. Since the clouds were moving sideways, the extra leading lines in the image aren’t as helpful, even though they look nice.

Summary and Conclusion

After reading this article I hope you have a better understanding of how the shutter speed will affect an image and when increasing or decreasing it will be beneficial. There’s no “correct” way of doing it, and in the end, which image you prefer depends on what you’re looking for in your image. However, as I’ve mentioned multiple times, it’s extremely important that you understand how a longer or shorter shutter speed will impact the image. By understanding this, you’ll be able to save a lot of time in the field and ultimately create better images.

Remember, a slower shutter speed can affect the appearance of an image when there’s more than one moving element within the frame. A slow shutter speed is not going to make a difference when there are no moving elements.

The post How a Short Versus Long Exposure Will Affect Your Landscape Images by Christian Hoiberg appeared first on Digital Photography School.


Digital Photography School

 
Comments Off on How a Short Versus Long Exposure Will Affect Your Landscape Images

Posted in Photography


How to Understand Your Camera’s Light Meter and Get the Exposure You Want

26 May

Regardless of how you shoot, and whichever shooting mode you prefer to use, there is one item that remains constant – the light meter. Somehow, either you or your camera has to know how much light in on your scene in order to determine the optimal combination of aperture size, shutter speed, and ISO sensitivity to get the photo you want. This tool, which may not seem all that relevant to new photographers, is called a light meter.

Understanding what your camera’s light meter does and how it works is critical to advancing your skills and helping you get the shots you really want. Hopefully, this article will help you get a grip on it.

How to Understand Your Camera's Light Meter and Get the Exposures You Want

An analogy to help you understand the light meter

Before I get into a discussion about how the light meter works, think about the last time you cooked some meat on the grill. Whether it was a steak, some pork chops, or even just a couple hamburgers – you likely had a vision in your mind of what the finished product would be.

For backyard chefs like me who aren’t very good at this sort of thing, we have to use a meat thermometer to make sure our food is properly cooked. There’s always the question of where to put the thermometer to check and see if the meat is done. Or, in photography terms, check to see if the meat is properly exposed. You can touch it to the surface, poke it through to the middle, or insert the thermometer at various points around your dinner in order to get a good overall reading.

Each method would work for a different scenario, but it all depends on what you are cooking and how you want the finished food to turn out.

How to Understand Your Camera's Light Meter and Get the Exposures You Want

Your camera’s light meter is like measuring the temperature using a meat thermometer. Placement is crucial for an accurate reading.

How the camera light meter works

When you point your camera at a scene you also need a way of measuring the incoming light so you know how much of it there is and what settings you (or your camera) need to control in order to get the shot you want. It’s just like measuring the temperature of your food with a thermometer to make sure it’s done properly.

Most cameras today use a process called TTL Metering, which stands for through-the-lens. It means that your camera examines the light coming in through the lens and evaluates the brightness of the scene. Then you, or your camera, can adjust the settings in order to make sure your photo is exposed how you want. You may not ever notice the light meter at work or even see that it’s there at all unless you shoot in Manual Mode. But trust me, it’s constantly monitoring the light whether you know it’s working or not.

View the metering scale in Manual Mode

To see the light meter doing its thing, put your camera in Manual Mode and look for a series of dots or vertical lines at the bottom of your camera’s viewfinder.

How to Understand Your Camera's Light Meter and Get the Exposures You Want

In Manual Mode, look at the bottom of the screen in your viewfinder. Notice the scale with zero in the middle. That is the light meter at work.

The number scale at the bottom of the image above is an example of a camera’s light meter, and the tiny little triangle shows whether the picture is properly exposed or not. In this case, the triangle is at 0, which means the image is neither under or overexposed, but changing the aperture, shutter speed or ISO would make the triangle move up or down the line accordingly and result in a picture that is either a little too bright or a little too dark.

What part of the scene is the camera measuring the light from?

While that is all well and good, it’s only part of the story because it doesn’t explain how your light meter actually functions. Is it looking at all the incoming light or just some of it? Where in the frame is it looking as it measures the light? Understanding the answers to these questions is the key to unlocking the power of your camera’s light meter, and it all has to do with what’s known as metering modes.

How to Understand Your Camera's Light Meter and Get the Exposures You Want

Measuring the Light

Most cameras today have a few basic ways of measuring the incoming light:

  1. Matrix or Evaluative Metering – the camera looks at the light in the entire scene and averages it, (Nikon puts a bigger emphasis on the area where your lens is focused as well). Nikon calls this Matrix Metering, Canon calls it Evaluative.
  2. Center-Weighted Average Metering – looks at the light of the entire scene and averages it, but with emphasis on the center of the frame. Nikon and Canon both call this Center-Weighted Average Metering.
  3. Partial Metering – this measures the light only in a small portion of the center of the frame (about 8-12% of the scene). This is a Canon metering mode, Nikon does not have one similar.
  4. Spot Metering – measures the light only in a small area around the central autofocus point (about 1.5-3% of the frame). Nikon and Canon both call this Spot Metering.

Other camera manufacturers have different names for these modes, but suffice it to say the way in which your camera measures incoming light can have a huge impact on whether your photo is properly exposed. As an example, here are three shots that were taken with different metering modes.

Image #1, taken with Matrix (Nikon) or Evaluative (Canon) Metering.

Image #2, taken with Center-Weighted Metering.


Image #3, taken with Spot Metering.


Reflective versus incident metering

There’s another aspect of light metering that comes into play when setting up a shot. It has to do with how TTL metering works as opposed to a handheld light meter.

Reflective metering

The former, (the type of metering used in DSLRs), works by measuring the amount of light that comes through the lens. But the problem with that is that unless you are pointing your camera directly at the light source, the light being measured is actually bouncing off your subject first.

All the colors we see in the world around us get their hues and tonal values by absorbing every color of light except for what is bounced off of them. As many of us learned in grade school, light is made up of a spectrum of colors including red, orange, yellow, green, blue, indigo, and violet. A green tree leaf absorbs every color of light except for green. A red car absorbs every color except for red, and so on.

reflective metering - camera light meter

When your camera measures incoming light, it’s looking at the amount of light being bounced off your subject, not the amount of light actually hitting your subject. This has huge implications and can dramatically affect your exposure. In the illustration above, the subject is wearing clothes that absorb most colors of light except for blue, which means there is still a great deal of light being bounced off him and sent to the camera. However if the child changes clothes things can change a great deal.

reflective metering dark subject - camera light meter

In the illustration above, even though the amount of light hitting the boy has not changed, the camera will read the scene much differently because he is now wearing a dark shirt and pants. The camera will think it needs more exposure to compensate for what it thinks is less light on the scene, and the overall image will be overexposed as a result.

Here’s a real-world example of how this works:

reflective metering - camera light meter

Nikon D7100, 200mm, f/2.8, 1/8000th of a second.

In the photo above, so much light was being reflected off the girl’s white shirt that my camera had a hard time metering the scene properly. Much of the sunlight was bouncing off the shirt and coming directly back to my camera, so it responded by using a very fast shutter speed and low ISO value in an effort to make sure the shirt was properly exposed. Unfortunately, the rest of the scene was underexposed as a result.

Nikon D7100, 200mm, f/2.8, 1/1500th.

This was a few seconds later in the exact same spot, and all I did was have her put on a brown shirt. With much of the light from the sun being absorbed by the dark color of her outfit, my camera created a much brighter exposure by using a slower shutter speed. Not as much light was being captured by the TTL metering system so the camera thought more light was required for a good exposure.

Incident metering

This phenomenon can be particularly troublesome if you are shooting a wedding; grooms often wear dark tuxedoes whereas brides will usually be dressed in dazzling whites, which can really throw off your camera’s TTL metering system. The solution is to use an external handheld light meter, such as the Sekonic L-308S-U, which actually measures the amount of light falling on the subject.

Handheld light meter for incident light metering (light falling on the subject).

In the image above you can see that the meter shows you need an aperture value of f/16, shutter speed of 1/125th of a second, and ISO 100 in order to get a properly exposed scene. These numbers will likely be different from what the camera’s TTL system measures because some light will invariably be absorbed by the subject, which is why an external system like this can be so useful.

Here’s how the diagram from earlier would look if the setup involved an external handheld incident light meter.

incident metering - handheld light meter

You will often see wedding photographers using a light meter such as this in order to get a more accurate reading of how much light is hitting the wedding party during formal photos. This is especially true if they’re using a system of flashes or external speedlights because they need to know how much extra light the scene will require or tolerate.

When shooting a wedding it is quite common for the bride to wear a white dress, which reflects a great deal of light, and the groom to wear a dark tuxedo which absorbs almost all light. This can wreak havoc with a TTL metering system, and an external light meter is a great way to address the problem.

light metering - camera light meter

Conclusion

The overall goal here is to understand how the light meter in your camera functions. This, in turn, will help you know how you will need to alter the exposure settings to get the shot you want.

I hope this article has been helpful in explaining how the light meter works, how light is reflected off your subjects, and why your camera may not see a given scene quite like you expect it to. Ultimately it’s important to remember that there is no one correct way of metering a scene. Any of the metering modes and methods will work as long as you know what you are shooting and what type of results you are trying to achieve.

Knowing the difference between the various metering modes and types, and understanding how light is measured as it hits your camera can help you get the shots you want. None of these methods are any better or worse than the other, but each one has its own strengths and weaknesses. The more you know about how all of this works the better equipped you will be to get precisely the photographs you want.

The post How to Understand Your Camera’s Light Meter and Get the Exposure You Want by Simon Ringsmuth appeared first on Digital Photography School.


Digital Photography School

 
Comments Off on How to Understand Your Camera’s Light Meter and Get the Exposure You Want

Posted in Photography


ISO Invariance: The End of the Exposure Triangle?

22 Apr

Since the beginning of photography, there have been three basic elements that need to be taken into consideration when making an image; the size of the aperture on your lens, the speed of the shutter, and how sensitive your film (or, in modern times, the digital image sensor) is to light. Indeed almost all of photography boils down to an understanding of how those three variables affect the overall exposure of your image. Like death, taxes, and the morning sunrise – they are immutable and must be considered no matter the type of camera you have or the subject you are shooting.

Some photographers prefer to shoot in manual and control each of these elements individually, while others prefer the full Auto route. Still others find themselves somewhere in between by letting the camera make some decisions while they control one or two of the parameters themselves.

But at the end of the day the aperture, shutter, and ISO always work together to help you get the photos you want. Until now. Sort of…

ISO Invariance: The End of the Exposure Triangle?

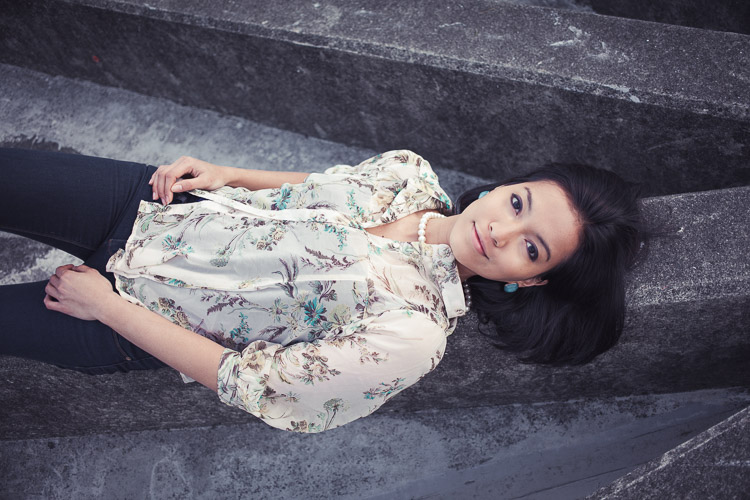
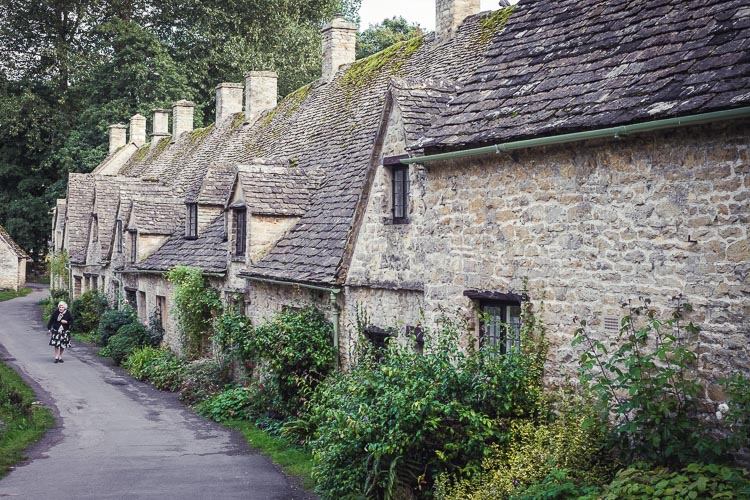
This squirrel was astonished that I could take an underexposed picture of him at ISO 100 and turn it into a completely usable photograph in Lightroom.

Two constants – aperture and shutter speed

Two of the three elements of the Exposure Triangle are, and will always be, limited by physics. Changing the size of the aperture on your camera lens determines not only how much light will be let in, but other parameters as well such as the depth of field. Using a fast shutter speed will always be necessary to freeze motion, particularly with fast-moving subjects. Conversely, a slow shutter speed is an unchangeable requirement for capturing light trails and other types of  long exposure photography.

ISO is different

But ISO is not nearly the limiting factor it once was and on some newer cameras is almost irrelevant. Almost!

There are many analogies to help you understand ISO, but one of my favorites is that of a microphone. If you have the gain turned down low you will need to speak very loudly for your voice to be heard. But this gives you the benefit of cutting out low hums and other noises that might otherwise be picked up, such as a desk fan or overhead ventilation unit. Turn the gain up high and you won’t have to speak as loudly, but along with your voice, a myriad of other background sounds will be picked up as well. Once those other sounds are recorded, it’s almost impossible to get rid of them!

In similar fashion, shooting with a low ISO of 100 or 200 means your camera sensor is not very sensitive to light. So you will need a lot of incoming light in order to take an image. This is accomplished through either a large aperture, slower shutter speed, or combination of the two. The benefit is that ISO 100 results in a picture that is free of digital noise that often looks like colored static – the kind you might see on an old tube-style television set.

ISO Invariance: The End of the Exposure Triangle?

Nikon D7100, 50mm, f/1.8, 1/90 second, ISO 100 (pushed 3 stops in Lightroom)

Raise the ISO

If you don’t have much incoming light, there has always been a simple solution – raise the ISO. (In the days of film the solution was similar but not as easy. It required the photographer to physically remove the film in the camera and put in another roll of 400 or 800 ASA film that was more sensitive to light.) Like I mentioned earlier, though, photography is all about tradeoffs. Shooting at a high ISO of 3200 or 6400 can help you get the shot you want, but will often result in a picture that is far more noisy and grainy than you might prefer.

What’s a photographer to do?

ISO Invariance: The End of the Exposure Triangle?

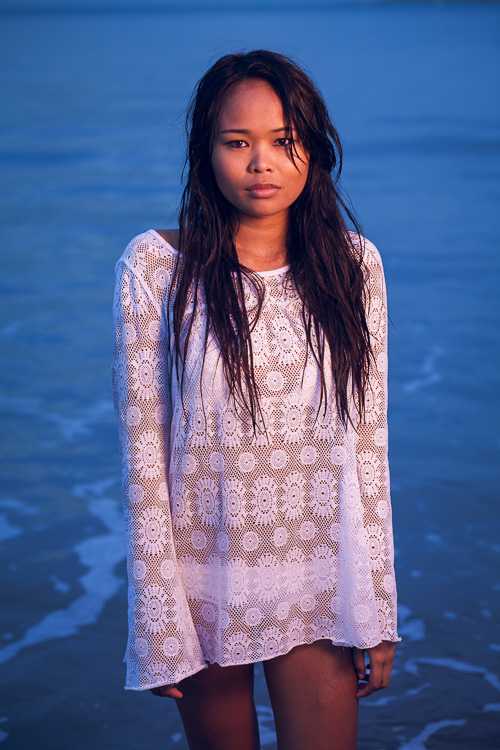
Nikon D750, 35mm, f/4, 1/1000 second, ISO 100. No need to adjust exposure in post-processing.

Thanks to incredible advances in modern sensor technology, shooting at ISO 3200 or 6400 on a new camera like a Canon 5D Mark IV or a Nikon D7200 results in images that are far more usable than their counterparts from five or 10 years ago. But there’s another solution that’s gaining prominence as well.

Some camera sensors today are so good they are essentially what’s known as ISO Invariant, which is a fancy way of saying the ISO doesn’t really matter. Not in a practical sense, anyway. Shooting with a camera that is ISO Invariant means that you will get roughly the same results if you shoot at a low ISO of 100 or 200, and then change the exposure in post-production, as you would from shooting a higher ISO (like 1600) in the first place.

Explaining ISO Invariance

Allow me to illustrate what this means with the help of some visual aids. The following two images look fairly similar, but a closer look reveals something a bit deeper under the surface. They were both taken with the same camera using the same exposure settings, with one key difference – the ISO.

ISO Invariance: The End of the Exposure Triangle?

Nikon D750, 50mm, f/2.8, 1/60th of a second, ISO 3200

The above photo looks decent, but the sun was almost down and I had to shoot at ISO 3200 in order to let in enough light…or did I?

ISO Invariance: The End of the Exposure Triangle?

Nikon D750, 50mm, f/2.8, 1/60th, ISO 100 (pushed 5-stops in Lightroom – to effectively ISO 3200)

Here is the same image except this one was shot at ISO 100, then in Lightroom, I pushed the exposure up by five whole stops. Five stops! That’s a lot of adjustment, yet the final image looks almost identical to the one shot at ISO 3200. Just for the sake of comparison, here is the original ISO 100 image before any editing in Lightroom.

ISO Invariance: The End of the Exposure Triangle?

Nikon D750, 50mm, f/2.8, 1/60th, ISO 100 (no editing in Lightroom)

Whoa – what?!

I’m not kidding here – the original image was almost entirely black. If you look closely you can just barely make out the roof of the bird house and a bit of color in the sky. Yet so much data was captured by the sensor at ISO 100 that I was able to create a file that was not only usable but in my opinion, superior to its ISO 3200 counterpart. Even doing a bit of pixel-peeping reveals little difference in terms of the noise levels between the two images.

Not only are the two images quite similar, I would go so far as to argue that the one shot at ISO 100 and boosted 5-stops has richer colors and better noise levels than its high-ISO counterpart. This is, in a nutshell, what ISO invariance is all about. It gives you the ability to shoot at virtually any ISO value and still get a usable image, assuming you shoot in RAW and have the ability to adjust the photo in post-processing software. ISO, then, no longer becomes much of a determining factor in the overall exposure.

Is it the end of the ISO as we know it?

Modern camera sensors are getting so good at picking up luminance and color data from incoming light. So the idea of a photographer needing to manually adjust the sensitivity of the image sensor is becoming almost moot. Note that I’m hedging my bets here, as I have throughout this whole article. I will stop short of saying that ISO is not a factor to be considered anymore. Far from it!

The fact is that camera sensors are getting so good that they are significantly outperforming their counterparts from a few years ago in all areas, not just ISO invariance. ISO 3200 or 6400 on many cameras today, in general, results in images that are perfectly usable. Whereas the same settings on a digital camera from yesteryear would yield an image so muddy it might have been well-nigh unusable. This has also resulted in the same sensors being able to capture significantly more details at low ISO that can, if desired, be used to edit an image ex post facto.

ISO Invariance: The End of the Exposure Triangle?

Nikon D750, 200mm, f/5.6, 1/350 second, ISO 100. Using a low ISO allowed me to pull out lots of color detail in post-production on this image.

Down on the upside

Of course, not all is sunshine and roses in the land of ISO invariance. It’s important to note that not all cameras are even capable of such a feat. The Nikon D750 is a 24-megapixel full-frame camera. So its individual pixels are physically larger, and therefore much more sensitive to light than a 24-megapixel crop-sensor camera like a Canon Rebel T6 or Nikon D3300.

Only a handful cameras today can actually be described as ISO Invariant. Whereas most cameras still follow the same rules about using ISO in tandem with aperture and shutter speed that have been the foundations of photography since its inception.

A demonstration

To illustrate, here’s another series of images taken with a Nikon D7100. It’s a few years old but quite similar to many cameras today in terms of its imaging prowess.

ISO Invariance: The End of the Exposure Triangle?

Nikon D7100, 50mm, f/4, 1/60 second, ISO 3200.

Now take a look at a similar photo taken at much lower ISO:

ISO Invariance: The End of the Exposure Triangle?

Nikon D7100, 50mm, f/4, 1/60 second, ISO 100.

Whoops! That’s the unedited version in which you can barely tell that there’s a picture at all. Here’s the same image with the exposure bumped up by five stops in Lightroom.

Nikon D7100, 50mm, f/4, 1/60 second, ISO 100 (pushed 5-stops in Lightroom)

Even on these smaller web-sized photos, you can see some key differences. The colors are not as natural, the darker portions are muddier, and there is significant banding in the shadows. “Wait a sec,” you might be saying right about now. “What’s banding in the shadows?” Follow the advice of Rafiki from The Lion King and look harder…

Here you can clearly see that the ISO 3200 image is superior. All throughout the ISO 100 picture, there are horizontal lines crossing through the image, which is a phenomenon known as banding. It often happens when you try to recover details from darker portions of an image. Add this to the fact that the colors are harsh and the whole thing required such a significant amount of processing and you start to see why ISO still matters. It matters quite a great deal.

Limitations

There are also some significant limitations to take into account when looking at ISO invariance:

  • It only matters if you shoot in RAW, which allows you to have as much data from your camera’s image sensor as possible. RAW file sizes are huge and must be processed by a program like Lightroom before they can be shared or printed.
  • Processing takes time. Many photographers, myself included, like to get the exposure right in camera if at all possible.
  • In almost every situation you won’t get better results from shooting at low ISO values and then raising the exposure afterward. Most of the time you will get results that are roughly equal to what you would have achieved with just raising the ISO, to begin with.
ISO Invariance: The End of the Exposure Triangle?

Nikon D750, 50mm, f/8, 1/200 second, ISO 1250.

Conclusion

I like to think of ISO invariance as a backup tool to use when I really need it, not something on which I can rely for everyday shooting. Who among us hasn’t come back from a photo session only to find out that some key pictures were horribly underexposed by accident? (Raise your hand if this is you. Go on, I’ll wait.) I know I have, and it’s nice knowing I can still get a usable photo in these situations as long as I have not blown out the highlights.

We’re still years, perhaps decades, away from a point at which ISO is no longer a practical consideration, and it’s possible we will never get there entirely. However, if you look at where we have been and where we are now in terms of camera sensor technology, it’s easy to draw a line to a point in the future when ISO might not matter nearly as much as it does now.

In the meantime, my suggestion for most photographers remains the same; use all three elements of the exposure triangle to get the shot you want. And if you’re worried that using a fast shutter speed will result in a photo that is underexposed, just raise your ISO as you are shooting instead of fiddling with sliders back at your computer. You’ll learn more about photography by doing so, and you will probably have more fun since you’ll be taking pictures instead of being hunched over your laptop.

The post ISO Invariance: The End of the Exposure Triangle? by Simon Ringsmuth appeared first on Digital Photography School.


Digital Photography School

 
Comments Off on ISO Invariance: The End of the Exposure Triangle?

Posted in Photography


Essential Equipment for Long Exposure Photography

22 Apr

Normally, I say that equipment is not important, at least not for those just getting started with photography. Until you know how to master the camera, equipment shouldn’t be the main focus. You don’t need to worry about having the best equipment or things you don’t actually need. However, to achieve certain techniques or effects, having the right equipment is essential. Long Exposure Photography is one of these techniques where some additional equipment is needed.

equipment for long exposure photography

Let’s jump straight to it and look at what I consider to be essential equipment for long exposure photography:

Camera with Manual and Bulb Mode

Okay, so this one might be a given. It’s obvious that you’ll need a camera to take an image. However, to be able to use a slow shutter speed (which is what long exposure photography is all about), you need a camera that allows you to manually adjust the ISO, aperture and shutter speed.

Since you are working with different shutter speeds it’s essential that you’re able to adjust these settings yourself, so you can then control the quality of your image. Even though most compact cameras do have this opportunity now, I highly recommend using a DSLR (or mirrorless) camera if you don’t already. It doesn’t have to be anything fancy, an entry level camera will do just fine.

bulb mode

Nikon D800 Bulb Mode

Bulb Mode is another option that it’s beneficial for your camera to have. While it’s not essential, it allows you to take exposures that are longer than 30 seconds. Most DSLR cameras have a maximum shutter speed of 30 seconds so if you want to use an exposure longer than that, you need to be in Bulb Mode. 

With this mode selected (it’s located different places on different cameras), you can expose an image for as long as you want. Basically, as long as you hold the shutter button triggered, the camera continues to take the image. I’ll come back to a neat trick to avoid pushing the button for several seconds or minutes in a bit.

A Tripod

I consider a tripod to be essential for any type of landscape photography but when dealing with slow shutter speeds, it’s hard to work without one. Some of you might comment that you can just lean the camera on a fence or lay it on a rock but that really limits your flexibility and, of course, the stability of your camera.

The reason I always travel with a tripod is because I normally work with images that have a shutter speed just too slow to capture handheld. Plus even if I’m not, I have the option.

This image wouldn’t be possible without a tripod.

You don’t need to spend thousands of dollars on the best tripods available but avoid getting the cheapest aluminum ones from the local electronic shop. Make sure that the tripod you choose is sturdy enough to be used in a river with rushing water, or when the weather is windy.

Exposure times of anywhere between 1/4th of a second to multiple minutes is common with long exposure photography. It goes without saying that you’re not able to get a sharp handheld image when using a shutter speed of 30 seconds. By using a tripod you make it possible to work with such long exposures and capture great, sharp images.

Neutral density filters

I’ve previously explained how to do long exposure photography without filters, so why do I now say they are essential? It’s quite simple – the quality of your images will be much higher.

Before explaining why I consider neutral density filters to be essential for long exposure photography, let’s quickly look at what they are:

  • Neutral density filters are darkened filters that are placed in front of the lens, requiring a slower shutter speed for the same amount of light to reach the sensor.
  • There are two systems available: screw-in and drop-in or square filters.
  • The filters come in different strengths (3-stop, 6-stop, 10-stop, etc.) which describes how much you need to lengthen the exposure time to maintain a well-exposed image.

NiSi 6-Stop ND Filter in front of my Nikkor 14-24mm

There are many filters to choose from on the market and it seems like new brands appear all the time. Personally, I’ve been using LEE Filters, NiSi Filters and B+W. NiSi has become my go-to choice these days as their filters don’t have a visible color cast (which is a common issue with these types of filters). LEE is known for its strong blue color cast and B+W had a very dominant red tone. These are relatively easy to fix in Adobe Lightroom or Camera RAW but I prefer to get as much as possible right in the camera.

Why are ND Filters essential for long exposure photography?

As mentioned, these filters require you to lengthen the exposure time for the same amount of light to reach the camera’s sensor in order to get a well-exposed image. The filters are darkened and their strength dictates how much you need to slow down the shutter speed. Compared to doing this without filters, using an ND filter allows you to use a much longer exposure times while still maintaining optimal quality (the sharpest aperture of your lens).

equipment for long exposure photography

Nikon D800 w/ Nikkor 16-35mm f/4 @ ISO100 – f/11 – 241 seconds.

It wouldn’t have been possible to capture an image with a 241-second shutter speed, without using an ND filter in the conditions present when I took the image above. You might be able to reach such an exposure time at night but not during a sunset. Without a filter, I might have gotten a 1-second exposure, which would look completely different with an overall lower quality. By placing a dark ND filter in front of my lens (the NiSi 10-stop) I was able to use a very long exposure and capture some of the beautiful motion going on in the sky as well as soften the surface of the lake.

Remote shutter

I’ll admit it right away, a remote shutter isn’t essential to achieve a long exposure but it is going to make the process much easier (I feel naked when mine is left behind)!

I’ve previously written an article where I compared using a Delayed Shutter and Remote Shutter, so I won’t go into the details of which is better here. What I will mention, however, is that when doing long exposure photography you often have to work with quickly changing elements (such as rushing waves). In these scenarios, you want to be able to capture the image at the exact moment the moving element is where you want it to be and can’t afford to wait an additional two seconds (for the self-timer to go off).

equipment for long exposure

A remote shutter was used to capture the exact moment the waves went over the rock

The image above represents one of these scenarios. As the tide was rising, the formations of the waves were constantly changing. I knew that I wanted to capture the exact moment the water started running down the left side rock and to be able to do that, I needed a remote shutter. Had I used the built-in delayed shutter (with a delay of two seconds) I would most likely have missed that exact moment, even though I could have tried to predict the moment of impact.

For Bulb Mode

Another benefit of using a remote shutter for long exposure photography is that most of them have a shutter lock function, which is going to save you a lot of hassle when working in Bulb Mode. Rather than manually holding the shutter button (and causing a visible camera shake) for minutes, you can lock up the shutter with a remote release.

remote shutter

Remote Cable Release

You don’t need to purchase the most expensive release out there (they can be surprisingly pricey) just make sure that it’s something that won’t break right away and one that has the opportunity to lock up the shutter. Note: make sure to get one that is compatible with your camera model.

Cardboard to cover the viewfinder

My last recommendation is something that many articles forget to mention. You need something to cover the viewfinder! Many cameras have this as built-in function and have a sort of “curtain” that you can close. But there are still many cameras that don’t have this option. If your camera doesn’t, make sure that you bring a piece of cardboard, or similar, that you can use to block the viewfinder during a long exposure. This is to avoid any unwanted light leaks as you see in the image below.

camera light leak

I forgot to block my viewfinder so my two-minute exposure looked like this.

Conclusion

While there are many other accessories available to make long exposure photography easier, these are the ones I consider to be essential. Do you have any others to add to the list?


The-Ultimate-Guide-to-Long-Exposure-Photography-eBookIf you want to learn more about Long Exposure Photography I’ve shared everything I know in my eBook The Ultimate Guide to Long Exposure Photography. This eBook is for those who are ready to take their images to the next level and expand their creative vision.

The post Essential Equipment for Long Exposure Photography by Christian Hoiberg appeared first on Digital Photography School.


Digital Photography School

 
Comments Off on Essential Equipment for Long Exposure Photography

Posted in Photography


Upcoming Fujifilm GFX 50S firmware update promises to improve AF, exposure compensation

19 Apr

In addition to announcing a handful of new medium format GF lenses, Fujifilm also unveiled plans for the first major firmware update for the GFX 50S medium format camera. According to the Fujifilm press release:

“Fujifilm will release a free firmware update for the FUJIFILM GFX 50S later this spring, adding new functionality and improving operability. New functions include computer tethering via Wi-Fi and improved operability in exposure compensation and autofocus performance in difficult scenes.”

We recently reviewed the Fujifilm GFX 50S and while we gave the camera a gold award, it was noted that AF speed and reliability was one area ripe for improvement. We also were disappointed in the lack of a dedicated exposure compensation button, so perhaps this update will make accessing that functions less annoying. Furthermore, the addition of a Wi-Fi tethering feature should go a long way to making the GFX 50S appeal to studio shooters.

Articles: Digital Photography Review (dpreview.com)

 
Comments Off on Upcoming Fujifilm GFX 50S firmware update promises to improve AF, exposure compensation

Posted in Uncategorized


6 Tips for Shooting Long Exposure Night Photographs

16 Feb

In this article I am going to share with you six tips that I have found to produce amazing long exposure night photographs. I have learned the hard way by making every mistake possible and through that finding what really does work.

So here are the 6 tips to make your long exposure photographs at night:

6 Tips for Shooting Long Exposures at Night

Tip #1: Try to avoid using a Neutral Density filter

On this photo (below) I did a 25 second exposure. That is quite a long exposure and to help prevent it from blowing out, I took the photo right at the end of sunset. There was less light, so that I didn’t have to put an ND Filter on.

6 Tips for Shooting Long Exposures at Night

If you put an ND filter on it is going to give you a color cast during long exposures. Yes you can use a polarizer, but avoid Neutral Density filters. Shoot when the sun is going down and keep your camera at a low ISO like 100 or 200. Don’t get me wrong, I love ND filters but not at night.

Tip #2: The best time for long exposures is 25 seconds

I know that’s a bold statement. Not as bold as stating that French food is the best in the world, but still a bold statement. Here is why I recommend this; I’ve found that when I shoot at 25 seconds it makes the water silky and the clouds stretchy and this has a beautiful look that sells well. Obviously it’s also an artistic choice, but as a photographer you likely want people to buy your photos. The best indicator that people like your photos is that they buy them.

Here is an example:

6 Tips for Shooting Long Exposures at Night

First I started with a 6 second exposure.

Now, in taking the photo I exposed the image for the highlights. So when you open up the shadows, bring down the highlights, and boost the exposure a little bit like so:

6 Tips for Shooting Long Exposure Night Photographs

I do have all the details of the photo, but the only problem is that the clouds were not moving and the water is not silky.

6 Tips for Shooting Long Exposure Night Photographs

So I went ahead and put the exposure time to 25 seconds. Now it does seem like the highlights in the photos are a little burnt, but I have found that on city lights it doesn’t really matter that much because it still works great on a print.

To conclude; 25 seconds is the best long exposure, you don’t even need a remote, you just need to put your camera on the 2-second timer and go into manual shooting mode, use a low ISO, and an aperture that is going to work like f/7 or f/8.

If your photo is too bright you can adjust the aperture to f/14 and if it is too dark you can even put your aperture to f/4. Just make sure you check your focus to ensure the background is sharp.

Tip #3: Try different exposures of the same scene

Even though I said that 25 seconds exposure is the best, it’s always good to shoot different exposures because this may be different for your situation. For example, I thought that this first image was my go-to photo.

6 Tips for Shooting Long Exposure Night Photographs

But in the end the one that I am going to retouch and going to send to the gallery is this one.

6 Tips for Shooting Long Exposure Night Photographs

So you already have your camera setup and on a tripod. Go ahead and try 8 seconds, 15 seconds, 25 seconds all without touching the tripod and then when you are evaluating your photos for retouching you will have several options.

Tip #4: Shoot towards the sun

When you are doing a long exposure without an ND filter (so as to avoid the color cast, tip #1), a good thing to do is to shoot toward the sun. When it is behind the horizon line it will always give you a nice sky with lots of color and gradations.

You can see on this photo that the sun is setting on the left.

6 Tips for Shooting Long Exposure Night Photographs

And as I turn the camera more away from the sun and back towards the city you get this view.

6 Tips for Shooting Long Exposure Night Photographs

You can see that we get less and less details in the sky. But if you shoot where the sun sets you will always have great details even after sunset, and it is the right time for these type of photos.

Tip #5: Make sure you have water and the sky in your photo

Those are two important things for a long exposure which help to really elevate your photos into what I like to call miracle photos.

Tip #6: Try to get the clouds coming towards you

You can study meteorological information to get a sense of which direction the clouds are moving and try to position your shot accordingly. There are even a few apps which great for this.

As I said, this is not always easy but I got lucky on this one. The clouds are going to be stretchy and create leading lines and that help make this photo really interesting.

6 Tips for Shooting Long Exposure Night Photographs

I hope this helped you and you will be able to capture beautiful places at the perfect time. Please share your long exposure night photos in the comments below.

** NOTE ** If you’d like to know more about this subject, learn more about my brand new course on night photography here, so you can take stunning night photos too!

googletag.cmd.push(function() {
tablet_slots.push( googletag.defineSlot( “/1005424/_dPSv4_tab-all-article-bottom_(300×250)”, [300, 250], “pb-ad-78623” ).addService( googletag.pubads() ) ); } );

googletag.cmd.push(function() {
mobile_slots.push( googletag.defineSlot( “/1005424/_dPSv4_mob-all-article-bottom_(300×250)”, [300, 250], “pb-ad-78158” ).addService( googletag.pubads() ) ); } );

The post 6 Tips for Shooting Long Exposure Night Photographs by Serge Ramelli appeared first on Digital Photography School.


Digital Photography School

 
Comments Off on 6 Tips for Shooting Long Exposure Night Photographs

Posted in Photography


Handy tool helps you say no to work for ‘exposure’

16 Dec

Graphic designer Jessica Hische has developed a tool to help creatives respond to requests for work. Made with designers in mind, photographers who are frequently asked to work ‘for exposure’ or very little pay might find it appealing too. The choose-your-own-adventure style tool helps you build a letter based on the client and the proposed budget – none, very low or good. It will also help you negotiate other tricky situations like an ambiguous timeline or very quick turnaround. 

Hische’s tool creates a letter that’s polite but firm, and more than just saying ‘no,’ aims to inform the asker why creative professionals must insist on being paid for their work. It also offers terms for taking on no-budget projects for charities and friends. 

Articles: Digital Photography Review (dpreview.com)

 
Comments Off on Handy tool helps you say no to work for ‘exposure’

Posted in Uncategorized