RSS
 

Posts Tagged ‘Exposure’

Motion Exposure: Light Art Captures the Movement of Kayaks

04 Dec

[ By Steph in Art & Photography & Video. ]

motion exposure 1

Strange undulating patterns of colored lights seem to slink across the surface of water like living entities in this captivating series of images by Ontario-based photographer Stephen Orlando. In a variation on the art of light painting, Orlando attaches LED lights to the oars of kayaks and canoes, literally spotlighting their movements as they cut through rivers and lakes.

motion exposure 2

motion exposure 3

Long exposures capture nothing but the lights as the subjects move against the backdrops, erasing the kayaks and the humans piloting them. The result is surreal, as if bioluminescent alien creatures were gliding on the surface of the water.

motion exposure 4

motion exposure 7

“I’m fascinated with capturing motion through time and space into a single photograph,” says Orlando. “Using LED lights with custom color patterns and long exposure photography, I’m able to tell the story of movement.”

motion exposure 5

motion exposure 6

“This technique reveals beautiful light trails created by paths of familiar objects. These light trails have not been artificially created with Photoshop and represent the actual paths of the objects.”

spark faces

cyclones

Another project takes light painting to a more urban setting, with painter Diliz capturing faces in sparks. Cyclones of light also appear to break through the surface of the earth and bodies of water in stunning works by Martin Kimbell.

Share on Facebook


[ By Steph in Art & Photography & Video. ]

[ WebUrbanist | Archives | Galleries | Privacy | TOS ]


WebUrbanist

 
Comments Off on Motion Exposure: Light Art Captures the Movement of Kayaks

Posted in Creativity


The Optimum Digital Exposure

29 Oct


One of the most popular articles on Luminous-Landscape is by Michael Reichmann Expose (to the) Right from 2003.  It’s an article that has been referenced numerous times and even today makes total sense.  Today, Bob DiNatale revisits this concept in his article The Optimum Digital Exposure.  It’s a different take on achieving a good exposure with today’s digital cameras.

Michael and Kevin are traveling this week.  Michael is headed to PhotoPlus East (PPE) and Kevin is headed to Scotland to lead a Rockhopper Workshop.  Michael will publish an update from PPE and Kevin will publish articles from Scotland (if the internet cooperates).  We will be back full force the week of November 10th.


The Luminous Landscape – What’s New

 
Comments Off on The Optimum Digital Exposure

Posted in News


5 Easy Steps to Exposure Blending for High Contrast Landscapes

27 Oct
Final Image  Bear Rock, Dolly Sod Wilderness Area, West Virginia

Final Image: Bear Rock, Dolly Sod Wilderness Area, West Virginia. Sunrise and Sunsets can be extremely contrasting and very challenging to capture the wide exposure range.

Here’s a problem I am sure you have encountered, instances where you try to photograph an image that has a greater range of light and dark than your camera can accurately capture. In the example above, when we set our exposure to expose the sky correctly, the foreground objects are severely under-exposed. Likewise, if we set our exposure to correctly expose the foreground, the sky is blown out and loses almost all detail. One solution to this dilemma might be to use HDR software to combine several bracketed exposures into one image. However, this method can be overwhelming and time-consuming to do correctly for a pleasing result. Another solution to this problem could be to use graduated neutral density filters. Unfortunately, a good set of filters can be quite expensive and a cheap set can harm the quality of your image.

A simple solution to this problem scenario may be as easy as taking two exposures, one correctly exposed for the dark areas (in this case the foreground) and the other correctly exposed for the lighter area (in this case the sky). Place your camera on a tripod so that both images will be composed exactly the same.

image correctly exposed for the sky 1/10 of a second @ f/10. ISO 100

Image exposed for the sky: 1/10th of a second @ f/10, ISO 100

Image exposed for the foreground: 1 second @ f/10, ISO 100

Image exposed for the foreground: 1 second @ f/10, ISO 100

Now, let’s look at a simple five step exposure blending process, performed in Photoshop, to resolve this contrast issue.

Step 1: Open your images

Open the two exposures in Photoshop as layers. This can be simply done with the following script. In Photoshop, select: File/Scripts/Load files into stacks (if you use Lightroom just select both thumbnails, right click and choose “Edit in>Open as Layers in PS). Then select your two exposure files. Label the layers for identification. (In this case we label one layer “Sky” and the other “Foreground”). Drag the Sky to the top layer if not already in that position.

Step 2: Add a layer mask

Add layer mask filled with black to top layer.

Add layer mask filled with black to the top layer.

Add a layer mask, as shown below, to the highlighted Sky layer. While holding down the ALT (opt) key, select the Add layer mask button located at the bottom of the layer palette. This will add a layer mask to the Sky layer and automatically fill it with black. The black-filled layer will mask out all of the Sky layer and reveal all of the Foreground layer.

Step 3: Paint over sky

Click on the black layer mask and select the paintbrush tool. Set your paintbrush to paint with white, and set the size of your brush as needed. Set the hardness of your brush to a low number to give it a soft edge while you paint. Paint over the sky area of the image, which will reveal the Sky layer. By adjusting the opacity, size and hardness of the brush as you paint, blend the two exposures together.

Paint with white on your layer mask to reveal the sky in the top image. use different opacities and hardness to make the blending look natural.

Paint with white on your layer mask to reveal the sky in the top image. Use different opacities and brush hardness to make the blending look natural. This is what the mask might look like.

Step 4: Add finishing touches

Add adjustment layers (see below) as needed to adjust colors and contrast of the layers to make the image look natural.

Final layer palette

Final layer palette

Step 5: Save your file

Save your file as a Photoshop document (.PSD). This will preserve your image with layers which you can return to if you need to make further adjustments to improve the image.  You can now can flatten the layers (Layer/ Flatten Image) and Save As a single layer file such as a JPG.

This image was created from three files using Exposure blending. Exposure #1 was exposed for the light green area above the falls and exposure #2 was exposed for the shadow area below the falls. The light was hitting the rock on the left  very hard so a third exposure was need just for that rock.

This image was created from three files using exposure blending. Exposure #1 was exposed for the light green area above the falls and exposure #2 was for the shadow area below the falls. The light was hitting the rock on the left very hard so exposure #3 was needed just for just that rock.

So next time you are faced with an extremely contrasting scene, try this easy exposure blending process to extend the exposure range of your image. Do you have any exposure blending tricks that you use? Post samples of your images.

The post 5 Easy Steps to Exposure Blending for High Contrast Landscapes by Bruce Wunderlich appeared first on Digital Photography School.


Digital Photography School

 
Comments Off on 5 Easy Steps to Exposure Blending for High Contrast Landscapes

Posted in Photography


Step-by-step Guide to Long Exposure Photography

30 Jul

In the past few years, thanks to the diffusion of useful accessories and photographic filters with good quality and low prices, the technique of long exposure has become increasingly popular among photography enthusiasts. Even if this technique can be used both in studio and in a urban environment, the perfect playground of long exposures is landscape photography.

Unfortunately often it happens that the result we get is far from our expectations, and we end up classifying the long exposure as a demoniacal technique. However, following this step-by-step guide to long exposure photography, you’ll see how easy it is to get a good result on the first attempt (or almost).

Picture 1

Step One: study the weather

A day with a cloudless sky is a good day to drink a beer with friends, not to make long exposures. Likewise it cannot rain forever, so do not resign yourself to an afternoon with your PlayStation. You should study satellite images rather than the meteorological sites, trying to figure out if there is an incoming storm, or if the downpour is about to end.

Step Two: visit the location well in advance

Scout the location ahead of time, as you need a lot of time to find the perfect composition, or at least more than the time needed for a “short exposure”. In fact in a long exposure the world is completely different from how you see it with your own eyes. You have to try to see it with your mind, looking for a harmonious composition that includes moving subjects, trying to predict the direction of the clouds or the force of the sea. Try not to put the sun into the composition because its movement will ruin the shot and it will create area of overexposure that is not recoverable. If you cannot avoid the sun, wait for it to hide behind a cloud.

Picture 2

Step Three: use a tripod

Mount your camera on a tripod and install all the accessories such as the remote shutter release and the filter holder (if you are using drop-in filters). However, wait to actually install the filters. Very important!

Step Four: compose the image and lock focus

Refine your composition, focus on the subject and lock the focus. If you are using manual focus, just do it. If you are using the autofocus mode, you should focus by half-pressing the shutter button, and once the focus has been made, while still holding down the shutter button halfway, push the lever from Auto Focus to Manual. In this way, your camera will maintain the focus (or alternately you could use back-button focus).

Picture 3

Step Five: set the exposure

Now set your camera to Manual (M) mode or Aperture Priority (A/Av) mode. Then set the aperture to an appropriate value for the scene (for landscapes I suggest between f/8 and f/11) and take a “Test Shot”. The test is complete when you get a correct exposure. To determine if the exposure is correct, check the histogram (do not trust your display, it is too bright). It is true, there is no universally correct histogram, but there are histograms that are universally incorrect, namely moved completely to the right or left side (the image is respectively overexposed or underexposed). Once the test shot is successful, write down the shutter speed you used for that shot.

Step Six: add your filter

Now add your Neutral Density (ND) filter. If the filter is very strong, for example 10 stops, you will not be able to see through the viewfinder or the Live View. Do not worry, because if you have followed the guide up to this point you will notice that we have already made the composition and the focus too. You are blind, but your camera will see everything perfectly.

Picture 4

Step Seven: change to Bulb mode

Set the shooting mode to Bulb (B) in order to take over the thirty second limit of the camera. Do not change any of the other settings (ISO and aperture) used in the test shot.

Step Eight: take your long exposure shot

It is finally time to take our long exposure shot. But how long will you to leave the shutter open? It is less difficult than you might expect. First of all, recollect the shutter speed that you noted down from the “Test Shot” you did in Step Five above. Now you must compensate by the number of stops introduced by the filter. For example, if your test shot was 1/15th of a second, adding 10 stops will get a shutter speed of approximately 60 seconds. There you have your shutter speed. No need to be stuck in the mathematics: on the internet you can easily find conversion tables and applications for your smartphone that will do the conversion for you.

Picture 5

Step Nine: check the histogram again

Once you’ve taken the shot with the calculated shutter speed, check the histogram. If the new histogram is approximately equal to the one of the test shot, mission accomplished. If it is shifted too far to the right or to the left, repeat the shot again correcting the shutter speed.

Easy, isn’t it? Now fill your backpack with your camera and filters and go to practice in the field. For any doubt or if you need any help, don’t hesitate to ask questions in the comments below. Please share your long exposure images as well.

The post Step-by-step Guide to Long Exposure Photography by Francesco Gola appeared first on Digital Photography School.


Digital Photography School

 
Comments Off on Step-by-step Guide to Long Exposure Photography

Posted in Photography


When to Trick Your Camera to get a Good Exposure

28 Jul

Hacking_photography_somerstyle-9526

I bought the Sony A7 camera recently and have been taking it out quite a bit to get a feel for it.

My wife is starting a fashion blog so I thought I would take her out for a fashion shoot at the beach. I was shooting a high-contrast scene and realized. . .

The camera doesn’t always know what’s best

Your camera always has the best intentions, but it doesn’t always get it right. Sometimes the sensor will think you want to expose a scene one way when you actually want it to expose it another.

I’ll show you an example. I put the camera on aperture priority and shot this:

Hacking_photography_somerstyle-9425

To most people, this image would be considered underexposed because the model is dark. This happens because the scene has a lot of contrast. In other words, there is a lot of bright pixels (the sky) and a lot of dark pixels (the rocks, ground, and model).

Why doesn’t the camera always get the exposure correct?

The camera sensor is trying to create an average of dark pixels to light pixels. The histogram shows the dark pixels on the left of the graph and the bright pixels on the right.

A “properly exposed” photo means the balance between the blacks and whites is mostly even. The graph isn’t pushed into the left wall which would be very underexposed, or pushed into the right wall which would be very overexposed. The problem is that to expose properly for the model we need more bright pixels, we need to increase the exposure. Sometimes you will need to trick the camera to get a good exposure.

Using exposure compensation

Sometimes you just need a little bit more or a little bit less. In this case I had the ISO and the aperture exactly where I wanted them. I had my camera set up so the front dial controls the exposure compensation.

In this case, exposure compensation is set up to slightly change the shutter speed to either increase or decrease the exposure. I twisted the exposure compensation dial until the image looked good which was a shutter speed of 1/200.

Hacking_photography_somerstyle-9426

This looks much better. The model is properly exposed now but the sky is now overexposed. Because the sky is now white, you can see the histogram is pushed to the far right.

This typically means the image is overexposed but in this case it’s simply because the sky has a lot of white pixels in it that register on the right of the histogram. Let’s see it in another example:

Hacking_Photography_Somerstyle

I just used the exposure compensation to bump up the exposure again so the model was properly exposed and the sky was overexposed in the image on the right.

This happens a lot when subjects are backlit

Hacking_Photography_somerstyle_diptic

When you shoot with the sun behind your subject, the camera will sometimes struggle to decide whether to properly expose the background or the subject. The camera is trying to figure out which one you want exposed.

If you are shooting for a silhouette you can underexpose the subject to create a dark outline of their figure. If you want to properly expose the subject you will overexpose the background in high contrast light.

Decisions, decisions

Ultimately it’s up to you how you would like the image to look. I like the high-key look of some of these images. The final touch once you have the light and exposure the way you like it is to edit the image.

Here is one of my favorite photos straight out of camera:

Hacking_photography_somerstyle_pre-9523

I used one of the 1-Click Hacking Photography Lightroom presets in the Old School Color set called “Warm Film” and came up with this final image:

Hacking_photography_somerstyle_post-9523

Overall it was a good shoot on the beach with my wife, I had fun running more tests on the Sony A7, and created some great images in the making!

The post When to Trick Your Camera to get a Good Exposure by Mike Newton appeared first on Digital Photography School.


Digital Photography School

 
Comments Off on When to Trick Your Camera to get a Good Exposure

Posted in Photography


Double Exposure Portraits by John Williams

02 Jul

At April and John’s Wedding at Consall Hall we tried something a little different from our usual bride and groom portraits and combined two photos in Photoshop to create a cool double exposure portrait effect. Here is a brief tutorial explaining the technique behind the effect. First of all, you need to choose your starting […]

The post Double Exposure Portraits by John Williams appeared first on dslrBlog.

dslrBlog

 
Comments Off on Double Exposure Portraits by John Williams

Posted in Photography


Photography Tutorial: Intro Into Exposure

27 Jun

Retro Photography Gear With Exposures

Intro to Photo: Part 2 – Exposure


Good morning, Fashion Photography Blog readers!  Welcome back to our brief intro to photography. Last post we talked about the camera basics. In this post we are going to going to talk about how to set up your exposure correctly. So let’s jump right in.


Setting Your Exposure


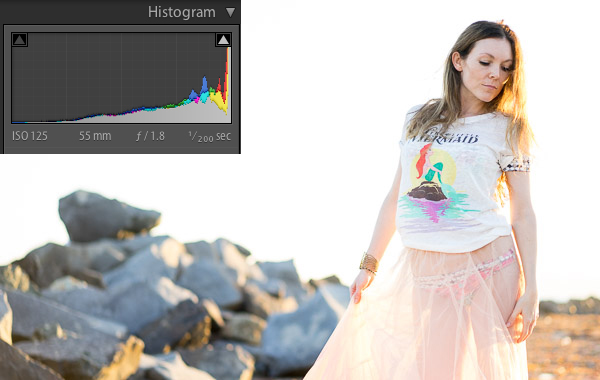
There are three main settings to be aware of prior to taking a photograph. Those settings are ISO, Aperture and Shutter Speed.


ISO – ISO, back in the days of film, was the measure of a film’s sensitivity to light. This system has been adopted by digital cameras and essentially works the same way it did with film. “Less sensitive” films require more light to make an exposure – The higher the ISO number, the more sensitive the film. So, what exactly does this mean?


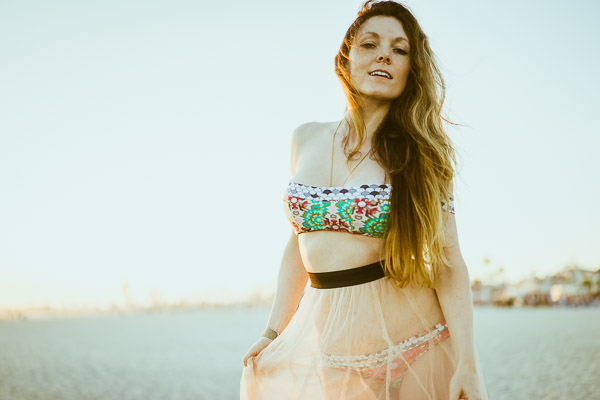
Let’s say you want to shoot someone outside on a bright, sunny day. You would use a film (or set your digital camera) with an ISO of about 100. Because of the large quantities of light available to you, it’s not necessary to use a sensitive film.


If you’re trying to shoot someone in a room solely illuminated by candle light, you’re going to need film that is much more sensitive. For this situation I would suggest using something closer to ISO 1600. Films that are more sensitive are referred to as “fast films” whereas films that are less sensitive are referred to as “slow films.”


In the case of film, the more sensitive it is, the more grain you will see in the final image (this has to do with the chemistry of the film and something called “silver halides.”). With digital cameras, the higher the ISO, the more noise you will see in your final images. This has to do with the image sensor and how much heat it is giving off while capturing your image, among other things.


ISO Comparison Example

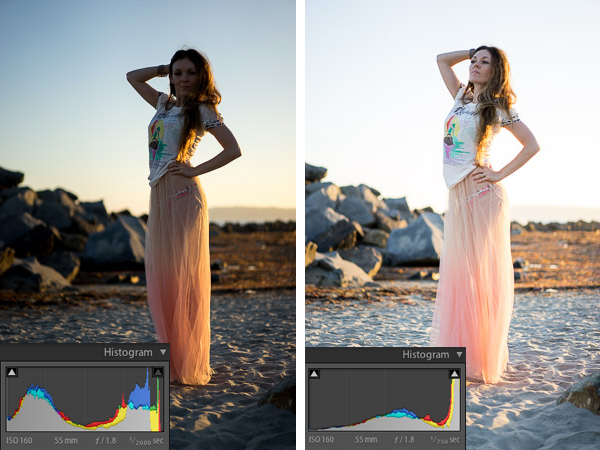
ISO Comparison – Same camera settings, only difference is the ISO


Aperture (f/stop) – Aperture is the size of the hole in the lens that controls the amount of light let in. The larger the f/stop # the smaller the opening in the lens.


Aperture F/Stop Diagram

Shutter Speed – Shutter speed is the other setting which controls how much light is let into the camera. This one is kind of self-explanatory, time works in fractions of a second.


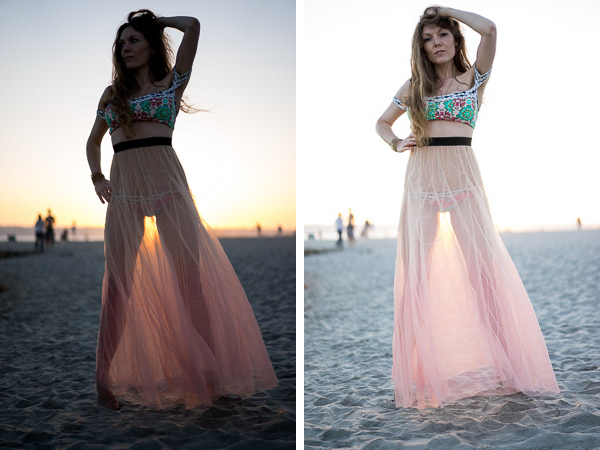
You must understand the relationship between shutter speed and aperture in order to precisely control your exposure. The wider open your aperture, the faster your shutter speed to prevent overexposing your image. The smaller your aperture, the slower your shutter speed to prevent underexposing your image.


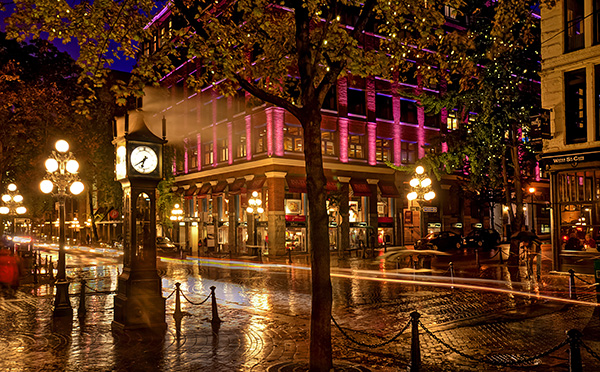
Think of it this way… Let’s pretend that your camera is a bucket and light is water. In order to fill your bucket with water, you have to control how much pours in at a time. The larger the opening (the wider open your lens is, i.e. f/2.0) the more water (light) will pour in. Therefore you must shut off the water relatively quickly (use a faster shutter speed, i.e. 1/250th) in order to prevent it from “overflowing” or overexposing your image. It works in the reverse as well… If you have a smaller opening (smaller aperture, i.e. f/22) you must let the light in for longer (use a longer shutter speed, ie 1/15th) in order to prevent an underexposed image.


Shutter Speed Diagram

(The numbers in this image have nothing to do with the number in the paragraph above)


Stops


Everything in photography is measured in stops. You should memorize these stops because you will need to recall them at a moments notice. Cameras and light meters often measure things in thirds of a stop for more precision, but this can be turned off.


The main stops for ISO:


(Least sensitive) 100, 200, 400, 800, 1600, 3200 (Most sensitive)


The main stops for aperture (f/stops):


(Largest opening) f/1.4, f/2.0, f/2.8, f/4, f/5.6, f/8, f/11, f/16, f/22, f/32, f/64 (Smallest opening)


The main stops for shutter speed:


(Longest) 2s, 1s, 1/2, 1/4, 1/8, 1/15, 1/30, 1/60, 1/125, 1/250, 1/500, 1/1000 (Shortest)


Stops either double or halve when opening up or stopping down. This is blatantly obvious with shutter speeds; it works the same with ISO and f/stops. F/8 allows in 1/2 the amount of light that f/5.6 allows in.


Stops work in relation to each other. If you have the combination for a perfect exposure but decide you want to use a more shallow depth of field or want a longer shutter speed for motion blur, you can easily achieve your desired effect without having to re-meter or anything.


This is something called equivalent exposures.


Equivalent Exposures Chart


Count the number of stops between your actual exposure and your desired exposure to figure out what is the new f/stop – shutter speed combination would be. I know this sounds confusing but I promise it’s quite simple.


Let’s say you are shooting at ISO 100 @ f/16 with a shutter of 1/15th of a second.. But you want a shallow depth of field and would rather shoot at f/4. Count the number of stops between the two and adjust your shutter speed accordingly.


The difference between f/4 and f/16 is 4 stops. In this scenario, you’re opening up your aperture, therefore letting in more light. So you must stop down (close) your shutter 4 stops to keep an equivalent exposure. 4 stops difference from 1/15 would be 1/250.


Your new, but equivalent exposure would be ISO 100 @ f/4 with a shutter speed of 1/250th of a second.


F Stops Versus Shutter Speeds Chart

I know this part gets a bit confusing.  Just stick it through and I promise we’ll get to the fun stuff soon.


Check back in tomorrow for Day 3 – Lenses.  (Or if you missed it, catch up on yesterday’s post, Part 1 – Cameras.)


In the meantime if you have any questions, just ask! Shoot me an email at alana@alanatylerslutsky.com.


Happy shooting!


Alana


Fashion Photography Blog

 
Comments Off on Photography Tutorial: Intro Into Exposure

Posted in Uncategorized


Alien Skin Software’s Exposure 6 now available

11 Jun

Exposure6-BoxShot-1024x1024.jpg

Alien Skin Software has launched an update to its popular photography effects software, Exposure. Announced in April, Exposure 6 has a new processing engine for instant image effect previews, a new user interface for a faster workflow and tools for ‘Bokeh.’ It’s available for download now at $ 149 for new users and as a $ 69 upgrade for existing users. Read more

News: Digital Photography Review (dpreview.com)

 
Comments Off on Alien Skin Software’s Exposure 6 now available

Posted in Uncategorized


Camera Basics 101 The Exposure Triangle

08 Jun

One of the first things you will want to get your head around in photography is understanding exposure. To do that you will need to learn some camera basics and master:

The Exposure Triangle

If this term has of yet eluded you, or you’re not quite ready to claim full mastery here are 3 video tutorials to help you understand the basics of the exposure triangle including:

  • ISO
  • Aperture
  • Shutter speed

In this first video the host Mark Wallace (with Adorama TV) goes through all three of these elements and explains each briefly, and how they work together:

Mark also mentions this book in the video as a good starting point for learning more about exposure.

Next up is Shoot in Manual Mode Pt. 1 – Aperture, Shutter Speed and ISO – by photographer Sean von Tagen

Lastly is this video by a host whose name I couldn’t find. If you can get past his really monotone voice, the information is really good and should be easy to understand and follow.

If you want more reading, try these:

  • Exposure Triangle – Not just about more/less light
  • Understand Exposure in Under 10 Minutes
  • Getting off Auto – Manual, Aperture and Shutter Priority modes explained
  • Photo Nuts and Bolts – Know your camera and take better photos – a dPS eBook

The post Camera Basics 101 The Exposure Triangle by Darlene Hildebrandt appeared first on Digital Photography School.


Digital Photography School

 
Comments Off on Camera Basics 101 The Exposure Triangle

Posted in Photography


How to do Long Exposure Photography and Light Trails at Night

03 Jun
Gastown Light Trails

Gastown light trails, Vancouver, Canada

Before I understood how photography worked, I was always intrigued by light trails in images. I never understood how that happened. When I began to study photography, one of the first assignments I did was an advanced course on night photography. I decided I would try and capture some light trails. I set up my camera, made sure the settings were correct and waited. A few cars went past, but my timing was off and the shots were not great. I continued to wait. After about an hour of trying and experimenting, I got the shot I was looking for. It was like magic to me. The car was not in the shot but the lights seemed to float in mid air. I was hooked. This was something that mystified me for a long time and, I had managed to get it right.

What was so mesmerizing for me was that the image I saw on my LCD screen was not what I saw in real life. The camera had managed to capture a scene that my eyes could not capture in the same way. This seemed amazing to me. I soon realized that the camera was able to “see” things differently to the way my eyes saw them. I spent many nights trying to capture light trails in various locations. I was also doing lots of reading and research and came across a technique called long exposures. This too was amazing. It had the ability to alter a scene in such away that it looked totally different to the way our eyes normally see it. Again I was hooked and still, to this day, long exposures and light trails are some of my favourite techniques in photography.

Long exposure photography and light trails have similar techniques, it is the subject matter that differs, so I will discuss each technique separately and tell you how to get the best results in both.

How to do long exposure photography

Shooting long exposures effectively requires that you should be shooting in Manual mode as much as possible. If you are not sure how to shoot in Manual, take a look at Getting off Auto – Manual, Aperture and Shutter Priority modes explained to learn more about these modes. To be able to get sharp and effective long exposure images, here is a checklist of item you will need.

1. What equipment is needed to shoot long exposures?

  • A tripod – this is a good piece of equipment to have in most instance, but is a critical piece of equipment for shooting long exposures. Make sure your camera is properly mounted onto the tripod before you start shooting.
  • A camera – obviously you will need a camera, but many people assume you can only do this type of photography with an SLR. Some advanced point-and-shoot cameras can also do long exposures if they have a Shutter Priority function. Take a look in your camera’s manual to see if it has this function, you may be surprised.
  • Cable release – your camera will be on a tripod, so it should be very still, however, sometimes the action of pressing the shutter release button can cause the camera to move slightly and this movement can cause your image to blur very slightly. You may not notice this on the LCD screen, but when you open the image on your computer, it will be evident. I recommend getting a cable release (also called a remote trigger). It is simply a cable that attaches to your camera and acts as a shutter release button. Using a cable release means you can set up your camera, step away from the tripod and press the button without touching the camera. Cable releases can be wireless too. If you don’t have a cable release or don’t want to buy one, you could use your camera’s self-timer function to trigger the shutter.
  • Warm clothes and comfortable shoes – depending where you live, and the time of year you plan to be shooting, you may need to dress warmly. Long exposures work well after dark and it may get cold, so be sure to wear warm clothes. Be sure that you have comfortable footwear too as you may be standing for a few hours.

2. What subjects are best for long exposure photography?

Long exposures work well for certain types of subjects like seascapes, landscapes and cityscapes. The key to getting a successful long exposure image is to have something in your image that is perfectly still and something that is moving. Water, clouds and trees blowing in the wind all work well if the rest of the scene is stationary. This difference between the elements in the scene will create drama and will add significant value to your image. The viewer will be seeing something that cannot be seen with the naked eye. The reason why long exposure images are so compelling is that they warp time. Water looks like a soft mist, trees look like a dull blur and clouds become long and streaky. This is what makes a familiar scene more compelling.

Long Exposure scene in Vancouver BC

Long exposure scene in Vancouver, Canada

3. What camera settings should be used?

Long exposures are ideally shot on Manual mode. If you are not sure how to shoot in Manual mode, you can use one of the other semi-manual modes such as Aperture priority or Shutter priority. Here are some quick pointers on the settings:

  • Shutter speed – depending on the light in your scene, your shutter time will need to be at least a 10 to 15 seconds, or longer if necessary. If you are doing a seascape and the water is moving quickly, then a few seconds may be long enough to make the water look misty.
  • Aperture – you will want to have your aperture set at anywhere between f/8 and f/16. This again, will be determined by how much light is in the scene and how long you want to expose for.
  • ISO – keep your ISO settings as low as possible, ISO 100 is what I use for long exposures.

4. When is the best time of day to shoot long exposures?

It’s normally a good idea to shoot long exposures as the sun is setting, or just after sunset. My suggestion is to be on the scene an hour before sunset. That way you can test some shots, make sure your composition is good and be sure all your settings are correct. Then wait. Personally, sometimes I will simply sit there and enjoy the scene, other times I may listen to some music, but I like to be relaxed and ready for when the light starts to work. Normally you will want to start shooting about 15 minutes before the sun has completely set and up to an hour after it is below the horizon.

The important part is to be willing to experiment. Each time you decide to shoot long exposures will be a little different. The light may be brighter than you think, the sunset may not be as dramatic as you hoped, or the shot may not be just as you imagined. Be patient and experiment. I will sometimes go back to a location two or three times to try and get the shot I am looking for. Once I have it though, the sense of reward is fantastic and the patience and effort is paid off!

Long Exposure of Science World in Vancouver

Long exposure of Science World in Vancouver

How to shoot light trails

Much of the advice for shooting light trails is very similar to the tips above. The key difference is in the timing and location of your shoot.

1. What equipment is needed to shoot light trails?

  • Same as above 

2. What subjects are best for light trails?

For light trails to work, you need to have something with lights moving through your scene. A car, a bus, a train and even an aircraft can work. Be sure to be out of the direction of the vehicle you are photographing. Please do not stand in the middle of the road, or on train tracks. Position yourself in a safe place to make this work. Always be aware of your surroundings. It is easy to become immersed in what you are shooting and lose sight of where you are standing. Be safe, first and foremost!

A moving bus in the scene made this shot more dynamic

A moving bus in the scene made this shot more dynamic

3. What camera settings should be used?

Light trials, like long exposures are ideally shot in Manual mode.

  • Shutter speed – depending on the light in your scene, your shutter time will need to be at least 10 to 15 seconds, or longer if necessary. Make sure that your shutter speed is long enough to capture longish light trails. You don’t want to cut them off too soon as you will have some short trails in your image that may look strange.
  • Aperture – you will want to have your aperture set at anywhere between f/5 and f/11. This again, will be determined by how much light is in the scene and how long you want the exposure.
  • ISO – keep your ISO settings as low as possible, ISO 100 is what I use for light trails. If your ISO is set to 500 or higher, your exposure will be shorter and you run the risk of overexposing the highlights ESPECIALLY when shooting car headlights.

4. When is the best time of day to shoot light trails?

Light trails can be shot in the early evening, or after the sun has set. Each scene will be different, but sometimes it is too light to get effective light trails just after sunset. You may need to wait until 30 minutes after the sun has set to get longer light trials.

The important part, once again, is to be willing to experiment. Try different times after sunset and see what works for you. Spend time behind your camera perfecting your timing. Scout locations during the day that you will think will work for light trails and then go and try it out.

Steam Clock in Gastown, light trails on the road

Steam Clock in Gastown, light trails on the road

Photographing after dark can be very rewarding. It is worth the effort to learn how to use these techniques to bring new images into your portfolio, and to have new skills which will enable you to shoot under any lighting conditions. Experiment and enjoy! Happy shooting.

The post How to do Long Exposure Photography and Light Trails at Night by Barry J Brady appeared first on Digital Photography School.


Digital Photography School

 
Comments Off on How to do Long Exposure Photography and Light Trails at Night

Posted in Photography