RSS
 

Posts Tagged ‘Exposure’

Making Sense of Exposure

24 Sep

When I first started out in photography I had a tough time wrapping my head around one of its most fundamental concepts: exposure. I learned everything I could about things like aperture, light, shutter speed, highlights, shadows and dynamic range, but all these were planets orbiting a central sun called exposure and I couldn’t nail down exactly what that meant. I heard terms like “expose for the highlights” and “try to get a good exposure” sandwiched between people talking about “double exposure” and “long exposure” and my head was swimming. I figured things out eventually, but it took trial and error and cries for help to my fellow photographers (not to mention a lot of online research and books). So, then, let me help other aspiring image-makers learn a thing or two by making sense of exposure.

what-is-exposure-building

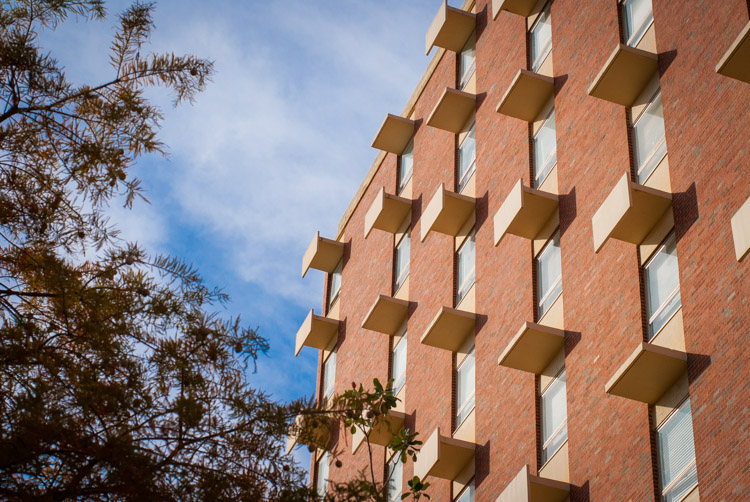
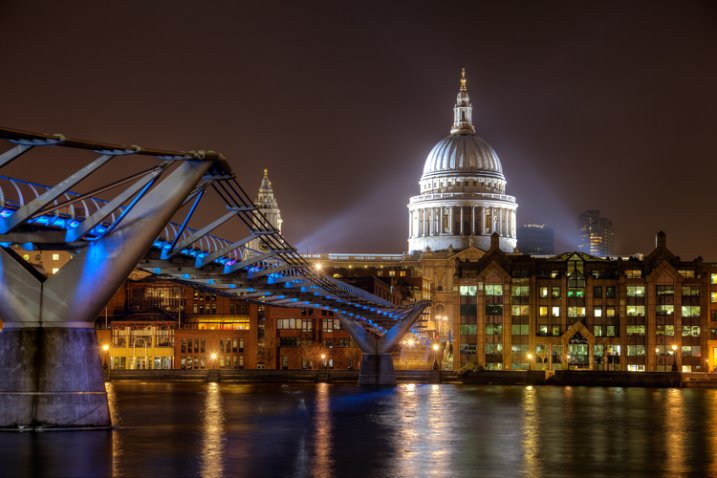
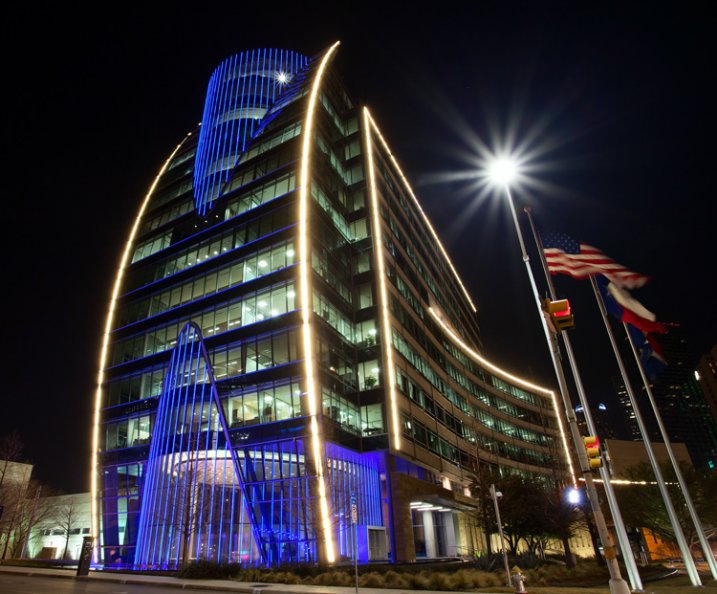
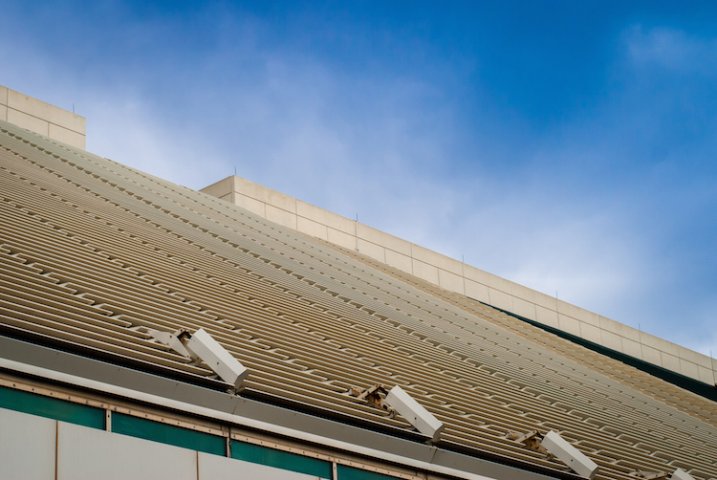
A properly exposed architecture photo.

Here’s the most basic, but informative, definition I can offer of exposure: it’s how bright or dark your photograph is. If a photo is too bright, it’s considered to be overexposed. Too dark, and it’s underexposed. But the Goldilocks-approved version of almost any picture is what’s known as a proper exposure – it’s neither too dark nor too light. All other bits aside, when people talk about getting a properly-exposed image, or tweaking camera settings to get a good exposure, all it really means is getting an image that’s not too bright or not too dark.

what-is-exposure-birthday

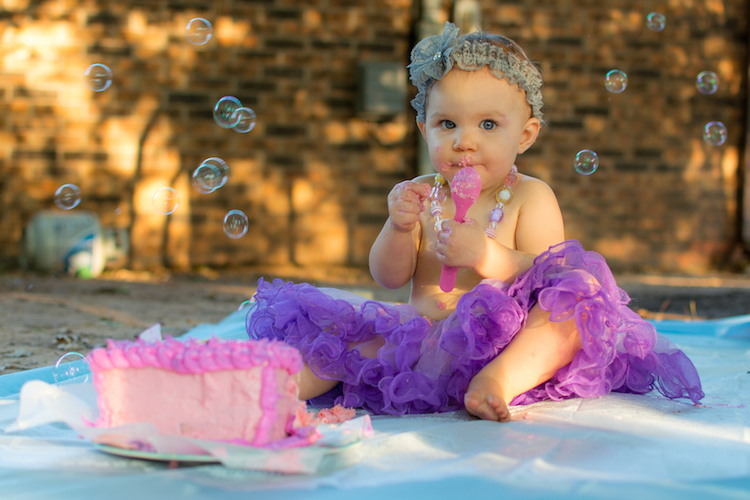
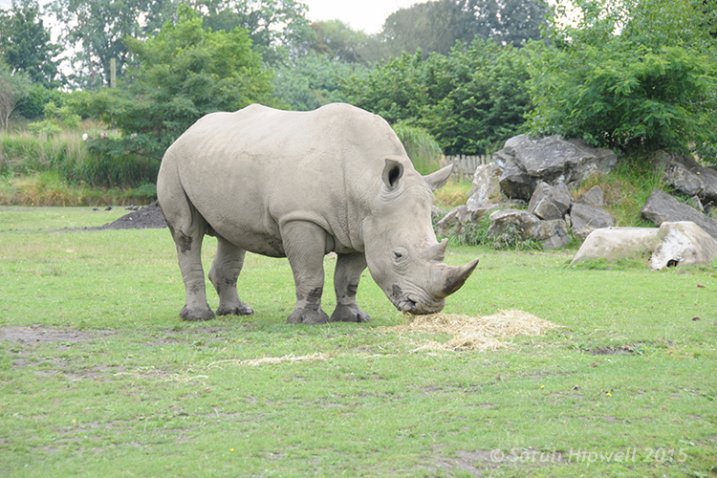
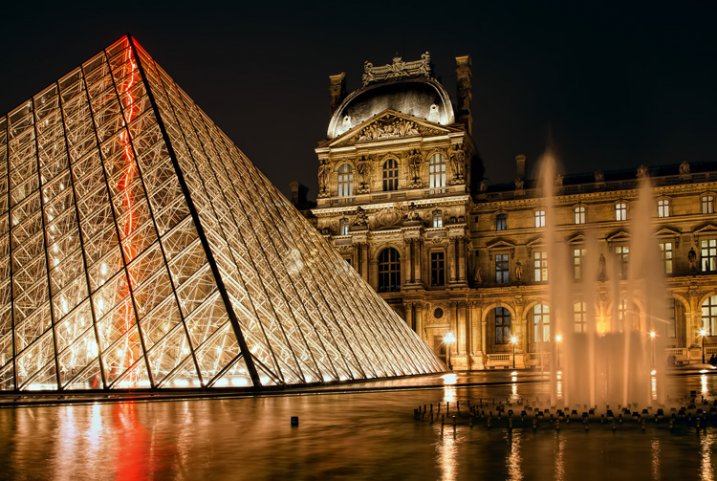
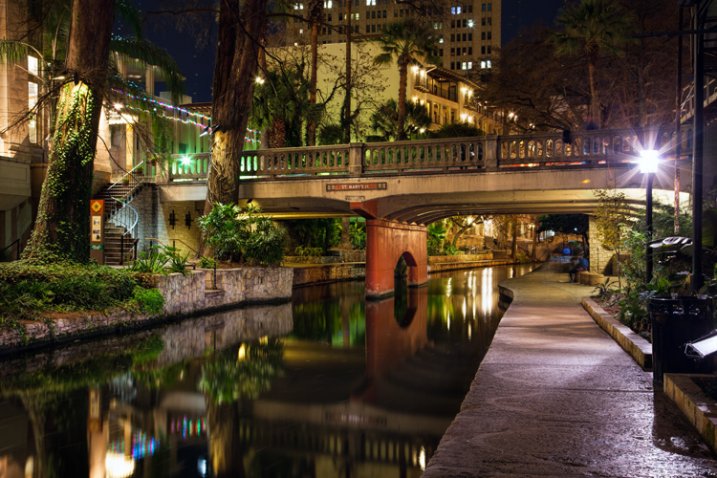
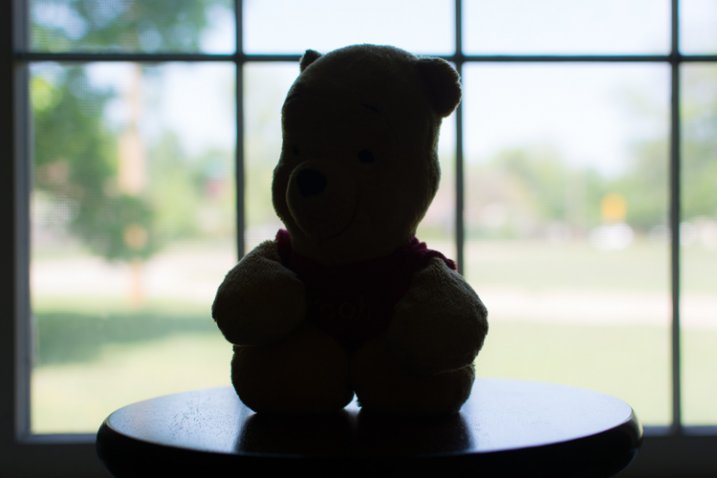
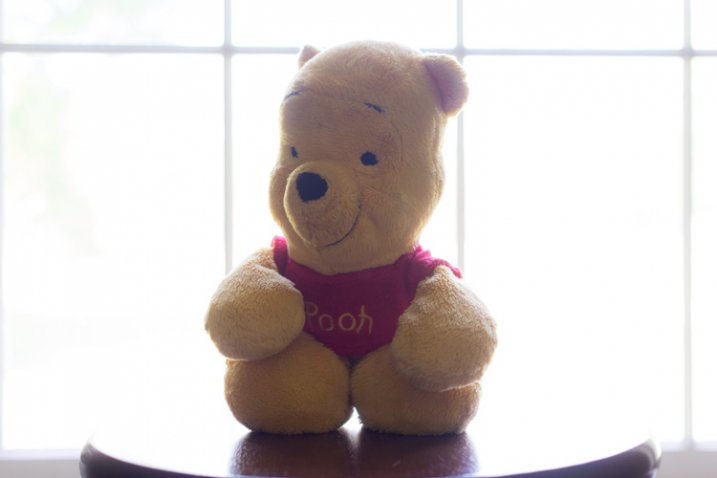
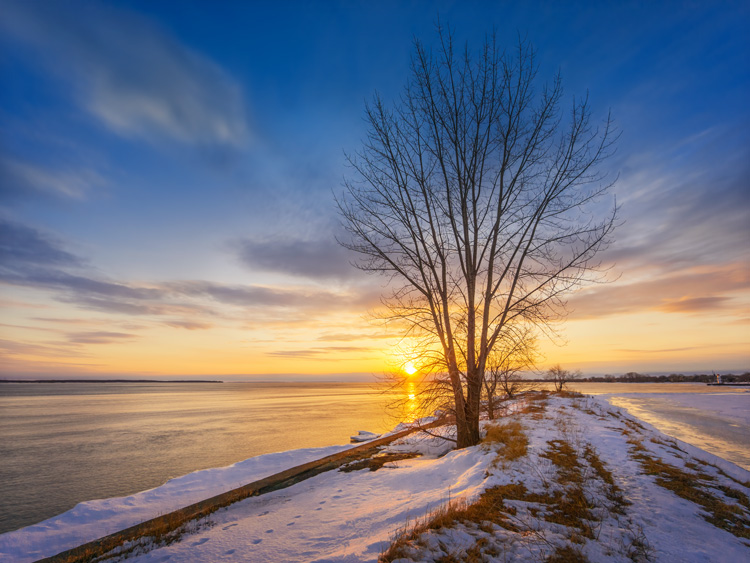
The bright sunlight made getting a proper exposure a bit tricky, but understanding how it works helped me get the photo I was looking for.

Sounds simple, right? It is, and yet it’s much more because photography is not just about getting things to be neither too bright or too dark. It’s up to you as a photographer to know not only how to get an image that’s properly exposed but how to adjust your camera’s settings to get the exposure you want. You might look at a given scene and decide that you want things to be a bit too bright or too dark, or you would really like some of the darker areas of the image to show up brighter, or you want to get a picture of something in broad daylight that’s normally too bright for your camera to deal with. Or perhaps you like images with extremely dark and light areas and you want to purposely create a sense of contrast while also maintaining a certain type of exposure. In Auto mode your camera will almost always try to get what it thinks is a properly-exposed image, but if you can work up the courage to try Aperture Priority, Shutter Priority, or even Manual mode you can start to control the various parameters that combine to make an image and, thus, get the precise type of exposure you want – not what your camera thinks you want.

what-is-exposure-trees-sunrise

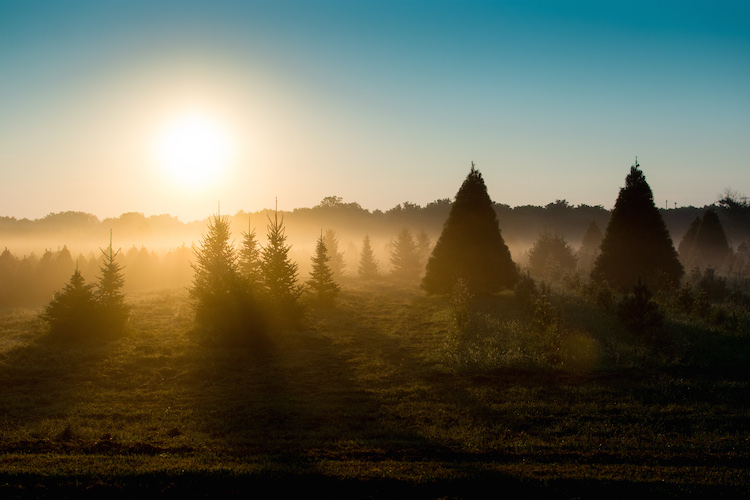
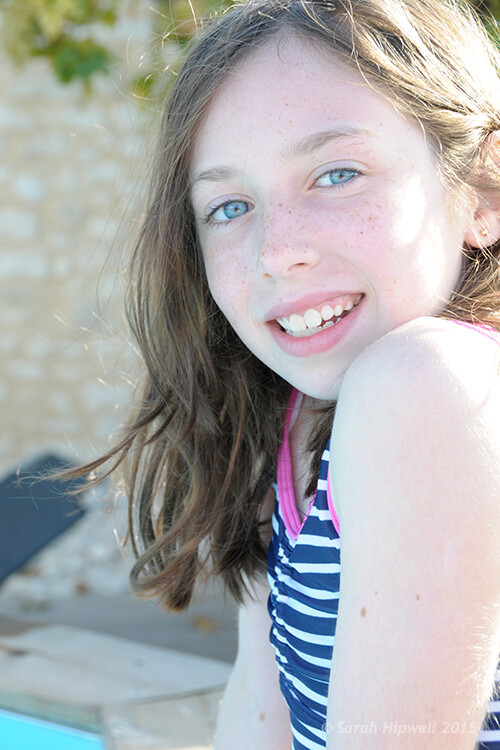
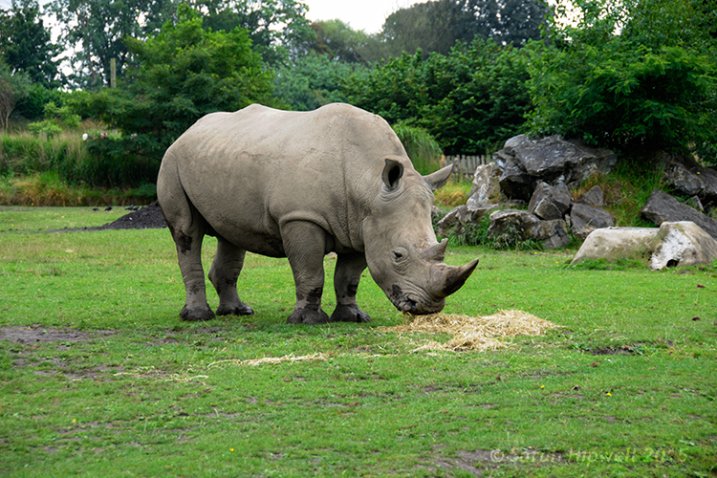
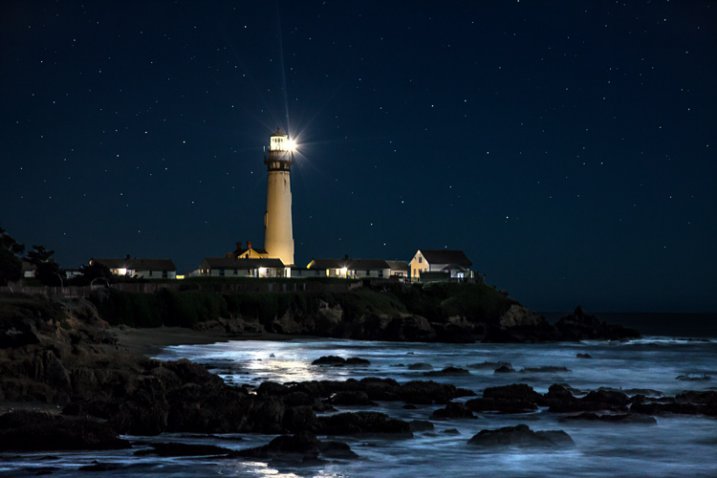
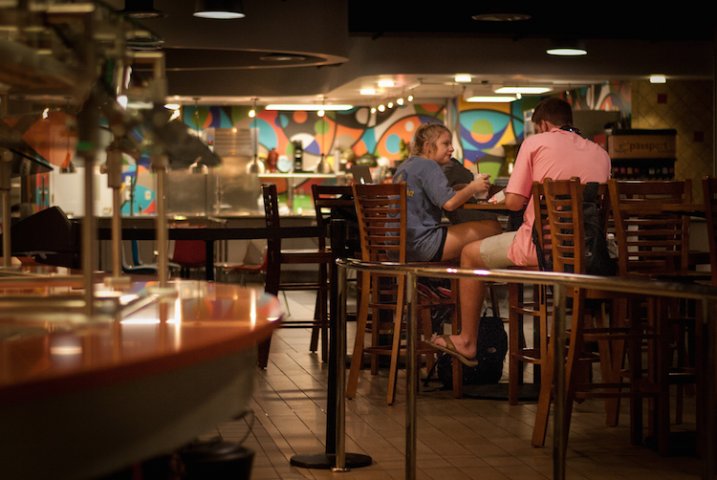
Knowing how to adjust my exposure was critical to capturing this image. My camera’s Auto function would have left me with an unusable photo.

So how do these other elements affect exposure, and what can you do to manipulate them to get the exposure you want? This is a simple breakdown of the three most important things you need to know:

Aperture: The size of the opening in your camera lens that lets light pass through to the image sensor. A larger aperture will let more light pass through, while a smaller one will not let much light pass through.

Shutter Speed: How long the curtains in front of the image sensor are open. A longer shutter speed will let more light pass through, while a shorter shutter speed will not let much light pass through.

ISO: How sensitive your image sensor is to light. Lower ISO values mean your camera is not very sensitive to light, which means a proper exposure requires either a longer shutter speed, a wider aperture, or both. High ISO values mean your camera is very sensitive to light, which means a proper exposure requires either a shorter shutter speed, smaller aperture, or both.

what-is-exposure-silhouette

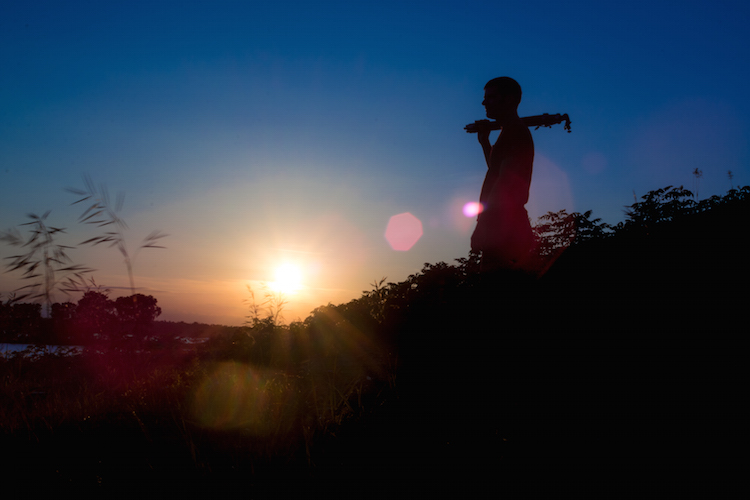
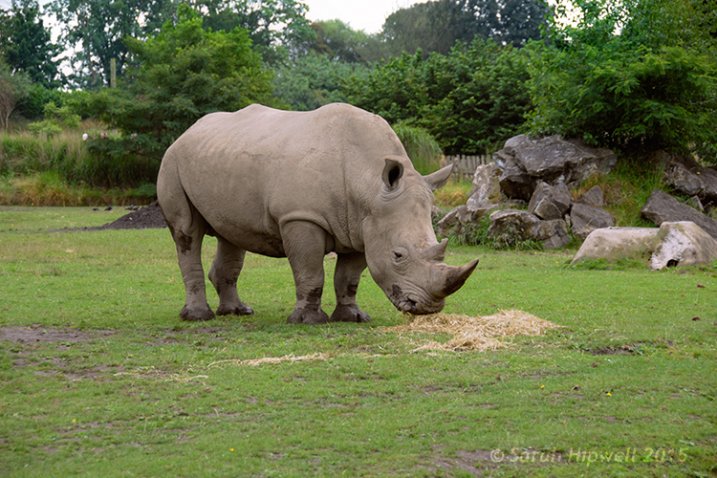
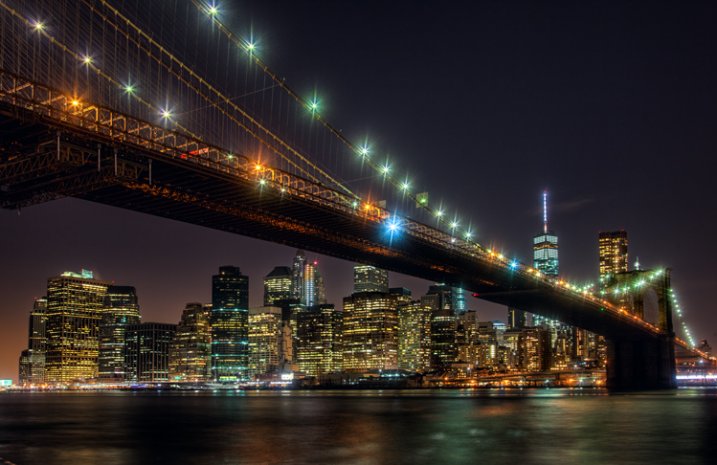
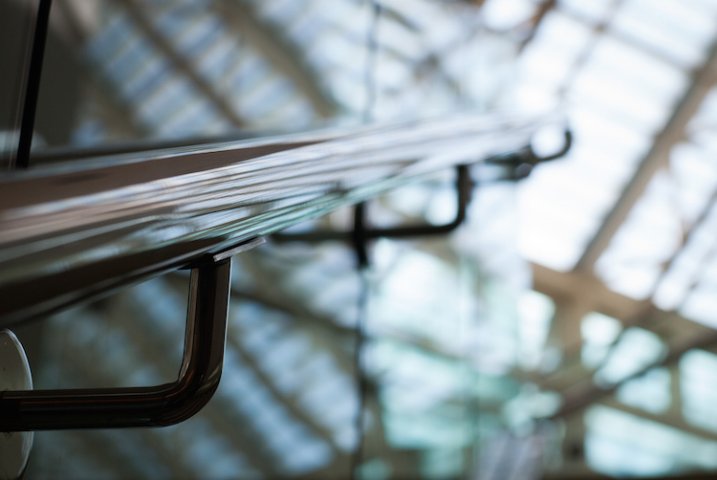
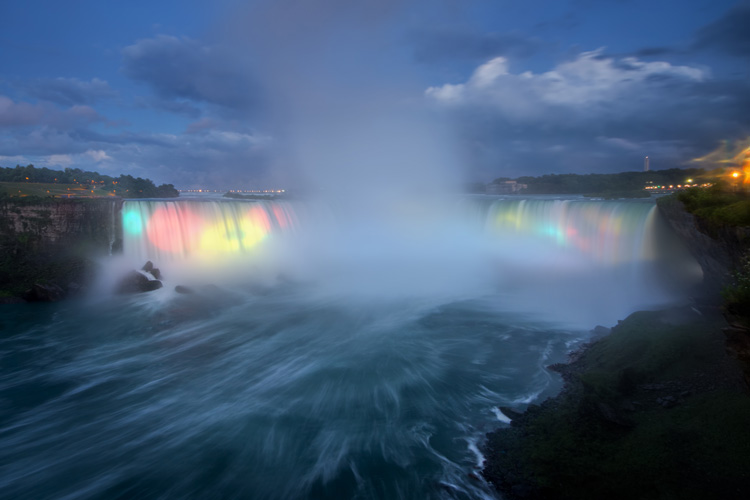
In this shot, I used a special light-blocking tool called a neutral density filter in order to get the desired exposure.

What does all this mean in practice, and how can you adjust these elements to get the exposure you want? To illustrate a few basic principles, here are some photos that show what can be done to manipulate your camera in order to get the proper exposure (combination of light and dark) that you want.

This first picture has a proper exposure: there’s some bright areas, some dark areas, and a mix of both in various sections of the photo.

what-is-exposure-even

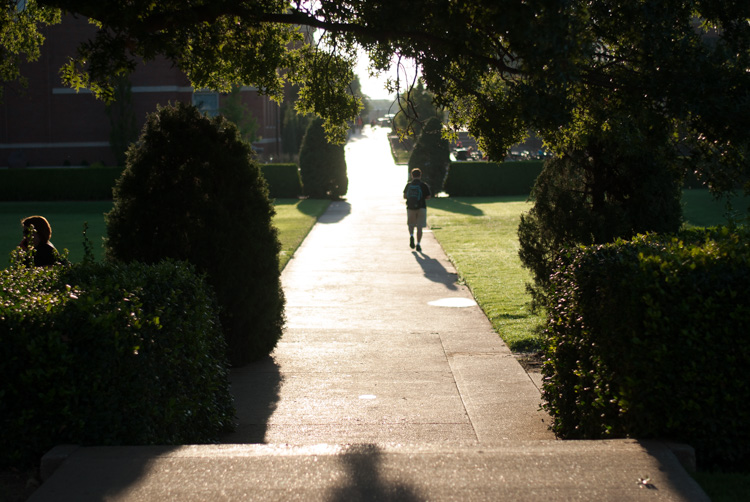
Early morning on campus with a good overall exposure. 50mm, ISO 100, f/4.0, 1/2000 second.

Now take a look at the next one, which has been exposed for the highlights. This means I wanted to take the bright areas of the picture, specifically the sidewalk as it recedes to the horizon, and make that part be properly exposed. To do this, I had to decrease my shutter speed quite a bit, which meant that only a little bit of light was captured. Since there was so much light shining on the sidewalk, a little bit was all I needed. You’ll notice that the result illustrates a bit of a trade-off: the very bright portions of the  image are now more properly balanced and you can make out a lot more detail in the sidewalk, but the darker portions are now really dark and you can’t see much of anything.

what-is-exposure-highlights

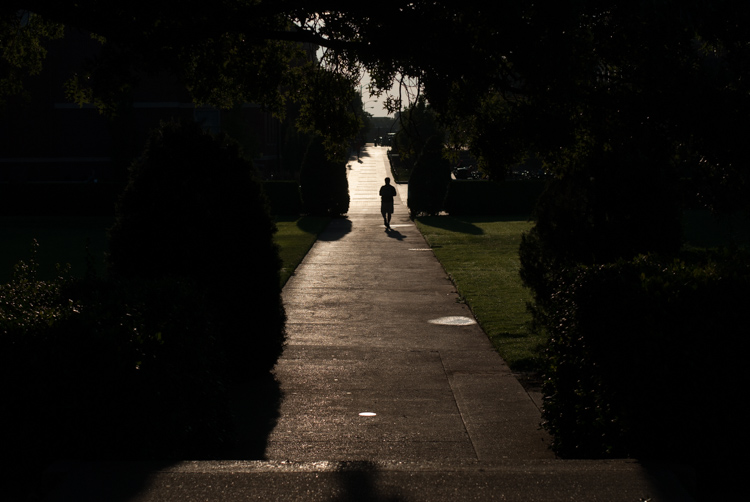
The same scene, exposed for the highlights. 50mm, ISO 100,f/4.0, 1/5000 second.

I also took a photo of the same scene but exposed for the shadows. Since the dark areas of a given composition are not reflecting much light, you’ll need to find a way of capturing as much of it as possible. In this case, I chose to use a much longer shutter speed in order to let in much more light. Once again, you can see an immediate trade-off: the dark areas are much more colorful, but the bright areas are way too bright. If I wanted to emphasize the trees, shrubs and other greenery this is one way to do that, even though it would come at the expense of some of the color and detail on the sidewalk.

what-is-exposure-shadows

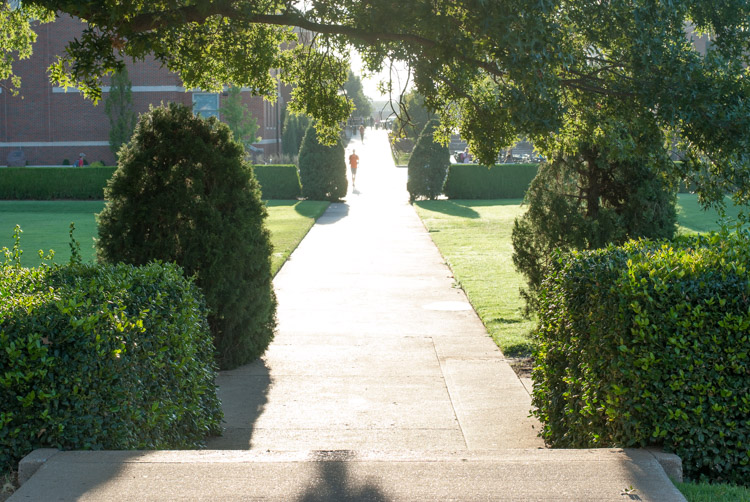
The same scene, exposed for the shadows. 50mm, ISO 100,f/6.7, 1/90 second.

If you want to try altering the exposure of a given photograph the simplest way is to use your camera’s exposure compensation function to quickly over – or under – expose your composition. Alternatively, you can manually adjust the parameters like Aperture, Shutter Speed and ISO to get the desired result. If you want to get really creative you can use different metering modes on your camera (spot, center-weighted, average, etc.) to adjust how your camera takes various sources of light into account in order to get the exposure you are looking for.

As a side note, you might have heard about a technique called HDR which stands for High Dynamic Range, and involves taking multiple exposures of the same scene and combining them on your computer using a program like Photoshop. This means you get the best of all worlds: properly exposed highlights and shadows along with a good overall balance of color throughout the image. It’s just another tool in your kit that you can utilize to get the exact image you are going for, which is why understanding exposure is so critical to photography. By knowing what it is and how to control the exposure of a scene to get the picture to turn out how you want, you can take more control over your pictures and start making creative decisions instead of leaving things up to your camera.

I hope this article clears up some confusion you might have about the subject of exposure, as it’s the kind of piece I wish I had in front of me several years ago. Do you still have questions about what exposure is all about? What are your favorite tips and tricks to deal with exposure? Leave your thoughts in the comments below.

googletag.cmd.push(function() {
tablet_slots.push( googletag.defineSlot( “/1005424/_dPSv4_tab-all-article-bottom_(300×250)”, [300, 250], “pb-ad-78623” ).addService( googletag.pubads() ) ); } );

googletag.cmd.push(function() {
mobile_slots.push( googletag.defineSlot( “/1005424/_dPSv4_mob-all-article-bottom_(300×250)”, [300, 250], “pb-ad-78158” ).addService( googletag.pubads() ) ); } );

The post Making Sense of Exposure by Simon Ringsmuth appeared first on Digital Photography School.


Digital Photography School

 
Comments Off on Making Sense of Exposure

Posted in Photography


10 Common Mistakes in Long Exposure photography

27 Aug

On all the 2015 Workshop I held here in Italy, I introduced a little game, where at the end of the workshop the attendees had to write down on a paper three mistakes that they used to make before taking the workshop. So I decided to collect all these lessons learned papers and make a list of the 10 most common errors in long exposure photography so you can learn from this also:

FG 1

Mistake #1 – Vibration reduction system is set to ON

There are some lovely technologies that can help get much sharper images minimizing the blur caused by camera shake, which are extremely useful in low-light conditions where slow shutter speeds are required. Every brand calls this technology something different, but the aim is the same. They can be lens-based (like for Nikon and Canon cameras) or camera-based (like for Sony, Olympus and Pentax cameras), but at the end the result is that this vibration reduction can give you the same image quality up to four shutter speed stops slower than usual.

They use some movement sensors to detect motion and try to compensate for it by moving an element group in the lens, or on the sensor itself.

The point is that if the camera is on a sturdy tripod (and if you are shooting a long exposure, your camera is definitely on a tripod!), you shouldn’t expect any vibration. You may know this, but your camera doesn’t, so even if there is no movement, it can happen that this anti-vibration system tries to compensate anyway moving a lens group (or the sensor), and this will actually result in an introduction of a vibration (and blur) instead of a removal.

So, if your camera is on a sturdy tripod, turn the anti vibration system to OFF!

FG 2

Mistake #2 – Forgetting to use Mirror Lock-up

In a DSRL camera, light travels through the lens and is sent to the viewfinder by a mirror. When you press the shutter button, the mirror flips up so that the light goes directly onto the image sensor. This movement introduces a small vibration that will cause slight blurring in the photo.

To avoid this vibration, you can activate the Mirror Lock-up function in your camera. After its activation, the first time you press the shutter button, your camera will lift the mirror; the second time it will open the shutter. If you wait a couple of seconds between the first and the second press, you will avoid the vibration!

Yes, if you have a mirrorless camera, you can skip this advice!

Mistake #3 – Not using a GND filter because they are expensive

In some situation (in places where there is not a big difference in the exposure between different areas of the scene), just a Neutral Density filter can allow you to get the desired result. However, in many situation the light condition require the use of a Graduated Neutral Density filter to balance the exposure.

If you are using a screw-on ND filter, you may believe that the only chance you have is to try to apply a GND filter in post-production – but you’d be wrong!

FG 3

You can just hold the filter with your hand in front of the lens. For a shot with a shutter speed up to few seconds, your only problem will be the correct alignment of the filter. For shots which are minutes long, even if your hand is not perfectly still, the final result will be more than great – try it if you don’t believe me. The holder is required if you want to use multiple filters together (or when you start having cramps in your hand).

Mistake #4 – Setting the aperture to f/22 to increase the exposure time

The rule was simple: if you decrease the aperture, you increase the exposure time.

With this rule in mind, you may think that you can transform your 30 second exposure to a two minute exposure just moving from f/11 to f/22. Theoretically, you’re right. Unfortunately there is a physical phenomenon called optical diffraction that above f/16 is enough intense to ruin the sharpness of your image.

If you are already at f/11 and you need a slower shutter speed, decrease ISO if possible or use a stronger filter.

FG 4

Mistake #5 – Forgetting to adjust the ISO

ISO can be a powerful ally in a long exposure. Sometimes you forget the possibility of changing the ISO setting, and you only play with filters and aperture. Remember that every camera has a range of ISO where the output quality is almost the same. In high-end cameras this range is usually between ISO 50 and 200.

This means that you have two stops to play with, and in a long exposure shoot, two stops mean minutes of exposure.

Mistake #6 – Shooting like you’re in a studio

FG 5

When you shoot pictures at home or comfortably seated in a studio, no external agent can affect the quality of your image. But if you are perched on a rock in front of the sea, on a beautiful stormy day, quite soon your filters will be completely wet.

Remember to fill your bag with cleaning cloths. A a thin layer of water on your outer filter will result in a high diffraction, and this will irremediably ruin your image. Never underestimate nature, even on a sunny day, the weather conditions can change very quickly.

Mistake #7 – Choosing a low quality filter

Every time you add a filter in front of your lens, you inevitably decrease the overall quality of the optical system. Yes, some well-known filter brands are quite expensive, but do you believe it is worth puttting a 5$ filter in front of a camera of thousand dollars? No, it isn’t – so focus on quality: fewer filters but better! You don’t need the whole set of density ranges for ND and GND filters. Try to understand which filters you will probably use more often, then remember that you have ISO and Aperture to play with to cover the gap between. Finally, remember that a lot of good quality filters are available at incredibly affordable prices. Check in advance for filter reviews on internet.

FG 7

Mistake #8 – Underestimating the wind

When you take a long exposure shoot, you camera is exposed to possible external vibration agents for minutes. Even a wind gust of a few seconds can ruin your image. Invest on a sturdy tripod, and then set it firmly on the ground. If needed, hook an additional weight to the tripod to make it even sturdier and solid.

Avoid using the tripod’s central column too – if you raise it up, you raise the center of gravity of the system and it will be less stable.

Mistake #9 – Not covering the viewfinder

You took a three minute exposure, and the preview is full of strange purple lines and halos. Why?

It is because light, like water, loves to find a way – always.

FG 9

Your camera is intended to allow light through only from the hole in your lens, but unfortunately there are some other accesses that can potentially harm your images.

The most common of them is the viewfinder. To avoid infiltration of light from it, cover it after composing the image. If your camera is not provided with a cap, you can even use some black tape. If you forgot the black tape, use a chewing gum. The typical result of viewfinder infiltration is a strange purple halo. Yes, if you have a mirrorless camera, you are also free of this issue!

If you use slot-it filter system, another possible source is the gap between one filter to another (this is one of the reason why many photographers love screw-on filters). In this case, the best solution is to cover that gap with black tape. The typical result of filter infiltration is a vertical purple line on the opposite side of the sun.

Finally, if you use a tilt-shift lens, or a lens adaptor, you may have an infiltration from the lens body. The best way to avoid this is to cover the lens with a black neck warmer.

Mistake #10 – Believing the filter vendor

FG 8

When you buy a six stop ND filter, you expect that it has exactly the optical density to get a six stop reduction. Unfortunately, you are wrong. In my life I never found a filter with the exact intensity stated by the manufacturer. Of course, the difference usually is minimal, but remember that even ½ stop of difference, in a long exposure means minutes of error.

To avoid errors when you are on field, test it in advance by following these steps:

  • Choose a room in your home, turn on the lights and close the windows (you need a place where the lighting is perfectly constant).
  • Mount your camera on a tripod and take a photo of the room until you get a shot with a good histogram. Note down all the parameters (ISO/Aperture/Shutter speed) of the shot.
  • Mount the ND filter and compensate the shutter speed obtained before, according to the f-stop reduction introduced by the filter.
  • Take a picture with the ND filter.
  • Look at the histogram of the photo taken with the filter, and compare it to one taken without. If they are approximately superimposable (exactly the same), the filter intensity stated by the manufacturer is accurate. If the new histogram has shifted to the left, your filter has an intensity greater than that the one declared; if it is moved to the right, it has a lower intensity.
  • If the two histograms are not superimposable, take another shoot changing the shutter speed to obtain a histogram approximately similar to the one of the picture without the filter.

FG 6When you have found the exact optical density, build your own shutter speed conversion table. Another possibility is the PhotoPills app for your iPhone, the only one that allows you to convert the shutter speed for non-standard f-stop reductions.

That’s the ten mistakes to avoid when doing long exposure photography. Have you got any others you’ve made and learned along the way you’d like to share? Please do so in the comments below.

googletag.cmd.push(function() {
tablet_slots.push( googletag.defineSlot( “/1005424/_dPSv4_tab-all-article-bottom_(300×250)”, [300, 250], “pb-ad-78623” ).addService( googletag.pubads() ) ); } );

googletag.cmd.push(function() {
mobile_slots.push( googletag.defineSlot( “/1005424/_dPSv4_mob-all-article-bottom_(300×250)”, [300, 250], “pb-ad-78158” ).addService( googletag.pubads() ) ); } );

The post 10 Common Mistakes in Long Exposure photography by Francesco Gola appeared first on Digital Photography School.


Digital Photography School

 
Comments Off on 10 Common Mistakes in Long Exposure photography

Posted in Photography


3 Useful Photoshop Techniques for Making Images Exposure Corrections

20 Jul
Title-correct-exposure

Using a Curves Adjustment Layer with the Blend Mode set to Screen to correct exposure in Photoshop.

In general, where images are too dark, this is referred to as underexposed. Conversely, images that are too light are overexposed. Photos taken on sunny days are prone to being overexposed.

exposure

An animated gif to illustrate a correct exposure, an underexposed shot and an overexposed one.

In an ideal situation, the aim is to try and get the correct exposure in-camera. In doing so, less time will be spent in front of your computer post-processing.

In this article, I will describe how to easily correct photos that are underexposed (photos that are too dark) and overexposed (photos that too light) using Adjustment Layers and Blend Modes in Photoshop. I will then describe how the Dodge and Burn tools work to target specific areas to brighten or darken your image.

The following techniques are not new, but have been around for quite some time in Photoshop. The methods are still very effective, quick and easy to do.

  • Overexposed photos – Blend Mode: Screen with Curves Adjustment Layer.
  • Underexposed photos – Blend Mode: Multiply with Curves Adjustment layer.
  • Dodge & Burn tools – New Layer above the image filled with 50% gray – Blend Mode: Overlay/Softlight.

Read:  The First 3 Photoshop Blend Modes You Need to Understand

All of the images I used in this article are the jpegs straight out of the camera, completely unedited. I want to demonstrate how effective these techniques are when applied.

Correcting Overexposed Images

Becky-overexposed

A typical washed-out look from an overexposed photo.

As you can see, from the first overexposed shot. The subject has that washed-out look. The subject is overexposed by a stop and a half. I applied a Curves Adjustment Layer and changed the Blend Mode to Multiply. Straight away, the contrast of the image has dramatically increased.

Becky-curves-multiply

The result is quite dramatic when the Curves Adjustment Layer (with Multiply blend mode) has been applied, but there is a noticeable change in color shift.

The Multiply Blend Mode can cause a shift in color, but this is easily remedied. To adjust the color balance, go to the Properties panel (CS6) and choose the channel you want by clicking on the menu left of the Auto button. In this case, the color was too cool, so I adjusted the three channels (Red, Green and Blue) to get the result I wanted.

Becky-correct-exposure

The color balance has now been modified by adjusting the red, green and blue channels in the the properties panel for the Curves layer.

In the image of the Rhino below, when I applied the adjustment layer and changed the Blend Mode to Multiply, the effect caused a color shift to green, and the intensity of the effect was too dramatic. I adjusted the color balance by choosing the green and red channels in the Properties panel. I then reduced the Opacity to 55% of the layer to further fine-tune the image.

Rhino-underexposed

Overexposed photo of a Rhino taken at Dublin Zoo.

Rhino-curves-multiply

A Curves Adjustment layer with the Blend Mode set to Multiply.

Rhino-correct-exposure

I reduced the Opacity of the Curves Adjustment Layer as the effect was too much. I then adjusted the color balance by tweaking the red, green and blue channels.

Correcting Underexposed Images

Underexposed shots are typical when working outdoors on sunny days. Usually, the background is properly exposed but your subject is silhouetted. Similarly, if the background is washed out but your mode/subject is exposed correctly.

For example, the photo of the flower was taken at the beach on a very sunny day. I focused and exposed for the flower, which meant the background was way too dark. I applied a Curves Adjustment Layer and changed the Blend Mode to Screen. The shadows became lighter, but I duplicated this layer again as I wanted more detail in the shadows. (In most cases, this effect of using the one Adjustment Layer is enough but if your photo is very washed out, or very dark, you may need to duplicate the Adjustment Layer and adjust the opacity accordingly.)

flower-underexposed

An underexposed flower in green foliage.

I reduced the opacity of both layers and added a mask to bring back the highlights on the flower’s petals. Similar to the Multiply Blend Mode, the Screen Mode can cause a shift in color. In this instance, the photo had too much green. Similar to the photo above, I was able to adjust the color balance in the Properties panel and chose the green channel to modify the color balance.

flower-curves-screen

Two Curves Adjustment Layers were applied to this photo. I wanted to bring out more detail in the shadows.

flower-changing-to-green-channel

flower-input-output-sliders

By going into the different channels, it’s easier to target the specific colour that needs adjusting. In the image of the flower, I wanted to reduce the green colour. So by clicking on the top right point of the graph (output) and dragging it down. I then moved this Input slider to the right to bring in some magenta. As this an adjustment layer, you can play around with each of the colour channels and experiment using the input and Output sliders in an non-destructive way.

flower-green-channel-S-curve

A more accurate way would be to plot different points on the grid to get that classic S shape, which is what the Curves Adjustment is know for.

flower-correct-exposure

Opacity was reduced on each of the two Curves Adjustmnet layers. The green channel was adjusted to modify the color balance.

The shot of the hippo below was taken at Dublin Zoo and the day was quite overcast. As before, I added a Curves Adjustment layer and changed the Blend Mode to Screen. I then adjusted the red, green and blue channels to correct the color balance. I reduced the opacity on the Adjustment Layer only slightly.

Hippo-underexposed

A underexposed shot of a hippopotamus taken at Dublin Zoo

Hippo-curves-screen

A Curves Adjustment layer with the Blend Mode set to Screen.

The shot of the Hippo was taken at Dublin Zoo and the day was quite overcast. As before, I added a Curves Adjustment layer and changed the Blend Mode to Screen. I then adjusted the red, green and blue channels to correct the color balance. I reduced the opacity on the Adjustment Layer only slightly.

Hippo-correct-exposure

The Opacity was only slightly reduced for this image but the color balance again had to be adjusted in all the channels.

So by using an adjustment layer and changing the Blend Mode to Multiply or Screen, overexposed and underexposed shots can be easily fixed in a few steps. But what if specific areas of your image only need the exposure corrected?

Dodge and Burn

The Dodge tool lightens and the Burn tool darkens specific areas of your photo. This is why the Dodge and Burn tools are really useful if you don’t need to apply a global exposure correction.

I use these tools a lot in my workflow, it can create highlights in hair. When I shoot headshots, the eyes are important and the Dodge and Burn tools can also really enhance eyes and make them sparkle. Other forms or parts of the body can also be accentuated and given more depth by using these tools.

However, the Dodge and Burn tools, if used directly on a image, work in a destructive way. So to use these tools non-destructively, you will need to create a new blank layer above the image that you are working on, fill it with 50% gray and change the Blend Mode to Overlay or Softlight.

Dodge-Burn-tools

Where to locate the Dodge and Burn tools in Photoshop.

Before you begin, use a brush with the hardness set to soft (0-30). In the Tools Options Bar, make sure that you set the Range to Midtones, Exposure is set to low (8-10%) and that the Protect Tones is checked, as shown below.

Midtones+Exposure+Protect-Tonespsd

Set the Range to Midtones. Keep Exposure at a low setting. Make sure the Protect Tones box has been checked.

dog

In this photo of the dog, I want to create some highlights on the dog’s fur. Well, fur is like hair!

Dog-dodge-burn

You can see the difference in what a little dodging can do in this image of the dog with the photo above.

If you feel that you have overdone either the Dodge or the Burn tool, just lower the opacity of the layer.

Lisa

Lisa, before any Dodging or Burning has been applied to the image.

Lisa-dodge-burn

Just a little dodge and burn can make a difference to your photo.

Even subtle differences can enhance your images. In this image of Lisa, I applied some dodging to her eyes, I used the Burn tool to emphasize her lips. I then added a bit more dodging to the face and hair.

I hope you find these techniques useful? Maybe, you have some of your own? If so please share in the comments below.

googletag.cmd.push(function() {
tablet_slots.push( googletag.defineSlot( “/1005424/_dPSv4_tab-all-article-bottom_(300×250)”, [300, 250], “pb-ad-78623” ).addService( googletag.pubads() ) ); } );

googletag.cmd.push(function() {
mobile_slots.push( googletag.defineSlot( “/1005424/_dPSv4_mob-all-article-bottom_(300×250)”, [300, 250], “pb-ad-78158” ).addService( googletag.pubads() ) ); } );

The post 3 Useful Photoshop Techniques for Making Images Exposure Corrections by Sarah Hipwell appeared first on Digital Photography School.


Digital Photography School

 
Comments Off on 3 Useful Photoshop Techniques for Making Images Exposure Corrections

Posted in Photography


Tips for Getting Proper Exposure for Night Photography

24 Jun
Proper Exposure at Night - Millenium Bridge example

Exposure settings for this shot: Shutter speed of 4 seconds; aperture at f/5.6; ISO 400.

Night photography can be much more rewarding than photography during the day. Because everything looks different at night, you don’t need to go somewhere exotic to get great pictures. Bridges, attractions, and buildings are usually brightly lit at night, and places that might seem rather pedestrian during the day – can make stellar photography subjects at night. Further, you can take your time when photographing at night, more so than during the day. There are generally less people out, and you don’t have to worry about the light changing.

The main challenge when photographing at night is getting a proper exposure. During the day, you can just walk around and hand hold your camera without worrying about camera shake. In addition, because of the amount of available light during the day, you don’t need to worry about shooting at a high ISO and the resulting digital noise. At night, however, hand holding is generally not an option and digital noise can be a major problem.

The principles of exposure work the same way at night as during the day – you will just need a lot more time to allow light into your camera. It goes without saying that you will need a tripod to stabilize your camera, and a remote shutter release to keep from moving anything during the exposure. But with these changes made, you can get out and explore the night with your camera. When you do, here are some tips to keep in mind to help you maximize the experience.

Proper Exposure at Night - ouvre example

Exposure settings for this shot: Shutter speed of 4 seconds; aperture at f/11; ISO 400.

# 1.  Work in Manual Mode

The first tip is to make sure you are shooting in Manual mode. In Manual mode, you will set the shutter speed, aperture, and ISO. This puts you in complete control over you camera.

When shooting at night, your camera will be on a tripod and you will be working slowly. There is no need to use any automatic mode because of the speed provided. Further, there might be a little trial and error with the exposure settings (the camera can be easily fooled by the great differences in bright and dark areas of the picture) and you want to make sure you have plenty of control over this process. Manual mode gives you that control.

#2.  Make sure you are comfortable with Bulb Mode

Manual mode only works for exposures up to 30 seconds. If you need a shutter speed that is longer than 30 seconds, the only option for getting a proper exposure is Bulb mode. Therefore, while you should generally shoot in Manual mode, you should also be comfortable with Bulb.

In Bulb mode, the shutter stays open as long as you hold the shutter button down. When you press the button, the shutter opens. When you release the button, the shutter closes. To avoid introducing any shake or movement into the exposure, using a remote shutter release is imperative when using this mode.

With Bulb mode you can make your exposure several minutes long. If your remote shutter release does not have a timer built-in to it, make sure you keep another timer handy (your phone may have one). If your remote does not have a timer, make sure it has a locking feature so you do not have to hold it the entire time.

Proper Exposure at Night - Pigeon Point example

Exposure settings for this shot: Shutter speed of 6 seconds; aperture at f/5.6; ISO 1600.

#3.  Shoot in Raw

When shooting at night, it is particularly important to make sure you are shooting in Raw format. The Raw files coming out of most cameras are 14 bit files, whereas JPEGS are only 8 bit files. The more bits, the higher the range of available colors and the smoother the transitions between them.

The reason shooting in Raw is even more important at night, is that most of the colors that a camera can capture are at the top (bright) end of the scale. The range of available colors at the low (dark) end of the scale is extremely limited. At night, your pictures will almost always include a large dark portion. A JPEG file, with its reduced color options, you will likely introduce banding in your pictures.

#4.  Bring a flashlight

Knowing your camera controls really well pays dividends at night. You can make changes to the settings without being able to see everything. Nevertheless, a small flashlight is tremendously useful. Keep one handy to make sure you can see everything on your camera and tripod. It occasionally comes in handy for lighting areas of your picture as well.

Proper Exposure at Night - Brooklyn Bridge

Exposure settings for this shot: Shutter speed of 10 seconds; aperture at f/9.0; ISO 200.

#5.  Choose proper settings

Proper settings will always depend on the situation. Nevertheless, there are some ways you should bias your settings when shooting at night. Here are a few:

  • Aperture: Open up your aperture more at night than you would during the day (i.e., use a lower f/number). Most night photographs tend to be of shots on a narrower plane than shots during the day. Further, the background and sky will be black anyway and you will not need as large a depth of field. The larger aperture also has the benefit of letting more light into the camera.
  • ISO: Keep your ISO setting as low as you can. Night photography always means there will be dark areas in your pictures, and these dark areas inevitably lead to digital noise. Raising the ISO will compound the problem.
  • Shutter speed: Whereas shutter speed might be the first exposure setting you worry about during the day, it should generally be the last one you think about at night. Since you will be shooting from a tripod, you can let the shutter stay open as long as you need. If you have traffic (streaking lights), a fountain, or running water in your picture, the longer shutter speed will actually benefit your pictures anyway. The only exception is high winds, or other instability impacting your rig.

One other setting to check is the Long Exposure Noise Reduction, which will be in your camera’s menu. If you enable this option, the camera will make two exposures, one normal and one with the shutter closed, which the camera will use as a comparison to filter out noise from the normal picture. Photos taken with this option enabled will take twice as long to expose, but will be less noisy.

#6.  Meter for the highlights

Determining the proper exposure level can be tricky at night. Each metering mode presents its own challenges. If you use evaluative metering, the camera is likely to be confused. If you use spot or partial metering, the meter will jump around depending upon whether you are aimed at a bright light or the dark background.

One answer to this problem is to use spot metering and to expose for the highlights. Set your meter between +1 and +2 as you meter on the highlights. The +1 -2 setting will keep your highlights looking bright, but at the same time, will keep the highlights within the dynamic range of the camera. Do not worry as much about the dark portions of the picture. If the dark areas happen to turn black, well, it is nighttime after all, and there is supposed to be some black. Take a test shot and adjust as necessary.

Proper Exposure at Night - Dallas example

Exposure settings for this shot: Shutter speed of 5 seconds; aperture at f/16; ISO 400.

#7.  Take a test shot at a high ISO

Speaking of test shots, you should make liberal use of them when shooting at night. However, you don’t want to sit around for 30 seconds, a minute, or even longer, waiting to see if the test shot is going to work out. The best way to get a test, without wasting a lot of time doing so, is to take tone at a much higher ISO than you would ordinarily use.

For example, let’s say you think the proper exposure settings for a given shot are: 30 seconds at f/5.6 with an ISO of 400. Rather than taking that shot and waiting around 30 seconds for the exposure, crank up the ISO and speed up the shutter speed by the same number of stops. The exposure level will be the same, but it will take a lot less time to expose the test picture. In this case, I would raise the ISO by four stops to ISO 6400 (raising it one stop to moves it to ISO 800, one stops increases it to ISO 1600, three stops to ISO 3200, and four stops gets you to ISO 6400). That allows you to reduce your shutter speed by four stops to only 2 seconds (reducing the shutter speed by one stop shortens it to 15 seconds, two stops shortens it to 8 seconds, three stops to 4 seconds, and four stops gets the shutter speed down to 2 seconds).

When you are satisfied with your exposure, just decrease the ISO and increase (lengthen) the shutter speed by an equal amount to get back to the final settings.

#8. Bracket your photos

Night photography is one area where you will want to bracket your photos. Blending and HDR can work wonders at night, but even if you are against such processing, bracket your photos anyway. Think of it as exposure insurance.

Proper Exposure at Night - San Antonio Riverwalk example

Exposure settings for this shot: Shutter speed of 30 seconds; aperture at f/11; ISO 200.

#9.  Verify the exposure with the Histogram

After you have taken your exposures, check them on the LCD on the back of your camera. The picture on the LCD will show you if the exposure is close to correct, but it is better to also check the histogram to make sure the exposure is within the dynamic range of your camera. Remember to keep the highlights on the right side of the histogram, but avoid a spike on the far right. If the dark areas spike on the left side the histogram, that is okay since parts of your picture are supposed to be black. In general, however, keep as much of the image as possible within the range of the histogram, but err on the side of keeping the highlights from blowing out.

Exposing at Night

If you are not totally comfortable with exposure, then doing some night photography will get you there in a hurry. You will have your camera on a tripod in unchanging light, so you can take as much time as you need to think through the exposure, and get it right. You’ll be forced to take into account the highlights and shadows when you meter, then study them on your histogram. Taking test shots, and making adjustments, will help you see the interrelationships between the exposure controls.

When you follow these steps, you are likely to get some great shots. Every city lights up its major attractions, bridges, and museums – often in colorful ways. A scene that might be boring during the day could be a great photo at night. Often, because of the effects of the lights, you’ll actually be surprised at what you end up with. Taking your time and applying these tips to nail the exposure will help you maximize the experience.

googletag.cmd.push(function() {
tablet_slots.push( googletag.defineSlot( “/1005424/_dPSv4_tab-all-article-bottom_(300×250)”, [300, 250], “pb-ad-78623” ).addService( googletag.pubads() ) ); } );

googletag.cmd.push(function() {
mobile_slots.push( googletag.defineSlot( “/1005424/_dPSv4_mob-all-article-bottom_(300×250)”, [300, 250], “pb-ad-78158” ).addService( googletag.pubads() ) ); } );

The post Tips for Getting Proper Exposure for Night Photography by Jim Hamel appeared first on Digital Photography School.


Digital Photography School

 
Comments Off on Tips for Getting Proper Exposure for Night Photography

Posted in Photography


5 Reasons You Should Learn Long Exposure Photography

12 May

Long exposure imagery is an interesting and highly satisfying technique of creating images. It requires you to use the manual mode or sometimes shutter priority mode to control your shutter speed.

Normal vs Long exposure

Shutter priority mode is marked on Nikon camera with ‘S’ and on Canon systems with ‘Tv’. They mean the exact same thing. When you switch to shutter priority mode you can select the shutter speed while the camera selects the appropriate aperture.

Obviously if you need a bit more flexibility, you should use the manual mode, where both shutter speed and aperture value are in your control. That helps you to maintain a long shutter speed while also controlling the depth of field.

At this point you would probably be asking yourself why you would need to shoot long exposure images. Wouldn’t shooting such exposures risk your images to be washed out? This is because there are some other tools and techniques involved in the process as well. Such as using ND filters or using exposure compensation to find the right aperture / shutter speed combination that allows sufficient light over a long period of time without risking a washed out image.

So why should you learn how to shoot long exposure images?

1. You can record an image over a long period of time.

Something that evidently means an action is recorded as it unfurls in front of the camera. For example, clouds moving across the sky in a landscape image creates a beautiful blurred effect that gives the hint of time passage. The same thing happens when you shoot an image of a pier and the surf coming back and forth is recorded over a long period of time. The final result will be a beautiful misty look.

2. You can make waterfalls become silky.

Water fall

If you love nature photography there are probably a million different subjects that you could shoot using the long exposure technique. Waterfalls are often shot using a slow shutter speed which basically results in a long blurred line of water and accentuates the overall surreal look of the image. I call this “silky waterfalls”.

3. You can capture trails of lights.

Light trail

Long exposure technique is perfect for night time photography as well. You can shoot star trails, light trails, light painting, or even fireworks. All of these subjects require a long shutter speed which allow the sensor to be exposed to the light movement. These topics, when doing right, can capture a beautiful pattern of light in the final image easily.

4. You can make the annoying pedestrians disappear.

There are certain unique perspectives to get if you are prepared to use the long exposure technique in broad daylight. It is not difficult, you will just need an ND filter. What I have in mind primarily is street photos. Let’s say you are photographing a busy street at noon. You want a look when nobody is around. On a busy street right in the middle of the day, it is seemingly an impossible task. Not if you know how to use an ND filer.

A ten stop ND filter, something like a Lee big-stopper, is what you need. You can first meter for the scene, then attach the filter to the front of the lens. A ten-stop filter will allow you to use a shutter speed of up to 10 stops slower than what you metered initially, without the filter. That will make everybody simply disappear. If you do it the right way, what you will get in your image is a city completely devoid of people! Like a postapocalyptic
scene, it will be an amazing image.

5. You can easily create B&W fine art photographs.

Another reason you would want to shoot long exposure photos is to enhance your black and white compositions. Black and white images are somehow more powerful than color images.

Sydney bridge

It is the contrast, the different shades of grey, ranging from pure white to pure black, the shapes, the forms, everything seems to appear more interesting. The greatest disadvantage of B&W images is that, well, they are devoid of color. That, however, is also the greatest advantage. Because without color, the essential aspects of composition and the underlying story comes to the forefront.

Do you have any other compelling reasons to do long exposure photography? Please share in the comments below.

googletag.cmd.push(function() {
tablet_slots.push( googletag.defineSlot( “/1005424/_dPSv4_tab-all-article-bottom_(300×250)”, [300, 250], “pb-ad-78623” ).addService( googletag.pubads() ) ); } );

googletag.cmd.push(function() {
mobile_slots.push( googletag.defineSlot( “/1005424/_dPSv4_mob-all-article-bottom_(300×250)”, [300, 250], “pb-ad-78158” ).addService( googletag.pubads() ) ); } );

The post 5 Reasons You Should Learn Long Exposure Photography by Kevin Choi appeared first on Digital Photography School.


Digital Photography School

 
Comments Off on 5 Reasons You Should Learn Long Exposure Photography

Posted in Photography


Exposure Lock Button – What is it and How to Use it?

07 May

Nestled quietly on the back of most cameras is a button that is often ignored or misunderstood, particularly by those who have recently upgraded to a DSLR or Mirrorless camera. It’s the Exposure Lock button, and it can be a tremendous asset to photographers who are looking for ways to get more control over their cameras and ultimately their photography in general.

students

Using the exposure lock button helped me get the correct exposure on this picture of two students studying for final exams.

To understand what this button does it’s helpful to know a bit about how your camera calculates the exposure using aperture, shutter speed, and ISO sensitivity.

In Full Automatic mode these are all handled by the camera itself, producing images that are often pretty nice but can sometimes turn out too dark, too bright, or otherwise not exactly how you intended. In Manual mode you are required to set all three parameters yourself, which can sound intimidating at first, but is quite easy once you get the hang of it. However if you shoot in one of the semi-automatic modes like Aperture Priority, Shutter Priority, or Program Auto you have a high degree of control while still letting your camera figure out a few things too.

In Aperture Priority you set the aperture and ISO, while your camera figures out the shutter speed to use for a properly exposed photo. But, in Shutter Priority you set the shutter speed and ISO to use, while letting your camera set the aperture. In these so-called Creative modes the automatic parameters (whichever settings are handled by your camera, not you) are constantly changing depending on what you point your camera at in order to get a nice, even overall exposure.

stairway

I didn’t have much time to get this shot, so using the Exposure Lock button was a quick way for me to get the image I was looking for.

This is where the Exposure Lock button comes in; it freezes whichever exposure parameter was set by your camera until you take a picture. At first this might sound like a silly thing to do but makes a bit more sense when you understand how it can be used.

I shot the picture below in Aperture Priority with my aperture set to f/2.8 while my camera selected a shutter speed of 1/500. Unfortunately my camera was looking at the entire scene, not just the subject, and chose a shutter speed that resulted in my subject being far too dark. The tradeoff was that the background was properly exposed, but my camera did not know that I was more concerned with the teddy bear than the scenery outside. To correct the problem I simply pointed my camera down at a darker spot in the foreground, pressed the Exposure Lock button, and held it down while recomposing my shot to the original framing. When I locked the exposure my camera selected a slower shutter speed of 1/30 which resulted in my subject being well lit even though the background elements were a bit too bright.

bear-underexposed

I shot this in Aperture Priority at f/2.8 but with the bright light through the window, my camera picked a shutter speed of 1/500 second. The outside looks great, but my subject is horribly underexposed.

Aperture Priority, f/2.8, 1/30, ISO 200.

By pointing my camera down, locking the exposure, and then recomposing the result was f/2.8 with a shutter speed of 1/30 second. Far too slow for the background to be properly exposed, but my subject looks just fine.

You might look at this photo and wonder where the background went, but remember what happened in the original when the background was visible – the subject was too dark. By locking the exposure such that my subject was well lit, the background ended up far too bright. It worked out just how I wanted, because it was the bear that mattered to me, and not the scenery outside the window. I could have also employed another method to get my subject properly exposed such as center-weighted metering or adjusting the Exposure Compensation, but in this case I found the Exposure Lock function to be quick and easy enough to get the job done. It’s a handy tool to have in your back pocket for those times when you need to quickly over or under expose your shot.

rooftop

The Exposure Lock button came in handy here as well, and helped me get both a background and foreground that are well lit.

If you’re interested in trying your hand at Exposure Lock, most camera manufacturers make it fairly painless. On Nikon cameras the button says “AE-L/AF-L” and is located about an inch from the right-hand side of the camera (on the back), while Canon’s button is a bit smaller and marked with an asterisk. You can even customize it on some cameras so that exposure is locked until you take a picture or as long as you physically press the button. Sony, Pentax, Olympus, and others have this button too but its exact appearance and location varies depending on the manufacturer and model.

exposure-lock-button

Most Nikon bodies have the Exposure Lock button in the top-right corner, but the exact location on your camera may be a bit different.

The Exposure Lock button is a nice tool to have at your disposal, but it’s not quite the same as shooting in Manual mode while reading your light meter and histogram to make sure your exposure is nailed precisely how you want it. Still, it’s a fantastic way to adjust your exposure quickly, without changing any metering modes or other shooting parameters. I often find myself using it when I need to over or under expose the scene in a pinch, and once you get the hang of it you might find it useful in a similar fashion.

Are you a fan of the Exposure Lock button, or do you have any other photography tips to help your curious camera-owning counterparts get photos that are properly exposed? Leave your thoughts in the comment section below.

googletag.cmd.push(function() {
tablet_slots.push( googletag.defineSlot( “/1005424/_dPSv4_tab-all-article-bottom_(300×250)”, [300, 250], “pb-ad-78623” ).addService( googletag.pubads() ) ); } );

googletag.cmd.push(function() {
mobile_slots.push( googletag.defineSlot( “/1005424/_dPSv4_mob-all-article-bottom_(300×250)”, [300, 250], “pb-ad-78158” ).addService( googletag.pubads() ) ); } );

The post Exposure Lock Button – What is it and How to Use it? by Simon Ringsmuth appeared first on Digital Photography School.


Digital Photography School

 
Comments Off on Exposure Lock Button – What is it and How to Use it?

Posted in Photography


Long Exposure Photography Without a Tripod

01 May

For me, as a travel photographer, the size and the weight of the photography equipment that I carry around is very important. Over the years, I learned how to carry only the items absolutely necessary for shooting in order to eliminate anything unessential.

Long_Exposure_Photography_Without_Tripod_Photo-2

Long exposure photo shot without a tripod, using the Align+Blend technique.

I was able to replace some of the pieces of equipment with software. For example, I stopped using ND Graduated filters a few years ago. For me, it was easier to take bracketed shots and blend two images in Photoshop or simply use the graduated filter in Lightroom. Next, I left behind the remote trigger because I learned that using the two second delay function on the camera allowed me to achieve the same result without an extra piece of equipment.

A couple of months ago, I pulled the trigger on the biggest change in my photography universe when I switched from a Canon DSLR to a Sony Mirrorless (read my article here 5 Lessons Learned Switching from DSLR to Mirrorless for Travel Photography). That drastic switch resulted in cutting the weight and the size of the equipment I carry around by more than half.

During my latest photography trip to Hawaii and Northern California, I did quite a bit of hiking and realized that, after the switch to mirrorless, the biggest and by far the bulkiest, piece of equipment I carried was my tripod. I love my Feisol tripod because it is light, tall, and steady like a rock. But, sometimes it is just impossible to bring with me.

Even though I learned how to take bracketed shots handheld and merge them effectively to HDR in Photomatix and Photoshop HDR Pro (read Natural Looking HDR in Photoshop and Lightroom in 5 Easy Steps), without a tripod I still could not accomplish one of the most important types of photography, which is long exposure photography.

Long_Exposure_Photography_Without_Tripod_Photo-1

Long exposure photo – shot with a tripod.

I use long exposure photography quite a bit, especially when shooting seascapes, and of course, I have plenty of seascapes in my portfolio. Longer shutter speed allows me to achieve beautiful, smooth and silky looking water plus, it works just as well for the sky.

Lately, I’ve been experimenting with a few techniques in an attempt to achieve the same long exposure effect in the water and the sky by shooting handheld without a tripod. After I started to produce predictable results on a consistent basis, I am now ready to share the technique with you.

Shooting

Below is the effect I achieved using my new technique that I call Align+Blend.

Normally, I shoot in bracketing mode, taking at least three exposures. In order to use the Align+Blend technique, I had to switch from bracketing mode (AEB) to the Single Shot Mode. I shot 10 consecutive shots of the scene, trying to be as steady as possible, without too many movements. I was shooting at an approximate speed of one shot per second and, it took me nine seconds to complete the series. In order to get the sharp images, I used a shutter speed of 1/200th of a second.

Long_Exposure_Photography_Without_Tripod_Photo-22

Single RAW image, unprocessed (1/200 sec).

That was it. The shooting part was done. The rest was accomplished in post-processing.

Processing

Step 1 Import

I imported the 10 RAW files into Lightroom.

Step 2 Process in LR

I applied one of my landscape presets to the entire set making sure that each image had an identical look (If you are interested you can download my free preset collection on my blog).

Step 3 Open as layers in Photoshop

I selected 10 images in Lightroom and opened them in Photoshop as layers in the same document (right/option click).

Long Exposure Photography Without Tripod Photo 3

Step 4 Align Layers

I used the Auto Align Layers feature in Photoshop to align all 10 layers with Projection set to AUTO. The Auto Align is a fairly sophisticated tool, and Photoshop had no issue aligning all of the 10 individual layers.

Long Exposure Photography Without Tripod Photo 4

Step 5 Convert to one Smart Object

I converted the 10 layers to one single Smart Object (right/option click).

Long Exposure Photography Without Tripod Photo 5

Step 6 Set Stack Mode

I used the following command to blend the 10 original layers inside of the Smart Object. Layer > Smart Object > Stack Mode > Mean. This resulted in a long exposure effect by moving elements of the scene (water, sky).

Long Exposure Photography Without Tripod Photo 6

Step 7 Fix any areas with issues using a layer mask

At the same time, the windy weather created some unwanted effects by moving tree branches and the grass in the foreground. To fix the blurry effects I placed one of the 10 original RAW images on top of the Smart Object layer and blended together two layers with the help of transparency (layer) masks. I used the area of the water and the sky from the smart object layer and, the rest of the scene from the single RAW layer.

Long Exposure Photography Without Tripod Photo 7

I managed to achieve the long exposure effect without a tripod and without sacrificing the quality of the final image.

This technique also works as the replacement for Neutral Density filters. In broad daylight, even when you have a tripod but the smallest aperture (f/22) is still not small enough to slow down the shutter speed, take multiple shots and blend them together later in Photoshop in a similar manner.

Here’s the final image again:

Long Exposure Photography Without Tripod Photo 2

googletag.cmd.push(function() {
tablet_slots.push( googletag.defineSlot( “/1005424/_dPSv4_tab-all-article-bottom_(300×250)”, [300, 250], “pb-ad-78623” ).addService( googletag.pubads() ) ); } );

googletag.cmd.push(function() {
mobile_slots.push( googletag.defineSlot( “/1005424/_dPSv4_mob-all-article-bottom_(300×250)”, [300, 250], “pb-ad-78158” ).addService( googletag.pubads() ) ); } );

The post Long Exposure Photography Without a Tripod by Viktor Elizarov appeared first on Digital Photography School.


Digital Photography School

 
Comments Off on Long Exposure Photography Without a Tripod

Posted in Photography


37 Ethereal Almost Supernatural Long Exposure Photographs

30 Jan

Landscape photographers use a technique involving long exposures to create those milky smooth waterfalls, and misty images of coastlines. But what other ways are long exposures used?

Here are a few long exposure photographs that seem almost otherworldly or supernatural in their appearance for you to ponder and enjoy:

Photograph Smoking Jungle by Karim Nafatni on 500px

Smoking Jungle by Karim Nafatni on 500px

Photograph Snake on a Train by Brian Donovan on 500px

Snake on a Train by Brian Donovan on 500px

Photograph Skipping Rocks by Michael Shainblum on 500px

Skipping Rocks by Michael Shainblum on 500px

Photograph Autumn Swirl by Andrew Kumler on 500px

Autumn Swirl by Andrew Kumler on 500px

Photograph 49 Shades of Grey by Dylan Toh  & Marianne Lim on 500px

49 Shades of Grey by Dylan Toh & Marianne Lim on 500px

Photograph The Proposal by Ryan Buchanan on 500px

The Proposal by Ryan Buchanan on 500px

Photograph Children of the Atom by WK Cheoh on 500px

Children of the Atom by WK Cheoh on 500px

Photograph Stars over Teton homestead by Royce's NightScapes on 500px

Stars over Teton homestead by Royce’s NightScapes on 500px

Photograph Cascading Levels by Jason Hatfield on 500px

Cascading Levels by Jason Hatfield on 500px

Photograph Beach Morning by Mobeen Mazhar on 500px

Beach Morning by Mobeen Mazhar on 500px

Photograph Timeless by Stefan Mitterwallner on 500px

Timeless by Stefan Mitterwallner on 500px

Photograph Erosion of an Iceberg by André Alessio on 500px

Erosion of an Iceberg by André Alessio on 500px

Photograph Trollstigen light trail by Attila Roszjár on 500px

Trollstigen light trail by Attila Roszjár on 500px

Photograph Forever Strong by Max Rive on 500px

Forever Strong by Max Rive on 500px

Photograph Machu Picchu by Jacky CW on 500px

Machu Picchu by Jacky CW on 500px

Photograph Onshore by Dave Cox on 500px

Onshore by Dave Cox on 500px

Photograph Long WayTo Sun by Mostafa Ammar on 500px

Long WayTo Sun by Mostafa Ammar on 500px

Photograph Persistence - Blue Boat Shed, Perth. Western Australia by Luke Austin on 500px

Persistence – Blue Boat Shed, Perth. Western Australia by Luke Austin on 500px

Photograph Colosseum Lite Trails by Yhun Suarez on 500px

Colosseum Lite Trails by Yhun Suarez on 500px

Photograph Startrails by Kittikorn Nimitpara on 500px

Startrails by Kittikorn Nimitpara on 500px

Photograph Time by David Watson on 500px

Time by David Watson on 500px

Photograph Grand Central by Conor MacNeill on 500px

Grand Central by Conor MacNeill on 500px

Note: long exposures of busy places full of people can help make all the people disappear magically!

Photograph Dubai 2014 Happy New year by Dalia Al Ameen on 500px

Dubai 2014 Happy New year by Dalia Al Ameen on 500px

Photograph Viva sant'Agata! by Giuseppe Torre on 500px

Viva sant’Agata! by Giuseppe Torre on 500px

Photograph SkyWheel in Niagara Falls, Canada by Roberto Machado Noa on 500px

SkyWheel in Niagara Falls, Canada by Roberto Machado Noa on 500px

Photograph Carnival by Photo Bones on 500px

Carnival by Photo Bones on 500px

Photograph C A R N I E by Matthew James on 500px

C A R N I E by Matthew James on 500px

Photograph L I G H T | S P I N by Matthew James on 500px

L I G H T | S P I N by Matthew James on 500px

Photograph Spinning by Benjamin King on 500px

Spinning by Benjamin King on 500px

Photograph fountain of fire by Zachary Voo on 500px

fountain of fire by Zachary Voo on 500px

Photograph The Spin by Bipphy Kath on 500px

The Spin by Bipphy Kath on 500px

Photograph Fire show amazing at night by Sasin Tipchai on 500px

Fire show amazing at night by Sasin Tipchai on 500px

Photograph Insane Crazy by Ben Hirst on 500px

Insane Crazy by Ben Hirst on 500px

Photograph Flurry II. by Christopher Chung on 500px

Flurry II. by Christopher Chung on 500px

Photograph THE WINDMILLS OF YOUR MIND, LES MOULINS DE MON COEUR... by Magda Indigo on 500px

THE WINDMILLS OF YOUR MIND, LES MOULINS DE MON COEUR… by Magda Indigo on 500px

Photograph Tunnel of Fire by Luc De La Mare on 500px

Tunnel of Fire by Luc De La Mare on 500px

Photograph The Tunnel by Dave Brightwell on 500px

The Tunnel by Dave Brightwell on 500px

googletag.cmd.push(function() {
tablet_slots.push( googletag.defineSlot( “/1005424/_dPSv4_tab-all-article-bottom_(300×250)”, [300, 250], “pb-ad-78623” ).addService( googletag.pubads() ) ); } );

googletag.cmd.push(function() {
mobile_slots.push( googletag.defineSlot( “/1005424/_dPSv4_mob-all-article-bottom_(300×250)”, [300, 250], “pb-ad-78158” ).addService( googletag.pubads() ) ); } );

The post 37 Ethereal Almost Supernatural Long Exposure Photographs by Darlene Hildebrandt appeared first on Digital Photography School.


Digital Photography School

 
Comments Off on 37 Ethereal Almost Supernatural Long Exposure Photographs

Posted in Photography


Why Manual Exposure is Better for Winter Wildlife Photography?

18 Dec

My winter wildlife photography tours and workshops put us in locations with lots of snow on the ground, which presents a new issue for most people – how to get good exposure without continuously messing around with exposure compensation.

You have to tell the camera to brighten your images by up to two stops of exposure to make whites white, because the meter in your camera wants everything to be a mid-tone gray.

MBP Cranes Exposure Example

For example, here is a photograph of one of our main subjects, the Japanese Red-Crowned Crane (above, left). It’s a predominantly white bird on a snowy white background. For a shot like this if I put the camera in Aperture Priority mode with the aperture set to f/8 for example, the camera would tell me that the shutter speed should be about 1/2000 of a second, which would result in a photo like the under-exposed dark version (above, right).

To avoid under-exposing images like this, one thing you can do is to dial-in +2 stops of exposure compensation in Aperture Priority mode. This would result in a new shutter speed of 1/500 of a second at the same aperture, and a beautifully white image.

There is one fundamental problem with this method though, and this is what most people fail to understand until they’ve missed enough shots for them to take my advice seriously. The moment your subject moves away from their white background, the exposure with +2 stops of exposure compensation is no longer valid.

To prove my point during a recent tour, I switched to Aperture Priority with auto-ISO and photographed this Whooper swan on the snow with +2 stops of exposure compensation dialed in. This gave me a perfectly white bird with perfectly white snow, as we’d expect.

MBP Hokkaido 20140221 0212

Then, just moments later, I photographed a flock of Whooper swans flying into the same location, this time with a darker background, which fooled the camera into increasing my exposure and the result was this totally over-exposed photograph.

MBP Hokkaido 20140221 0217

To avoid this, when photographing wildlife in the snow, the best course of action is to lock your exposure down (using Manual) so that when the opportunity to photograph something with a darker background arises, the exposure doesn’t shift, and the subject and the snow remains perfectly exposed, as in this example.

MBP Hokkaido 20140131 1261

The downside of this method is that you do have to continually check your exposure, especially on a day with patchy cloud for example. Because you’ve locked down your exposure totally, you are responsible for noticing when it gets a bit brighter or darker, and updating your camera settings.

In my experience though, although you sometimes have to tweak the exposure in post-processing, you still return home with many more usable shots, as opposed to the above example with the flock of supernova swans, which is a firm candidate for deletion.

Settings Your Exposure for White

To set my exposure I usually just fill the frame with snow, and adjust the settings in Manual mode, until I see the caret on the camera’s meter indicate that the exposure is now at +2 stops for overcast snow or +1 1/3 stops for brightly lit snow.

MBP Filling the Frame with Snow 640 f8 ISO1001

How you achieve your exposure depends on your subject. Personally, I usually start with the aperture, as that controls depth-of-field, and I want to select that based on how much of the subject or scene I want to be sharp, and how much of it I want to be nice blurry out of focus bokeh.

Then I select the shutter speed, based on my focal length and how much I expect my subject to move. The rule of thumb for the slowest shutter speed you can use without the risk of introducing camera shake, is to use the focal length as the denominator of the fraction in your shutter speed. For example if you are shooting with a 200mm lens, the slowest shutter speed you can safely shoot hand-held is 1/200 of a second.

Of course, image stabilization or vibration reduction in the lens can help you to go slower, but you also have to consider subject movement with wildlife. To freeze a large bird in flight you need at least 1/500 of a second, but ideally 1/1000 or higher if possible.

These are, of course, general guidelines. You may decide to slow down the shutter speed and pan with your subject to use the blur of the wing movement artistically as in this example, but that’s the subject for another article.

MBP Hokkaido 20130207 4320

Once I’ve decided the aperture and shutter speed based on the subject and any artistic decisions I might make, the last setting that I usually change as I lock in on my manual exposure is the ISO. Once the caret reaches +2 on the camera’s meter scale, I make a test shot, and check the histogram.

For a photograph of a field of snow, or a white bird on a white background, most of the data in the histogram should be almost touching the right shoulder of the histogram. This means the image data captured is almost pure white, as it should be. If the data is in the middle of the histogram, the whites will be gray. This is what the camera would do automatically without our help.

MBP White on White Histogram

Also remember to turn on your highlight alert or highlight warnings in your camera’s settings, commonly called “the blinkies”, as these will alert you to any areas of your image that you might be over-exposing. It’s okay to over-expose a few specular highlights, but try not to over-expose large areas of your image, especially on your main subject, or the detail in those areas will be lost, and cannot be recovered on a computer later.

One of the other nice things about photographing birds over snow is that the light from the snow reflects up onto the underside of the birds in flight, as in this example. This means that you really don’t have to worry about where the bird is once you have locked your exposure down in Manual mode.

MBP Hokkaido 20140221 6768

The subject can be on white background, a dark background, or a blue sky, and your exposure will be spot on, leaving you free to concentrate on focusing and composition, instead of frantically trying to adjust your exposure compensation as the action unfolds.

googletag.cmd.push(function() {
tablet_slots.push( googletag.defineSlot( “/1005424/_dPSv4_tab-all-article-bottom_(300×250)”, [300, 250], “pb-ad-78623” ).addService( googletag.pubads() ) ); } );

googletag.cmd.push(function() {
mobile_slots.push( googletag.defineSlot( “/1005424/_dPSv4_mob-all-article-bottom_(300×250)”, [300, 250], “pb-ad-78158” ).addService( googletag.pubads() ) ); } );

The post Why Manual Exposure is Better for Winter Wildlife Photography? by Martin Bailey appeared first on Digital Photography School.


Digital Photography School

 
Comments Off on Why Manual Exposure is Better for Winter Wildlife Photography?

Posted in Photography


Alien Skin offers Exposure 7 with Raw support

11 Dec

Alien Skin software has announced Exposure 7, a new version of its flagship film emulation software. This iteration introduces non-destructive Raw editing, supporting files from a number of Canon and Nikon cameras as well as a handful of mirrorless models from Fujifilm, Olympus and Sony. Read more

Articles: Digital Photography Review (dpreview.com)

 
Comments Off on Alien Skin offers Exposure 7 with Raw support

Posted in Uncategorized