RSS
 

Posts Tagged ‘doing’

10 Tips for Doing Your First Family Portrait Session

15 Nov

Photographs from a good family portrait session will be treasured for many years to come. It’s an incredibly rewarding area of photography, but it can also be a little daunting for new photographers. You need to build a rapport with the family fast, keep the children on board, and meet the parents’ expectations with gorgeous photographs.

Family portrait FAMILY GROUP

So where do you start? Which camera settings should you choose?

Here are some important pointers to make your first session go smoothly, and to help you take great family portraits.

1. Get down to their level

Get down to a child’s eye level. This will lead to far more engaging photographs, as well as helping you to interact better with the child.

Family portrait INDIV GIRL flowers

2. Use Centre point focus

Different focus settings suit different photographers, but center point focusing tends to be the most useful for family portraits. As you take more and more family portraits, you’ll get a feeling for whether this suits you, But it’s a great starting point for your first session.

3. Choose an appropriate aperture

Your aperture settings will be influenced by the style you prefer. As a starting point, many lifestyle family photographers choose to shoot wide open for individual portraits (f/2.2 works really well), and around f/5.6 for group shots to ensure everyone is in focus.

Family portrait DAD AND SON opt

This was taken at f/5.6.

Family portrait INDIV GIRL park

This was shot at f/2.2.

4. Starting shutter speed

You will probably find yourself needing a slightly faster shutter speed for family portraits than you’d need for many other kinds of portraits. Children move fast, and sometimes unpredictably! A good setting to start with is 1/250th, which will give you flexibility for children rolling over or waving. If you have a situation where someone is moving very fast, such as a child jumping or racing off into the distance, choose a much faster shutter speed like 1/800th.

Family portrait BABY opt

This was taken at 1/800th]

5. Use Auto ISO

While you’re familiarizing yourself with the apertures and shutter speeds that work for you on family portrait sessions, consider setting your ISO to auto. The results are usually satisfactory, and it’s one less thing to think about on the day. As you gain experience and confidence, you can start to select the ISO as you go along.

6. Metering mode

Certain metering options seem to suit some photographers better than others. As you take more family portraits, you’ll soon see which works best for you. To start with, try using spot metering for individual portraits, and evaluative metering for a group shot.

Family portrait MUM AND BABY

This was taken with the evaluative metering mode.

7. Shoot in RAW format

The editing options open significantly in Lightroom, and you’ll have a far greater range of colors and detail recorded if you shoot in the RAW format.

8. Auto White Balance

Set your white balance to auto if you’re doing a location shoot. You’ll be working in a variety of locations with different lighting, and you won’t have much time for setting white balance as you go. Correcting white balance is an easy edit in Lightroom, so you’d be better off spending the time engaging with the family you’re photographing.

9. Choose your lenses

Consider which lenses to take with you to the family portrait session. If your budget doesn’t stretch to having several lenses, consider renting some. It can be surprisingly economical, and it gives you the opportunity to try out different focal lengths to see which suit you best.


Family portrait BABY

This was taken with an 85mm lens.

Using several lenses throughout a family portrait session will give you lots of variety in the images, as well as meaning you can cope with most locations. A zoom lens like a 24-70mm will give you lots of flexibility, or a popular prime lens for family portraits is an 85mm lens, which is very flattering for portraits. A wide lens like a 35mm will help you to set the scene.

As you gain experience photographing families, you’ll develop a sense for which lenses suit you best. That’s a good time to invest in the best quality lenses you can afford.

Family portrait SIBLINGS INSIDE

This was taken with a 35mm lens.

10. Set limits

Limit yourself to taking five versions of each scene. This will train your eye to look for the details and expressions you want to capture and to make sure you ultimately combine them all in one photograph.

Conclusion

So there you have it – family portraits in a nutshell. Practice makes perfect, though, so be prepared to work hard and hone your camera skills. Above all, a friendly and professional attitude combined with careful preparation for each family portrait shoot should make for happy clients and repeat business.

Please share your family portrait tips and photos in the comments section below.

googletag.cmd.push(function() {
tablet_slots.push( googletag.defineSlot( “/1005424/_dPSv4_tab-all-article-bottom_(300×250)”, [300, 250], “pb-ad-78623” ).addService( googletag.pubads() ) ); } );

googletag.cmd.push(function() {
mobile_slots.push( googletag.defineSlot( “/1005424/_dPSv4_mob-all-article-bottom_(300×250)”, [300, 250], “pb-ad-78158” ).addService( googletag.pubads() ) ); } );

The post 10 Tips for Doing Your First Family Portrait Session by Louise Downham appeared first on Digital Photography School.


Digital Photography School

 
Comments Off on 10 Tips for Doing Your First Family Portrait Session

Posted in Photography


Tips for Doing Macro Underwater Photography

04 Nov

Look at the photograph below. What an unreal, alien animal! It could be right out of one of the many upcoming Star Wars sequels. You just don’t see creatures like that in your everyday life. It’s a sea slug (to be scientifically precise: Nembrotha Kubayana) which I photographed 20 meters underwater on a reef in the Philippines. The head of the slug is only about a centimeter across, so the image is quite a close-up (macro photograph).

Nudibranch1

If it doesn’t sound easy to dive 20, 30 or more meters below the ocean’s surface to take a picture of a slug the size of your pinky – it isn’t. But with the right gear, with the proper knowledge and experience using that gear, and with skills to find those small animals you can do it too. So let’s talk about each of these points one at a time.

The Gear

Naturally, you will need an underwater camera. There are a number of great choices these days. Compact cameras have greatly improved in recent years, and you can get a pretty good deal on a camera plus the fitting underwater housing. Many camera manufacturers make acrylic housings for their own compact camera models, which tend to be a lot cheaper than third party models. To have any chance of taking good macro shots, you need a strobe or a video light as well.

underwater-macro-setup

Me with my underwater camera setup. Note the diopter (magnifying lens) attached to the front of the lens port. The strobe is relatively close to the port and aimed slightly forward. The closer the subject, the closer the strobe can be to the port. The farther away the subject is, the further the strobe has to be to avoid backscatter.

If you have a lot of money or if you are obsessed with underwater photography (like myself) you can get yourself a DSLR, and put it in an underwater housing. I have been using a Canon 5DII in a Hugyfot (machined aluminum) housing, with two Inon z-240 strobes for several years now. Camera choice is an interesting and complex issue, but I want to concentrate on the gear you need specifically for underwater macro photography.

Macro lens

Tambja

Another sea slug, from Botany Bay, Australia.

Modern macro lenses are technological miracles. If you are using a DSLR or a mirrorless camera, you can switch lenses. So you need to mount one that is capable of focusing close up, with significant magnifying power. I routinely use the Canon 100mm f/2.8 macro lens(price it on Amazon or B&H Photo), which can focus at 35 centimeters. That distance is measured from the sensor plane, hence I can place the subject only a few centimeters in front of the housing’s lens port. The sharpness this lens achieves when capturing minute animals is simply amazing. Nikon’s 105mm macro (price it on Amazon or at B&H Photo) is a legendary lens as well, and for cameras with cropped sensors (mirrorless cameras and entry to mid-level SLRs) 60mm macro lenses do a great job.

Other options

A small, but clever piece of gear I have been using with quite some success, is an extension tube. It’s simply a spacer inserted between the macro lens and the camera body. The extension tube eliminates the ability of the lens to focus to infinity (not used in macro photography anyway) and adds another 20% of magnification. The fact that no additional lens elements are introduced is a good thing for image quality.

Diopters (also called close-up filters) are also highly recommended. A diopter is simply a magnifying glass which is placed on the front of the camera’s lens. This is not ideal in terms of the optics, and distortions towards the edges are possible. With diopters, it makes sense to invest in a quality product to minimize such distortions. However, the amount of magnification achieved with a good diopter is absolutely mind-boggling. It can turn your underwater camera setup into a field microscope.

Goby2

Another goby, very well camouflaged on a soft coral.

You can get both dry diopters which are attached to the actual lens, and wet diopters which are attached to the lens port on the outside of the housing. Wet diopters exist for DSLR and compact camera underwater setups. The convenient thing about the wet ones is that you can take them off underwater, and shoot larger animals again.

Tip: Make sure you store your wet diopter in a safe place when it’s not mounted.

Request: If you see a wet diopter for a 10cm diameter macro port, with a gray plastic mount somewhere on the west coast of Cebu, please return it to me.

How to use your macro gear

I’d like to stress two things when it comes to the proper camera technique for macro underwater photography – camera settings and strobe placement.

Almost all the light for your underwater photographs will come from your artificial light source anyway, so the shutter speed is usually not important. It needs to be equal or slower than the maximum speed your camera can synchronize with the strobes. That kind of information will be in the user manual for your camera since it differs between camera models. Otherwise, a shutter speed as fast as possible is beneficial for sharp images.

Goby1

A small goby on a piece of hard coral, with the entire image in sharp focus. Canon 5DII, Canon USM 100mm f2.8 lens, at f/22.

Aperture considerations

A small aperture helps to keep the whole scene in your image sharp. Macro lenses naturally have a shallower depth of field due to the distance to subject being much smaller. So to photograph a tiny goby and all of the pretty coral it perches on, with all of it in focus, I use an aperture anywhere from f/22 to f/32 (that’s the smallest my Canon 100mm f2.8 macro can do).

There is also the option of using a wider aperture to achieve a Japanese-style effect in your images. Such a photographic style is indeed popular with Japanese underwater photographers these days. It is somewhat reminiscent of the late medieval Japanese painting style where the artists would just hint at a few twigs to depict a tree. How wide you can go depends on your lens, the distance to the subject and its orientation. The aperture of f/4.2 used in the picture below is as wide open as I can go. Whenever I can, I set my camera to approximately correct values before the dive so that I don’t have to find my way around in the menus while already underwater with a cool fish showing up in photographic range.

Stick

Only the face of this stick pipefish from Sydney in Australia is in focus. This Japanese style shot gives the image a dreamy atmosphere. Olympus TG-1, at f/4.2.

Lighting

You will need to use artificial light for most of your macro shots. Light-hungry macro lenses will not make good images with sunlight in many situations on land, and underwater, with so much sunlight absorbed by the water above you, they do even worse. The internal flash of most cameras is not strong enough and it’s in a less-than-ideal position just above the lens.

Avoid back-scatter

The external strobes you use should be mounted on some kind of adjustable or bendable arm. Keep them positioned moderately close to your lens, and a bit behind it. In underwater photography, you are always aiming to avoid back-scatter. Your strobe will light up the suspended particles in the stretch of water between your lens and the sea slug, and this will make your image look as if taken in a snow storm. There is nothing quite as annoying in underwater photography than a well composed, well lit shot, with a lot of back-scatter ruining it. You can take care of back-scatter in post-processing to some degree in some shots, but it’s a pain and better avoided, to begin with. Back-scatter is to underwater photography what blisters are to hiking.

A diver on a shipwreck in the Philippines. These are harsh conditions for underwater photography. I had my strobes turned outwards, and placed away from the camera, but not enough. The illuminated particles (the backscatter) stand out especially in front of the darker part of the wreck.

A diver on a shipwreck in the Philippines. These are harsh conditions for underwater photography. I had my strobes turned outwards, and placed away from the camera, but not enough. The illuminated particles (the back-scatter) stand out especially in front of the darker part of the wreck.

When shooting wide-angle underwater, you need to place your strobes far away from your lens and slightly outward-oriented to avoid illuminating any particles in front of the lens’s wide field of view. This minimizes the amount of light reaching the space between your lens and the subject.

Positioning your strobes

In underwater macro photography, the situation is not quite as difficult. Still, the further away you are from the subject (the distance may vary between the subject almost touching the front of the lens port to no more than 30cm) the more you need to move your strobes away from the lens. When I am really close, I try to mimic a ring-flash with my two underwater strobes. In case you haven’t seen one, a ring-flash is a circular light source which is mounted on the front of a macro lens. Such a strobe is often used in land-based macro photography. It provides very even illumination. Putting one of my underwater strobes close to each side of my camera’s lens port gives me a similar type of direct, smooth illumination.

How to find good underwater macro subjects

Photo legend Jim Richardson is quoted as saying that, “If you want to be a better photographer, stand in front of more interesting stuff.”. Underwater, that’s not quite true. You need to hover in the water in front of more interesting stuff, or at least lay in the sand in front of more interesting stuff, but that doesn’t look quite as stylish. And you should definitely not lay on corals in front of more interesting stuff because you may break them and it will evoke the rightful anger of a lot of other divers!

Hunter

A flamboyant cuttlefish hunting in the Philippines. This animal is about 5cm long.

Good buoyancy will have other advantages besides not breaking corals (thank you again for not doing that). If you are stable in the water, you will be able to position yourself in a proper position in front of the animal you’d like to shoot. You will also not stir up silt or sand from the bottom, which would then cloud the image you are about to capture and cause the aforementioned dreaded back-scatter.

Whipcoralgoby

Whip coral goby, Moalboal, Philippines.

Back-scatter happens, to the best of us, including myself (above).

In the bottom image (before) we see way too much backscatter. I did two things. First I corrected the exposure of the image, cutting off the darkest part. This eliminated some of the unsightly dots. The remaining white dots I removed with the healing brush in my image processing program. The resulting image on top is vastly improved by these two post-processing manipulations.

Don’t spook your subjects

A neutrally buoyant, controlled, and calm approach towards your photo subjects will also reduce the chance of spooking them. There is a lot to be said for good buoyancy when photographing underwater. If you are not quite there yet with your positional control while diving, try photographing less easily spooked animals like slugs and sea urchins, and save the shrimp (very nervous) or the blennies (very fast) for the future once you have improved your buoyancy.

Blenny

A blenny. Not easy to catch!

Hunting subjects

What you have to figure out next is where to find those psychedelic slugs and the fish straight out of Salvador Dali’s sketchbook. If you are on a diving vacation in some foreign tropical land, just follow your guide, and pay good attention to what he points at. The guys and gals guiding every day, year in and out, in the same location, usually know their reefs really well and are proud to show off the unusual animals on it. It also helps to have a quick chat with your dive guide beforehand and to tell him that you are out to find interesting macro subjects.

If you are diving on your own, things will move a bit slower. You will have to become that expert guide yourself. Study the reef when you are diving and study marine life books and web resources on land to figure out what to look for, where, and when. Certain animals will only be active at night, or at sunset (like the famous mandarin fish shown below). Some crabs will only live on one species of soft coral, and some shrimps will only live on the skin of certain sea cucumbers. If you don’t know where to look for them, it’ll be near impossible to find them. It’s a curious psychological effect that you will find such animals over and over again after you have spotted them once for the first time.

Mandarin

A mandarin fish! So pretty!

Nudibranch2

Sea slug laying its eggs (these slugs called nudibranchs are hermaphrodites, functioning as males and females at the same time). It was magic moments of animal behavior like these that got me addicted to macro photography underwater.

Conclusion

To become a skilled macro underwater photographer you need patience. Go for a dive, take some shots, come back, look at them, and think about them. Rinse (your camera gear, and yourself) and repeat. Take your time to inspect your work, and to reflect on what you could do differently next time. I recommend that you consider the points above during each and every iteration and the following questions:

Did I bring the right gear? Did I use it properly? Did I do a good job in finding that fascinating new sea slug?

Please put your comments and questions below, and do please share your underwater photos there too. We’d love to see them.

googletag.cmd.push(function() {
tablet_slots.push( googletag.defineSlot( “/1005424/_dPSv4_tab-all-article-bottom_(300×250)”, [300, 250], “pb-ad-78623” ).addService( googletag.pubads() ) ); } );

googletag.cmd.push(function() {
mobile_slots.push( googletag.defineSlot( “/1005424/_dPSv4_mob-all-article-bottom_(300×250)”, [300, 250], “pb-ad-78158” ).addService( googletag.pubads() ) ); } );

The post Tips for Doing Macro Underwater Photography by Dr. Klaus M. Stiefel appeared first on Digital Photography School.


Digital Photography School

 
Comments Off on Tips for Doing Macro Underwater Photography

Posted in Photography


Tips for Getting Started Doing Event Photography

17 Oct

Have you ever wanted to be a fly on the wall? To see the behind-the-scenes of amazing events and activities? To meet influential or interesting people? If so, candid event photography may be the thing for you!

While wedding photography is technically event photography, that is not our focus here. There’s just something different about wedding photography. It’s more pressure, higher stakes, more intensity. In this article we are going to focus more on other types of events – social, corporate, family, religious, and others, that can broaden your experience (and line your pocketbook!).

Getting Started

event photography tips 1

Unless you are an event planner or have an “in” already, sometimes it can be a little hard to break into event photography. You are probably going to have to volunteer for a few events to get started.

Are you or any of your immediate family members part of an organization or club? This can be absolutely anything – PTA for your child/grandchild’s school, a community fraternal organization, a slow-pitch softball team, your place of worship. Do they have any big events that they feature regularly or annually? Ask if they would like some free event photography. The good thing about doing free photography is that it lets you practice and hone your skills without feeling like you’re wasting someone’s money if your photos aren’t perfect.

Communication is Key

Before the event, work with the event coordinator in advance. A phone call, or thorough email, is usually sufficient, but you may also want to meet in person. You’ll want to ask some key questions, if they don’t have the information readily available such as:

  • “Is there an itinerary for the program? Can I receive a copy in advance?” If you’re anything like me, you’re a planner. You want to know in advance exactly what is going to happen, and ideally, where. That way, you can make sure that you’re lined up to catch the keynote speaker or the moment when an honoree receives their award. This isn’t just a matter of convenience for you, it helps you make sure that you are able to provide the shots that will help the group remember their event (or, if appropriate, to market it for the future!).

event photography tips 2

Who to photograph

  • “Who are the key people I should photograph?” Unless you’re a seasoned veteran of the event you’re photographing, you might not know who the big players are. I recently photographed a big charity gala for the biggest hospital in the area . Some of the attendees were CEOs of companies, coaches of Big 12 sports teams, mayors, and councilpersons. By receiving the names of the key attendees in advance, you can do a Google Image search for them (yeah, I know it sounds super-creepy) so that you can recognize them on-site.
  • “Who or what should I avoid photographing, if anything?” Nobody really wants to get into a situation where the person being photographed becomes belligerent or aggressive. You also don’t want to photograph a moment that is supremely personal if that is not desired. There are many events where you don’t need to ask this question, but keep it on the list for more personal events (such as family or religious ones). Don’t be paparazzi!

event photography tips 3

event photography tips 4

What to photograph

  • “How many/what kind of pictures would you ideally like?” I try to provide as many photos as possible to my clients because everyone’s tastes vary so widely. However, this can be really overwhelming for some people who are under time constraints, or who really only want photos of a certain portion of the event. Figure out their ideal amount and try to stick to it.
  • “Is it okay if I use any of these photos in my business advertisements or on my web page in the future?” It can essentially be free advertising if you can use these photos to demonstrate your abilities.
  • “When are you setting up for the event? May I stop by early for some test photographs?” Unless you want to take every flash, diffuser, and lens you own, you want to get a feel for the venue in advance. It’s ideal if you can get some test shots using the same lighting (whether it’s natural or artificial) and see how they come out. This will not only help you decide what gear to bring, but it also saves you time on the day of the event. Having to readjust your camera settings to accommodate the environment, get your ISO correct, decide on a lens, etc., all take time. This will make you look more professional and prepared.

Work the Crowd – Tastefully

This next bit may not be appropriate for more solemn and serious occasions. For most, however, your foot is officially in the door. Be friendly and professional, make appropriate jokes or comments to appear personable and fun. Keep the attention off of you, but interact kindly with everyone you meet.

Having a camera in your hand instantly makes people more prone to smile around you, so use that goodwill to make them laugh. This will also allow you to get natural, fun shots that will please both the client and the subject of the photo. This will often lead to people either asking for your business card or asking the event organizer for your information. Make sure to keep a stack of business cards on hand, and give a few to the event organizer if they are comfortable with that.

event photography tips 5

After the event, don’t hesitate to ask the organizer if you can use them a a reference, or if they might be wiling to write you a review. You’re doing them a service, potentially for free. It’s not uncommon or inappropriate to ask for an honest review of your services.

Details, Details, Details

Whether you’re photographing a political dinner, a church bazaar, a birthday party, or an awards event, someone put a great deal of thought and time into making that event unique and special. Someone spent hours thinking aboutcenterpiecess and the dessert table, about the table layout, registration table, the serving stations and other details. In many instances, the people who planned the event are also in charge of hiring the photographers now and in the future, so it doesn’t hurt to get on their good side!

To do so, get good quality shots of the small things that went into the event to make it special. Programs, food, signage, the little things. These shots are good for remembering all of the wonderful details that were so special to them on that day, and they can also make good marketing (for a company, religious entity, charity organization, or similar) in the future. Getting them these shots gives them lots of options – this makes you more helpful and versatile, as they’re getting more bang for their buck. This ultimately makes you more marketable!

event photography tips 6

event photography tips 7

event photography tips 8

While You’re At It…

For some events, they want to get the feel of the event from the attendee’s eyes. These can be tricky to do, you may have to photograph tactfully over someone’s shoulder, or through an open door. These types of photos, however, can be used to promote events in the future, especially if they do not actually feature the faces of anyone. It’s always important to get shots of the attendees for the event, but you can also get some of these shots that are not related to a specific date and time. This gives the organization (if applicable) options if the attendees do not want their faces being used as advertisements.

event photography tips 9

event photography tips 10

Make It Artsy… But Not TOO Artsy

One of the biggest mistakes that I see in some candid event photography is that there is little artistic focus or composition to the photos. Yes, there will be times you’re ultimately just getting crowd shots, and those ARE important. In those instances, make sure you’re using the appropriate aperture and focal length to get everyone in focus who needs to be.

Try and catch an interesting moment, or a moment when the crowd is focused on something , when someone is the center of the crowd’s attention. This composes your photo more and draws the viewer’s eye. For shots of smaller groups, couples, or solo shots, use a wider aperture and an appropriate focal length to get more artistic portraits. Attendees like to see more personal, beautiful photos of themselves. People are predisposed to stopping and smiling for the camera, so you will end up with some staged shots. But also get images of people in mid-conversation, or engaging in activities.

Pic 11

You can also use a wider aperture to up your artistic factor. Is there a beautiful centrepiece that is blocking your shot of a crowd on the other side of the room? Focus on it with an f/2.8 or f/4 aperture so that your crowd in the background is slightly blurred. This will make for some interesting variety in your shots.

Pic 12

Not Too Flashy

Just imagine that you are in the crowd at a movie night sponsored by the PTA. The lights have been dimmed, your eyes adjusted for the screen, and then someone’s camera flash pops right in your eyes. This exact same situation can occur at almost any event. A flash can distract from the event and disrupt not only the audience, but a potential performer or speaker. While it is usually absolutely appropriate to use a flash for group and/or staged photos to get proper lighting, it is often ideal to simply adjust your camera settings to make the available lighting work for candid photos.

The photos below were taken at a PTA movie night just like the one I described. It was in the cafeteria of a local elementary school, with no artificial lighting other than the projector screen, and some natural light coming in through a skylight. I adjusted my ISO to 800 to accommodate for the limited light, and opened my aperture to f/2.8. Even at that, I had a shutter speed around 1/25 or 1/15 pretty consistently. If I needed to capture action (which was very limited in this sort of event), I bumped my ISO up to 1600 to accommodate it. These adjustments allowed the families to watch the film without disruption as I photographed.

Pic 13

Pic 14

Picking the Best Shots

The first time I photographed an event was at my church, and I realized during editing how much people yawn and pick their noses when they think nobody’s looking!

For a multiple-hour event, you will likely get an abundance of photos. On your first pass through, obviously weed out any photos that are fuzzy or have poor technical skills. Since these photos will represent your abilities, you want to make sure to highlight the best of them.

I always take a second and third pass through, however. Hopefully the event organizer gave you a rough idea of how many photos he or she wanted. So go through and remove any photos that are boring, or that paints the subjects in a bad light (such as picking their nose). If you still have a surplus, narrow it down on the next pass through to weed out ones with weak composition, or ones that don’t tell the story of the event well. I will then edit the remaining photos (rather than editing hundreds that I will just throw away), and export them. I usually give them another look at that time to make sure there isn’t anything I missed in my editing software.

Pic 15

I personally use Lightroom for editing event photography. Unless it is a statement photograph or a photo to be used for advertisement, I try to do very spare editing. These photos are not likely to be hung on someone’s wall in a large size, so you usually do not need to worry about editing out stray hairs or specks of lint. Basic adjustments for exposure and contrast, white balance, and occasionally a conversion to black and white are often sufficient.

Pic 16

Ready to Roll

You’re now ready to deliver your photos to your client. Be sure to provide your contact information and business cards for the future. If they indicated that you could share the photos on your website or business pages, make sure to feature them to show your amazing prowess as an event photographer.

Do you do events? If you have any other tips please share them in the comments below.

googletag.cmd.push(function() {
tablet_slots.push( googletag.defineSlot( “/1005424/_dPSv4_tab-all-article-bottom_(300×250)”, [300, 250], “pb-ad-78623” ).addService( googletag.pubads() ) ); } );

googletag.cmd.push(function() {
mobile_slots.push( googletag.defineSlot( “/1005424/_dPSv4_mob-all-article-bottom_(300×250)”, [300, 250], “pb-ad-78158” ).addService( googletag.pubads() ) ); } );

The post Tips for Getting Started Doing Event Photography by Angie DeWaard appeared first on Digital Photography School.


Digital Photography School

 
Comments Off on Tips for Getting Started Doing Event Photography

Posted in Photography


Beginner’s Guide to Doing DSLR Video Clips

06 Oct

The video function on your camera is probably one that you don’t play with very often. It’s often disregarded – after all, DSLR cameras are not exclusively video cameras are they? But did you know that some big budget films, including The Avengers, have scenes shot on DSLR cameras? In fact, The Avengers used the Canon EOS 5D Mark II and 7D cameras on the set!

Dave Dugdale

By Dave Dugdale

Understanding your camera’s video mode opens a world of opportunities to you. Filming is great for recording a developing scene, rather than trying to record a sequence in a still image. As a wildlife photographer, I use film to record sequences of behaviour with wildlife. For obvious reasons, it’s much easier to convey something that occurs over time with moving images. Whether you work with wildlife or not, I hope the following guide to taking DSLR video helps you to unlock the potential of your camera’s video mode.

#1 Understand frame rates

When you’re shooting a video, you’re actually recording images at a very fast frame rate. These are then played back so quickly that the human brain sees one moving image. Depending on where or what you are shooting, the frame rate you go for will vary. It’s worth noting that the frame rate your camera can shoot video at is different to the frame rate at which it can shoot still images.

Movies are shot almost exclusively at 24 frames per second. Television doesn’t have an internationally accepted frame rate. For example, in Europe and many other countries, videos are shot in PAL format at 25 fps. In North America, and also Japan, videos are shot in NTSC format and at 29.97 fps (often written as 30 fps).

Steven Worster

By Steven Worster

#2 Choose your shutter speed

Big movie cameras will likely have rotary shutters. They are semicircular and spin around to expose the sensor for each frame. Filmmakers would then adjust the shutter angle to alter the amount of motion blur in a video and how smooth the movement appears to the eye.

DSLR cameras almost exclusively use curtain shutters. You don’t need to worry too much about the workings of the shutter for this. Just remember that to convey normal motion in your video, and avoid static uncomfortable viewing of your video, you should shoot at 1/ double the frame rate.

So, if you are shooting at 25 frames per second, then you should choose a shutter speed of 1/50th second. You can balance the exposure using the aperture or ISO. The following video illustrates the differences in motion blur with different shutter speeds.

#3 Do both wide and close-up shots

It can be easy to train your camera on an event, set it to record and leave it alone. But how many films or videos have you watched where the camera angle or composition never changes? Very few, if any. One of the best ways to keep the viewer’s attention, and add a professional touch to your videos, is to shoot one scene in a number of different compositions.

This is why shooting video with a zoom lens is so handy. You can zoom out to record your wide shots, and then zoom in to record close-ups that highlight the details of whatever you are filming. It allows you to jump between clips, keeping the viewer’s attention.

If you were to just show one clip for 30 seconds solid, it is likely that the viewer would become bored. If you cut between compositions, then their interests are peaked. It also allows you to skip through time, cutting between more interesting parts of a sequence (although you need to be careful that the scene looks the same and flows – that’s known as continuity).

Take a look at this example:

#4 Focus manually

It’s super tempting to use autofocus when you first start filming, especially if you’re recording a moving subject. But autofocus makes the lens search for the focus, and once it starts trying to refocus in your video then it looks very amateur. Instead, pull the focus manually.

You’ll need to practice this technique, but it’s not as hard as it sounds. Using a smaller aperture helps too. In big film productions, there are entire jobs for focus pullers – this is a guy who manually focuses the lens for the cameraman.

#5 Take filler shots

Make sure you record the little details around your subject of the film. It might be water hitting a leaf, or the wind blowing through trees. It could be anything. But filler clips let you pad out your final film with extra details, meaning that you don’t require footage of your target throughout the whole film.

This is particularly useful in wildlife films, as it helps to transition time and events more easily by breaking up different clips. It works in a similar way to the wide and close-up shots mentioned in tip #3 above.

#6 Record sound externally

Big productions never record sound directly from the camera. They’ll have a sound man with a boom pole, holding it over people talking. This removes the interference of you actually working the camera, but it also ensures sound receives the attention it deserves. A film without sound is often a bad film, but a film with only sound can paint a picture easily.

For wildlife, we record sound at a later date. Very rarely is it recorded at exactly the same time. Instead, it is dubbed onto the footage during editing. Here’s an example:

Notice how it helps the clips to flow into one another? I am definitely not a sound expert, but it helps to make a conscious effort to improve your sound recordings.

In Conclusion

Video is a fantastic medium, I love it. There is a reason we are transfixed by film and television. Quality film production is an art, just like photography, and it is great fun to try your hand at it. So switch over to the video mode of your camera and see what you can put together.

If you’ve made any DSLR films yourself, please share them in the comments below.

googletag.cmd.push(function() {
tablet_slots.push( googletag.defineSlot( “/1005424/_dPSv4_tab-all-article-bottom_(300×250)”, [300, 250], “pb-ad-78623” ).addService( googletag.pubads() ) ); } );

googletag.cmd.push(function() {
mobile_slots.push( googletag.defineSlot( “/1005424/_dPSv4_mob-all-article-bottom_(300×250)”, [300, 250], “pb-ad-78158” ).addService( googletag.pubads() ) ); } );

The post Beginner’s Guide to Doing DSLR Video Clips by Will Nicholls appeared first on Digital Photography School.


Digital Photography School

 
Comments Off on Beginner’s Guide to Doing DSLR Video Clips

Posted in Photography


Tips for Getting Started Doing Photography with Drones

26 Sep

Until very recently, my mindset was decidedly anti-drone. To me, drones seemed like a complicated plaything for geeks. After all, isn’t this photography hobby expensive enough without adding flying apparatuses to the equation? Plus there was very little doubt in my mind that if I bought a drone I would send it flying into the ocean on its first flight. No thanks.

Downpatrick-Head photography with drones

Why a drone?

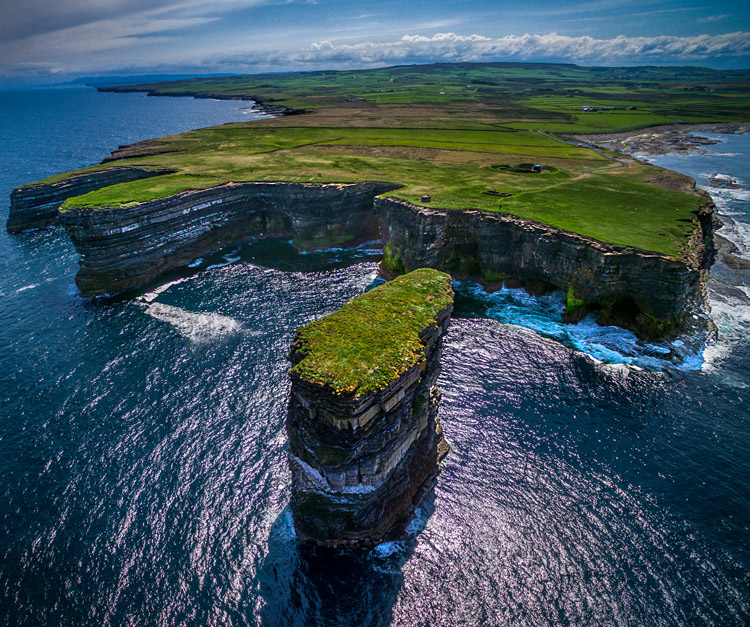
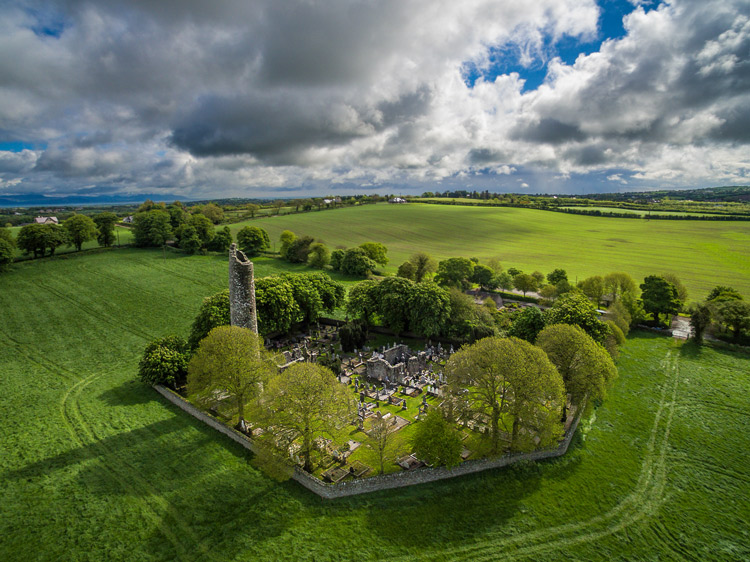
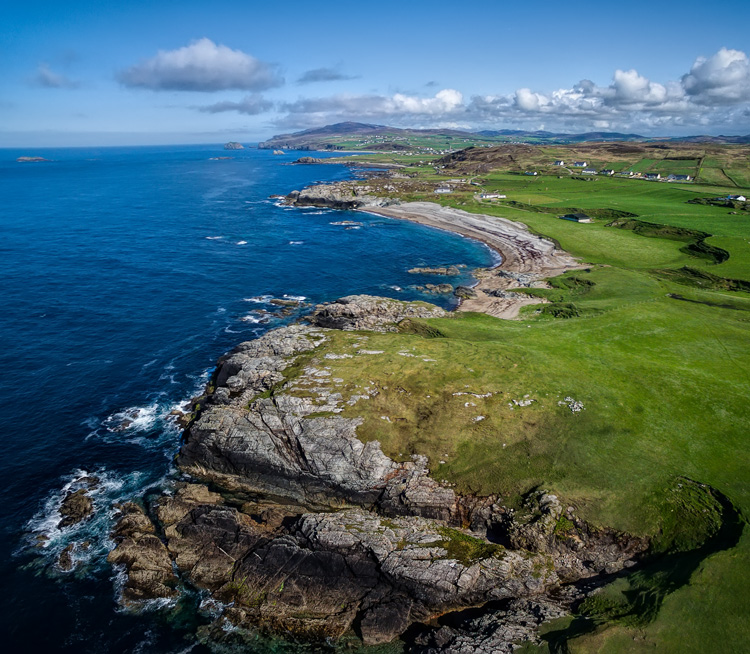
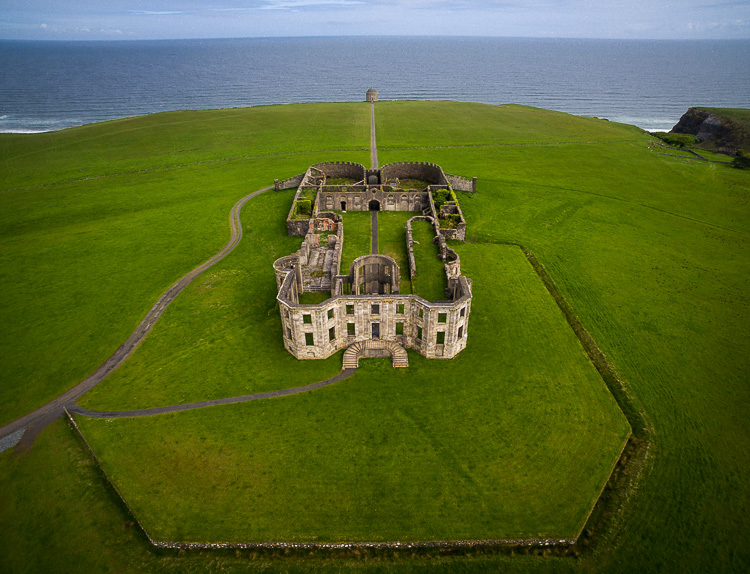
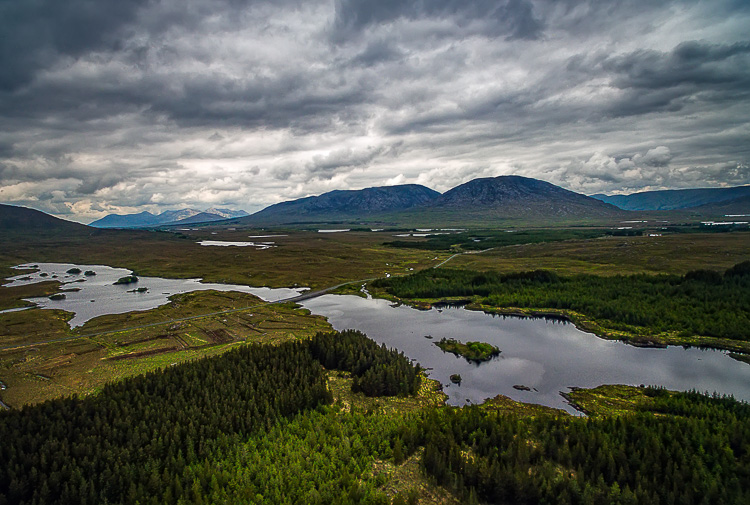
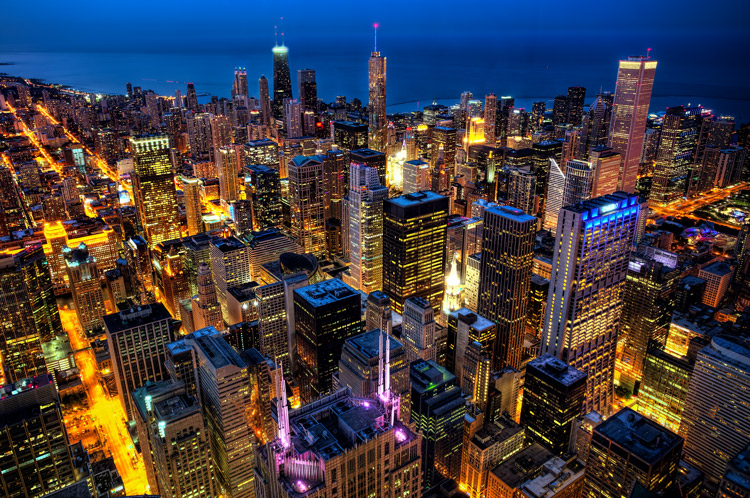
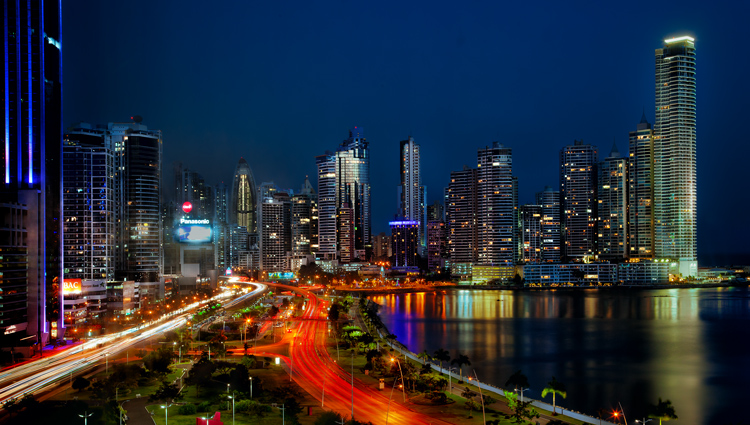
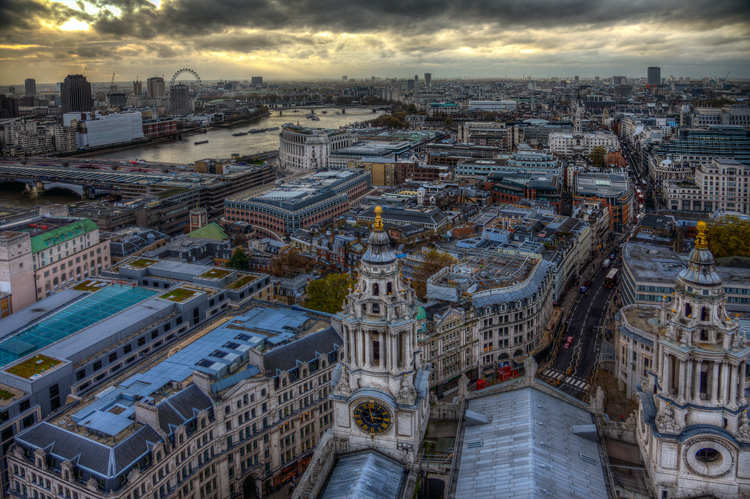
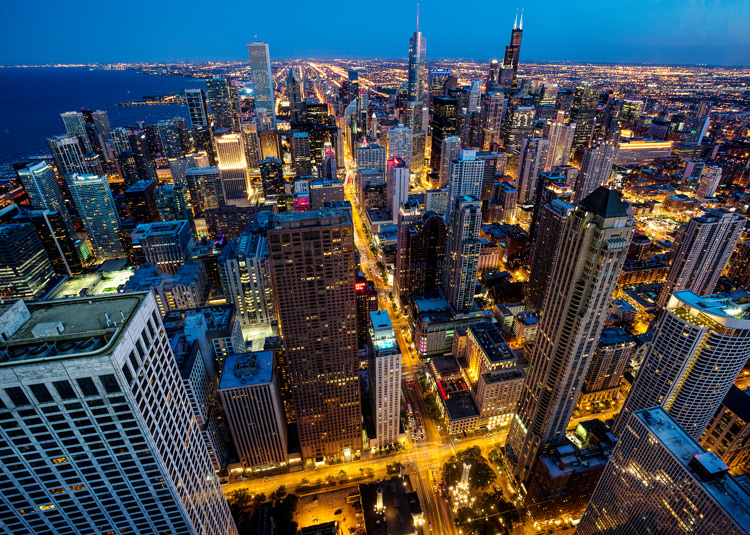
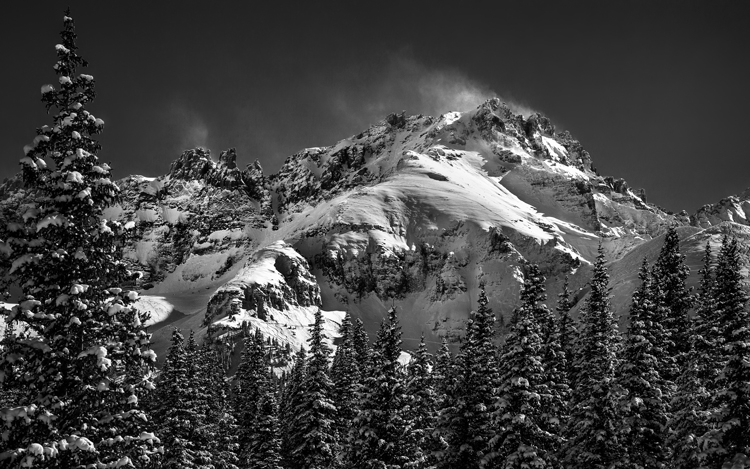
I had a problem though. I had a coastal photography trip planned, and in coastal photography it is often difficult to take pictures of the coast while standing on the coast. I have long wanted some way to be able to look back at the coast from out to sea and photograph it from that perspective. A drone was the only real answer for me, so I bit the bullet and bought one.

After having used the drone for several months now, I can say my attitude has changed markedly. Much of what I thought about drones was wrong, or at least the problems were overemphasized. Flying them is actually very easy. It isn’t that complicated. It isn’t even that expensive (at least not compared to what we spend on cameras and lenses).

You may be pondering buying a drone, or at least wondering what they are all about. You might also see all the video footage from drones and wonder how drones are used in still photography. So let me introduce you to drones and how they can add a new dimension to your photography.

Kinbane-Head

Flying drones is easy

First, let’s talk about flying drones. This is something you are probably concerned about. You might wonder if flying will require skills you don’t have. Or perhaps you just don’t want to devote time to learning it. This is one area where you have nothing to worry about. Flying a drone is remarkably easy. That’s not to say you shouldn’t be careful or that you won’t be nervous every time you fly it, but flying is really easy.

The main thing to understand is that if you have your drone in the air, and you completely let go of the controls, it will just hover harmlessly in the air. It literally just sits there until you tell it what to do. Another thing that people worry about is having the battery run out while you are in the air. That won’t happen. Most drones have a feature that brings the drone back to its take-off point when the battery gets down to a certain level. In fact, most drones have a return to home feature you can press if you ever find yourself in an uncomfortable situation. You always have a way out.

Controlling the drone is easy. You have a controller with two joysticks on it. Pushing on one of them sends the drone up or down; doing the same to the other joystick sends it forward and backward. Each of the joysticks also goes right and left. One will turn the drone to the right and left; the other will make it move to whichever side you push to. I’ll talk more about the specifics of the control later. For now, I just want you to get a feel for how easy it is. If you were worried about being able to fly a drone, don’t be.

Fanad-Head

Watch where you fly

You may have heard a lot about the new laws affecting drones. It is true that most countries are enacting regulations for drones. In the U.S., the FAA has recently finalized its rules regarding drones. But many of the rules and restrictions apply to those using drones commercially. Most of us are just doing this for fun, so let me try to make this simple for you.

If you are flying your drone for recreational purposes, you don’t need a permit. There are no pilot requirements. Just register your drone with the FAA and you are set. The registration process is simple and only costs $ 5. To do so, just go to this page, create an account, and follow the instructions to register your drone.

That said, you cannot just fly your drone wherever you want. The main limitations you should understand are as follows:

  • You must always fly below 400 feet.
  • You must keep your drone within direct eyesight.
  • Never fly near other aircraft, or within five miles of any airport.
  • Never fly over groups of people, stadiums, or sporting events.

There are other restricted areas as well. For example, you cannot fly anywhere in Washington D.C. or in national parks. There are online maps and apps for your phone – including the FAA’s B4U Fly app – that will tell you when you are in a restricted space.

Anyway, the regulations above apply to the U.S. Other countries will have their own regulations. Here are links to the regulations for Australia, New Zealand, and the UK.

Old-Head

Getting the right drone

Next, let’s talk about getting a drone, if you don’t already have one.

You may have dreams of buying a drone and sending up your DSLR to take high quality pictures. Forget about that, unless you want to spend upwards of $ 6,000. Instead, you’ll probably want to get a drone that comes with its own camera, but there are also models that work with the GoPro. The most common models are the Phantom 4 by DJI (check prices on Amazon or B&H Photo) or the Typhoon H by Yuneec (check prices on Amazon or B&H Photo). These will cost you about $ 1,300 – $ 1,500 for the drone and camera, although you can still get older models cheaper.

What will you get for that? You’ll get a drone that will fly up to about 40 miles per hour, which can operate up to a few miles away from you. It will remain aloft on a battery charge for about 20-30 minutes. You can expect it to have features like an automatic return to home, collision avoidance, and the ability to follow you. Of course, specific features will depend on the actual model you choose.

As to the camera, you can expect to get one that shoots both stills and video (usually 4K). We’ll talk more about the specifics of the cameras in a minute. First let’s talk more about how to fly.

Giants-Causeway

How to fly

When you fly the drone for still photography, things are pretty simple. Unlike shooting video, you won’t need to do any fancy pans or reveals. You just want to get the drone to the right spot(s) to take the picture. It’s just a matter of getting it up in the air, watching where you are going with it, and moving it where you want.

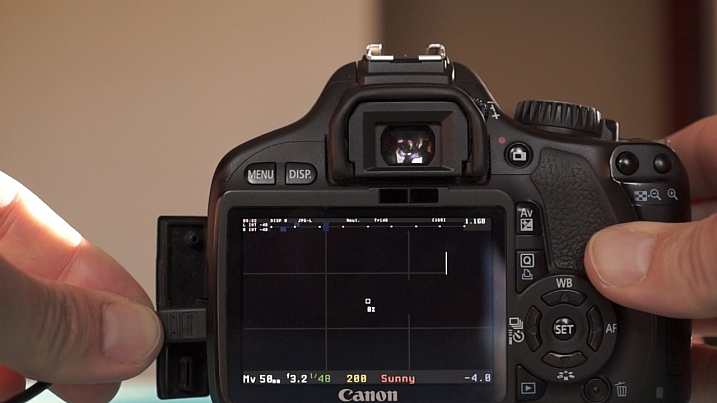
Your drone will have a controller with two joysticks. The controller plugs into your phone or other device. You control the drone with the two joysticks. At the same time, you can see through the drones camera on your device. To send the drone up into the air, all you do is press up on the left joystick. That stick controls altitude. It is as simple as pushing up on the stick to increase the altitude, and pulling down to bring the drone down. That stick will also turn the drone from side to side. The other (right) joystick will fly the drone forward and backward by pressing up and down. When you press that joystick left or right, it moves the drone in that direction.

Monitoring the flight

To keep an eye on where your drone is going, you can either watch the drone itself or watch where it is going via the screen on your phone. Of course, you can operate the controller while keeping your eyes on the drone to make it go where you want.  But you can also see what the drone sees to control it, which is often much easier. You will have a controller that connects to your phone or other device. Your screen will show the view from the drone’s camera as well as other pertinent data. Remember that your drone has to be kept in direct eyesight though.

That doesn’t sound too difficult, does it? It’s really not. After a few flights, it will be even easier. Of course, there are additional nuances and things will be a little different depending on what model you buy. Be sure to read the instructions and watch a few online videos on your specific model.

Monasterboice

You’ll be using a camera made for video

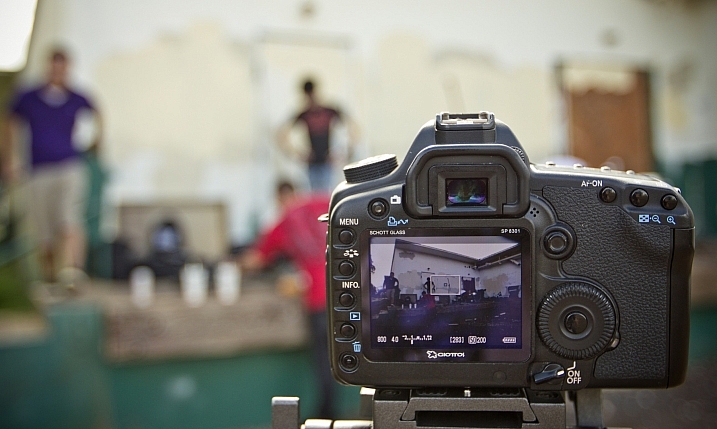
Next let’s talk about the camera that will come with your drone. First, the good news. When it comes to shooting video, the cameras in drones are top notch. They routinely shoot Ultra HD and most shoot 4K video. It doesn’t get better than that.

The bad news is that still photography is something of an afterthought for drones. The sensors are small. In most cases they are what you’d get in a compact camera. The resolution is moderate (12-16 MP is standard). The dynamic range is extremely limited and the low light performance isn’t great.

In addition, the lens will likely be very limited; a fixed focal length. It will be a wide angle lens, usually around 15-20 mm. The lens will also have a fixed aperture, meaning you cannot change it.

Working with the limitations

Virtually none of us would feel good about going out shooting with such a limited camera and lens. However, in drones it isn’t that bad. As to the camera, remember you will be shooting in daylight (you can only fly drones during the day – within 30 minutes of sunrise and sunset – in the U.S.), so there will usually be plenty of light. As to the lens, the fixed aperture isn’t as limiting as it would first appear. Keep in mind that everything in your picture will be so far away that the focus will be at infinity. You don’t need a lot of deep depth of field for everything to be sharp.

So the cameras are pretty limited, but you can make do. In any event, the cameras are getting better all the time, so you can expect significant improvements in camera quality in the near future.

Malin-Head

Tips for photographing with your drone

We’ve talked about the capabilities of drones and the basics of how to fly them. Let’s talk now about taking pictures with them. For the most part, it is similar to operating a normal camera. You have the normal modes to choose from. You can set the shutter speed and ISO yourself or have the camera set them for you. That said, there are some aspects of using cameras on drones you should be aware of. Here are some tips to get you started:

#1 Consider Shooting in Automatic Mode

I am a dedicated manual mode shooter when it comes to shooting with my DSLR. I would not think of using an automatic exposure mode. But when it comes to shooting with a drone, I put it in automatic exposure mode more often than not.

Why? Because there is enough to worry about when it comes to drones. I don’t want to add exposure control to my list of issues to think about. So when you are starting out using a drone for photography, consider using automatic mode. When you get more comfortable with the other controls, you can then set the exposure controls yourself. In any case, your camera will typically do a pretty good job setting the exposure level. You’ll rarely have tricky exposure scenarios here.

Connemara

#2 Bracket your photos

One way to make sure you get the right exposure every time is to bracket your photos. Drone cameras are usually capable of doing 3-shot brackets. Use this to overexpose and underexpose your shots by a stop. Think of this as exposure insurance. Sometimes you will just like one of the over or underexposed shots better. In that case, just use it. In addition, you can blend the exposures or use HDR software to combine the exposures later.

#3 Use filters

As mentioned earlier, the lens on your drone will likely have only one aperture. That leaves you limited options for changing shutter speeds. You aren’t completely out of luck though; you can still buy neutral density filters for your lens. These filters are used more for video, but they also help still photographers. They restrict the amount of light that gets into the camera, thereby forcing the camera to use a longer shutter speed.

Dunluce

You can also get polarizing filters for your drone. These filters cut down on reflections and make skies appear a deeper, richer blue. This is helpful for drone photography, where the sky is often a significant part of the picture.

#4 Get multiple batteries

This isn’t strictly a photography tip, but it is important nonetheless. Be sure to get more than one battery for your drone. Drone batteries typically last only 20-30 minutes. That isn’t a lot of time. Further, you may also want to fly in a few different locations on the same day. Most of the time you won’t be able to charge your battery in between locations. So, you’ll need more than one.

How many do you need? That depends. You can get away with only two batteries (I do), but many drone photographers have three or four. You shouldn’t need more than that. Batteries are not cheap so think carefully about what you will need.

DownhillCastle

#5 Watch out for the deone’s blades in your pictures

Obviously, when you are flying the blades on your drone will be spinning. Remember that you will also be using an extremely wide angle lens. If you aren’t careful, your picture will include the spinning blades.

The best way to avoid this problem is to simply angle the camera down. That will keep the spinning blades out of the camera’s field of view. Of course, changing the angle of the camera will change the composition of your picture. Flying higher while angling the camera down might keep the composition similar to the picture you originally had in mind.

In any case, just be sure to look for blades in your pictures. You will need to look closely sometimes because it isn’t always obvious. You don’t want to get home and discover that your pictures are all ruined because there are spinning blades in all your pictures. If they are present, just change things up and take another shot without the blades in the picture.

#6  Keep it low

Your drone will fly up to 400 feet in the air. It is fun to fly it high, and it also ensures that you are far away from trees, power lines, and other obstacles. But for the best photos, you will not want to be anywhere near that high. Your shot will look like something from Google Earth. Instead, keep your drones pretty low to the ground (under 100 feet) to get the best shots. That will help you establish a foreground for your picture.

Connemara-2

Getting started with your new drone

So I admit it, I was wrong about drones. They are fun, easy to fly, and they really add something to your photography. Is one right for you? The answer will be different for everybody, but if you are on the fence I really encourage you to give it a shot.

A “just get out there and do it” attitude might not seem appropriate when it comes to drones. After all, any mistake can lead to a crash. But there is one simple rule that will make flying drones easy. That is to just stay away from everything. In fact, stay far away. Don’t go anywhere near trees, buildings, power lines, etc. If you do that, very little can go wrong.

Do you have any other drone tips to share with dPS readers? Please do so and share your drone images in the comments below.

googletag.cmd.push(function() {
tablet_slots.push( googletag.defineSlot( “/1005424/_dPSv4_tab-all-article-bottom_(300×250)”, [300, 250], “pb-ad-78623” ).addService( googletag.pubads() ) ); } );

googletag.cmd.push(function() {
mobile_slots.push( googletag.defineSlot( “/1005424/_dPSv4_mob-all-article-bottom_(300×250)”, [300, 250], “pb-ad-78158” ).addService( googletag.pubads() ) ); } );

The post Tips for Getting Started Doing Photography with Drones by Jim Hamel appeared first on Digital Photography School.


Digital Photography School

 
Comments Off on Tips for Getting Started Doing Photography with Drones

Posted in Photography


Tips for Doing City Photography from Above

30 Aug

Many cities have places with great panoramic views of the city vistas from above. For example, in the U.S., New York has the top of the Empire State Building or Rockefeller Center. Similarly, Chicago has observation decks in both the Willis Tower (formerly the Sears Tower) and the Hancock Building. In Europe, there are great views of Paris from Montparnasse Tower. You can capture London from the top of St. Paul’s Cathedral, or now the observation deck of the Shard (the new tallest building in London), and the list goes on.

Madrid, Spain, from the Circulo des Bellas Artes

The Gran Via in Madrid, Spain, from the Circulo des Bellas Artes

But these shots present certain challenges. Often tripods are not allowed. Sometimes you have to shoot through glass. And when should you go? What settings should you use? In this article, we’ll work through these issues so you can get great shots from these city overlooks.

What? I Can’t Use My Tripod?

Sometimes you are allowed to use a tripod, and sometimes not. Each building has its own rules. To make things even more interesting, some buildings seem to have different rules depending on when you visit (or perhaps the mood of the security guards). So you will need to be prepared to shoot without a tripod.

If you go up the building in the middle of the day, that might not matter very much. There will be enough light to support a fast shutter speed, and you can get away with hand holding. But if you are shooting in dim light or at night, you will want to use a longer shutter speed. That will require some sort of stabilization.

Paris from the Eiffel Tower

Paris from the Eiffel Tower

In almost every case, you will find something available at the top of the building to support your camera. Sometimes you have to resort to using the the floor (which can work if you press your lens up against the window), but often there is some sort of shelf to use. Many buildings have plexiglass panels at the top, with small gaps between them, and you can hold your camera against the sides of the panels to steady it.

Shooting Through Glass

Oftentimes, you are photographing from an enclosed structure surrounded by glass. That means reflections are going to be a problem. I wish there was a magic bullet to solve this problem, but there isn’t. I do have a few tips to help you minimize the reflections though.

Chicago from the Willis Tower (formerly known as the Sears Tower)

Chicago from the Willis Tower (formerly known as the Sears Tower)

Before resorting to that, see if there is any way to shoot unobstructed. As mentioned above, some buildings have plexiglass panels on top. There are often carve-outs in the panels that you can shoot through, which you should definitely use. If not, check to see if you can shoot between the panels. That will avoid the whole issue with reflections.

If not, you are going to need to take steps to minimize reflections. Let’s start with one that should be obvious (but I always see people doing it). Do not use your camera’s flash. First of all, the flash is useless in this situation. Everything will be too far away for the flash to have any effect. More importantly, the flash will cause reflections and glare in the glass.

Next, hold your camera directly up against the glass. This will minimize reflections. In addition, make sure your point of focus is set far away from you and that your camera is not trying to focus on the reflections.

Panama City, Panama from the Intercontinental Hotel (shot through glass)

Panama City, Panama from the Intercontinental Hotel (shot through glass)


If you are on your own (like in a hotel room or somewhere you can set up), then make sure all the inside lights are off, and use the curtains to block any light coming from the room. Some photographers hold a black cloth against the window with a hole cut in the center to shoot through. If you have the opportunity and time to prepare, that is the best option.

Usually, you will find yourself in a public place where such steps are not possible. In that case, just use your body or hand to block any areas of glare or bright light.

After that, just take a few pictures and see if there are any reflections in the final result. Zoom in on your LCD to take a close look. If you find any reflections or glare, just adjust your position slightly to try to get it out and shoot again. You would also try a polarizing filter.

London from the top of St. Paul's Cathedral

London from the top of St. Paul’s Cathedral

What Camera Settings Should I Use?

Your exposure settings will depend on how much light is available at the time you are shooting. While I obviously cannot give you exact exposure settings, I can give you a few ideas to maximize your light and get the best exposure.

First and foremost, remember that you don’t need to use a small aperture for these shots because you do not need a deep depth of field. Your focus will be set at infinity. Nothing in your shot will be within 50 feet/15 meters of you. Too see this for yourself, take a look at the distance scale on the top of your lens (assuming it has one). It will show you that everything farther than about 30 feet/10 meters is set at infinity (in fact, the focus will be at infinity even sooner for wide angle lenses). There will not be a wide range of distances in your shot that require a deep depth of field. Therefore, if you find yourself in need of more light to create your exposure, widening the aperture is a good place to start.

Chicago from the Hancock Building

Chicago from the Hancock Building

Your other two exposure settings (shutter speed and ISO) will depend entirely on whether you can use a tripod. If you cannot use a tripod, raise the ISO until your shutter speed is fast enough to hand hold. Remember you can cheat a little bit and use a slower shutter speed than usual by propping your camera on something. But blur from movement during the exposure will ruin the picture. Remember that digital noise can be fixed in post-processing, but camera shake cannot. Raise the ISO as much as you need to get a supportable shutter speed.

If a tripod is allowed, things are much easier when it comes to exposure settings. You can use as slow a shutter speed as you want. That will also allow you to reduce the ISO, and use a smaller aperture as well. In fact, you may want to keep the the ISO low and the aperture small to force the camera to use a long shutter speed. That will capture traffic trails, create some movement in the clouds, and other effects.

New York, from Rockefeller Center (Top of the Rock)

New York, from Rockefeller Center (Top of the Rock)

Finally, consider bracketing your photos, especially if you are shooting at night. The scene before you will contain bright lights and dark portions. This will challenge your camera’s dynamic range. Even if you will never use any sort of blending or HDR, you might be pleasantly surprised by the overexposed or underexposed images.

Making a Composition from a Jumble of Buildings

When you are up high in a building overlooking the city, you will have a great view, but that doesn’t necessarily mean a great picture. The key to success is creating a composition out of what is before you, in other words to generally find a center of interest. That is, find something to key on that will anchor the picture. Sometimes it is obvious – like when you are staring at the Empire State Building or the Eiffel Tower – but other times it isn’t. You’ll just have to find something to center your picture on. It could be a building that stands out, perhaps a bridge, or even a leading line.

In doing so, don’t overlook the usual compositional rules. Start with the Rule of Thirds. Put your horizon line on either the top third or the bottom third. After that, you might consider placing an important, or prominent, feature on one of the vertical third lines.

Paris from the Montparnasse Tower

Paris from the Montparnasse Tower

Just these two concepts – ensuring you have a center of interest and following the Rule of Thirds – will go a long way to ensuring success. After that, you can find lines, shapes, and forms to work around. Experiment with different focal lengths and angles. Remember that nothing is moving so you can keep experimenting all you want.

When to Go

Deciding when to go capture you city view from above will have more to do with how the pictures turn out, than anything else you do. Avoid going in the middle of the day. Travel schedules don’t always allow that, but that is the worst time for these pictures.

If you are going to a public observation deck, when you can go will be limited by the opening hours of the building. They are generally not open early enough for sunrise, so that won’t be an option. Almost all locations are open for sunset and a few hours of darkness, so that is often an option.

London from the tower of Westminster Cathedral

London from the tower of Westminster Cathedral

The best time to go is just before sunset. You will have the best of all worlds with one ticket. You can capture the sunset and twilight. After that, just wait around for a little while for some night shots.

But in any case, go. It is an easy way to get great shots of whatever city you happen to be visiting. Get up high and capture the city from above.

googletag.cmd.push(function() {
tablet_slots.push( googletag.defineSlot( “/1005424/_dPSv4_tab-all-article-bottom_(300×250)”, [300, 250], “pb-ad-78623” ).addService( googletag.pubads() ) ); } );

googletag.cmd.push(function() {
mobile_slots.push( googletag.defineSlot( “/1005424/_dPSv4_mob-all-article-bottom_(300×250)”, [300, 250], “pb-ad-78158” ).addService( googletag.pubads() ) ); } );

The post Tips for Doing City Photography from Above by Jim Hamel appeared first on Digital Photography School.


Digital Photography School

 
Comments Off on Tips for Doing City Photography from Above

Posted in Photography


Tips for Doing More Spectacular Sunset Photography

17 Aug

The first thing I was told to do when I wanted to learn how to photograph landscapes and cityscapes, was to always shoot during the sunset. I have always asked myself why, but the answer is actually pretty easy. You get amazing colors in the sky, dramatic clouds, and soft light.

Sunset tips 1

You can photograph the most beautiful place in the world and I can guarantee you, it will look much better during the sunset. The only problem with this mindset, is that you will never take another image in the middle of the day. If I find a really cool spot to photograph, but there won’t be any sunset anytime soon, my go to option is to create a desaturated long exposure. The second option is to come back another day.

In this article, I am going to give you some tips on how to shoot sunsets to get the best results possible. These tips can also be applied to photographing a sunrise, if you have the energy to wake up at 5am and go outside.

How to predict the best sunsets

Depending on where you live, the sunset will be different. You can’t really predict a nice sunset, but there are some signs that can help you decide wether you should go out and give it a try or not. Of course, I would recommend going out and photographing all the time, but if you’re a busy person and do not want to go back home frustrated, then you should consider these few tips.

There are some areas in the world where sunsets are not vivid, and you won’t see any colors in the sky. For example, I have lived in the United Arab Emirates for a year and during that period I have only witnessed around 10 beautiful sunsets (no joke). However, when I go to the south of France, there is a dramatic and vivid sunset everyday.

Sunset tips 2

One of the better sunsets in the United Arab Emirates. This is considered as an amazing sunset over there, but in reality it is just very average.

Sunset tips 3

An amazing sunset in the south of France: I was really surprised because I got the same sunset five days in a row. and it wasn’t even summer.

There is a simple reason explaining this – clouds make all the difference. I am talking about patchy white clouds with a blue sky. These clouds will catch some amazing colors and give you the best results possible when the sun sets.

Sunset tips 4

There were some patchy clouds in the sky, and during the sunset the colors turned out really nice in this image.

If there aren’t any clouds, then your sunset will be pretty boring. You will only have a nice gradient of color going from blue to orange.

Sunset tips 5

Example of a sunset without any clouds.

I usually don’t bother going out when there is an overcast day to shoot sunsets, because the results are quite disappointing. The clouds cover the sky and you can’t see it, so you will end up having no colors at all.

If there is some light rain during the evening, then you can be pretty sure you will get an amazing sunset. I really can’t explain it, but trust me, it works all the time.

Planning and patience

Planning is the most important thing, I would recommend going to the location around 30 minutes before the start of the sunset to compose your shot, especially if you don’t know the location.

With sunsets, the scene can change very very quickly. I highly recommend composing your shot, placing your camera on the tripod, and not moving until the sunset is totally finished.

Sometimes a nice color can appear on a cloud for only two minutes, and if you’re not ready then you won’t be able to photograph it. There is an app called Magic Hour which you can download on your mobile device (for iOS only) Based on your location, it will give you the time that magic hour begins, the time of the sunset, and the time it ends. It also does the same thing for the sunrise the next morning.

Note: you could also try the Photographer’s Ephemeris or PlanIt! apps.

Sunset tips 6

With this information, you have the time to look around, try different compositions, and decide which one works best. I will repeat – once you find your composition, place your tripod, and do not move it. It’s better to have one good photo of a sunset then five different average ones.

You will stay behind your tripod for 30 minutes, taking an image every time the sunset changes, with the clouds moving and new colors appearing. It is quite frustrating, but at the end you will have the best composition possible, with an image of the best clouds, and the best colors of the whole evening.

Sunset tips 7
I waited in the cold for one hour to photograph this sunset. At first it looked terrible, but it started developing very well. I ended up having some nice cotton candy looking clouds.

Lens and composition

I would recommend using a wide angle lens to capture the whole scene, if you’re going to compose your image to include some foreground, middle ground and background, which I highly recommend. This enables the viewer to position himself in the image, and it adds a good sense of depth. Also, try to make the sky or the foreground at least a third of the image.

Sunset tips 8

The trees as the foreground, the Eiffel Tower as the middle ground, and the sky as the background, all give nice depth to this image.

If you cannot find that type of composition, then using a long lens can be a good alternative, while using the rule of thirds.

Sunset tips 9

I could not find a good composition for this shot, so I used a long lens to compress everything. and composed it using the rule of thirds.

Sunset tips 10

Composing my shot using the rule of thirds.

Settings and extra gear

A tripod is essential because you will want to shoot with an aperture between f/8 and f/13 for sharp images, and ISO 100 for the best image quality. This cuts down the light quite a lot, and you will end up having a slow shutter speed to compensate. To avoid any shaky images, use a tripod with a cable release or a two second timer.

I highly recommend exposing your images for the highlights (which means you are exposing for the sky). The rest of the image will be underexposed, but if you’re shooting in RAW you will be able to recover details in the shadows.

Another solution is to use a graduated neutral density filter that will cut down the light on your highlights in the sky, and keep your mid-tones and shadows well exposed.

Sunset tips 11

A graduated filter that you can stack.

I usually leave my white balance on auto, because with RAW files I can take more time to change it on Lightroom. If you’re shooting JPEG, the white balance that works the best with sunsets is Shade or Cloudy. It gives a nice warm magenta color to the image, and makes the vivid colors in the sky pop more.

Polarizing filters are also a good alternative to recover details in the sky, and make the colors more saturated without any post-production.

Sunset tips 12

Using manual focus can be useful if it gets too dark and your lens has trouble focusing by itself.

Get creative

For sunsets, in my opinion the best thing to do is to get creative – either do HDR or digital blending.

In both cases, it’s better to take three different exposures to get the full dynamic range of the scene. Especially because there will be a lot of contrast between the brights and the darks, it’s difficult to get all the details. You can merge the exposures automatically with a software, or manually with luminosity masks.

Sunset tips 13

This sunset looks good, but because I did not shoot three different exposures you can see in the middle there are white pixels in the sky that I could not recover.

You can also get creative by doing long exposures and stretching the clouds. And of course you always have Photoshop and Lightroom to finish your art the way you like it.

Sunset tips 14

This is an example of a creative sunset: I shot 3 different exposures, a long exposure of the clouds, a long exposure of the car trails one hour later, and merged everything on Photoshop to get the best of both worlds.

Now it’s your turn. Do you have any other sunset photography tips to share? Please do so, and share your images as well, in the comments below.

googletag.cmd.push(function() {
tablet_slots.push( googletag.defineSlot( “/1005424/_dPSv4_tab-all-article-bottom_(300×250)”, [300, 250], “pb-ad-78623” ).addService( googletag.pubads() ) ); } );

googletag.cmd.push(function() {
mobile_slots.push( googletag.defineSlot( “/1005424/_dPSv4_mob-all-article-bottom_(300×250)”, [300, 250], “pb-ad-78158” ).addService( googletag.pubads() ) ); } );

The post Tips for Doing More Spectacular Sunset Photography by Yacine Bessekhouad appeared first on Digital Photography School.


Digital Photography School

 
Comments Off on Tips for Doing More Spectacular Sunset Photography

Posted in Photography


Improve Your Middle of the Day Photos By Doing Black and White

16 May

Crystal-Palace

Sometimes beginning photographers ask me to look at their photos and tell them how they can make the photos better. Nearly every time this happens I end up saying the same thing, “You need to stop taking your pictures in the middle of the day.”

I have previously written about how and why photos taken at dawn and dusk are vastly superior to those taken at midday, so I won’t do so again here. I have also talked about a few things you can do to mitigate the damage of the midday sun. But that’s all you are doing – mitigating the problem – not solving it.

At the same time, I understand that you cannot always photograph at dusk or dawn. Family and work commitments limit us all. We cannot always get up so early or stay out so late.  Some places aren’t even open or accessible at dawn. Is there anything else that can be done if you have to shoot in the middle of the day?

There is one way that you can still take great photos in the middle of the day. That way is to convert them to black and white. Black and white photos frequently work much better than color photos in this regard.

Dallas-1

Look to the old masters

If you don’t believe me, just to check out the work of photography masters. I initially noticed this when looking at the work of Ansel Adams, who many – myself included – consider the greatest photographer ever. A large number of his photos are obviously taken at midday. For example, check out Monolith, the Face of Half Dome (1927). Yosemite Winter Valley (1940), Canyon de Chelly National Monument (1942), Mount Williamson (1944). and Half Moon and Clouds (1968).

All of these photos were obviously taken at midday. You can tell by the bright light and shadows. But they are all still great pictures. In fact, some of them are among his best. Why is that?

Reason #1: High contrast works well in black and white

Why does the same picture taken at midday look horrible in color, but pretty good as a black and white? One reason is that black and white pictures handle high contrast really well. That is not to say their dynamic range is any different, but that these pictures look great when there is high contrast within them. In fact, black and white pictures crave high contrast. Color pictures, on the other hand, don’t always do well with stark contrasts. Therefore photographing at midday – with all of its bright areas and dark shadows creating high contrast – can look really nice as a black and white photo.

Mountain-1

Reason #2: Pushing the processing

The other reason why black and white photos taken at midday can still look great, is that they seem to handle processing better than color photos. In other words, you can push the processing further with a black and white photo and get away with it. This was true in the darkroom, and it is also true today with digital tools.

Why is that? I think it is because black and white photos are already unnatural; obviously, the world is not black and white. When you look at a black and white photo, your mind knows that it is not an accurate representation of reality. If the processing is pushed a little further, your mind accepts it more readily.

That is not to say that you cannot over do processing in black and white, you can. But it does offer you a little more flexibility.

Longhorn

A reason for HDR?

Perhaps, for this reason, this is one area where HDR can still be a really useful technique. There is much discussion these days about HDR being dead. To be sure, almost no one in photography likes the HDR look (oddly, 100% of non-photographers do like that look). In addition, there are a lot of great tools these days for dealing with dynamic range problems without resorting to HDR. Nevertheless, black and white photos are one area where HDR is still very useful. Since there is no color, part of the surreal nature of HDR is avoided. In addition, the same phenomena mentioned above about being able to push the processing further in black and white is at work.

Barn-2

Break out the Neutral Density filter

Another way to improve your black-and-white photos taken at midday is to break out your 10-stop neutral density filter. If there are clouds in the picture, it will give them a sense of movement. If there is water in the picture, it will smooth it out. You can see and example of this in the top picture in this article, which has both clouds and water. Of course, this works for color pictures as well, but it seems to work particularly well with black and white images.

Conclusion

I still maintain that the number one thing you can do to improve your photographs is to start shooting at dawn or dusk. It costs nothing, and you don’t even have to increase your skills to make vast improvements. You just have to get up earlier, or stay out a little later. But for those occasions when that is just not possible, try converting some of your photos to black and white. The high contrast might look good on your photo. In any case, you’ll be able to push the processing a little further. It might prove an easy way to make your photos better.

Please share your black and white midday photos in the comment below.

googletag.cmd.push(function() {
tablet_slots.push( googletag.defineSlot( “/1005424/_dPSv4_tab-all-article-bottom_(300×250)”, [300, 250], “pb-ad-78623” ).addService( googletag.pubads() ) ); } );

googletag.cmd.push(function() {
mobile_slots.push( googletag.defineSlot( “/1005424/_dPSv4_mob-all-article-bottom_(300×250)”, [300, 250], “pb-ad-78158” ).addService( googletag.pubads() ) ); } );

The post Improve Your Middle of the Day Photos By Doing Black and White by Jim Hamel appeared first on Digital Photography School.


Digital Photography School

 
Comments Off on Improve Your Middle of the Day Photos By Doing Black and White

Posted in Photography


5 Tips for Doing Photography from a Hot Air Balloon or Biplane

08 May

Do you do most of your shooting with your feet firmly planted on the ground? Camera shake is a basic concept that directs you to take a strong stance, brace your elbows, and keep that camera as still as possible. But what if you are not on the ground? What if you are up in the air? For myself, I would say that 95% of my photography happens on land, and while I get to do some underwater scuba photography sometimes, and that shooting from the sky is something I have only done a couple of times. But I hope that the lessons I have learned will help you, when and if you have that rare opportunity to get up off the ground and photograph the world from new heights.

001 Title

These tips are inspired by a balloon flight that I had in Bagan, Myanmar. Despite growing up with one of the world’s largest balloon festivals in my backyard (Albuquerque, New Mexico), I had never been in one. I have helped many land, but never been up in a balloon. So in Bagan, when an opportunity presented itself, I couldn’t think of a better way of seeing the over 2,000 temples of the area from the air. Also, I will show some photography examples from a single engine prop plane flight over the Bay Area, California.

So here are my five tips for doing photography from midair:

1. There’s limited space – so chose wisely

In anything defying gravity, whether it be a balloon or a plane, space is always limited. Before going up, there should be a safety briefing, and the pilot has the final say. So talk to the pilot and see if you can get a spot on the corner, or if he knows the best place from which to get a photos. It may not even be where you expect.

002 Limited space

2. The changing light conditions – be prepared

Most balloon flights start before sunrise, for both romantic notions, along with better flying conditions. But for a photographer that makes our job all the more difficult to capture the early morning darkness, turning into blue, then golden hour, and finally full daylight. So we have four different lighting conditions that need to be captured. If you bring a tripod leave it on the ground. It may be good for a sunrise picture, but getting the balloons or airplanes ready requires work. So there are lots of moving parts, and when you are in the air, you will definitely not need it.

The tip is really that there are many variables regarding light conditions.  I know it is a little obvious, but in a balloon (or airplane) you are not in a stable environment.  You will be dealing with multiple light conditions in a limited time and it is not so easy to just wake up the next day and fly again, so you need to be prepared for anything.

Bring a flash for fill. Use a gel on your flash to balance the blue or orange natural light. The fill flash is for the people in the balloon. During flight the balloon rotates, thus there are many times when the sun is at your back, being able to fill the shadows with some light is beneficial.

003 Changing light 2

003 Changing light

3. Camera – bring a second one along if possible

While I am not a gear junky, this is one place where it is nice to have another camera on hand. The confining space and the dynamic conditions (take off, spinning, turning, landing, etc., along with the changing light) make an extra camera really handy to have to be able get a range of shots in a limited space, in a limited amount of time. There are really not many options for doing that without having multiple cameras.

4. Lenses – take a long one

So what lenses to put on your cameras, is the next logical question. My first tip with lenses would be to bring a long telephoto. I have seen too many people with a 16-35mm lens try get the whole landscape, but when you are up high, you can get everything in frame with a longer lens. At 16mm the features of the landscape become minuscule from the air. It may seem strange to you to use a longer focal length lens for landscapes, but they are your good friend when floating or flying.

004 Lens 150mm

150mm lens

5. Don’t forget to just enjoy the trip

Balloons are to airplanes, as sailboats are to motorboats – they are quiet and hover calmly. It’s a bit surreal that it’s just a pocket of air that so delicately hoists you off the ground and drifts with the wind. It’s so smooth, so enjoy it!

Let me give you a breakdown of what I found worked for me, and if you have your own ideas please share them in the comments below.

004 Lens 200mm

My two cameras where a Canon 7D and a G-12. I brought two lenses with me, an equivalent 16-35mm lens, which stayed in my bag once we loaded up, and a 70-200mm. I brought a Canon 430ex II flash that was mounted on the hot shoe of my Canon G-12 (no need for it to be on the 70-200 when you are floating way up in the air). The flash was used primarily as fill light when the balloon would spin into the sunset with the sun behind. Thus, the basket, pilot and other passengers wouldn’t be black silhouettes or the background being totally blown out. I used a ¼ CTO gel to balance the orange morning sun.

Using my 70-200mm lens I was able to compress the background while still encompassing the landscape. In this case using a higher f-stop could help for clarity of both foreground and background. However, depending on when you actually get up in the air, you might want some more speed while keeping your ISO down. You also need to remember that you are moving. On the other hand, while directly over a subject a little less depth of field can be used, so a larger aperture. Takeoff and landing would be the best times to get some nice landscapes, but inside the balloon safety is first, and we were instructed to have our cameras secured. Thus, after takeoff get ready to start shooting before you are just way too high.

005 Zoom in

While having coffee and getting instructions from our pilot I asked a question, made a joke (that was not about safety), and hinted at a corner spot. The pilot, in my case, goes up every day during the winter months, and was no fool when it came to understanding my intention. So what do you know, he assigned me first, right in the corner. Whether he did it for a tip or for photography sake, I have no idea, but it worked in my favor. Instead of only a 180 degree view, I saw more like 270 degrees and that was 25% more options. I took it.

So go out there and get up in the air, land safely, and see the world from a new perspective. After all, photography is about perspectives and new horizons. Change your perspective of the world down here.

006 Salt Ponds of San Fransisco Bay Areal Photo from Single Engine Prop Plane

007 Sutro Tower San Fransisco 170mm from Single Engine Prop Plane

Seeing things in a new way can only make you understand your time on the ground that much better. As photographers a common goal we all share are the amazing visuals that we capture and create. So create from above, and share your thoughts in the comment section below.

googletag.cmd.push(function() {
tablet_slots.push( googletag.defineSlot( “/1005424/_dPSv4_tab-all-article-bottom_(300×250)”, [300, 250], “pb-ad-78623” ).addService( googletag.pubads() ) ); } );

googletag.cmd.push(function() {
mobile_slots.push( googletag.defineSlot( “/1005424/_dPSv4_mob-all-article-bottom_(300×250)”, [300, 250], “pb-ad-78158” ).addService( googletag.pubads() ) ); } );

The post 5 Tips for Doing Photography from a Hot Air Balloon or Biplane by Branson Quenzer appeared first on Digital Photography School.


Digital Photography School

 
Comments Off on 5 Tips for Doing Photography from a Hot Air Balloon or Biplane

Posted in Photography


4 Tips to Help You Get Started Doing Lifestyle Photography

27 Apr

135

People are my favorite subject to photograph, and one of my favorite ways to capture them is through lifestyle photography. I love documenting a day in the life of a family, student, or child. I love making beautiful photos out of real life happenings; the everyday stuff that we forget to treasure. Some moments are perfect and gorgeous, and other moments are more ordinary, and sometimes even unattractive; but I love every one of those moments, and I find joy in looking for the beauty in everything.

If you would like to get started with lifestyle portraiture, maybe these tips and photos will inspire you to jump right in. These photos are from a day in the life session with a sweet family. I wanted to document what a normal, ordinary day is like for them, and give them photos that they would treasure forever. We had a lot of fun together, and not only do they love the photos, but I ended up being inspired by them as I spent a little time getting to know who they are.

1 – Set yourself up for success

160

If you decide to do a lifestyle session and just show up without a plan, you may get exactly what you planned for – nothing. I asked the B family to tell me some of the things they enjoy doing together as a group, and we chose some that would photograph well, and represent their life right now.

We took photographs of snack time, with kids helping prepare and eat the peanut butter and apples. We took a few photographs of them jumping on the trampoline, and then we came inside while they played games together. We ended the session with something that they do every single day, and is a huge part of the fabric of their family. They read scriptures together, and prayed as a family. It was important to me to capture the essence of their family, so we planned, ahead of time, the things that would best show who they are.

There are so many scenarios that could be planned and prepared. Families are fun, because there is a lot of interaction. You could have them bake cookies together, or go for a picnic in the park. A family hike might be the perfect thing to photograph if they love the outdoors. It’s so much fun to do sessions on the lake with the family’s boat, or at home with their pets.

168

Although families are fun, they’re definitely not the only group of people who lifestyle photography lends itself to. A group of tweens painting fingernails together, or some kids playing a game of basketball could make great lifestyle sessions. A day in the life of a college student, or a documentary style session with an elementary school teacher could also be amazing. People are involved in so many great things, whether it be their hobbies, work, or recreation. It’s a wonderful experience to capture them in action, doing the things that they love.

As long as you don’t get too attached to it, it can be helpful to create a shot list. This could be a list of all the photos that you are hoping to capture during your session together. If all the things on your list don’t happen, don’t fret about it, but it can give you some ideas to get going.

2 – Be ready for the unexpected

180
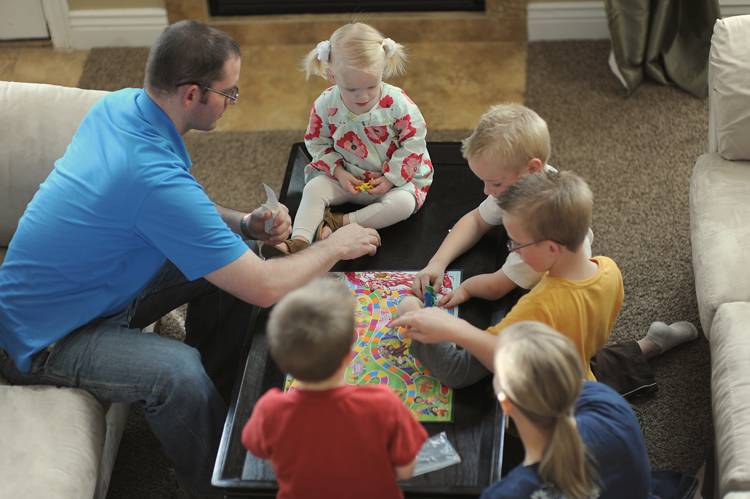
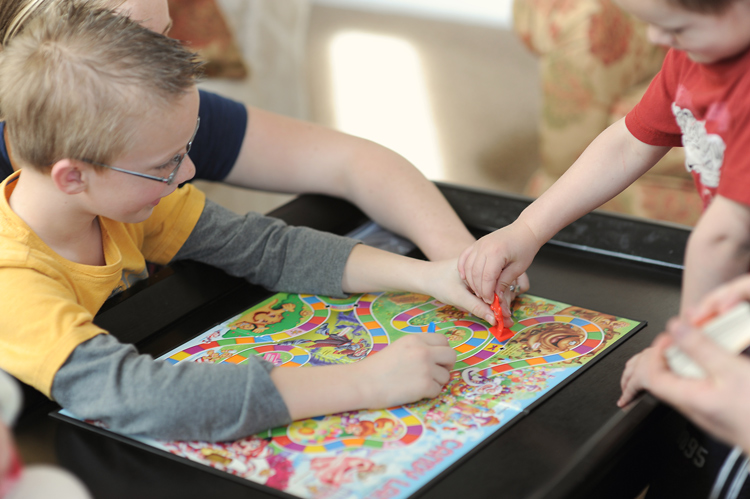
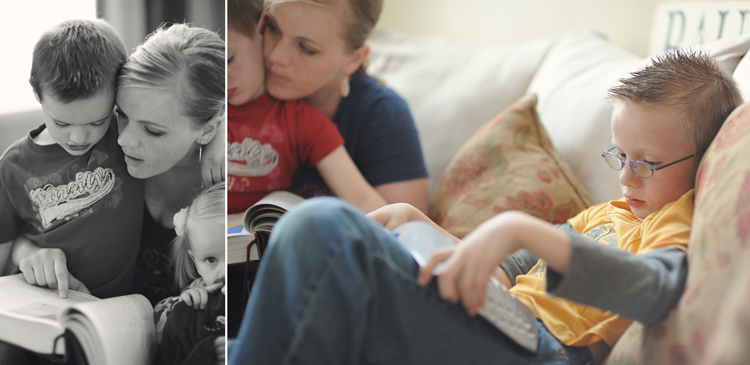
Now that you’ve planned and prepared, and set yourself up for success, loosen up and go with the flow. If you try to manage every moment, or even direct too much, you lose the realness of a lifestyle session. Things just happen during your time together, and sometimes those things are what make your most memorable photos.

In the photo to the right, the little one got quite upset over something that happened in the game, and she knew right where she had to go, and exactly what she had to do; standing with her nose in the corner was the standard procedure in her family. Although it wasn’t her finest moment, and she probably wasn’t enjoying it very much, I’m pretty sure this photo will be one that she will love when she grows up, and her parents will cherish forever.

These moments are the ones that aren’t on your shot list, because you can’t foresee them happening, but you need to be ready to capture them and include them as part of the story you are telling. You may even have days where you don’t capture one thing that you had planned, and nothing on your shot list is even available to shoot. If that happens, just go with it, and know that you may create something even better than you could have planned. If you have a calm mindset, knowing that you are prepared, but you are ready to roll with the punches, you’ll be just fine.

3 – Capture the story details

181

Some of your photos may not even have your human subjects in them. A lot of your photos might not show any faces or expressions. These detail shots can create interest in the group of photos chosen to represent their story, and tell the story even more deeply than if all the photos were of their faces.

For each scene you are photographing, you might consider taking the “big picture” with lots of the surroundings, and all of the participants visible in the photo. This will provide context, and help your viewer understand the setting, and exactly what is going on. Then you might want to break it down a little further, showing a close up of one or two of the people, or a close up of their hands, or the activity. You could then break it down even further, and take detail shots of what is going on, and the objects that are part of your subject’s story.

100

As you break down these little details, you’ll enrich your story by showing emotions, interactions, and the things that are most important to your subject. Be careful not to get too sidetracked. If you start photographing anything and everything that is in the room, your story becomes muddied, and it won’t be clear what you are trying to portray. Have a clear vision of the story you are telling, and keep that focus as you shoot.

4 – Consider different perspectives

200

Be creative as you figure out how to best tell the story you are trying to portray. Perspective is a great way to add interest to your photos, and show a unique point of view. There are two different types of perspective to consider.

Your perspective

Where are you located when you are taking the photograph? Try shooting from above, or below. Try shooting from behind curtains, or stair railings. Sometimes having something in the foreground makes the viewer feel like they are really seeing into the heart of someone’s life, and seeing something they wouldn’t normally see. Move closer, move back, move around. Be creative.

Their perspective

How does your subject view this activity? What might the little girl be feeling? How could you portray that in a photograph? What does the mother see when she looks at her family? Can you capture her feelings and perspective? When you are creating lifestyle portraits, your vision will definitely be part of the process, but trying to capture your subject’s perspective can add a whole new dimension to your photographs.

196

One of the best things about lifestyle portraiture is that there really are no rules. This opens up so much more room for fun and creativity, and takes a lot of stress off of you as a photographer. Have fun with it, and get you and your camera out there to tell a really great story. I’d love to see your lifestyle photographs in the comments below!

People photography week

This week on dPS we’re featuring articles all about different kinds of people photography including portrait, event and travel photography. See all the previous ones below, and watch for more people photography articles over the next few days.

  • How to Take Low Key Head-shots
  • How to Do a One Light Portrait Setup and Use it as Your Back-up Plan
  • Travel People Photography – Tips and Pitfalls
  • 8 Tips for Photographing Men
  • 24 Diverse Images That Showcase People Photography
  • Weekly Photography Challenge – People Photography
  • Tips for Getting Yourself to Relax as a Photographer and Have More Successful Portrait Sessions
  • 5 Good Reasons to Add People into Your Landscape Photography
  • 6 Must-Have People Shots to Capture When Photographing Corporate Events

googletag.cmd.push(function() {
tablet_slots.push( googletag.defineSlot( “/1005424/_dPSv4_tab-all-article-bottom_(300×250)”, [300, 250], “pb-ad-78623” ).addService( googletag.pubads() ) ); } );

googletag.cmd.push(function() {
mobile_slots.push( googletag.defineSlot( “/1005424/_dPSv4_mob-all-article-bottom_(300×250)”, [300, 250], “pb-ad-78158” ).addService( googletag.pubads() ) ); } );

The post 4 Tips to Help You Get Started Doing Lifestyle Photography by Melinda Smith appeared first on Digital Photography School.


Digital Photography School

 
Comments Off on 4 Tips to Help You Get Started Doing Lifestyle Photography

Posted in Photography