RSS
 

Posts Tagged ‘doing’

Tips for Doing a Successful Picture-a-Day Photography Project

03 Jul

Sometimes, fitting quality photography time into an already busy schedule is a challenge in itself. Even over weekends, pressing matters mean that photography is often left by the wayside. I know I’m guilty of relying on a camera phone to capture images – compromising image quality and control. One way to get back on the proverbial creative saddle is to embark on a photography project. And although starting a photo-a day project may seem a little daunting at first, committing even a minute each day to composing a photograph with a dedicated camera can go a long way.

Tips for Doing a Successful Picture-a-Day Photography Project

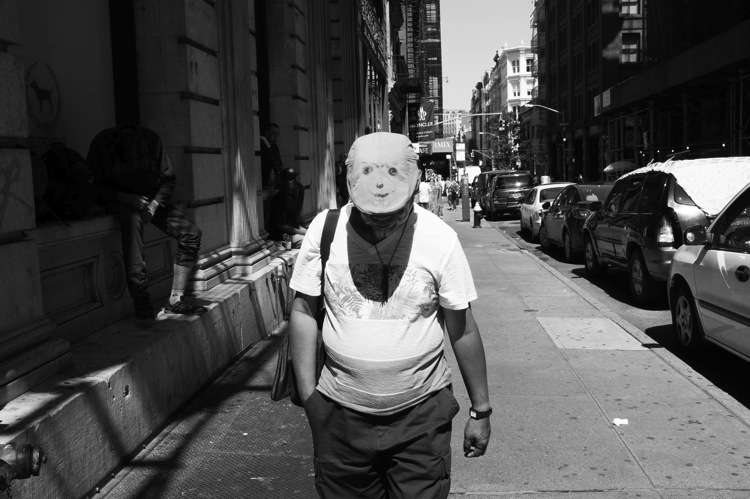
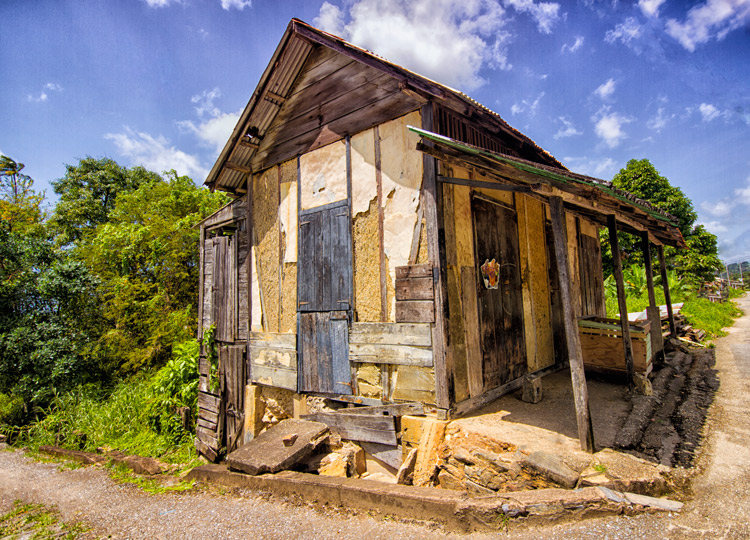
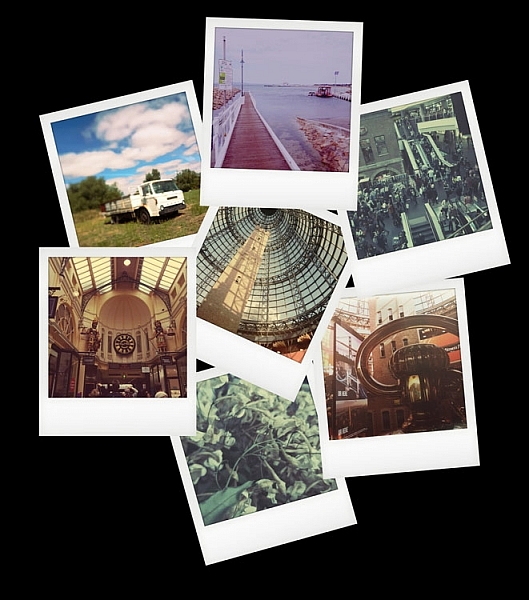
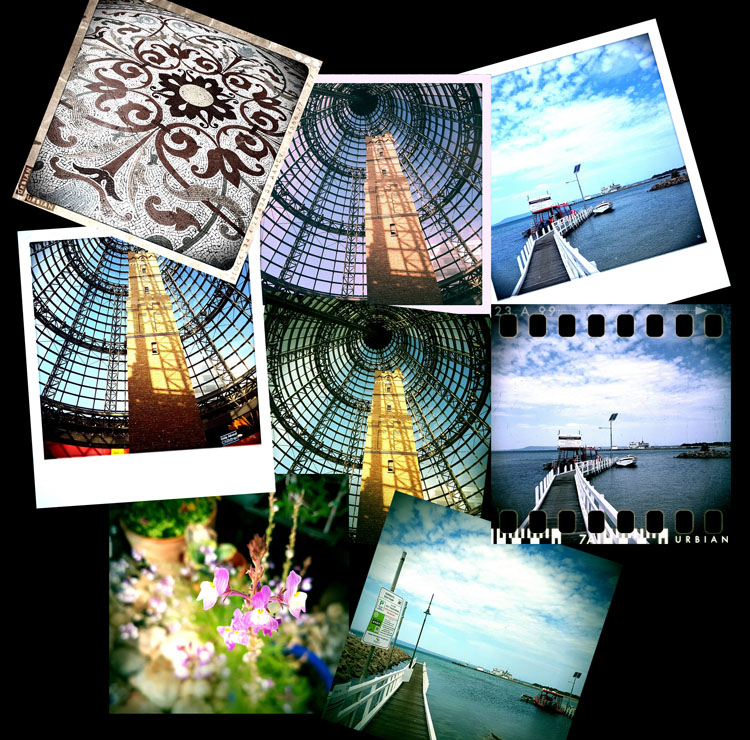
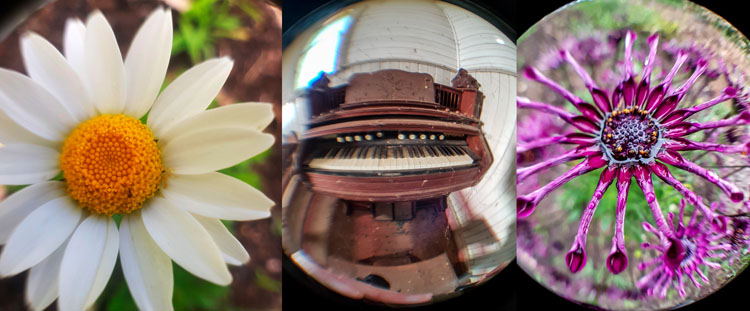
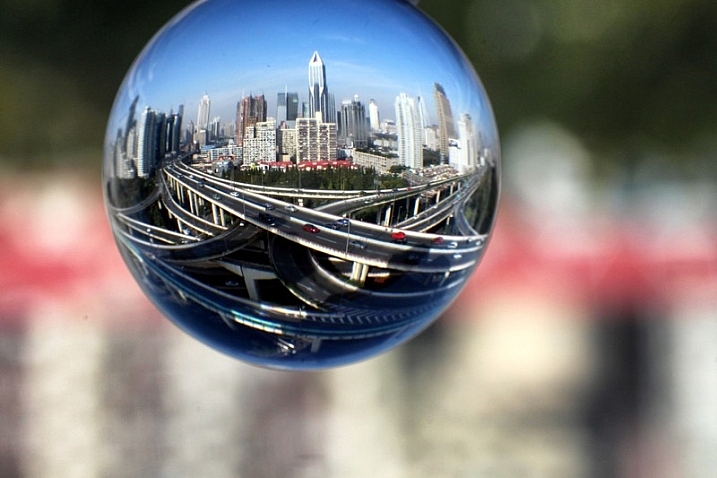
The results of my own 30-day photography project challenge!

Make a game plan for your photography project

There are no hard and fast rules for photo-a-day projects or challenges. You might even want to take a photo weekly or monthly instead. It’s the regularity and the plan that forms the basis of the challenge. Any other rules are those you set for yourself.

How often do you plan to take a photograph, daily, or weekly? Will you need to stock up on film or memory cards? Is there a certain time of day or location you want to capture images? Do you need a new camera bag? Setting out a clear plan before embarking on your challenge will help you keep motivated and shape the outcome of your final body of work.

Tips for Doing a Successful Picture-a-Day Photography Project

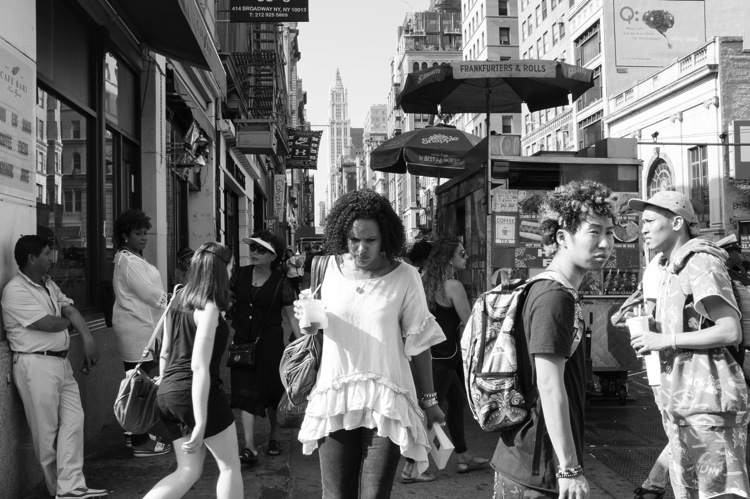
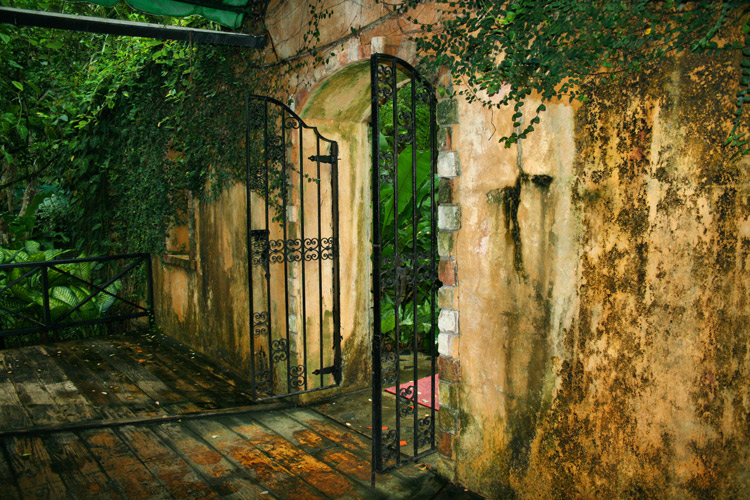
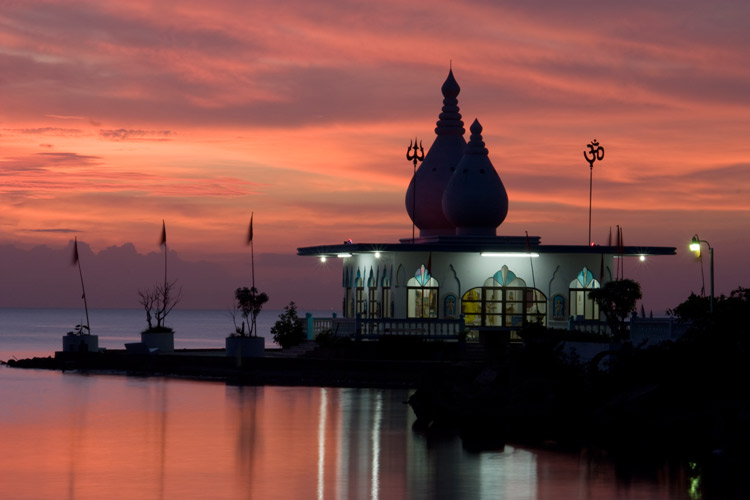
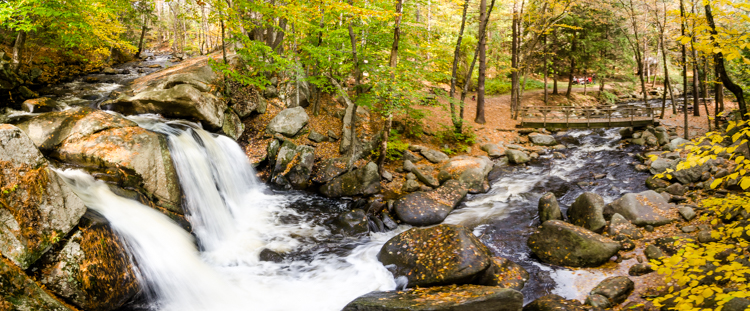
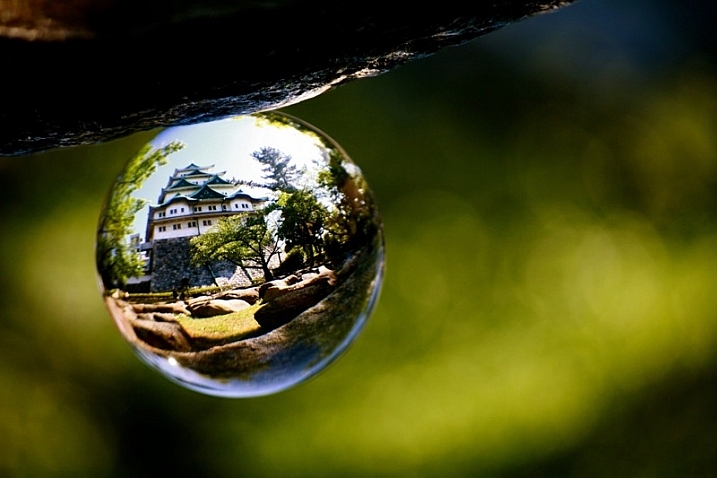
Daily or regular photography projects can reveal many creative opportunities.

Set a goal for your project

Before starting out on your quest, consider what it is that you want to get from the photography project. Having a clear idea of your motivations will help guide you through your challenge more smoothly. Are you looking to expand on your technical skills? Or would you like to get to know your camera a little better? I find that writing down the desired outcome of a project is helpful. Plus, if your series does change course, it’s interesting to be able to look back at your notes and see how your project has grown.

Choose a theme

Choosing a theme for your photo-a-day project can help create a cohesive series overall. If you are keen to hone your technical skills, try a theme that utilizes new photographic techniques. Or take on a subject which is different than what you usually shoot. If you want to make more time for photography, you’ll be surprised at what a few minutes a day can achieve. If you aren’t sure where to start, there are an abundance of websites that supply free-printable lists of plans, themes and tasks for each day, week, month, or year.

However, if you feel constrained by the idea of a hard-and-fast theme, remember that choosing not to have a clear theme is a choice in itself! Relying on subjects that catch your eye will expand your ability to decipher creativity and meaning in any given environment.

Tips for Doing a Successful Picture-a-Day Photography Project

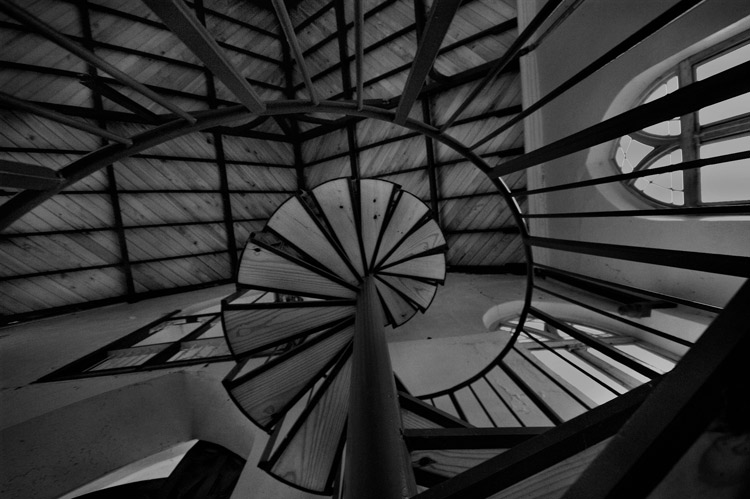
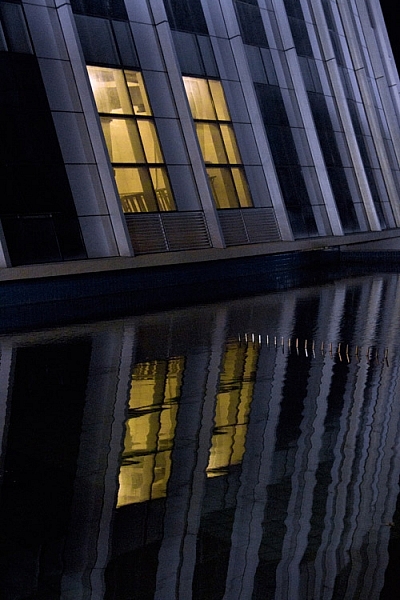
An abstract pattern I stumbled upon while walking home.

Set a time frame

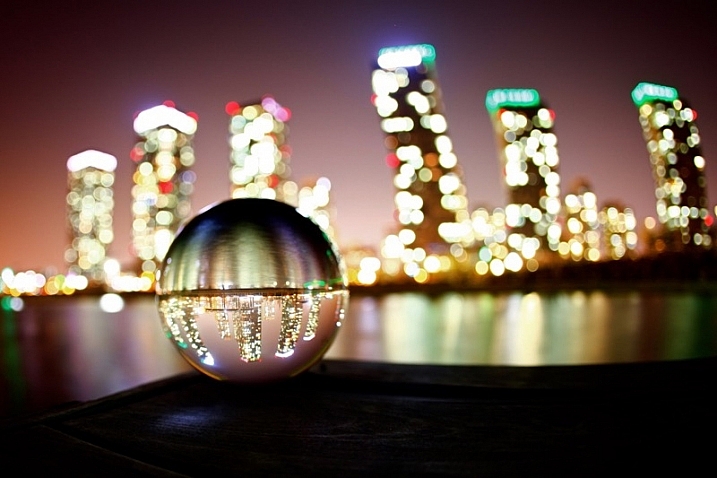
Next, consider a time frame for your  project. Daily photographic challenges can last weeks, or even years. The time of day is a factor too – would you like to shoot your series during the day or the night? Maybe even both.

The time frame of the project relies on your goals and chosen theme. It also dictates the kind of equipment you’ll need. For example, documenting a landscape over the seasons requires a longer time frame than a series of self-contained photographs. Additionally, a project spanning over a longer time frame may only require a single photograph each week or per month, depending on the level of detail you prefer. If you want a consistent outcome from your series, consider using a tripod and a dedicated vantage point.

Tips for Doing a Successful Picture-a-Day Photography Project

Equipment

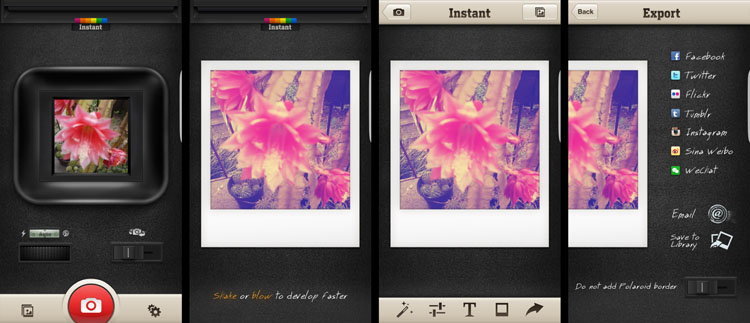
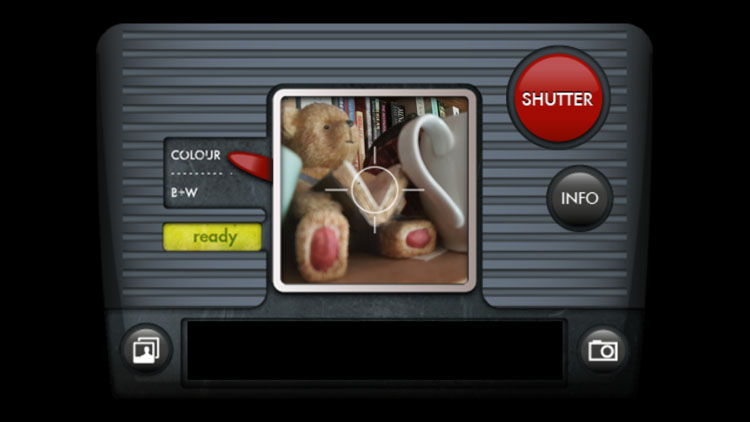
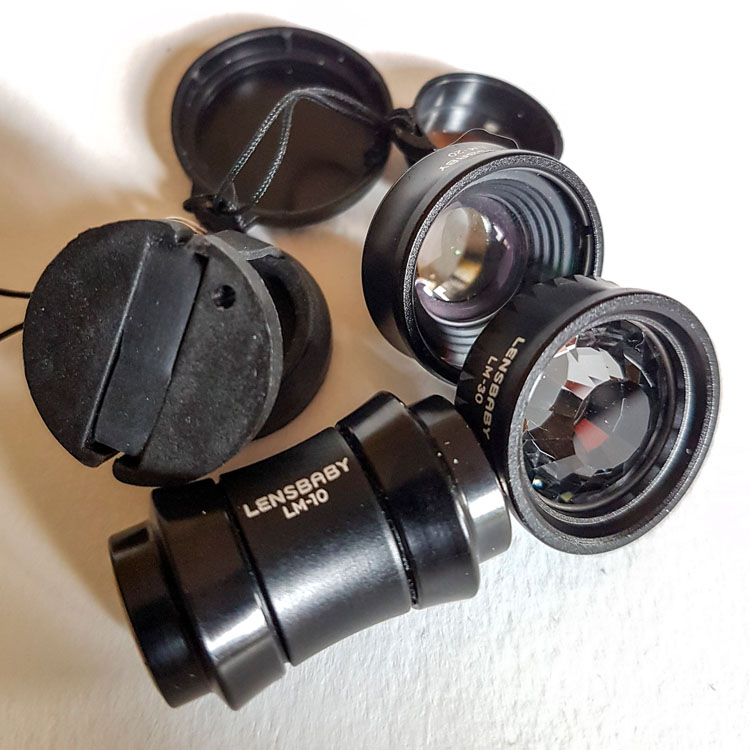
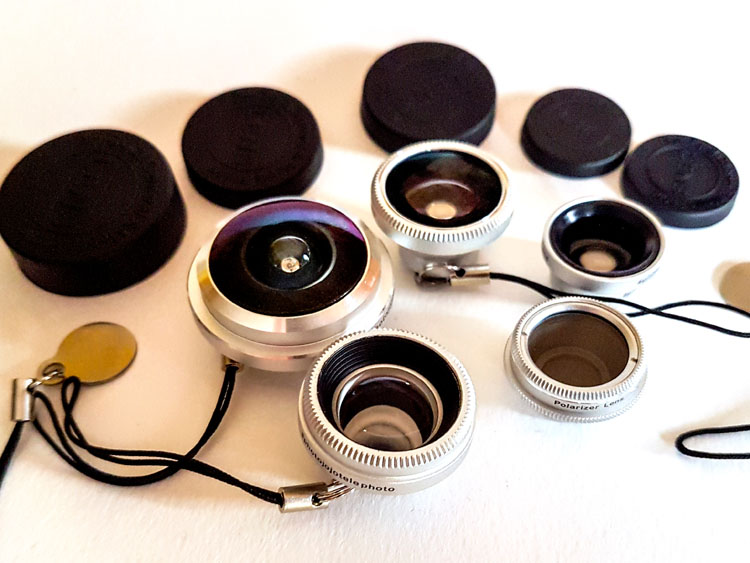
Selecting photographic equipment for the project will shape the aesthetic of the series and relate back to your initial goals and themes for the project. The beauty of daily or regular photography challenges is the opportunity to become more familiar with your photographic tools. It’s a perfect way to invest in developing your DSLR skills, or trying out a new lens. You may even want to use an analogue camera. Why not experiment with a different camera setting each day? Or focus on photography fundamentals such as shutter speed and aperture over the course of each week?

One of the requirements of taking on a photo-a-day challenge is keeping a camera on hand. This can be an issue in terms of additional carrying weight. Rather than resorting to the portability of a camera phone, pack your wallet, keys and phone into a camera bag instead. Your DPI will thank you later. And after a bit of adjustment, you’ll find that keeping your camera with you becomes so natural that you might feel naked without it.

Tips for Doing a Successful Picture-a-Day Photography Project

I’m not a regular on the selfie-circuit, but I couldn’t pass up the chance to capture this wobbly image for my daily project.

Ready to shoot!

Okay, so you have your goals set, your theme decided, your time frame sorted and your equipment at the ready… now what?

Start off simple by taking a few photographs around the house, or on your way to work. Keep in mind that not every image you take for the day will be perfect – and that’s okay! Sometimes it’s not the content that’s important, but the habit. Creative blocks are inevitable – just take a deep breath, snap a few photos for the day and come back to them later. The project is about learning and developing, not creating a masterpiece (although that is a possibility too!). Soon the exercise will become less of a chore, and more therapeutic.

Tips for Doing a Successful Picture-a-Day Photography Project

Setting a reminder on your phone is a good way to remember to take a photo each day.

Setting a reminder on a phone is a good way to remind yourself to take a photo – but don’t beat yourself up if you skip a day or two. A photo-a-day project is all about heightening your technical and creative skills -not shoving them down your own throat.

Having said that, there is a chance that over the course of the project you may begin to feel unmotivated or bored. You might even consider giving up. Making a blog, posting on Facebook, or creating a dedicated Instagram account to track your progress is a great way to stay on track. You’ll be able to easily view your own growth and share the results with others. An ongoing project helps you build up an online presence and a space to give and receive feedback from other photographers. Your friends might join in too.

Review your images

Along with posting material from your project online at regular intervals, take some time to reflect on your work. Take note of the direction that your series has taken, and where it is headed. Doing a weekly or monthly check-in with your series will reveal interesting trends and techniques in your own photographic practice.

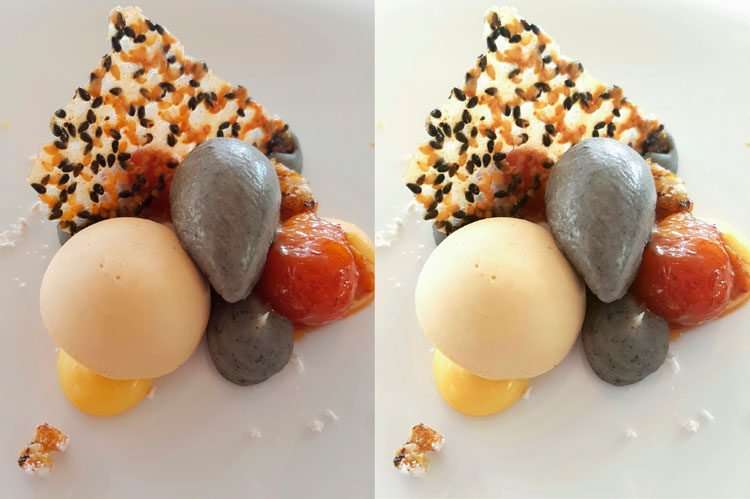
Having a long-term body of work, even over the course of a few weeks, provides a great opportunity to identify and remedy errors and bad habits. You may even discover hidden strengths in subject-selection and technical proficiency that you never knew you had!

Tips for Doing a Successful Picture-a-Day Photography Project

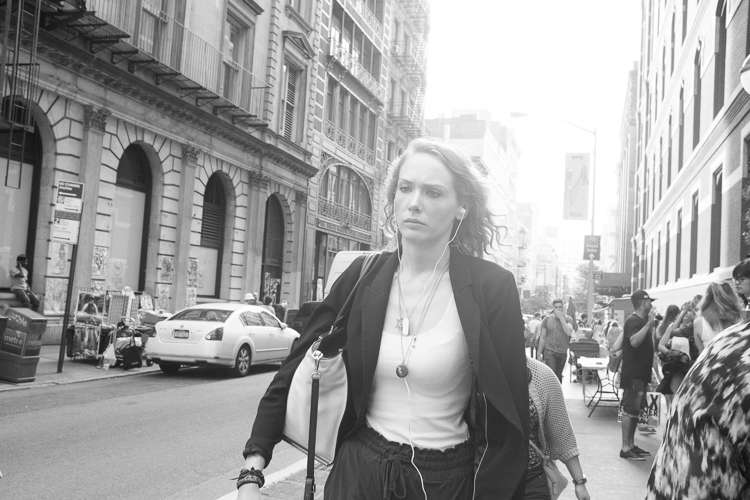
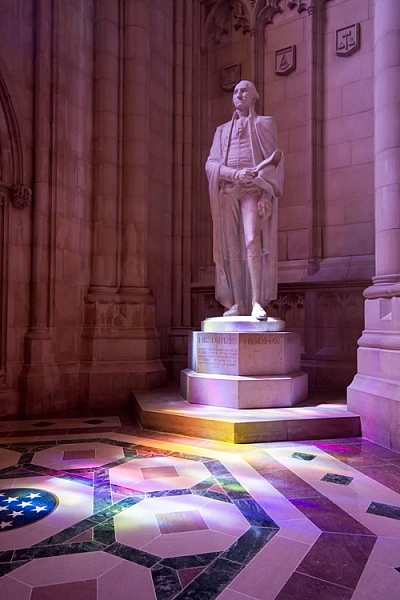
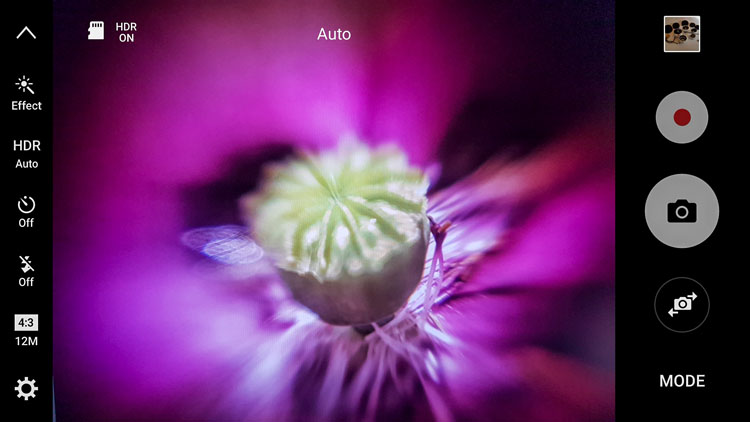
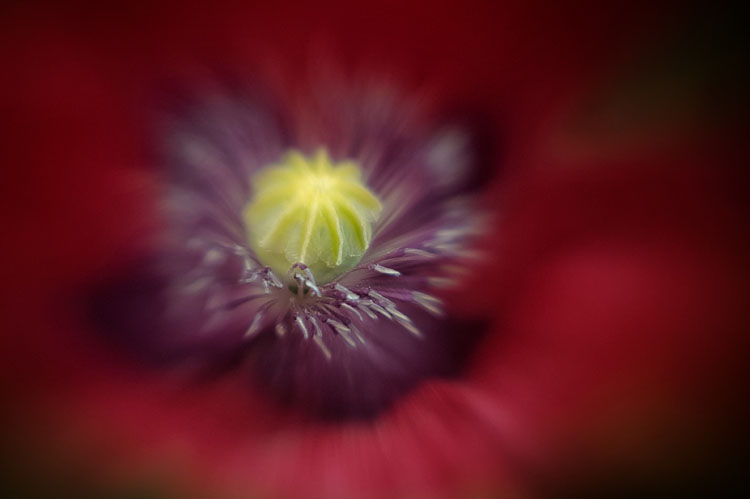
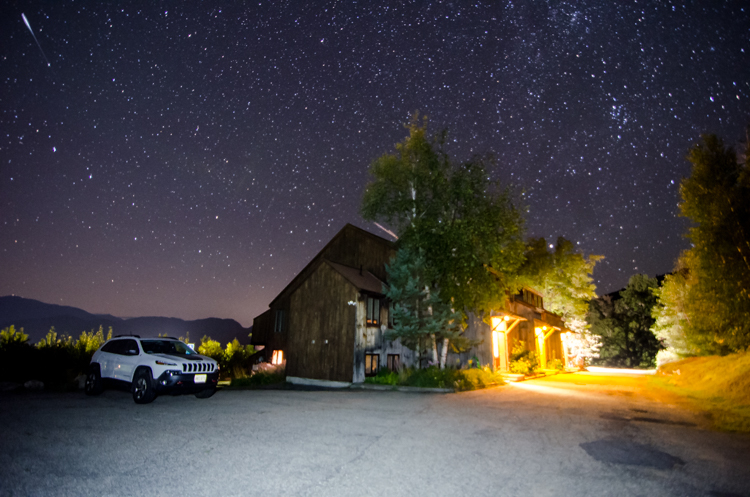
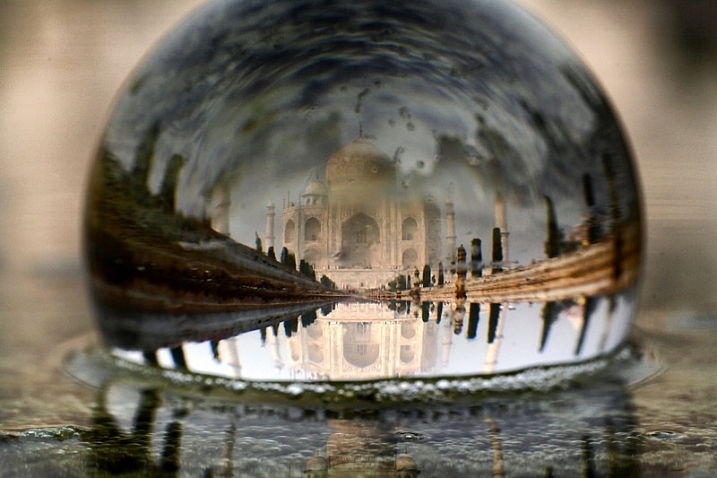
Partaking in my own daily photography challenge gave me the opportunity and the motivation to photograph ideas that I have wanted to experiment with for a while.

Conclusion

Once you begin to actively seek out new  photographic opportunities, you’ll see the world around you in a whole different light. Daily and regular photography projects reveal opportunities everywhere, even in the ordinary. Having a camera with you to capture those opportunities is a rewarding challenge. And although your daily efforts alone may seem insignificant, your series will gather momentum faster than you realize. So what are you waiting for? Get out there and start your own photographic challenge!

Here are some images from my own project – please share yours in the comments below.

Tips for Doing a Successful Picture-a-Day Photography Project

catching up a bit of TV – a perfect photographic opportunity

The surreal light of a butcher’s window

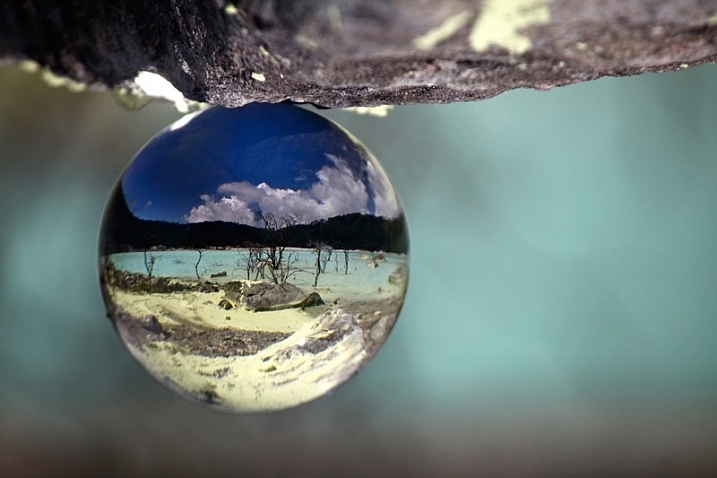
Some radioactive looking sludge I encountered made an interesting abstract photo of the day

This cute little guy posed just long enough for my daily shot

The post Tips for Doing a Successful Picture-a-Day Photography Project by Megan Kennedy appeared first on Digital Photography School.


Digital Photography School

 
Comments Off on Tips for Doing a Successful Picture-a-Day Photography Project

Posted in Photography


7 Tips for Overcoming Nerves When Doing Street Photography

17 Feb

Good street photography can sometimes look deceptively easy to do yourself. All you have to do is be in the right place at the right time, get a little lucky, and bam – you have an incredible, one-of-a-kind photograph.

Astor Place Newsman, New York Street Photography

However, the reality is much more difficult than that, and it’s something that can surprise photographers when they try it. Suddenly, everything is moving so fast. You look around, but you don’t actually see any amazing moments. Then when you do capture something that you thought looked good, it didn’t turn out anything like you imagined.

These are all things that take time and practice to improve at, but the hardest obstacle for people to overcome with street photography is fear. Suddenly, you’re in the middle of it all. People are looking at you. Even the people who you aren’t photographing are watching from the side. You freeze, you have trouble putting the camera to your eye, and it doesn’t feel as fun as it should because you are so nervous! Fear stops too many people before they start, and this is a shame because it’s a very enjoyable type of photography.

Here are some tips to help you get over those street photography fears so you can enjoy yourself out there.

1. Think about what you will say if someone stops you

SoHo, New York Street Photography

The thing that will make you the most comfortable out there is knowing that you have a plan if someone stops you after you have taken their photograph. This rarely ever happens to me, but when it does, I feel confident in how I can handle myself.

First of all, if someone notices me, I always smile. Acting confident and like you’re not doing anything wrong will make the subject more comfortable. If you’re sneaky and look sheepish, they will see that you look guilty and be much more inquisitive.

Then if someone asks you why you took their photograph, tell them the truth. I say that I am a photographer doing a cultural project on the people and streets of New York, and I thought they looked fabulous. Flattery will help you get out of most situations. Or tell them you are a student. Offer to email them the photograph. Explain that you find people and fashion and things of that nature just as interesting as the buildings. If the person then continues to seem uncomfortable or angry, apologize and say that you didn’t mean to make them uncomfortable and you are happy to delete the photograph. That will diffuse most situations.

2. Choose your subjects wisely

SoHo, New York Street Photography

If someone looks angry, stressed, scary, or in any way that makes you uncomfortable, you are NOT to photograph them. More subjects will come soon after. By picking the right people, you will make things much easier for yourself, and that will also make you feel more comfortable.

3. Go to a busy place and let people come to you

Canal Street, New York Street Photography

This is one of my favorite tips. While street photography can and should be done in areas without many people, one of the best things you can do is to photograph where a lot is going on. Go to busy street corners, markets, or festivals. Go at times when things are happening. Follow the action.

This will immediately ease your fears somewhat. In those areas, people will be too busy to notice you and will be used to people with cameras. It will give you time to practice and to get comfortable with the act of shooting street photography.

Take this a step further, by picking a spot and letting things happen around you. You do not always have to walk around to search for a photograph. By staying in the same location, you will be quicker to notice moments as they occur, you will already be in position, and people will be entering your personal space instead of you entering theirs. This will help to make you feel a lot more comfortable.

4. Try some street portraiture

Skater, Street Portrait, New York Street Photography

Start out the day with some street portraits. Stop someone, tell them they look great and that you’re doing a project on people in the area, and ask if you can take a few quick photographs. Some photographers will then just capture a couple quick photographs, mumble a thank you, and run off, but I want you to interact with them.

Make conversation as you photograph and capture them from a couple angles. Compliment them and make their day. Doing this will make both you and the subject happier, and it will help remove the creepy feeling that can happen when shooting street photography.

5. Learn to be candid

No matter how comfortable you become shooting in these environments, it is important to learn to act candidly. If everyone stops you to ask if you took their photograph or if everyone notices you right away to ruin the moment, you will not get anywhere. Learning to act candidly will make you feel much more comfortable.

SoHo, New York Street Photography

The camera snap

The most important tip, probably in this whole article, is what I call the camera snap. As photographers, one of our instincts is to slightly take the camera away from our eye right after we take a picture. Everyone does this, and this is how people notice that you have taken their photograph – it’s the main thing that tips them off. So instead, take the photograph and keep the camera to your eye as they pass completely by. This will make them think that you are just photographing the background and that they got in your way.

This way of shooting works fantastically well in busy areas, but in areas with fewer people, it can help to change it up a bit. Instead of aiming the camera at a subject right away, this time, aim the camera at a building above or a scene to the side of them. Then at the last second, act like you took the photograph and are moving your camera down, take the picture of them, and move on.

It cannot hurt to play a role as well. Some of the best street photographers are fantastic actors; they have a way of looking the dumbest with their cameras. They furrow their brow and act like they don’t know how to use the camera at all, are testing it out, and don’t even notice that the person is right where they are photographing. Some even act like tourists. It’s hilarious and it works.

6. Don’t shoot from the hip

SoHo, New York Street Photography

Shooting from the hip is an important practice in street photography. I do it about 30-40% of the time, but I do it with my camera right below my eyes, looking like I’m standing there waiting for something to happen instead of putting the camera very low down. If you are just starting out with street photography, particularly with a large DSLR and zoom lens, this will be your first instinct.

It can be important to learn to shoot from the hip, particularly for the moments that you really want to keep candid, but I suggest staying away from it at first. It can become too much of a crutch and it can make you more uncomfortable in the long-run as you will always feel like you are sneaking around. You need to learn to put the camera to your eye at first to both get good photographs and to improve your confidence. Force yourself to shoot with your camera to your eye as much as possible, and as you get more experienced, then you can experiment with shooting from the hip some of the time.

7. Repetition

5th Avenue, New York Street Photography

Nothing will get you more comfortable out there than shooting frequently. Even if it is only ten minutes here or there, try to not go too long without photographing. These skills are like any other in that you will quickly get rusty, and this will make you feel more self-conscious. Turn your photography into a routine, even if it is only once every two weeks, and you will become much better.

Now that you’ve read all of this, just get out there and go for it. Put a smile on your face, enjoy the walk, and have fun with it!

googletag.cmd.push(function() {
tablet_slots.push( googletag.defineSlot( “/1005424/_dPSv4_tab-all-article-bottom_(300×250)”, [300, 250], “pb-ad-78623” ).addService( googletag.pubads() ) ); } );

googletag.cmd.push(function() {
mobile_slots.push( googletag.defineSlot( “/1005424/_dPSv4_mob-all-article-bottom_(300×250)”, [300, 250], “pb-ad-78158” ).addService( googletag.pubads() ) ); } );

The post 7 Tips for Overcoming Nerves When Doing Street Photography by James Maher appeared first on Digital Photography School.


Digital Photography School

 
Comments Off on 7 Tips for Overcoming Nerves When Doing Street Photography

Posted in Photography


5 Reasons Why You Should be Doing Night Photography

10 Feb

We photographers tend to avoid night photography. Sure, there are some who seem to specialize in it, but most of us stick to daylight hours.

night photography tips and course

Historically, there were good reasons for this. Night photography was hard. You couldn’t see what you were doing because there were no LCD screens on camera. Every mistake cost you money in the form of film and processing. Even when digital cameras came on the scene, the low light performance in most cameras was so atrocious that it made it difficult to shoot at night.

But now, times have changed. Obviously, with digital, you can see exactly what you are doing and take as many test shots as you like. Cameras – and the low light performance of cameras in particular – have improved drastically in the last three to five years. Post-processing tools have come a long way as well, so now you can enhance your night photos a great deal.

night photography tips and course

All that makes night photography much more feasible. But is it something you should do? Will it lead to great photos? Is it fun?

The answers are; yes, yes, and yes. In this article, I will show you some of my favorite things about night photography. Once you get started, you are sure to have some of your own reasons.

1.  Otherwise mundane places are dramatic at night

Most photographers struggle with one thing in particular. That is how to make their photos stand out from the crowd.

Photographing at night can help you make that happen. Let’s be clear, though, just taking any old photo at night won’t get you there. But you’ll be surprised at how many locations that appear rather mundane or drab during the day can be made to look incredibly dramatic at night.

night photography tips and course

In cities, for example, you will find well-lit facades, bridges, skylines, etc. The city lights add interest and give you lots to work with. During the day, these appear flat and uninteresting. At night, however, there is usually dramatic lighting added. In rural environments, you have the night sky. A clear sky in the daytime is nothing special, but at night you are treated to a sky full of stars. In either case, you can add your own light to the scene via a flash unit or light painting (bring your flashlight!).

In addition, the night is just different than what most people normally see. That’s not to suggest that night photography is somehow a novelty, but photography during the day is much more common. People are accustomed to seeing photos during the day. They are even used to seeing dramatic sunrise and sunset photos. Night photos are a little more unusual. Take advantage of it.

2.  You can achieve amazing effects that are impossible during the day

Light trails, starburst effect, motion blur . . . these are all easy at night. The long shutter speeds that are often required for proper exposure in night photography can lead to really cool effects. In addition, at night you can work with lights that just aren’t on during the day.

night photography tips and course

At night, not only are you taking pictures that many others don’t take because they are at home, but you are also taking pictures that many photographers can’t take. You need to have more than a rudimentary understanding of exposure to get a good night shot. Long exposures are very common, so a tripod and a remote shutter release are necessities. Beyond that here are some other considerations for night photography:

  • You need to control shutter speed to get motion blur where you want it and avoid camera shake when you don’t.
  • Aperture control is needed to balance competing goals of letting enough light in, achieving a proper depth of field, achieving a starburst effect to lights, and avoiding diffraction.
  • You need to control ISO to achieve a proper exposure without an intolerable amount of noise that often goes along with night photography.

Granted, some of these things are issues during the day as well. But they are much more of an issue at night. The lack of light is not that difficult to overcome, but you do need to know what you are doing.

3.  The light never changes

night photography tips and course

As someone who loves landscape photography, it can be really frustrating to spend all your time waiting for fleeting moments of light that may or may not ever arrive. Have you ever considered what percentage of a typical day is actually good light for landscape photography? It is a tiny window! Furthermore, how many times have you awaited a sunset and aftermath that didn’t even pan out?

With night photography, on the other hand, you aren’t waiting around for the light. Once the sun is fully set, the light never changes. It is just always dark. Streetlights, spotlights, and other artificial lights aren’t changing (so long as they are on), but rather are constant. So you have all night.

night photography tips and course

You can go out any night and things will be the same. Once you are out, you don’t have to hurry your exposures on account of the changing light. Of course, you may have to hurry if your subject is moving, but it won’t be on account of the changing light.

4.  It is Not So Weather Dependent

Night photography is also not as dependent on the weather. For example, at night, whether it is clear or cloudy, any sky in your picture will likely be black or very dark. You aren’t looking for particular cloud formations.

night photography tips and course

That said, certain weather is not conducive to photography whether it is day or night. Grey, misty days often don’t lead to great pictures (unless you are looking for a mysterious element). And you probably don’t want to go outside in a monsoon or storm. But for the most part the background of your shots just isn’t as weather dependent as shots taken during the day.

5.  It fits your life

You know how you want to get out and do more photography but life keeps getting in the way? You cannot get out during the week because you have to work. On weekends you seem to be tied up with family commitments and errands. It seems like there is never a good time to get out and do some photography.

Most people find, however, that it is easier to get out and do photography at night than during the day. During the day, you are working. At night, most people are off work. During the day, there are family activities. At night the family is winding down and/or going to sleep. During the day, there are errands to run. At night, most stores are closed. You get the idea. There is just less going on at night, such that it always seems easier to get away and do some photography.

night photography tips and course

Conclusion

Don’t forget – half of every day consists of night. In fact, in higher latitudes, the winter can feel like nothing but darkness. But by neglecting the night, you are overlooking the majority of every day. In some ways, you are missing the best part.

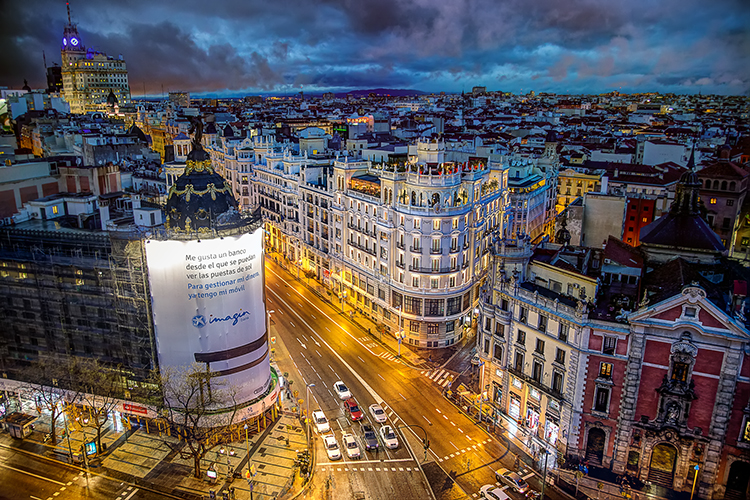
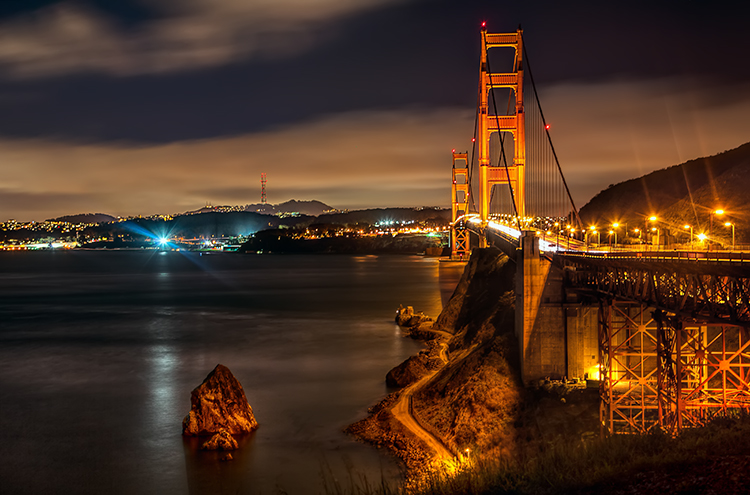
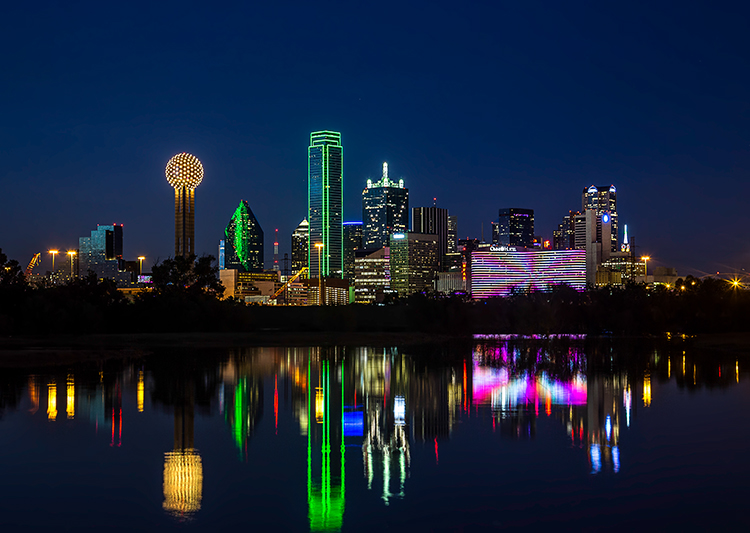
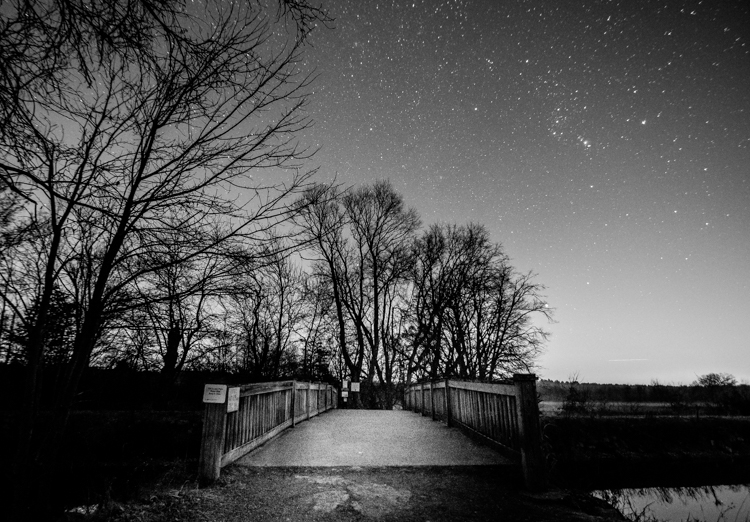
Anyway, these are some of my favorite things about night photography. Once you try it, you are sure to have some of your own reasons.

** NOTE ** If you’d like to know more about this subject, learn more about my brand new course on night photography here, so you can take stunning night photos too!

googletag.cmd.push(function() {
tablet_slots.push( googletag.defineSlot( “/1005424/_dPSv4_tab-all-article-bottom_(300×250)”, [300, 250], “pb-ad-78623” ).addService( googletag.pubads() ) ); } );

googletag.cmd.push(function() {
mobile_slots.push( googletag.defineSlot( “/1005424/_dPSv4_mob-all-article-bottom_(300×250)”, [300, 250], “pb-ad-78158” ).addService( googletag.pubads() ) ); } );

The post 5 Reasons Why You Should be Doing Night Photography by Jim Hamel appeared first on Digital Photography School.


Digital Photography School

 
Comments Off on 5 Reasons Why You Should be Doing Night Photography

Posted in Photography


8 Tips For Doing Stunning Urban Landscape Photography

10 Feb

As a photographer, when you hear the word landscape your mind will most likely conjure up images of lush valleys, looming mountains, and majestic, sweeping vistas. With good reason, as the natural world can be a place of staggering beauty. But done well, a different type of landscape photography, the urban landscape, can produce shots that are equally as compelling as anything Mother Nature can throw your way.

The energy of a major city lends images a vitality that can’t be found anywhere else. There’s so much movement and life in the urban environment, and the best city shots capture that buzzing vibrancy.

Urban landscape 02

Shooting urban landscapes also has plenty of practical advantages too. Every type of photography is all about the light, and that is one thing cities never run out of. You can shoot in the artificial glow of the metropolis long after you’d have been forced to pack up your kit and make your way home from a day in the countryside.

Couple that with the fact that, for the most part, cities are a lot more accessible for the majority of us, and shooting urban landscapes is the ideal activity for photographers during those long winter months.

So here are our top 8 tips for getting the most out of your time pounding the sidewalks.

#1. Research

You wouldn’t embark on a traditional landscape photography outing by jumping in the car, heading for the hills and hoping for the best. Likewise, the success of an urban landscape shoot depends largely on how well you plan.

Your home town

Even if you’re off to capture the town or city you grew up in, putting in the effort to do a little research up front usually pays dividends.

Urban landscape 01

For example, when I wanted to get a shot from high up, overlooking my hometown of London, I didn’t foresee any problems in finding a suitable viewpoint. However, after a little digging, I learned that while London isn’t lacking in tall buildings offering amazing views, the number you can actually gain access to, that are also well suited for photography, can be counted on the fingers of one hand.

The vast majority are either restricted entry or in the case of The Shard (seen at the top of this article), cursed with a viewing gallery shrouded with ultra-reflective windows.A few minutes Googling directed me to a lesser-known church tower on the banks of the Thames with unrestricted views downriver, saving me hours of fruitless searching.

Visiting another city

If you’re visiting a city for the first time, it’s a good idea to spend a little longer familiarizing yourself with the place before you go. Drawing up a shot list of the locations you want to photograph is a good idea as well.

But all that being said, don’t make yourself a slave to it. Few things are more exciting or rewarding in photography than allowing yourself the freedom to meander through a new landscape, get a little lost, and allow whatever happens to happen.
One word of warning: depending on your location, be sure you know where you can and cannot shoot. Many places these days are understandably sensitive about strangers waving cameras around. If in doubt, ask.

#2. Light

The quality, color, and angle of the light can make or break any shot, and this is especially true for urban landscape photography. A subject that looks dull and uninspiring at one time of day can transform into a truly spellbinding image just with the passing of a few hours.

Urban landscape 03

As with any landscape photography, dragging yourself out of bed before the sun puts in an appearance can reward you with the kind of light show that almost makes up for all that missed sleep. The golden hour, that brief a period right after sunrise and before sunset, can present you with views of a city that you may never have seen before.

Plus, you can carry on shooting long after the sun’s gone down. Cities come alive at night. They never get truly dark, and some of the most interesting shots can be taken with the only illumination coming from artificial light.

Just remember to bring your tripod!

Urban landscape 04

#3. Hustle and Bustle

Major cities are fast and frenetic places. Everyone seems to be moving a million miles an hour and there’s always something going on. It’s the perfect environment for photographers.

If you can manage to avoid getting swept along in the tidal wave and stop to look around, you can capture images that convey all that chaotic frenzy. Using a slower shutter speed will help you pick up a real sense of movement, either tripod-mounted or handheld if you’re feeling brave.

Urban landscape 05

#4. Details

There are countless small and fascinating details in cities. Always be on the lookout for the tiny intricacies, the patterns, and shapes that otherwise go unnoticed.

They won’t all be right in front of you. Keep your eyes moving and your head on a swivel, some of the most rewarding shots are going to be found way above your head or close to the ground.

Urban landscape 06

Whether it’s an advertising billboard, some rugged brickwork, or a set of windows, get in close, fill the frame, and isolate your subject.

This is another time when the quality of the light can make all the difference to the success of a shot. A strong, high contrast light can give interesting areas of highlights and shadow, turning an everyday scene into a beautiful abstract. If you have time, it’s worth revisiting potential subjects at different points throughout the day.

Urban landscape 07

#5. Composition

Moving from the countryside to the urban environment doesn’t mean all the old landscape composition rules go out the window. Much of what applies standing on top of El Capitan in Yosemite Park, is still relevant looking down on New York from the Empire State.

Keep the basics of composition in your mind, things like the rule of thirds, leading lines, and natural frames. Then be prepared to break the rules when necessary.

Urban landscape 08

Always think before you shoot. Look around you and see if taking a different viewpoint would improve your shot. Can you get higher and look down or even lie on the ground and shoot upwards?

Unfortunately, in major cities buildings are often so close together they can restrict your options and movements as a photographer, but make sure you’re at the optimum position for your subject. The difference between a winning shot and a mediocre one can sometimes be measured in the space of just a few feet.

Urban landscape 09

#6. People

One area where urban landscapes differ greatly from the traditional is in the number of people you’re likely to encounter. It can be frustrating when you arrive at your dream location, only to find it swarming with tourists, as well as the locals going about their daily business, all seemingly determined to clutter up your shot. Along with the great light, it’s another good reason to be up and about in the early hours of the day, while everyone else is still tucked up in bed.

But people make great subjects for candid portraits as you wander the streets. Big cities attract some real characters, and capturing them in their home environment can lead to some winning images.

One thing to remember is to always ask your subject’s permission before you shoot. The vast majority will be more than happy to oblige so long as you’re polite. (Take this from a man who once got a severe and humiliating telling off from a Buddhist monk in Thailand for taking his picture without having the courtesy of asking first. They’re not as chill as you’d think!)

Urban landscape 11

#7. Reflections

Modern cities seem to be more glass than anything else. This is great news for you as a photographer. You can use that beautiful reflective quality in your compositions to create some wonderful, quirky effects.

The major landmarks in every city have been photographed a bazillion times. So, you have to work a little harder and think a little more creatively to come away with shots that are distinctly your own. Shooting a famous and easily recognizable building reflected in the windows of another gives an interesting change of context, especially as it often contrasts the old and the new.

Urban landscape 12

Many big cities are built along the banks of hefty rivers as well, which gives you another opportunity to utilize reflections in your shots. Clear skies offer the best results, preferably at the start or end of the day to give a little color. A dull, overcast day will be reflected in the water, giving it an ugly, muddy quality.

Urban landscape 13

#8. Monochrome

Urban landscapes are very well suited to the simplicity of black and white photography. Taking away the distractions of the vast range of different colors on show in any city and focussing on just the tones and textures, gives a completely new dimension to your shot.

Urban landscape 14

The increased contrast of a monochrome image benefits architecture especially, enhancing the shape of buildings and accentuating their details. Again, the light is all-important. A low sun highlights surfaces and gives areas of rich shadow for added depth.

Try and avoid using the black and white function on your DSLR and shoot RAW if you can. Then use your post-production software for the conversion. It allows you much more control over the final image.

Conclusion

Shooting urban landscapes can be a richly rewarding experience and gives you the opportunity to try out several different disciplines at once.

You have the chance to flex your portraiture and architectural photography muscles, as well as experimenting with close-up abstracts and shooting in black and white. Plus, you get to practice all that while staying firmly in civilization and never more than a few feet from a decent cup of coffee!

Urban landscape 15

Of course, all that added convenience comes at a price. Shooting in cities has its inherent risks and you always need to keep your wits about you. Watch where you stand to shoot and make sure you’re not in any danger from fast-moving traffic or trespassing on anyone’s property.

Also, keep a tight grip on your equipment, especially if you’re shooting at night. Cities have more than their fair share of bad people who’d not think twice about running off with your expensive kit. If you’re nervous, it’s the perfect opportunity to buddy up with another photographer and explore the location together.

Please share your urban landscape photos in the comments below.

googletag.cmd.push(function() {
tablet_slots.push( googletag.defineSlot( “/1005424/_dPSv4_tab-all-article-bottom_(300×250)”, [300, 250], “pb-ad-78623” ).addService( googletag.pubads() ) ); } );

googletag.cmd.push(function() {
mobile_slots.push( googletag.defineSlot( “/1005424/_dPSv4_mob-all-article-bottom_(300×250)”, [300, 250], “pb-ad-78158” ).addService( googletag.pubads() ) ); } );

The post 8 Tips For Doing Stunning Urban Landscape Photography by Andy Callan appeared first on Digital Photography School.


Digital Photography School

 
Comments Off on 8 Tips For Doing Stunning Urban Landscape Photography

Posted in Photography


8 Tips For Doing Stunning Urban Landscape Photography

09 Feb

As a photographer, when you hear the word landscape your mind will most likely conjure up images of lush valleys, looming mountains, and majestic, sweeping vistas. With good reason, as the natural world can be a place of staggering beauty. But done well, a different type of landscape photography, the urban landscape, can produce shots that are equally as compelling as anything Mother Nature can throw your way.

The energy of a major city lends images a vitality that can’t be found anywhere else. There’s so much movement and life in the urban environment, and the best city shots capture that buzzing vibrancy.

Urban landscape 02

Shooting urban landscapes also has plenty of practical advantages too. Every type of photography is all about the light, and that is one thing cities never run out of. You can shoot in the artificial glow of the metropolis long after you’d have been forced to pack up your kit and make your way home from a day in the countryside.

Couple that with the fact that, for the most part, cities are a lot more accessible for the majority of us, and shooting urban landscapes is the ideal activity for photographers during those long winter months.

So here are our top 8 tips for getting the most out of your time pounding the sidewalks.

#1. Research

You wouldn’t embark on a traditional landscape photography outing by jumping in the car, heading for the hills and hoping for the best. Likewise, the success of an urban landscape shoot depends largely on how well you plan.

Your home town

Even if you’re off to capture the town or city you grew up in, putting in the effort to do a little research up front usually pays dividends.

Urban landscape 01

For example, when I wanted to get a shot from high up, overlooking my hometown of London, I didn’t foresee any problems in finding a suitable viewpoint. However, after a little digging, I learned that while London isn’t lacking in tall buildings offering amazing views, the number you can actually gain access to, that are also well suited for photography, can be counted on the fingers of one hand.

The vast majority are either restricted entry or in the case of The Shard (seen at the top of this article), cursed with a viewing gallery shrouded with ultra-reflective windows.A few minutes Googling directed me to a lesser-known church tower on the banks of the Thames with unrestricted views downriver, saving me hours of fruitless searching.

Visiting another city

If you’re visiting a city for the first time, it’s a good idea to spend a little longer familiarizing yourself with the place before you go. Drawing up a shot list of the locations you want to photograph is a good idea as well.

But all that being said, don’t make yourself a slave to it. Few things are more exciting or rewarding in photography than allowing yourself the freedom to meander through a new landscape, get a little lost, and allow whatever happens to happen.
One word of warning: depending on your location, be sure you know where you can and cannot shoot. Many places these days are understandably sensitive about strangers waving cameras around. If in doubt, ask.

#2. Light

The quality, color, and angle of the light can make or break any shot, and this is especially true for urban landscape photography. A subject that looks dull and uninspiring at one time of day can transform into a truly spellbinding image just with the passing of a few hours.

Urban landscape 03

As with any landscape photography, dragging yourself out of bed before the sun puts in an appearance can reward you with the kind of light show that almost makes up for all that missed sleep. The golden hour, that brief a period right after sunrise and before sunset, can present you with views of a city that you may never have seen before.

Plus, you can carry on shooting long after the sun’s gone down. Cities come alive at night. They never get truly dark, and some of the most interesting shots can be taken with the only illumination coming from artificial light.

Just remember to bring your tripod!

Urban landscape 04

#3. Hustle and Bustle

Major cities are fast and frenetic places. Everyone seems to be moving a million miles an hour and there’s always something going on. It’s the perfect environment for photographers.

If you can manage to avoid getting swept along in the tidal wave and stop to look around, you can capture images that convey all that chaotic frenzy. Using a slower shutter speed will help you pick up a real sense of movement, either tripod-mounted or handheld if you’re feeling brave.

Urban landscape 05

#4. Details

There are countless small and fascinating details in cities. Always be on the lookout for the tiny intricacies, the patterns, and shapes that otherwise go unnoticed.

They won’t all be right in front of you. Keep your eyes moving and your head on a swivel, some of the most rewarding shots are going to be found way above your head or close to the ground.

Urban landscape 06

Whether it’s an advertising billboard, some rugged brickwork, or a set of windows, get in close, fill the frame, and isolate your subject.

This is another time when the quality of the light can make all the difference to the success of a shot. A strong, high contrast light can give interesting areas of highlights and shadow, turning an everyday scene into a beautiful abstract. If you have time, it’s worth revisiting potential subjects at different points throughout the day.

Urban landscape 07

#5. Composition

Moving from the countryside to the urban environment doesn’t mean all the old landscape composition rules go out the window. Much of what applies standing on top of El Capitan in Yosemite Park, is still relevant looking down on New York from the Empire State.

Keep the basics of composition in your mind, things like the rule of thirds, leading lines, and natural frames. Then be prepared to break the rules when necessary.

Urban landscape 08

Always think before you shoot. Look around you and see if taking a different viewpoint would improve your shot. Can you get higher and look down or even lie on the ground and shoot upwards?

Unfortunately, in major cities buildings are often so close together they can restrict your options and movements as a photographer, but make sure you’re at the optimum position for your subject. The difference between a winning shot and a mediocre one can sometimes be measured in the space of just a few feet.

Urban landscape 09

#6. People

One area where urban landscapes differ greatly from the traditional is in the number of people you’re likely to encounter. It can be frustrating when you arrive at your dream location, only to find it swarming with tourists, as well as the locals going about their daily business, all seemingly determined to clutter up your shot. Along with the great light, it’s another good reason to be up and about in the early hours of the day, while everyone else is still tucked up in bed.

But people make great subjects for candid portraits as you wander the streets. Big cities attract some real characters, and capturing them in their home environment can lead to some winning images.

One thing to remember is to always ask your subject’s permission before you shoot. The vast majority will be more than happy to oblige so long as you’re polite. (Take this from a man who once got a severe and humiliating telling off from a Buddhist monk in Thailand for taking his picture without having the courtesy of asking first. They’re not as chill as you’d think!)

Urban landscape 11

#7. Reflections

Modern cities seem to be more glass than anything else. This is great news for you as a photographer. You can use that beautiful reflective quality in your compositions to create some wonderful, quirky effects.

The major landmarks in every city have been photographed a bazillion times. So, you have to work a little harder and think a little more creatively to come away with shots that are distinctly your own. Shooting a famous and easily recognizable building reflected in the windows of another gives an interesting change of context, especially as it often contrasts the old and the new.

Urban landscape 12

Many big cities are built along the banks of hefty rivers as well, which gives you another opportunity to utilize reflections in your shots. Clear skies offer the best results, preferably at the start or end of the day to give a little color. A dull, overcast day will be reflected in the water, giving it an ugly, muddy quality.

Urban landscape 13

#8. Monochrome

Urban landscapes are very well suited to the simplicity of black and white photography. Taking away the distractions of the vast range of different colors on show in any city and focussing on just the tones and textures, gives a completely new dimension to your shot.

Urban landscape 14

The increased contrast of a monochrome image benefits architecture especially, enhancing the shape of buildings and accentuating their details. Again, the light is all-important. A low sun highlights surfaces and gives areas of rich shadow for added depth.

Try and avoid using the black and white function on your DSLR and shoot RAW if you can. Then use your post-production software for the conversion. It allows you much more control over the final image.

Conclusion

Shooting urban landscapes can be a richly rewarding experience and gives you the opportunity to try out several different disciplines at once.

You have the chance to flex your portraiture and architectural photography muscles, as well as experimenting with close-up abstracts and shooting in black and white. Plus, you get to practice all that while staying firmly in civilization and never more than a few feet from a decent cup of coffee!

Urban landscape 15

Of course, all that added convenience comes at a price. Shooting in cities has its inherent risks and you always need to keep your wits about you. Watch where you stand to shoot and make sure you’re not in any danger from fast-moving traffic or trespassing on anyone’s property.

Also, keep a tight grip on your equipment, especially if you’re shooting at night. Cities have more than their fair share of bad people who’d not think twice about running off with your expensive kit. If you’re nervous, it’s the perfect opportunity to buddy up with another photographer and explore the location together.

Please share your urban landscape photos in the comments below.

googletag.cmd.push(function() {
tablet_slots.push( googletag.defineSlot( “/1005424/_dPSv4_tab-all-article-bottom_(300×250)”, [300, 250], “pb-ad-78623” ).addService( googletag.pubads() ) ); } );

googletag.cmd.push(function() {
mobile_slots.push( googletag.defineSlot( “/1005424/_dPSv4_mob-all-article-bottom_(300×250)”, [300, 250], “pb-ad-78158” ).addService( googletag.pubads() ) ); } );

The post 8 Tips For Doing Stunning Urban Landscape Photography by Andy Callan appeared first on Digital Photography School.


Digital Photography School

 
Comments Off on 8 Tips For Doing Stunning Urban Landscape Photography

Posted in Photography


Throwback Thursday: doing the twist with the Nikon Coolpix 950

03 Feb

Few cameras in the early days of consumer digital photography are as legendary as the Nikon Coolpix 950. This graphic pulled from the DPReview archives says it all:

In case you’re wondering, the answer was ‘yes’. It earned a ‘Highly Recommended’ award, with site founder Phil Askey calling it an ‘important camera at an important time for digital photography.’

The thing about the Coolpix 950 that grabbed the most attention was, of course, its rotating lens (or was it the body that rotated?). It wasn’t Nikon’s first camera to use that design: the original Coolpix 900 has that honor. 

The lens was reasonably fast (F2.6-F4), though its equivalent focal length of 38-115mm didn’t make it a great choice for wide-angle shooters (and forget about selfies which, thankfully, didn’t become a fad for another 15 years or so.) Nikon did offer accessory lenses for the 950: a telephoto adapter that doubled the focal length, a wide-angle adapter that dropped it to 24-72mm and a fisheye adapter with a 183° field-of-view.

The CP950 had a whopping 1/2″, 2.1 Megapixel CCD, which saved those 1600 x 1200 images to a CompactFlash card. Nikon made a lot of noise about the camera’s autofocus system, boasting that it had 4,746 steps, allowing it to be ‘unerringly accurate.’ The CP950 could shoot continuously at a speedy 1.5 fps and featured Best Shot Selector, a feature which Nikon cameras offered for many years, which took three shots in a row and picked the sharpest one. Another feature that was a big deal then was automatic file numbering.

The Coolpix 950 had a magnesium-alloy frame and feels as solid as a modern-era enthusiast camera.  As you can see, it had a built-in flash. What you can’t see is that it also had a flash sync terminal, and Nikon sold a flash bracket for off-camera Speedlights.

As with most cameras those days, it had an optical viewfinder along with a 2″, 130k-dot LCD that doesn’t look very good in 2017. The physical controls and menus may have been competitive then, but they’re baffling now.

The CP950 was priced at $ 899 back in 1999, which is just under $ 1300 in 2017. That would make this Coolpix one of the most expensive fixed-lens cameras on the market. While it’s hard to imaging paying that now, back in ’99 the Coolpix 950 was definitely worth the price.

Read DPReview’s Coolpix 950 review

Articles: Digital Photography Review (dpreview.com)

 
Comments Off on Throwback Thursday: doing the twist with the Nikon Coolpix 950

Posted in Uncategorized


4 Beginner Tips for Doing Architecture Photography

20 Dec

The first thought you will want to steer clear of is that architecture means buildings, as it actually encompasses most man-made structures. Architectural photography involves capturing an image of a physical structure in an aesthetically pleasing way for your viewers. Here are a few tips to consider if you are just getting into this category of photography.

architecture photography tips

1. Gear Up

In any genre of photography, the right gear makes the difference and this also holds true for architectural photography.
If you want to get an entire structure or room into your frame or opt for a dramatic composition, pack a wide-angle lens in your bag.

architecture photography tips

Keep in mind that there will be times when even a wide angle lens may not be adequate to capture an enormous structure or a sense of place – here the knowledge of shooting panoramic images can come in handy.

architecture photography tips

On the flip side, you may not want to show everything and just focus on some interesting details. Pack a zoom lens to capture those details which help to convey the more ornate and interesting characteristics of architecture.

arnos-vale-entrance-architecture

architecture photography tips

Also, a telephoto lens allows shooting your subject from further away and can help a building’s walls and lines appear straighter (with less distortion).

2. Compose Yourself

Interesting architectural photography benefits from good composition. While distortion can add drama and lend to that artistic feel, buildings leaning backwards or looking too distorted can be less appealing. Always consider your angles and how you want to convey your subject.

architecture photography tips

Photographers who specialize in architectural photography find themselves correcting skews in the post-processing phase or invest in a tilt-shift lens to avoid distortion in the first place.

If you are starting out and want to play around with the dramatic feel, you can shoot from lower or higher angles to maximize the disfigurement. Remember while doing this can be interesting, it is recommended to reduce the effect so that it is not too distracting.

architecture photography tips
Move around and try different angles – shoot straight up, get closer or further away, go low to the ground or higher than the building if possible and see what enhances your architecture.

3. Lighting

A major challenge with architectural photography is that you have no control over the position and orientation of the subject (especially when it comes to buildings), so most times you have to make the most the available light.

architecture photography tips
One of the most interesting (and recommended) lighting options for buildings is when light falls on its side and front (side-front lighting). This angle of lighting provides a decent amount of illumination and can cast interesting shadows across the face of a building, which gives it a more three-dimensional look. So scout out your location at different times and see how the light and shadows change the look and feel of your image.

architecture photography tips
Be wary with strong back lighting when shooting buildings since it can create uniform dark surfaces, unless you are going for that silhouetted look. Again the time of day comes into play and if the structure itself has lights, it adds to the photo.

architecture photography tips
Alternatively, you can shoot at night. Many buildings and cities are designed with night time in mind. Even bridges, sculptures, and windmills can be interesting pieces to photograph after dark. Look for color and the way the buildings are lit and use a tripod!

4. Time Investments

As noted there is little control over large-scale lighting on existing grand architecture, so work with the light that is already there. You can do this effectively by investing time to determine what light is most flattering.

architecture photography tips nighttime

Does the building look better in the morning sun or at sunset? How about at night – is it lit or does it make a great silhouette? Are there interesting reflections in the daytime or a lot of texture to capture? Remember that different times of the day and varying weather conditions can change the mood of your architecture.

architecture photography tips light

Conclusion

Architectural photography is interesting and can be quite exciting. Give yourself time to see architecture from alternate angles, at different times of the day and study it long enough to know what you want your end result to be. Invest the time – it can be worth it.

What is your favorite type of architecture to shoot? Please share some of your shots and techniques with us in the comments below..

googletag.cmd.push(function() {
tablet_slots.push( googletag.defineSlot( “/1005424/_dPSv4_tab-all-article-bottom_(300×250)”, [300, 250], “pb-ad-78623” ).addService( googletag.pubads() ) ); } );

googletag.cmd.push(function() {
mobile_slots.push( googletag.defineSlot( “/1005424/_dPSv4_mob-all-article-bottom_(300×250)”, [300, 250], “pb-ad-78158” ).addService( googletag.pubads() ) ); } );

The post 4 Beginner Tips for Doing Architecture Photography by Nisha Ramroop appeared first on Digital Photography School.


Digital Photography School

 
Comments Off on 4 Beginner Tips for Doing Architecture Photography

Posted in Photography


Tips and Resources for Doing Android Phone Photography

20 Dec

Everywhere you go in the world today you will find someone, or many people, with their phones in the air capturing what they see. They all have a camera with them because they have their phones and can photograph everything they see. Phones have had cameras in them for quite a few years now, but slowly over the years they have improved and today many phones are amazing.

However, when you look around at phone photography there does seem to be an emphasis on iPhones and their cameras. While this article isn’t about which is better, it is important to remember that when it comes to phones Android has a much larger market share and therefore more people are using Android phones and their cameras.

Android phone photography tips

The camera user-interface for the Samsung Galaxy S7 Edge.

For this reason, this article is going to concentrate on Android photography, as there are many who seem to think that everything is made for the iPhone and if they don’t have one they are missing out. That really isn’t the case and since beginning research for this article so many things have come to light.

Phone

Not all phones are the same, nor are the cameras in them. If you are serious about using it for photography, then it would be good to do your research and get one that has a good camera.

While Samsung has had some bad press lately over the debacle with the release of the Note 7, it has to be remembered they are still good phones and the camera in the Galaxy S7 Edge is said to be the best still camera (inside a mobile phone) on the market. It is very clear and the photos have an amazing quality. This is the one I use.

Get one that matches your needs

The camera, as with most, has lots of different settings and modes so you can find one that will be suitable for the type of photography that you are shooting.

If your intention is to use your phone a lot for photography then be sure to select on that has what you need. Also, make sure that it is easy to get the photos from the phone to your computer. In today’s phone market, though, that is easier than ever.

Android phone photography tips

Some food photography with the Samsung Galaxy S7 camera.

Apps for photography

We live in a world of apps. There seem to be apps for everything. Whether they are good or not is another story.

If you go to the Google Play Store and search for cameras you will be given an overwhelming choice. You can get apps for image sharing, doing effects, making selfies, collages, and so on. The list seems endless. Just the popular results give you over 200 choices.

Android phone photography tips

Photos taken with the Instant Camera App.

Most of them are free, so if you are unsure which ones to use you can install them, try them out, and if you don’t like one then just uninstall it. The reviews and number of stars can be a good indicator, especially for ones that you have to pay for. If you have to spend money, then you want to make sure it is a good purchase. Having said, though, many of them don’t cost a lot.

I purchased Instant, which imitates the type of image you would get with a Polaroid camera. After playing around with it for a bit I discovered that there are lots of filters in the app to create many different effects. It is set up for you to shake or blow the image for it to be revealed, like the original Polaroids. Even though you know you don’t need to do it, it almost seems irresistible to not shake or blow on it.

Android phone photography tips Instant app Polaroid.

Taking photos with the Instant Camera App.

Retro camera app

Another one that you can try out is the Retro camera. It’s free and comes with several different cameras. If you press the camera icon in the app you can scroll through and find different ones. I quite like the Xoloroid one and the Fudgecan.  This app does not seem to have the filters, but you can choose to either take colour or black and white images with it.

Android phone photography tips retro camera

The Retro Camera app as it is taking an image.

They are great fun to play around with and I do suggest you try many apps. You might even fall in love with one.

Android phone photography tips retro app

Using the cameras within the Retro Camera app you can get a variety of results with each of the different options.

Lenses to attach to your phone

Lenses for mobile phones have been around for a while, but there does seem to be the impression that they are only for iPhones. I thought the same thing too. But, there are many lenses available for you to attach to your Android phone.

Lensbaby has lenses for the iPhone. When asked why didn’t they do them for Android the answer was simple. They did, but people didn’t seem interested and they didn’t sell. Perhaps the reason they didn’t sell well, was because people didn’t know about them. Well, now you do.

It is unknown how many lenses there are for Android, but apparently, a lot of the ones for iPhones can also be used on Androids. They use a magnetic ring that sticks over the top of the camera on the back of your phone. Some rings are better than others, and some don’t work very well.

Lensbaby

There are three phone lenses from Lensbaby and they all do different things. Along with them is an app for your phone that helps you take photos.

  • The Lensbaby LM-10 is a two-way lens, meaning you can turn it around and use the opposite end as well. The sweet spot is in the center for both ends, but one end will let you get closer than the other. It is a bit like reversing the lens on your camera.
  • LM-20 has a bigger sweet center spot and lets you take more normal images.
  • LM-30m this is very sharp in the middle and gives a crazy effect around it. Some say the photos are mind-bending, and can too strange. You do have to think about where you would use this lens. It isn’t suitable for everything.
Android phone photography tips Lensbaby LM-10

Lensbaby Lenses

The magnetic ring that sticks to the camera is great and doesn’t come off when you take the lenses off. However, it can be hard to focus using it and if you leave it on, the camera can move so it may need readjusting next time.

One thing that is quite good is that you can take it on and off a bit. I’ve done it up to four times and often leave it stuck to the back of the phone until I need it, and then move it over the camera when I’m ready to shoot.

Android phone photography tips lenses

Macro photo taken using the Lensbaby LM-10

Lensbaby app

As previously stated, Lensbaby also has a free app that you can download that lets you have a lot more control over the images. You can move the sweet spot around, or lock it to one position. Be aware that the LM-10 does reverse the image when you are taking it, so you need the app so you can reverse the view so it appears right way around.

Overall the lenses are great and are small enough to carry around in your pocket or bag when you’re out. I use them a lot for macro photography.

Android phone photography tips Lensbaby

Three images, the first taken with the Lensbaby LM-20, the second two taken using the LM-30 lens.

Photojojo

Another company that has produced lenses is Photojojo. You can buy all five or just a couple of them. They have standard lenses, but they also have some special effects ones as well. They are the only company that I saw with a polarizer, which could be very handy for some situations.

Here is a list of what they have:

  • Fisheye
  • Superfisheye
  • Polarizer
  • Wide/macro
  • Telephoto lens
Android phone photography tips Photojojo

Photojojo lenses

They are all good but the super fisheye is probably the one I’ve played with the most. It is very wide and distorted. You will get your hand holding the camera in the shots you take with this lens. The other lenses are much what you would expect.

The Photojojo lenses come with the magnetic rings to attach to your camera, but they don’t stick very well and when you remove the lens, the ring often comes off as well. If the lens is a bit heavy, like the super fisheye, when you angle the phone down it will just come off, along with the ring.

Android phone photography tips Photojojo lenses

Photos taken with the Photojojo lenses, the super fisheye.

I’ve been using the Lensbaby rings with the Photojojo lenses. Sometimes you have to move the lens or the ring around, but you can get them to work together if you are patient.

Photo editing apps

When you start taking photos with your phone the next progression is to start sharing them with the world on social media places like Facebook or Instagram. You could just post them straight up, use the filters that come with Instagram, or you can do some fine tuning of the images photo editor apps.

If you do a search for photo editors in the Play Store you will be given many choices. As it was for the cameras, you need to go through and see which ones you think will work for you and your purposes. We are going to look at two here.

Snapseed

Snapseed is a photo editor app that has been around for a while. It is free and fairly easy to use. While it does have some filters that you can just add to your image, it also has quite a few adjustments as well. Often, that is all you need to do, just do a few tweaks and the photo is ready to be saved.

As with any software that allows you to make changes to your images you always have to save it. On your phone, Snapseed will make a new gallery for your new saved edited images. You will end up with two of every image, the original and the edited version. When you are sharing, make sure to choose the one from the Snapseed gallery.

leannecole-androidphone-snapseed

The photo on the left was taken with my phone and then processed in Snapseed on the right.

Lightroom Mobile

To get Lightroom Mobile for your phone you have to be a subscriber to Adobe for Photoshop CC and Lightroom CC. It comes as part of the package. Once you are a subscriber you can download the app and sign in.

Get a 20% discount on Photography Plan using this link for dPS readers only! 

It doesn’t work like Lightroom CC on your computer, rather is very similar to other photo editing apps like Snapseed. It is easy to navigate around and figure out. Again, save everything you do and it will export it into a Lightroom gallery for you on your phone.

If you don’t subscribe, then don’t do it just to get this app. Snapseed is probably just as good, and if you don’t like it there are lots of other editing apps. Ask around and I am sure you will get a list for a lot of them. One thing that is great is the ability to install them, and if you don’t like, just uninstall.

Android photography round-up

Taking photos with your phone can very enjoyable and just because you have an Android that doesn’t mean you can’t take photos just as well as those with iPhones. Don’t let Apple users tell you your phone isn’t as good. Now you know that you can take good photos just as good, maybe even better.

In the end, it comes down to the person holding the camera (you) and how good you are. Have faith and share your photos. I would love to see them in the comments section below.

googletag.cmd.push(function() {
tablet_slots.push( googletag.defineSlot( “/1005424/_dPSv4_tab-all-article-bottom_(300×250)”, [300, 250], “pb-ad-78623” ).addService( googletag.pubads() ) ); } );

googletag.cmd.push(function() {
mobile_slots.push( googletag.defineSlot( “/1005424/_dPSv4_mob-all-article-bottom_(300×250)”, [300, 250], “pb-ad-78158” ).addService( googletag.pubads() ) ); } );

The post Tips and Resources for Doing Android Phone Photography by Leanne Cole appeared first on Digital Photography School.


Digital Photography School

 
Comments Off on Tips and Resources for Doing Android Phone Photography

Posted in Photography


4 Tips For Doing Eye-Catching Landscape Photography

20 Dec

Landscape photography is everywhere today and for good reason – the world is beautiful! However, because landscape photography is so popular, it can be difficult for your photographs to grab the eyes of your desired viewers. While there’s no way to predict exactly what image will stand out in the crowd, you can use these four techniques to give your photography the edge when it comes time to grab some eyes.

Landscape Photography

#1. Define your vision

As a photographer you are not only taking a photograph, you are sharing a vision – your vision. It’s important to remember this concept every time you’re capturing an image. This is important because if you are aware of why you’re attracted to a scene, and why you want to share it with others, the easier it will be for your viewers to connect with what you saw.

This does not mean that you have to stick with the same definition of vision through every photograph you take. Instead, you should try to adapt and evolve your vision each time you go out to take photographs. Letting your experiences influence the choices you make in your photography will allow your photography to express your individuality as a person.

#2. Perspective

Landscape Photography

It’s easy to see a beautiful landscape and take a photograph of what you see, but that is often not enough to grab the eye of your viewer. After you’ve defined your vision for a specific photograph it’s time to answer some questions about the perspective you wish to convey.

Do you want to photograph from a low angle or from above the scene? Are you thinking of using a super wide-angle lens or would your scene be better suited for the compressed look of a telephoto? You can even begin to think about what type of post-production techniques you will use. Will it be HDR, black and white, vibrant and saturated, or muted?

Each photograph you take is going to be unique in its answers to these questions. There’s no one-answer-fits-all solution here, it’s just a matter of finding out what works and learning from experiences over time.

#3. Be purposeful in the choices you make

Landscape Photography

If you’re going to overexpose a photograph, have a reason why. If you’re going to post-process an image using the HDR technique be sure do it because it makes sense, not because you want it to be HDR. Making purposeful decisions in your photography will make every photograph you take better.

In regards to post-production in general, be sure to use it as a tool to elevate your great photographs to the next level, and not to save your misfires from the trashcan. Post-production is not what makes a photograph great, it can only enhance an already great photograph allowing it to stand out, above the crowd.

#4. Subject matter, light, and the basics

Landscape Photography

Finally, a boring landscape, shot in bad light, with the wrong techniques is not going to win any love from the peanut gallery so brush up on the basics first. Learning how to photograph in the right lighting conditions, how to properly use a tripod, and how to achieve the perfect exposure of your scene will allow you to create more eye-catching photographs.

What else?

Do you have some other tips for achieving eye-catching landscape photographs? Share them with us in the comments below!

googletag.cmd.push(function() {
tablet_slots.push( googletag.defineSlot( “/1005424/_dPSv4_tab-all-article-bottom_(300×250)”, [300, 250], “pb-ad-78623” ).addService( googletag.pubads() ) ); } );

googletag.cmd.push(function() {
mobile_slots.push( googletag.defineSlot( “/1005424/_dPSv4_mob-all-article-bottom_(300×250)”, [300, 250], “pb-ad-78158” ).addService( googletag.pubads() ) ); } );

The post 4 Tips For Doing Eye-Catching Landscape Photography by John Davenport appeared first on Digital Photography School.


Digital Photography School

 
Comments Off on 4 Tips For Doing Eye-Catching Landscape Photography

Posted in Photography


7 Tips for Doing Crystal Ball Refraction Photography

15 Nov

You’ve have heard of reflections in photography, but have you have tried refraction? When used well, refraction creates compelling images that will leave your audience both wowed and curious. I’ve been approached many times by strangers who are curious about how I photograph with a glass ball. Once you’ve mastered this type of photograph you’ll likely get the same audience. Here are some tips to help you do crystal ball refraction photography.

Doing Crystal Ball Refraction Photography - house inside glass ball

The subject shows prominently in the ball, and around the ball is bokeh.

So what is refraction?

Refraction happens when light passes through an object of denser mass, such as water or glass. When this occurs, light is bent, and there is a distortion. When refraction occurs with a transparent spherical object something magical happens. An inverted image of the scene behind the ball is seen. The lens elements in your camera actually work this way as well. You can use a glass ball as an extra lens element, one you can move around your scene.

Doing Crystal Ball Refraction Photography

How to do refraction photography

Now you know what refraction is, it’s time to learn how to apply it to your photography. If you follow the guide below you won’t go far wrong with this type of photography.

#1 – Dealing with the upside down image

There are instances where it works to have an upside down image in the background or inside the ball. If you want to avoid this, the best way to deal with an upside down background is to blur it out using bokeh. An alternative to blurring out the background is to use reflection since the reflected image will be the right way up inside the ball.

Doing Crystal Ball Refraction Photography - The image inside the ball will be upside down.

The image inside the ball will be upside down.

#2 – Get above your subject

You should get the ball off the ground so it’s level with the subject you’re photographing. A centered subject in the ball will have less distortion and more impact in the frame. There are always exceptions, of course, as leaf beds or puddles work well when the ball is placed right in them.

#3 – Fill the glass ball with your subject

You have to get close to your subject, or it (they) will appear very small inside the ball. The best advice I can give here is to see if your scene would fill a wide angle lens. If so you’re gold.

Doing Crystal Ball Refraction Photography

In this photo, the cityscape is captured inside the ball, and a closer framing was employed.

#4 – Choose the correct lens

The best option here is to use a macro lens or a telephoto lens with macro capability. The macro lens will allow you to get close to the ball, making it easier to create bokeh around the ball. Using a wider angle lens can also work if your scene allows it.

#5 – Choose the correct aperture

You need to get the correct aperture for your scene. An aperture that’s too small won’t blur out the background. One that’s too large will make it hard to get a sharp image inside the ball. I would choose an aperture of around f/4, it depends on the scene you are photographing, though.

Doing Crystal Ball Refraction Photography

One of the best ways of dealing with the upside down image is to use reflection in the photo.

#6 – Find a safe place to position the ball

This is very important, especially if you are photographing from a high vantage point. The ball needs to sit on a flat surface, finding a crevice to sit the ball on is better. Once you have placed the ball ensure it isn’t going to fall and keep your hands near it during this time.

If there is no place to rest the ball you can ask a friend if they’ll hold the ball for you. You need to be especially careful on a windy day, a strong gust of wind can move the ball if it’s not in a secure position.

In this photo of the Taj Mahal there is reflection in the background, and this reflected image is in fact upside down.

In this photo of the Taj Mahal, there is a reflection in the background, and this reflected image is in fact upside down.

#7 – Lighting the subject in front of the ball

You should have a well-lit subject in any kind of photo, but it’s even more important with refraction photographs. A strongly lit subject will shine through the ball with less reflection appearing on the ball. Look to photograph when the sun is behind you or during blue hour shooting towards lit buildings.

Refraction photography versus a standard landscape

A lot of locations that suit refraction photography with a glass ball will also be good for regular landscapes. The question is why photograph a refraction photo when you could take a wide-angle shot of the same scene? Let’s take a look at some of the pros and cons of crystal ball refraction photography.

Pros of refraction

  • A glass ball is cheaper than a lens and allows you to create a fish-eye like effect.
  • You can move the ball to different positions in your scene.
  • Using a large aperture in conjunction with the ball to create bokeh, is great for minimalism.
  • Scenes created with a crystal ball often have a more artistic feel.
  • The ball creates a natural frame for your photo.
Images that work well as a wide angle photo also work well inside a crystal ball.

Scenes that are well suited for a wide-angle photo also often work well inside a crystal ball.

Cons of refraction

  • The larger glass balls are heavy to carry, in an already heavy camera bag.
  • You need a macro lens, something a landscape photographer may not normally carry.
  • Distortion on the edge of the ball.
  • It’s difficult to get a sharp image inside the ball.
  • The image in the ball is upside down.
This is a wide angle photo of a famous road junction in Shanghai.

This is a wide angle photo of a famous road junction in Shanghai.

The choice of taking a glass ball is yours to make, I highly recommend experimenting with it, though.  The pros really outweigh the cons, and following the tips in this article will help. You may also find weight an issue, so I recommend scouting a location before shooting with the ball. Then return for a second visit with just the equipment you need to take the photo, this will reduce the weight somewhat.

Experiment with the ball

The first thing you’ll need of course is a crystal ball, you can buy them easily through amazon for 27$ . While you wait you can try filling a wine glass with water, you’ll get the refraction effect this way too.

Now you’re ready to get started, so head to a local landmark and start experimenting. The list of subjects is really endless; you can start with a lone tree, a church, or a cityscape scene. If you have any photos that show refraction please add them to the comments below, it would be great to see them.

Natural landscape look great inside the ball. This is a volcanic lake found in Indonesia.

Natural landscapes look great inside the ball. This is a volcanic lake found in Indonesia.

googletag.cmd.push(function() {
tablet_slots.push( googletag.defineSlot( “/1005424/_dPSv4_tab-all-article-bottom_(300×250)”, [300, 250], “pb-ad-78623” ).addService( googletag.pubads() ) ); } );

googletag.cmd.push(function() {
mobile_slots.push( googletag.defineSlot( “/1005424/_dPSv4_mob-all-article-bottom_(300×250)”, [300, 250], “pb-ad-78158” ).addService( googletag.pubads() ) ); } );

The post 7 Tips for Doing Crystal Ball Refraction Photography by Simon Bond appeared first on Digital Photography School.


Digital Photography School

 
Comments Off on 7 Tips for Doing Crystal Ball Refraction Photography

Posted in Photography