RSS
 

Posts Tagged ‘crop’

No Telephoto Lens No Problem – Tips on Shooting for the Crop

22 May

shoot-for-the-crop

Maybe your photos are better than you think. Perhaps all you need to transform your images into keepers is to simply cut out the dead wood and get ruthless with the crop tool. While I’m not against getting your shot perfect ‘in camera’, I do believe that cropping like a boss during post-production can turn a ‘meh’ shot into a ‘whoa’ shot just by carefully placing those marching ants in Adobe Camera Raw and hitting ‘crop’.

Why limit yourself to a mediocre image when there’s a little hidden gem inside your average shot, waiting to be teased out like a gleaming pearl?

Get closer after the fact

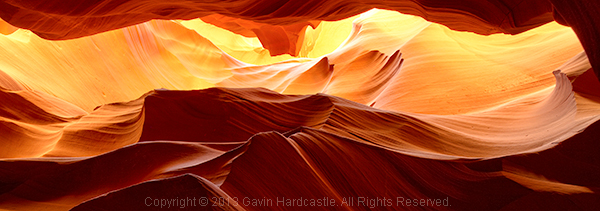
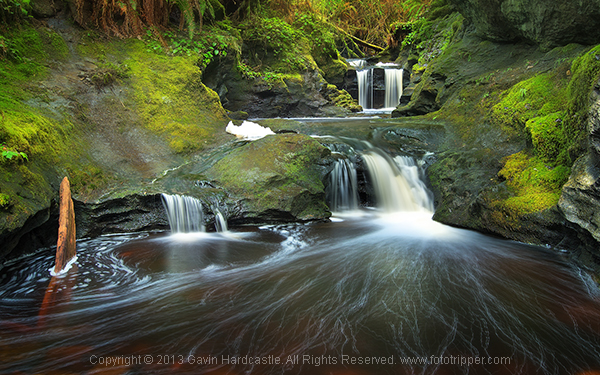
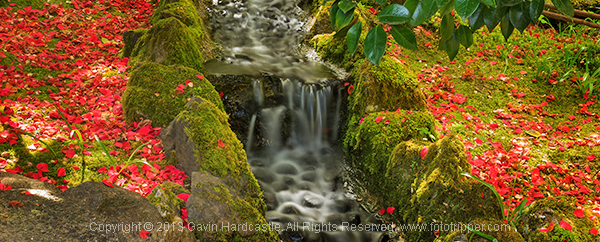
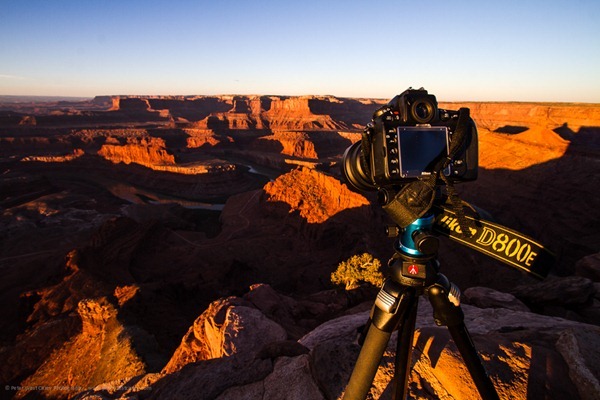
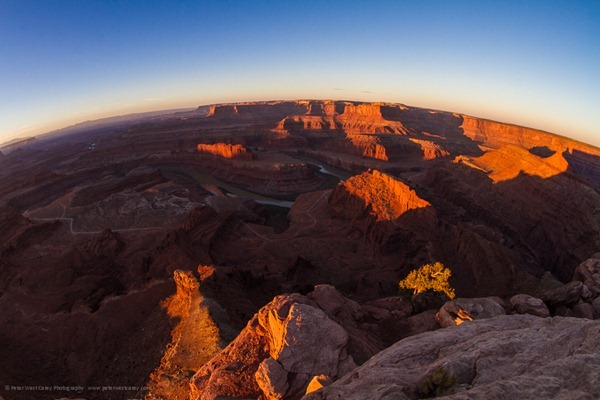
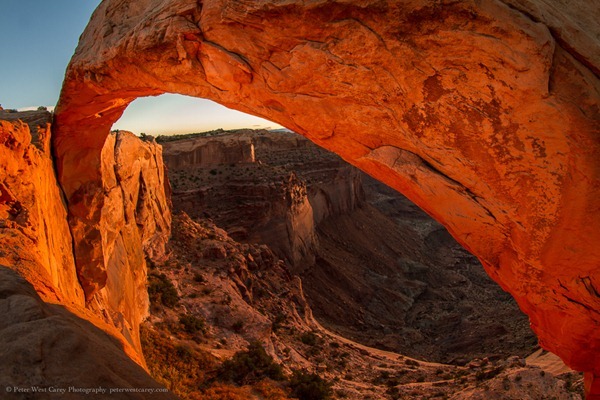
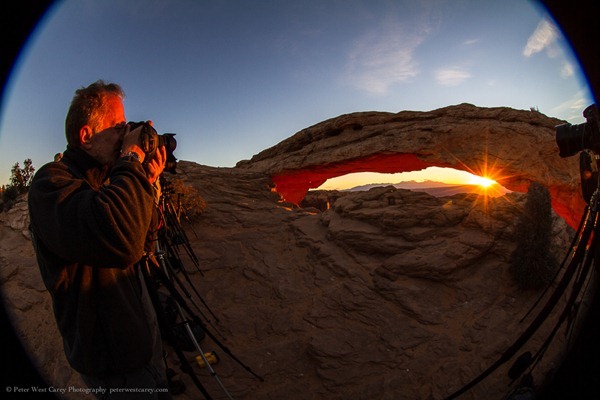
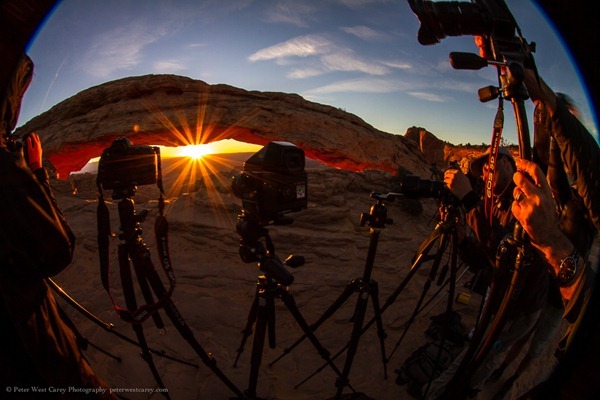
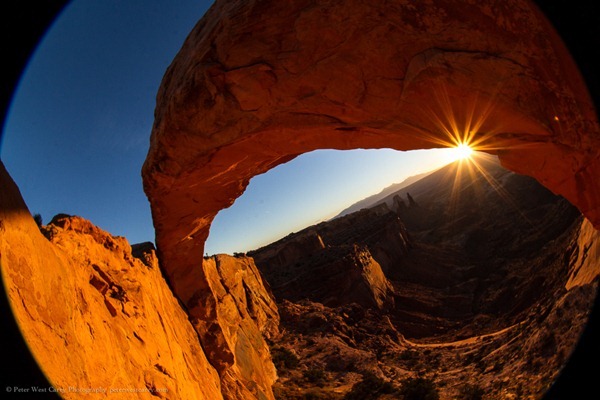
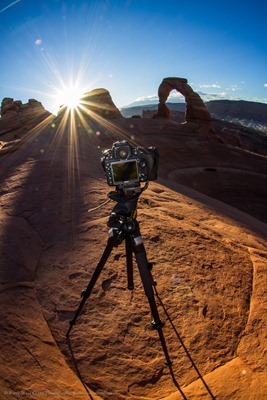
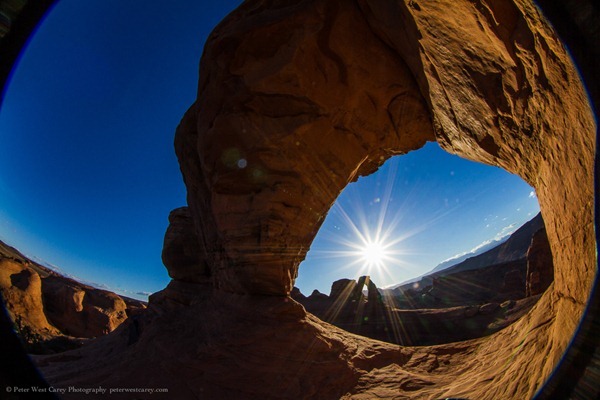
Here’s an example of a cropped shot with the full frame shot below it. During the shoot I was happy with the original composition (below), but after studying the shot at home I decided that the scene needed to be more intimate, so in I went with the scissors of brutality.
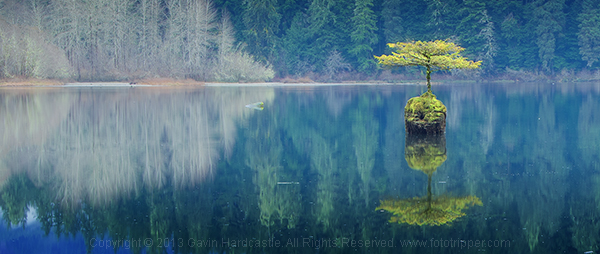
Vancouver Island Waterfall Landscape Image Crop - Gavin Hardcastle

Cropped version

How to Shoot for the Crop

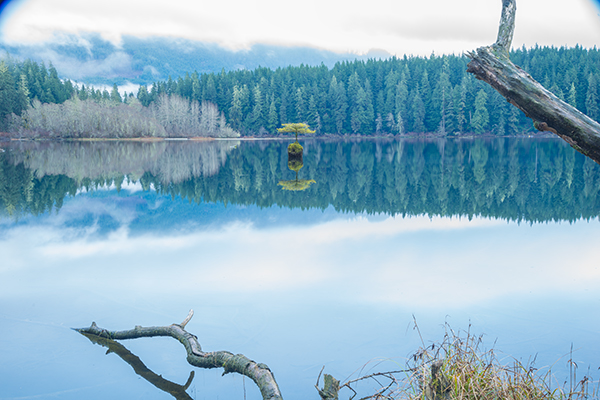
Full image uncropped
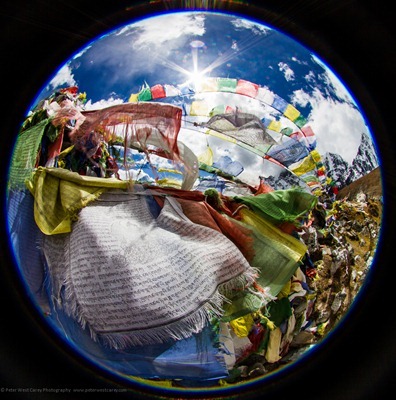
Tell the story

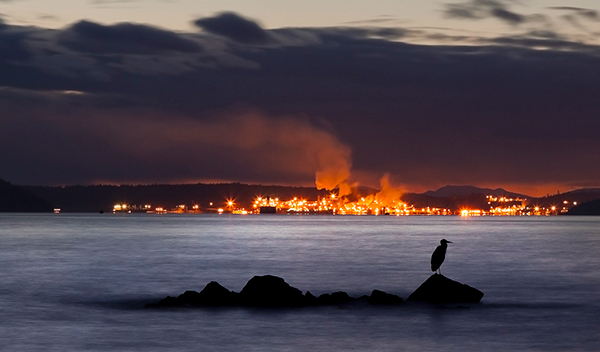
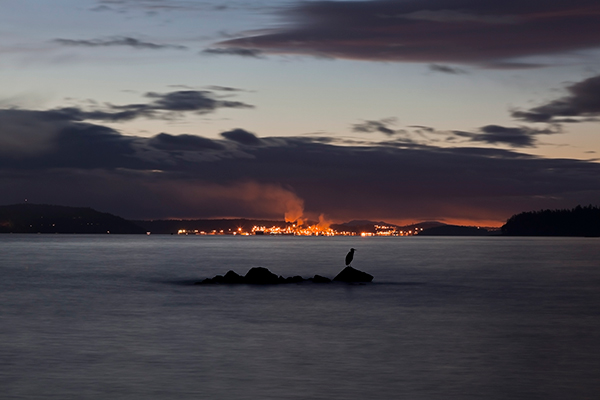
When your image has an obvious story, it’s often wise to cut out any non-essential space to ignite a more immediate reaction in your audience. By discarding all distractions, you’ll direct their attention to what matters most. With the image below, I wanted to portray the resilience of nature under the menacing specter of toxic pollution. I knew I had the shot but the story had much more impact after I’d cropped out all of the wasted space in my image. Ideally I would have used a longer lens to achieve the same result but all I was carrying at the time was a 24-105mm and there was no way I was going to let that stop me. Shoot, crop, done, breakfast.

'Held To Ransom' by Gavin Hardcastle

held-to-ransom-full-gavin-hardcastle

Use your megapixels

You’ve doubtless heard grumpy old fossils whine on about why big megapixels are pointless unless you’re printing wall sized prints. I’m here to tell you that’s a load of old codswallop. Try cropping out a small section of a 16 megapixel image and let me know good it looks at the full size of your computer screen. Lacking in resolution, hmm? Well I guess it depends on the size of your crop, but chances are things are starting to look a little crusty if you’re not packing some heat in the megapixel department. Size, as they say, does matter.

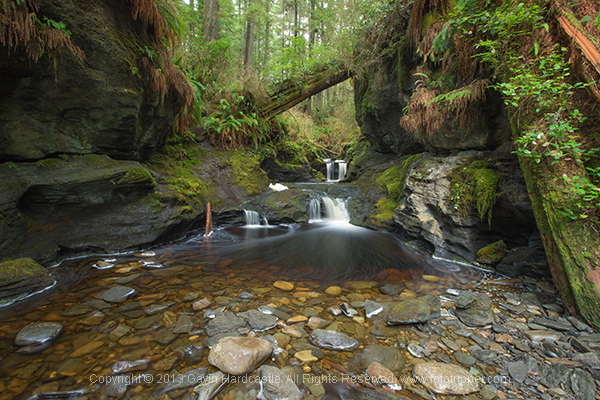
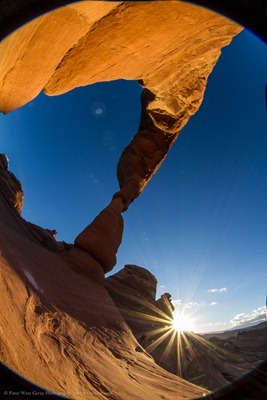
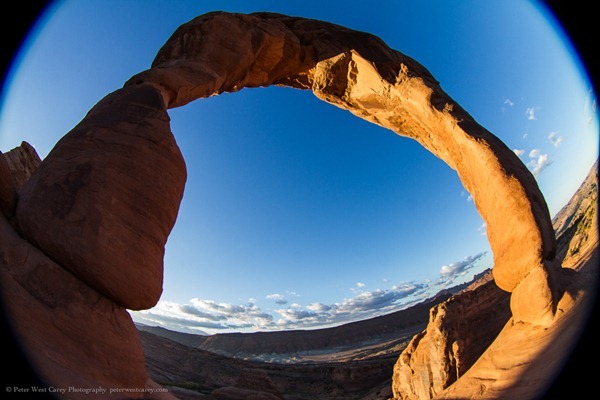
Here’s another example of using my megapixels to get closer to my subject. As you can see from the full frame image below the crop, I made no attempt at composing a foreground because I knew I’d be cropping out everything but my main subject – the magic tree of Fairy Lake on Vancouver Island. You can even see a hideous vignette in the full frame shot caused by the polarizer rig. Crop, done, lunch.

gavin-hardcastle-fairy-lake-port-renfrew-vancouver-island-crop

gavin-hardcastle-fairy-lake-port-renfrew-vancouver-island-full

If you can’t afford a big telephoto lens but have a good quality wide-angle lens and a decent megapixel count, it’s still worth taking that shot of the bird on the other side of the lake. You can crop it later and possibly come away with a keeper. Sometimes it’s not even the cost of long lenses that puts people off using them, it’s the chiropractors bills that come from dragging them around. That being said, a top notch telephoto lens creates a specific look and for serious wildlife shooters it’s a must-have lens. This isn’t an anti-telephoto article so don’t be leaving angry comments.

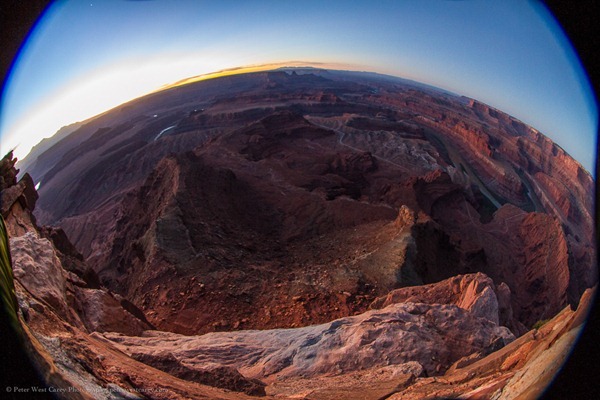
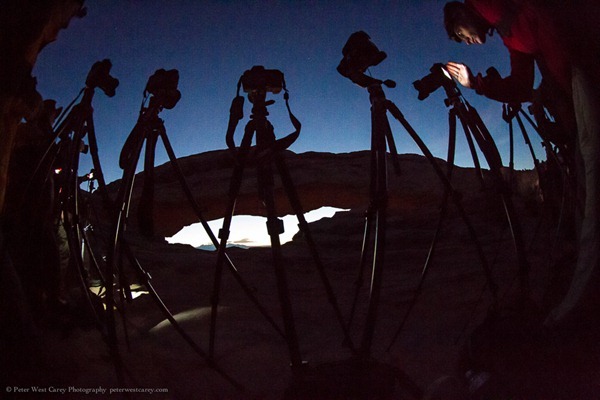
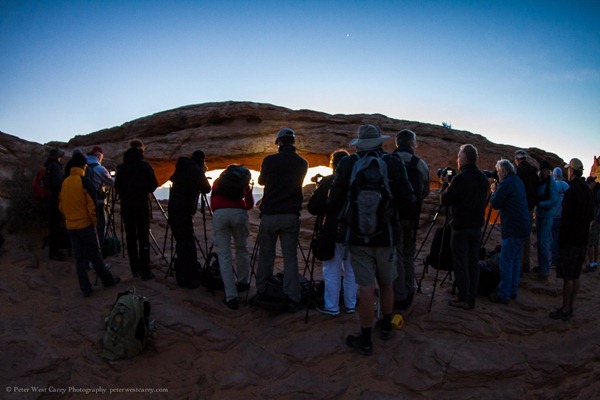
A second chance at composition

When you’re familiar with a location and you’ve shot there many times before, it’s easy to plan your compositions long in advance. But what if it’s your first time and you’re shooting under pressure? Sometimes you get lucky, but sometimes you won’t spot the perfect composition until you review your images back at home on a full size computer screen.  That’s when cropping will give you that second chance at getting the perfect shot.

Butchart Gardens Vancouve Island Gavin Hardcastle

Teach yourself composition

I’m always telling my students that you can learn a huge amount about composition simply by reviewing and editing your images. Try and find two or more new compositions that are hiding in plain site right there in your existing images. This simple process teaches you a lot about balance, symmetry, framing, leading lines and whatever other compositional elements are right there in your images. Spend enough time doing this and you’ll become a better photographer when you’re out shooting. When cropping, you can start by asking yourself a few essential questions:

  • What is the main subject of my image?
  • What parts of the image do I love?
  • What parts of the image do I not like?
  • How can I focus the viewers attention?
  • What can I exclude?

By answering these five simple questions you’ll quickly identify the strongest parts of your image and transform them from stale, forgotten megabytes, into beautiful memories you can share with the world. I hope you found this article helpful and please, get cropping and then share your best cropped images with me, I’d love to see your results.

grand-canyon-crop

The post No Telephoto Lens No Problem – Tips on Shooting for the Crop by Gavin Hardcastle appeared first on Digital Photography School.


Digital Photography School

 
Comments Off on No Telephoto Lens No Problem – Tips on Shooting for the Crop

Posted in Photography


Batch Crop and Resize in Lightroom

15 Apr

Lightroom batch crop and resize opener

If you’re working on a large shoot and need to output a lot of images at a fixed size then Lightroom can do the work for you. It isn’t obvious how you can crop all your images to a fixed size and output them at a certain set of pixel dimensions but it is easy to do when you know how. Here’s how to do it:

Step 1

Lightroom batch crop and resize 1

First locate the folder with your images in it. I prefer to make virtual copies of my images and put them in a new collection but you can do whatever makes sense to you.

Step 2

Lightroom batch crop and resize 2

Select all the images in Grid view in the Library module in Lightroom.

Open the Quick Develop panel on the right and, from the Crop Ratio dropdown list, select the crop ratio that you want to crop to. For example you can crop to fixed ratios such as 1 by 1 or printing sizes such as 5×7, 4×6 and so on.

Here I’ve selected 5×7 and when I do so all the selected images are automatically cropped to this 5 x 7 ratio.

Lightroom is smart enough to understand that some images are portrait orientation and others are landscape. Portrait images are cropped to 5 x 7 and landscape orientation images to 7 x 5.

Lightroom batch crop and resize 2a

Step 3 (optional)

Lightroom batch crop and resize 3

If desired, you can now move to the Develop module and check the crop for all the images. By default, Lightroom will center the crop rectangle on the image and this may not be exactly what you want for some images. However, it is easy to go to the Develop module, click the first image and click on the Crop Overlay Tool so you see the crop marquee in position on the on the image.

Now from the filmstrip you can click on each image in succession to preview it in the crop window and you can easily identify if any of them need an adjustment to the crop rectangle. If they do simply drag on the crop rectangle to reposition it. When you’re done return to the Library view.

Step 4

Lightroom batch crop and resize 4

As the images are now all cropped to size, press Ctrl + A to select them and then click Export. Choose a folder to export the images into or click New Folder to create a new folder.

You can now set your desired preferences in the Export dialog.

To control the output size – in pixels wide and tall – of the images easily because you already know the crop ratio. To do this, select the Resize to fit checkbox and choose Long Edge from the dropdown list. Then type a pixel dimension for the long edge. So, for example, to prepare 5 by 7 ratio images for printing at 300 dpi the longest edge will need to be 2,100 pixels (7 x 300) so type 2100 and set the resolution to 300.

Step 5

Lightroom batch crop and resize 5

Click Export to export your images and they will be exported to a folder at the chosen size and resolution.

This process allows you to quickly and effectively prepare a batch of images for printing. It manages portrait and landscape images so that you don’t have to separately handle each type. It’s a simple workflow and a fast way to prepare images from a large shoot.

Post originally from: Digital Photography Tips.

Check out our more Photography Tips at Photography Tips for Beginners, Portrait Photography Tips and Wedding Photography Tips.

Batch Crop and Resize in Lightroom


Digital Photography School

 
Comments Off on Batch Crop and Resize in Lightroom

Posted in Photography


MooN Canon 60D Crop Movie Mode EF 70-200mm F4L IS USM

21 Jan

Testing Canon 60D’s Crop movie mode with EF 70-200 F4L IS USM on SLIK AMT Pro Tripod.
Video Rating: 4 / 5


The Moon – T2i Test: Movie Crop Mode

20 Dec

I decided to test the Movie Crop Mode (640×480) on my T2i (550d). The lens that I used was my Canon EF-S 55-250mm at 250mm/F5.6 with a shutter speed of 800 and ISO at 200. Considering it is VGA quality (640×480), the quality is quite acceptable. I know it’s not HD, but I am thoroughly impressed.


Nikon Canon lenses’ true focal range or length on a consumer grade crop sensor DSLR

17 Nov

razzi.me www.facebook.com www.PhotographersOnUTube.com https

 
Comments Off on Nikon Canon lenses’ true focal range or length on a consumer grade crop sensor DSLR

Posted in Nikon Videos


Why You Might Want To Consider A Full Frame Fisheye Lens Even If You Have A Crop Sensor Camera

13 Nov

There are few things better in life than having something go wrong that leads to the discovery of something even better.

Such is the case with my plan to test out a Canon 8-15mm fisheye lens courtesy of BorrowLenses.com. My intent with the lens was to take it with me to the wilds of Arches and Canyonlands National Parks in Utah for some crazy, circular images. The problem is I lack a full frame Canon camera, but would be traveling with Michael Riffle, who owns a Canon 5D Mark III. He accepted the challenge to test the lens, being familiar with fisheyes himself.

One thing led to another and we never got around to testing the lens on his camera. Instead, I often found myself using the lens on my Canon 7D, a crop sensor camera. The Canon 8-15mm is intended to fit a full frame sensor and produce, at 8mm, a fully circular image, much like this example from a Sigma 4.5mm on a crop sensor camera.

PeterWestCarey-Nepal2011-1008-9891

What happened instead was a cross between this full circle and a more traditional 15mm on a crop sensor. The 8-15mm lens will show edges of the circle when below 10mm but will otherwise fully cover the sensor from 10mm-15mm. A major difference from a non-fisheye lens, though, is the curving in the image.

For instance, here are two shots, both taken at 10mm. The difference: the first lens is a non-fisheye Canon EF 10-22mm lens and the second is the Canon 8-15mm fisheye.

PeterWestCarey-Utah2012-1021-7193

PeterWestCarey-Utah2012-1021-7187

Both shots are taken from nearly the same perspective (the fisheye is taken from the position of the Nikon D800E in the first image) but the fisheye gives a different feel. I only made slight clarity and level adjustments in the photos and did not crop them, so this is what you can expect at 10mm.

Below 10mm the black edge of the area outside the fisheye is seen. How bad is it? It depends.

At first it annoyed me to have the incomplete image. Neither full fisheye nor filled frame. Like this:

Peter-West-Carey-Utah2012-1021-7155

But then I started finding instances where it worked well. The arches found in these parks lent themselves naturally to the form factor. The more I experimented, the more I enjoyed the effect.

I realize not everyone will like this look. By the time you read this, there might be a dozen notes in the comment section below stating how horrible it is. But this is photography and it is art, so it doesn’t really matter what I like or the commenters like. It matters what you like.

Below are more examples from my short trip. If they intrigue you to give the lens a try, all the better. Some have the corners blacked out and some are zoomed in slightly. Experiment, play, have fun.

(Click on an image for a 1000px version)

The first set of images are from Mesa Arch in Canyonlands NP at sunrise which was packed with 20 or more photographers. The second set is from Delicate Arch in Arches NP at sunrise with absolutely no one else around.

Peter-West-Carey-Utah2012-1022-7348

Peter-West-Carey-Utah2012-1022-7392

Peter-West-Carey-Utah2012-1022-7445

Peter-West-Carey-Utah2012-1022-7451

Peter-West-Carey-Utah2012-1022-7456

Peter-West-Carey-Utah2012-1022-7500

Peter-West-Carey-Utah2012-1023-7955

Peter-West-Carey-Utah2012-1023-7961

Peter-West-Carey-Utah2012-1023-8001

Peter-West-Carey-Utah2012-1023-8010

A special thank you to BorrowLenses.com for giving me the chance to play with the lens.

Post originally from: Digital Photography Tips.

Check out our more Photography Tips at Photography Tips for Beginners, Portrait Photography Tips and Wedding Photography Tips.

Why You Might Want To Consider A Full Frame Fisheye Lens Even If You Have A Crop Sensor Camera


Digital Photography School

 
Comments Off on Why You Might Want To Consider A Full Frame Fisheye Lens Even If You Have A Crop Sensor Camera

Posted in Photography


Photoshop tutorial: The Crop tool and Content-Aware tool | lynda.com

24 Oct

This Photoshop tutorial discusses how to use the Crop and Content-Aware tools to extend the canvas and background of a photograph. Watch more at www.lynda.com This specific tutorial is just a single movie from chapter three of the Photoshop for Photographers: Portrait Retouching course presented by lynda.com author Chris Orwig. The complete Photoshop for Photographers: Portrait Retouching course has a total duration of 6 hours and 4 minutes, and explores techniques for reducing wrinkles, enhancing eyes and other facial features, improving hair, retouching makeup, and reshaping portions of a portrait using transformations, the Warp tool, and the Liquify filter. Photoshop for Photographers: Portrait Retouching table of contents: Introduction 1. Getting Started 2. Removing Distractions in the Frame 3. Making Creative Image Adjustments 4. Improving Skin 5. Improving the Shadows and Highlights 6. Reducing Wrinkles 7. Enhancing Eyes 8. Cleaning Up Eyelashes and Eyebrows 9. Retouching Lips 10. Whitening Teeth 11. Improving Hair 12. Adding and Changing Makeup in Photoshop 13. Advanced Skin Smoothing 14. Enhancing Shape and Structure in Images Conclusion

anthonywhitegd.com | https | youtube.com | http Enhance your photos, bring out the lights and darks, improve the look.
Video Rating: 5 / 5

 
Comments Off on Photoshop tutorial: The Crop tool and Content-Aware tool | lynda.com

Posted in Retouching in Photoshop


Lenses (focal length, crop factor, macro lenses) – Photography with Imre – Episode 5

10 Aug

Episode 5 of my photography series discusses topics related to lenses such as focal length, crop factor and macro lenses.You’ll also want to check out my blog – binarygraphite.blogspot.com – as it’s supplemented with additional information and links to sites describing this topic in detail. Hope you enjoy, remember to rate (5 stars!), and subscribe so you can stay up to date with my future videos.