All images © Gina Milicia 2015
“Learn the rules like a pro, so you can break them like an artist.” ? Pablo Picasso
When it comes to knowing what is right for me there are a few things I know for sure: First, garlic and ice cream are never meant to be mixed together. Secondly, even if I colour my hair blonde I’m never going to look like madonna, and finally when my mechanic warns me that the timing chain in my car should be fixed as soon as possible, I need to listen up and act.
If who have read my other articles or ebooks, you will know that I’ve also learned many lessons in my photography career from stupid mistakes, or lapses in judgement. It’s through learning from failure, and trial and error, that I’ve managed to discover what works best for me.
When it comes to how I crop my portraits there are a few cropping styles I try to avoid because just like eating garlic ice cream I have learnt what works best for me.
How I crop my portraits is just as important to defining my style as the lens I use, the way I light, and how I process my files. I believe the way an image is cropped can change the look from “meh” to “amazing”.

I always crop a shot below the knee, mid-thigh, at the waist, across forearm, or through the top of head. If I’m going to crop through my model’s waist I will usually ask my model to bring their arms up so I don’t have to crop through their arms.

I avoid cropping at any of the joints of the body. This includes fingers, toes, elbows, knees and wrists. I also think cropping through the model’s chin looks odd.
It took me many years of trial and error, and studying the work of my favourite photographers, to learn that there are actually a few golden rules of cropping worth following. Ones that make a huge difference to the visual impact my portraits make, and how flattering these portraits can be for the subject.
Like all rules there are always exceptions, and the art world would implode if these rules were not constantly tested and broken. Pablo Picasso, Vincent Van Gogh, and Jackson Pollack are examples of artists whose styles broke every rule in the, “how to paint book” and in their time they were mocked and ridiculed by other artists and critics alike, yet today their paintings are priceless. Having said that, they all studied conventional painting rules of their time, and then went on to break those rules, and create their own signature styles. I wonder if they ever considered changing their hair colour to look like Madonna…
My shooting,lighting,posing, and post-production style has developed and evolved over the years, but the way I crop my images has remained the same.
Here are my top five tips for how to crop portraits:
#1 Crop In-Camera

Cropping in-camera basically means that you compose your image exactly how you want your final crop to look when you are taking the photo, rather than shooting loosely and cropping the shot in post-production. There are two reasons for this:
- Firstly, images cropped in-camera look totally different to images that are cropped in post-production. Filling the frame and cropping tight means that you will create great background blur (bokeh), which removes any background distractions and focuses more attention on your model, which is always a good thing.
- The other advantage of cropping in-camera is that your file size is not affected. A loosely photographed cropped image may only leave you with 10-15% of your file size, so a file that was originally 30MB as a full size image, is reduced to 3MB with a tight crop. Lower resolution images have less detail and won’t be as sharp as a full size image.
#2 If it bends don’t crop it
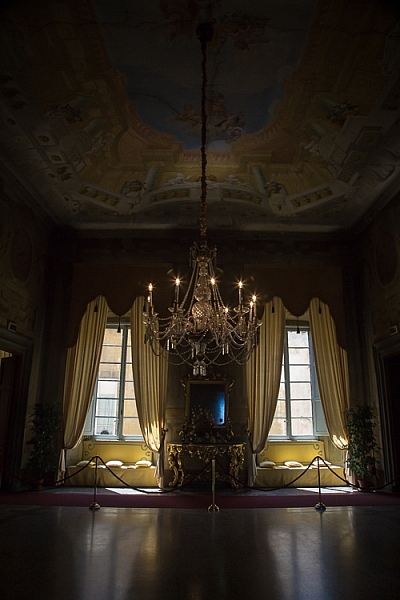
 Bad crop Bad crop |
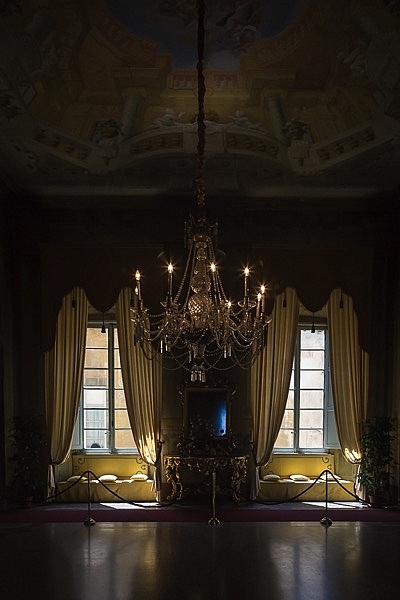
 Good crop Good crop |
I think cropping mid thigh looks visually more pleasing than doing so at the knee. Seeing just part of the knee where the dress ends also looks untidy.
There are also certain ways to pose models that are more flattering to the body. I’m always looking for ways to pose my models that elongate, rather than shorten, their body parts. I try and emphasize their best features, and hide or diminish the features that are not as strong.
As a general rule I crop in a way that will elongate and flatter the body. Cropping at the knees, waist, elbows, toes, fingers, ankles, or wrists can make your model look stumpy. Cropping off the arms or legs can make your model look square, or larger than they really are.
#3 Avoid cropping into the chin and keep the eyes in the top third of the frame
 Bd crop Bd crop |
 Good crop Good crop |
Keeping the eyes in the top third of the frame is visually better than cropping into someone’s chin, which to my eye looks like I wasn’t paying attention when I took the shot, and visually this crop (above left) looks awkward.
I find my portraits look much stronger visually when the eyes are positioned in the top third of the frame. Cropping into the chin is visually jarring in the same way that garlic ice cream was jarring to my tastebuds.

This is the original framing of a shot I took for the cover of my dPS book, Portraits – Striking the Pose. I wasn’t sure how much of the shot we would be using, so I deliberately shot wider, and left space on the left of my frame to allow for text and other images.


The final shot for the cover was cropped very tightly because I felt including the hands looked a bit messy. I cropped this image with the eyes in the top third of the frame because this was visually the strongest option.
#4 Give yourself options
The explosion of social media has radically changed how I shoot my portraits. When a client booked me for a session a few years ago, I would shoot the majority of their portraits as vertical images. Now I make allowances for websites and social media platforms that run both vertical, square, and horizontal images.
I will usually start with portraits framed as vertical images and then rotate my camera to shoot some horizontal frames.
I generally position my model to fill the left or right hand third of the frame. This adds interest to the portrait, and makes it visually more dynamic. Having said that, there are times when I will frame my portrait in the centre of the shot because I personally love the way it looks.
I also love cropping into people’s heads, but this is not everyone’s cup of tea, so I always shoot a few frames with space above the head just in case.
You never know where the final image may end up in a few weeks or a few years, so I think it’s a good idea to plan ahead. It only takes a couple of minutes to shoot slightly wider, vertical, and horizontal at the end of each setup.
#5 Crop like you mean it!
Use these suggestions as a starting point, and find a style that works for you. Start with a full length portrait and first try cropping using traditional rules, then try breaking the rules and see which way you prefer the most.
Each person, location, and pose you shoot will always be different, so don’t be afraid to mix it up a bit and create your own signature style. The one question I always ask myself when I’m cropping my images is, “Does this crop look deliberate or does it look like a mistake?”
Sometimes following cropping rules to the letter will still leave my portraits looking visually jarring. An example of this is if I photograph a model wearing 3/4 sleeves and crop at a point which is technically correct, leaving a tiny amount of arm showing just below the sleeve. This looks like a mistake and would look better if I cropped a little higher to remove the skin.
The more you shoot, the more you will start to get a feeling for what looks right to you. If you’re still not sure, do two versions and compare them.
You might like to deliberately create a series of portraits that are visually jarring because they will evoke an emotional reaction.
How do you like to crop your portraits? Do you like to crop in-camera or in post-production? Do you think a tighter crop looks best ,or do you like to let your portraits have lots of space around them? Is there anything I’ve missed? I’d love to hear your thoughts and see your images. Please feel free to share in the comments section below.
This week on dPS we’re featuring a series of articles about composition. Many different elements and ways to compose images for more impact. Check out the ones we’ve done so far:
- Using Framing for More Effective Compositions
- 7 Tips to Improve Your Skyline Photos
- 33 Images that Exemplify Compositional Elements
- Weekly Photography Challenge – Composition Craziness
- How to Take Control of Aperture and Create Stronger Photos
- How Cropping in Post-Production Can Improve Composition
googletag.cmd.push(function() {
tablet_slots.push( googletag.defineSlot( “/1005424/_dPSv4_tab-all-article-bottom_(300×250)”, [300, 250], “pb-ad-78623” ).addService( googletag.pubads() ) ); } );
googletag.cmd.push(function() {
mobile_slots.push( googletag.defineSlot( “/1005424/_dPSv4_mob-all-article-bottom_(300×250)”, [300, 250], “pb-ad-78158” ).addService( googletag.pubads() ) ); } );
The post Good Crop Bad Crop – How to Crop Portraits by Gina Milicia appeared first on Digital Photography School.

Digital Photography School


You must be logged in to post a comment.